Your Backyard Isn’t a Lost Cause: The Pro’s Guide to Building an Outdoor Space That Actually Works
I’ve spent a long, long time with dirt under my fingernails, figuring out what makes a backyard feel right. I started out on the crew, hauling stone and digging holes, and eventually worked my way up to designing and building these spaces myself. And let me tell you, I’ve seen it all—the stunning successes and the train wrecks that cost a fortune to fix. The difference, almost every single time, comes down to the very first step: having a real plan.
In this article
So many people see their yard as just a patch of grass to fill with stuff. A grill over here, a plastic slide over there, maybe a sad little patio set in the middle. They buy things one at a time, and the result is almost always a disconnected, awkward space that nobody really wants to use.
A truly great outdoor space isn’t a collection of things; it’s a system. It’s a genuine extension of your home that works with your life and your environment. Forget the quick fixes. We’re going to walk through the process the pros use to build a functional, beautiful outdoor area that will last for years. It all starts not with a shopping list, but with some quiet observation.
Feeling overwhelmed? Do this one thing today: Grab a chair and a drink. Go outside at the time of day you’d most like to be out there. Plop yourself down and just look around. Find the one spot with the best view or the perfect sun. No tools, no pressure. This is your starting point, your little observation post to begin dreaming from.
The Foundation: Actually Understanding Your Yard
Before you even think about buying a single plant or paver, you have to get to know the space you’re working with. Honestly, skipping this is the #1 mistake people make. It’s like trying to build a house without ever looking at the land it’s on. This part isn’t the most exciting, I get it, but a proper site assessment will save you from ridiculously expensive errors, like a patio that turns into a pond every time it rains.
Mapping It Out for Real
First, get accurate measurements. You’ll need a good 100-foot tape measure (you can grab one for about $30 at any hardware store), a notepad, and a pencil. The best trick here is to use graph paper and make each little square equal one square foot. This makes visualizing everything so much easier and helps you calculate materials later on. Sketch out a simple, to-scale map, marking the house, property lines, big trees, and any other permanent stuff. Don’t forget to mark where doors and windows are—this is key for planning views and how you’ll walk from inside to outside.
Next up is your sun map. This is a game-changer. Over the course of a sunny day, go outside every couple of hours and sketch where the sun and shadows are falling on your map. You might find out that the spot you dreamed of for a sunny lounge chair is actually in deep shade all afternoon. Or that perfect patch for a vegetable garden only gets two hours of direct sun. This map is gold when it comes to placing seating areas and, of course, choosing plants that will actually survive.
Getting to Know Your Ground
Drainage and soil pretty much dictate what you can build and what you can grow. After a heavy rain, take a walk outside. See any puddles? Those are low spots you’ll have to deal with. And if you see water flowing towards your house’s foundation, that’s a major red flag. You might need to plan for some light grading or even a French drain system to move that water away. We fix this problem on other people’s failed projects all the time.
You also need to know what kind of soil you have. The easiest way to find out is with a simple jar test. Dig down about 6 inches and grab a cup of soil. Fill a clear glass jar about two-thirds full with water, dump in your soil, screw the lid on tight, and shake it like crazy for a minute. Then, just let it sit for a day. The soil will settle into layers: sand on the bottom, silt in the middle, and clay on top. What you’re hoping for is a nice, balanced mix—maybe 40% sand, 40% silt, and 20% clay. If you see a huge layer of clay (more than 50%), you know you’ve got drainage issues and will need to mix in a ton of compost to break it up.
That Annoying but Crucial Call to the City
This part is non-negotiable, trust me. Before you finalize any plans for a deck, fence, or patio, you have to check with your local government. Start by calling your town’s Building Department or Planning & Zoning office. You’ll want to ask them about “setback requirements” (how far a structure needs to be from your property line), fence height rules, and “impervious surface limits” (how much of your yard you’re allowed to cover with concrete or pavers). A five-minute call can save you from a disaster. I once had a client who built a gorgeous pergola right on his property line, only to be forced by the city to tear it all down. Don’t let that be you.
Hardscaping: Building the Bones of Your Outdoor Room
Hardscaping is all the non-living stuff: the patios, walkways, decks, and walls. These are the bones of your backyard, and they need to be planned first and built to last.
Patios: The Floor Under Your Feet
A patio is your main outdoor floor, and your material choice impacts everything. Poured concrete is usually the budget option, but it will inevitably crack, and repairs look patchy and awful. Pavers, either natural stone or concrete, are my go-to for most projects. The upfront work is more intense, but the long-term benefits are huge. If a paver gets cracked or stained by a grill grease-splatter, you can just pop it out and replace it. Good luck doing that with a concrete slab.
Let’s talk cost and effort. A professionally installed paver patio typically runs between $20 and $50 per square foot, depending on the materials and complexity. If you’re thinking of doing it yourself, be realistic. A simple 10×10 foot patio is a serious project that will likely take a few solid weekends of hard labor for a beginner. The key is the base prep: digging out 6-8 inches of soil, laying down separator fabric, and compacting layers of gravel and sand. And you have to get the slope right—about a quarter-inch drop for every foot, angled away from your house. My first-ever solo patio project? I eyeballed the slope. It held water like a soup bowl. I learned the hard way that a 4-foot level and a tape measure are your absolute best friends.
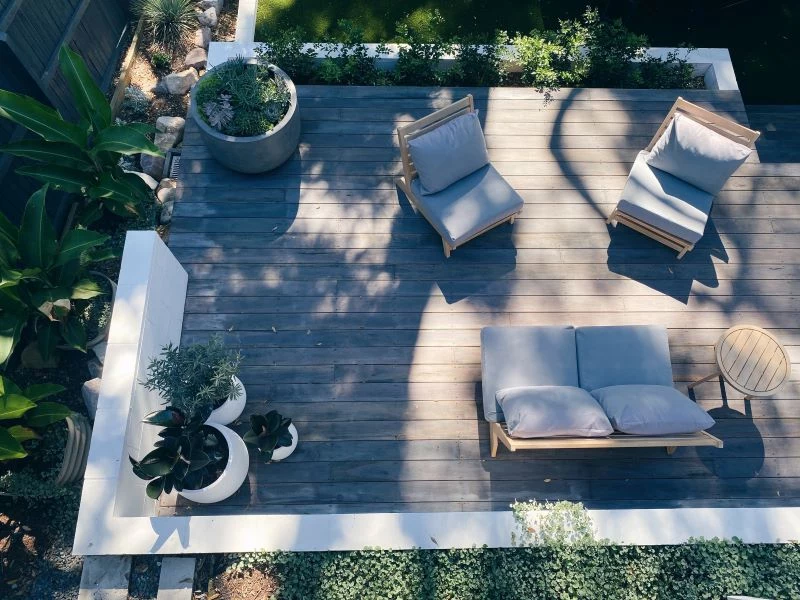
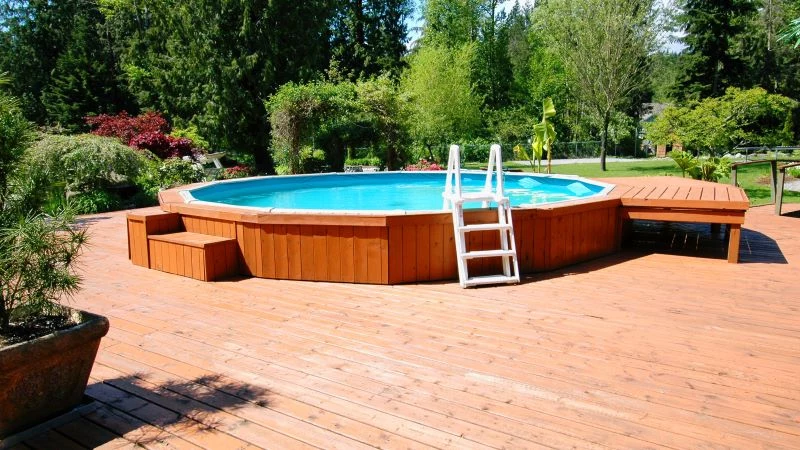
Decks: Taking Your Living Space Up a Level
If your back door is high off the ground, a deck is your answer. Wood is the classic choice; cedar is great because it naturally resists rot and bugs. Pressure-treated pine is cheaper but demands regular sealing to avoid turning into a splintery mess. The popular alternative these days is composite decking, which is a mix of wood fibers and recycled plastic. It costs more upfront, for sure, but the trade-off is that you basically just have to wash it once a year. No staining, no sealing. Ever.
Heads up! The single most important part of a deck is its foundation. The support posts have to sit on concrete footings that go below the frost line for your area. In colder climates, that can be 48 inches deep. This stops the ground from freezing and heaving your deck upwards in winter. The other critical spot is where the deck attaches to your house. This board, called a ledger, is where most catastrophic deck failures happen. It MUST be attached with heavy-duty bolts, not just nails, and it needs proper flashing to keep water from rotting out the frame of your house. To be blunt, if you’re not 100% confident in this, hire a pro. A collapsing deck is no joke.
Softscaping: Bringing It All to Life with Plants
Plants are what turn a sterile construction project into a living, breathing garden. But a gorgeous garden isn’t about just grabbing pretty flowers at the store; it’s about putting the right plant in the right place.
Know Your Zone, Save Your Money
Professionals live and die by plant hardiness zones. In the US, the USDA creates a map that tells you the average coldest winter temperature for your specific area. You can find it by searching online for the “USDA Plant Hardiness Zone Map” and typing in your zip code. If you live in Zone 6, for example, you need plants rated for Zone 6 or lower (like 5 or 4). If you buy a beautiful plant rated for Zone 8, it’s almost guaranteed to be a mushy, dead mess after the first hard frost. Checking the zone is the fastest way to stop wasting money.
Planting for Your Region
What thrives in rainy Seattle will shrivel up and die in sunny Phoenix. So, you have to plant for where you live. For instance, in the humid Southeast, we lean on plants that love the heat, like magnolias and crepe myrtles. But in the dry Southwest, the whole game is about using less water (a style called xeriscaping) with succulents, agaves, and native grasses. The principles are the same everywhere, but the plants are totally different. Quick tip: For the best advice, go to a real local nursery, not a big-box store. The people there know the microclimates in your town and will stop you from making expensive mistakes.
The Secret to a Lush Look is Layering
A pro-looking landscape always uses layers, just like a painting has a background, middle ground, and foreground. The Backdrop: Start with canopy trees. These are the big guys that provide shade and a high ceiling for your outdoor room. The Middle Ground: Next come smaller understory trees and large shrubs. Think dogwoods, Japanese maples, or hydrangeas that fill in the space below the big trees. The Forefront: Then you have your perennials and ornamental grasses. These are the workhorses that provide seasonal color and texture. The Floor: Finally, use groundcovers and bulbs to fill in all the gaps and give you that pop of early spring color.
This layered approach doesn’t just look better; it’s healthier for your garden, creating a more diverse and resilient little ecosystem.
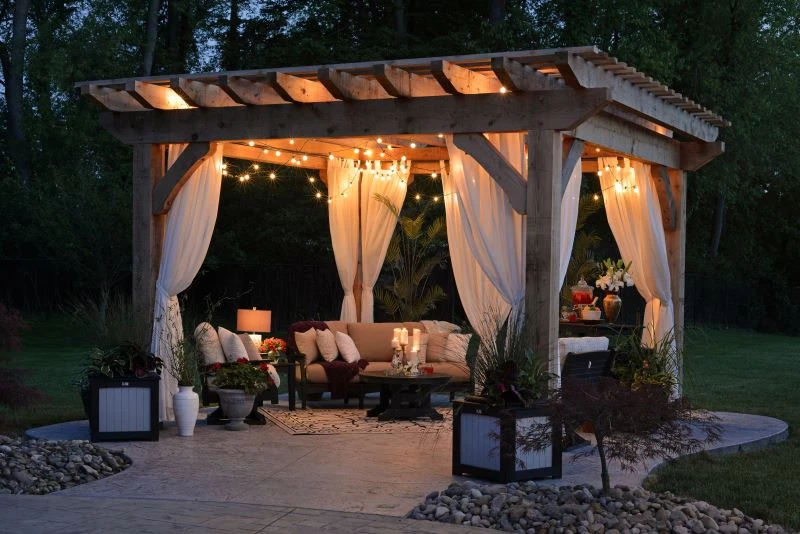
Lighting: Adding Magic (and Safety) After Dark
Good lighting is what lets you use your backyard in the evening, and it’s a huge safety feature. The good news is that most landscape lighting systems are low-voltage (12V), making them much safer for a DIYer to install than standard household current.
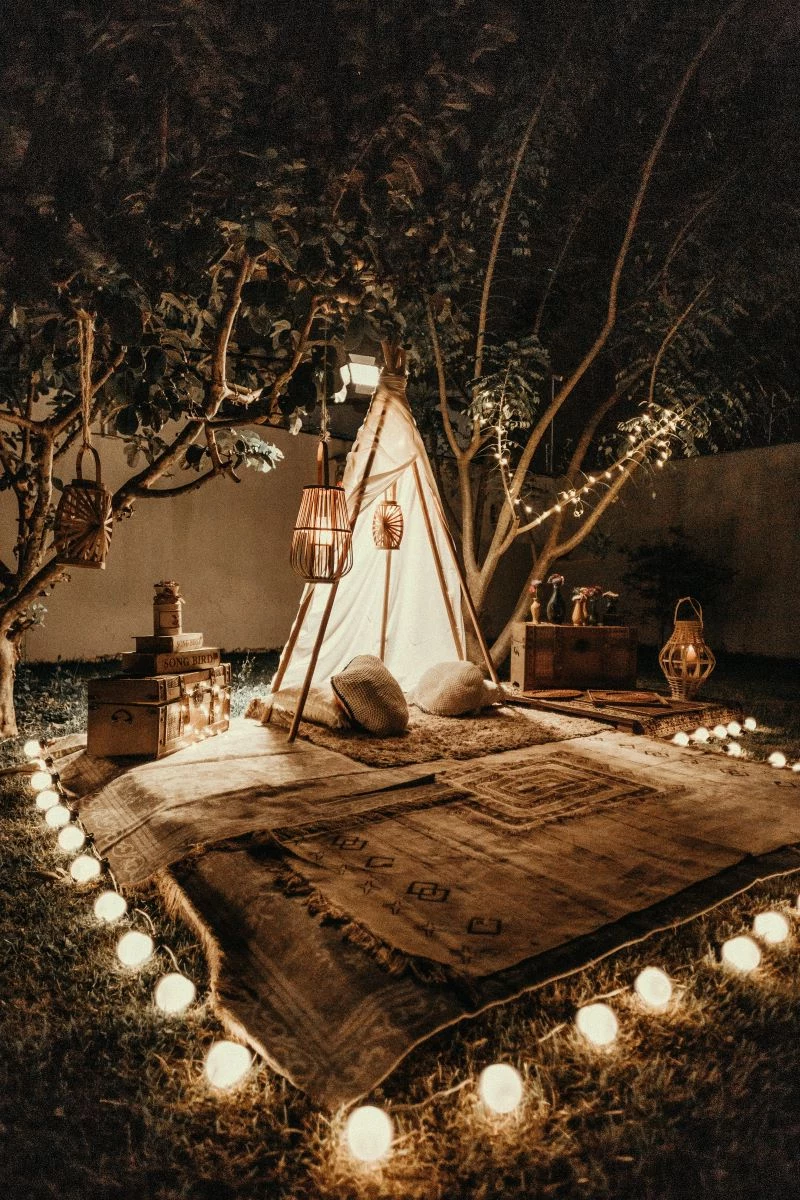
We think about lighting in three simple layers: Safety Lights: This is purely functional. Path lights along walkways, and a light over the stairs or the grill. The goal is simple: don’t let anyone trip. Accent Lights: This is for the drama. Use an uplight to show off the cool bark of a tree or wash a stone wall with a soft glow. This creates beautiful focal points at night. Ambient Lights: This is the general mood lighting. Think string lights over a patio or soft lights hidden in a pergola. It makes the space feel like a cozy, inviting room.
A common mistake is using way too many lights and making the yard look like an airport runway. Less is more. You want soft pools of light, not a blinding glare.
By the way, here’s a tip I’ve learned from seeing dozens of DIY systems fail: Before you bury a single wire, lay out all your lights and cables on the ground one evening. Turn the system on and move the fixtures around until the effect is perfect. Once you love how it looks, then you can go back and bury the cables. It saves so much time and frustration.
Finishing Touches: Furniture and Fire
Once the heavy lifting is done, you can bring in the furniture and other fun stuff that makes the space truly yours.
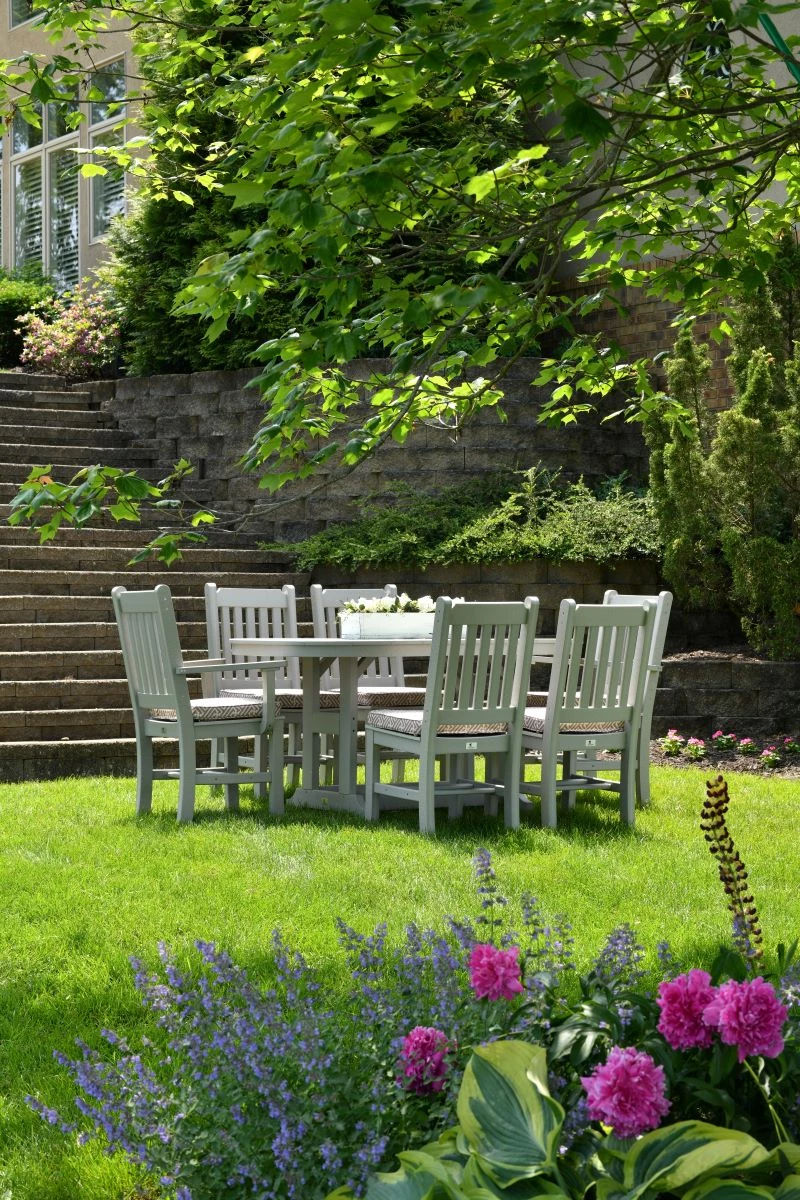
Choose Furniture That Will Actually Last
Outdoor furniture takes a brutal beating from the sun and rain. Cheap steel sets will start showing rust spots in a single season. Untreated pine will rot. When you’re buying, think about longevity. A cheap $200 patio set that you have to replace every other year is way more expensive than an $800 aluminum set that will last a decade. Powder-coated aluminum won’t rust, teak wood weathers to a beautiful silver and lasts forever, and resin wicker over an aluminum frame gives you a classic look that can handle the weather. Investing in quality furniture and some good covers will save you a ton of cash in the long run.
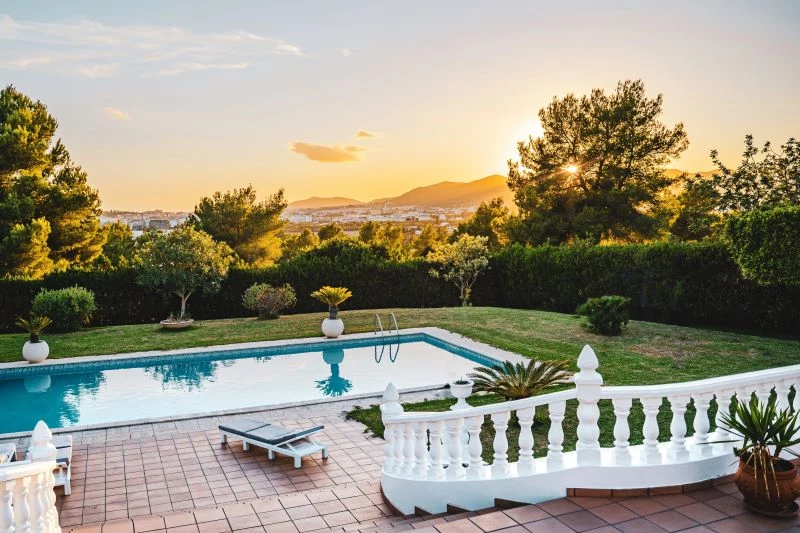
A Quick Word on Fire and Food
For a truly next-level space, you might want a fire pit or an outdoor kitchen. For any feature with an open flame, check your local town rules first—many have restrictions on location and type. A gas fire pit is often easier and cleaner than wood-burning, and might face fewer regulations.
An outdoor kitchen can be anything from a simple built-in grill counter to a full-blown setup with a fridge and sink. Just remember that these bigger projects often involve running gas, water, and electrical lines, which is absolutely a job for licensed professionals. It’s a big investment, but it can make your backyard the true heart of your home.
Bringing It All Together
Look, creating a great outdoor living area is a journey. It starts with a smart plan that comes from really understanding your own yard. It means building the solid, lasting structures before* you get to the fun stuff like planting flowers and picking out pillows.
Take your time with it. A backyard built in phases from a single master plan will always, always be better than one thrown together in a rush. Don’t be afraid to get your hands dirty with the parts you can handle, like planting or laying out a lighting system. But also be smart enough to know when to call in a pro for the big stuff. With the right approach, your backyard has the potential to become everyone’s favorite room in the house.


