Growing the Monkey Tail Cactus: Your Complete, No-Nonsense Guide
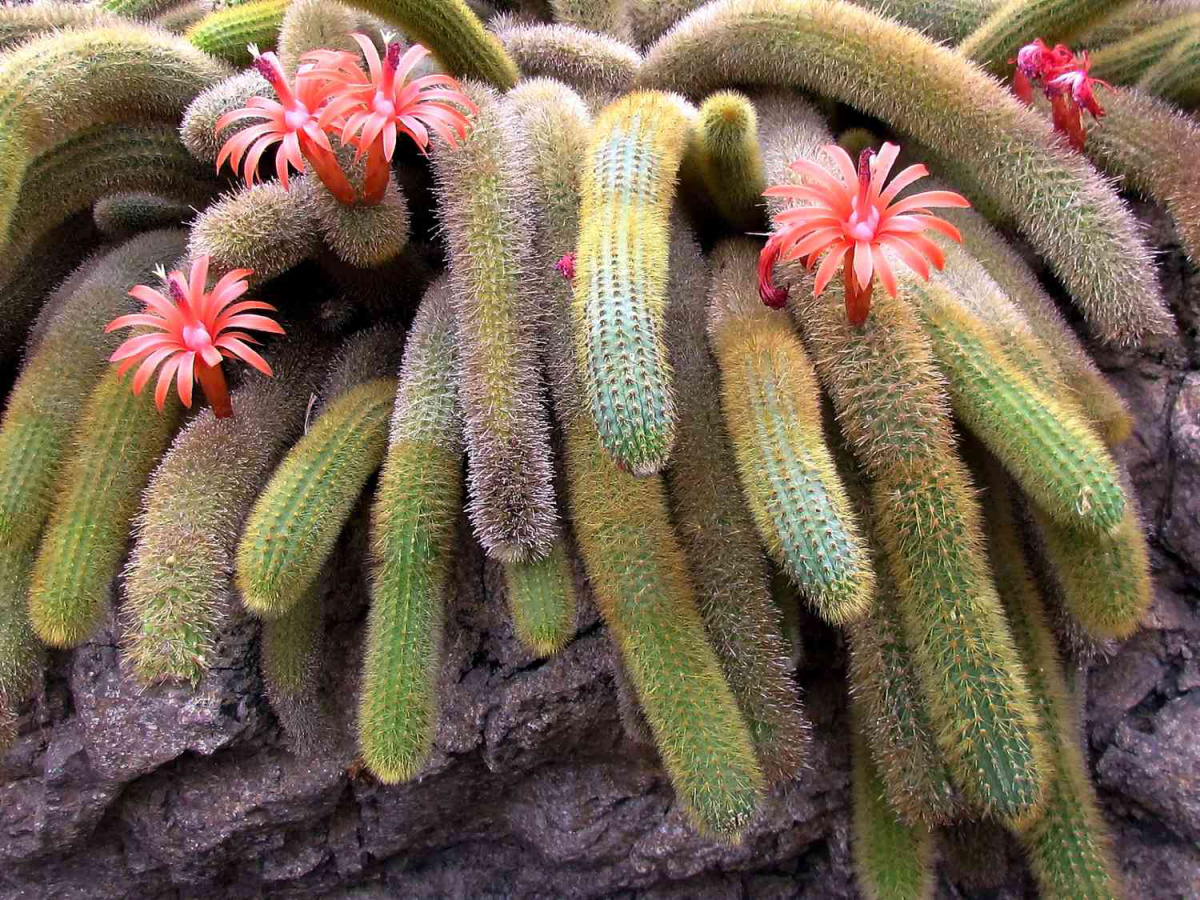
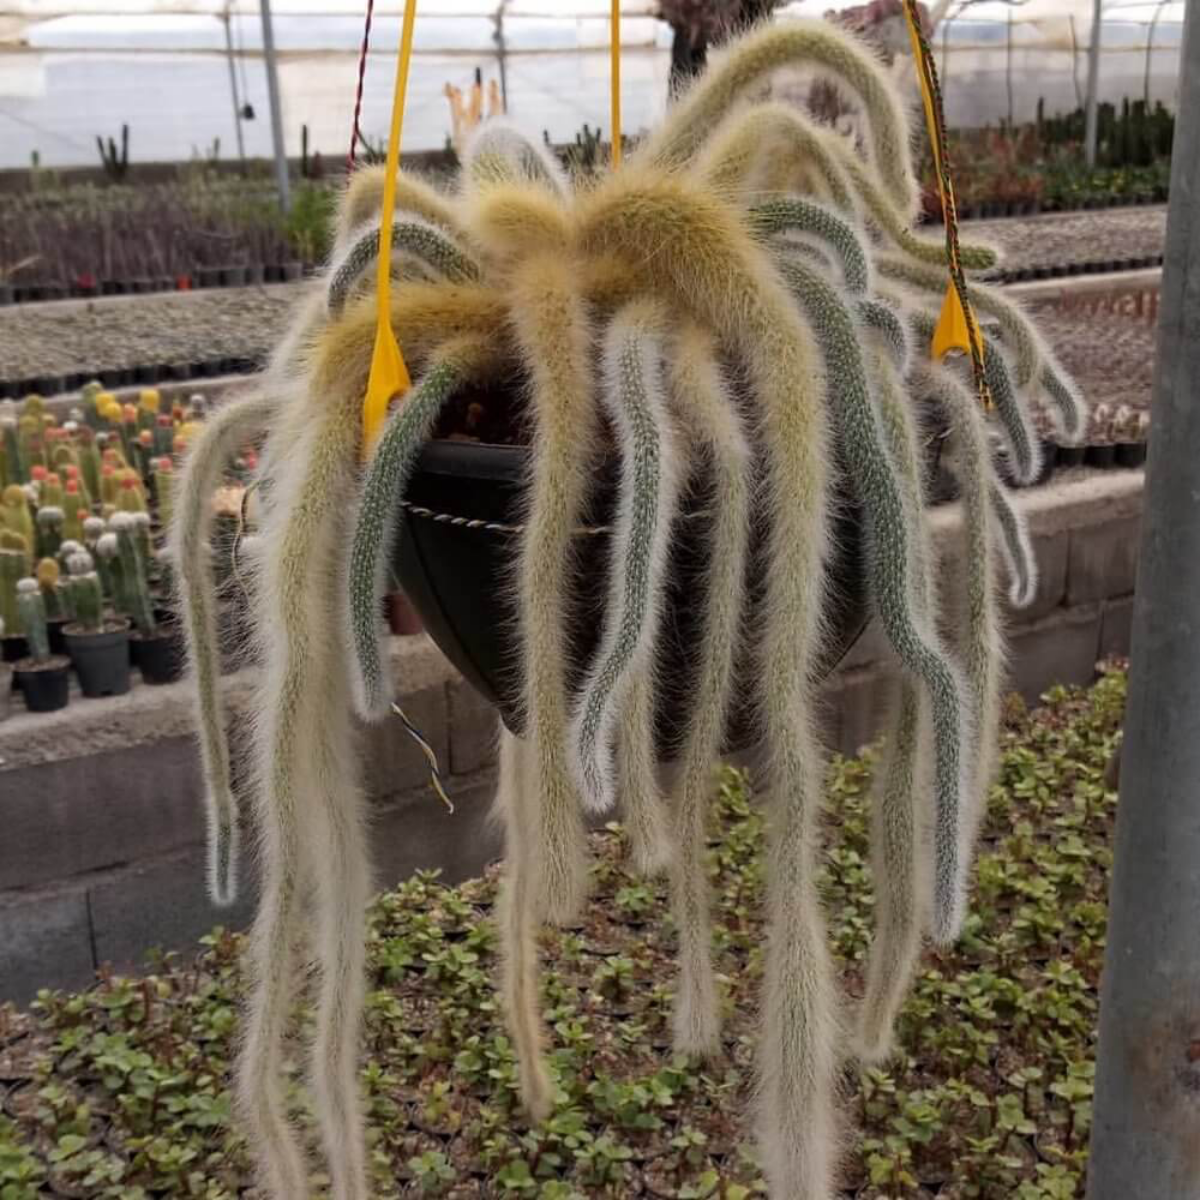
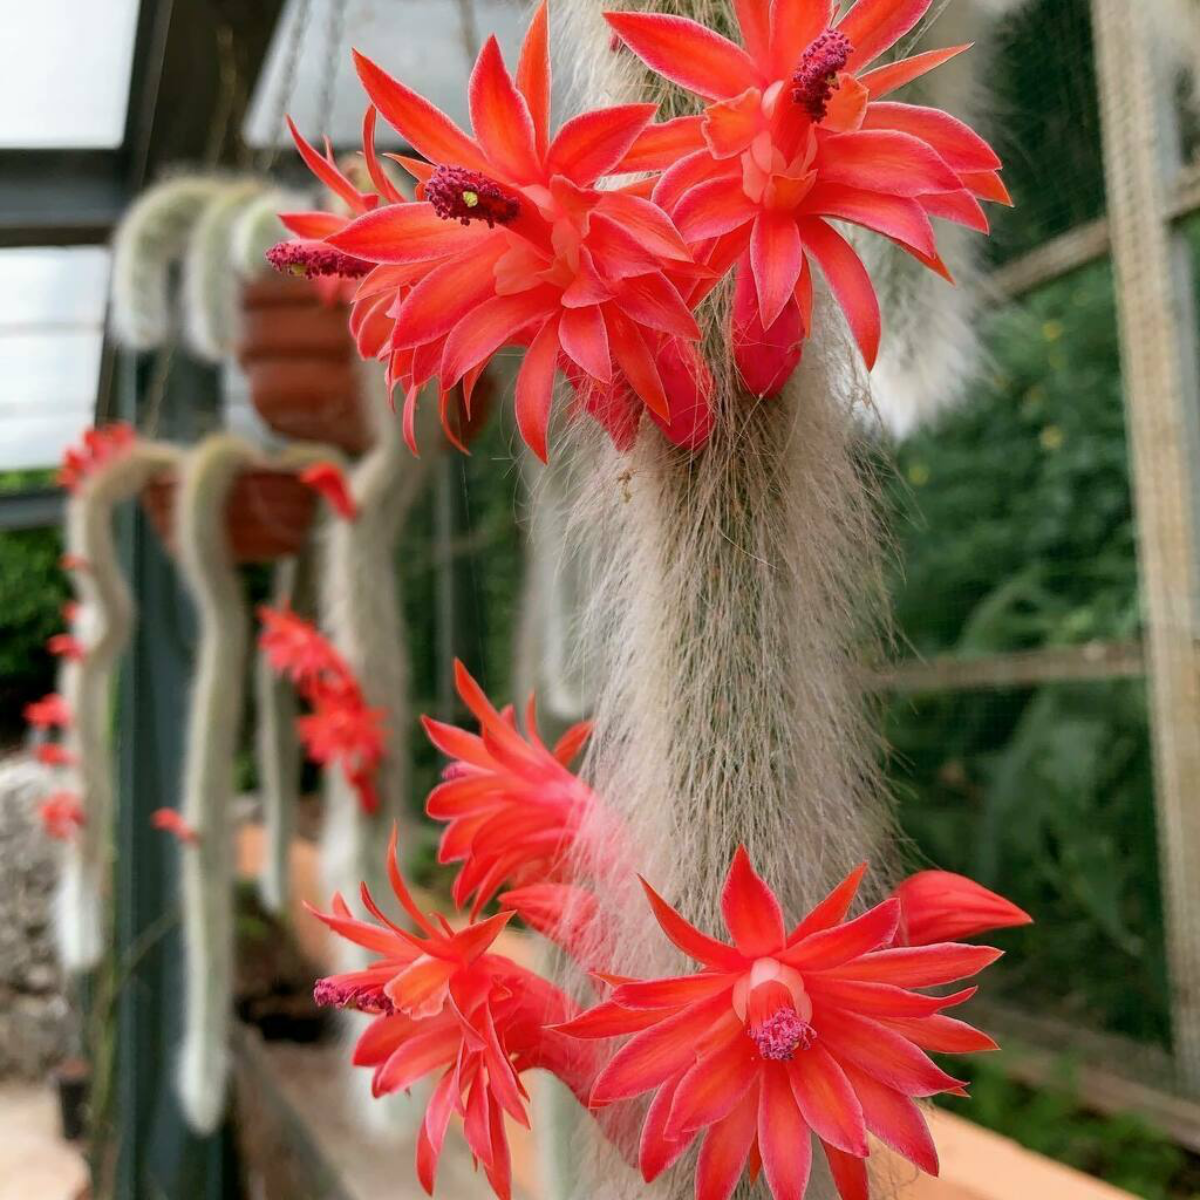
I still remember the first time I saw a truly magnificent Monkey Tail cactus. It wasn’t in some fancy botanical garden, but hanging in an old, private greenhouse, owned by a grower who had seen it all. The stems were just incredible—a cascade of pale green ropes, easily six feet long, covered in this soft, white fuzz that seemed to glow. It looked like something out of a fantasy world. The owner just smiled and said, “It’s a stunner, but it’ll teach you patience.”
In this article
And he was absolutely right. The Monkey Tail isn’t what I’d call a difficult plant, but to get it to thrive—to grow those epic, flowering stems—you have to think like the plant. It’s originally from the rocky cliffs of Bolivia, where it literally clings to rocks for dear life. It gets blasted with bright light but is often shielded from the worst of the midday sun by the cliffs themselves. It’s a life of extremes: long droughts followed by seasonal downpours. Honestly, everything we do in our homes is just trying to mimic that unique environment.
I’ve grown hundreds of these over the years, from tiny cuttings to huge, heavy showstoppers. I’ve made all the classic mistakes, like rotting a beautiful plant by watering it just one day too soon in the winter. This guide is basically all those lessons rolled into one. It’s not just a list of rules; it’s what I’ve learned from getting my hands dirty.
What Makes This Cactus Tick?
Before we even talk about soil or water, let’s get into the why. Understanding how this plant works is the secret sauce. It’s the difference between just keeping it alive and making it truly happy. When people ask me why their cactus looks skinny or pale, the answer is almost always in its environment.
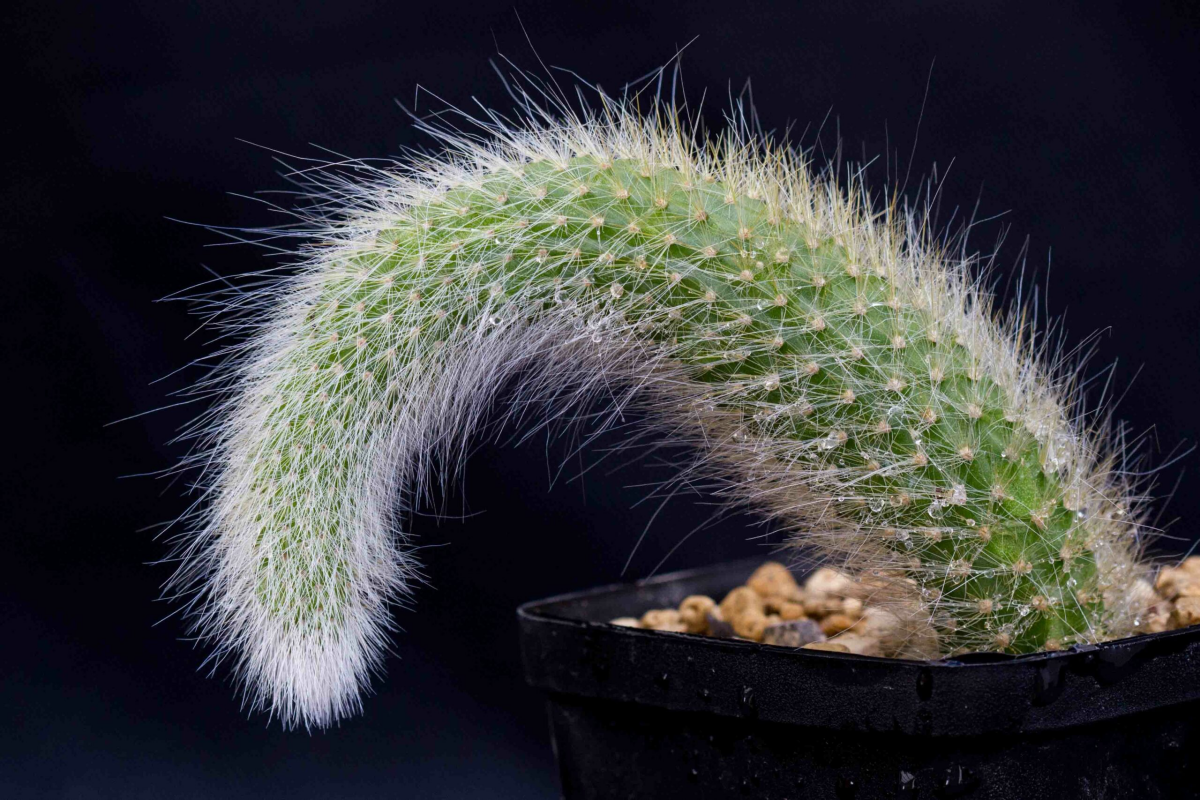
It’s Not Hair, It’s Armor
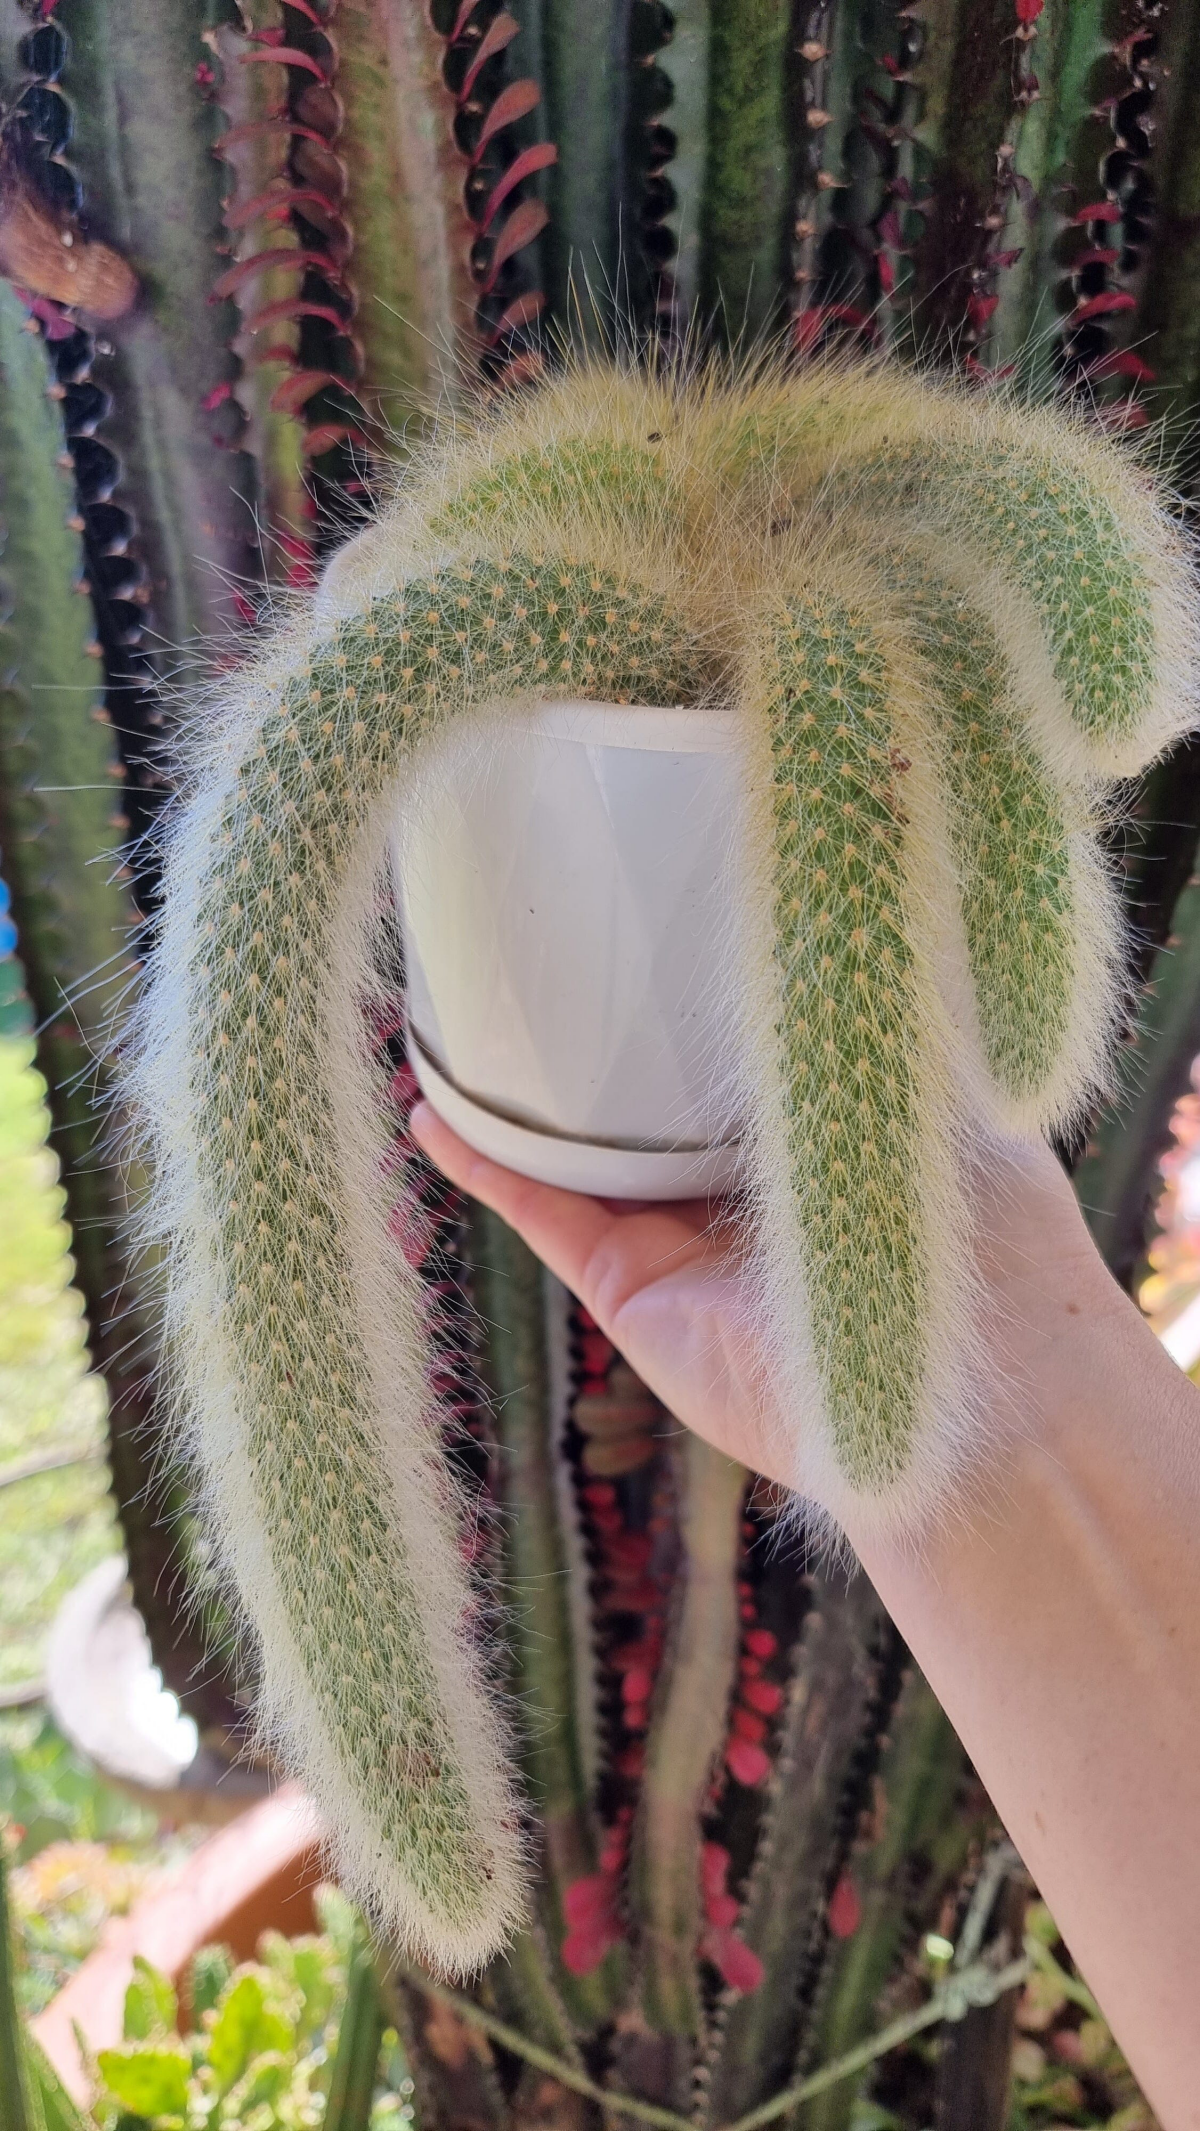
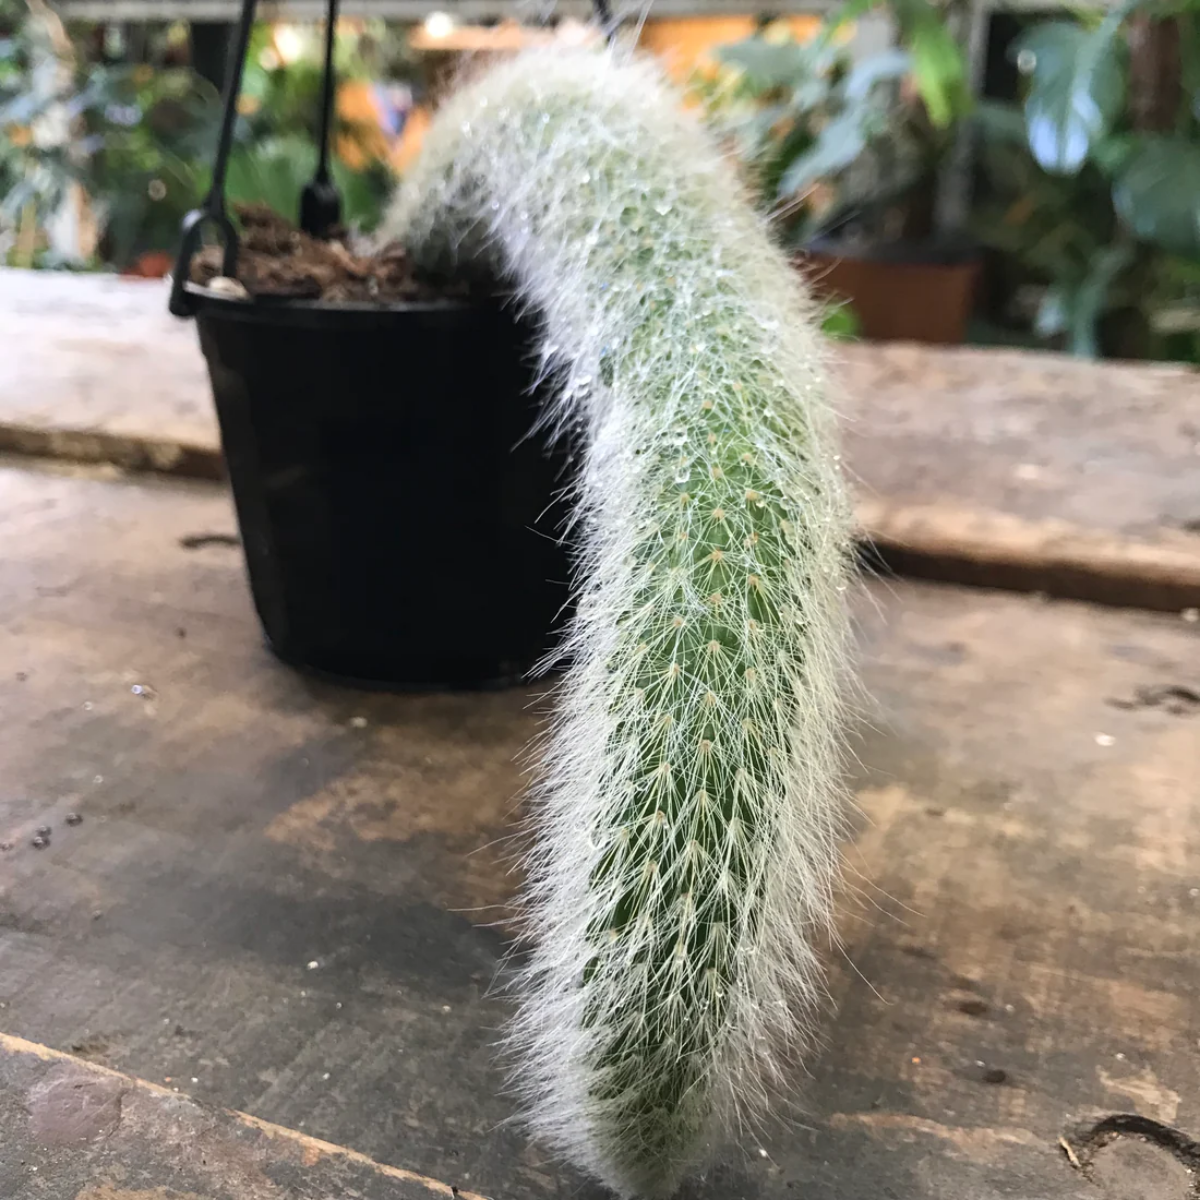
Those soft, hair-like spines are way more than just decoration. Out in the wild, that fuzzy coat is a multi-tool. It traps a layer of air to insulate the stem from chilly nights and scorching days. It also acts like a natural sunscreen, diffusing intense sunlight to prevent burns. A Monkey Tail with a dense, white coat of spines is a happy plant getting lots of bright light. If the spines look sparse and the stem is a dark, sad green, it’s probably begging for more sun.
How a Cactus Breathes and Drinks
Here’s a cool bit of plant science for you. Most plants open their pores during the day to breathe in carbon dioxide. Cacti? They do the opposite. To avoid losing precious water in the heat, they keep their pores sealed shut all day and only open them at night. This is a game-changer. It means the plant is most active after the sun goes down. Watering in the late afternoon or early evening can be a bit more effective because the roots are getting ready for their nighttime activity. It’s not a strict rule, but it’s a neat trick to have up your sleeve.
The Foundation: Getting the Soil and Pot Right
Let me be blunt: if you mess up the soil, nothing else you do will matter. I’ve seen more of these cacti fail from being in a boggy, dense soil mix than from anything else. The goal is simple: create a gritty, airy home for the roots that drains like a champ. Compact, wet soil is the enemy.
My Go-To Soil Recipe
You can buy those pre-made cactus and succulent soils, and they’re an okay start. But most of them are too heavy on peat moss, which can turn into a water-repellent brick when it dries out completely. After a ton of experimenting, I’ve landed on a simple three-part mix that works wonders.
- One-part Inorganic Grit: This is for drainage. I swear by pumice (the 1/8″ to 1/4″ size is perfect). It’s light and doesn’t compact. Coarse sand or perlite work too, but fair warning, perlite is so light it tends to float to the top over time, which is just a little annoying. You can find a bag of pumice at most hydroponics stores or online for about $10-$15.
- One-part Potting Compost: A good quality, sifted organic compost provides the nutrients. Just try to avoid brands loaded with chemical slow-release fertilizers; you want to be in control of feeding.
- One-part Soil Conditioner: My secret weapon here is fine orchid bark or a bonsai product called akadama. These materials hold just a bit of moisture without getting soggy and provide great long-term structure to the soil. You can find akadama at bonsai supply shops.
Quick tip for beginners: Feeling overwhelmed? Just grab a bag of commercial cactus soil and mix it 50/50 with extra pumice or perlite. It’s a massive improvement over using the soil straight from the bag and a great budget-friendly option!
Choosing a Home (The Pot)
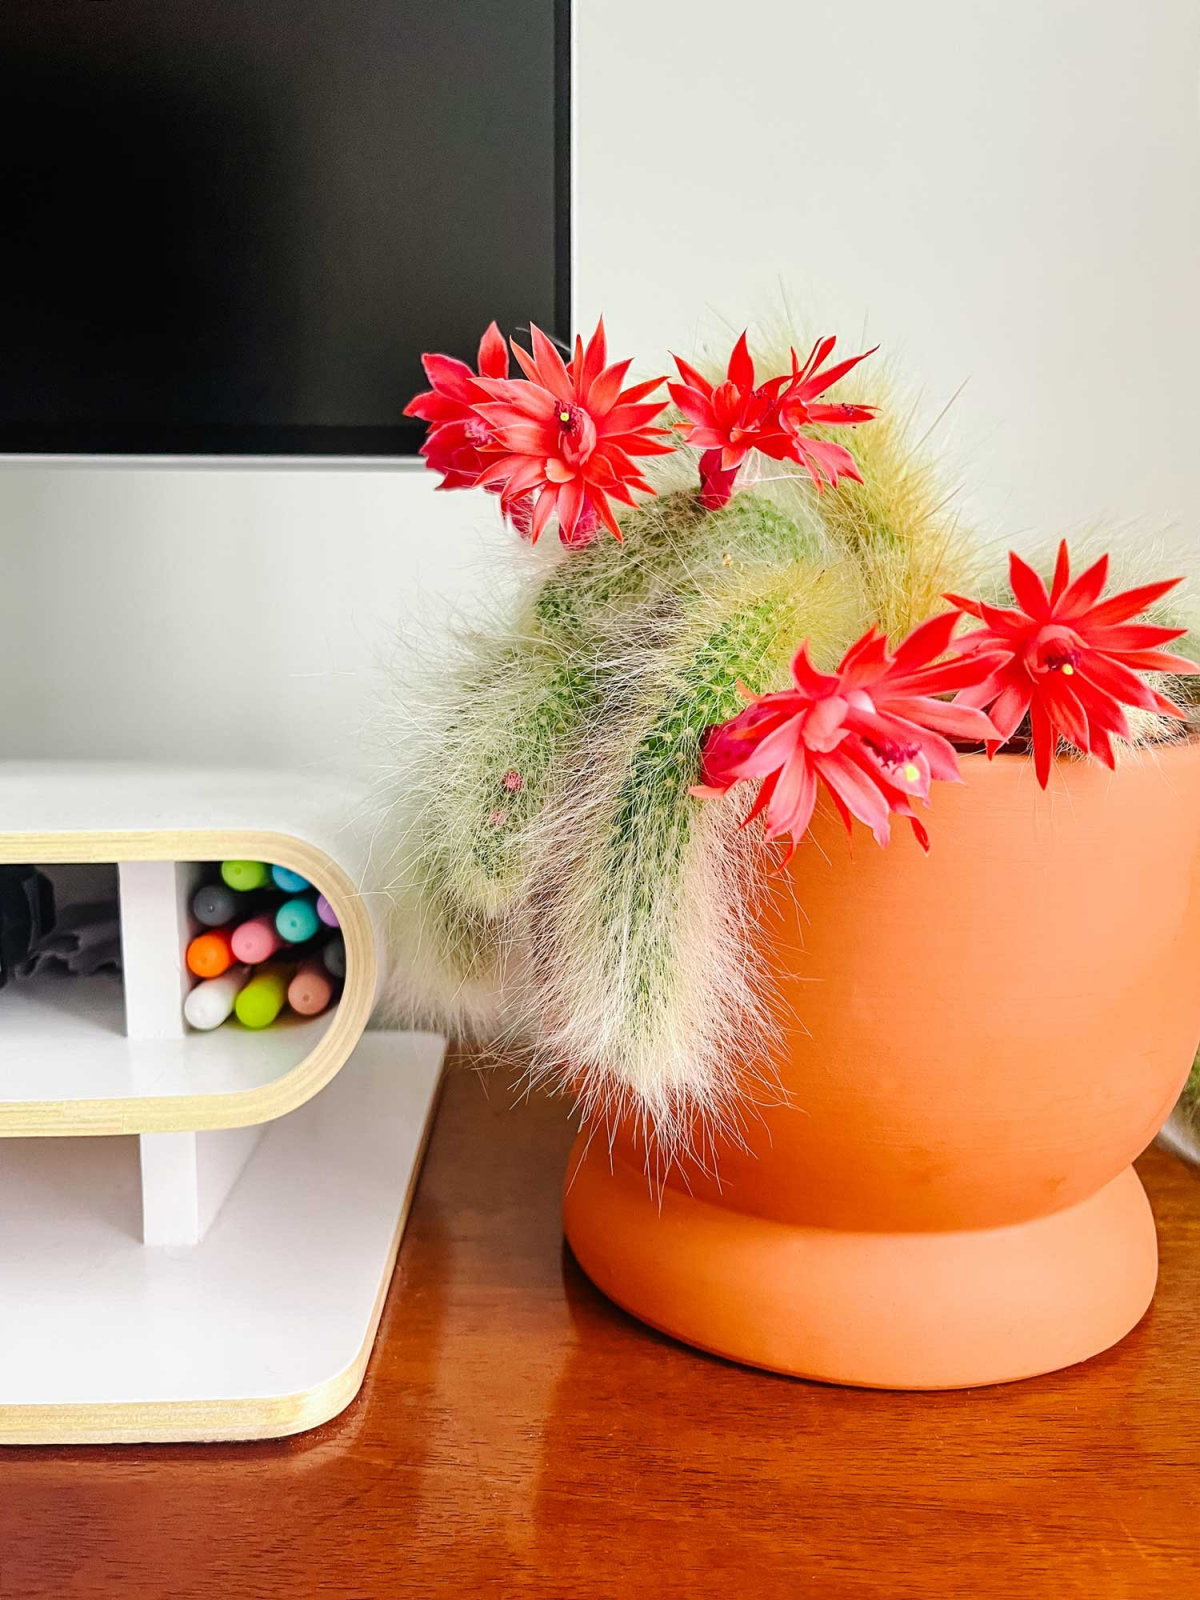
The classic hanging basket is the way to go. While plastic is fine, I really prefer unglazed terra cotta. Why? It’s porous, so it breathes. This allows the soil to dry out more evenly, which is exactly what this rock-dwelling plant loves. And whatever you choose, it absolutely MUST have good drainage. One tiny hole at the bottom of a big pot is not enough. I’m not shy about taking a drill to a pot to add a few more holes if needed.
Oh, and don’t pick a pot that’s too big! It’s a classic beginner mistake. A pot that’s too large holds a ton of extra soil that stays wet for too long, which is a one-way ticket to root rot. These guys prefer to be a little snug in their pot. When you do repot, only go up one size, about an inch or two wider.
How Do You Even Repot This Thing?
This is the question nobody asks until they’re standing there with a floppy, spiky plant in one hand and a pot in the other. It can be awkward! The spines are soft, but they can still get everywhere.
Here’s my method: Get a few sheets of newspaper or an old towel and gently roll it up. You can use this to create a sling or a wrap to cradle the long stems, gathering them together so you can lift the plant out of its old pot without breaking them. This also protects your hands. Once it’s out, you can gently work the old soil off the roots and get it into its new home. It takes a bit of coordination, but the newspaper trick is a lifesaver.
Watering: The Art of Knowing When to Stop
Watering is what stresses new growers out the most. But with this cactus, the guiding principle is simple: when in doubt, don’t. It can handle being thirsty way better than it can handle being drowned. The ‘soak and dry’ method is the gold standard for a reason.
- Check First, Water Second: Never, ever water on a schedule. Your plant’s needs change. The best way to check is with a wooden skewer or a chopstick. Poke it deep into the soil. If it comes out with dark, damp soil clinging to it, wait a few more days. If it comes out clean and dry, it’s go time.
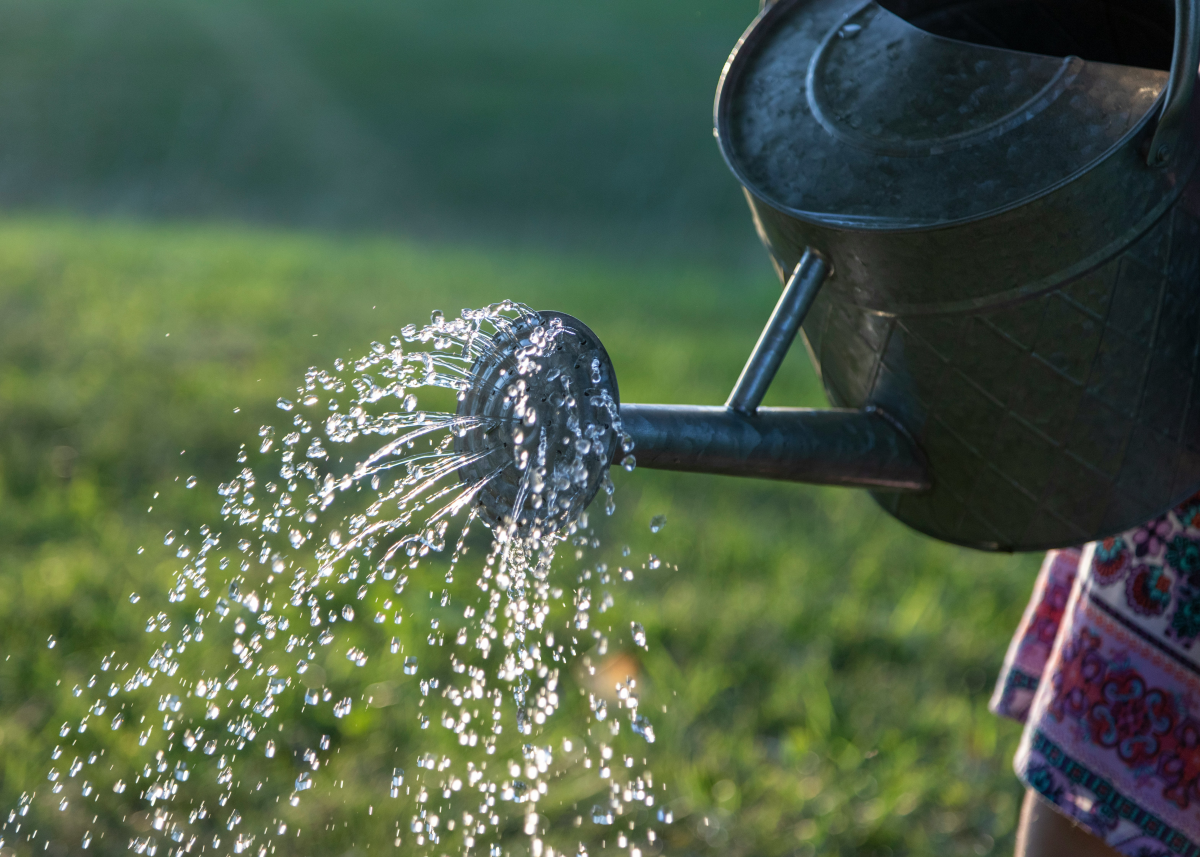
- Soak It Good: When you do water, be generous. Drench the soil until water is pouring out of the drainage holes. This ensures the entire root ball gets a drink and helps flush out any mineral buildup.
- Let It Drain: Never let your pot sit in a saucer full of water. That’s the fastest way to rot the roots. Let it drip dry completely.
- Embrace the Dry Spell: Now for the most important part. Let the soil dry out completely before you even think about watering again. In the summer, this might be every 7-10 days. But in the winter, it could be a month or even longer.
Speaking of winter, you have to adjust. During the cool, shorter days of fall and winter, the plant goes dormant. Reducing water isn’t just about preventing rot; a cool, dry winter rest is the main trigger for getting those gorgeous red flowers in the spring. Aim for a spot that stays between 50-60°F (10-15°C) and reduce watering to just a small splash once a month, if that.
Fueling the Growth: Light and Food
Getting those long stems and bright flowers comes down to two things: the right light and a sensible feeding plan.
Let There Be Light (But Not Too Much)
Monkey Tails crave a lot of bright, indirect light. An east-facing window with gentle morning sun is perfect. A south-facing window can also work, but you might need to pull it back a bit or use a sheer curtain to avoid scorching. If you’re growing it outside in a hot climate, putting it under a tree or a 30-40% shade cloth is a good move to protect it from the brutal afternoon sun.
If your plant’s stems are getting thin, stretchy, and pale, it’s called etiolation. It’s literally stretching itself out looking for more light. If you see this, move it to a brighter spot, but do it gradually over a week or so to prevent sunburn.
A Lean Diet for a Healthy Plant
This is not a hungry plant. Over-fertilizing makes for weak, sappy growth that attracts pests. I only feed during the growing season, from about spring through early fall. I use a special cactus fertilizer that’s low in nitrogen (the first number in the N-P-K ratio, like 2-7-7). This encourages strong stems and flowers instead of just foliage. I always dilute it to half the strength recommended on the bottle and use it about once a month instead of a regular watering. Once fall approaches, I stop all feeding to let the plant prepare for its winter nap.
Expanding Your Collection and Keeping It Tidy
Once you’ve got the hang of it, making new plants is incredibly rewarding. It’s a great way to share with friends or just, you know, make more for yourself!
Making New Plants from Cuttings
This is super easy. But you need to be disciplined.
- Take the Cutting: Use a clean, sharp knife to cut a piece of stem that’s at least 4-6 inches long. I always wipe my blade with rubbing alcohol first.
- Let It Scab Over: This is the step everyone wants to skip, but don’t! Let the cutting sit in a dry, shady spot for a week or two. A dry, hard callus will form over the cut end. This is crucial for preventing rot.
- Plant It: Stick the calloused end about an inch deep into a pot of your dry cactus mix.
- Wait to Water: Don’t water it for at least a week! This encourages it to send out new roots searching for moisture. You’ll know it’s working when you see the first signs of new growth a few weeks or months later.
Where to Buy and What to Look For
By the way, these plants are protected by international agreements to prevent them from being poached from the wild. So always buy from reputable sources. You can find great plants from specialty online cactus shops, sellers on Etsy with good reviews, or sometimes at a good local nursery. A small cutting might run you $15-$25, while a larger, established plant in a hanging basket could be $60 or more.
Before you buy, give the plant a quick health check. Gently squeeze the base of the stems near the soil. If it feels soft or mushy, walk away—that’s a sign of rot. Look for plump, firm stems and check deep in the spines for any little white, cottony pests called mealybugs.
Heads up on safety! A mature Monkey Tail in a big hanging basket gets HEAVY, especially right after you’ve watered it. A large one can easily top 30 pounds (about 14 kg). I once heard about someone whose entire plant crashed to the floor because the hook wasn’t in a ceiling joist. Please, use a stud finder and install a hook that’s rated for 50 pounds or more. Don’t trust a simple drywall anchor!
Easy Things You Can Do For Your Plant Today
Feeling motivated? Here are a few quick wins:
- Do the skewer test. Is it actually time to water, or can it wait?
- Give it a gentle dusting. Use a soft, clean makeup brush or paintbrush to get the dust off the stems. This helps it absorb more light.
- Rotate the pot. Give it a quarter turn to make sure all sides are getting even light exposure.
Troubleshooting Common Problems
Even with the best care, things can go wrong. The key is to catch problems early. From my experience, most issues are about the environment, not some mystery disease.
Pesky Critters
- Mealybugs: These are the most common pest, looking like tiny cotton fluff. For a small problem, dip a Q-tip in 70% isopropyl alcohol and touch it directly to the bugs. For a bigger issue, a horticultural soap or neem oil spray works, but always spray in the evening to avoid burning the plant’s skin.
- Spider Mites: These are tiny and hard to see, but you’ll notice their fine webbing. They love hot, dry conditions. Sometimes just giving the plant a good rinse with water is enough to disrupt them.
Plant Diseases (Usually Our Fault!)
- Root Rot: This is the number one killer. The base of the plant gets soft, mushy, and brown. If you catch it early, you can sometimes save it by cutting away all the rotted parts and repotting in fresh, dry soil. To be frank, the best bet is often to take healthy cuttings from the top and start over. It’s a tough lesson we all learn.
- Fungal Spots: Sometimes you’ll see rusty orange or corky brown spots on the stems. This is usually from high humidity and not enough air movement. It’s mostly cosmetic. Try to improve air circulation (a small fan helps!) and avoid letting water sit on the stems.
A Few Final Thoughts
Growing a Monkey Tail cactus is more like a long-term relationship than a hobby. It teaches you to slow down, pay attention, and appreciate the little things. The plant you bring home today could be with you for decades, a living, growing sculpture. Don’t get discouraged if you have a setback. Every rotted stem is just a lesson learned. And I promise, the feeling you get when you see those first, brilliant red flowers pop out after a long winter… well, that reward never gets old.


