Staghorn Ferns 101: Your Go-To Guide for Mounting and Care
I’ve worked with plants for a long, long time, from huge commercial greenhouses to the friendly local nursery down the street. And out of all the plants I’ve seen, almost nothing stops people in their tracks like a big, beautiful Staghorn Fern.
In this article
I still remember the first one I ever mounted. It was a small pup from a common variety, and honestly, I was all thumbs. I wrapped the fishing line way too tight and ended up bruising a brand-new frond. But you know what? The plant was resilient. Watching its main shield frond slowly grow to hug that cedar plank taught me a huge lesson. These ferns aren’t just pretty things to hang on a wall; they’re living systems you have to partner with. They teach you to pay attention and react, not just mindlessly follow a care schedule.
So, this guide isn’t just a boring list of rules. I want to pass on the practical, hands-on knowledge I’ve picked up over the years. We’ll get into how these unique plants actually work, the right way to mount them so they’ll truly thrive, and how to fix things when they go wrong. My goal is to give you the confidence that only comes from really understanding the plant you’re caring for.
First, Let’s Understand How a Staghorn Fern Works
Before you can even think about caring for a Staghorn Fern, you have to get your head around its biology. These plants are epiphytes, which is a fancy way of saying that in their native tropical forests, they grow on the sides of other trees. They aren’t parasites—don’t worry! They just use the tree as an anchor to get up higher where the light is better. This is the most important thing to remember: their roots are for clinging, not for digging into soil to find food like a tomato plant.
Staghorn Ferns have two very different kinds of fronds (leaves), and each one has a special job. Getting this part down is the secret to success.
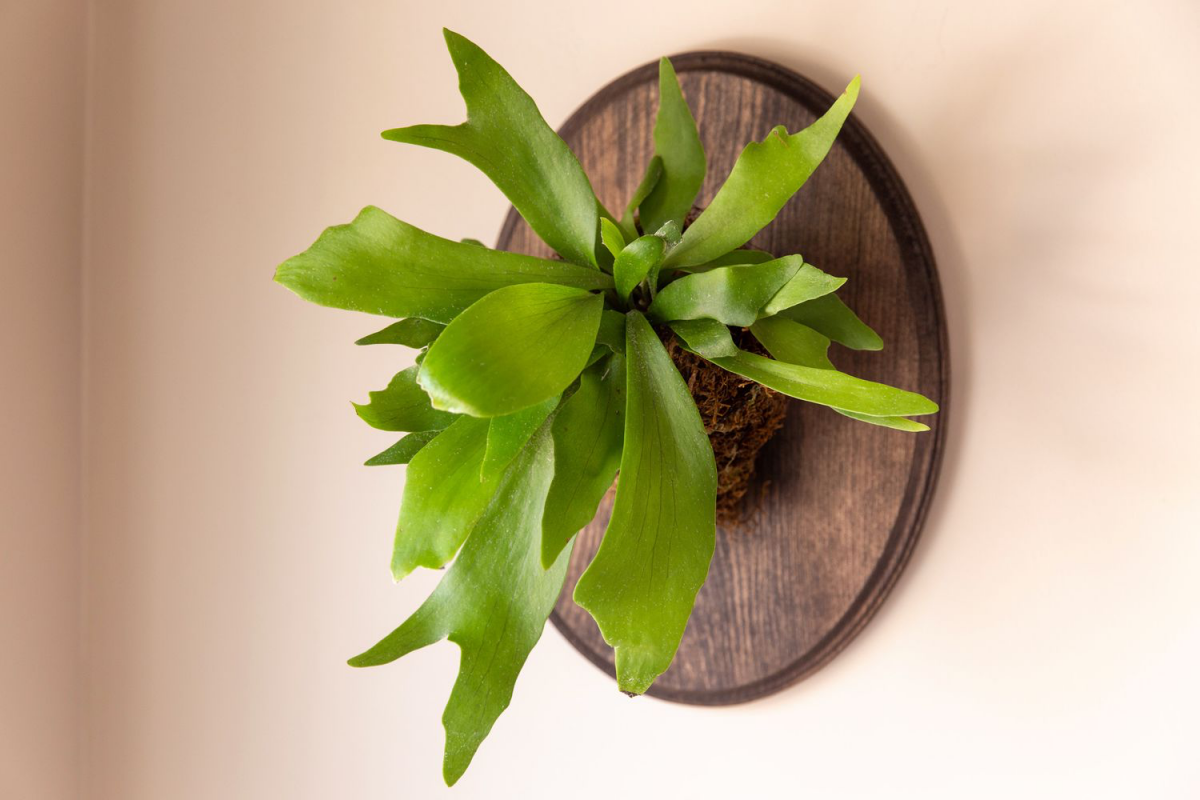
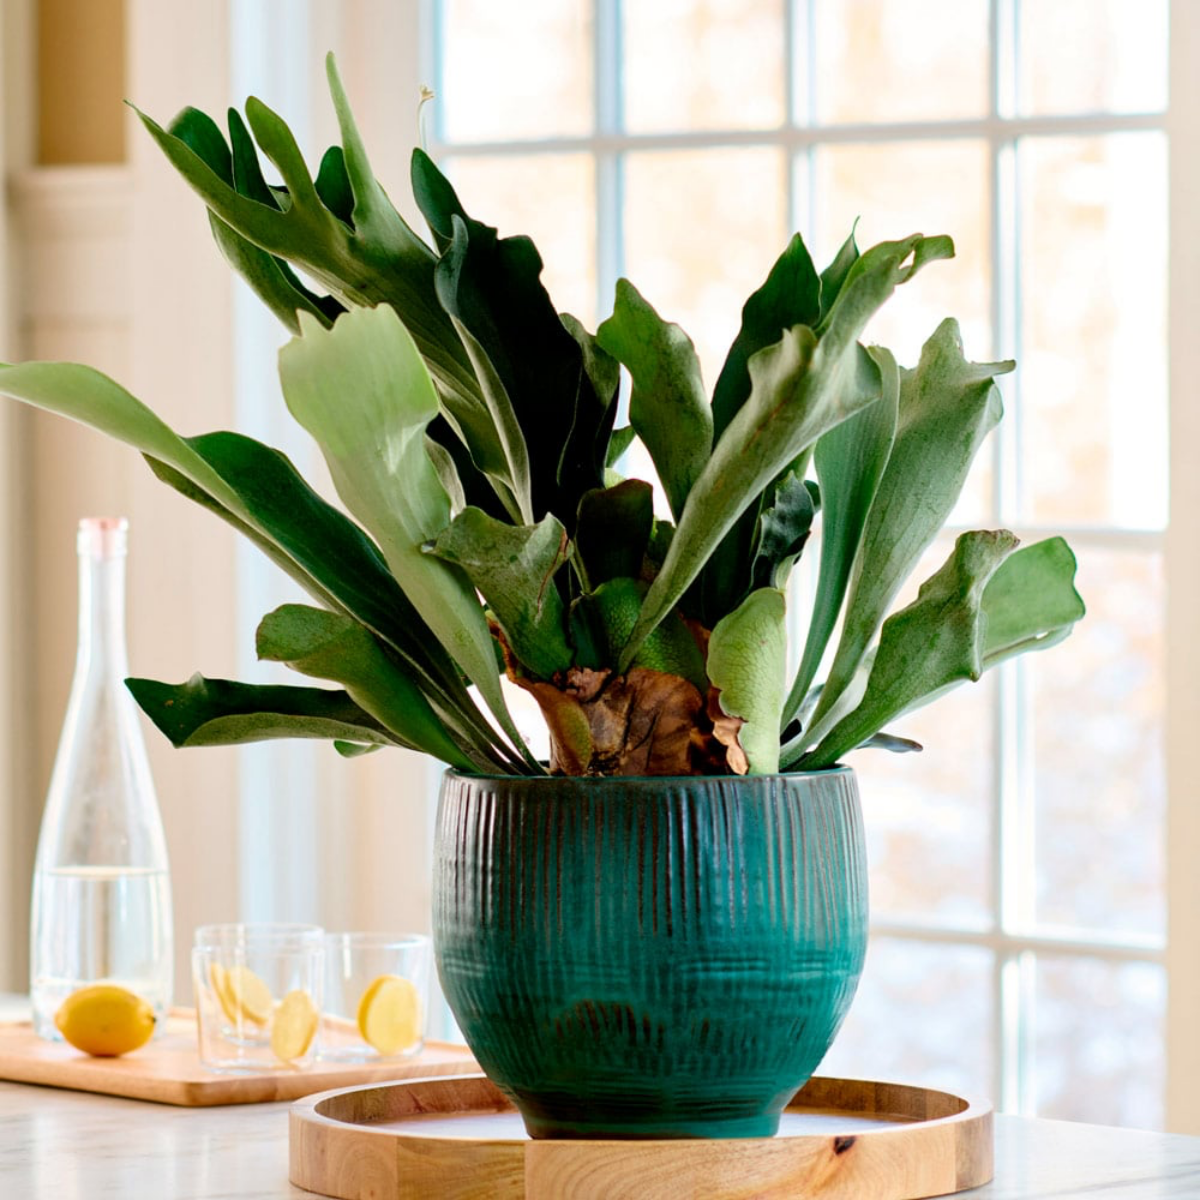
The Shield Fronds (The Round Ones)
The shield fronds are those round, flat leaves you see at the base of the plant. They start out green and fleshy, but as they get older, they turn brown and papery. So many new owners see this and panic, thinking their plant is dying. Their first instinct is to grab some scissors and trim off the brown bits.
Heads up: Do NOT remove the brown shield fronds. This is probably the most common mistake people make, and it can seriously set your plant back. Those fronds are absolutely essential. They do two critical jobs:
- They’re an Anchor: The shield fronds grow to tightly hug the tree branch (or your wooden mount), creating a super-secure home for the plant.
- They’re a Lunchbox: In the wild, things like falling leaves and organic debris get caught behind these shields. As that stuff breaks down, it creates a rich compost that the fern’s roots grow into for nutrients.
So, a healthy, growing shield frond—even a brown one—is a great sign. It’s protecting the roots and building the plant’s foundation. Just leave it be.
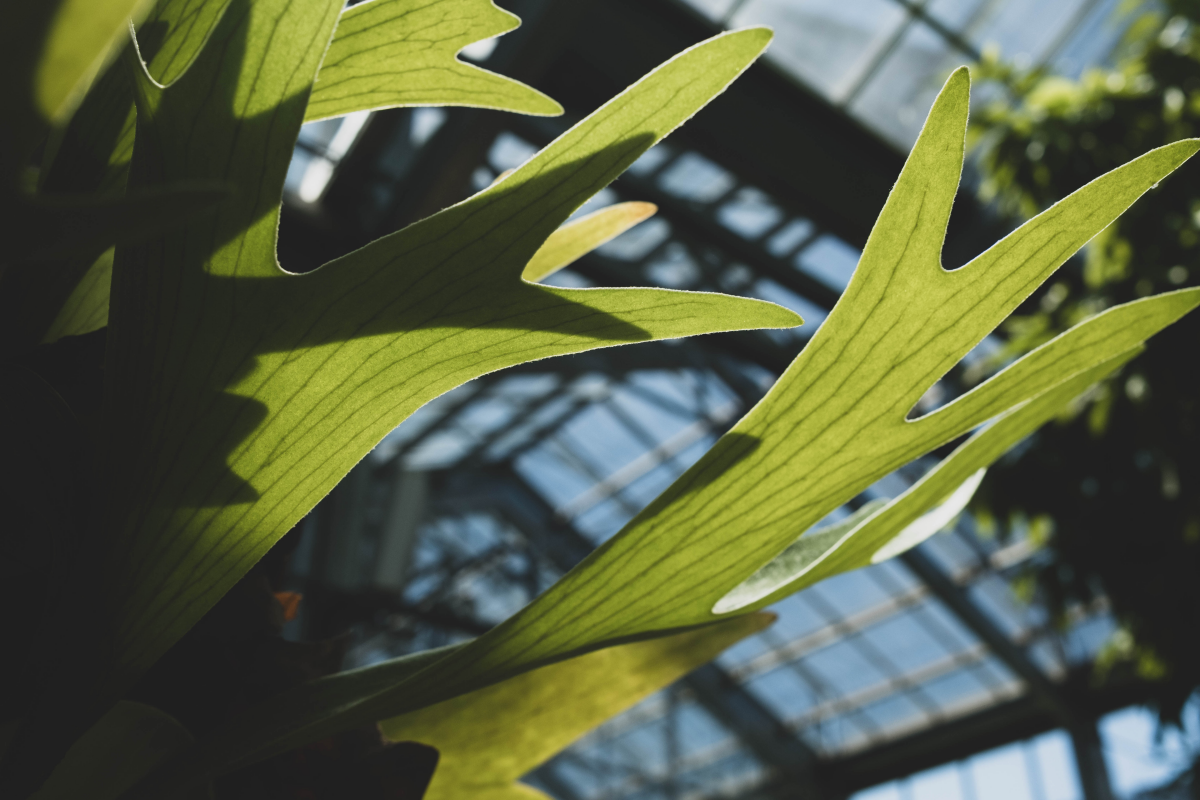
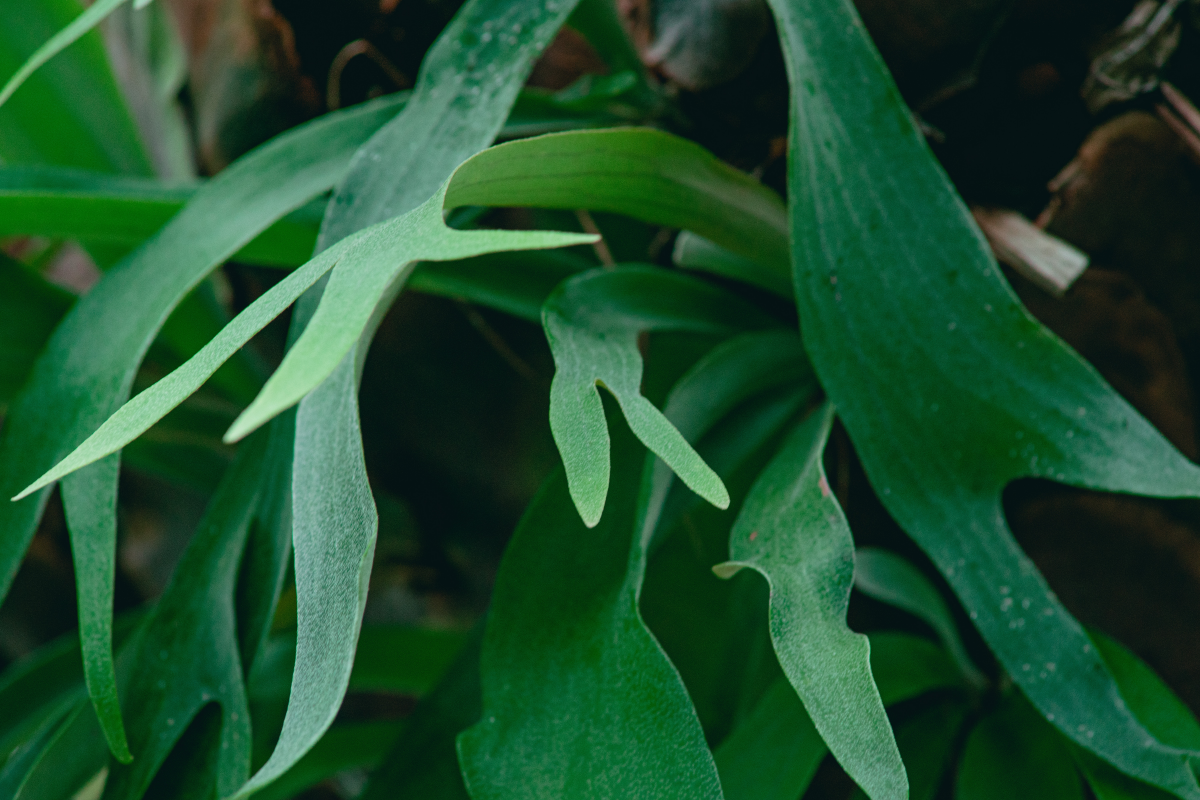
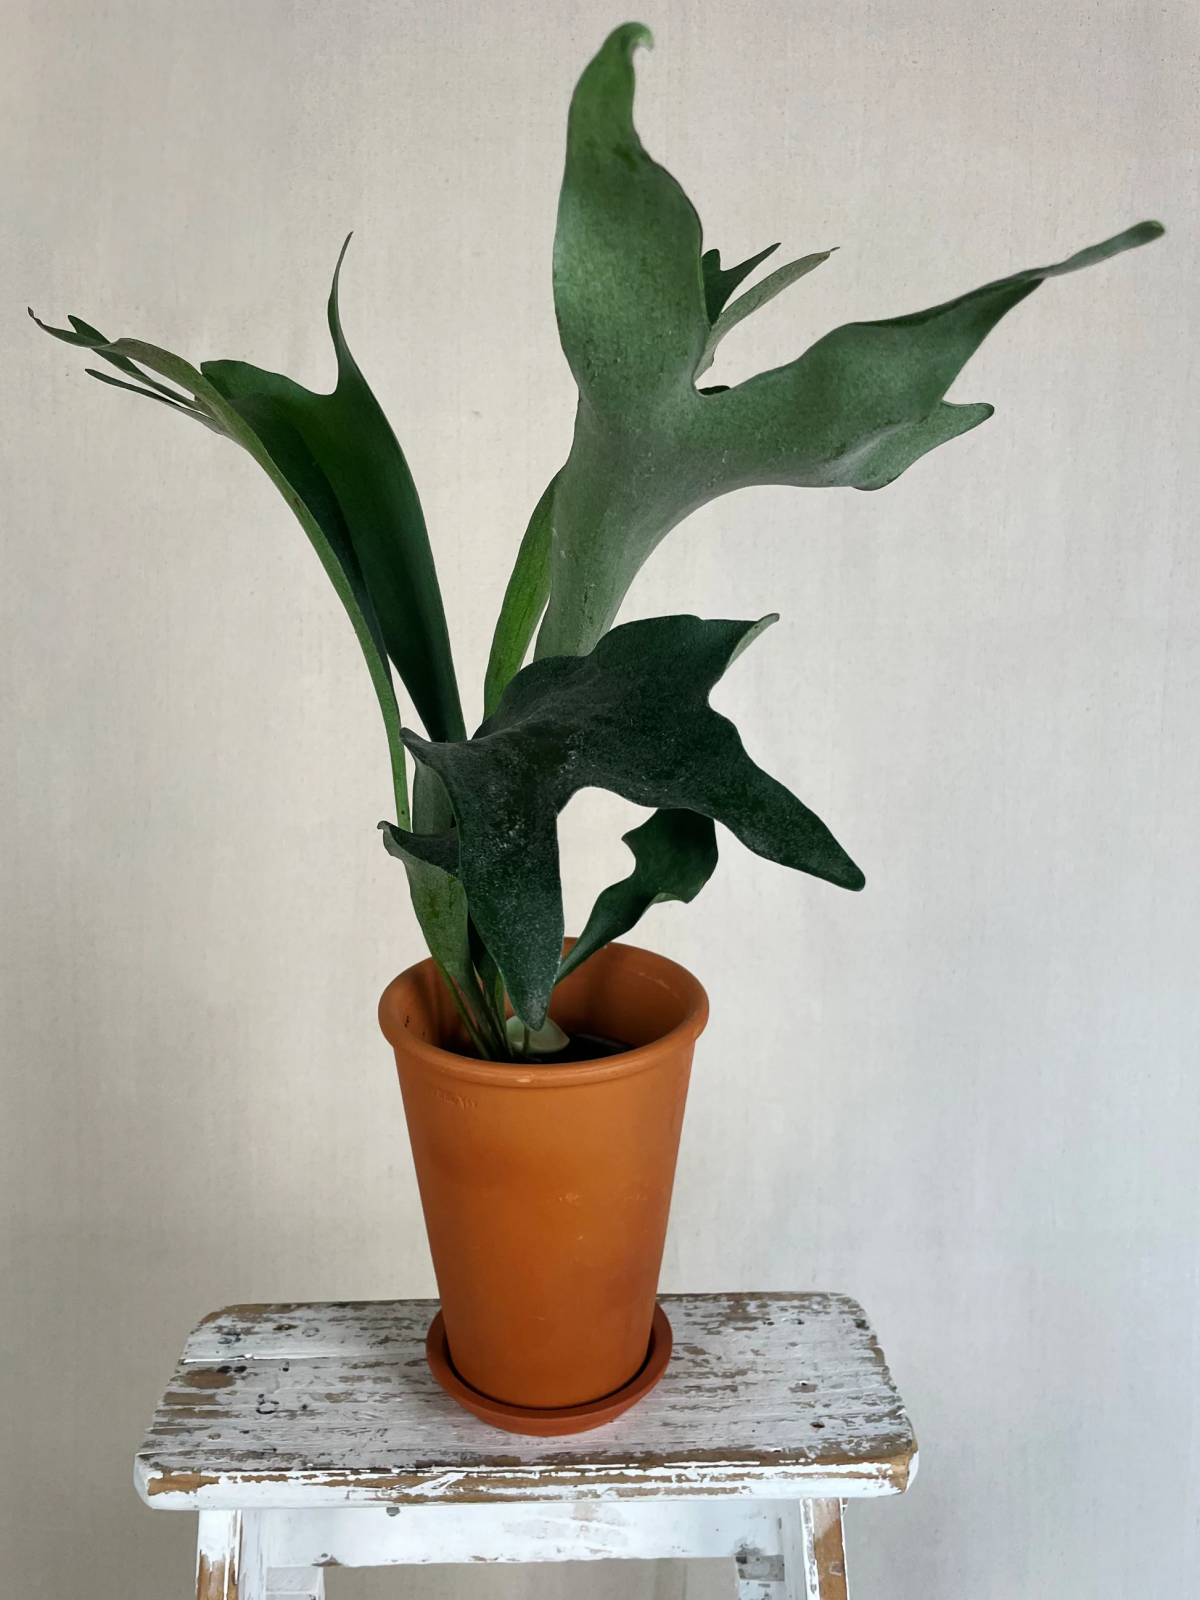
The Antler Fronds (The Showy Ones)
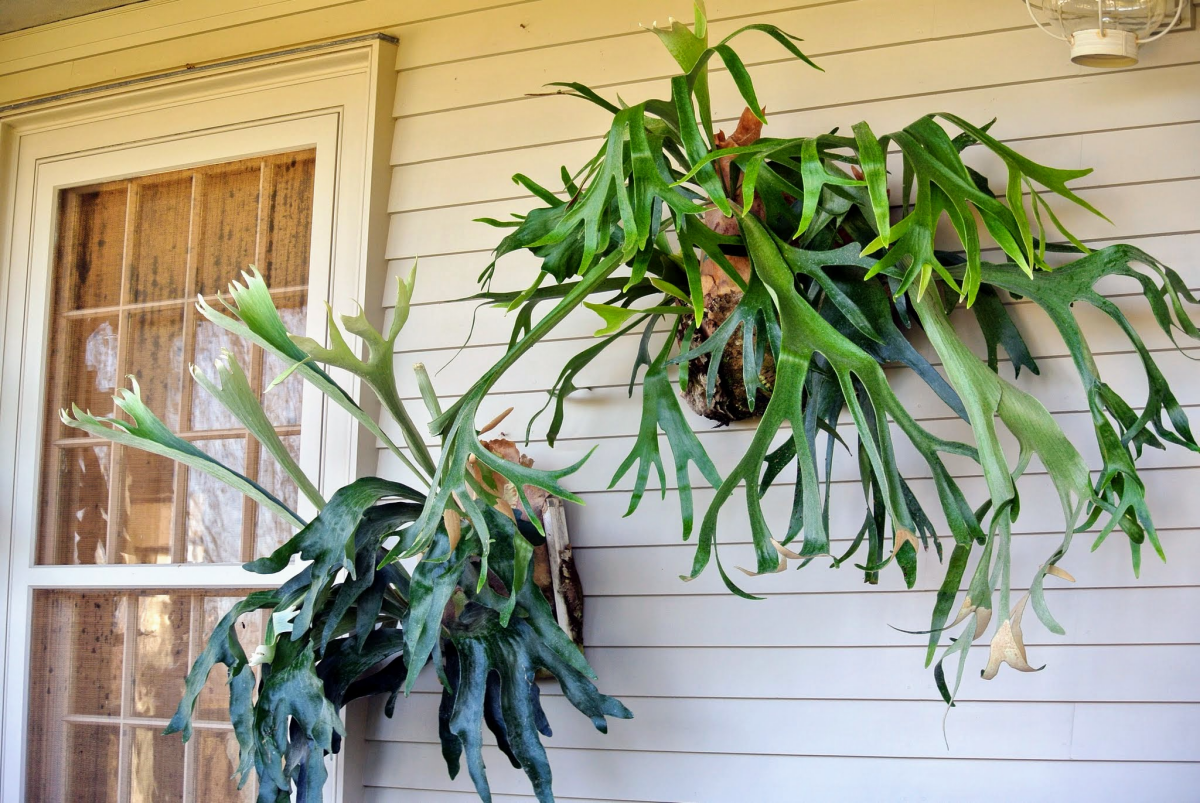
These are the fronds that give the plant its name—the long, forked ones that look like deer or elk antlers. They grow out and away from the base, and their main job is reproduction. If you look on the undersides of the tips, you might see some fuzzy brown patches. That’s not a disease or a pest! Those are spores, which is how the fern reproduces. Seeing spores is a sign of a mature, happy fern, so please don’t try to scrub them off.
The condition of these antler fronds is your best day-to-day indicator of the plant’s health. They’ll tell you pretty clearly if the fern is getting the right amount of light and water.
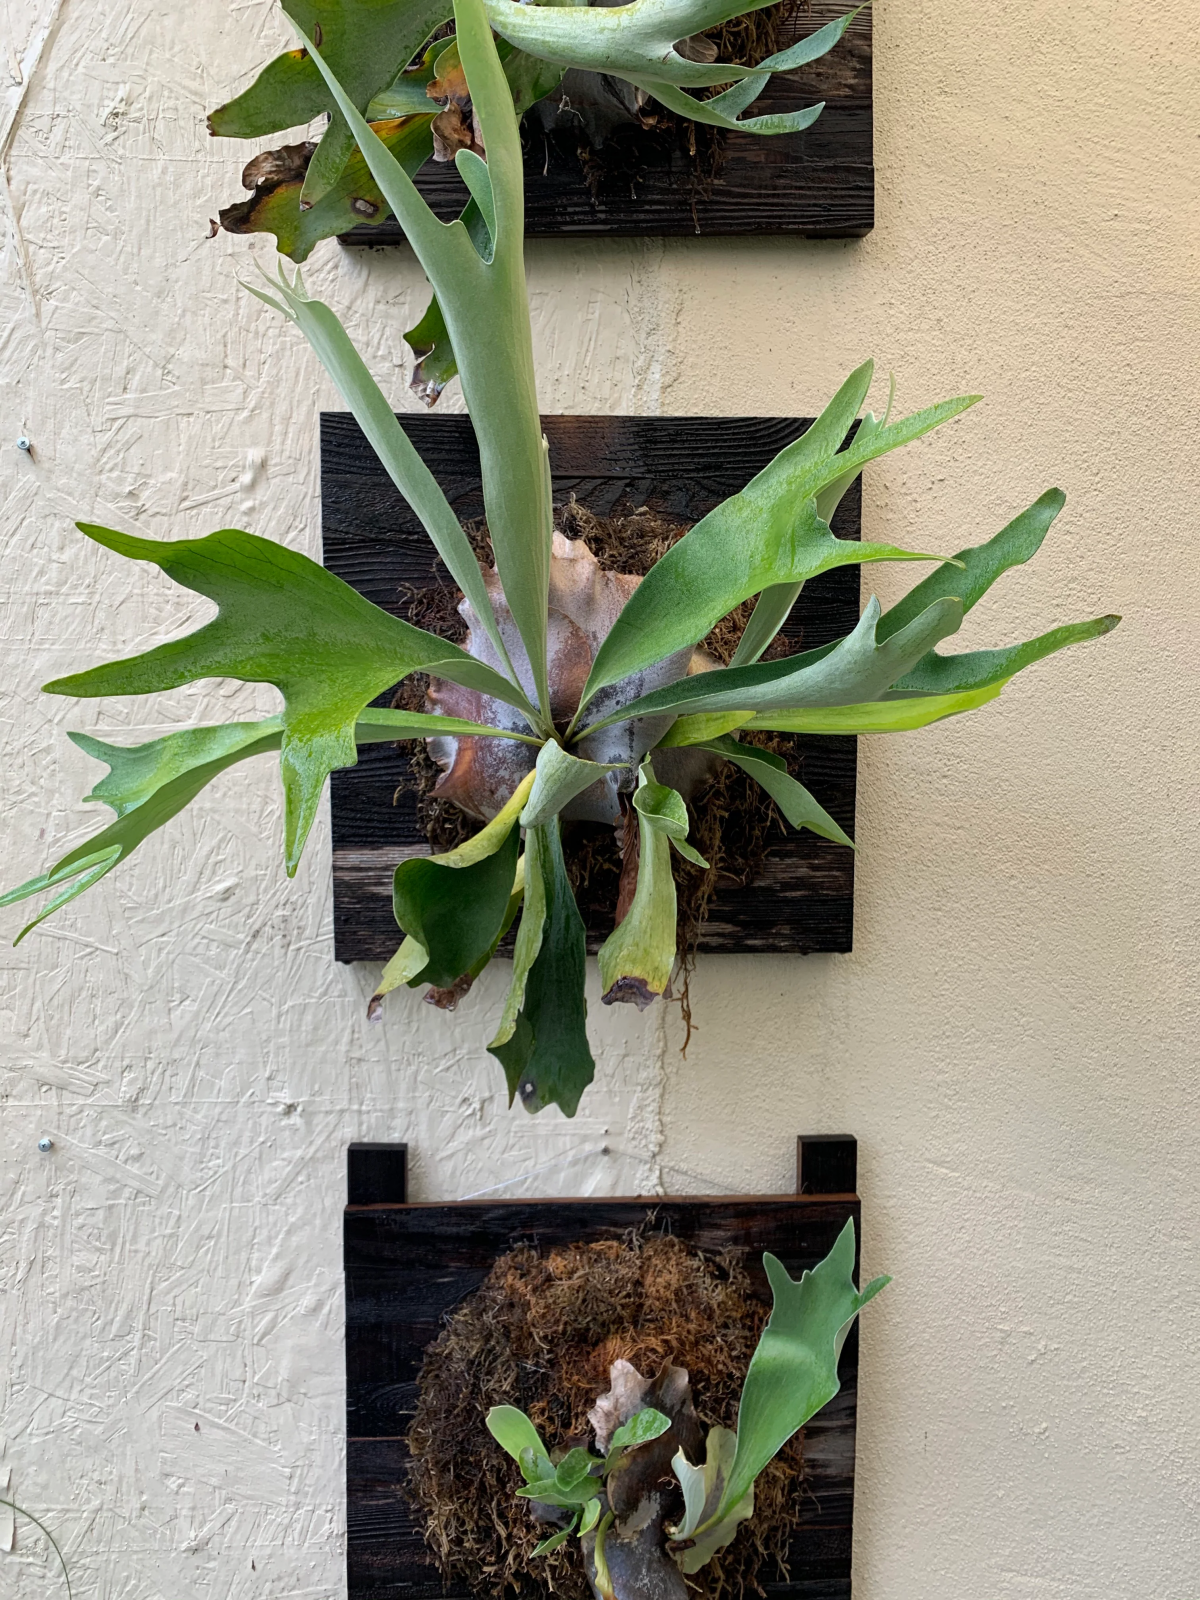
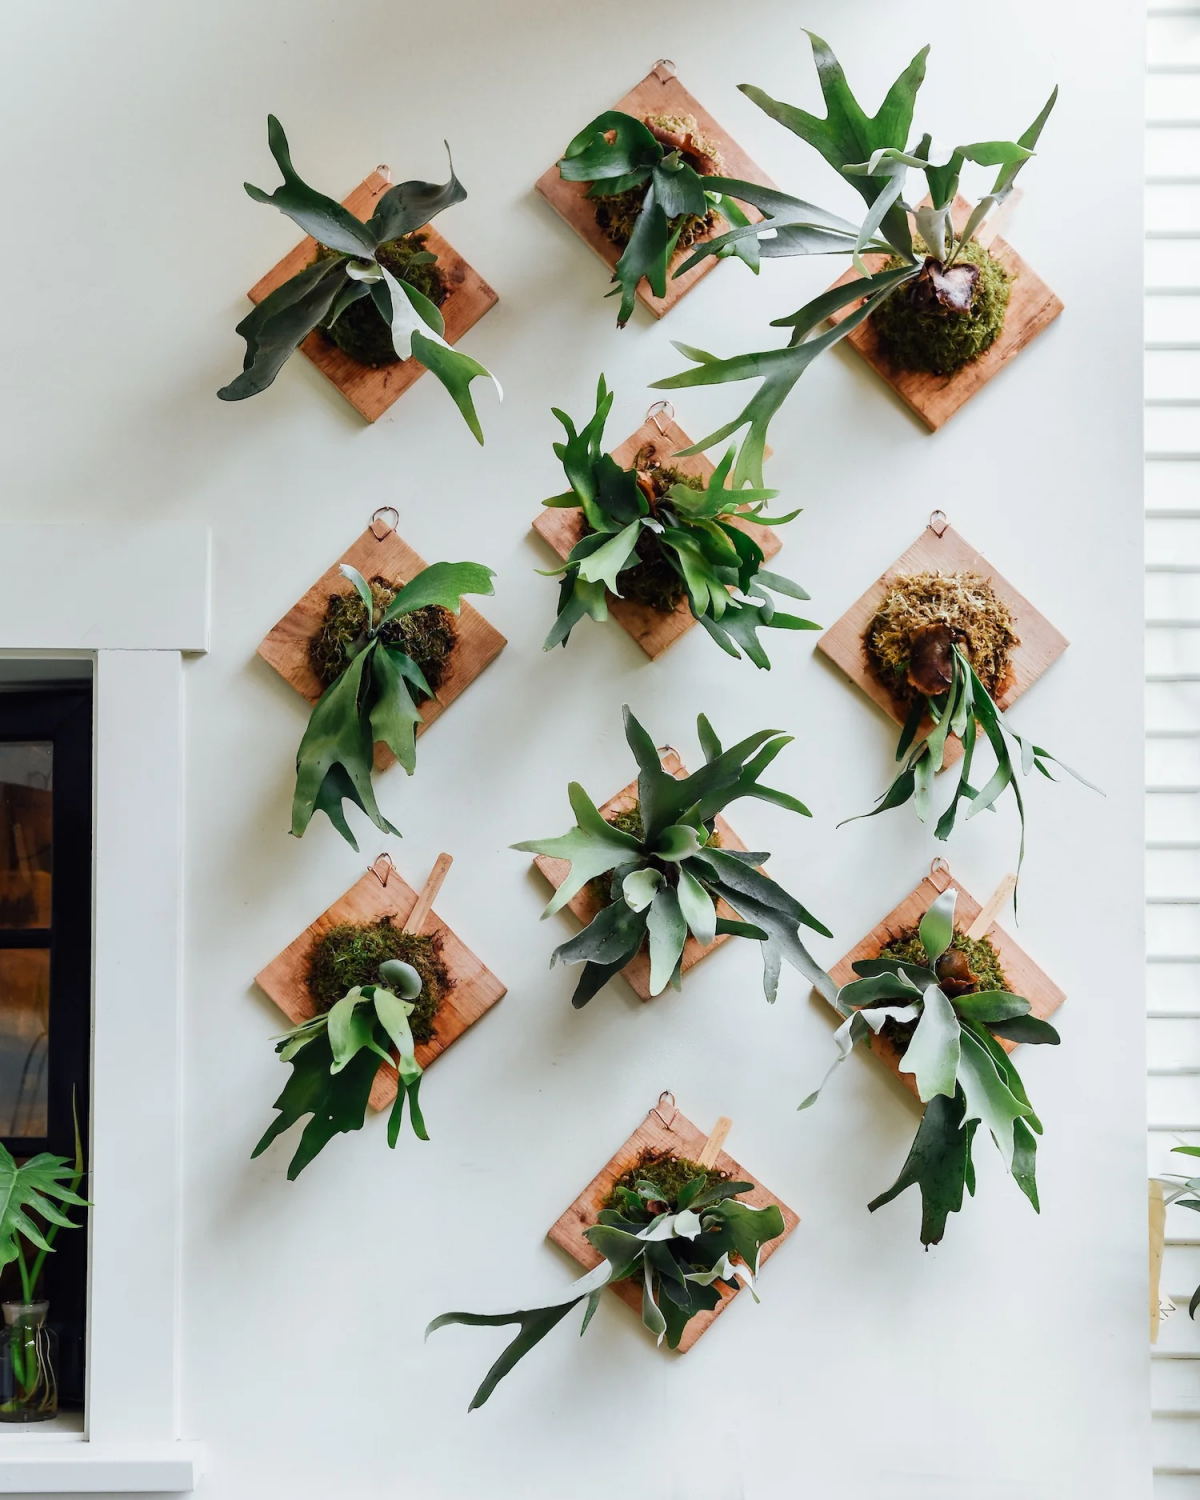
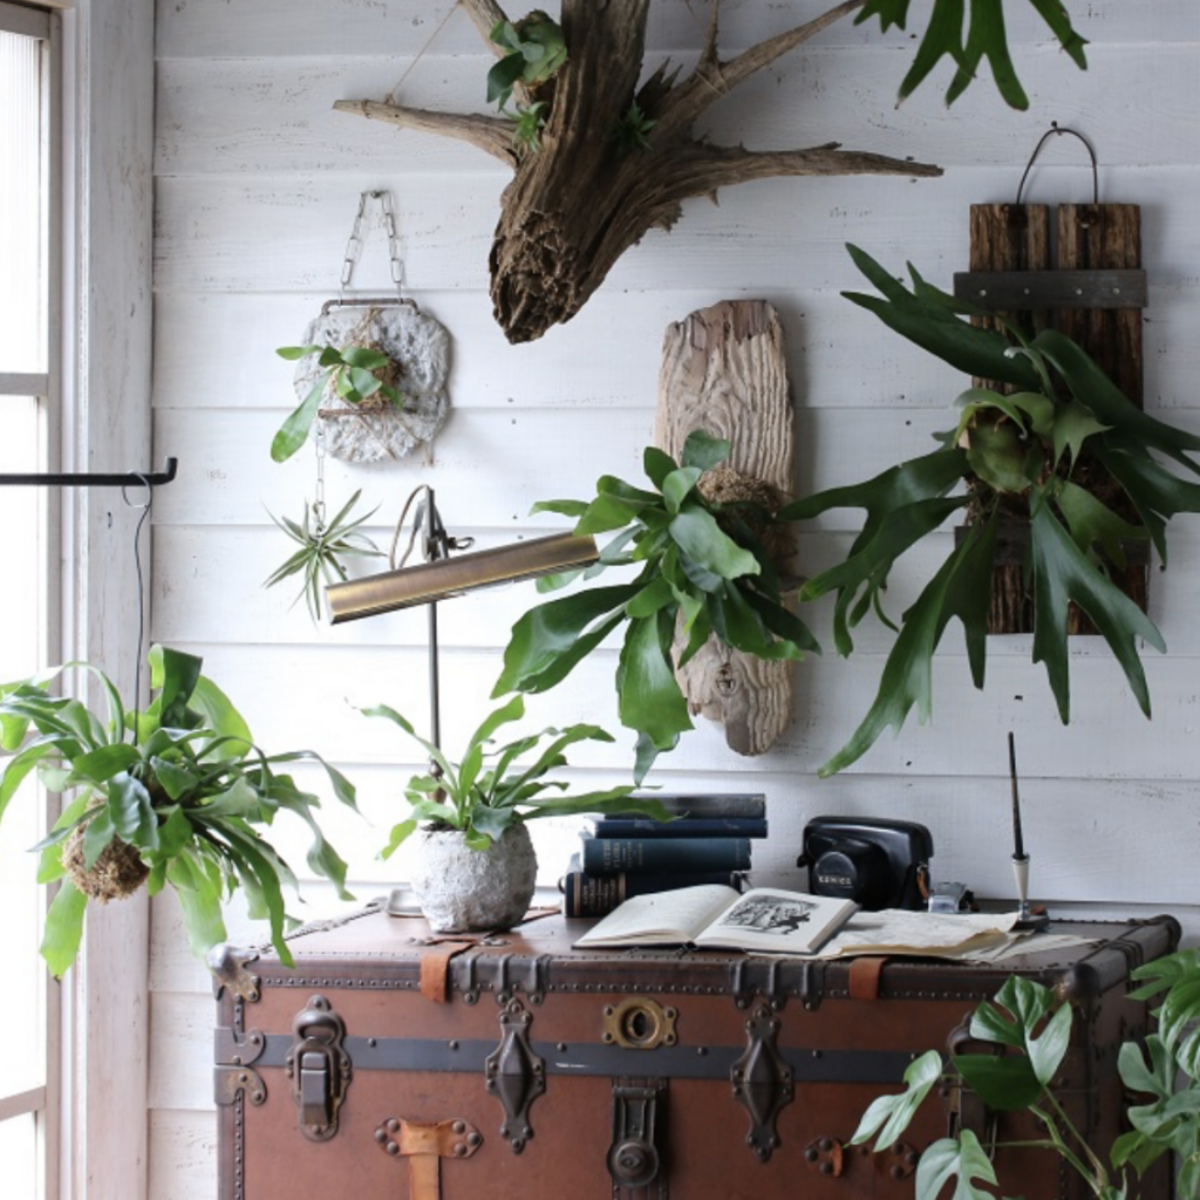
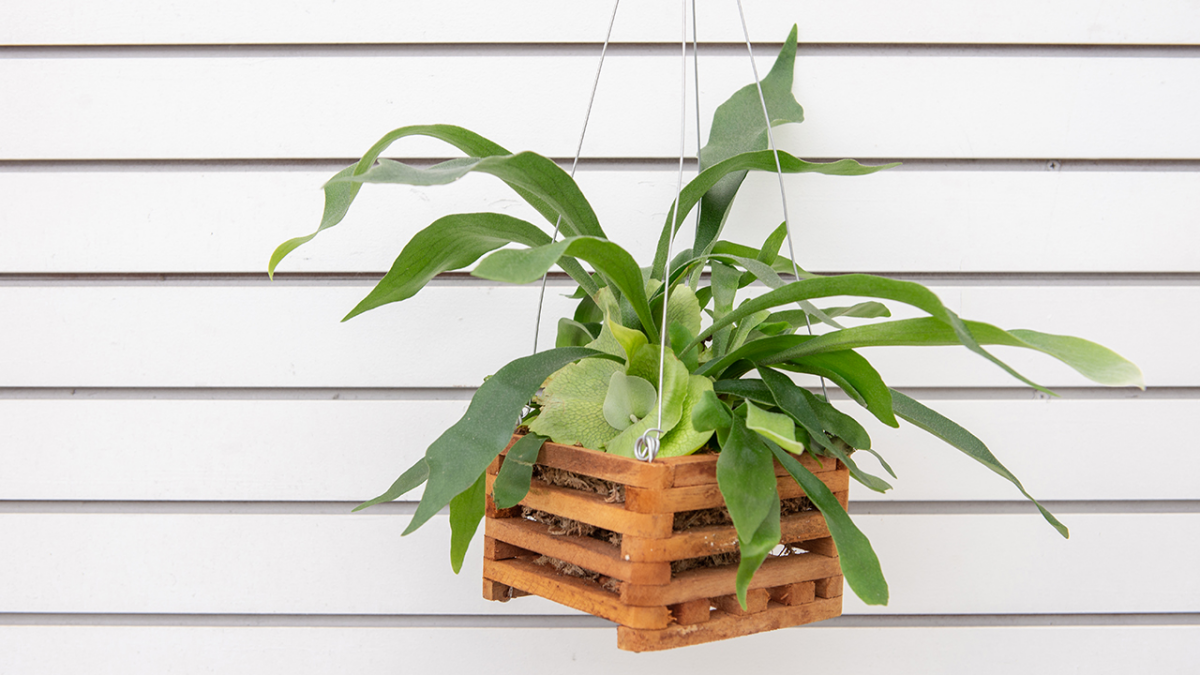
Setting Up Your Fern: The Art of Mounting
Because these guys are epiphytes, mounting them on a board is the best way to keep them happy. It copies their natural lifestyle and gives them the excellent air circulation they crave around their roots.
What You’ll Need for Mounting
Mounting a staghorn is pretty straightforward, but getting the details right makes all the difference. Here’s a little shopping list to get you started.
- The Mount: A piece of rot-resistant wood is your best bet. Cedar, cypress, or even a thick cork bark slab are fantastic choices. Quick tip: Whatever you do, don’t just grab a cool-looking piece of wood from your backyard or use treated lumber. Backyard wood can carry pests, and the chemicals in treated lumber can be fatal to your fern.
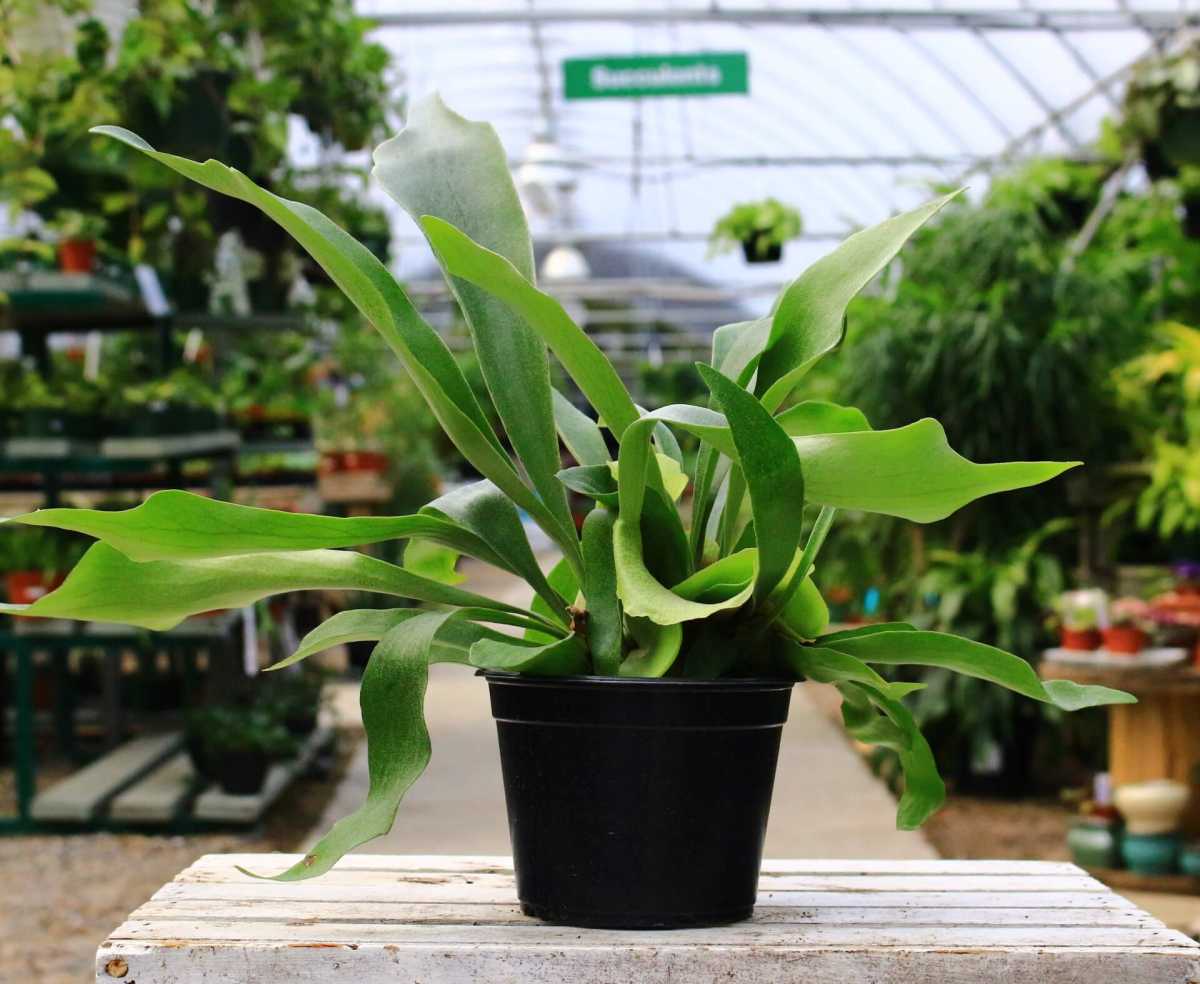
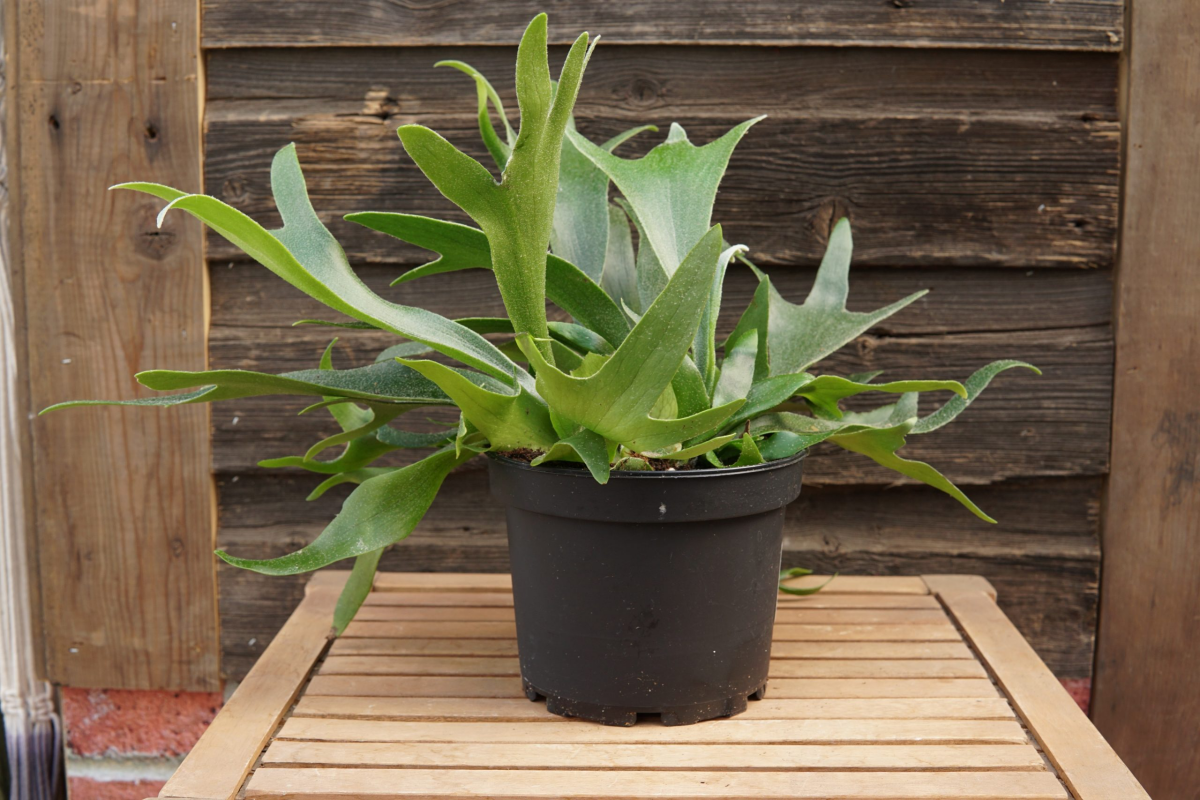
- The Plant Itself: You can find staghorn pups at local nurseries, some big box stores like Home Depot, or online from sellers on Etsy. Expect to pay around $15 to $30 for a healthy little starter plant.
- Growing Medium: Long-fiber sphagnum moss is the industry standard. It holds moisture perfectly without getting waterlogged. A bag costs about $8 and will be enough for several mountings.
- Securing Material: Clear fishing line or plastic-coated wire is perfect. You want something strong that won’t rot. Just avoid copper wire, as copper can be toxic to ferns.
- Hardware: A sturdy hook and wire for hanging.
A note on size: Pick a mount that looks a little too big for your plant right now. A good rule of thumb is to have at least 2-3 inches of bare board on all sides of the plant’s base. So, for a 4-inch fern, look for a board that’s at least 10 inches wide. This gives it plenty of room to grow for a few years before you have to think about remounting.
Step-by-Step Mounting Guide
For your first time, set aside a good 30-45 minutes. Don’t rush it; your fern will thank you for being gentle.
- Prep the Moss: Grab a big handful of your sphagnum moss and soak it in a bucket of water for about 20 minutes. Once it’s fully soaked, squeeze out the excess water until it feels like a damp sponge—not dripping wet.
- Prep the Mount: Go ahead and install your hook or hanging wire on the back of the board before you start. It’s a whole lot harder to do this with a plant attached!
- Make a Bed: Place a mound of your damp moss right in the center of the board. Make this mound slightly larger than the root ball of your fern.
- Position the Fern: Carefully take the fern out of its nursery pot and gently shake off any loose soil. Place the root ball right on top of the moss mound. Make sure the flat base of the plant, where the shield frond is, is pressed against the moss.
- Tuck It In: Add more damp moss around and over the root ball, covering it completely. You’re basically creating a snug little moss ball that encases the roots.
- Wrap It Up: Now, take your fishing line and start wrapping. Go around the moss ball and the board several times from different directions to make it secure. Pull the line snug, but not so tight that you’re cutting into the plant. You should only be wrapping the moss, never over the top of the shield frond or the delicate new antler fronds.
- The Final Check: Gently lift and tilt the mounted fern. If the plant or moss ball wiggles or shifts, it’s too loose. Add a few more wraps of fishing line until everything feels solid. And by the way, don’t worry if the fishing line looks a bit messy at first. In a few months, a new shield frond will grow right over it and hide it completely. It’s part of the magic!
Long-Term Care and Keeping It Happy
Once your fern is mounted, your job is to become an observer. Forget about watering every Saturday. Your plant’s needs will change with the seasons, the humidity in your house, and its own growth spurts.
Watering: The Soaking Method is Key
Improper watering is the #1 killer of these ferns. Misting the leaves does almost nothing, and just pouring a little water on top won’t cut it. The best way is the soaking method.
Simply take the whole mount to a sink or bathtub and let lukewarm water run over the moss ball for a few minutes until it’s completely saturated. Then, let it hang out in the sink or shower for 15-30 minutes to drip dry before putting it back. To know when to water, I teach everyone the weight method. Pick up your fern right after a deep watering and feel how heavy it is. A week later, pick it up again. It will feel noticeably lighter. When it feels very light, it’s time to water again. For me, that’s about every 7 days in the summer and every 10-14 days in the winter.
Light, Temperature, and Humidity
Light: Staghorns need bright, indirect light. What does that actually mean? A spot near an east-facing window is perfect. A few feet back from a sunny south or west-facing window works great, too. A simple test: hold your hand up between the light source and your plant. If it casts a soft, blurry shadow, you’re golden. If the shadow is sharp and dark, the sun is too direct and might scorch the leaves.
Temperature & Humidity: These are tropical plants, so they like it warm and humid, generally between 60-85°F (15-29°C). A bathroom that gets steamy from showers is an ideal spot. In drier homes, clustering plants together helps, but a small humidifier nearby is the most effective solution.
How to Feed Your Fern
During the growing season (spring and summer), feed your fern about once a month. Use a balanced liquid fertilizer (like a 10-10-10) diluted to half or even quarter strength. Just add it to your water when you’re doing a full soak. Don’t bother fertilizing in the fall and winter when growth naturally slows down. You might hear stories about tucking banana peels under the shield fronds. While it can provide some potassium, I avoid it for indoor plants because, frankly, it can attract fruit flies.
A Few Advanced Tips
Pruning and Tidying Up
Pruning is super simple. I’ll say it again: never cut off the brown, papery shield fronds! You should only ever trim the green antler fronds. If one gets damaged or dies back completely, you can snip it off at its base with clean, sharp scissors. I always wipe my blades with rubbing alcohol before and after—it’s a good habit to prevent spreading any potential issues.
Making New Plants (Propagation)
The easiest way to make more ferns is by dividing the little baby plants, or “pups,” that form around the base of the mother plant. Once a pup is about 4-6 inches wide and has its own little shield and a few antler fronds, you can carefully separate it with a sharp, clean knife. Then just mount your new baby on its own board. It might look a little sad for a few weeks, but that’s normal!
Pro Tip for Overgrown Ferns: If your fern has completely outgrown its mount, you don’t always have to go through the trauma of removing it. You can just take the entire old board and mount it directly onto a new, bigger board. This “double mounting” method avoids disturbing the root system at all and works like a charm.
Troubleshooting Common Issues
- Soft, black spots at the base? That’s almost always crown rot from overwatering. This is very serious. Reduce watering immediately and increase air circulation, but be prepared that it might not recover. This is why the soaking and drying out method is so critical.
- Limp, wilting fronds? This could be under-watering OR over-watering. Feel the moss. Is it bone dry? Your plant is thirsty. Is it soggy and heavy? The roots have likely rotted and can’t absorb water anymore. Adjust your schedule accordingly.
- Crispy brown tips on the antlers? Usually a sign of low humidity or sunburn. Try moving it to a spot with less direct sun or increasing the humidity.
- Small, hard brown bumps on the fronds? That’s likely scale, a common houseplant pest. For a small problem, you can dip a cotton swab in rubbing alcohol and touch each one to remove it. I once fought a scale infestation on a prized fern for a solid month with just rubbing alcohol and patience. It’s tedious work, but you can definitely win!
One last bit of advice. A mature, freshly watered staghorn can be incredibly heavy—we’re talking 50 pounds or more. When you hang it, please make sure you’re screwing the hook into a wall stud, not just drywall. I learned that lesson the hard way when a massive fern pulled its anchor right out of the wall and crashed. It was a bad day for both the fern and the floor. But with a little knowledge and observation, you’ll have a stunning living sculpture that will grow with you for years to come.
Galerie d’inspiration

How do I water my mounted Staghorn without soaking my wall?
Forget the watering can. The most effective method is the “dunk and soak.” Once a week (or when the base feels light and dry), take your fern off the wall and submerge the entire moss and shield frond base in a basin of lukewarm water for about 15-20 minutes, until it’s fully saturated. Let it drip dry for a bit before rehanging. This mimics a tropical downpour and ensures deep, even hydration.
In their native habitat, Staghorn Ferns absorb most of their nutrients from falling organic debris and rainwater collected by their shield fronds.
This means traditional root fertilizing isn’t very effective. Instead, they thrive on “foliar feeding.” Once a month during the growing season, mix a balanced liquid fertilizer, like a diluted orchid food or a weak solution of Schultz Plant Food Plus, to half-strength. Lightly mist the antler and shield fronds. They will absorb the nutrients directly through their leaves, replicating their natural feeding process.
Sphagnum Moss: The classic choice for mounting. Brands like SuperMoss offer excellent quality. It holds a tremendous amount of water, which is great for forgetful waterers, but can lead to rot if over-watered or packed too tightly.
Coconut Coir/Fiber: A more sustainable, airy alternative. It provides fantastic drainage and aeration, reducing the risk of root rot. However, it dries out much faster, requiring more frequent watering.
For beginners, sphagnum is often more forgiving, but coir is excellent for those living in humid climates.
While a simple cedar plank is timeless, your Staghorn Fern can become a true piece of living art with a creative mount.
- Cork Bark Slabs: Offer a rugged, natural texture that mimics a tree trunk perfectly.
- Grapewood or Driftwood: Provide dramatic, sculptural shapes for a striking display.
- Wire Hanging Baskets: Lined with moss and packed around the root ball, you can create a suspended, kokedama-like sphere.


