Your Thirsty Yard is Begging for This: A No-Nonsense Guide to Water-Wise Gardening
I’ve spent a couple of decades with my hands in the dirt, and let me tell you, I’ve heard it all. So many people come to me convinced their yard is a lost cause. They’ll point to a patch of sun-baked, cracked earth and say, “See? Nothing but weeds can grow here.” They’ve tried, they’ve watered, they’ve watched plants wither, and honestly, I get the frustration.
In this article
But here’s the secret I share with every single one of them: a stunning, resilient garden is 100% possible. It’s not about finding some magical, mythical plant. It’s about a simple shift in your thinking—learning to work with your yard’s personality instead of constantly fighting it.
We throw around the term “drought-tolerant” a lot, but it can be a bit misleading. It doesn’t mean “no-water-ever.” It just means the plant has some clever tricks up its sleeve to survive on less water once it settles in. Creating a water-wise garden is more than just a trend; it’s just plain smart. It saves you time, lowers your water bill, and builds a landscape that has a unique, tough kind of beauty. This isn’t just a list of plants; this is the full game plan I use on professional job sites.
First, Let’s Talk About Why This Works
Before you even think about picking up a shovel, it helps to understand what makes these plants so tough. It’s not magic, it’s just brilliant design. Once you see these features, you’ll start noticing them everywhere.
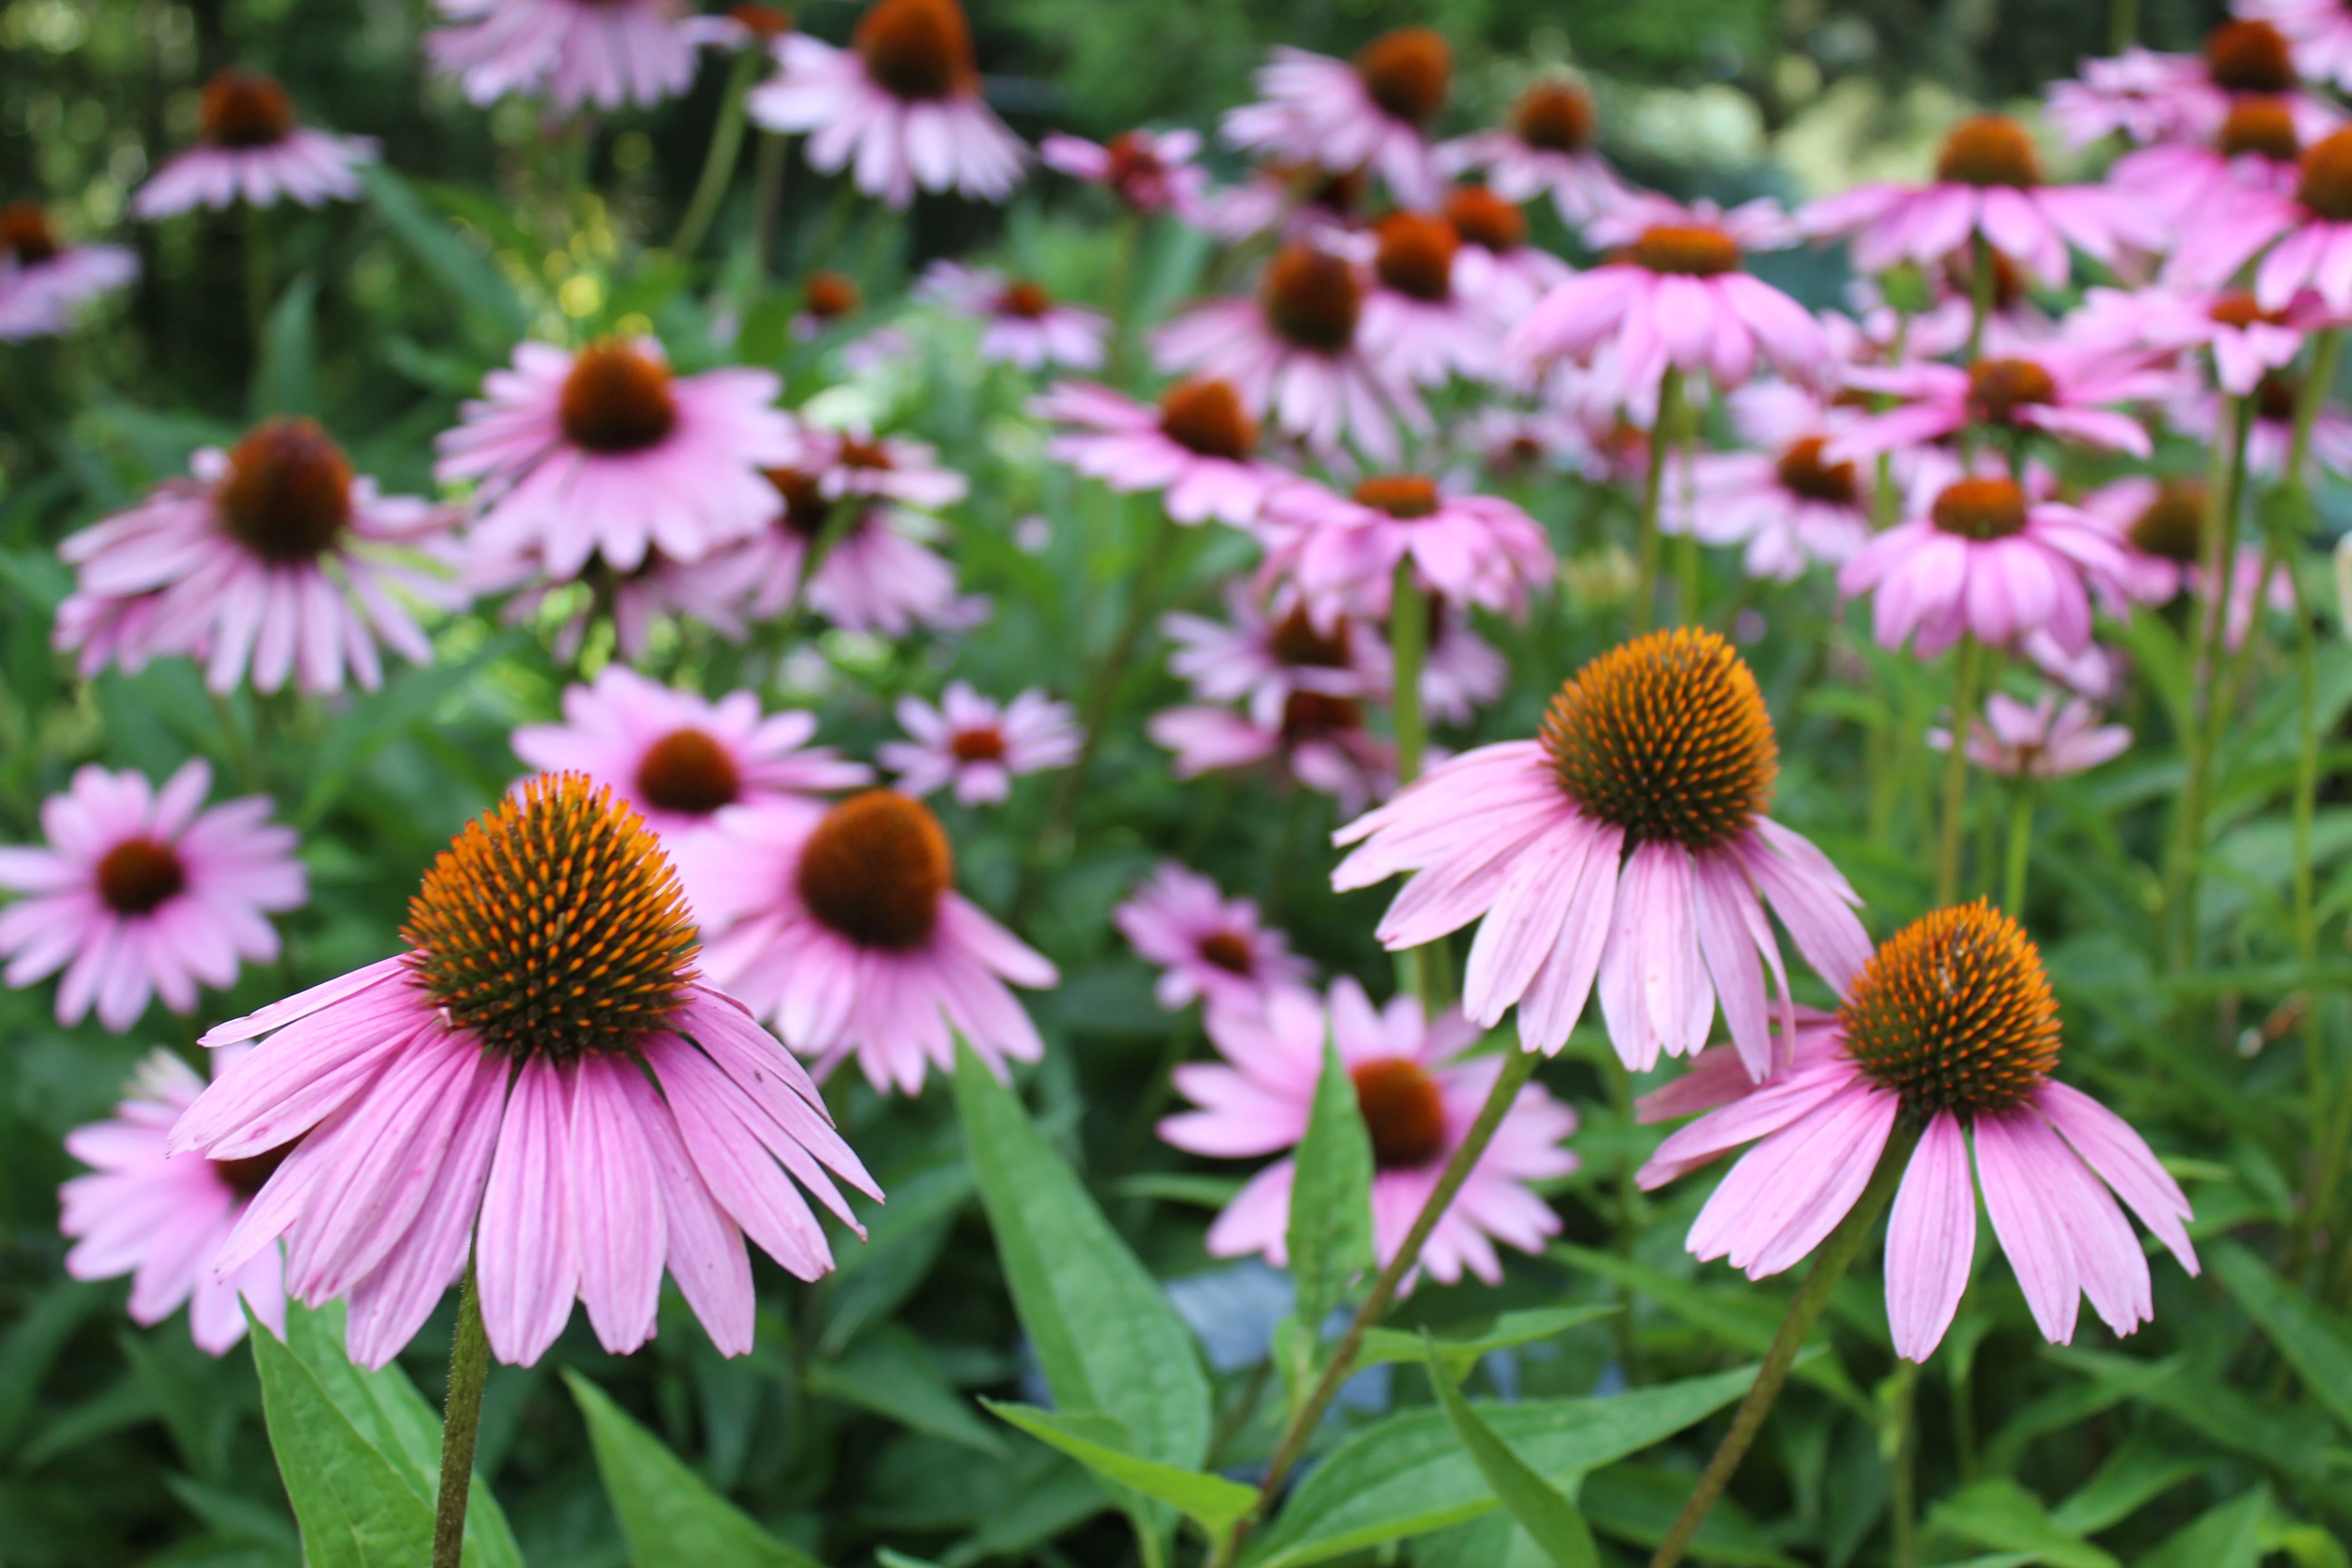
- Deep Roots: Some plants, like Coneflowers, are all about that deep-down security. They send one massive root, called a taproot, way down into the soil to find moisture others can’t reach. By the way, this is why they absolutely hate being moved once they’re happy—you risk snapping their lifeline.
- Silver or Fuzzy Leaves: Think about plants like Lavender or Lamb’s Ear. That silvery-gray sheen isn’t just for show; it’s like a natural sunblock, reflecting harsh light to keep the plant cool. The tiny hairs trap moisture right at the leaf’s surface, creating a little humid microclimate to reduce evaporation.
- Plump, Waxy Leaves: Succulents like Stonecrop are the camels of the plant world. They store water in their fleshy leaves, which are coated in a waxy layer that seals moisture in. That’s why they feel so firm.
- Thin, Wispy Blades: Many ornamental grasses have very fine leaves. Less surface area means less water loss. Some can even roll their leaves up during the hottest part of the day to protect themselves. Pretty smart, right?

Soil is Everything. No, Really.
I can’t say this enough: the single most important part of a water-wise garden is the soil. You can buy the toughest plant on the market, but if you stick it in the wrong spot, you’re setting it up for failure. The magic word is drainage. These plants despise having “wet feet,” meaning their roots sit in soggy, waterlogged soil. That’s a surefire way to cause root rot.
So, what are you working with? Go outside right now. I’m serious. Grab a handful of slightly damp soil and give it a squeeze. If it feels gritty and just falls apart, you’ve got sand. If you can squeeze it and form a long, smooth ribbon between your thumb and finger, you’ve got clay. Most of us have something in between, but this gives you a starting point. The goal is to get it to a nice, loamy balance that holds moisture like a sponge but lets the excess drain away freely.

The Professional Playbook for a Bulletproof Garden
Over the years, I’ve perfected my planting process. It’s not the fastest method, but it’s the one that works. A little extra effort now saves you a ton of money and heartache later. Think of it as an investment in not having to replant everything next year.
Step 1: Prep the Whole Bed (Don’t “Plop and Plonk”!)
The biggest mistake I see is digging a hole just big enough for the pot, dropping the plant in, and calling it a day. This essentially creates a clay bathtub where water collects and drowns the roots. You need to prepare the entire bed.
For a new 100-square-foot garden bed, my go-to recipe is to spread a 3- to 4-inch layer of good-quality compost over the whole area. If the clay is really compacted, I’ll also add expanded shale or pine bark fines to create permanent channels for air and water. Then, you have to work it all into the top 8 to 10 inches of existing soil with a tiller or a sturdy garden fork. Yes, this is the hard part. It might take you a solid afternoon, but it’s non-negotiable.
Heads up on the budget: To do this right for a 100 sq ft bed, you’ll probably need around 6 big bags of compost (which run about $8-$12 each) and maybe 4 bags of pine bark fines (around $7 a pop). So, you’re looking at an investment of about $80-$100 in soil amendments. It’s the most important money you’ll spend.
Step 2: Plant a Little High
Dig your hole about twice as wide as the pot, but no deeper. You want the top of the plant’s root ball to be level with or even slightly above the surrounding soil. This is a game-changer for plants that hate wet feet. Gently tease the roots apart if they’re circling the pot, place it in the hole, and backfill with your newly amended soil.
Step 3: The First Big Drink
Watering right after planting is critical for settling the soil. Create a small circular dam of soil around the plant to make a basin. Instead of a quick splash, let a hose on a slow trickle at the base of the plant for a good 10-15 minutes. You want the water to soak deep down. Do this a couple of times a week for the first few weeks until the plant starts to establish.
Step 4: Tuck It In with Mulch
Finally, add a 2 to 3-inch layer of organic mulch like shredded hardwood or pine needles. This is your garden’s secret weapon—it holds in moisture, keeps weeds down, and moderates soil temperature. Just be sure to keep the mulch an inch or two away from the base of the plant to prevent rot. A quick tip: I generally advise against rock mulch in really hot climates. It can absorb so much heat that it literally cooks the roots of your plants.
Your 5-Minute Task Today: Feeling overwhelmed? Forget all the steps for a minute. Just go outside and watch your yard. Where does the sun hit the hardest in the afternoon? That scorching spot that everything else hates? That’s your future Coneflower and Lavender spot. You’ve just taken the first step. See? Easy.
My Go-To Plants That Actually Work
Here are some of the toughest, most reliable plants I’ve used for years. They’re proven performers that won’t let you down.
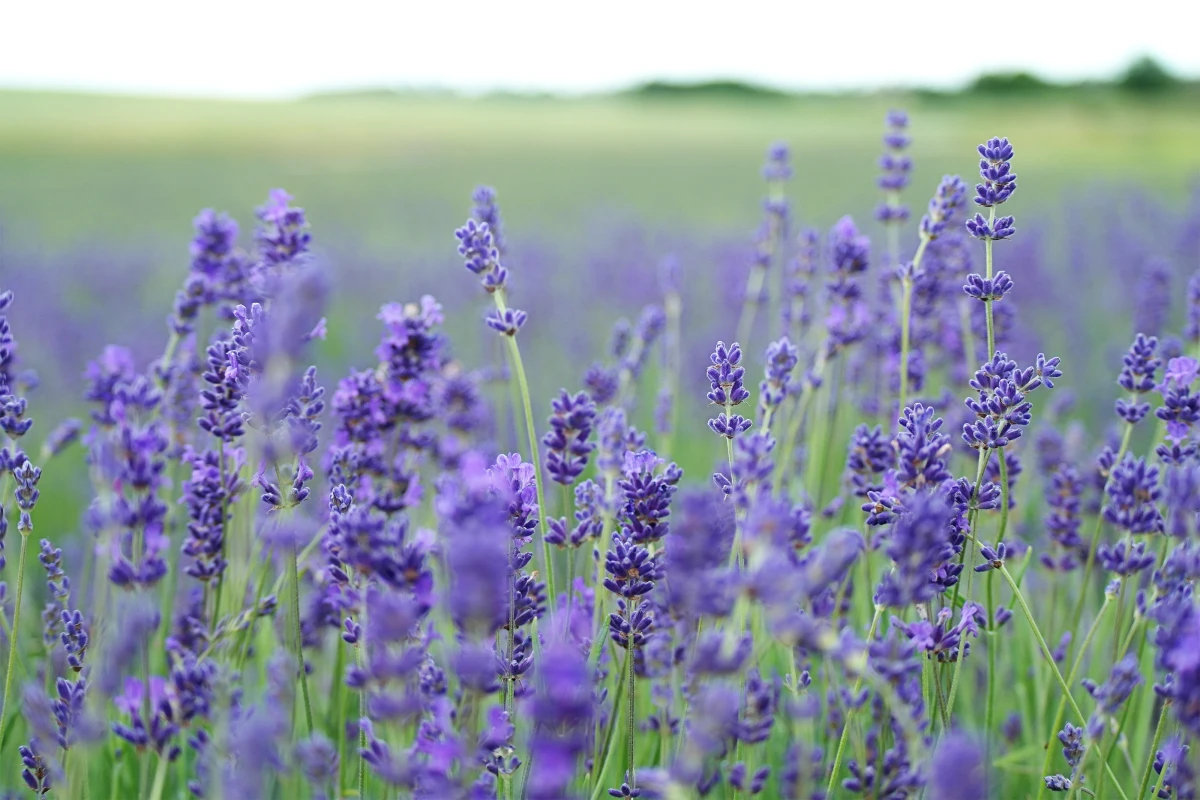
Lavender: Everyone wants it, but they often kill it with kindness—too much water and rich soil. My best lavenders are in lean, almost gravelly soil on a slight slope. It demands at least 6-8 hours of brutal sun. When planting, I toss a handful of chicken grit (you can get it at a feed store for cheap) in the bottom of the hole for perfect drainage. Expect to pay between $10 and $20 for a decent-sized plant.
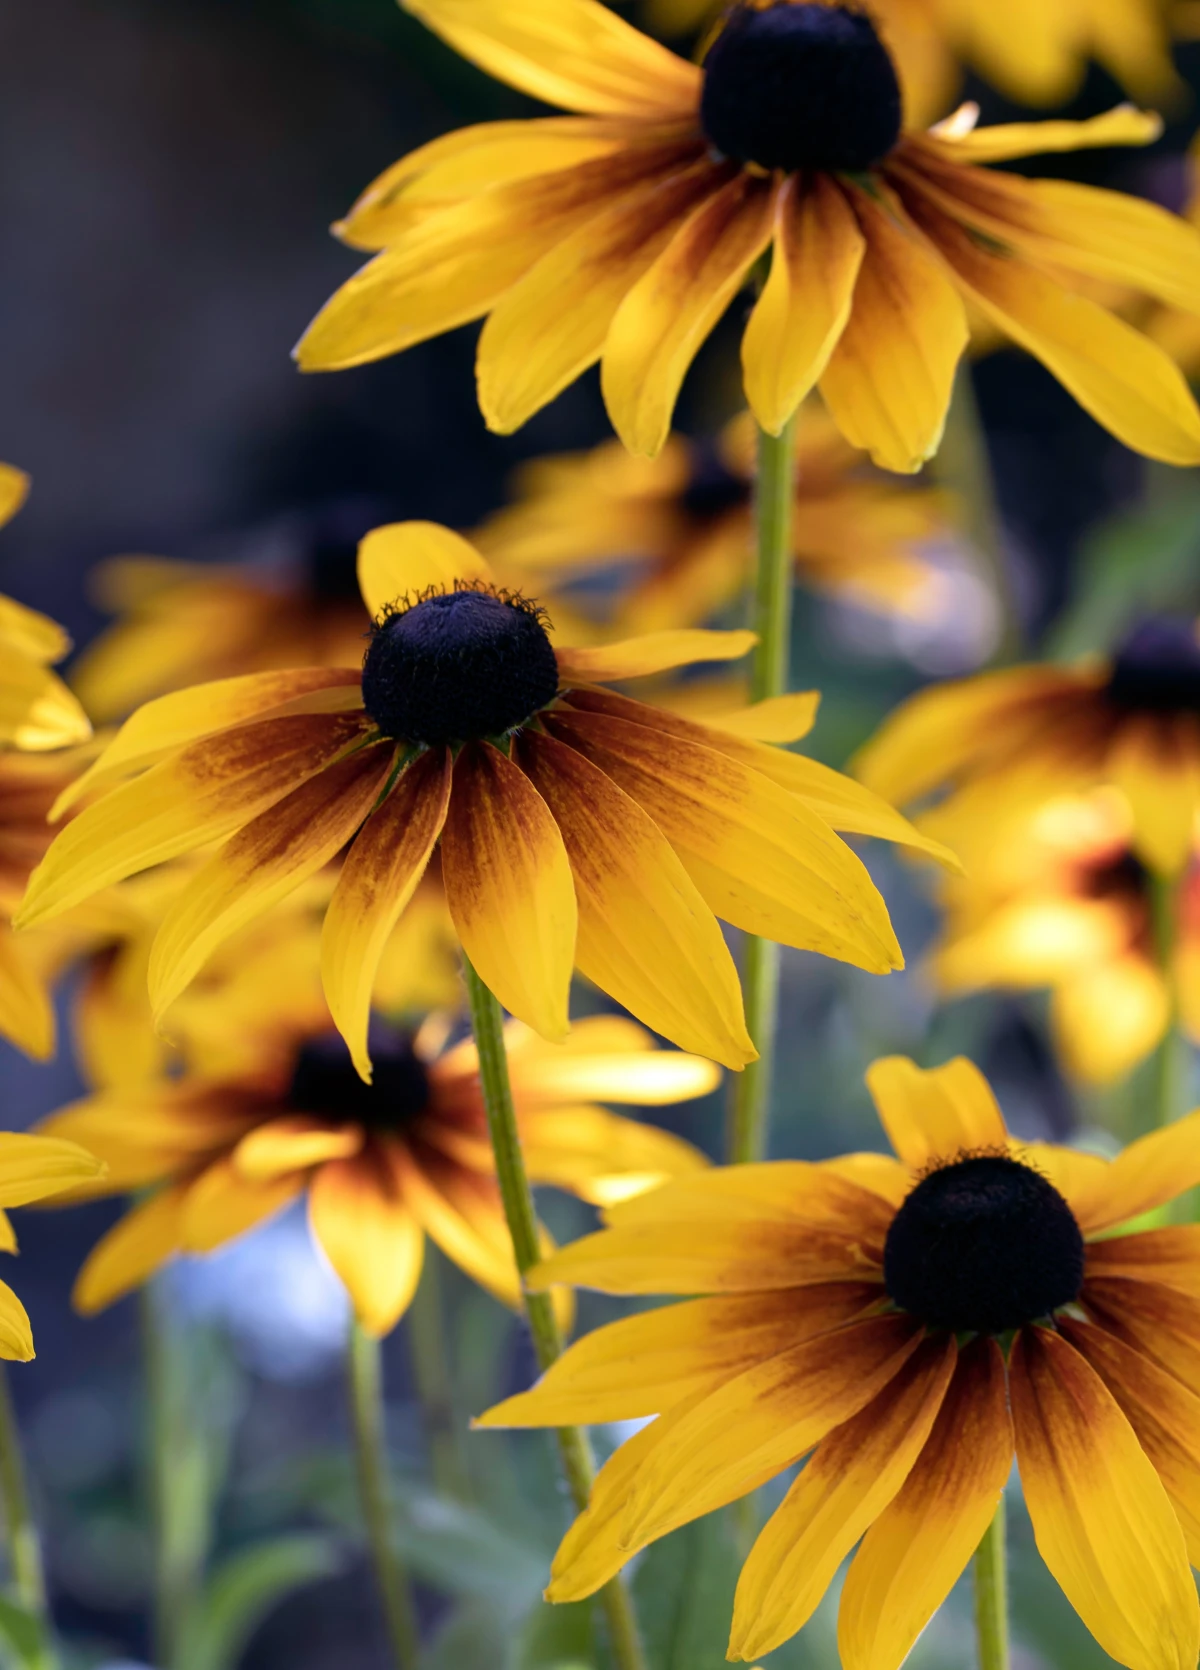
Coneflower (Echinacea): This is a prairie powerhouse. It gives you great summer color and then feeds the birds all winter if you leave the seed heads up. Be a little wary of the super-frilly new varieties; I’ve found the classic, simpler ones are often tougher and live longer. They aren’t picky about soil, as long as it isn’t a swamp. A one-gallon pot usually runs about $12-$18.
Black-Eyed Susan (Rudbeckia): You can’t beat that blast of gold in the summer. They’re cheerful and tough as nails. Just know that many common types are best treated as short-lived stars. They’ll give you an incredible show for a year or two and then may fade, but they often self-seed to keep the party going. They’re a great budget-friendly option, often available for under $10.

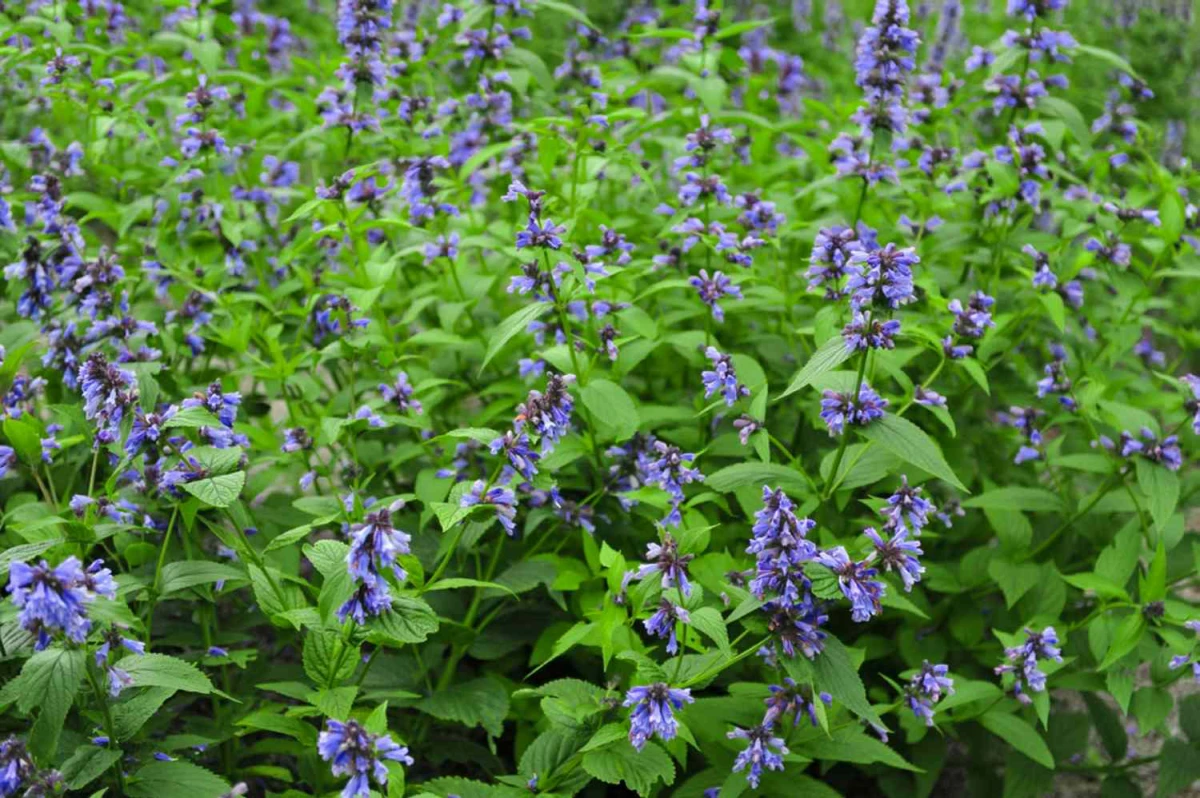
Catmint (Nepeta): This is my secret weapon when someone wants the look of lavender but has heavier soil. It’s billowy, soft, and unbelievably forgiving. Pro-tip: After its first big bloom in late spring, shear the whole plant back by about half. It’ll look rough for a week, but it will come back denser and bloom its head off for the rest of the season. A fantastic value plant, usually around $8-$15.
Stonecrop (Sedum): The ultimate beginner plant. I’ve seen these thrive in that sad, narrow strip of dirt between a sidewalk and a wall. They store water in their leaves and are pretty self-sufficient. For the taller types that sometimes flop open late in the season, just plant them in lean (not rich!) soil. That’ll keep them stout and strong. You can often find small starter pots for as little as $5-$8.
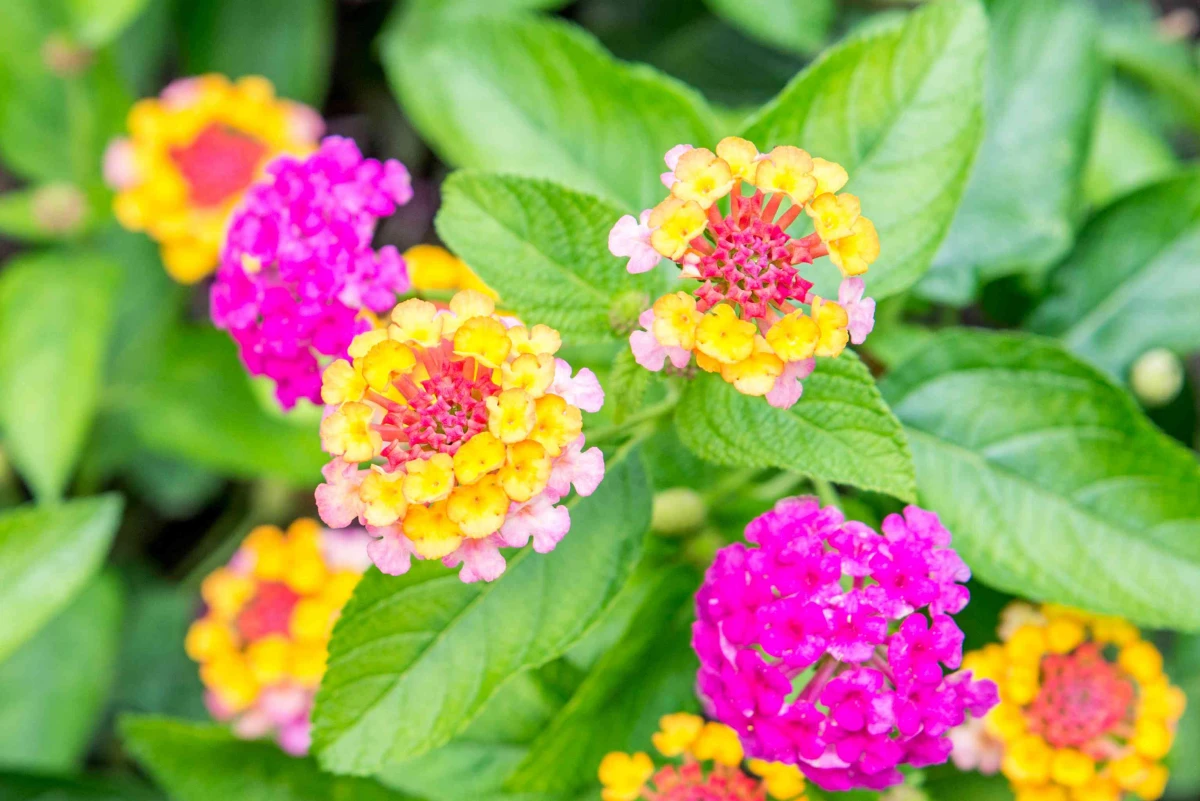
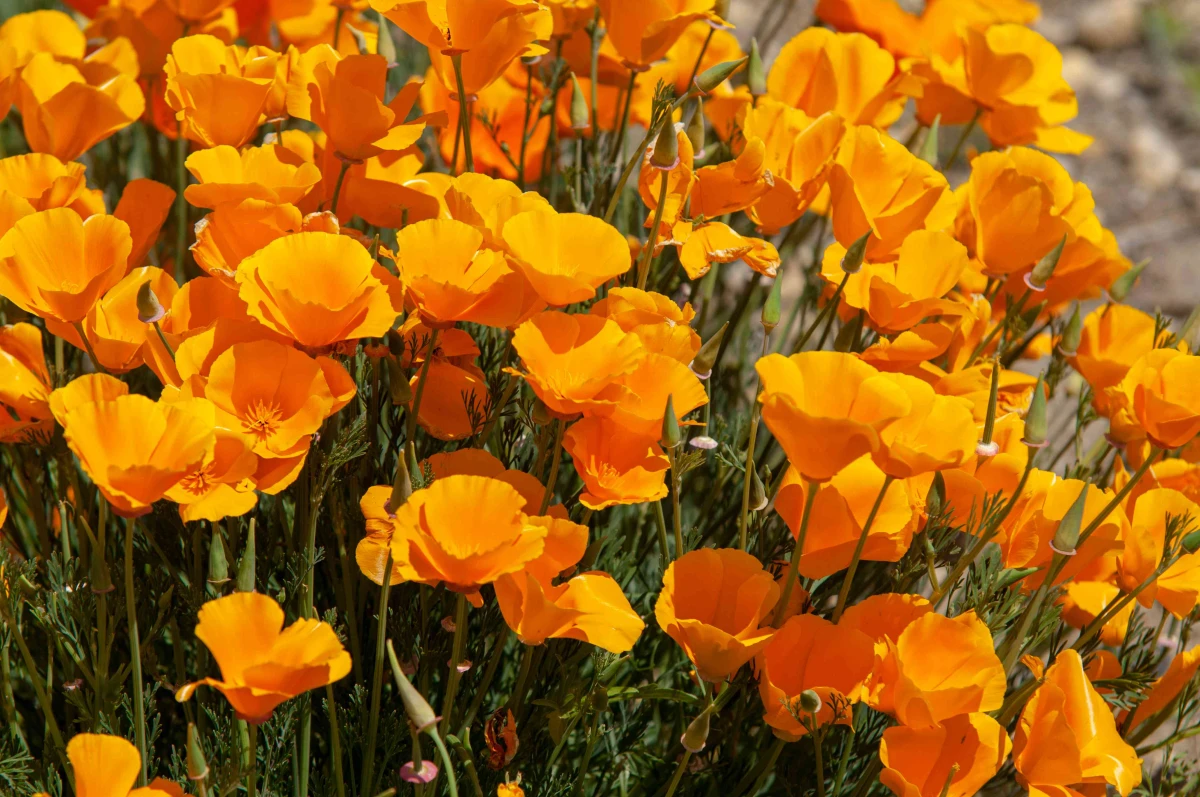
Lantana: In hot climates, this thing is a butterfly-attracting, nonstop-blooming machine. But you have to be responsible. First, its berries are toxic to pets and kids, so be aware. Second, in some frost-free areas (like Florida and Texas), the common variety can be invasive. Always check with your local county extension office (just Google “your county + extension office”) before planting. To be safe, look for sterile modern varieties which are bred to not produce seeds.
What If My Yard Isn’t a Sunny Wasteland?
Good question! Not every water-wise garden has to be in blistering sun. “Dry shade” is a real thing, especially under large, thirsty trees. The principles are the same—improve the soil and choose the right plant.
For those shadier, drier spots, look into plants like Coral Bells (Heuchera), which have incredible foliage color, or the tough-as-nails Liriope (Monkey Grass). Some Hosta varieties can also handle less water once established, believe it or not. The key is that they need to get “established” first. And what does that mean?
Oh yeah, good to know: A plant is considered established once it has made it through its first full year—all four seasons—in the ground. You’ll know it’s crossed the finish line when it puts on vigorous new growth the following spring without you having to baby it.
A Final Word on Safety and Sanity
This whole project is incredibly rewarding and very doable yourself. But please, be smart. Before you start digging any new garden bed, call 811. It’s the free “Call Before You Dig” service that marks underground utility lines. Hitting a gas line is a very bad, very expensive day.
And know your limits. If you’re talking about building retaining walls or significantly changing the slope of your yard, it’s time to call in a pro. They have the gear and knowledge to handle big drainage and structural issues safely.
At the end of the day, it all comes back to that simple idea: Right Plant, Right Place. When you partner with your yard’s conditions, you’ll spend way less time fussing and way more time actually enjoying the beautiful, sustainable space you created.
Galerie d’inspiration
The right plant is only half the battle. What’s the other half?
It’s what you put around it. Mulch is non-negotiable in a water-wise garden because it acts like a lid on a pot, dramatically reducing evaporation from the soil surface. A two-to-three-inch layer is your secret weapon. It keeps soil temperatures stable, suppresses weeds that compete for water, and gives your garden a finished, professional look. For plants like lavender and succulents that demand sharp drainage, a gravel or pea stone mulch is ideal. For most other perennials and shrubs, a quality shredded bark mulch works wonders, breaking down over time to enrich the soil.


