Stop Fighting Your Clay Soil: A Real-World Guide to Loving Your Yard
I’ve spent more than two decades with my hands in the dirt, and let me tell you, a whole lot of that time has been spent dealing with clay soil. From the pottery-like stuff in the Midwest to that infamous red clay in the Southeast, I’ve seen it all. If you’re a new gardener, I get it. You feel that thick, sticky mud in the spring, see the cracked, concrete-like ground in summer, and it’s easy to feel defeated before you even plant a single seed.
In this article
But here’s the secret: clay isn’t the enemy. I’ve learned to see it as a foundation with incredible, untapped potential. Seriously! Clay soils are absolutely packed with nutrients, and they hold onto water like a champ, which can be a lifesaver during a dry spell. The challenge isn’t the clay itself; it’s learning how to work with it, not against it. This guide is all about sharing those hard-won lessons, from the basic science to the practical tricks we use on professional job sites.

So, What’s the Deal with Clay Anyway?
Before you can fix something, you have to understand what you’re dealing with. Soil is basically a mix of sand, silt, and clay. Sand particles are the big, chunky ones you can see. Clay particles? They’re microscopic, flat, and plate-like. This tiny size and flat shape are what give clay its unique (and often frustrating) personality.
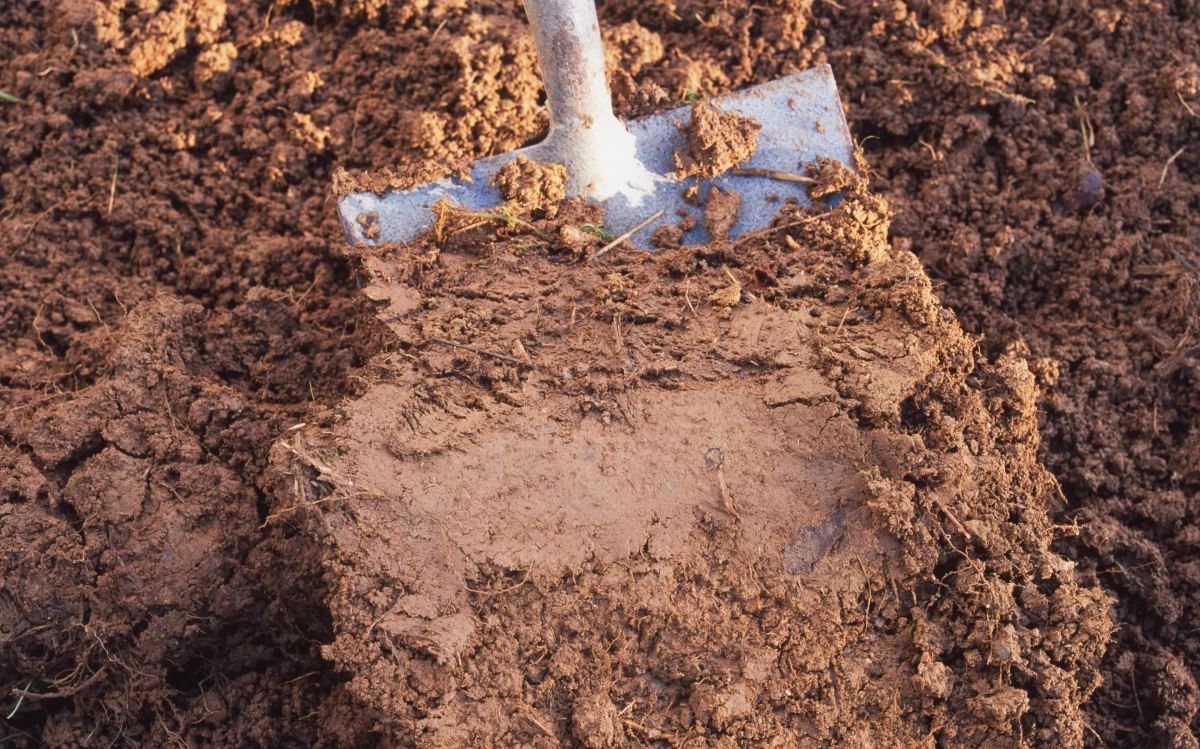
Because those tiny plates are so small and flat, they pack together incredibly tightly, leaving almost no room for air or water to move around. This is why clay drains so slowly. After a big rain, all those tiny spaces fill with water, pushing out the air. Plant roots need oxygen to live, and when they’re sitting in waterlogged soil, they can literally drown. It’s the number one reason plants fail in unimproved clay.
Then, when that same soil dries out in the summer heat, it shrinks. The particles pull together so tightly that the ground can become as hard as brick, with deep cracks on the surface. This makes it tough for water from a light rain or your sprinkler to even penetrate, and digging becomes nearly impossible. I’ve seen brand-new garden spades bend trying to break through dry, compacted clay.

But clay has a superpower. Those tiny particles have a natural negative charge, which allows them to grab and hold onto positively charged nutrients like calcium and potassium—the good stuff plants crave. This is why experts talk about a high Cation Exchange Capacity (CEC). Think of it this way: sandy soil is like a sieve where nutrients wash away, but clay soil is like a pantry, storing a feast for your plants. Our job is simply to unlock the pantry door.
Quick & Easy Ways to Identify Your Soil
You probably already have a hunch you’re dealing with clay, but it’s always good to confirm. Here are two simple, no-cost tests you can do right now.
The Sausage Test: Grab a handful of moist soil (not soaking wet, think the texture of a brownie). If it’s rock-hard and dry, just put it in a bowl and slowly mix in water until it feels like damp dough, then let it sit for about 30 minutes. Now, roll the soil between your palms. If you can form a smooth, shiny ribbon or sausage shape that’s at least two inches long before it breaks, you’ve definitely got a high clay content. Sandy soil will just crumble.

The Jar Test: This one gives you a bit more detail. Find a straight-sided glass jar with a lid, like a mason jar. Fill it about halfway with your garden soil, then add water until it’s almost full. Add a teaspoon of dish soap (this helps the particles separate) and shake it vigorously for a couple of minutes until all the clumps are gone. Set it on a flat surface and watch. The heavy sand will settle in minutes. The silt will take a few hours. The clay is the last to settle, and the water might stay cloudy for days. You’ll see distinct layers, giving you a rough idea of your soil’s composition.
Honestly, for the best results, a lab test is the way to go. Your local university cooperative extension service can do this, and it’s usually pretty affordable—expect to pay between $15 and $50. Just search online for “your state + cooperative extension service” to find your local office. They’ll give you a detailed report on your soil’s texture, pH, and nutrient levels, which is invaluable for making smart choices.
How the Pros Actually Prep Clay Soil
The biggest mistake I see people make is trying to wage war on their clay. You have to work with its nature. Timing and technique are everything.
Rule Number One: Never, Ever Work Wet Clay
I can’t say this enough. Walking on, digging, or tilling wet clay is a disaster. It squeezes out all the tiny air pockets and creates severe compaction. I once watched a new apprentice walk across a freshly prepped bed after a spring shower, and his footprints became solid, compacted tubs that held water for a week. We had to wait for it to dry and then rework the entire area. Only work your soil when it’s moist but crumbly, not sticky.
The Right Way to Add Goodness to Your Soil
The goal here is simple: create larger air pockets so air and water can move freely. The best way to do this is by adding a ton of coarse organic matter. These are the best choices:

- Compost: This is the undisputed champion. It adds nutrients and builds great soil structure. Bulk compost from a local landscape supply yard is almost always cheaper than buying dozens of bags.
- Pine Bark Fines: These small pieces of pine bark break down very slowly, creating lasting air pockets that are fantastic for aeration.
- Shredded Leaves: A fantastic—and free!—amendment that adds rich organic matter as it decomposes.
Quick Tip: Spread a generous 2-to-4-inch layer of your chosen amendment over the garden bed. Then, gently work it into the top 6 to 8 inches of soil. For us newbies, that means just turning the soil over with a garden fork deep enough to cover the tines, mixing the compost down into the clay. Avoid over-tilling with a machine, as it can destroy the delicate soil ecosystem.
And a critical heads-up: Do NOT add sand. It’s a persistent myth that adding sand to clay will lighten it. It does the exact opposite. You end up creating a material that’s basically low-grade concrete. You’d need to add over 50% sand by volume to see any benefit, and that’s just not practical. Stick with organic matter. Trust me on this.
Digging the Perfect Planting Hole (It’s Not What You Think)
In heavy clay, digging a standard hole can be a death sentence for a new plant. If you dig a neat, deep hole with smooth sides, you’ve essentially created a clay pot. Water will pool at the bottom, and the roots will drown. We call this the ‘bathtub effect’.
Here’s the right way to do it:
- Go Wider, Not Deeper: Dig your hole two to three times as wide as the plant’s root ball, but no deeper. The plant should rest on a firm base of undisturbed soil, with the top of its root ball either level with or slightly above the surrounding ground.
- Rough Up the Sides: Once the hole is dug, take the tip of your spade or a fork and aggressively scrape and rough up the sides and bottom. This breaks up the glazed surface and gives roots a fighting chance to grow out into the native soil.
- Backfill Wisely: Use the original soil you dug out to backfill around the plant. It’s okay to mix in a little compost (about 25% compost to 75% native soil), but don’t replace all the soil with fancy potting mix. If you create a five-star resort in the hole, the roots will never be motivated to venture out into the tougher surrounding soil.
Choosing Plants That Actually Thrive in Clay
Here’s where you can make your life so much easier. Instead of fighting to grow a plant that hates having “wet feet,” choose allies that are naturally adapted to heavy soil. These plants will not only survive but will actively help improve your soil over time with their strong root systems.
Powerhouse Plants for Full Sun & Tough Clay
- Black-Eyed Susan (Rudbeckia): These native heroes are amazing. Their deep, fibrous roots are fantastic at breaking up compacted soil, and they handle both wet spells and summer droughts like champs once they’re established.
- Coneflower (Echinacea): A classic for a reason. Coneflowers develop a long taproot that punches down through clay to find moisture, which also creates drainage channels for other plants.
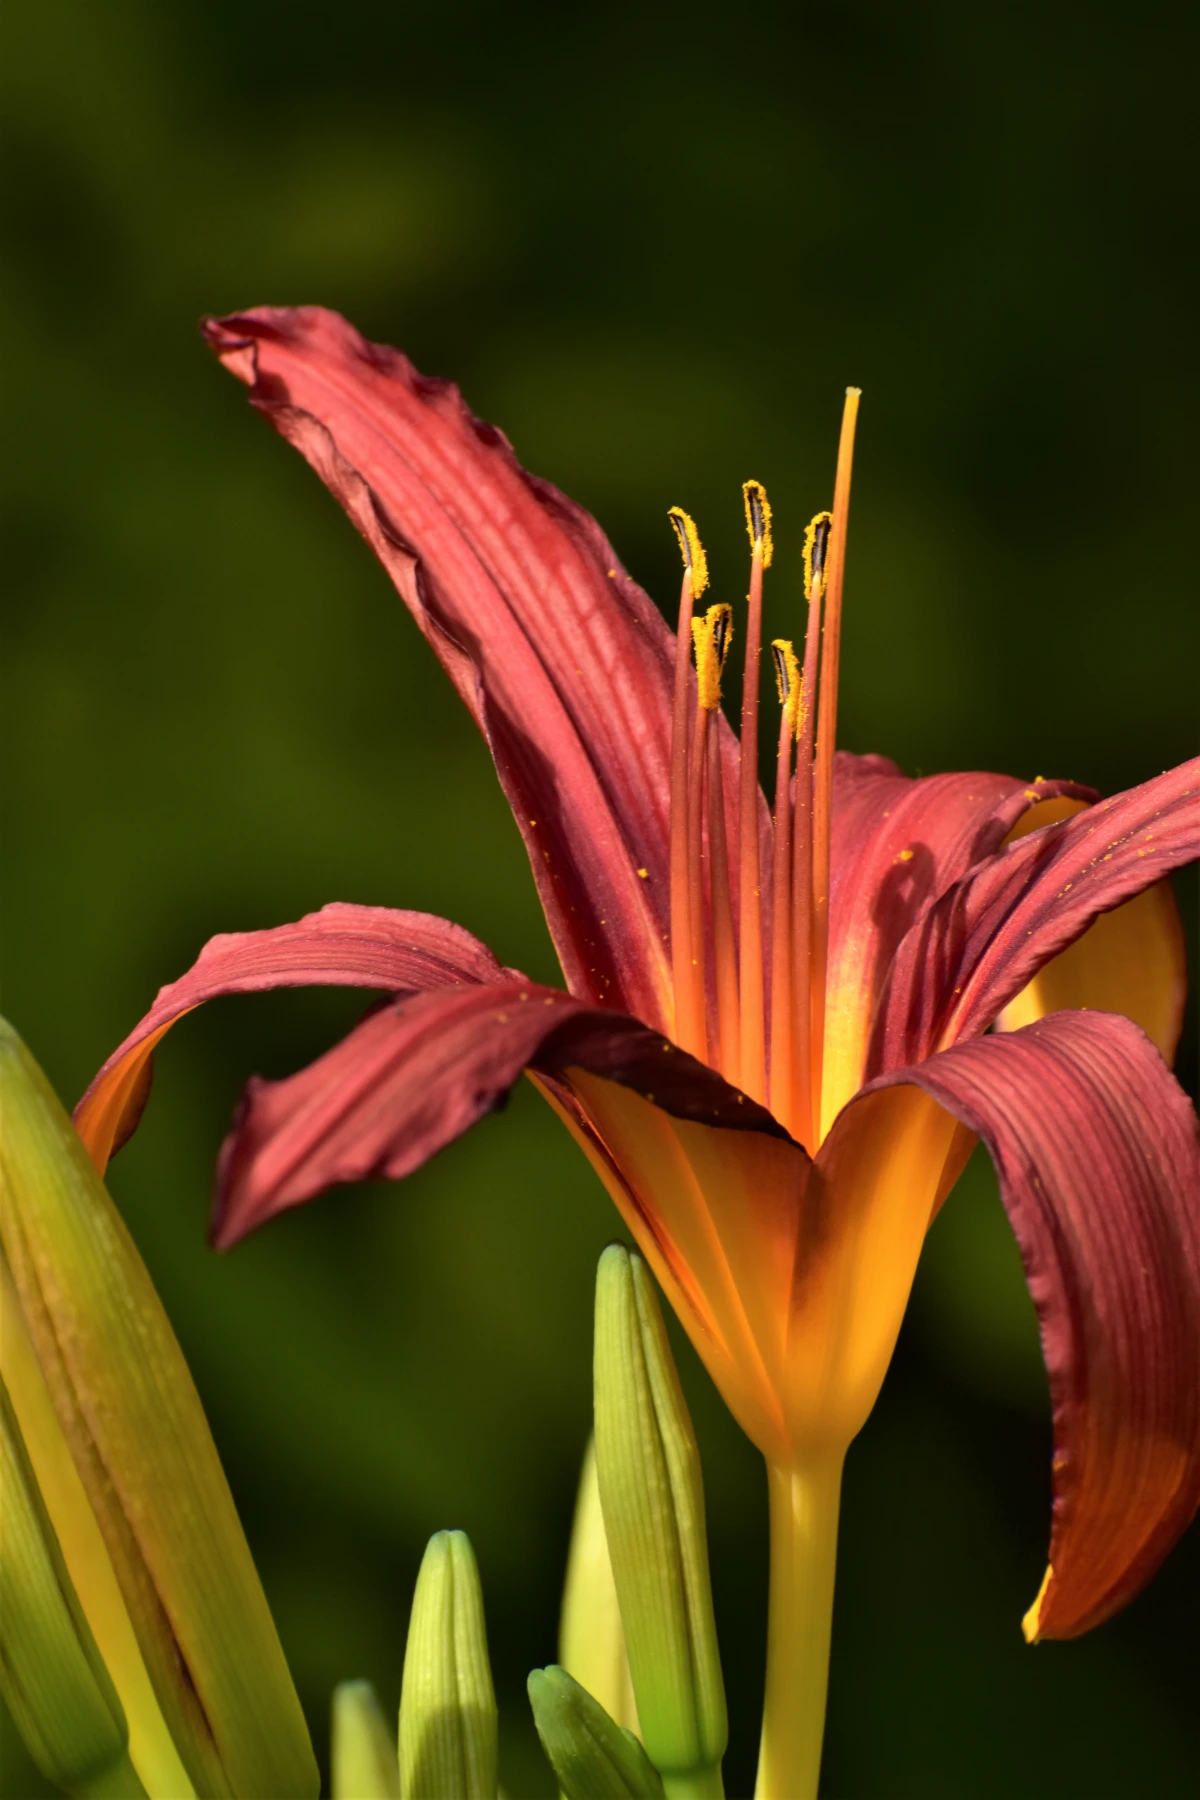
- Daylily (Hemerocallis): Honestly, these are nearly indestructible. Their fleshy roots store water and nutrients, making them incredibly resilient in the moisture-retentive (and sometimes dry) conditions of a clay landscape.
- Russian Sage (Perovskia): A perfect choice for a hot, sunny, baked-clay spot. Once it’s established, it’s incredibly drought-tolerant, and its woody roots are tough enough to push through anything.
Lifesavers for Shady, Clay-Rich Spots
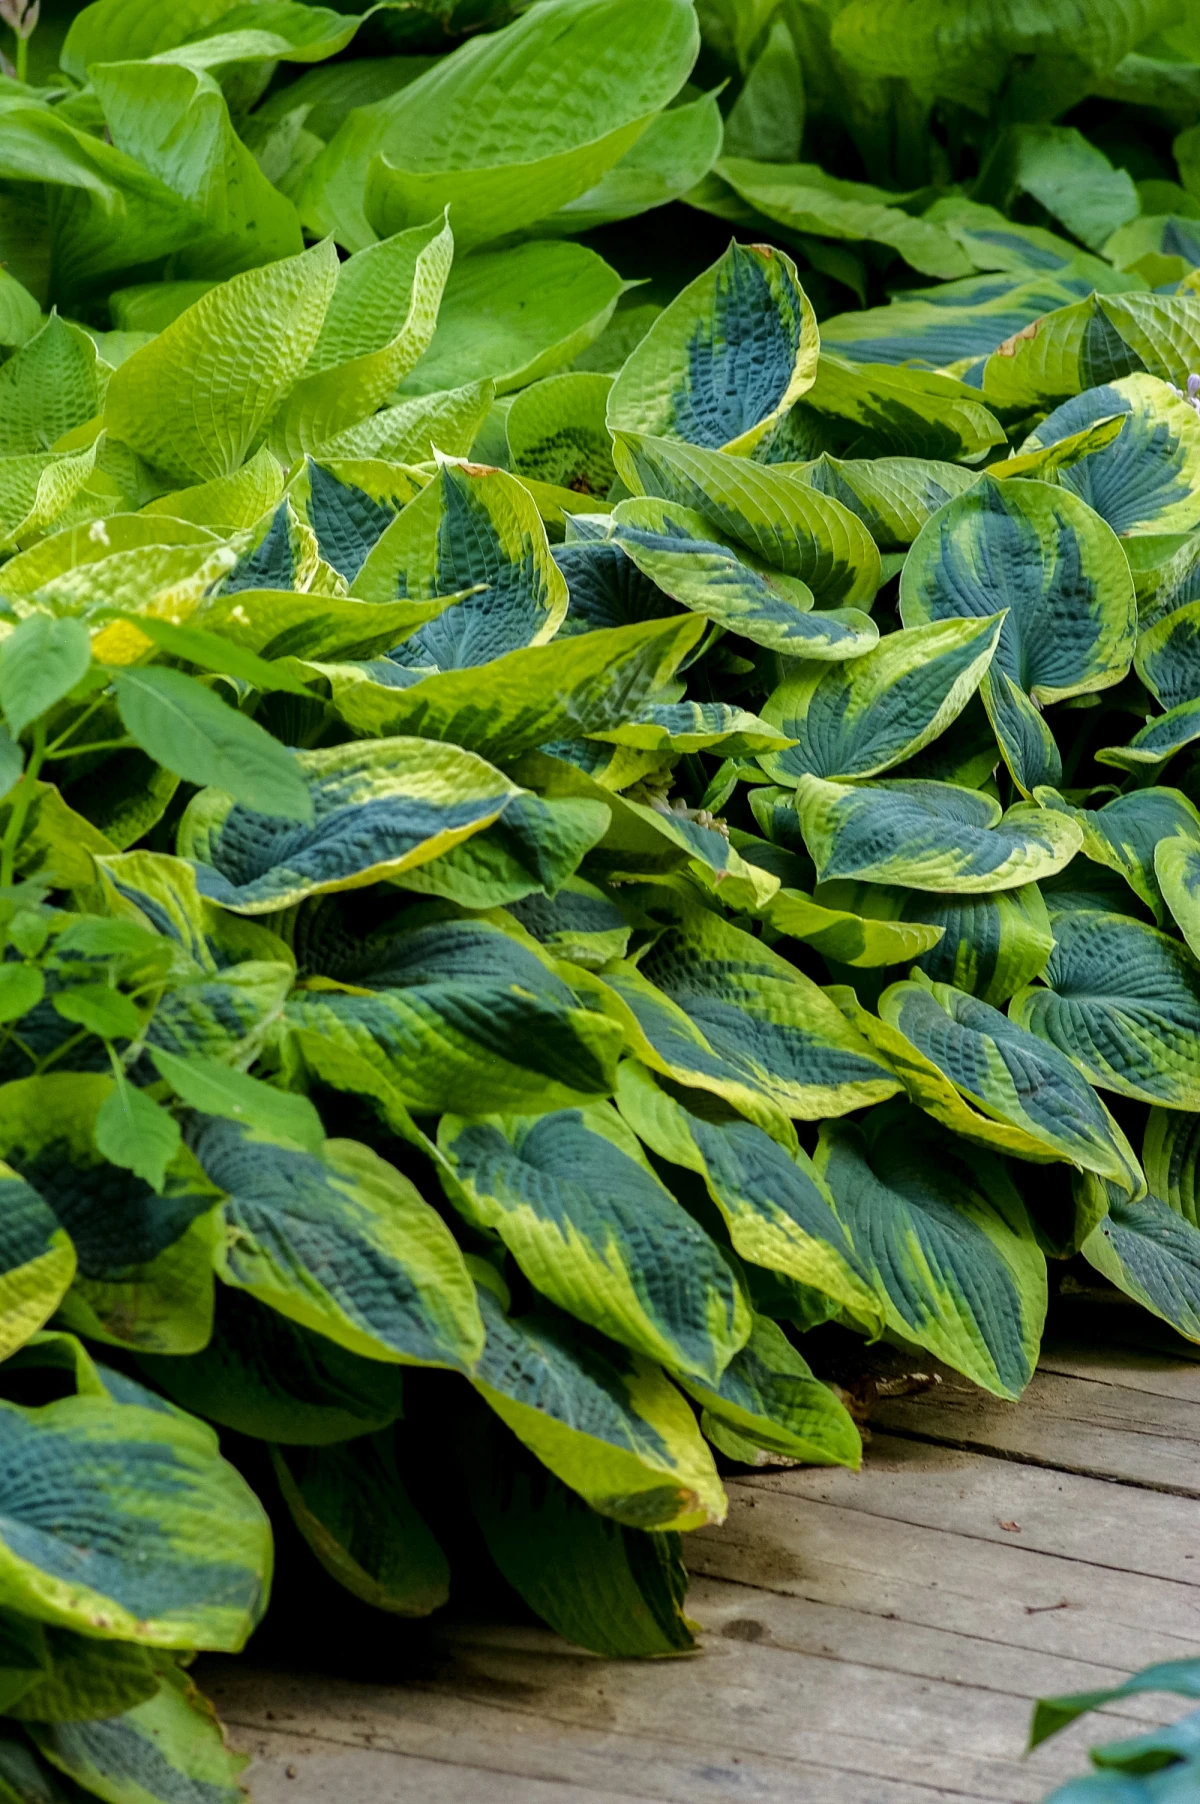
- Hosta: If you have a shady area, hostas are your best friend. They absolutely love the consistent moisture that clay provides. Good to know: if your shady spot stays a bit too wet, just plant your hostas on a slight mound or in a raised bed.
- Red Twig Dogwood (Cornus sericea): This shrub naturally grows in wet areas, so it’s perfectly adapted to heavy, moist soils. Plus, its bright red stems in winter are a stunning bonus.
- Viburnum: This is a huge family of shrubs, and many varieties are perfectly happy in clay. They offer something for every season, from flowers and berries to gorgeous fall color.
Trees That Don’t Mind Heavy Soil
- River Birch (Betula nigra): The name says it all. This tree is built to handle wet, heavy soils and offers beautiful peeling bark for year-round interest.
- Bald Cypress (Taxodium distichum): This tree is so tough it can famously grow in standing water. It’s an excellent choice for any low-lying, soggy spot in a clay-based yard.
- Red Maple (Acer rubrum): While many maples hate wet feet, the Red Maple is far more tolerant. It’s a fast-growing shade tree with brilliant fall color.
Making It All Work: Long-Term Success
Creating a great garden in clay is a marathon, not a sprint. It’s about building healthy soil over a few years, not just in one weekend. But the results are so worth it.
You’ll honestly see a difference in the soil texture by the end of the first season of amending and mulching. It will be easier to dig and won’t crack as much. By year three, you’ll have that dark, crumbly soil you’ve been dreaming of. I had one client whose yard was a cracked desert in summer and a mud pit in spring. After two years of adding compost and wood chip mulch, you could plunge a trowel into it with one hand. It’s totally possible!
Feeling overwhelmed? If you do just one thing today, go spread a 3-inch layer of wood chips, shredded leaves, or pine straw on top of one garden bed. Don’t even dig it in. This 10-minute job protects the soil, conserves moisture, and immediately starts the process of improving your soil from the top down.
When it comes to watering, think “low and slow.” A quick spray from a hose will just run off the surface. You need to water deeply and infrequently to encourage deep root growth. Soaker hoses or drip irrigation are perfect for this, as they apply water slowly enough for it to be absorbed. Water for a long time, then wait until the top few inches of soil feel dry before you water again.
A Few Final Words of Advice
Okay, a quick but serious heads-up. Working with clay is physically demanding. It’s heavy! Use high-quality tools. A cheap $15 spade will bend or break; investing in a sturdy one for $40 to $60 will save you a world of frustration. And please, use proper lifting techniques to protect your back.
Before you dig anywhere, call 811. It’s a free service that marks underground utility lines. I once had a client shear right through a shallow water line—it could have easily been a gas or electric line, which is far more dangerous. It’s not worth the risk.
Finally, if you plan on growing vegetables, especially in an older urban yard, it’s wise to get your soil tested for heavy metals like lead. Your local extension service can usually help with this. Better safe than sorry when it comes to the food you eat.
Gardening in clay teaches you patience. Don’t be discouraged. By understanding its nature and using these techniques, you can transform that heavy soil into a rich, productive, and beautiful garden. I’ve seen it happen hundreds of times, and the results are always worth the effort.
Inspirational Gallery
The one thing to never do: A well-meaning neighbor might suggest adding sand to “lighten” your clay. Don’t do it! Clay particles are tiny and sand particles are large. When mixed, the clay simply fills all the gaps between the sand, creating a substance remarkably similar to low-grade concrete. You’ll end up with a harder, more impenetrable soil than you started with. Always amend with organic matter, never just sand.
A single earthworm can process its own body weight in soil every day.
These tireless subterranean tillers are your best friends in clay soil. As they tunnel, they create channels for air and water and leave behind nutrient-rich castings that improve soil structure. Encouraging an earthworm population by adding compost and avoiding chemical pesticides is one of the most effective long-term strategies for transforming heavy clay into fertile loam.
When is the absolute best time to work with clay soil?
The sweet spot is when the soil is moist but not waterlogged. To test it, grab a handful of soil and squeeze. If water drips out, it’s too wet—working it now will destroy its structure and lead to severe compaction. If it’s dry and hard, you risk breaking your tools and your back. The ideal consistency is ‘crumbly.’ It should form a ball that breaks apart easily when you poke it. This usually occurs a day or two after a good rain.
- Dramatically improves drainage and aeration from day one.
- Allows you to choose your ideal soil mix, completely bypassing the native clay.
- Warms up faster in the spring for an earlier start to the season.
The secret? Raised beds. While amending your existing soil is a fantastic long-term goal, installing raised beds offers an immediate, foolproof solution for growing vegetables or delicate perennials without waiting for the clay to improve.
Building great soil structure is a marathon, not a sprint. The single most impactful thing you can do year after year is to apply a thick layer of mulch. A 2-3 inch layer of shredded hardwood bark, composted leaf mold, or even pine straw does more than just suppress weeds. It insulates the soil, preventing the extreme baking in summer and deep freezing in winter. Most importantly, as it slowly breaks down, it provides a constant, gentle source of organic matter, feeding the soil life that will do the heavy lifting of improving your clay for you.
Gypsum: This mineral amendment, also known as calcium sulfate, works chemically. It causes the fine clay particles to clump together (a process called flocculation), creating larger particles and thus improving drainage and aeration. It’s particularly effective in the dense, sticky clay of the Southeast and Midwest.
Expanded Shale: This is a lightweight, porous gravel created by firing shale in a kiln. When mixed into clay, it creates permanent air and water pockets that won’t break down over time like organic matter. It’s a one-time, structural amendment for heavily compacted areas.
While organic matter is king, these mineral amendments can provide a powerful initial boost.
Think beyond just single plants and start combining textures that thrive in heavy soil. The key is contrast. Try pairing the bold, sword-like leaves of a Yucca with the soft, feathery foliage of an Amsonia (Bluestar). Or, for a classic look:
- The tall, upright spires of Liatris (Blazing Star) emerge from a sea of the fine, airy foliage of Coreopsis ‘Zagreb’.
- The huge, glossy leaves of a Hosta ‘Sum and Substance’ contrast beautifully with the delicate fronds of a Japanese Painted Fern (Athyrium niponicum), a fern that tolerates clay better than most.
If you’ve ever bent a cheap shovel in hard-baked summer clay, you know the value of the right tool. Forget the standard rounded-point shovel. For breaking new ground in clay, you need a heavy-duty pointed spade or, even better, a digging fork with strong, flat tines. The ultimate clay-busting tool, however, is the broadfork. This large, U-shaped tool with long tines, like the models from companies such as Treadlite or Lam, allows you to use your body weight to deeply aerate large sections of soil without inverting the soil layers, preserving its delicate ecosystem.
Not all compost is created equal when it comes to breaking up clay. For the best results, look for amendments that are coarse and rich in fibrous organic material. These physically create air pockets and take longer to break down.
- Composted Pine Bark Fines: Often sold as a soil conditioner, its woody nature provides excellent, long-lasting structure.
- Mushroom Compost: A rich but fine-textured compost, it’s great for adding nutrients but should be mixed with coarser materials.
- Leaf Mold (Composted Leaves): A fantastic, fungus-rich amendment that dramatically improves soil life and texture. Many municipalities offer it for free.


