Building an Outdoor Kitchen That Actually Lasts: A Pro’s Unfiltered Guide
I’ve been designing and building outdoor living spaces for a long, long time. I’ve seen design fads come and go, and I’ve worked with homeowners everywhere from chilly northern states to the swampy Gulf Coast. Through it all, one thing never changes: we all love to cook and hang out outside.
In this article
A well-thought-out outdoor kitchen quickly becomes the heart of the home when the weather is nice. It’s so much more than just a spot for your grill. It’s a true extension of your house, a place where the best memories get made. But, and this is a big but, I’ve also been the guy called in to fix the projects that went wrong. I’ve seen gorgeous wood cabinets that rotted into mulch in just two seasons. I’ve seen thousand-dollar granite countertops crack because the foundation was a joke. Honestly, these mistakes are heartbreaking because they are so expensive and completely avoidable.
So, this guide is built on all those years of experience—the successes and the failures. I want to share the practical, no-fluff knowledge my team and I rely on. We’ll cover everything from getting the layout right to picking materials that can take a punch, and we’ll definitely cover the critical safety stuff for plumbing and electrical. My goal is to give you the insider info you need to plan a durable, functional, and safe outdoor kitchen, whether you’re hiring a pro or tackling some of it yourself.
The Physics of a Good Layout: It’s More Than Just Looks
Before you even dream about fancy appliances, you have to nail the location and layout. This is where 90% of the thinking should happen. A clunky layout will make your kitchen a pain to use, and a bad location can smoke you out of your own party.
Get to Know Your Yard
First thing’s first: figure out the prevailing winds on your property. Seriously. Go stand in your proposed spot on a breezy day. Which way is the air moving? You want your grill and any other smoke-producers (like a smoker) downwind from your house’s windows and doors. You also want the smoke to blow away from your main seating area. It sounds ridiculously simple, but it’s the most common mistake I see. Nobody wants to eat a burger in a cloud of smoke.
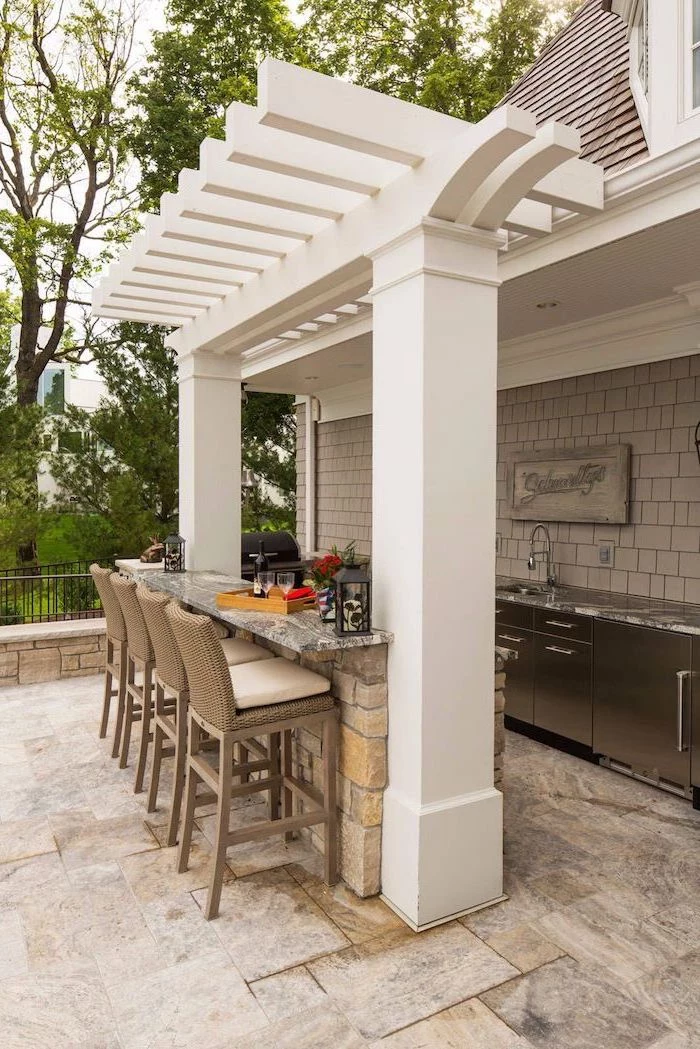
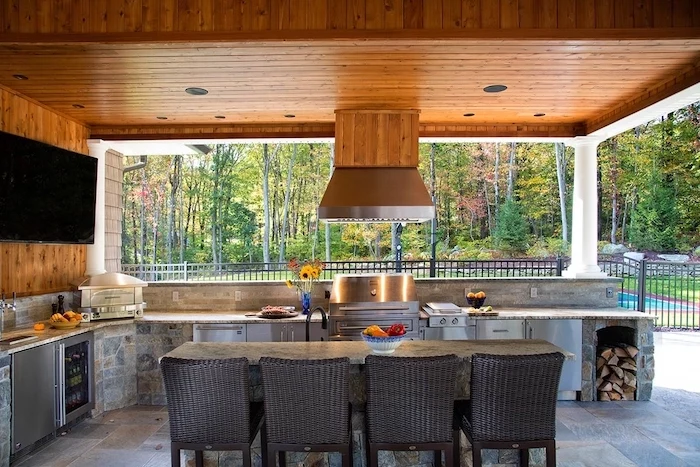
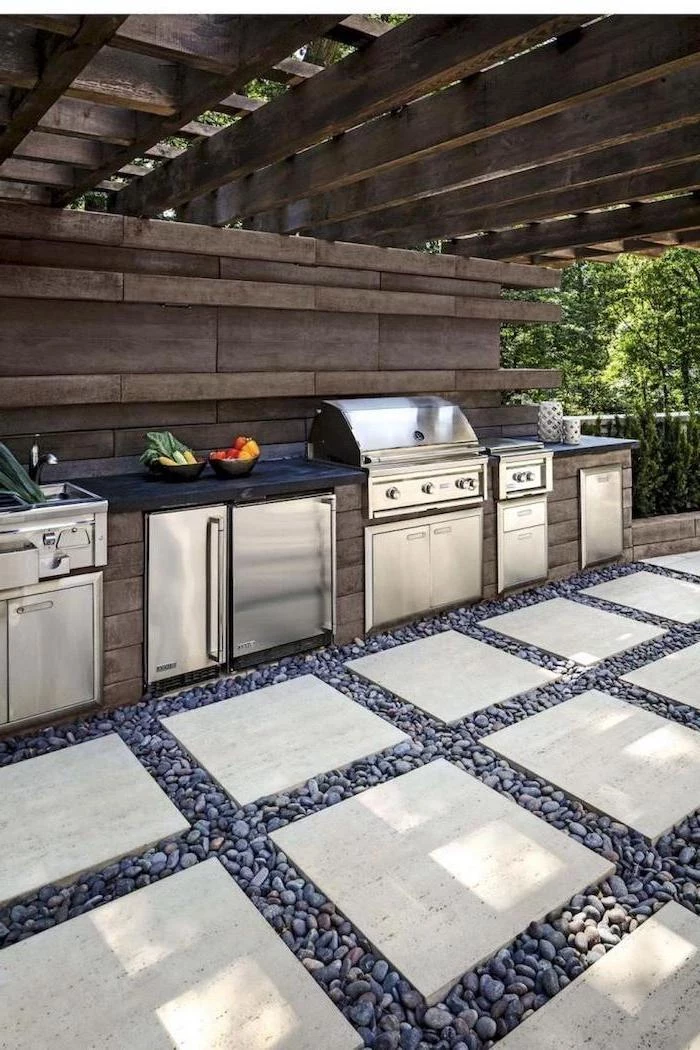
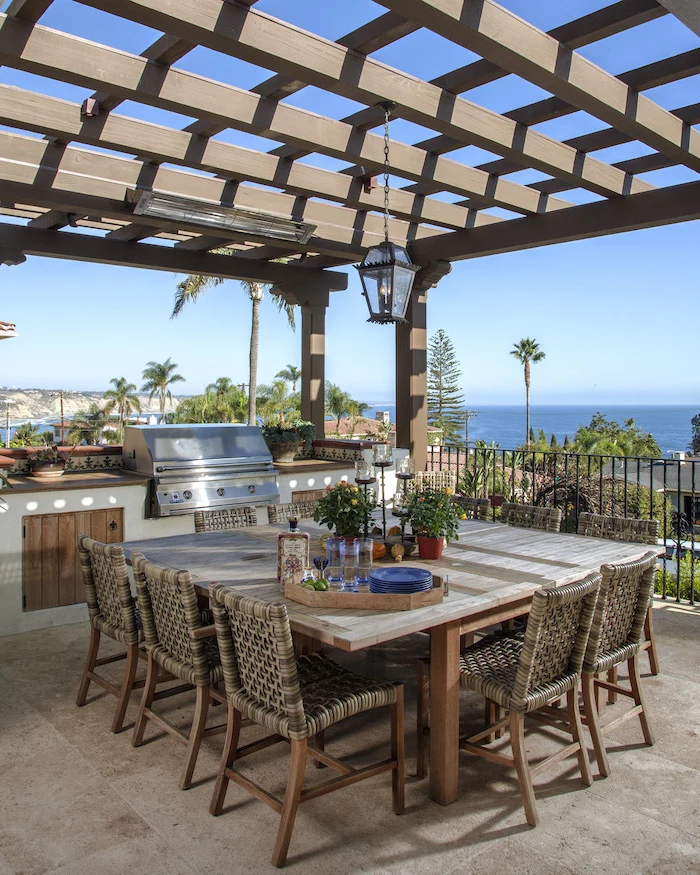
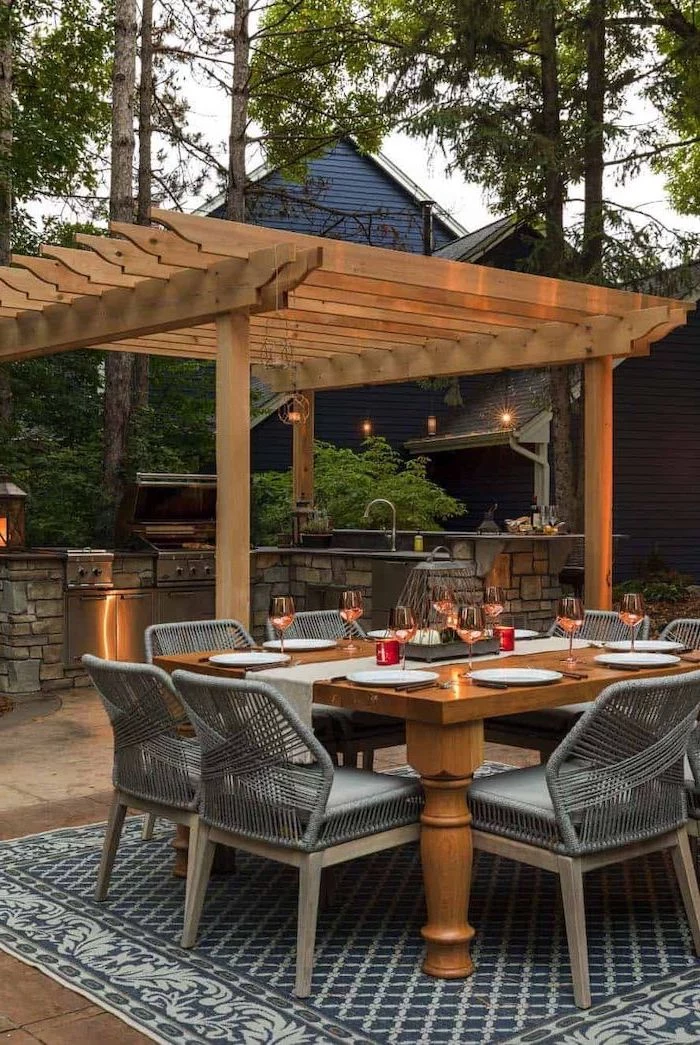
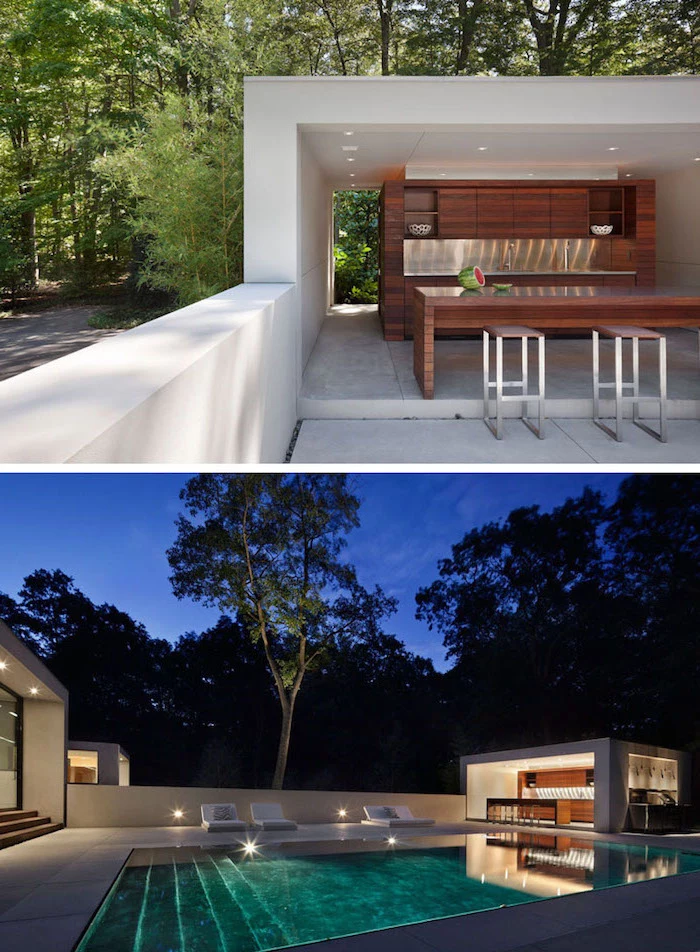
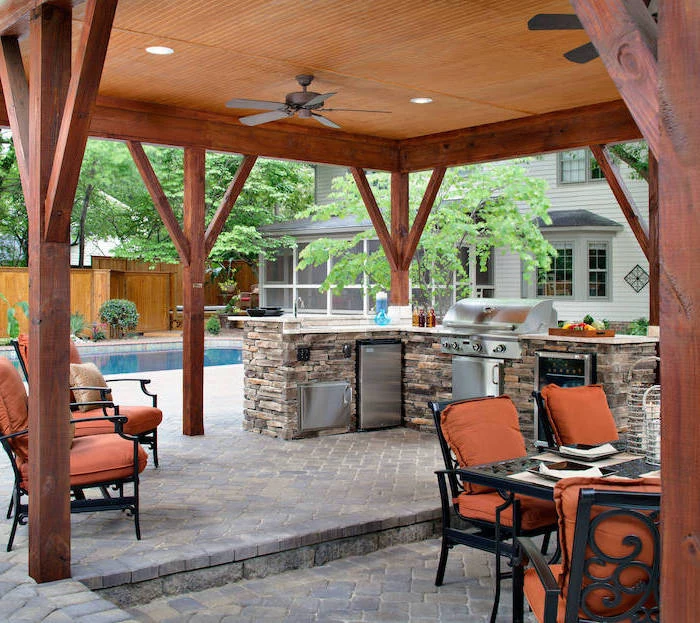
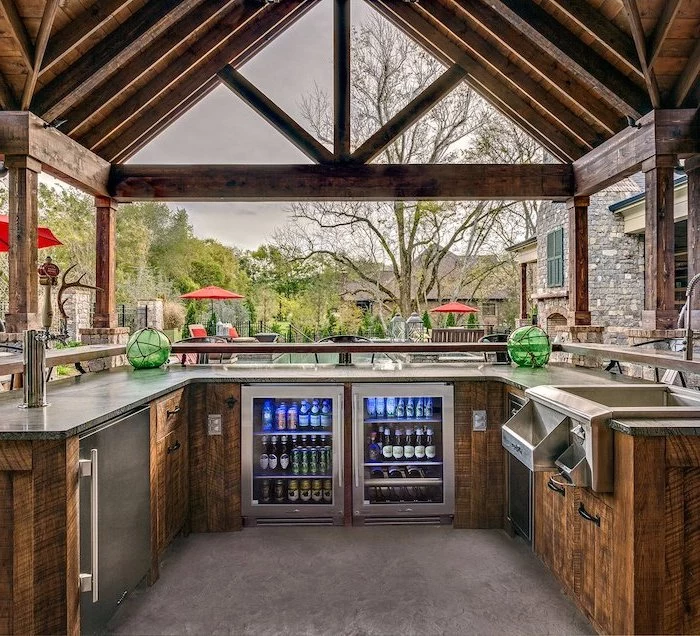
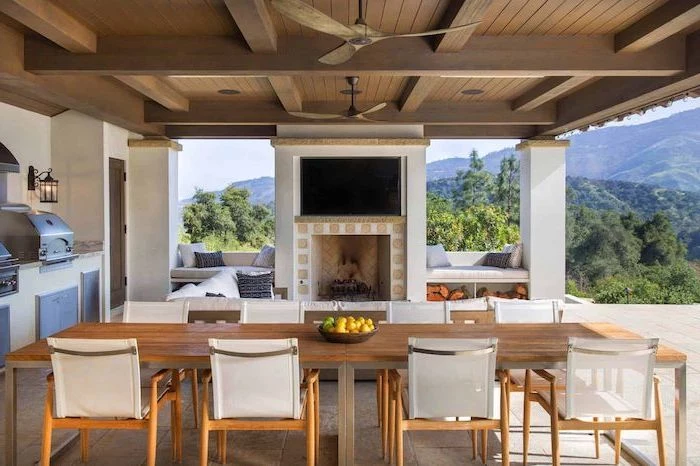
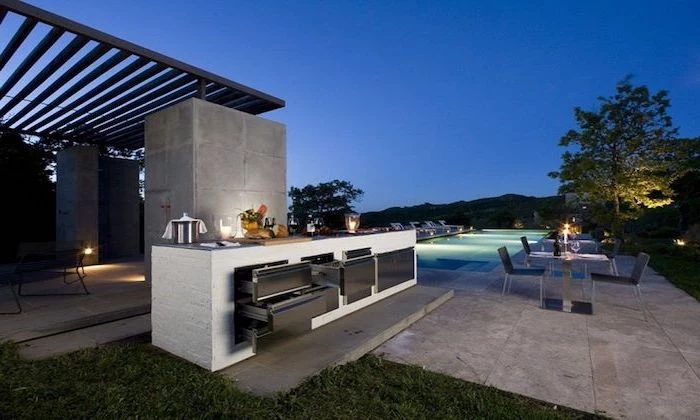
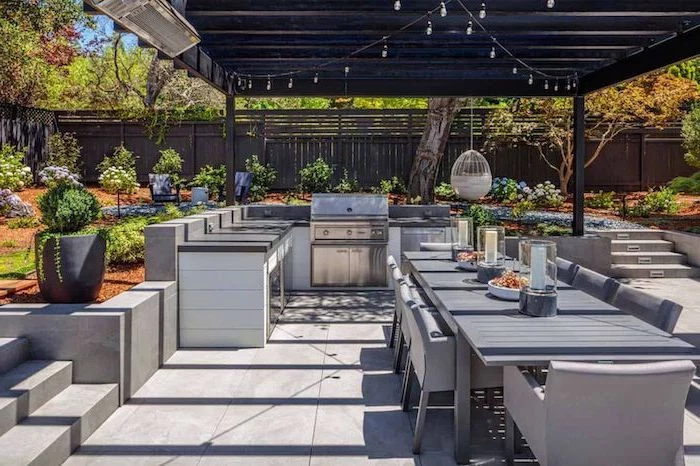
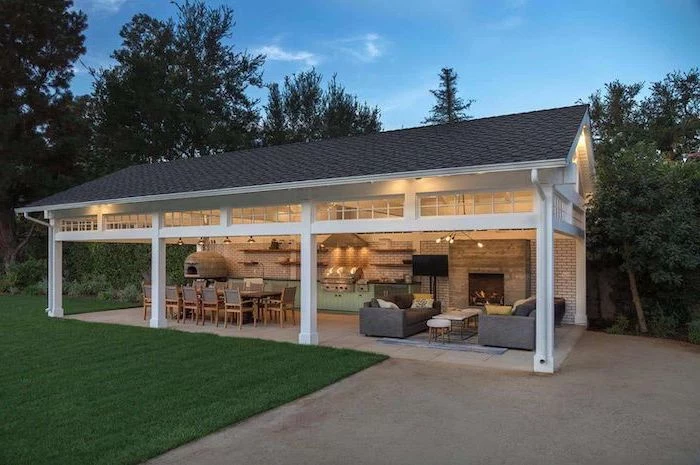
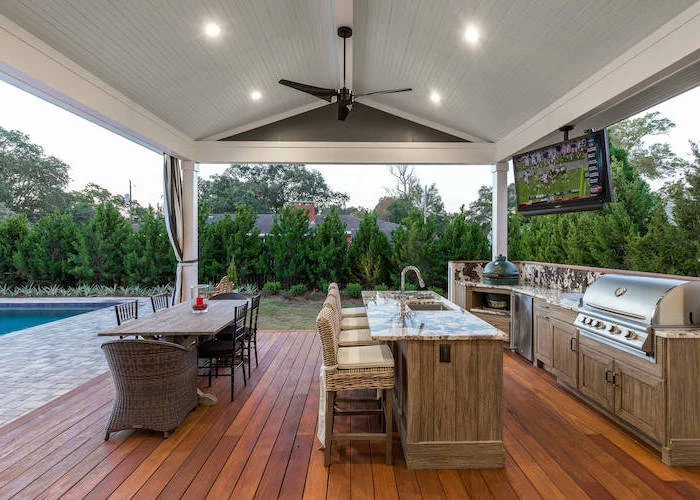
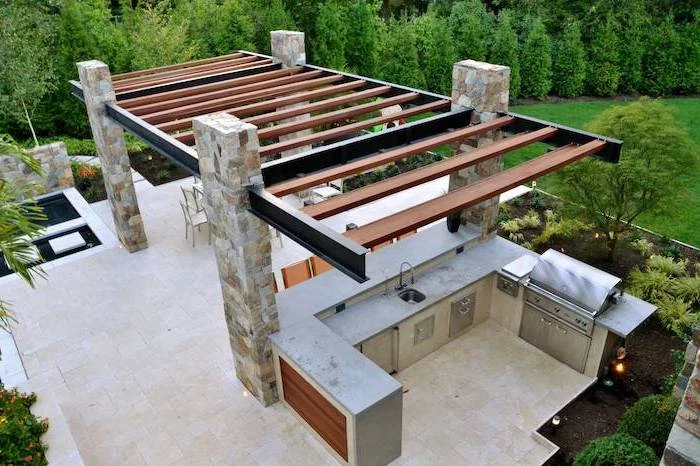
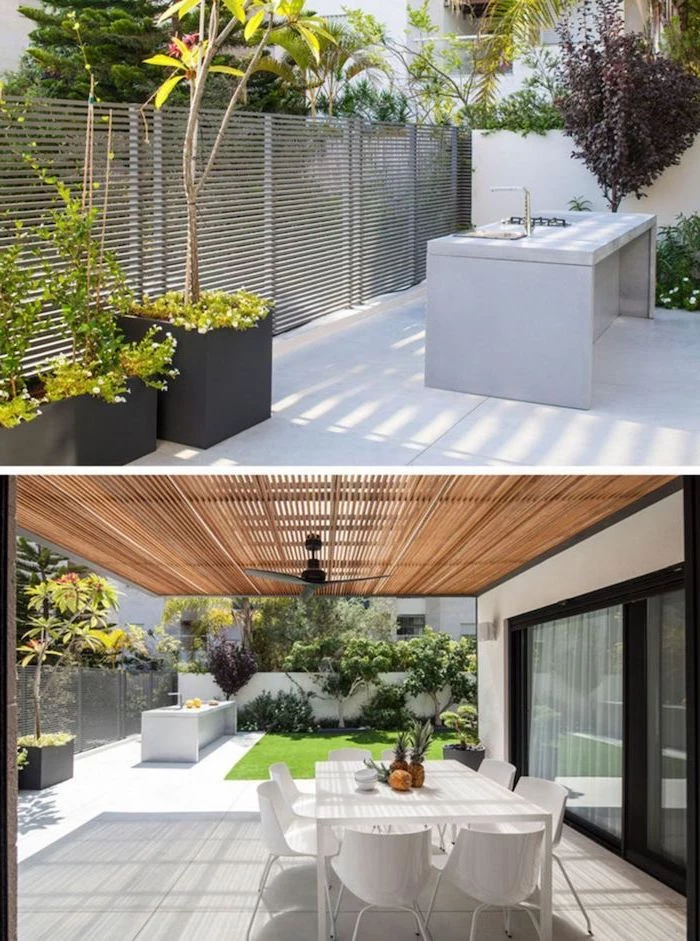
Next, let’s talk sun and shade. An outdoor kitchen baking in the afternoon sun is basically useless. The countertops can get hot enough to be a burn hazard, and whoever is cooking will be miserable. Watch how the sun moves across your yard for a full day. The sweet spot is a location that gets morning sun and afternoon shade. If you don’t have a big tree helping you out, you absolutely need to plan for a structure. A simple pergola, a solid roof, or even a retractable awning can be a total game-changer. This isn’t just about comfort; it’s about protecting your investment from constant UV damage.
The Outdoor Work Flow
You’ve probably heard of the “work triangle” for indoor kitchens. The same idea applies outside, but I think it’s better to think in zones. This is how I explain it to my crew:
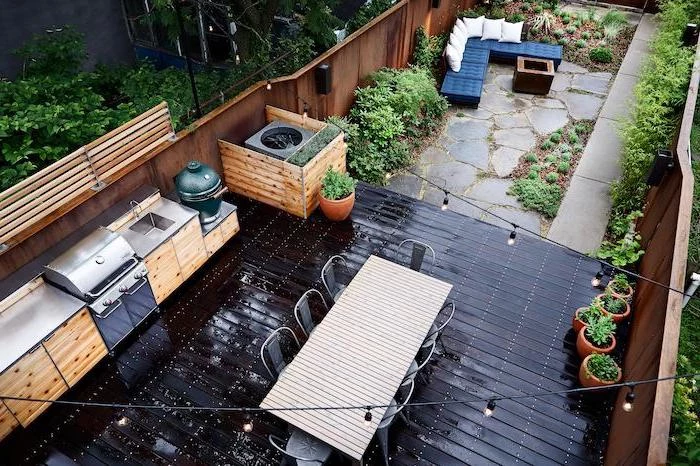
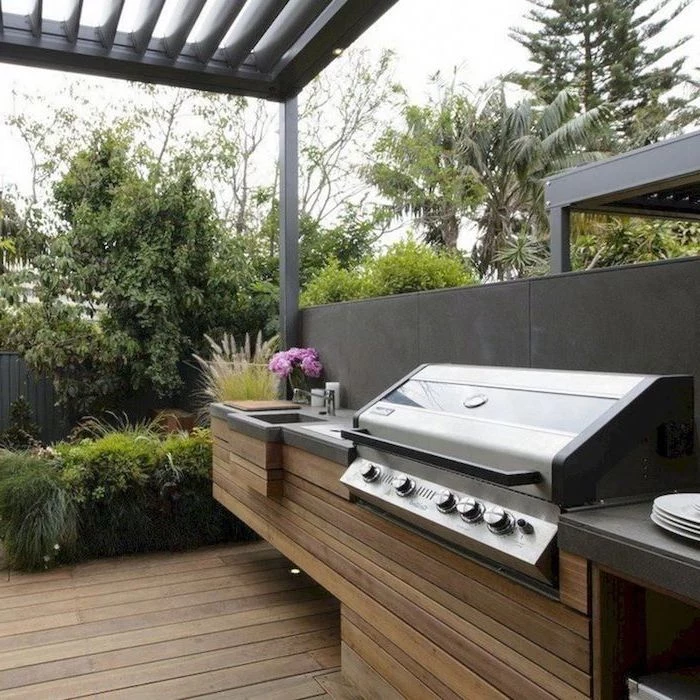
- The Hot Zone: This is your grill, side burners, maybe a pizza oven. This area needs serious ventilation and must be built from non-combustible materials. You need counter space on both sides for landing platters of raw and cooked food. A pro tip: aim for at least 18 inches of clear counter on each side of the grill.
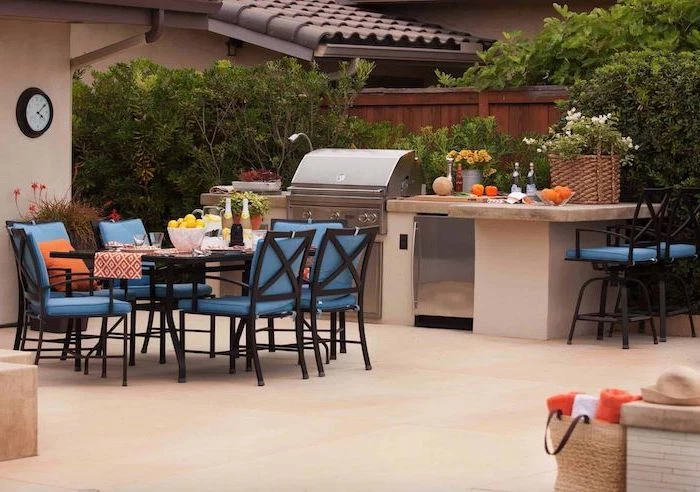
- The Cold Zone: Your outdoor-rated fridge and maybe an ice maker. This should be convenient for both the cook and the guests. I like to place it at the end of a cabinet run so people can grab a drink without walking right through your cooking space.
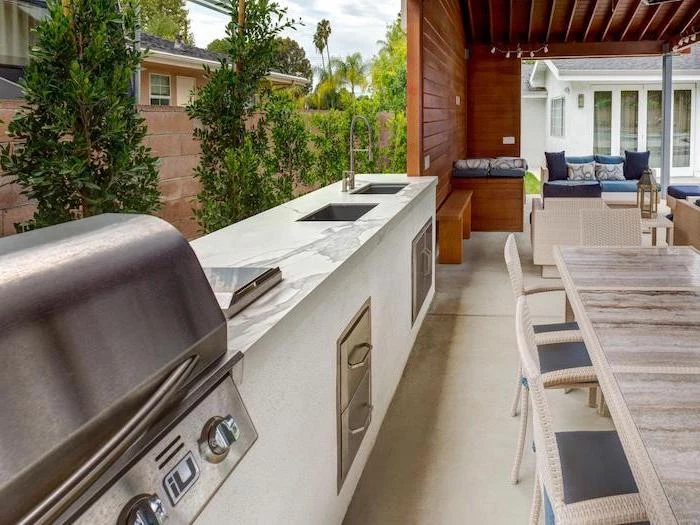
- The Wet Zone: This is your sink and your trash pull-out. The sink is mostly for hand washing and rinsing tools, not a full-on dishwashing station. This is prep central, so give it the most counter space. I always budget for at least 36 inches of clear, uninterrupted counter here.
- The Dry Zone: This is your main prep and serving real estate. It’s the open countertop that connects all the other zones. Keeping it spacious is the secret to a kitchen that’s a joy to use.
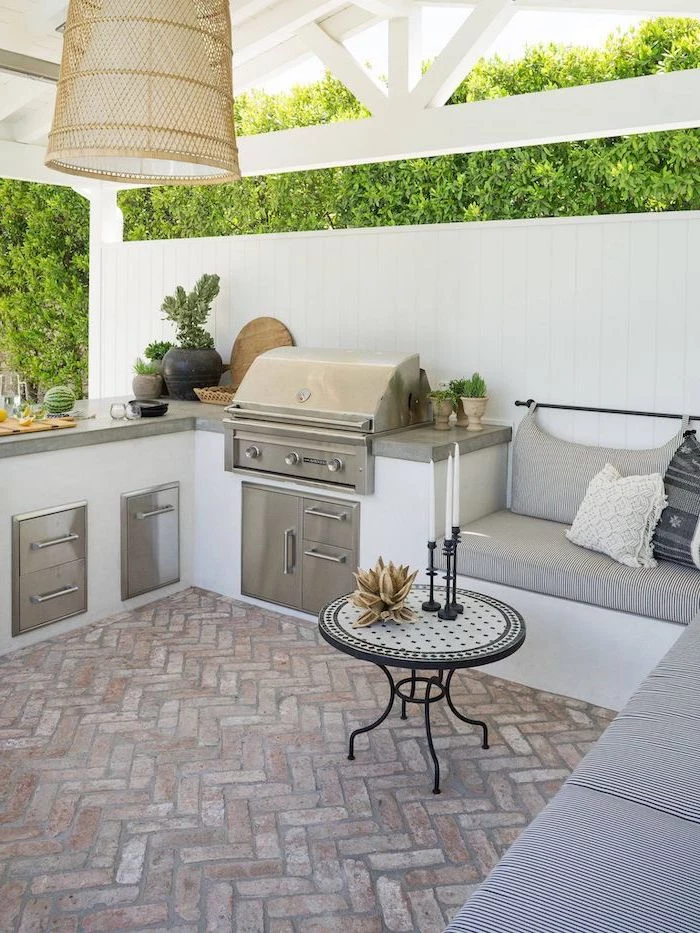
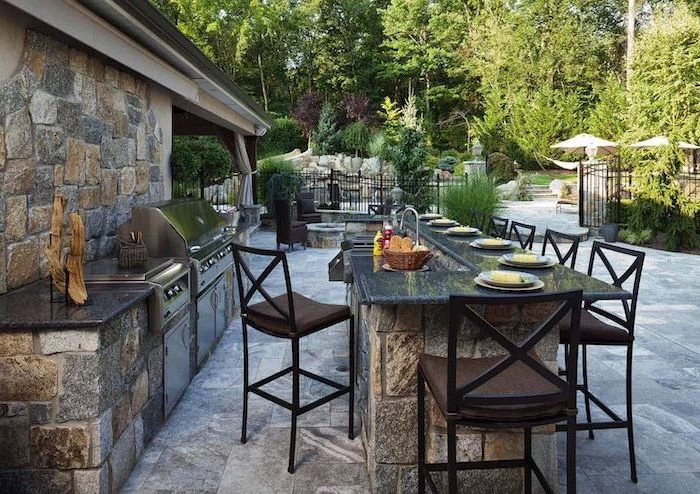
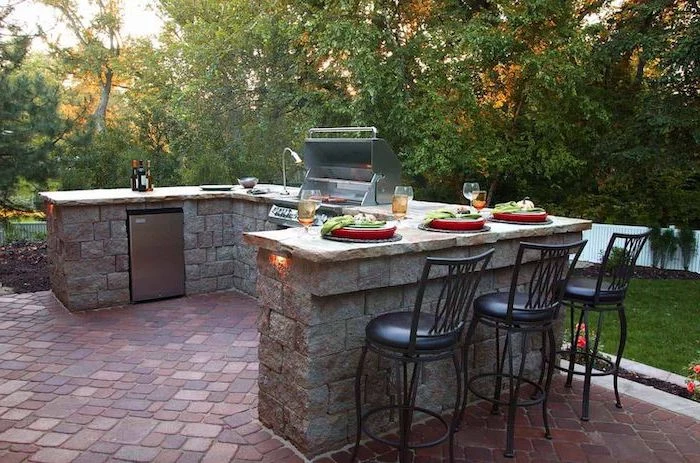
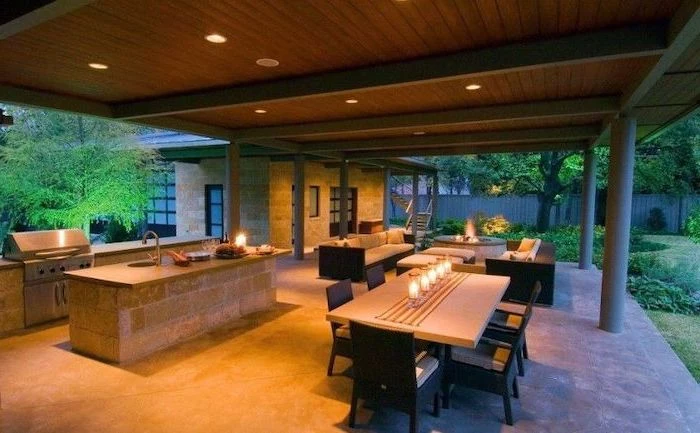
Imagine an L-shaped layout. The long arm of the ‘L’ could have your sink (Wet Zone) and a nice big prep area (Dry Zone). The shorter arm could house your grill (Hot Zone). Then, you place the fridge (Cold Zone) at the far end of the long arm. This creates a natural flow and keeps guests out of your hair. Oh, and proximity to your indoor kitchen door is huge. Because you will forget the paprika.
Choosing Materials That Won’t Betray You
The single biggest factor in your outdoor kitchen’s lifespan is the materials you choose. The outdoors is a brutal environment. Materials have to stand up to rain, snow, scorching sun, and wild temperature swings. This isn’t about what looks good in the showroom; it’s about what will still look good and work safely in ten years. This is where I see the costliest DIY blunders.
Countertops: Your Main Stage
Your countertop is your workhorse. It needs to be tough, easy to clean, and handle heat and stains. Here’s the real talk on the most common options:
- Granite: A solid choice. It handles heat well, but it is porous, so you have to seal it every year to prevent oil or wine from staining it. But listen, I have to caution you about dark colors. I once had to replace a stunning black granite top because in the direct sun it would get over 150°F—literally hot enough to burn you. Lighter colors are a much smarter bet. Expect to pay around $70 to $150 per square foot, installed.
- Poured Concrete: It’s a great industrial look, but I’m cautious. It needs an incredibly strong base, and if the pro you hire isn’t a true concrete artisan, it will develop hairline cracks. It’s also very porous and needs constant sealing with a food-safe product.
- Soapstone: This is an excellent, lesser-known hero. It’s non-porous, so it won’t stain, and it has amazing thermal properties, meaning it won’t crack from sudden temperature changes. The only ‘downside’ is that it’s a softer stone and can scratch. It also darkens over time to a beautiful charcoal gray, a patina most people end up loving.
- Sintered Stone / Porcelain Slabs: This is the top-tier stuff my team recommends for high-end projects. These are made by fusing minerals under insane heat and pressure. The result is a material that’s basically bulletproof: it’s non-porous, UV-stable (so it won’t fade), and super resistant to scratches and heat. It’s a bigger investment, probably in the $120 to $200+ per square foot range, but it’s as close to zero-maintenance as you can get. A quick heads-up: you won’t find materials like this at a big-box store; you’ll need to visit a specialty stone yard or a dedicated outdoor kitchen supplier.
- What to Avoid at All Costs: Never, ever use quartz countertops outside. The resins that bind the stone particles will turn yellow and brittle in the sun, ruining your investment in a year or two. I also steer everyone away from tile. The grout lines are a nightmare to keep clean and will eventually crack and harbor bacteria. Just don’t do it.
Cabinetry and Structure: The Unseen Hero
The framework holding up your beautiful countertop is arguably more important. It must be completely immune to water and pests.
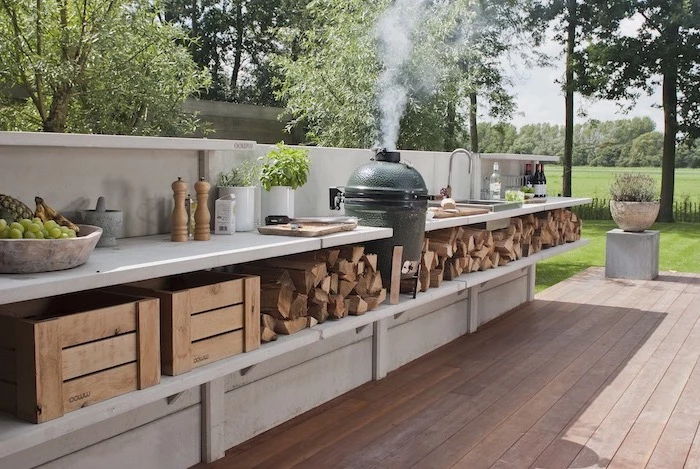
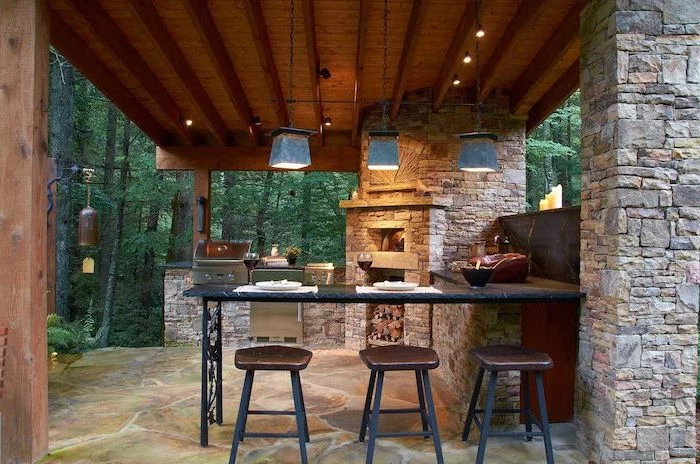
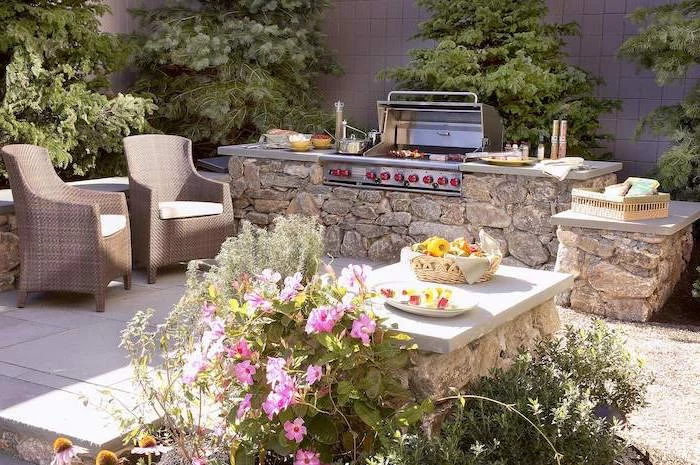
- Masonry: Cinder block or brick built on a proper concrete footing is the undisputed king of durability. It’s what we use for most custom builds. And that footing is non-negotiable. In cold climates, it has to go below the frost line to prevent the ground from freezing and heaving your entire kitchen apart.
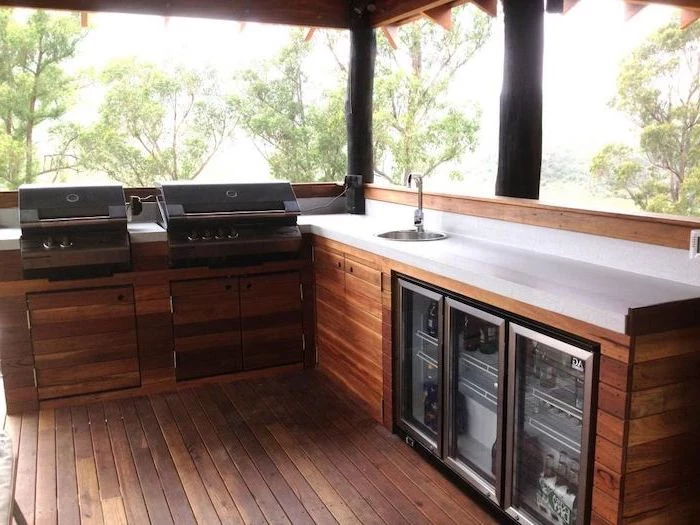
- Marine-Grade Polymer (HDPE): For pre-made cabinets, this is the best material, period. It’s a super-dense plastic that’s waterproof, easy to clean, and won’t be fazed by the sun. There’s a reason they use it on boats. It will not warp, rot, or fall apart.
- Stainless Steel: This gives you a sleek, pro look, but not all stainless is created equal. For most places, you want 304-grade steel. However, if you live within a few miles of saltwater, you MUST insist on 316-grade (marine-grade) stainless. I had a client call me about two years after a build, absolutely furious that every hinge and drawer slide was covered in ugly rust spots. The original builder used standard 304-grade steel less than a mile from the ocean. We had to replace it all. That 316-grade is essential if you can smell salt in the air.
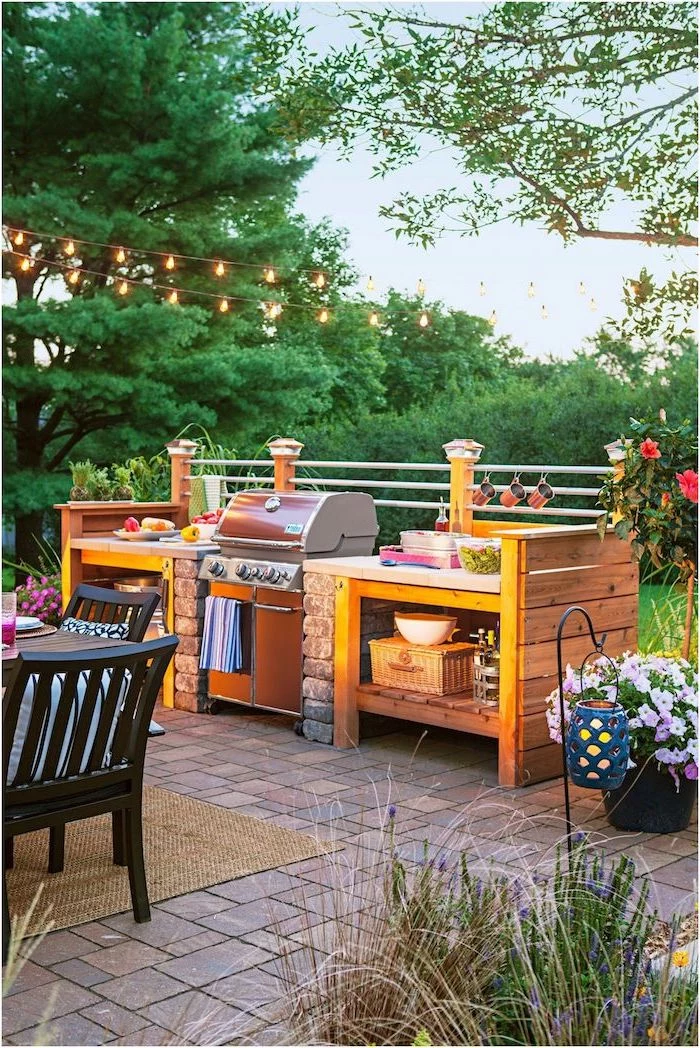
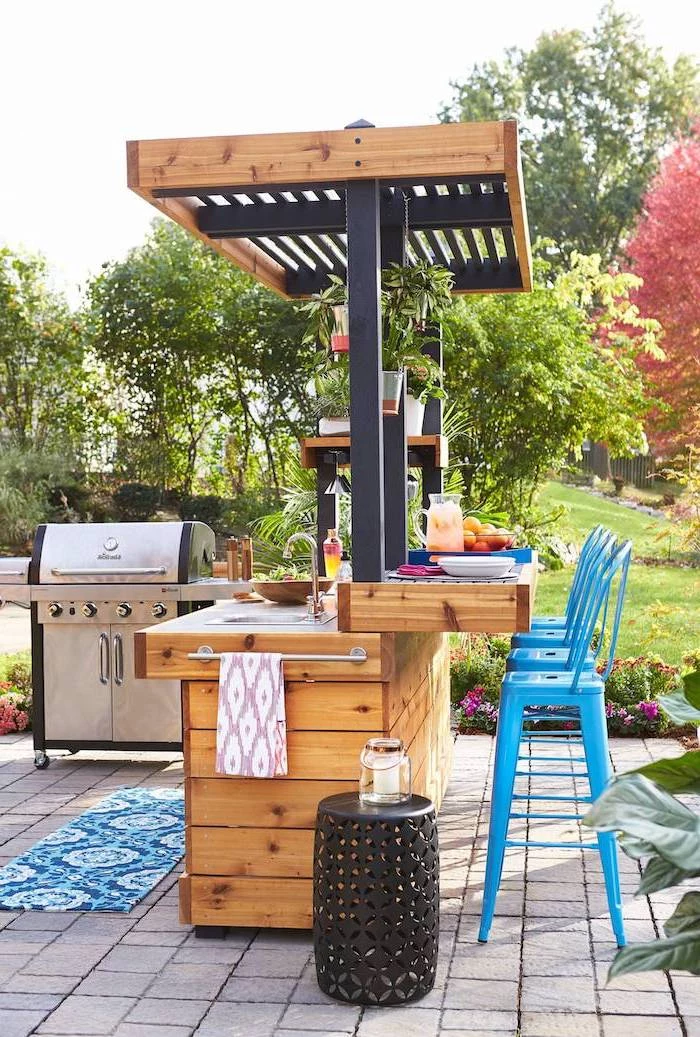
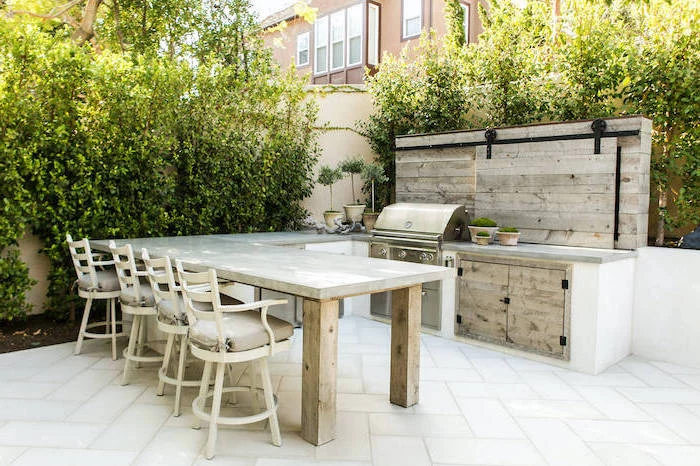
- A Serious Warning on Wood: I’m going to be blunt: I strongly advise against using wood for an outdoor kitchen structure, even if it’s covered. I’ve seen beautiful cedar kitchens turn to dust from ambient moisture and rain splash-back. It’s a risky bet that rarely pays off without constant, obsessive maintenance.
Your Local Climate is the Boss: Adapting Your Build
A design that’s perfect for Arizona will be a complete disaster in Vermont. You have to build for your specific climate.
- Cold Climates: The enemy here is the freeze-thaw cycle. That’s why a concrete footing below the frost line is mandatory. All your plumbing lines MUST be designed for easy winterization. This means shutoff valves inside the house and a way to blow the water out of the pipes. By the way, here’s the 15-minute fall chore that will save you thousands in burst pipes: 1. Shut off the water supply from the valve inside your house. 2. Open the outdoor faucet all the way. 3. Use a small air compressor to blow air into the line until only a fine mist comes out. That’s it. You’re done.
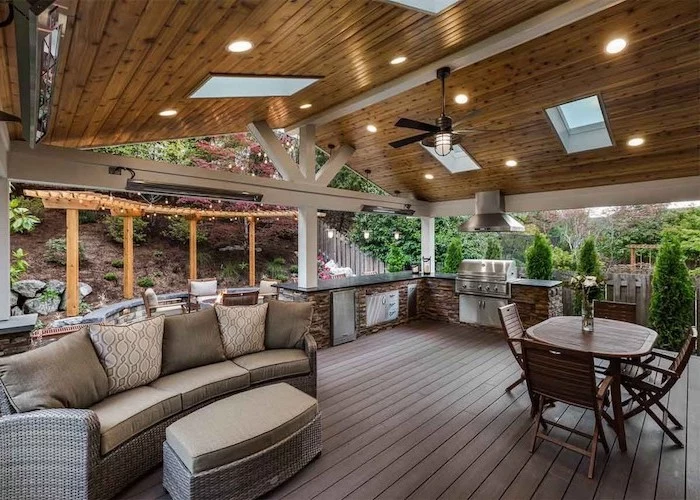
- Hot, Humid Climates: Here, it’s all about fighting moisture and heat. Cabinetry needs vents to keep damp air from stagnating and growing mildew. A solid roof is also a must-have for shade and protection from those daily pop-up thunderstorms.
- Coastal Areas: Salt is the villain. As I mentioned, 316-grade stainless steel is your only choice for metal. Powder-coated aluminum is another great option for cabinetry frames in salty air.
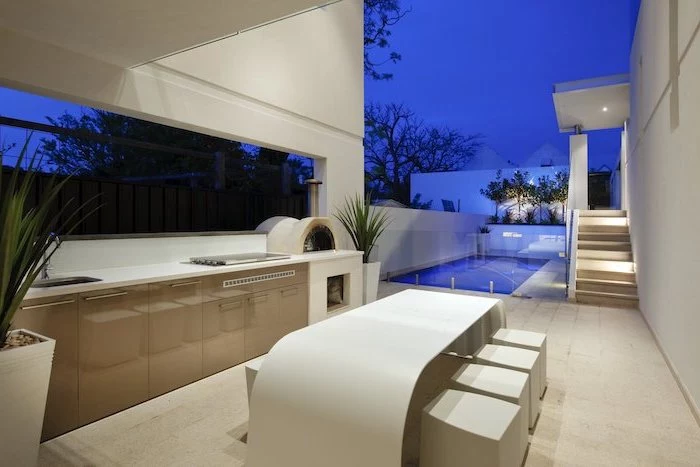
- Dry, Sunny Climates: UV rays are your primary concern. They make materials fade and turn brittle. This is where UV-stable materials like sintered stone and HDPE really prove their worth. Shade isn’t a luxury here; it’s a necessity to protect your investment.
How to Build an Awesome Kitchen on a Real-World Budget
Not everyone can or wants to drop $40,000 on a massive outdoor kitchen. The good news is, you don’t have to. You can get an amazing space on a more modest budget—say, in the $5,000 to $15,000 range—if you’re smart about it.
My Favorite Trick: The Phased Approach
You don’t have to build it all at once. Spreading the project out makes it so much more manageable.
- Year 1: The Foundation. Start with a great patio made of pavers or concrete. Buy the best freestanding grill you can afford. You’re already cooking outside!
- Year 2: The Structure. Add a pre-fabricated island or a set of cabinets. You can then sell your cart grill and invest in a built-in unit to drop into your new structure.
- Year 3: The Utilities. Now’s the time to run that gas line for the grill or plumbing for a sink. This is when you’ll definitely need to hire licensed pros.
This approach lets you build a high-quality kitchen over time without a massive upfront cost. And a quick note on timelines: a full custom masonry kitchen can take 2-4 months from design to finish, factoring in permits and schedules. A simpler prefab island install? You could be grilling in a weekend or two once it’s delivered.
Where to Splurge and Where to Save
- Splurge Here: The grill and any other built-in appliances (especially the outdoor-rated refrigerator). These are the engines of your kitchen and are a huge pain to replace once they’re built in. A cheap indoor fridge’s compressor will burn out in the summer heat. It’s a costly mistake many people learn the hard way.
- Save Here: You can save money on the finishing touches. Faucets, cabinet pulls, and light fixtures are all easy to upgrade later. You can also start with a more budget-friendly countertop and plan to upgrade it in a few years.
The Really Important Part: Safety, Codes, and When to Call a Pro
Okay, let’s get serious for a minute. An outdoor kitchen involves fire, gas, and electricity, often near water. There is zero room for error. This is about your family’s safety.
Fire Safety is Non-Negotiable
Your grill needs clearance from anything that can burn—your home’s siding (especially vinyl!), a wood fence, you name it. A good rule of thumb is a minimum of 36 inches. To protect the kitchen island itself, you need an insulated jacket. This is a stainless steel liner that fits around the grill, creating an air gap so the intense heat doesn’t transfer to the cabinet materials. I once saw a beautiful island with a wood frame catch on fire because the builder skipped the $300 insulated jacket. The whole thing was a total loss. It’s the cheapest insurance you will ever buy.
Utilities: This is Pro Territory. Period.
- Gas: Running a gas line is not a DIY project. It must be done by a licensed professional who will test for leaks and install the required shutoffs. An improper gas connection is a massive fire and explosion risk.
- Electrical: All outdoor electrical work needs a licensed electrician. Every outlet must be GFCI-protected, which could save a life in a wet environment. All wiring has to be rated for outdoor use.
- Plumbing: Even a simple sink needs a pro’s touch, especially the drain. You don’t want to create a muddy swamp that erodes your patio’s foundation.
Hiring pros isn’t just about doing it right; it’s about doing it legally. Most of this work requires a permit. Trying to do it without one can lead to fines and could even get a future homeowner’s insurance claim denied if something goes wrong. A good contractor handles all of that for you.
Building an outdoor kitchen is one of the most rewarding projects you can do for your home. If you plan carefully, choose materials that are right for your climate, and respect the need for professional help, you’ll create a space that’s not just beautiful, but safe, durable, and a true asset for years to come.
Inspirational Gallery
Granite: A natural classic, it’s tough and handles heat well. Each slab is unique, but it must be sealed periodically (typically annually) to prevent stains from oil or wine, especially in an outdoor setting.
Dekton: An ultra-compact surface, like the ones from Cosentino, is virtually indestructible. It’s non-porous, so no sealing is needed, and it’s completely unfazed by UV rays, frost, or heat. The look is more uniform than granite.
For a worry-free, modern aesthetic, Dekton often wins, but for pure natural beauty, granite remains a top contender.
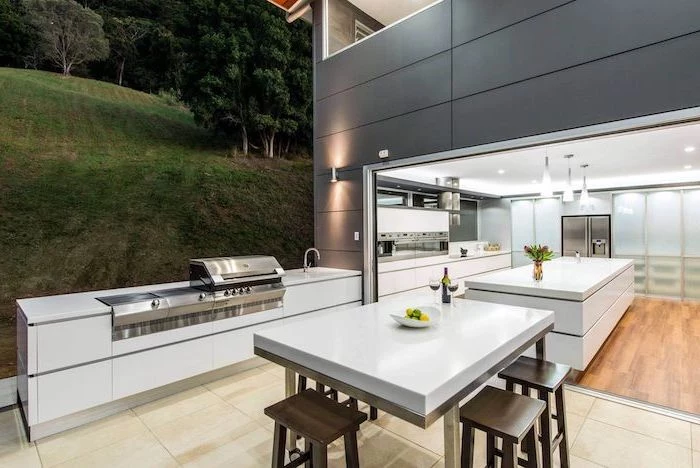
- Impervious to water and humidity.
- Will not swell, rot, or delaminate.
- Easy to clean with just soap and water.
- Available in a range of colors that mimic wood or offer bold, modern hues.
The secret? High-density polyethylene (HDPE) cabinetry. Brands like NatureKast and WeatherStrong offer a durable, low-maintenance alternative to wood that stands up to the harshest weather without sacrificing style.
A 2021 report by the National Association of Realtors found that an outdoor kitchen project can recover, on average, 71% of its cost upon resale.
This makes it not just a lifestyle upgrade, but a sound financial investment in your property. It enhances curb appeal and functional living space, which are major draws for potential buyers looking for a home that’s ready for entertaining.
Do I really need a sink in my outdoor kitchen?
Absolutely. Skipping a sink is one of the biggest regrets homeowners have. It transforms your grill station into a true kitchen. You’ll avoid countless trips inside for everything from washing hands and rinsing vegetables to cleaning up utensils. A simple cold-water line and a drain connected to your home’s wastewater system is a game-changer for functionality. For colder climates, ensure all plumbing can be easily winterized to prevent burst pipes.
Beyond the main grill, consider adding a dedicated high-heat searing station. Many high-end grill manufacturers, such as Lynx or Napoleon, offer infrared side burners that can reach over 1,800°F (980°C) in seconds. This is the professional steakhouse secret to achieving a perfect, crusty sear on steaks and chops while keeping the inside juicy, something a standard grill grate struggles to replicate.
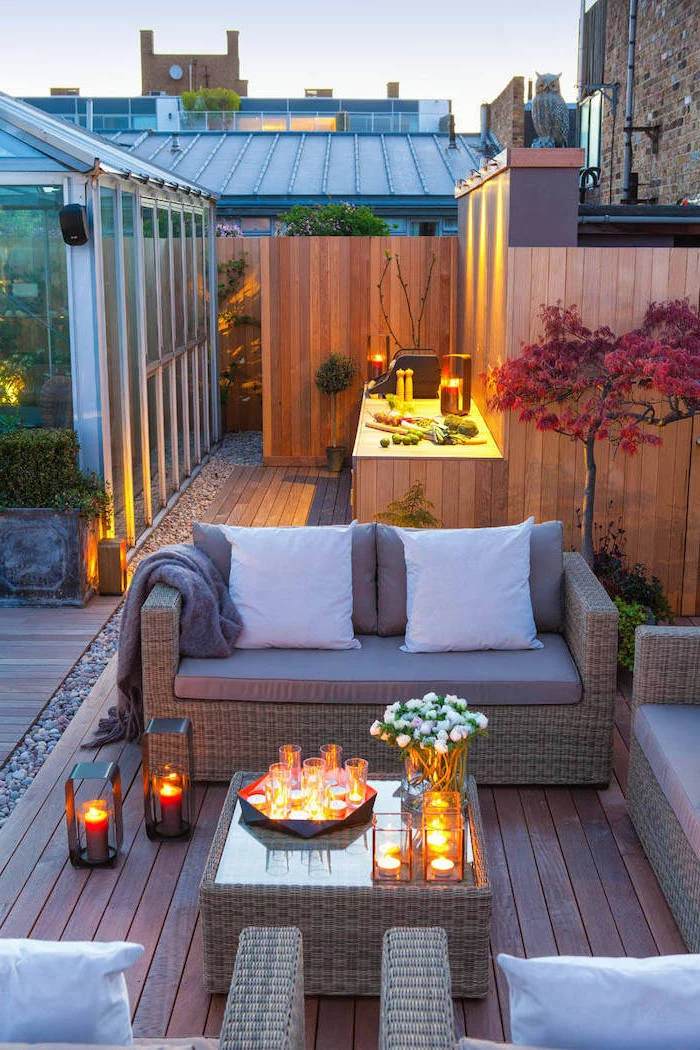
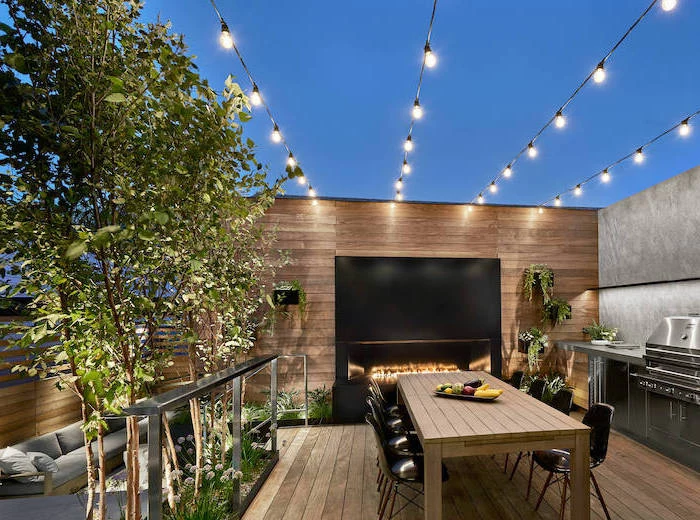
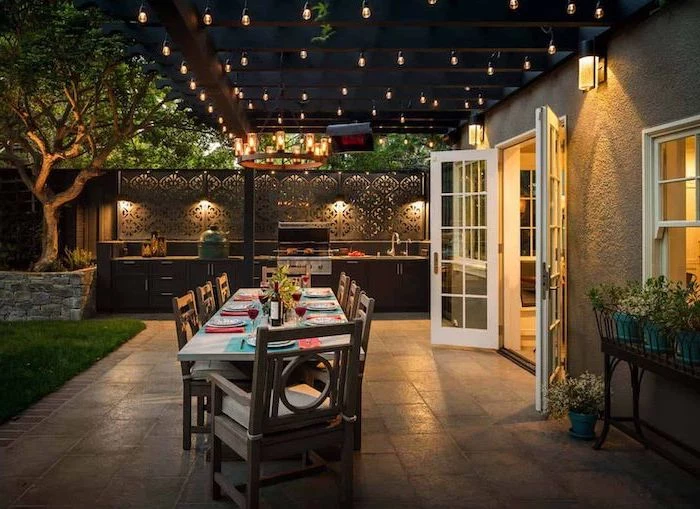
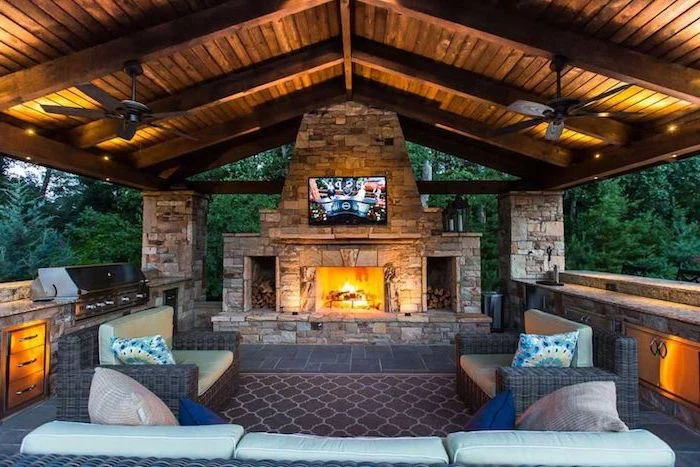
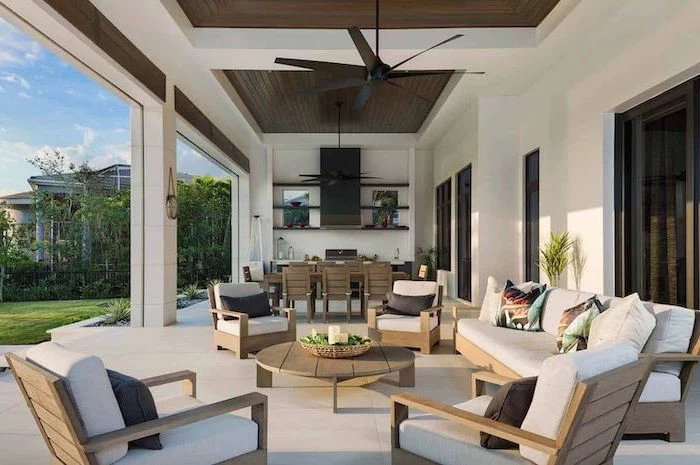
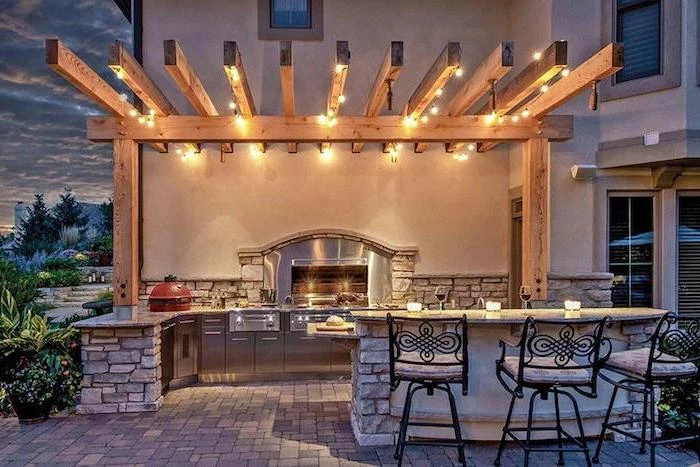
- Task Lighting: Focused, bright light directly over the grill, prep counters, and sink. Under-cabinet LED strips are perfect for this.
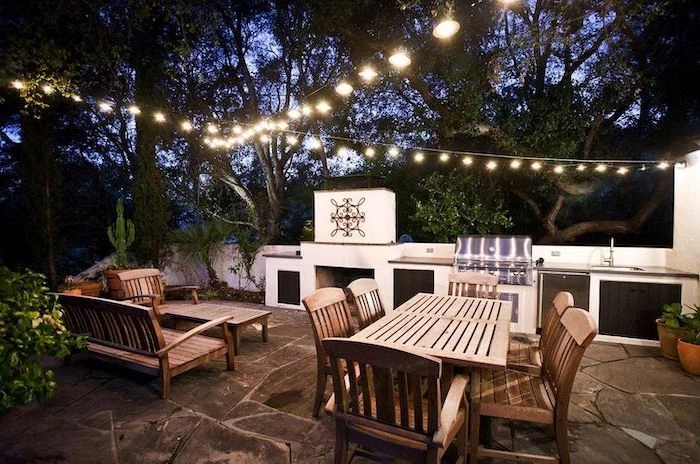
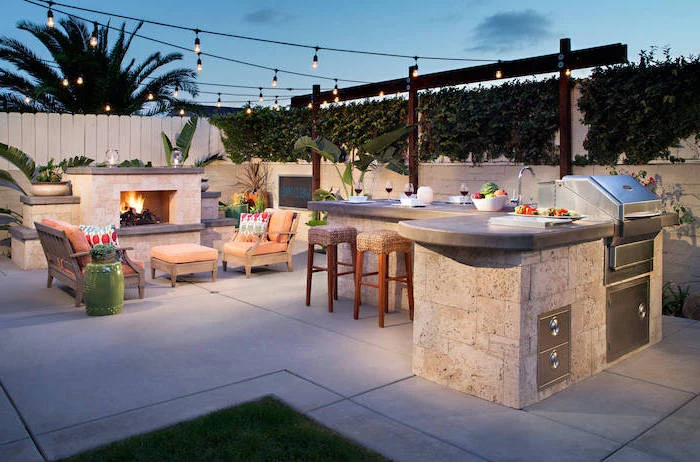
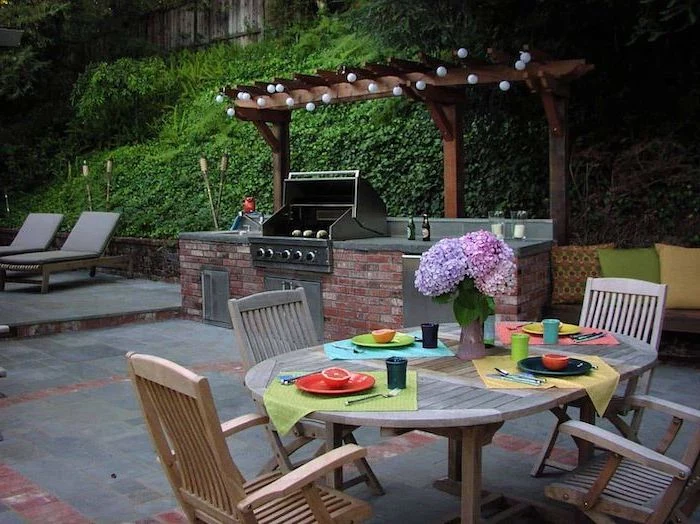
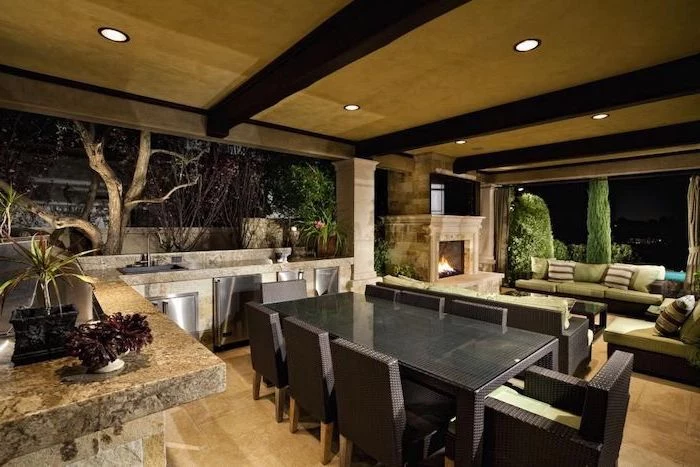
- Ambient Lighting: Creates the overall mood. Think dimmable string lights, wall sconces, or lights integrated into a pergola.
- Safety Lighting: Low-level lights along steps, pathways, and the perimeter of the kitchen area to prevent trips and falls after dark.
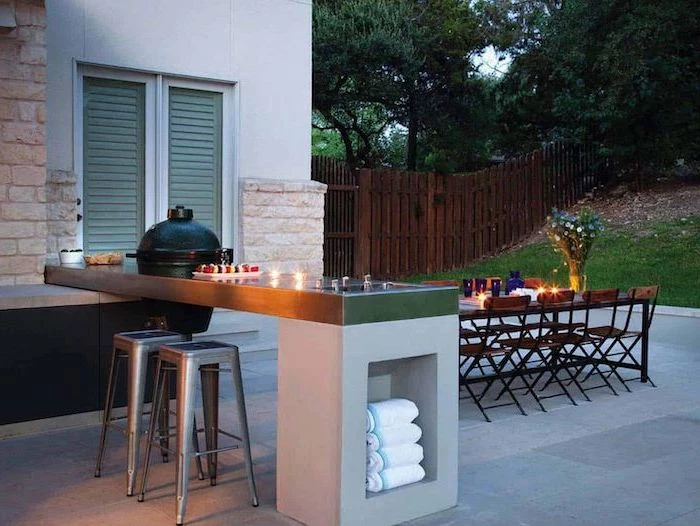
A critical detail for longevity: Ensure your countertops have a proper drip edge. This is a small groove cut on the underside of the counter’s overhang that prevents water from running back and down the face of your expensive cabinets. It’s a minor detail in fabrication that makes a major difference in preventing water stains, mold, and premature decay, especially on wood or stucco structures.
Don’t just think about cooking. Think about the entire experience. Integrating a sound system can elevate your outdoor space from a kitchen to an oasis. Weatherproof outdoor speakers, like the Sonos Roam or a discreet system from Bowers & Wilkins, can be built into the landscape or kitchen structure, allowing you to control the mood with music, a podcast, or the sound of the game.
“The kitchen work triangle—the conceptual path between the fridge, sink, and stove—is just as crucial outdoors. Keep these three key stations within a reasonable distance (ideally no more than 9 feet apart) to minimize steps and create an efficient workflow.” – Principle adapted from the University of Illinois School of Architecture.
When choosing stainless steel for cabinets or appliances, pay close attention to the grade. For outdoor use, 304-grade stainless steel is the minimum standard due to its excellent corrosion resistance. For coastal areas with salt in the air, upgrading to 316-grade (marine-grade) stainless steel is a wise investment. It offers superior protection against the pitting and rust that salt-laden humidity can cause.
Where will the trash go? It’s an unglamorous but essential question. A well-designed outdoor kitchen includes integrated, hidden receptacles for both trash and recycling. Look for pull-out cabinet systems designed by brands like Rev-A-Shelf, which keep waste out of sight, contain odors, and protect it from pests. A kitchen littered with overflowing trash cans is neither functional nor inviting.
- Splurge on the Grill: This is the workhorse. A quality grill from a brand like Weber, Napoleon, or Kalamazoo will cook better, last longer, and be safer.
- Save on the Finishes: Instead of a full stone-clad structure, consider a powder-coated steel frame with concrete backer board, finished with a more affordable stucco or tile.
- Splurge on the Countertop: It takes the most abuse from sun, food, and weather. Invest in a durable, non-porous material.
- Save on the Fridge: A high-end outdoor-rated fridge is great, but a quality, well-insulated cooler built into the counter can serve the same purpose for a fraction of the price.
To create a true chef’s prep zone, install a powerful magnetic knife strip on the backsplash. Choose one made from stainless steel or sealed hardwood to withstand the elements. It keeps your most important tools safely within reach, frees up precious counter space, and prevents sharp blades from dulling in a drawer.
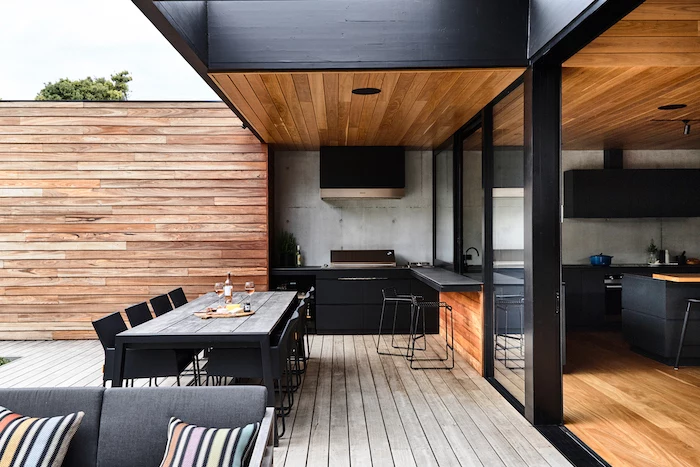
Powder-Coated Steel: Offers a sleek, modern look and comes in many colors. It’s durable but can scratch or chip, which may lead to rust if not touched up.
Ipe Wood: An incredibly dense and beautiful Brazilian hardwood that naturally resists rot and insects. It offers a warm, high-end look but requires regular oiling to maintain its rich brown color; otherwise, it weathers to a silvery gray.
Choose steel for low-maintenance modernism, and Ipe for natural beauty if you’re committed to its upkeep.
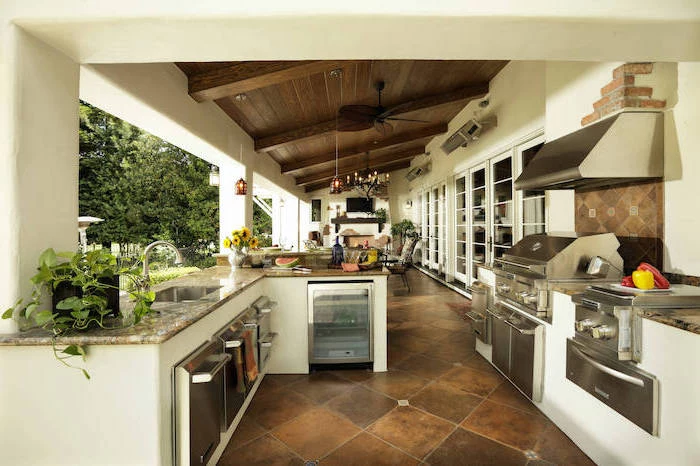
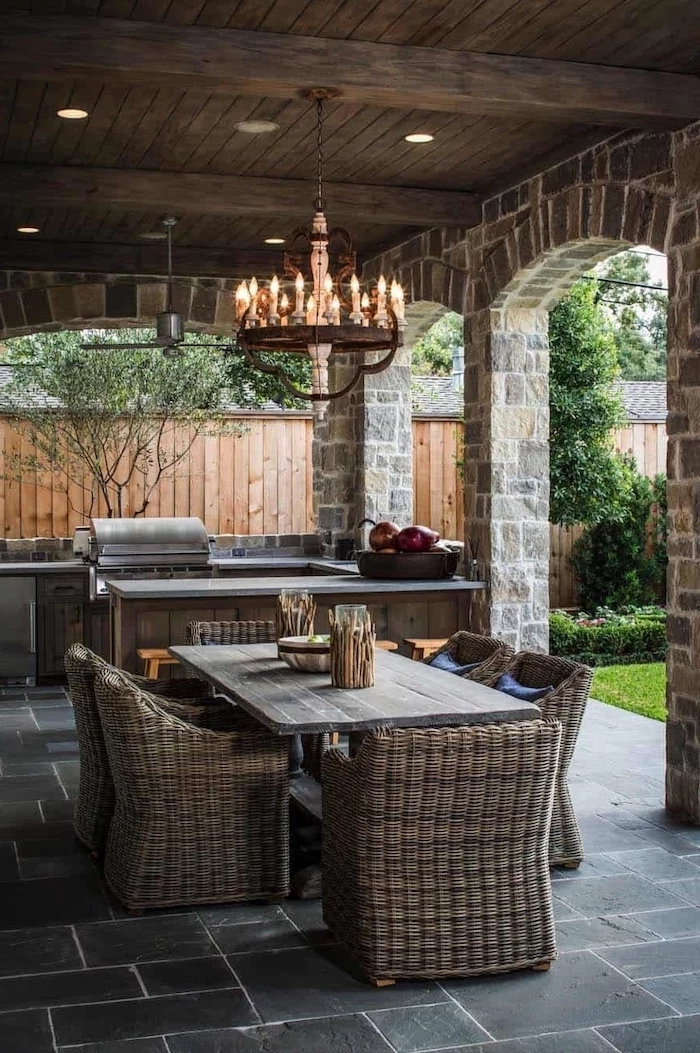
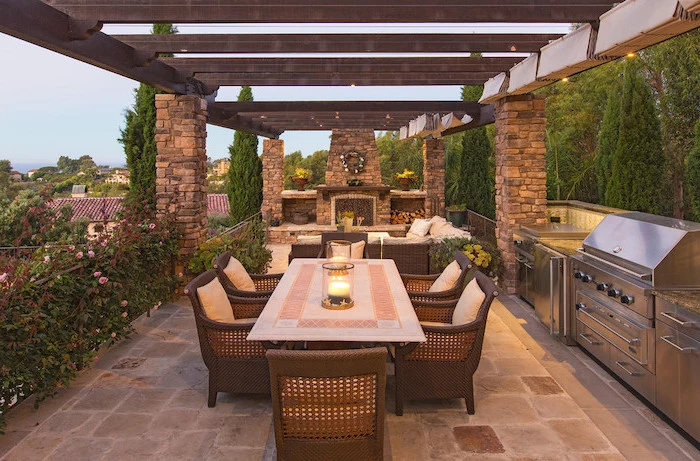
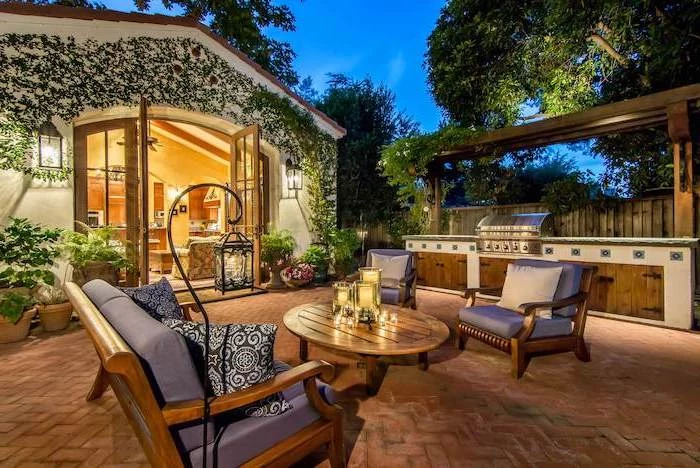
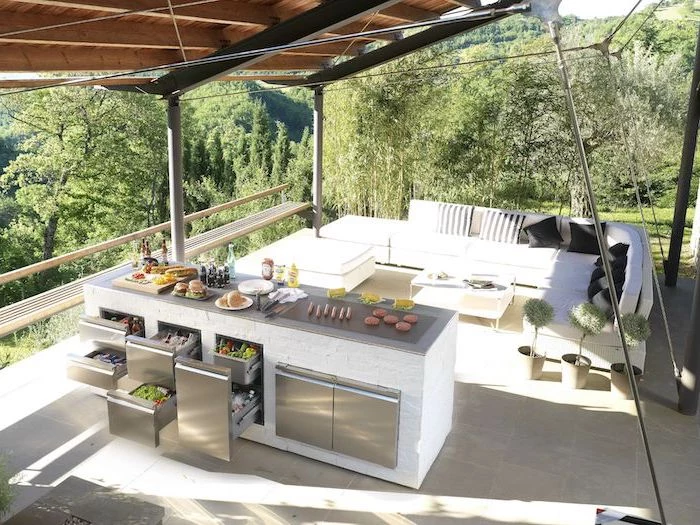
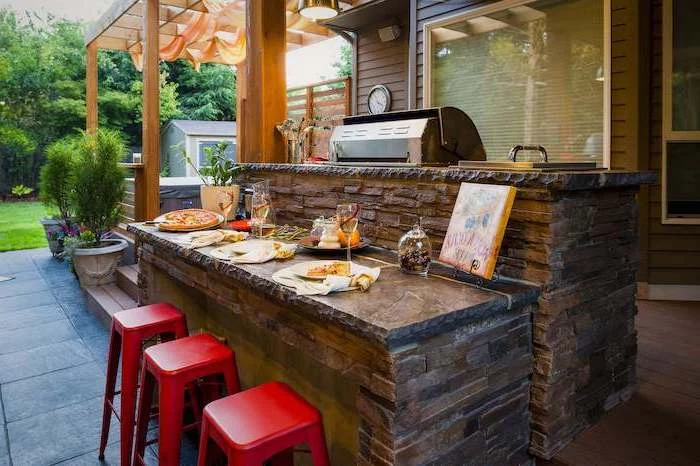
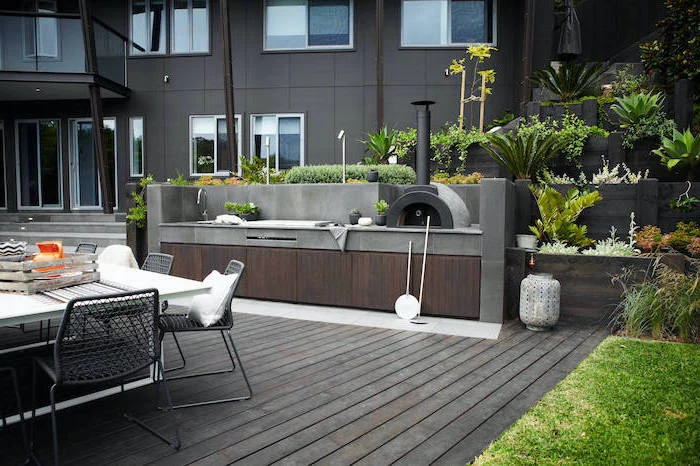
Bring the warmth and rustic charm of a Tuscan villa to your backyard. This style relies on natural, earthy materials. Think travertine pavers for the floor, a stucco or rough-stone finish for the kitchen island, and a terracotta-tiled roof on a cedar pergola overhead. A built-in wood-fired pizza oven is the ultimate centerpiece for this classic, inviting aesthetic.

All outdoor electrical outlets must be Ground Fault Circuit Interrupter (GFCI) protected. This is not a suggestion; it’s a critical safety requirement.
A GFCI outlet monitors electrical flow and will instantly shut off power if it detects an imbalance, preventing a potentially lethal shock. Given the presence of water from sinks, rain, and pool splashes, using anything less is a dangerous gamble. Ensure your electrician installs them in weatherproof boxes with “in-use” covers.
The latest trend? Fully integrated, outdoor-rated beverage centers. These are more than just mini-fridges. Models from brands like U-Line or True Residential can include dual-zone wine storage, a beer tap (kegerator), and chilled drawers for mixers and garnishes. It consolidates all your drink-making needs into one sleek unit, keeping guests out of the main house and the host in the center of the party.

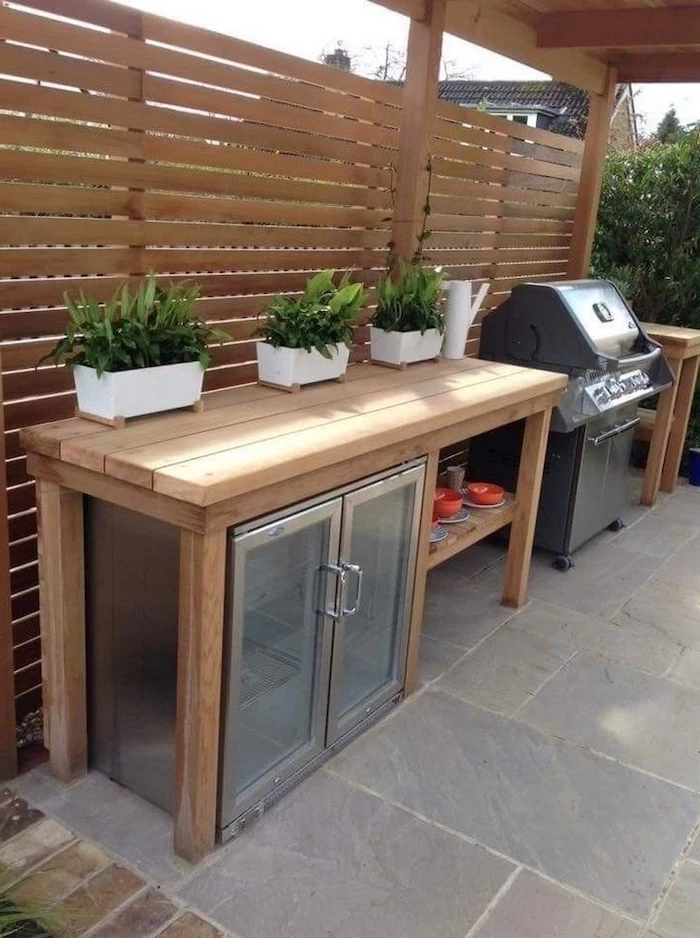
Integrate a small herb garden into your kitchen design. A set of wall-mounted planters or a dedicated planter box built into the end of a countertop ensures fresh rosemary for lamb skewers or mint for mojitos is always just a snip away. It’s a functional, beautiful, and sensory addition that truly connects your cooking to the garden.
- Less running back and forth to the house.
- A dedicated station for washing produce and hands.
- Makes cleanup of greasy tools and plates immediate and easy.
The key is a deep, single-basin, undermount sink. Go for 18-gauge stainless steel. It’s practical, durable, and large enough to handle grill grates and large platters, making your outdoor kitchen infinitely more functional.
To combat the inevitable grease and fingerprints on your stainless steel appliances, keep a simple, pro-approved cleaning kit handy. All you need is a spray bottle with a solution of one part white vinegar to one part water, and a high-quality microfiber cloth. Spray, wipe in the direction of the steel’s grain, and then buff dry with a clean section of the cloth. It cuts through grime without harsh chemicals.
How do I choose a color palette?
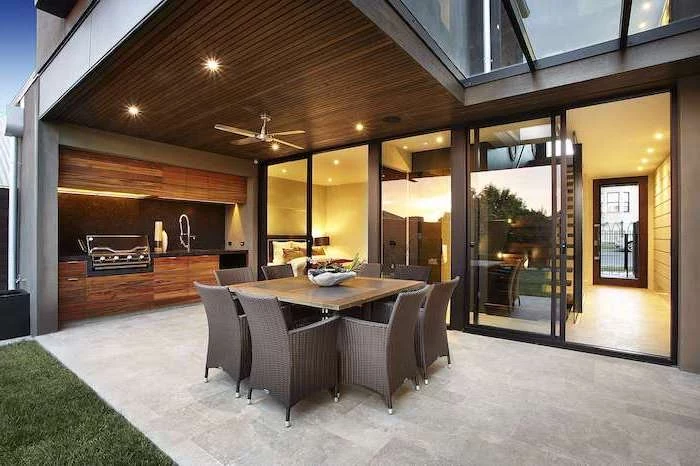
Look at your home’s exterior and the surrounding landscape. For a seamless, high-end look, pull colors from existing elements. If your house has dark trim, consider black powder-coated cabinets or a dark granite countertop. If your patio is surrounded by lush greenery, an earthy green or natural wood tone for the cabinets can create a beautiful, integrated feel. The goal is to make the kitchen look like a natural extension of the house, not an afterthought.
Important point: BTUs (British Thermal Units) are not the sole measure of a grill’s performance. High BTUs can simply mean an inefficient grill that wastes fuel. Look instead for features that indicate quality construction and heat retention, such as heavy-gauge stainless steel, double-walled hoods, and heavy-duty cooking grates. A well-built grill from a reputable brand will cook more evenly and effectively, even with a lower BTU rating.
Forgetting storage is a rookie move. You need dedicated, weatherproof storage for more than you think: grill tools, cleaning supplies, charcoal or propane tanks, serving platters, and even outdoor cushions. Plan for a mix of drawers for small items and larger cabinets for bulky gear. Brands like Danver Stainless Outdoor Kitchens offer extensive modular cabinet systems to create the perfect configuration.
If a custom-built island feels too permanent or pricey, consider a high-quality modular system. Brands like RTA Outdoor Living or Challenger Designs offer pre-configured units or mix-and-match components that you can assemble on-site. This approach provides a durable, professional look for a fraction of the cost and complexity of a fully custom-built project, making a high-end outdoor kitchen more accessible.
Concrete is an incredibly versatile and trendy material for countertops, but it’s not without its quirks. A 10-foot long concrete slab can expand and contract by as much as 1/8th of an inch with temperature swings.
This thermal movement is why experienced installers use reinforcement and control joints, especially in climates with extreme temperature changes. Without proper engineering, a beautiful, solid-looking concrete countertop can be prone to cracking over time. Always ask your contractor about their reinforcement strategy.


