The Real Guide to Laying Reclaimed Stone: Secrets From a Pro
I’ve spent a good chunk of my life with my hands on stone, learning the old ways from guys who could set a perfect curb with just a string line and a feel for the material. They taught me something important: stone has a memory. It tells a story. And when you work with reclaimed setts, you’re not just paving a path; you’re having a conversation with the past. Each stone is unique, worn smooth by countless footsteps and the turning of wheels.
In this article
So, let’s be clear. This isn’t your typical weekend DIY checklist. Laying a proper stone path or patio is a serious undertaking. It takes patience, a strong back, and a genuine respect for the materials. But the payoff? It’s a feeling of permanence that you just can’t get from a molded concrete paver. A well-laid stone feature looks like it has been part of the landscape forever.
This guide is here to walk you through the craft as I learned it, so you can build something that truly lasts.
First Things First: Your Toolkit and Materials
Before we get our hands dirty, let’s talk about what you’ll need. Nothing’s worse than having to stop mid-project for a trip to the hardware store. Here’s a quick rundown:
- Tools of the Trade: A sturdy shovel and wheelbarrow, a builder’s string line with stakes, a tape measure, a long spirit level, a rubber mallet (absolutely NOT a steel hammer), and a pointing trowel.
- The Heavy Machinery (Rental): You’ll definitely want to rent a plate compactor, often called a “wacker plate.” It’ll cost you around $50 to $80 for a day’s rental from places like Home Depot or a local tool hire shop, and it is worth every single penny. If you need to cut stones, you’ll also need an angle grinder with a diamond blade.
- Essential Materials: The stars of the show are your reclaimed setts or natural stone. Then you’ll need crushed aggregate for the sub-base (more on that in a sec), sharp sand and cement for the mortar bed, and your choice of jointing material.
- Safety Gear (Non-Negotiable!): Steel-toed boots, heavy-duty gloves, safety glasses, and a good quality dust mask. I’m talking a proper respirator, especially for cutting.
The Groundwork: It All Starts With a Solid Base
You can’t build a great patio on a terrible foundation. I’ve been called out to fix more sunken, wobbly paths than I can count, and the problem almost always starts with a poorly prepared base. This isn’t just about digging a hole; it’s about engineering a stable platform that can handle weight and water.
Know Your Stone
Different stones have different personalities, and you need to pick the right one for the job.
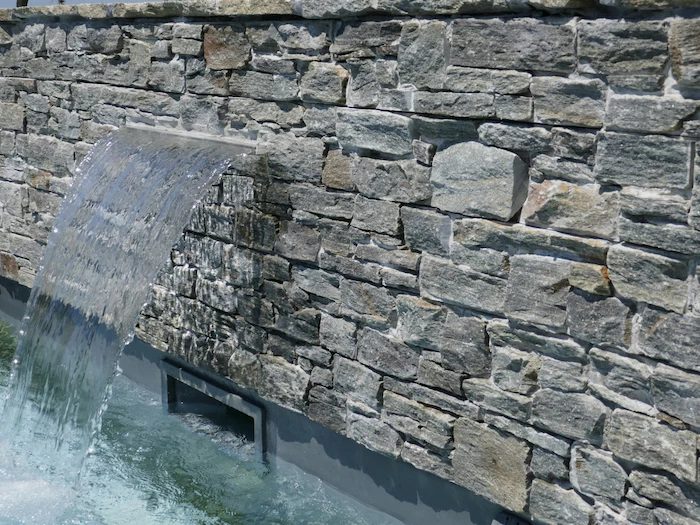
- Granite: This stuff is the heavyweight champion. It’s incredibly dense and hard, and it barely absorbs any water. That makes it a fantastic choice for colder climates where the freeze-thaw cycle can wreck more porous stones. It’s the gold standard for driveways and any high-traffic area.
- Sandstone: Formed from compressed sand, its quality can vary a lot. Some types are nearly as tough as granite, while others are softer and more porous. Its naturally layered look is beautiful and often provides great grip, but a very porous sandstone in a freezing, wet climate can start to flake and degrade over time.
- Limestone: Generally softer than granite, limestone often has a gorgeous, soft patina from years of use. It’s a wonderful choice for garden paths and patios in milder climates but isn’t the best for driveways where road salts and chemicals can damage it.
The Secret to a Bulletproof Foundation
Your foundation, or sub-base, does two critical things: it spreads the load (so stones don’t sink) and it helps with drainage. The magic ingredient is crushed aggregate. In some places, it’s called “MOT Type 1,” while in the US, you might hear it called “crusher run” or “dense grade aggregate.” It’s a specific mix of crushed stone, from about 40mm chunks all the way down to dust. When you pack it down, those different sizes lock together to form a solid, interlocking layer.
Quick tip for ordering: How much do you need? It’s simple math. Multiply the Length (m) x Width (m) x Depth of your base (m). This gives you the volume in cubic meters. For example, a 3m x 4m patio with a 0.1m (100mm) base needs 1.2 cubic meters of aggregate. Good to know: 1 cubic meter of this stuff weighs about 1.5 to 2 tons, so plan your delivery accordingly!
And a heads-up on a very common oversight: excavation creates a huge pile of dirt. For a small path, you might be able to spread it around your garden beds. For a bigger patio, you’ll have a literal ton of soil to get rid of. Plan on hiring a small skip or checking with your local waste center about soil disposal. It’s an unexpected cost and hassle if you don’t plan for it.
Laying Stone Like a Pro: The Step-by-Step Method
This is where patience becomes your most valuable tool. Rushing these steps will come back to haunt you. This is the process I use for every job, big or small.
Step 1: The Dig Out (Excavation)
First, mark out your area with string lines and stakes. Once you’re happy with the shape, it’s time to dig. Honestly, this is the hardest physical part of the job.
- For a simple footpath: Dig down about 150mm (6 inches). This gives you room for a 100mm sub-base, a 30mm bed, and the stone itself.
- For a driveway that takes cars: You need to go much deeper. I recommend a minimum of 250-300mm (10-12 inches) to allow for a much thicker, stronger sub-base.
For a beginner, expect the digging to take a good 2-3 hours of solid work per square meter by hand. And before you even think about putting a shovel in the ground, call your local utility locating service. It’s usually a free service, and hitting a buried electrical or gas line is a mistake you only make once.
You also need to plan for a slight slope, or ‘fall’, to make sure rainwater runs off and away from any buildings. A standard fall is about 1 in 60, which means the surface drops 1cm for every 60cm of width. Set this up now with your string lines and a level.
Step 2: Building the Sub-Base
Once you’ve dug out the area, it’s time for the aggregate. Don’t just dump it all in at once. You build a professional base in layers, or ‘lifts’. For a 100mm base, I’d lay and compact two separate 50mm layers.
After spreading a layer, you have to compact it with that wacker plate you rented. Compacting by hand with a tamper is a waste of time and won’t get the job done. The machine’s vibration locks the stone particles together. You’ll know a layer is fully compacted when the machine starts to bounce and chatter on the surface instead of thudding into it. Make three or four passes over the whole area for each layer.
Step 3: The Laying Course (The Bed)
This is the layer your stones will actually sit in. For reclaimed setts, I almost always recommend a mortar bed. It gives you the strength and adjustability you need for irregular stones. You’re looking for a semi-dry mix of 4 parts sharp sand to 1 part cement. The easiest way to get the ratio right is the bucket method: four buckets of sand for every one bucket of cement. Mix it until it’s just damp enough to clump in your hand when you squeeze it, but not so wet that water drips out.
Step 4: Setting the Stones
Now for the fun part. Start working from a fixed edge, like the wall of your house. Scoop a mound of your mortar mix onto the sub-base, place a stone on top, and tap it down firmly with your rubber mallet until it’s level with your guide string. Check it with your spirit level both ways.
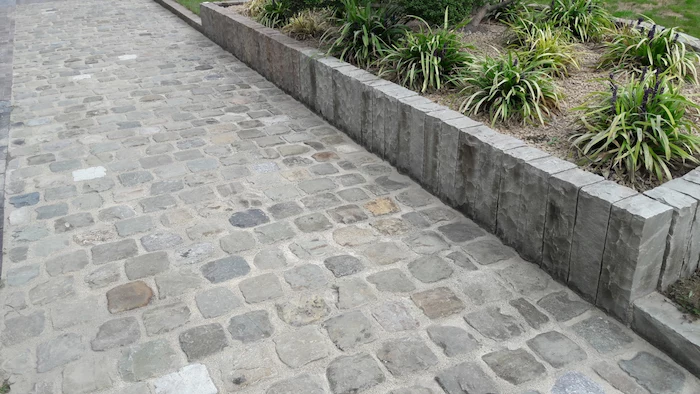
Reclaimed setts are all different thicknesses. This is where the skill comes in. You’ll be constantly adding or scraping away a little mortar under each stone to get the tops perfectly level. It’s a slow, methodical process. Leave a consistent gap of about 10-15mm between stones for the joints. My advice? Work on one square meter at a time, get it perfect, and then move on.
Step 5: Filling the Joints
After all the stones are laid, let the mortar bed cure for at least a full day. Then, it’s time to fill the joints, which locks everything together. You’ve got a few good options:
- Traditional Mortar Pointing: This involves mixing a wetter mortar (3:1 sand to cement) and carefully pushing it into the joints with a trowel. It’s incredibly strong and looks fantastic, but it’s slow work, and you have to be meticulous about not staining the stone faces. This is a high-skill option.
- Brush-In Resin Compound: This is a very popular modern choice, and for good reason. It’s a type of sand-like material that you simply sweep into the joints, and then a chemical reaction (sometimes activated with water) makes it set rock-hard. It’s fast, looks great, and is excellent at preventing weeds. It can be a bit pricey—a tub covering about 5-7 sq. meters might run you $80-$120—but it often saves a ton of labor.
- Loose Sand: This is the easiest and cheapest method, but it’s really only for paths that were bedded on sand, not mortar. You just brush kiln-dried sand into the joints. The downside is that you’ll have to top it up regularly as rain and wind wash it away.
For the durability and character of reclaimed setts, a strong mortar joint or a quality resin compound is the way to go.
Finding Good Stone and When to Call for Help
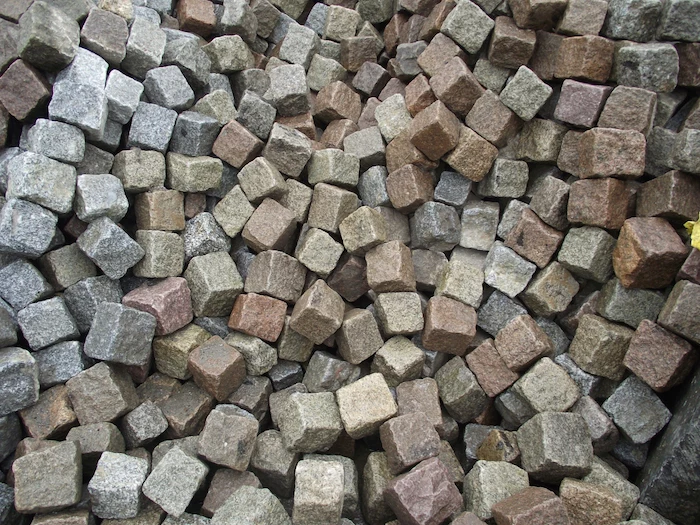
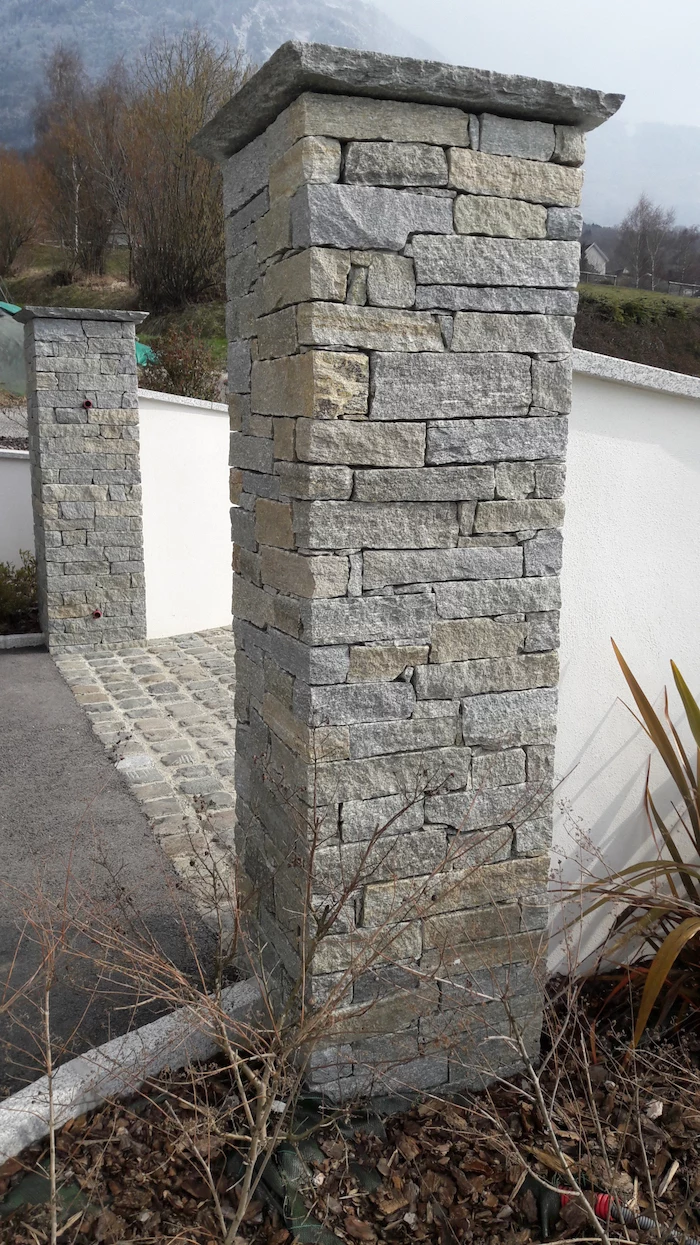
When you buy reclaimed setts, you’re buying character. But you need to be a smart shopper. Find a reputable architectural salvage yard and ask a few questions. Where did the stone come from? Is it all the same type? How clean is it? It’s often worth paying a bit more for stone that doesn’t have a thick layer of old tar on it—cleaning that off is a miserable job. Expect to pay anywhere from $250 to over $500 per ton for good, cleaned reclaimed setts, which typically covers about 4-5 square meters.
And remember to embrace the stone’s irregularity. Don’t try to force perfect, ruler-straight lines. A slightly wavy, organic bond often looks much more authentic and beautiful.
Knowing Your Limits
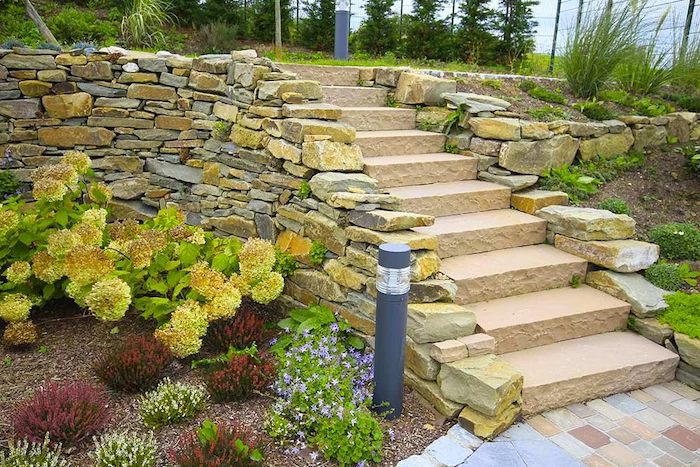
A small, level garden path is a fantastic and rewarding project. However, to be frank, there are times you should call a professional. I’d strongly recommend hiring a pro for driveways, large patios (over 20 sq. meters), projects on a steep slope, or any kind of retaining wall. The consequences of failure in those situations are just too big and expensive to risk.
A good pro has the experience to see problems you can’t—how water will pool after a heavy rain or how to handle tricky soil conditions. Sometimes, that experience is the most valuable material of all.
Inspirational Gallery
A common rookie mistake: an overly wet mortar mix. It seems easier to work with, but it leads to shrinkage, cracks, and weak spots. Your mix should be ‘stiff’ but workable, like damp brown sugar. Press a handful, and it should hold its shape without dripping water. That’s the consistency the old-timers swear by.
Where to find the real deal? Your quest for authentic reclaimed stone goes beyond the big-box store.
- Architectural Salvage Yards: Directories like Salvo are treasure troves for materials from demolished buildings and old estates.
- Demolition Companies: Contact local firms directly. They often salvage granite setts or Yorkstone flags from old city projects.
- Specialist Stone Suppliers: Companies like Marshalls or London Stone now offer ‘reclaimed-style’ new stone, which can be a good alternative if true reclaimed is out of budget.
The Appian Way, one of the earliest Roman roads, was so masterfully constructed with tight-fitting polygonal stones that some sections are still in use over 2,300 years later.
How do you get that aged, mossy look between the stones?
Patience is key, but you can give nature a hand. Forget harsh chemical weedkillers. Instead, encourage moss by brushing a mix of natural yogurt or buttermilk and water into the joints. The acidic, sugary environment is a perfect starter home for moss spores, giving your path that timeless, ‘been here forever’ feel in a season or two.
Stretcher Bond: The simplest pattern, with stones laid in straight, parallel rows. It creates a clean, linear look, ideal for long, straight paths.
Herringbone (45° or 90°): A more complex, interlocking pattern. It’s incredibly strong and stable, historically used for high-traffic courtyards and driveways as it distributes weight exceptionally well.
The choice depends on your space: stretcher for simplicity, herringbone for visual drama and strength.
There’s a sound you can’t replicate with concrete pavers. It’s the solid, satisfying ‘clink’ of a shoe on dense, ancient granite, a sound that echoes with history. It’s the subtle crunch of grit in the joints underfoot. This isn’t just a surface to walk on; it’s a sensory part of the garden that connects you to the ground in a way modern materials rarely do.
- It reduces the overall cost significantly.
- It creates a unique, textured look that blends old and new.
- It makes sourcing a full patio’s worth of matching reclaimed stone much easier.
The secret? Use prized reclaimed setts for the border or as a central feature, and fill the main area with more affordable, new natural stone flags that complement the colour and texture.
A permeable pavement can allow up to 80% of rainwater to filter through to the ground below, drastically reducing runoff.
When you lay reclaimed stone on a sand bed with grit-filled joints (instead of a solid mortar base), you’re not just creating a historic look; you’re building a modern, sustainable drainage system. This helps replenish groundwater, reduces the load on storm drains, and prevents puddles on your patio.
The jointing material is more than just filler; it’s a crucial part of the aesthetic and structural integrity. Your choice will dramatically change the final look.
- Traditional Sand/Cement Mortar: Provides a classic, rigid joint. It’s strong but can be prone to cracking over time if the sub-base isn’t perfect.
- Modern Resin Compounds: Brands like Sika FastFix or EasyJoint offer a permeable, durable, and weed-resistant finish. It’s applied with water and swept into the joints, making it a faster method for a clean result.


