Don’t Kill Your Plants on Vacation: A Real-World Guide to Keeping Them Alive
I’ve been working with plants my whole life, from big commercial operations to the kinds of prized plant collections people treat like family. And honestly, one of the biggest sources of anxiety I see is vacation. It makes sense, right? You spend all this time nurturing a beautiful fiddle-leaf fig or a fussy orchid, and the thought of coming home to a crispy, brown graveyard is just… devastating.
In this article
The good news? It’s almost always preventable. The secret isn’t some magic trick; it’s about prepping your plants properly and then picking a watering method that actually works for your trip length and your budget. It takes a little planning, but it’s so worth the peace of mind. So, let’s walk through the exact process I use to make sure plants are happy and healthy while their owners are off sipping margaritas.
The Game Plan: Pre-Vacation Prep is Everything
Seriously, what you do in the week before you leave is more important than any gadget you can buy. A healthy, hydrated plant can handle a little stress. A struggling plant can’t. So, let’s get them in fighting shape.
Heads up on timing: If you have around 10-15 plants, set aside a solid hour or two for this whole prep process. Don’t rush it!
Step 1: The Pest Check
Before you do anything else, you have to play detective. A tiny pest problem can explode into a full-blown infestation in two weeks of unchecked peace and quiet. I mean it—get in there and look closely. Check under leaves for the super-fine webs of spider mites and in the little crevices of new growth for those annoying cottony bits that signal mealybugs. If you see anything suspicious, you need to treat it now.
Quick Fix: Don’t have any commercial spray? You can make your own. For a simple and effective neem oil spray, just mix about 1 teaspoon of pure, cold-pressed neem oil and a half-teaspoon of mild liquid dish soap into a quart of warm water. Shake it up really well and spray all surfaces of the plant. Problem solved.
Step 2: A Little Tough Love (Pruning)
Next up, it’s time for a haircut. Snip off any yellowing or dead leaves. They aren’t doing the plant any favors and can even attract mold in a still, humid room. Now for the hard part: snip off any flowers or big flower buds. I know, it hurts! But flowering uses a ton of water and energy. Removing them tells the plant to chill out and conserve resources. It’s a small sacrifice for its long-term survival.
Step 3: Move ‘Em Out!
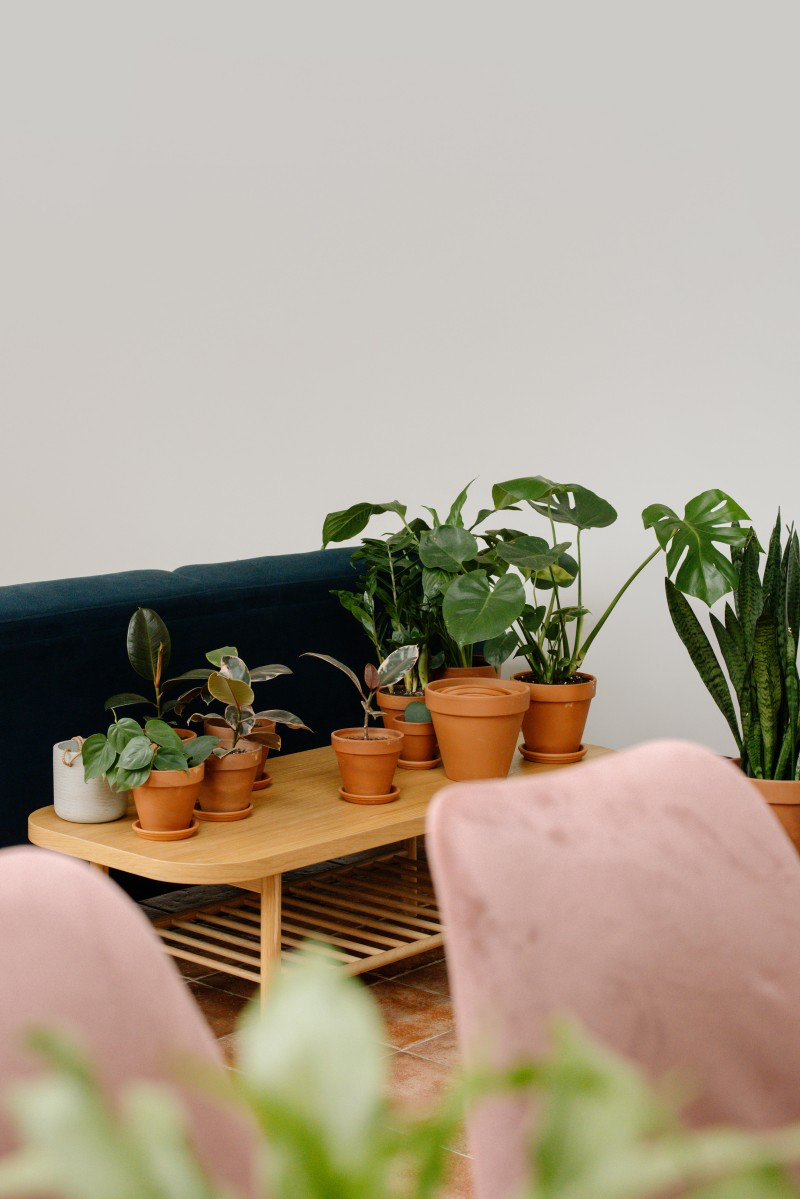
This is probably the single most effective thing you can do. A plant basking in a sunny south-facing window is going to guzzle water. The heat and light crank up transpiration (that’s just plants sweating, basically). So, move all your plants away from direct sun. A spot five or ten feet from a window is great. An unused guest room or bathroom with a small, north-facing window is even better.
By the way, grouping them together on the floor helps a ton. As they release moisture, they create a little humid microclimate for each other, which slows down water loss for the whole group. It’s a win-win.
Not leaving town? Try this relocation trick on your fussiest, most dramatic plant for a week. Group it with some friends in a lower-light spot and see how it responds. You might be surprised!
Step 4: The Final Soaking (and NO Fertilizer!)
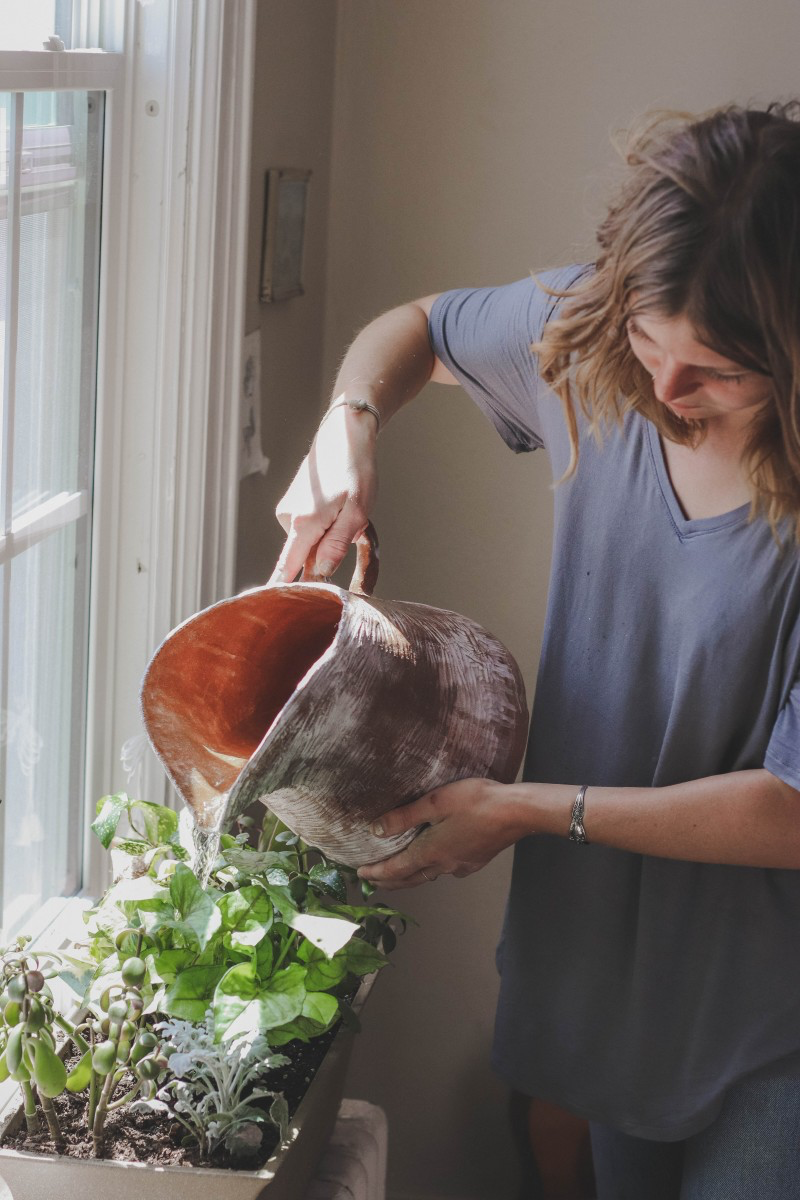
A day or two before you leave, give every single plant a really deep drink. Take them to the sink or tub and water them until it’s pouring out of the drainage holes. Let them sit for a half-hour to soak it all up, then let them drain completely. It is SO important that no pot is left sitting in a puddle of water. That’s the fastest way to get root rot, which will kill a plant way faster than a little dryness.

And on that note, absolutely do not fertilize your plants for at least two weeks before you go. Fertilizer encourages new, thirsty growth, which is the exact opposite of what you want. The goal is hibernation mode, not a growth spurt.
Choosing Your Watering System: What Actually Works?
Okay, so your plants are prepped. Now, how do we keep them watered? Most of the best low-tech methods work using a simple science principle called capillary action. Think of a paper towel sucking up a spill—the water climbs into the tiny gaps in the fibers all on its own. We can use that to our advantage.
Here’s a breakdown of the most common methods, who they’re for, and what they’ll cost you.
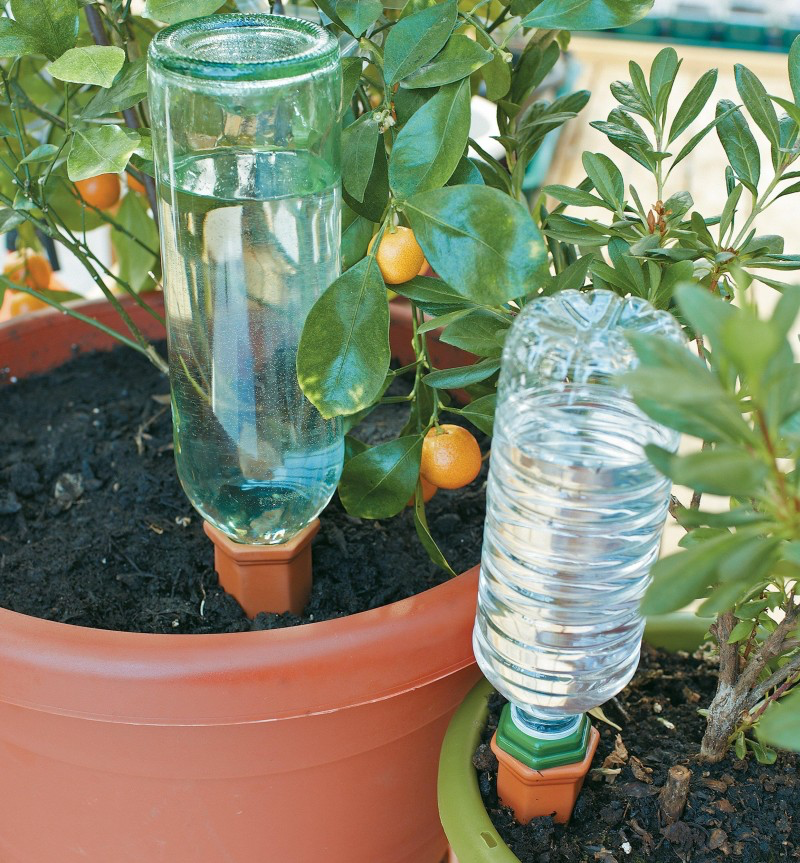
The Classic Wick System (Good for 1-2 week trips)
This is my go-to for most standard houseplants. It’s cheap, reliable, and you can customize it for different plants.
- How it works: You run a piece of wicking material from a water jug into your plant’s soil. The plant draws water through the wick as it needs it. Simple!
- Cost: Nearly free if you have jugs and synthetic fabric scraps. A roll of proper nylon wicking cord is maybe $8 online and will last you forever.
- Reliability: Very high, IF you use the right materials. I learned this the hard way once when I used a cotton string for a client’s prized fern. It rotted through in five days. I came back to a crispy tragedy. Never again! Always use synthetic materials like nylon rope, acrylic yarn, or even strips from a microfiber cloth. They won’t rot.
- Pro Tip: Place your water reservoir slightly higher than the plant pot—on a book or a small stool. This helps the wick work with gravity, not against it. As a rough guide, a typical 6-inch houseplant in low light will use about 1-2 cups of water over a week. A one-gallon jug of water can easily support 6-8 small plants for a week-long trip.
The DIY Bottle Dripper (Good for 3-5 day trips)
This turns a plastic or glass bottle into a slow-release waterer. It’s less precise but can work in a pinch for short trips.
- How it works: You poke a few tiny holes in a bottle cap, fill it with water, and stick it upside down in the soil.
- Cost: Free! Just recycle a soda or wine bottle.
- Reliability: Medium to low. You absolutely have to test this first. The drip rate can be super unpredictable. Sometimes it all drains in a day; other times the holes get clogged with dirt.
- How to Test: Set it up a couple of days before you leave. What to aim for? After 24 hours, the bottle should be about 1/4 empty. If it’s half empty, your holes are too big. If the water level hasn’t moved, the holes are clogged or too small.
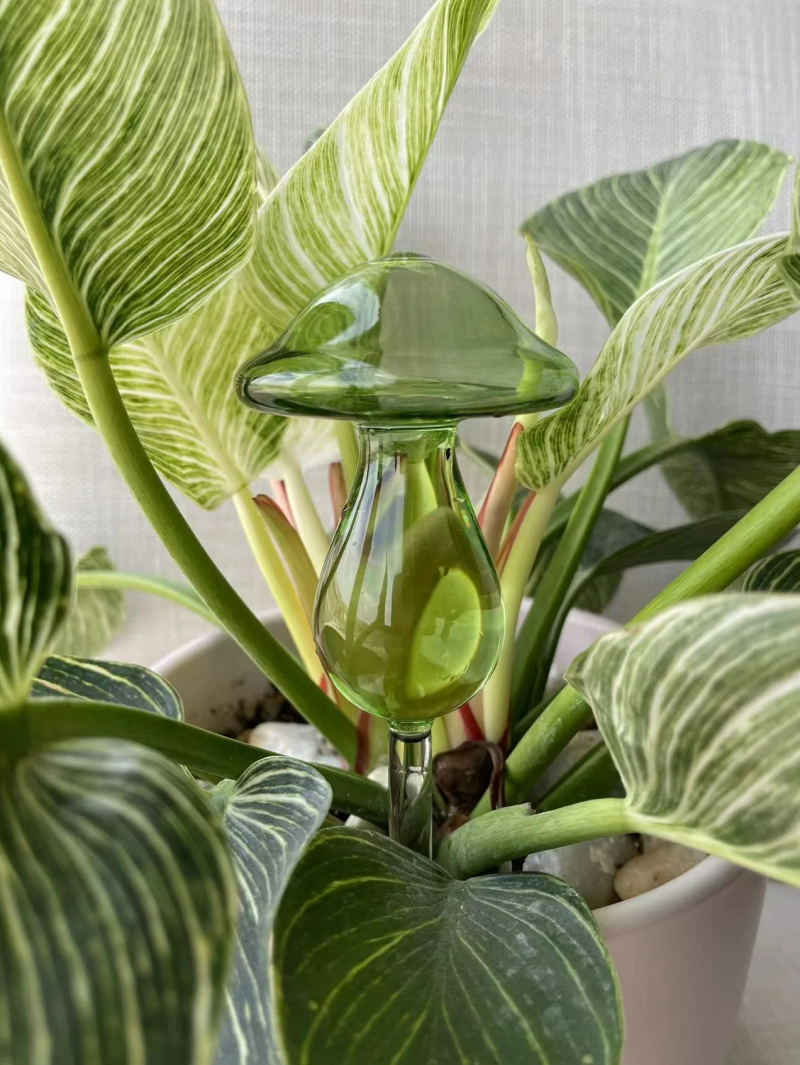
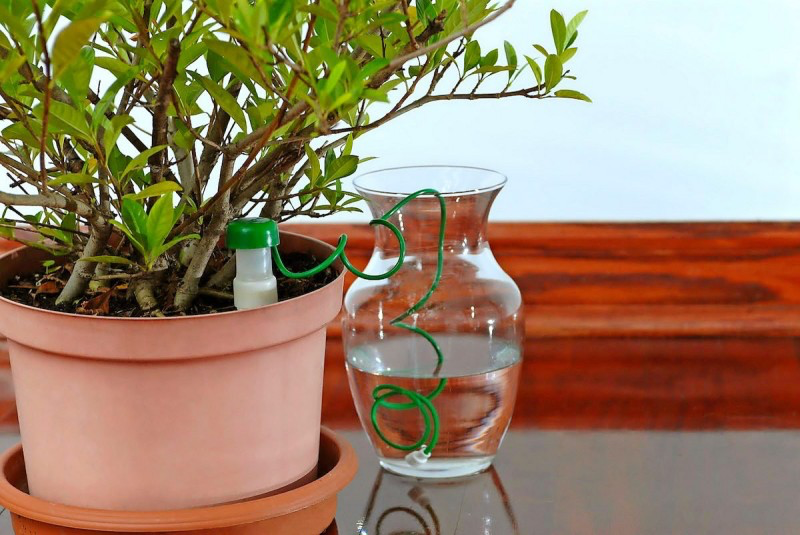
Ceramic Self-Watering Spikes (Good for 1-3 week trips)
These are a huge step up and what I trust for more sensitive or valuable plants. Think of them as a smart, low-tech alternative to those decorative glass globes (which, frankly, don’t work very well).
- How it works: It’s a porous ceramic cone that you stick in the soil, with a tube that runs to a water reservoir. When the soil dries, it pulls water through the cone. When the soil is wet, it stops. It’s a brilliant system that waters on demand.
- Cost: You’re looking at an investment here. Expect to pay around $15-$25 for a pack of 4 quality spikes (you’ll see them sold as Blumat-style systems) at garden centers or online.
- Reliability: Excellent, once you set them up correctly. You have to soak the ceramic cones for a few hours before using them to get the vacuum-sealed system working. But once you do, they are incredibly dependable.
Automatic Drip Irrigation Kit (The Gold Standard for 2+ weeks or lots of plants)
If you have a large collection or are leaving for a long time, this is the most reliable system, period.
- How it works: A timer connects to a water source and sends water through a network of tubes with little emitters that you place in each pot. You set it to run for, say, 5 minutes every 3 days.
- Cost: A beginner drip irrigation kit for a patio or a bunch of houseplants usually runs about $30-$50 at a hardware store like Home Depot or Lowe’s.
- Reliability: Professional-grade. But with great power comes great responsibility. You MUST assemble it and run it a few times to check for leaks before you leave. A popped hose can cause serious water damage. I always recommend using a high-quality battery-operated timer, not one that relies on your Wi-Fi.
What About That Bathtub Trick? Please, Don’t.
You’ve probably heard the advice to just put all your plants in the bathtub with an inch of water. I’m only bringing this up to tell you it’s a terrible idea. It’s a one-way ticket to root rot. Plants that hate wet feet will be waterlogged, and the stagnant, dark environment is a breeding ground for fungus and pests.
A much, much better option: Lay an old towel in the bottom of the tub. Get it fully damp, then wring it out so it’s not dripping at all. Place your pots directly on top of the damp towel. This creates a fantastic, humid microclimate around the plants without waterlogging the roots. It’s a far safer last-resort option.
The Best System of All: The Well-Informed Plant Sitter
Of course, the most reliable method is a trustworthy person. But just asking your neighbor to “water the plants” can be a death sentence. People tend to kill plants with kindness (aka, overwatering).
So, make it foolproof. Group plants with similar needs together and label them with numbered stakes. Then, leave a super-simple cheat sheet. Not “Water the fern when it looks thirsty,” but “#1 – Fern: If the top inch of soil feels dry, give it this 1 cup of water.” Show them what
Inspiration:
The global market for self-watering planters is projected to grow by over 7% annually, reflecting a major shift towards automated plant care.
This trend isn’t just about convenience; it’s about precision. For longer trips (2+ weeks), investing in a proven system can be a game-changer. Brands like Lechuza offer stylish planters with sub-irrigation reservoirs that mimic natural water uptake, preventing both drought and root rot. They’re a splurge, but for a prized Monstera Albo or a mature Fiddle Leaf Fig, the peace of mind is often worth the investment, ensuring you return to a plant that’s not just surviving, but thriving.


