Stop Being Scared of Repotting: The Real-World Guide to a Healthier Plant
Let’s be honest, repotting can feel like performing major surgery on a beloved family member. I get it. For years, I’ve seen that look of fear in the eyes of new plant owners. They know their plant is struggling, they know it needs a bigger home, but they’re terrified of making one wrong move and ending it all. But I want you to start seeing it differently. Repotting isn’t a high-stakes operation; it’s more like a spa day and a health checkup for your plant, setting it up for a future of happy, vigorous growth.
In this article
Most guides just give you the basic steps. They aren’t wrong, but they miss the soul of the process—learning to read your plant, understand its roots, and make smart choices. This is our goal today. We’re going beyond just plopping a plant into a new pot. We’re going to learn how to diagnose its problems and give it exactly what it needs to thrive.
First things first: Does Your Plant Actually Need Repotting?
Before you make a mess, let’s make sure this is even necessary. Over-repotting can be just as bad as waiting too long. Your plant is probably dropping some serious hints if it’s ready for a change.
Signs it’s time to repot:
- Visible Roots: This is the most obvious clue. You see roots creeping out of the drainage holes or circling on the surface of the soil.
- Stunted Growth: It’s the middle of the growing season (spring/summer), but your plant hasn’t put out a new leaf in ages.
- Water Rushes Through: When you water, it seems to run straight out the bottom in seconds. This means there’s more root than soil, and the plant isn’t getting a good drink.
- The Plant is Top-Heavy: It tips over easily because the root ball isn’t substantial enough to anchor it anymore.
- It’s Just Been Too Long: As a general rule, most fast-growing houseplants need a refresh every 12 to 18 months to get new, nutrient-rich soil.
Oh, and just as important is knowing when to leave it alone. Heads up! Avoid repotting if your plant is: actively flowering or budding (it’s putting all its energy into that), deeply dormant in the dead of winter, or already stressed out from a recent pest attack. Let it recover first.
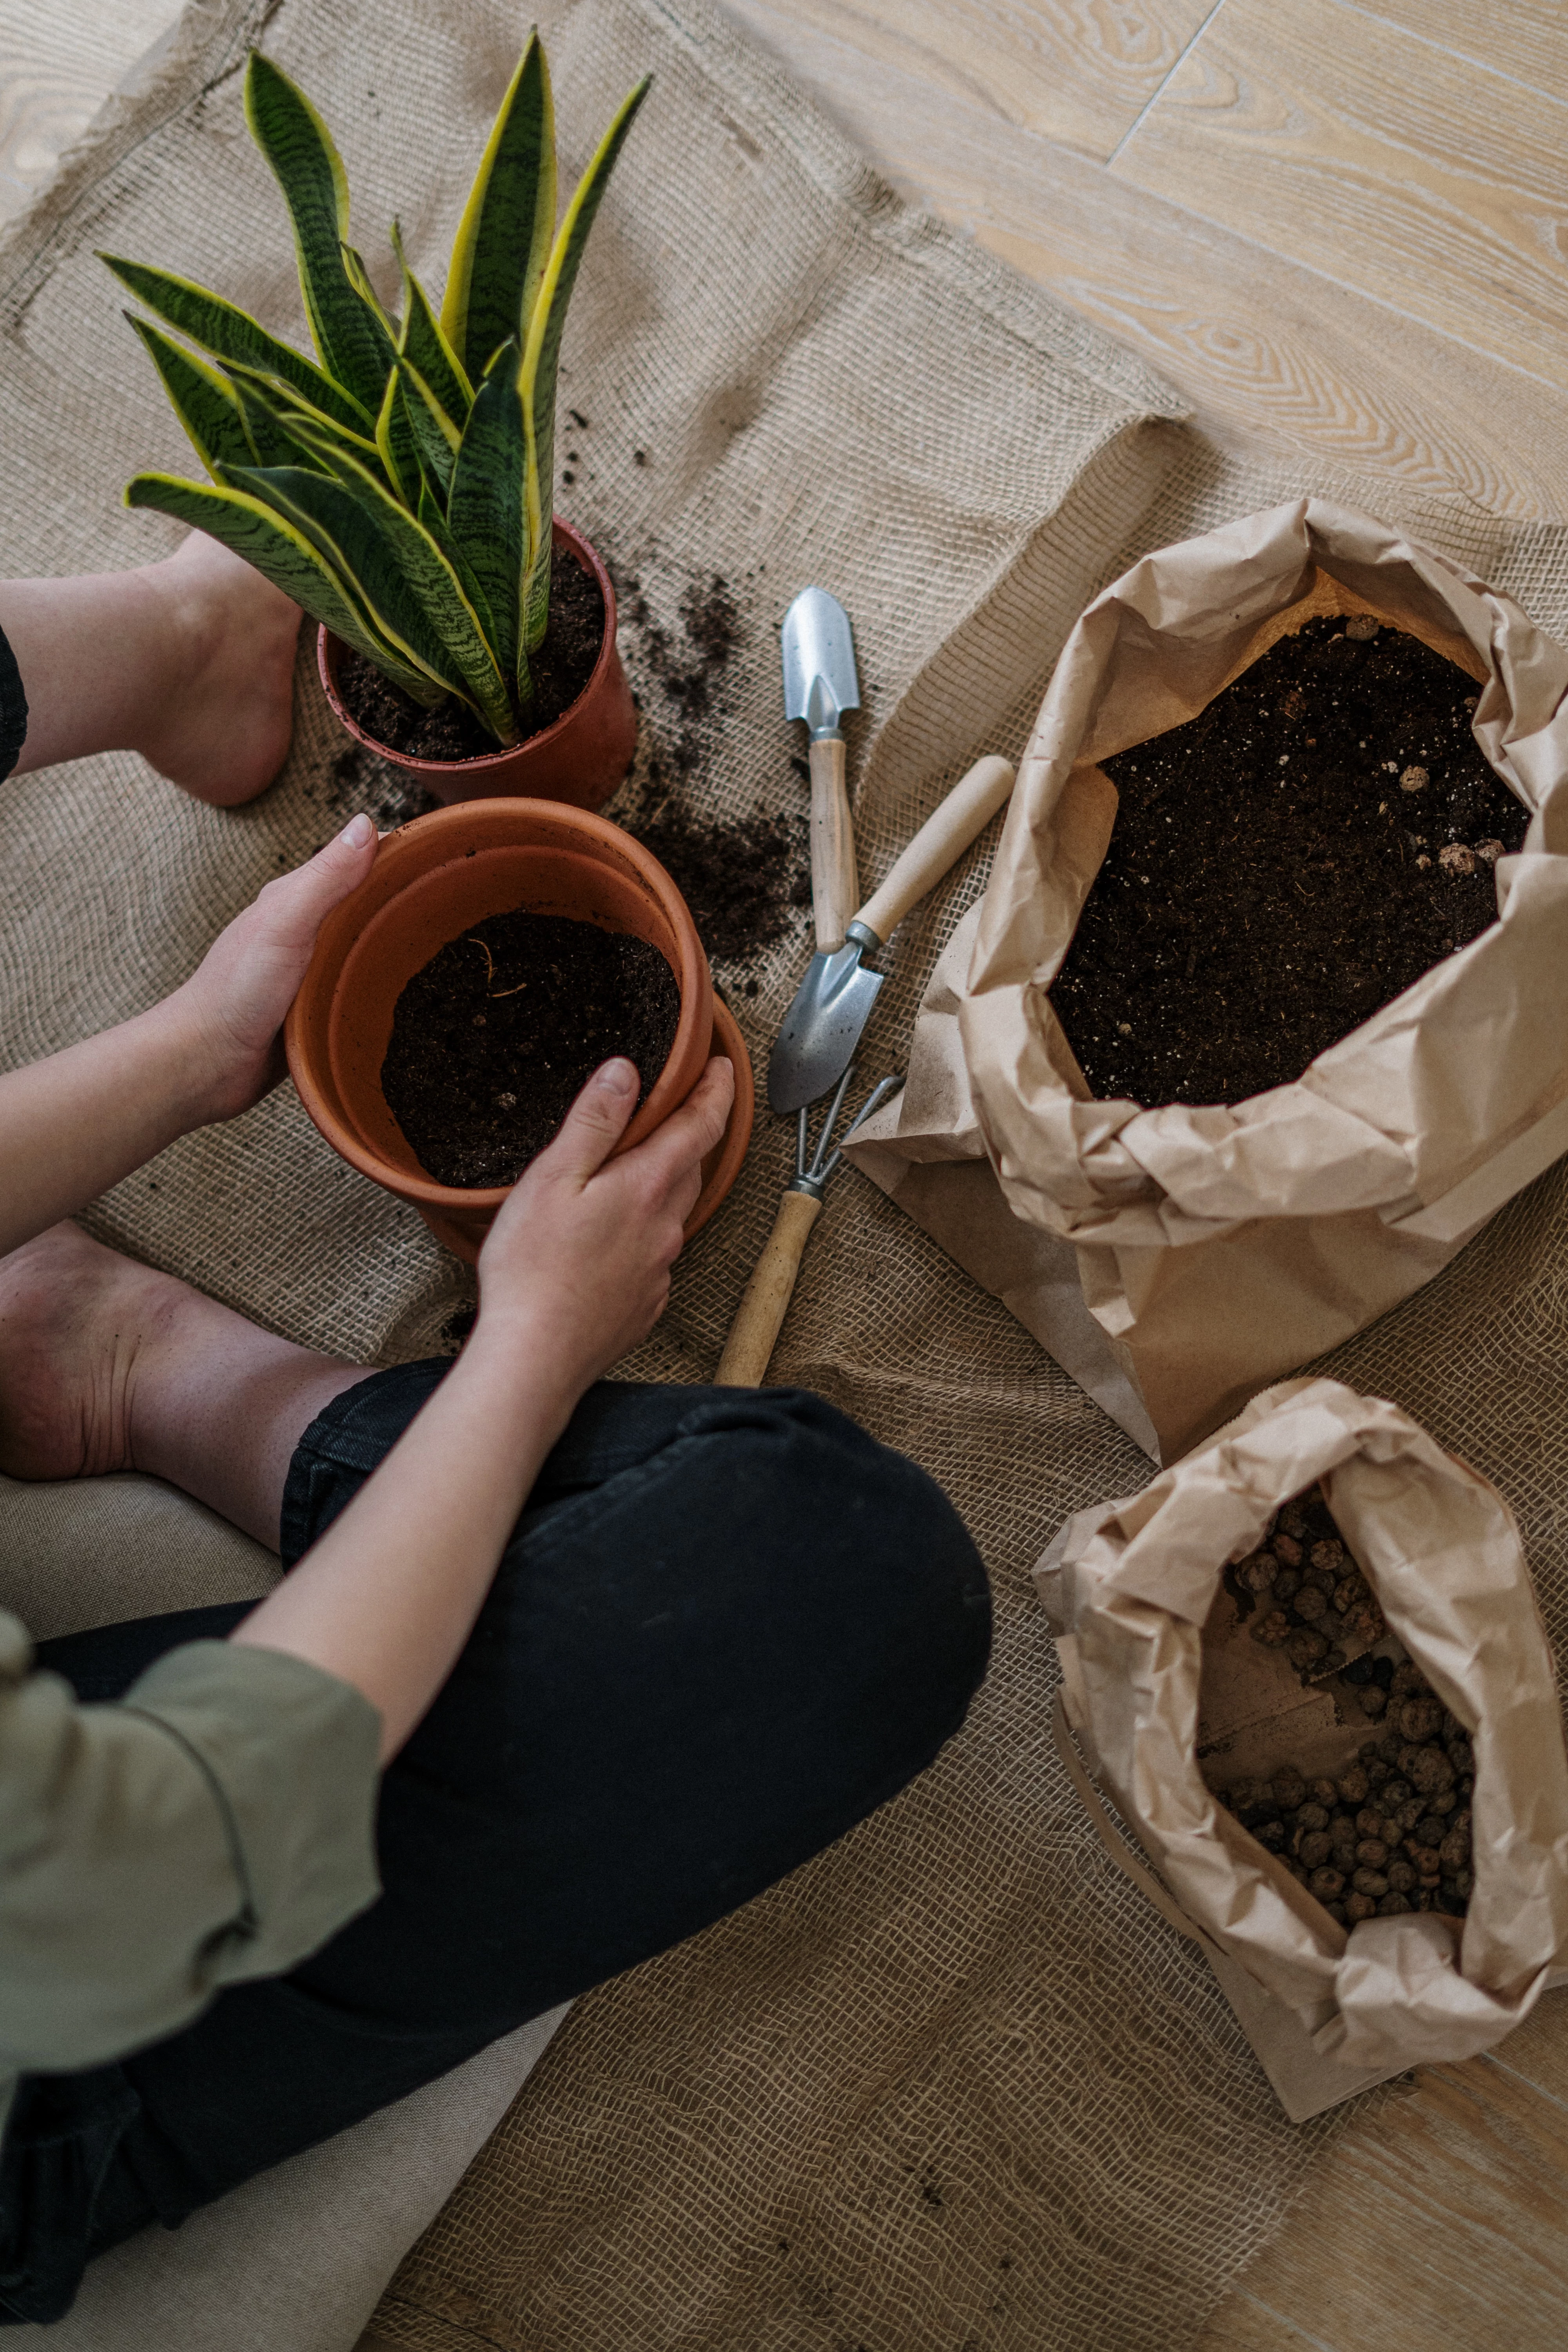
Your Repotting Shopping List & Toolkit
Nothing creates stress like running around looking for a tool with dirt-covered hands. Before you even touch the plant, get everything laid out. I usually put down a cheap tarp or some old newspaper to make cleanup a breeze. Plan on this taking about 30 minutes for a standard 6-inch plant, maybe an hour or more for a giant floor plant.
Here’s your beginner’s shopping list:
- The New Pot: More on this in a second!
- Quality Potting Mix: Steer clear of the cheapest stuff. Expect to pay between $10 and $20 for a good bag that isn’t just dense peat moss. Look for brands that mention coco coir or have a lighter, chunkier feel.
- Aeration Amendments: A small bag of perlite or pumice is a game-changer and will last you for ages. It usually costs around $8-$12 and you can find it at any local nursery or big-box garden center.
- Tools: You’ll want clean, sharp pruners or old scissors, and a butter knife or a hori-hori (a Japanese gardening knife that’s amazing).
- Safety Gear: A pair of gloves and some isopropyl alcohol for sterilizing your tools. Don’t skip the sterilization—it’s how you prevent spreading diseases between plants.

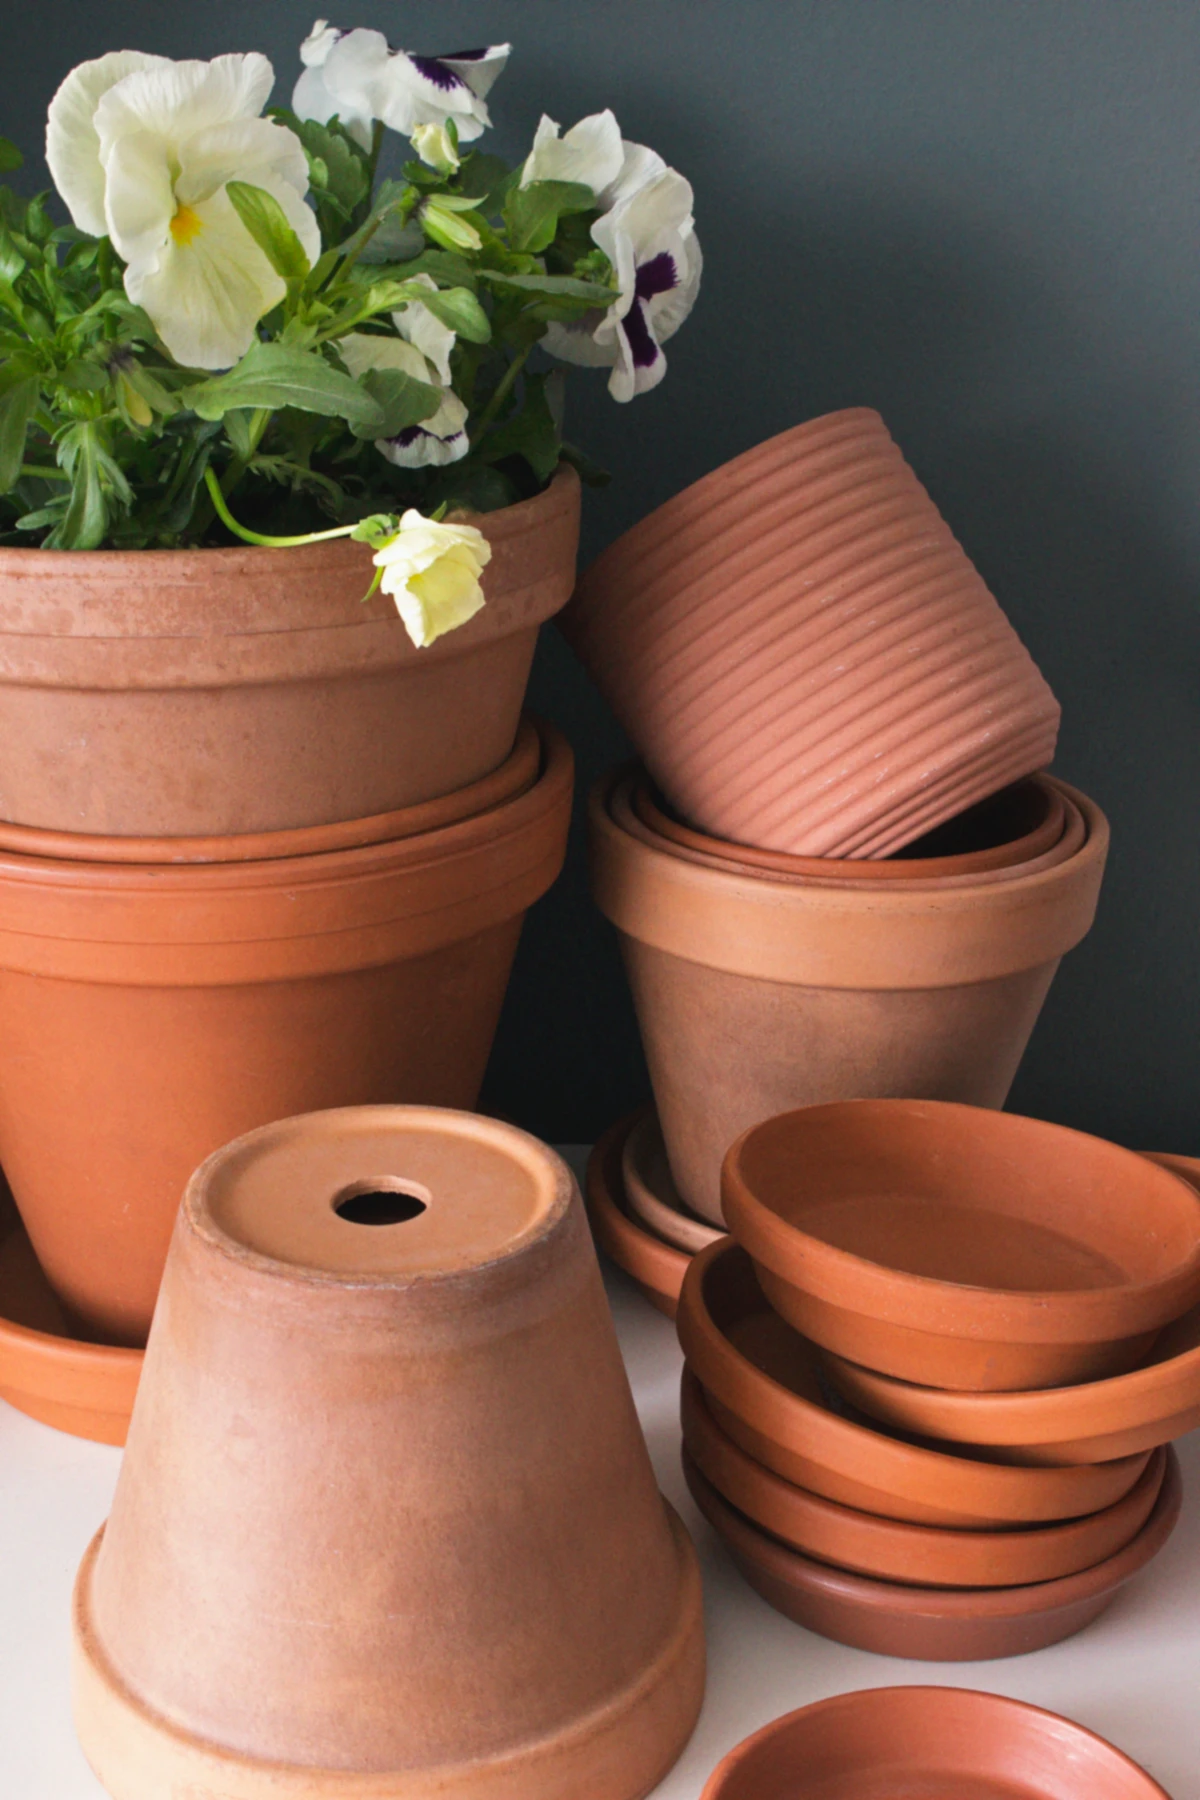
Choosing the Right Pot & Perfecting Your Soil
Okay, let’s talk about the new home. The number one rule is to only go up 1 to 2 inches in diameter. So, if your plant is in a 6-inch pot, its new home should be an 8-inch pot. Max. Resisting the urge to jump to a giant pot is critical. Why? A pot that’s too big holds way more soil than the roots can use, leading that extra soil to stay wet, compact, and eventually rot the roots. It’s probably the most common mistake people make.
As for material, you’ve got two main choices. Unglazed terracotta is a fantastic option for plants that hate wet feet, like succulents, snake plants, or anything you tend to overwater. The clay is porous, so it breathes, helping the soil dry out evenly. The only downside is you’ll have to water a bit more often.
On the other hand, glazed ceramic or plastic pots are non-porous and hold moisture for much longer. This makes them great for thirsty plants like ferns and calatheas, or if you’re a bit forgetful with the watering can. The risk of root rot is higher, though, so drainage is non-negotiable. If a plastic pot only has one tiny hole, I’m not shy about drilling a few more myself.
And by the way, please ignore that old myth about putting a layer of gravel in the bottom of the pot. It doesn’t help drainage. In fact, it does the opposite by creating a swampy zone right where the roots sit, which is a perfect recipe for root rot. Good soil and a drainage hole are all you need.
Mixing Your Own Soil (It’s Easy!)
Store-bought soil can be a bit of a mystery bag. I always prefer to mix my own to get the perfect balance of aeration and moisture. It sounds intimidating, but it’s super simple.
Here’s a fantastic, all-purpose recipe. Just grab an old coffee mug or yogurt cup to use as your measuring “part”:
- 2 parts base: Coco coir is my favorite. It’s sustainable and re-wets easily.
- 1 part aeration: Perlite or pumice are those little white rocks that create air pockets for roots to breathe.
- 1 part organic matter: Compost or earthworm castings provide gentle, natural nutrients.
For a cactus or succulent, you’d just flip the ratio: 1 part soil to 2 parts pumice. See? You’re a soil scientist now.
The Repotting Process: Let’s Get Our Hands Dirty
Alright, you’re prepped and ready. Take a deep breath. You’ll do better if you’re calm, and the plant… well, it won’t notice, but you’ll avoid clumsy mistakes.
Step 1: The Great Escape
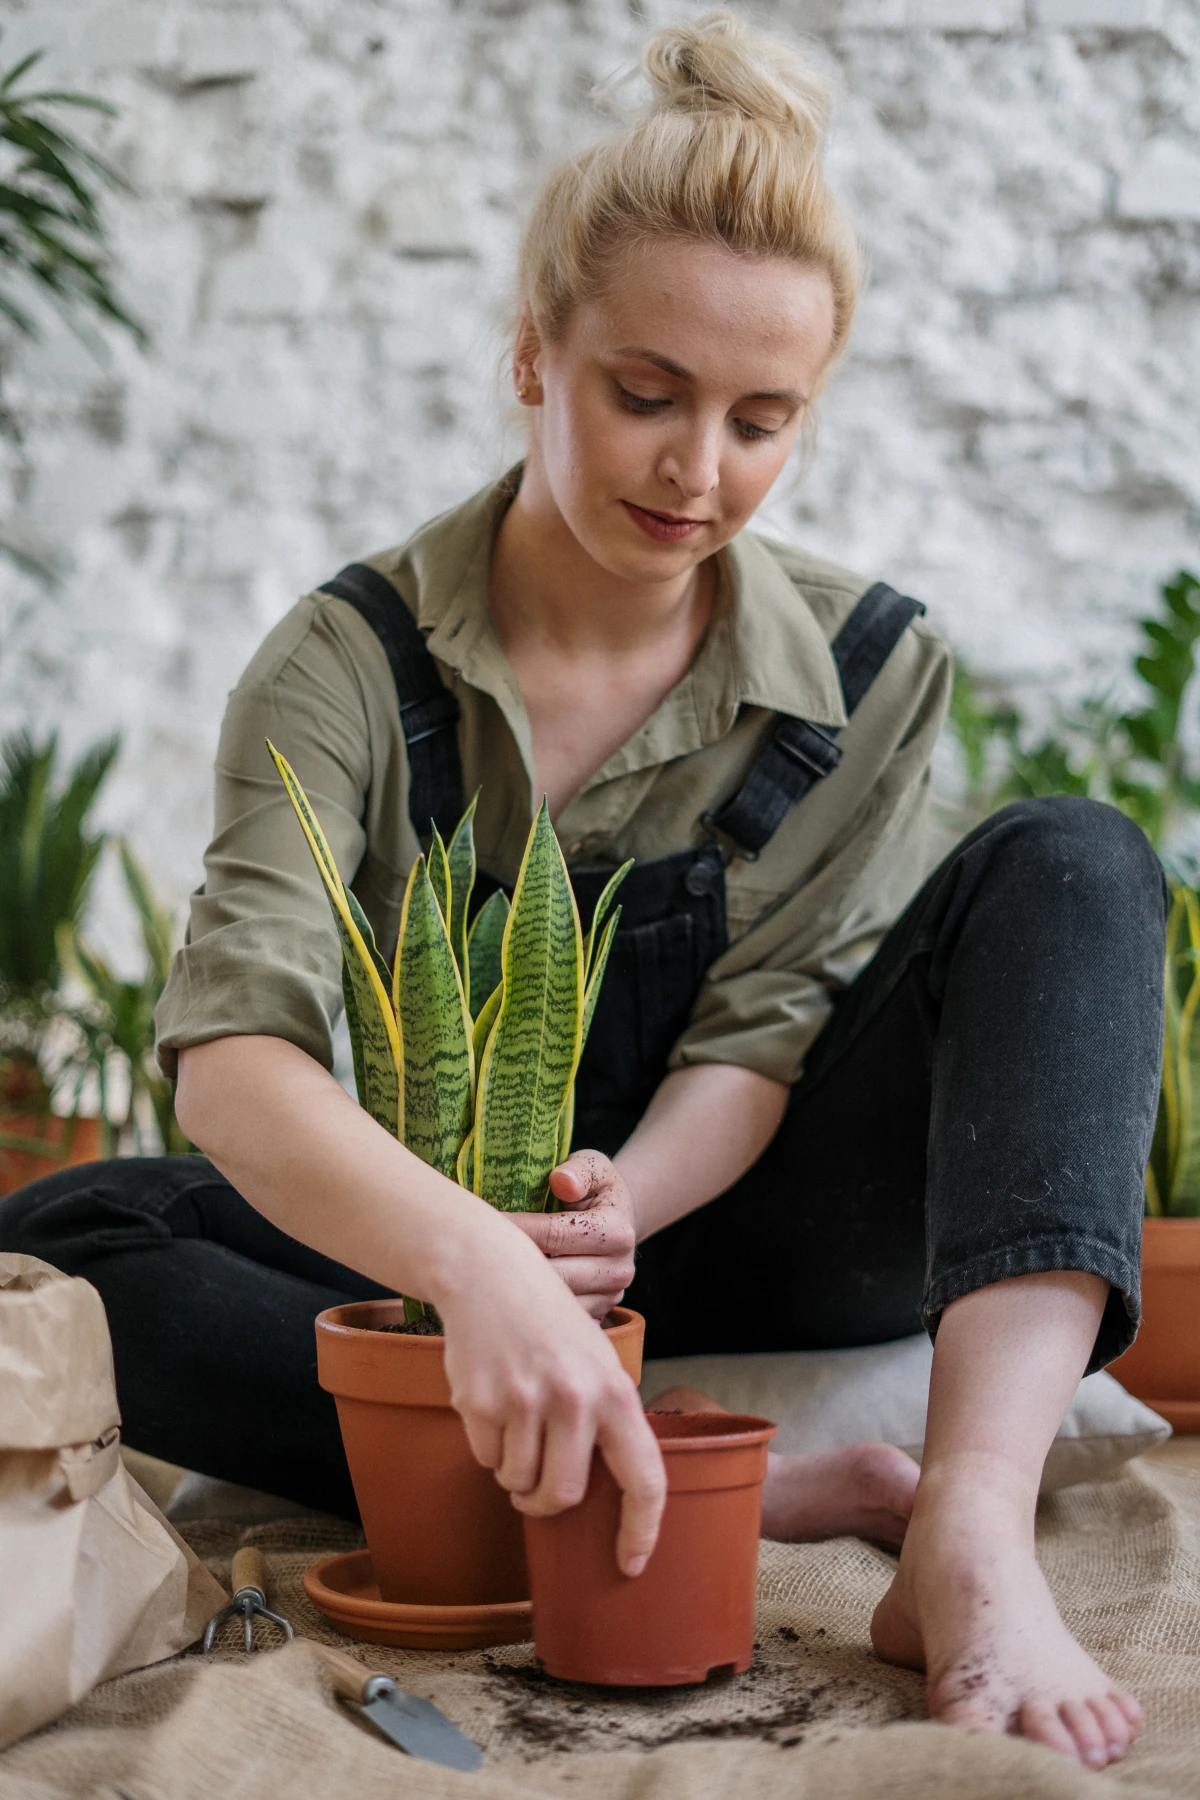
Don’t just yank the plant out by its stem! Turn the pot on its side, and with one hand supporting the plant, give the bottom of the pot a few firm taps. It should slide right out. If it’s really stuck, run your butter knife around the inside edge to loosen the root ball from the pot wall. For giant plants, this is a two-person job. I’ll never forget trying to repot a 10-foot Ficus by myself once; we both ended up on the floor. Lesson learned: lay it on its side and have one person gently pull the pot while the other supports the plant.

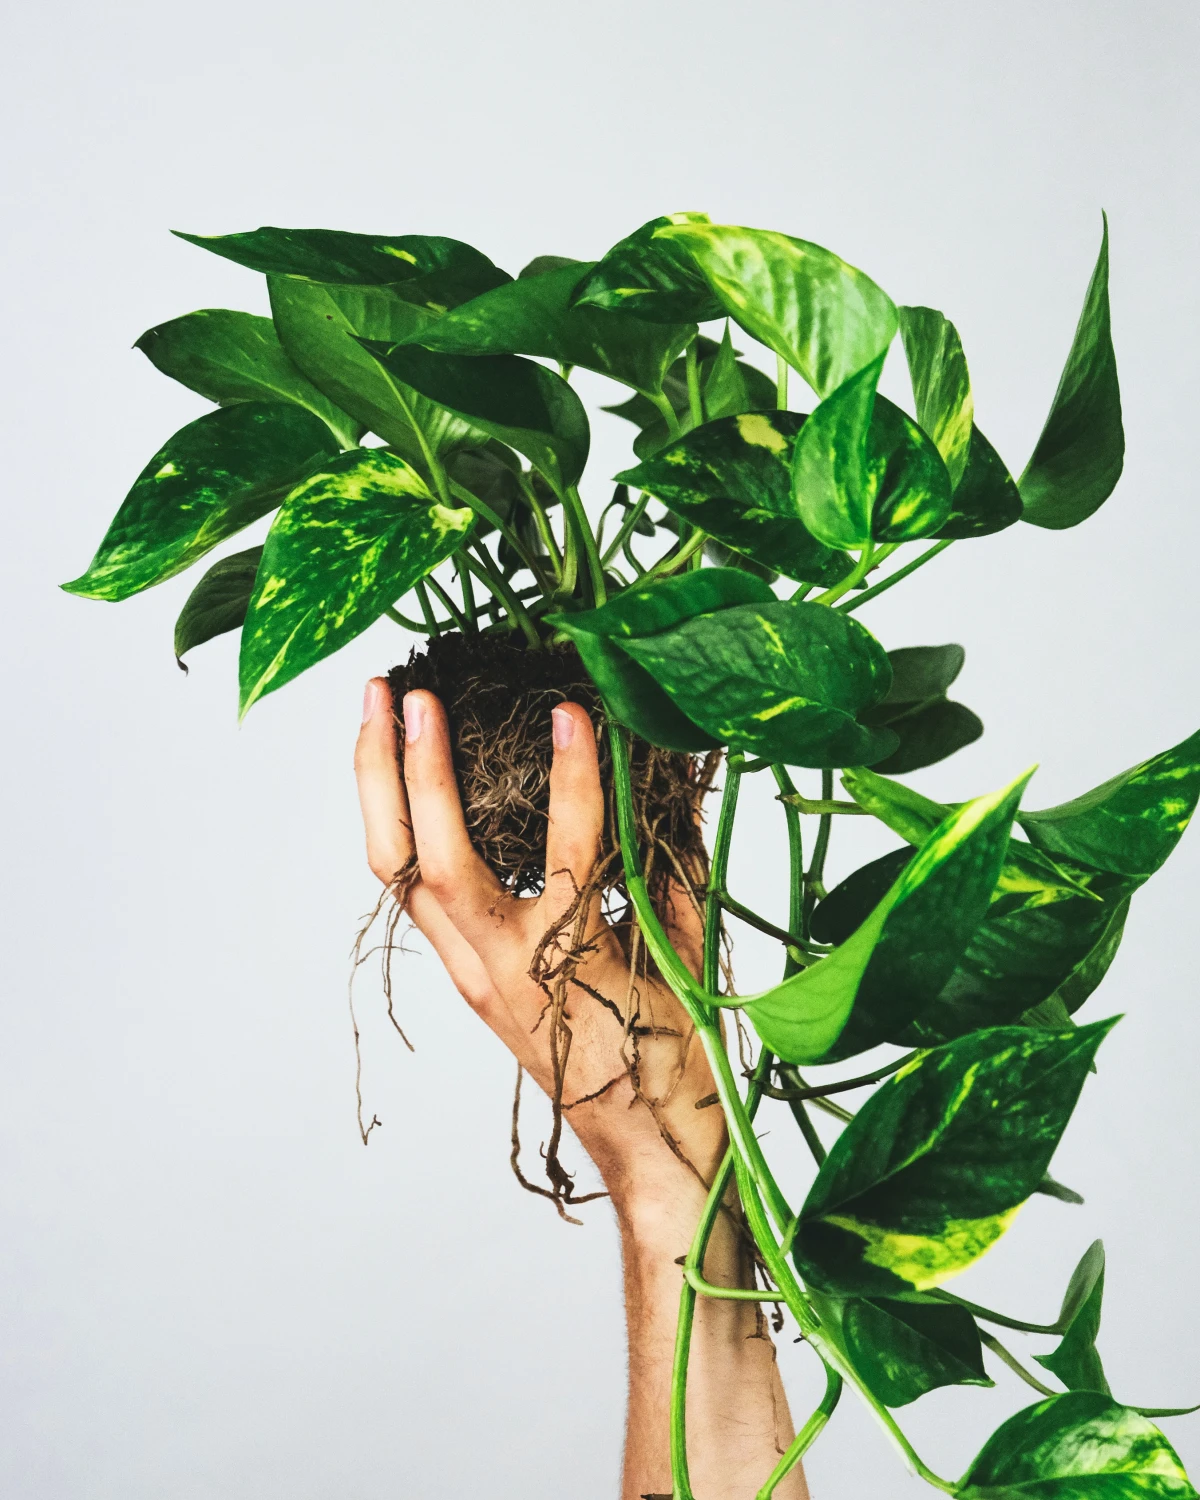
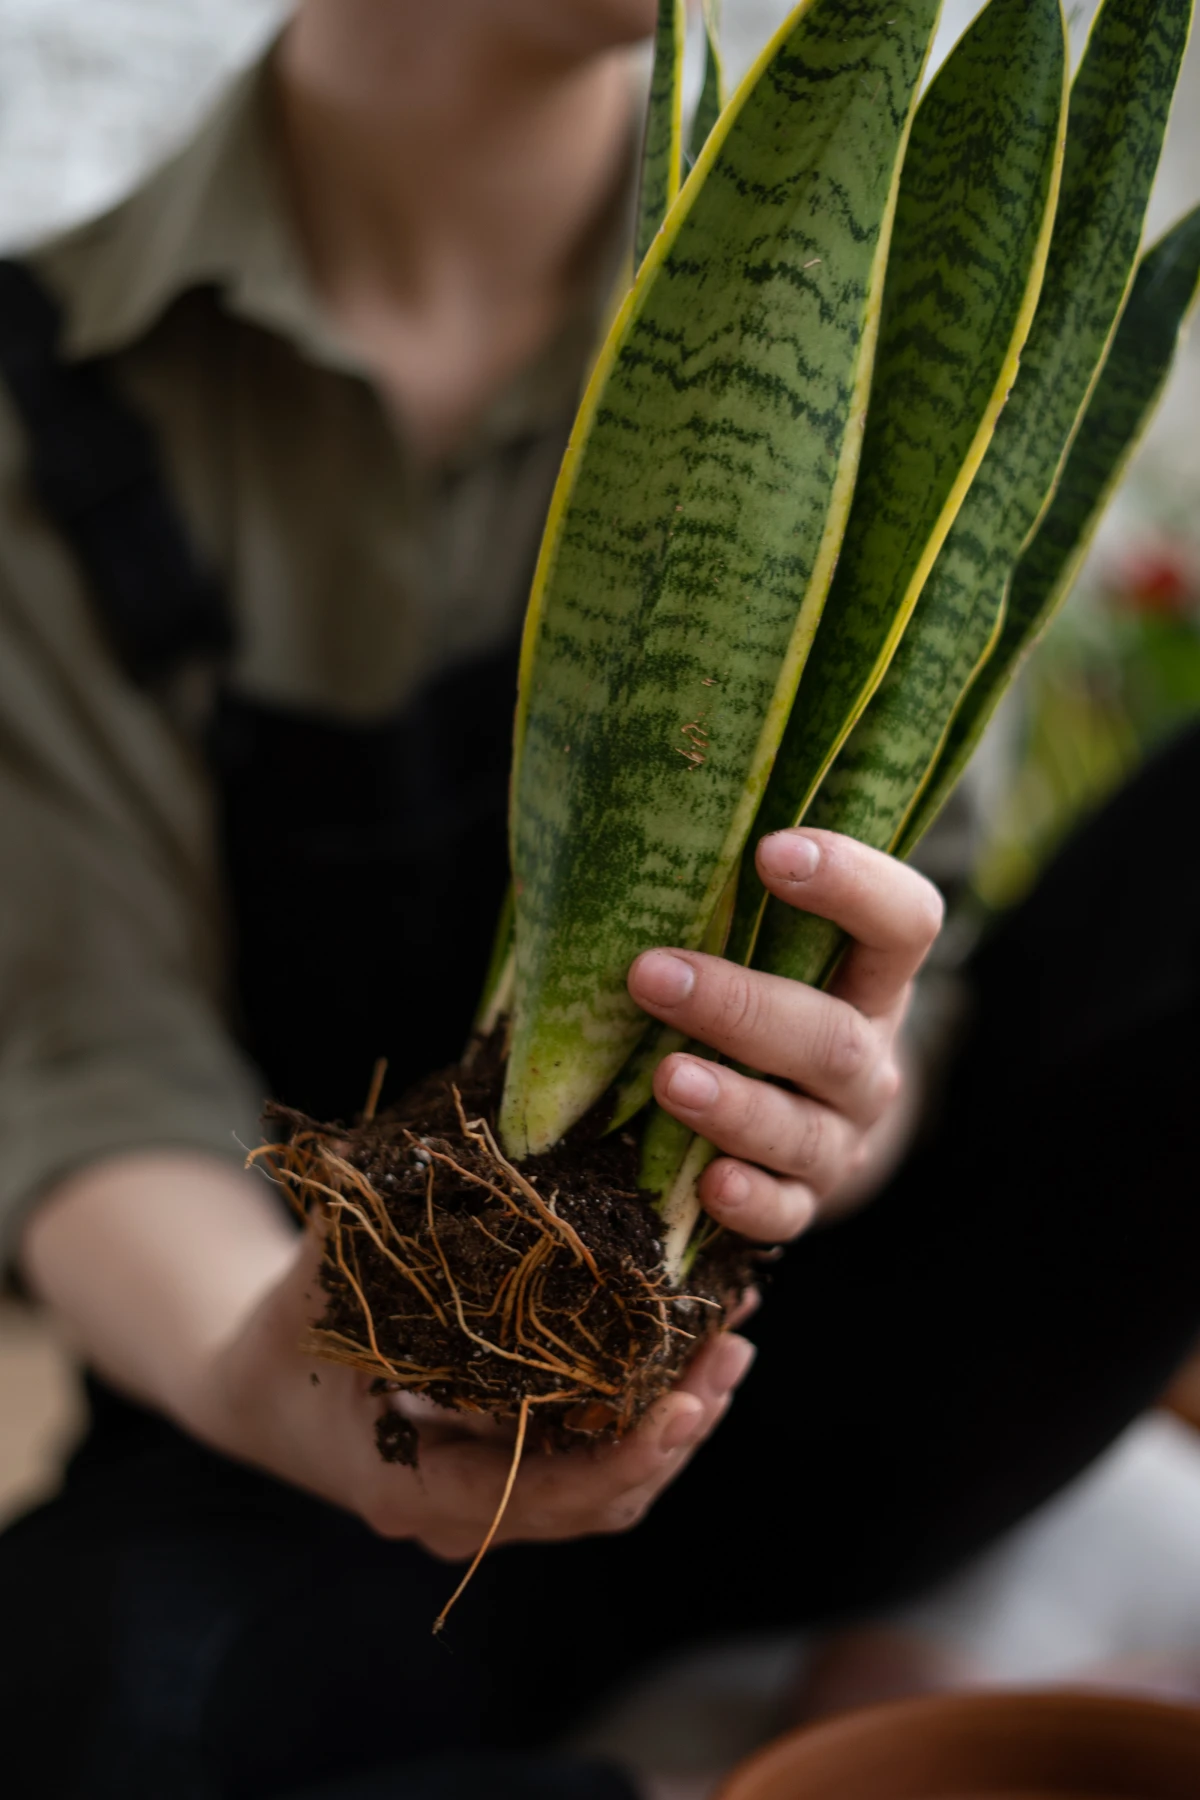
Step 2: The All-Important Root Checkup
This is where the real magic happens. Gently shake and massage the old soil away from the roots. You want to remove about a third of the old stuff so you can get a good look.
- What to look for: Healthy roots are firm, plump, and usually a white or light tan color. They smell earthy and fresh.
- Signs of trouble: Root rot looks and feels just like it sounds. The roots will be brown or black, mushy, and might even smell foul or swampy. If you find this, you have to be ruthless. Using your sterilized pruners, trim off every single piece of mushy root until you see healthy, white tissue inside. Leaving any rot behind will just let it spread.
Now, if the plant was root-bound, you’ll see a tangled mess of circling roots. You must fix this, or they’ll just keep growing in circles in the new pot. Gently tease them apart with your fingers. If they’re a solid brick, be brave. Take your sterile knife and make 3-4 vertical cuts, about an inch deep, down the sides. It feels wrong, I know, but it’s the best way to break the root memory and encourage new, healthy growth outwards.
Quick tip for a common panic moment: What if you accidentally break off a big, healthy root? It’s okay! Just make a clean cut with your shears where it broke. The plant will be fine. And what if you unpot it and find pests, like little white fuzzy root mealybugs? Don’t freak out. Take the plant to a sink and wash as many of the pests and as much of the old soil off the roots as you can. Then, proceed with the repot using fresh, clean soil.
Step 3: Potting It Up
Add a layer of your fresh soil mix to the bottom of the new pot. Center your plant inside and check the height. The top of the root ball should sit about an inch below the rim of the pot—this creates a reservoir for watering. Once the height is right, start backfilling soil around the sides, gently pressing it down to remove major air pockets but without compacting it. Fill it up to the level of the root ball.
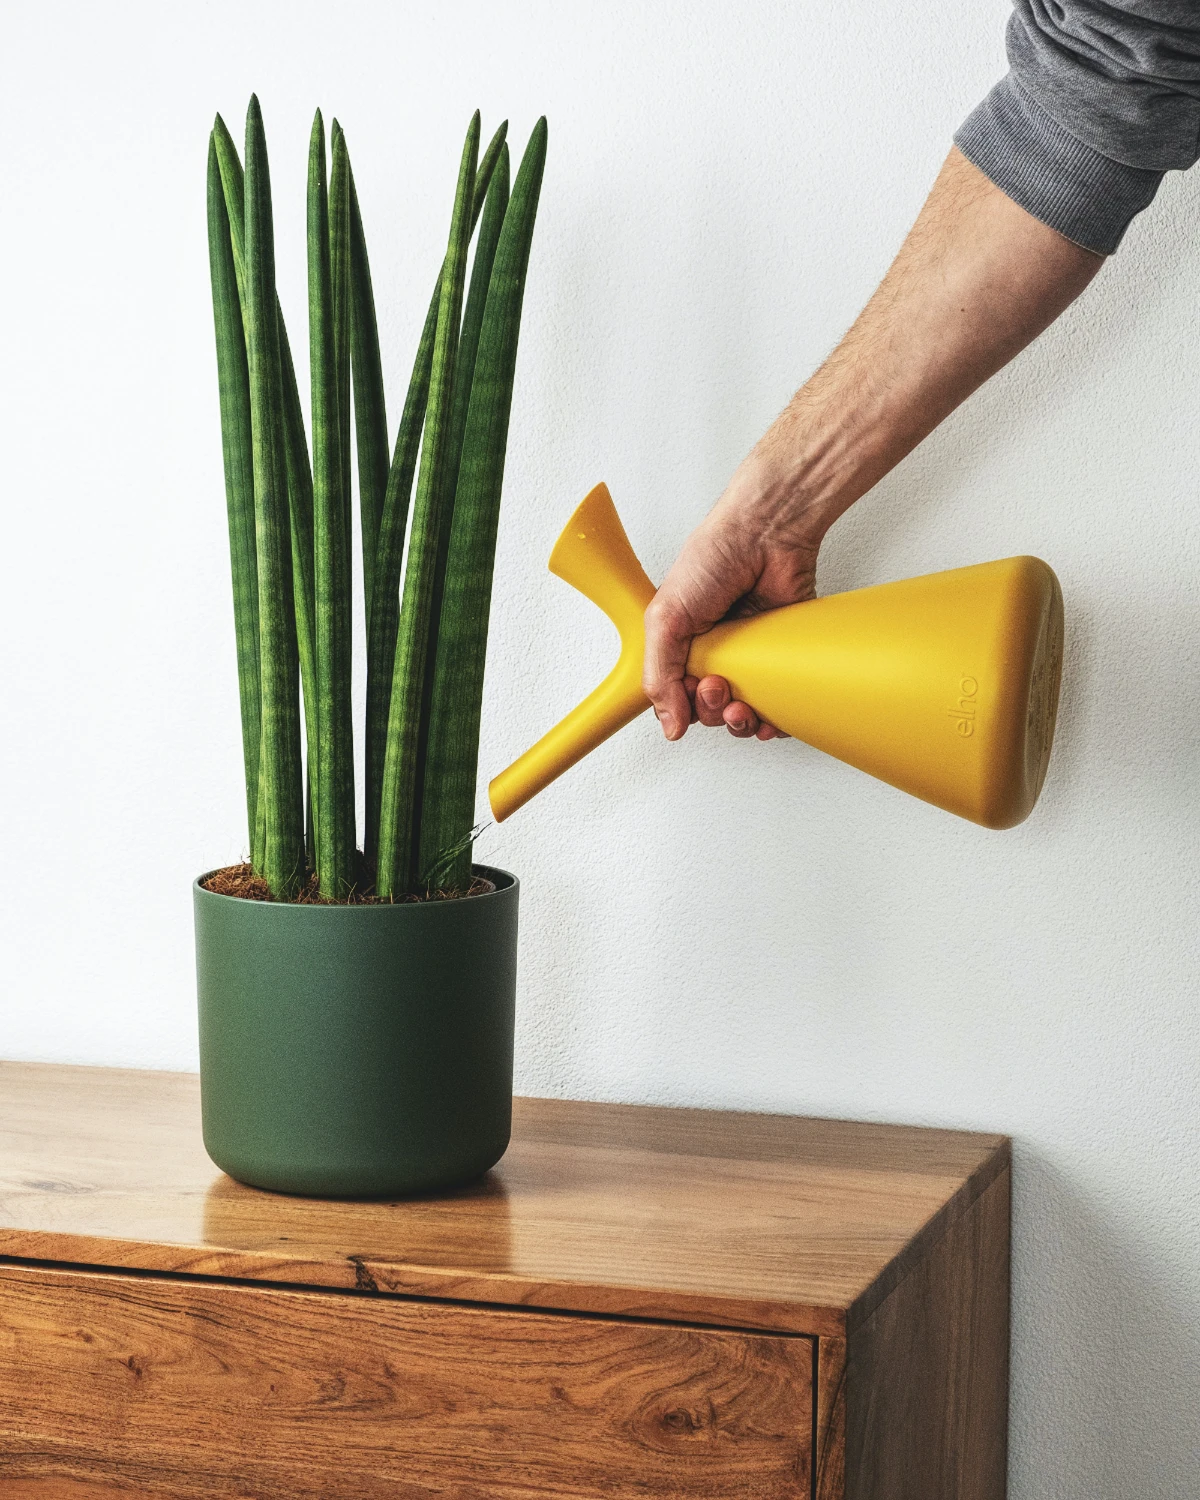
Step 4: Watering and Aftercare
Give the plant a thorough watering until it flows freely from the drainage hole. This helps settle the soil around the roots. Let it drain for a few minutes, then dump any excess water from the saucer. A plant should never sit in a puddle.
Now, for a little R&R. Your plant just went through a lot. Move it to a spot with slightly less light than it’s used to for a week or two. This reduces stress while the roots recover. And most importantly, hold off on fertilizer for at least four to six weeks. The new soil has plenty of nutrients, and fertilizer can burn tender, newly-cut roots. Just let it be, and let the soil dry out properly between waterings.
Repotting isn’t a miracle cure for a plant on its last legs, but for one that’s just feeling a bit cramped and tired, it’s one of the best things you can do. You’re not just giving it a new pot; you’re giving it a whole new lease on life.
Inspirational Gallery with Photos
One crucial tip: Resist the urge to move your plant into a giant pot. It seems like a kindness, but
For plants that crave airflow around their roots, like Monsteras, Philodendrons, and Anthuriums, a generic potting mix can be too dense. Try making your own chunky
My plant looks so droopy and sad after I repotted it. Did I kill it?
Don’t panic! This is likely
Terracotta: This classic, porous clay breathes. It allows water and air to move through its walls, helping soil to dry out faster. It’s a fantastic choice for succulents, cacti, and any plant prone to root rot.
Glazed Ceramic & Plastic: These non-porous pots hold moisture for much longer. They are perfect for thirsty plants like ferns, calatheas, or for plant parents who tend to under-water.
The right choice depends entirely on your plant’s needs and your watering habits!
Did you know? A high-quality potting mix is often only 50% solid material. The other 50% is crucial pore space, which holds the oxygen and water your plant’s roots need to thrive.
When you fill the new pot, avoid compacting the soil too much. Keep it light and airy to give the roots the space they need to breathe and grow.
Find a moment of zen in the process by taking inspiration from the Japanese art of kokedama, where a plant’s root ball is wrapped in moss and string. While you’re not making a moss ball, adopt the same mindful, gentle approach. Feel the texture of the roots, observe their structure, and handle them with care. Seeing the root system as a beautiful, living sculpture in its own right can transform repotting from a chore into a calming, meditative practice.
- Keep it out of direct sun: For the first week, place it in a spot with gentle, indirect light to reduce stress.
- Hold the fertilizer: Your new soil is packed with nutrients. Wait at least a month before you start feeding again.
- Water wisely: Water thoroughly once right after repotting, then let the soil dry out more than usual before watering again. This encourages the roots to search for moisture.
The world of potting soil goes way beyond the basic bag from a big-box store. Elevate your repotting game with targeted amendments. Coco coir is a sustainable, water-retentive alternative to peat moss. Pumice is a volcanic rock that adds aeration but, unlike perlite, doesn’t float to the top over time. And a scoop of nutrient-rich earthworm castings, like those from Wiggle Worm, acts as a gentle, all-natural fertilizer to give your newly repotted plant the best possible start.
- It stops your fresh soil from washing out the bottom every time you water.
- It prevents the drainage hole from getting clogged by a single large root.
The simple trick? Before adding soil, just place a small piece of window screen, a coffee filter, or even a shard from a broken terracotta pot over the drainage hole. It’s a 10-second step for a healthier pot environment.
Gently trimming a plant’s roots during repotting can stimulate a flush of new, healthy growth.
This doesn’t mean giving the root ball a major haircut! When you unpot your plant, look for any long roots circling the bottom of the pot. Use clean scissors to snip these circling roots and gently loosen the rest of the root ball with your fingers. This encourages the plant to send out a fresh network of feeder roots into its new soil, rather than continuing to grow in a constricted circle.


