Your Forever Yard: A Pro’s Guide to Designing It Right the First Time
I’ve seen it a hundred times over the years. Someone gets a burst of inspiration, heads to the garden center, and comes home with a car full of beautiful, blooming plants. They spend the weekend digging, and a week later, they’re wondering why half of it is wilting and the whole thing just looks… off. The single biggest mistake people make is rushing the process.
In this article
A stunning outdoor space that you’ll actually use for years isn’t about impulse buys. It’s about really getting to know your little patch of earth. It starts with observation, not a shovel.
Think of it this way: a well-designed patio or garden is a genuine extension of your home. It’s another room—a place for quiet coffee, family dinners, or just watching the world go by. This guide isn’t about quick fixes. I’m going to walk you through the exact same thought process the pros use, breaking down how to analyze your site, choose materials that won’t fall apart in a few years, and plan a space that fits how you actually live. Doing it right the first time saves a ton of money and frustration down the road.
1. It All Starts Here: The Site Analysis
Before you even dream about plants or pergolas, you have to become an expert on your own yard. You simply can’t design for a space you don’t understand. Honestly, this is the most critical step, and it informs every single decision that follows. Give it a solid week. Just watch and take notes.
Follow the Sun
The sun is the boss of your garden, period. Grab a notebook, sketch a simple map of your property, and a few times a day—say, 9 a.m., noon, 3 p.m., and 6 p.m.—mark where the sun and shadows are. Note the spots that get baked all day long; those are your full-sun zones, perfect for a sunbathing lounge or plants that love the heat. Then find the areas that only get gentle morning sun, great for things that can’t handle the afternoon scorch. And don’t forget the full-shade zones, like under a dense tree or on the north side of your house. This sun map isn’t optional. It’s your primary tool for keeping plants alive and placing your patio where it will be comfortable.

Get to Know Your Soil
Soil is way more than just dirt. To figure out what you’re working with, try the classic jar test. Dig down about six inches and fill a big mason jar about a third of the way with your soil. Top it off with water, screw the lid on tight, and shake it like crazy for a couple of minutes. Let it sit for a full day.
You’ll see layers form. Sand on the bottom, silt in the middle, and clay on top. Mostly sand? Water will drain right through, so you’ll be watering constantly. Mostly clay? It holds water forever, which can lead to root rot. What you do next is key. If you have heavy clay, the fix is to work in 3-4 inches of good quality compost to improve the structure. You can even add gypsum to help break it up. If it’s super sandy, compost is still your friend, as it helps hold onto moisture.
Next, grab a simple pH test kit from any garden center for about $15. Most plants are happiest in soil that’s slightly acidic to neutral (around 6.5-7.0). If your soil is too acidic (a low pH), you’ll need to add garden lime. If it’s too alkaline (a high pH), you’ll add garden sulfur. The packaging will tell you exactly how much to use for your square footage. This simple step prevents you from wasting money on plants that were doomed from the start.
Watch the Water
After the next big rain, put on your boots and go outside. Where does the water go? If it pools in one spot, you’ve got compacted soil and poor drainage. If it sheets off your property, you’re losing topsoil and moisture. That soggy spot that won’t grow grass could be the perfect location for a rain garden filled with plants that love wet feet. But a word of warning: if you see water pooling near your foundation, that’s a serious problem that needs to be fixed immediately, possibly with a French drain or by re-grading the area. Don’t mess around with water against your house.

2. Design for Your Life, Not Just for Looks
Okay, now that you’re an expert on your yard’s conditions, you can think about how you want to use it. A gorgeous garden that doesn’t fit your lifestyle will just be something you look at through a window. The goal is to create outdoor ‘rooms’ with a purpose.
What Do You Actually Want to Do Out There?
Be brutally honest with yourself. Write down a list of everything you need and want. This is your ‘program’.
- A dining area? For how many people—a small bistro set for two or a table for eight?
- A place to grill? Make sure it’s a short, easy trip from the kitchen.
- A play area for kids? It needs to be safe and, ideally, visible from inside.
- A quiet corner for reading a book? Tuck it away from the main hustle and bustle.
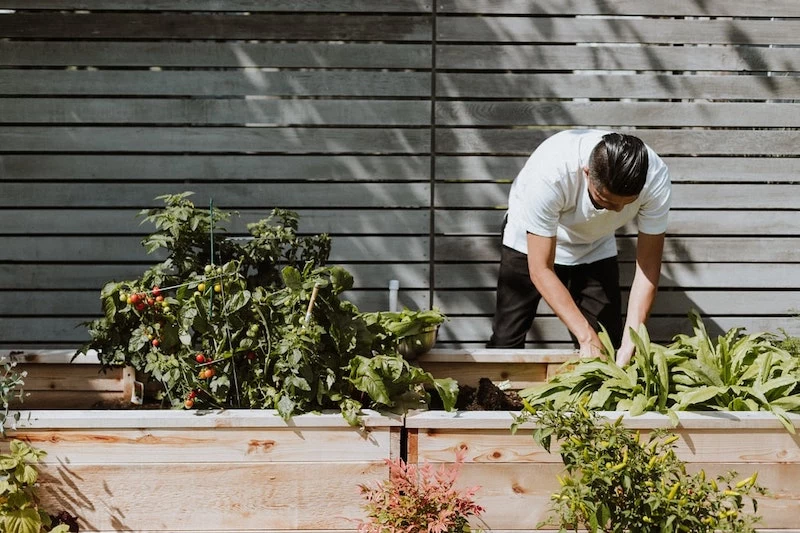
- A vegetable garden? You’ll need to place it in one of those full-sun zones you found earlier.
This list is your blueprint. It keeps you focused and stops you from getting sidetracked by a cool-looking fire pit you’ll never actually use.
Creating Rooms and Flow
Think about how you move around inside your home—the layout is logical. Apply that same thinking outside. The path from the back door to the grill should be clear and direct. You can create these ‘rooms’ without walls. A simple change in paving material, a low line of shrubs, or even a few large planters can signal that you’re moving from the ‘dining room’ to the ‘lounge’. Good flow just feels right.
3. The Bones of Your Yard: Hardscaping
Hardscaping is all the non-living stuff: patios, decks, paths, and walls. It’s the skeleton of your design, and it’s also the most expensive part. Getting this right is crucial.
Choosing Your Main Surface
This is a huge decision, and it comes down to budget, style, and your climate. Here’s a realistic breakdown of installed costs:
- Concrete Pavers: Super versatile and durable. If one gets stained or cracked, you can just pop it out and replace it. Expect to pay around $18 to $30 per square foot, installed. The installation is hard work, which is what you’re paying for.
- Natural Stone: You can’t beat the timeless look of flagstone or slate, but it comes with a price tag. You’re looking at $25 to $45+ per square foot. It can also get slick when wet and hot on bare feet.
- Poured Concrete: Often the most budget-friendly option, maybe $12 to $20 per square foot. It can be stamped and colored to look like stone. The major downside? It will crack eventually, and repairs are rarely invisible.
- Wood or Composite Decking: Great for sloped yards. Wood requires yearly maintenance. Low-maintenance composite has a higher upfront cost (often $35 to $60+ per square foot) and can get scorching hot in the sun.
A Lesson from Experience: The Base is EVERYTHING
I can’t say this enough: the success of a patio is all about the base underneath it. The number one reason patios fail is a poorly prepared base. In places with freezing winters, the ground heaves and will turn a poorly-laid patio into a wavy, ankle-twisting mess in just a few years.
Doing it right means excavating 8-10 inches. Then you lay down a special geotextile fabric, followed by about 6 inches of compacted aggregate base, a 1-inch layer of sand, and then your pavers. And you have to rent a heavy plate compactor (about $80-$100 for a day from a tool rental shop) and compact that base in stages. It’s a ton of work, but it’s the only way to make it last.
Quick Tip: For a basic 10×10 foot (100 sq ft) paver patio, you’ll need a shopping list that looks something like this: about 2 cubic yards of aggregate base, 0.5 cubic yards of paver sand, 100 sq ft of that geotextile fabric, and about 40 feet of paver edging to hold it all together.
DIY or Call a Pro?
A small, ground-level paver patio is a tough but manageable DIY project if you’re handy. But you should absolutely call a professional when:
- Your project involves a retaining wall over 3 feet high. These require engineering and permits because a failure is catastrophic.
- Your deck will be more than 30 inches off the ground. It needs proper concrete footings and must meet strict safety codes.
- You’re dealing with major slope or drainage issues.
It’s a small price to pay for safety and peace of mind.
4. The Fun Part: Plants!
With the hardscape planned, you can finally think about plants. This is where your sun map and soil test become your best friends. The golden rule is ‘right plant, right place.’ It means you choose plants that want to live in the conditions you have, instead of fighting a losing battle.
Think in Layers
A lush, professional-looking garden has layers, like a forest.
- The Canopy: Your large shade trees. Think about their mature size!
- The Understory: Smaller ornamental trees and large shrubs that add structure.
- The Perennial & Shrub Layer: This is the workhorse layer for color and texture. Plant in odd-numbered groups (3, 5, 7) for a more natural look.
- The Groundcover: Low-growing plants that act as a living mulch to keep weeds down.
As for cost, you can find perennials for $8 to $30 each. A nice shrub might run you $50 to $150, and a decent starter tree usually starts around $200 and goes up from there.
A Quick Planting Recipe
To see how layers work together, here’s a classic combo for a spot with decent sun: Use Black-Eyed Susans as your perennial layer, a ‘Limelight’ Hydrangea as your taller shrub, and a River Birch as your small understory tree. This gives you summer color, fall interest, and beautiful peeling bark in the winter.
Designing for All Four Seasons
Don’t fall into the trap of buying everything that’s blooming in May at the garden center. A great garden has something interesting going on all year. Plan for spring bulbs, summer flowers, shrubs with amazing fall color, and evergreens or trees with interesting bark for winter structure.
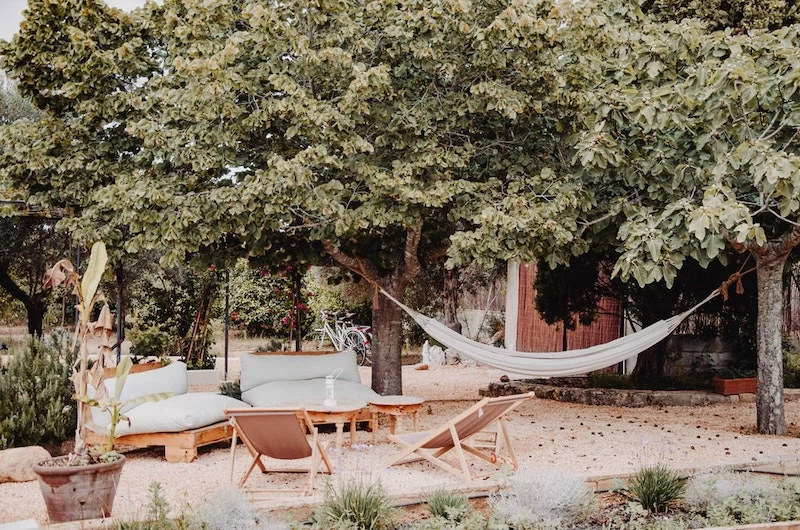
5. The Finishing Touches: Lighting, Water, and Shade
These elements can take your space from nice to truly special. They often have a bigger budget or require more technical skill, but the payoff is huge.
Landscape Lighting Done Right
Good lighting is about ambiance and safety, not a single harsh floodlight. A low-voltage system is the way to go. Pros use techniques like uplighting a beautiful tree, using path lights for safe walking, or
Inspirational Gallery
Underfoot and Overlooked: The surface of your patio sets the entire tone for your outdoor space. For a timeless, natural look, consider Pennsylvania Bluestone or classic Travertine—they develop a beautiful patina over time. If low maintenance is your absolute priority, composite decking from brands like Trex or TimberTech offers the look of wood without the yearly sealing, and it resists fading and staining for decades.
A single mature, leafy tree can produce the same cooling effect as 10 room-size air conditioners running 20 hours a day.
This staggering fact from the USDA Forest Service highlights why strategic tree planting is one of the smartest long-term investments for your yard. A well-placed deciduous tree on the south or west side of your home can dramatically reduce summer cooling costs while still allowing winter sun to warm your house after its leaves have dropped.
- Creates an instant sense of enclosure and privacy.
- Softens hard lines from fences and house walls.
- Provides vertical interest and a lush, green backdrop year-round.
The secret? A living wall or vertical garden. Instead of defaulting to a simple fence, consider planting fast-growing, non-invasive climbers like Star Jasmine on a trellis. It’s a sensory upgrade that adds fragrance and texture, transforming a boring boundary into a beautiful feature.
How do I light my yard without it looking like an airport runway?
The key is layered, indirect lighting. Think like a lighting designer: use uplighting to highlight the texture of a feature tree’s bark, place wash lights along a stone wall to create a soft glow, and install discreet path lights for safety. Avoid a single, harsh floodlight. Brands like Volt Lighting offer high-quality, low-voltage kits that are easy for a homeowner to install and create a truly professional, inviting atmosphere after dark.
Don’t forget the power grid. One of the most common regrets is failing to plan for outdoor electricity. Before you lay a single paver, think about where you might want to plug in string lights, a sound system, a water feature pump, or even a laptop. Running electrical conduit under your patio during construction is simple; tearing up a finished patio to add it later is a costly nightmare.
The average American lawn requires 20,000 gallons of water per year, not including rainfall.
This is precisely why xeriscaping—or designing with drought-tolerant plants—is more than a trend; it’s a responsible strategy. Swapping just a portion of your lawn for beds of ornamental grasses, succulents like Sedum, and flowering perennials like Russian Sage not only saves immense amounts of water but also dramatically cuts down on mowing and maintenance time.
A common design pitfall is choosing plants based only on their current size in the nursery pot. That charming little Blue Spruce will grow to be 50 feet tall and 20 feet wide, potentially overwhelming your house and foundation. Always read the plant tag to understand its mature height and spread, and place it where it will have room to grow into its final, glorious form. This single step is the essence of creating a ‘forever yard’ rather than a ‘five-year problem’.
Natural Cedar Fencing: Offers a classic, warm aesthetic and natural resistance to rot and insects. It requires regular staining or sealing (every 2-3 years) to maintain its color and prevent graying.
Vinyl (PVC) Fencing: A higher upfront cost but virtually zero maintenance beyond occasional washing. It won’t warp, rot, or fade and comes in a variety of styles, some even mimicking wood grain.
For a true ‘forever’ solution with minimal fuss, vinyl is often the winner in the long run.
Looking for a sophisticated, high-performance surface? Consider porcelain pavers. Here’s why the pros love them:
- Extreme Durability: They are non-porous, making them resistant to stains, moss, and freeze-thaw cracking.
- Color Consistency: Unlike natural stone, their color won’t fade in the sun and is uniform from paver to paver.
- Design Versatility: Advanced printing technology allows them to convincingly mimic everything from Italian marble to rustic wood planks.
“The details are not the details. They make the design.” – Charles Eames
This principle is paramount in landscape design. It’s the subtle curve of a garden bed, the specific texture of a container pot, or the way a path narrows to create a sense of journey. Before finalizing your plan, ask yourself what small details you can add to elevate the space from merely functional to truly personal and artful.


