The No-Nonsense Guide to Keeping Your Aloe Vera Alive (and Actually Thriving)
I’ve been working with succulents for what feels like a lifetime. In greenhouses, in workshops, and all over my own home. And through all that, the humble Aloe vera remains a favorite. It’s usually marketed as the perfect, easy-to-care-for beginner plant, but honestly, that’s a bit of a trap. I’ve seen more aloes accidentally loved to death than any other plant.
In this article
- Your First Aloe: What to Look For (and What to Avoid)
- Let’s Geek Out: How an Aloe Actually Works
- Setting Up Your Aloe’s Perfect Home
- Watering: Forget the Schedule, Read the Plant
- The Right Soil and When to Feed It
- Repotting, Pups, and Other Good Stuff
- A Serious Warning About Harvesting Aloe Gel
- Inspirational Gallery
The secret isn’t a complicated rulebook. It’s simpler than that: you just have to understand what it is. At its heart, an aloe is a desert survivor. Treat it like one, and it’ll flourish. Forget that, and you’ll be fighting an uphill battle.
So, this isn’t just a list of dos and don’ts. I want to show you the ‘why’ behind the techniques the pros use, based on plenty of my own successes and, let’s be real, a few tragic plant failures along the way. My goal is to get you a thriving aloe that looks amazing for years, not one that’s just barely hanging on.
Your First Aloe: What to Look For (and What to Avoid)
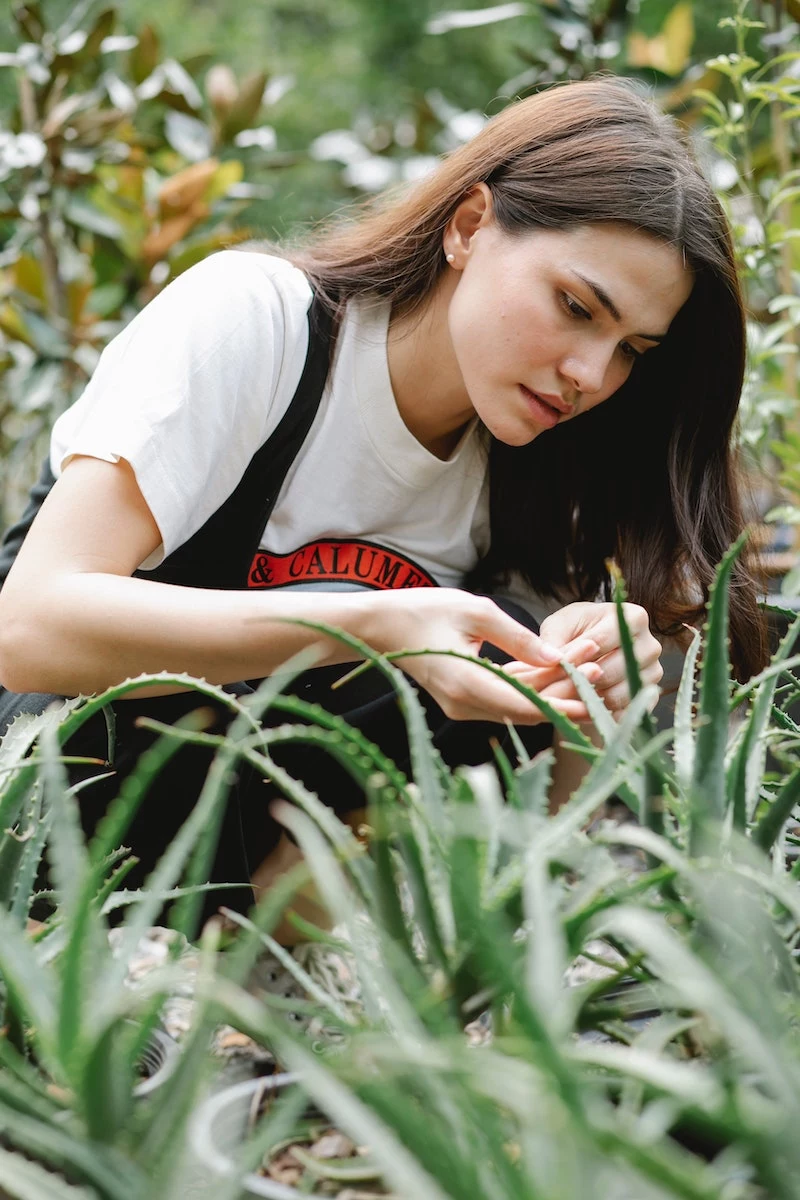
Before we even get into care, let’s talk about picking a winner. A healthy start makes everything easier. When you’re at the garden center or a big-box store like Home Depot, scan the aloe section for plants with firm, thick leaves that point upwards. The color should be a consistent, healthy green. Gently wiggle the base of the plant; it should feel sturdy and well-rooted.
Steer clear of any aloes with pale, thin, or droopy leaves. Big red flag! Also, look out for any brown, mushy spots, especially where the leaves meet the soil—that’s a classic sign of root rot, the number one killer. A lot of stores overwater their succulents, so if the soil looks soaking wet, be extra cautious. You’re better off picking a plant that looks a little thirsty than one that’s drowning.
Good to know: Getting set up is surprisingly affordable. Here’s a quick shopping list to give you an idea:
- A 4- to 6-inch Aloe Plant: Usually runs between $5 and $15, depending on the size and store.
- A Terracotta Pot (one size up): A 6- or 8-inch pot will only set you back about $5 to $8. The best insurance for your plant!
- A Small Bag of Cactus/Succulent Soil: Around $8.
- A Small Bag of Perlite or Pumice: Also about $8, and it will last you for many repotting sessions.
All in, you’re looking at a startup cost of around $25-$40 for a hobby that will last for years. Not bad at all.
Let’s Geek Out: How an Aloe Actually Works
To really succeed, you need to get inside the plant’s head. An aloe is basically a little biological marvel designed for tough climates. Most problems pop up when we treat it like a typical, leafy houseplant from the tropics.
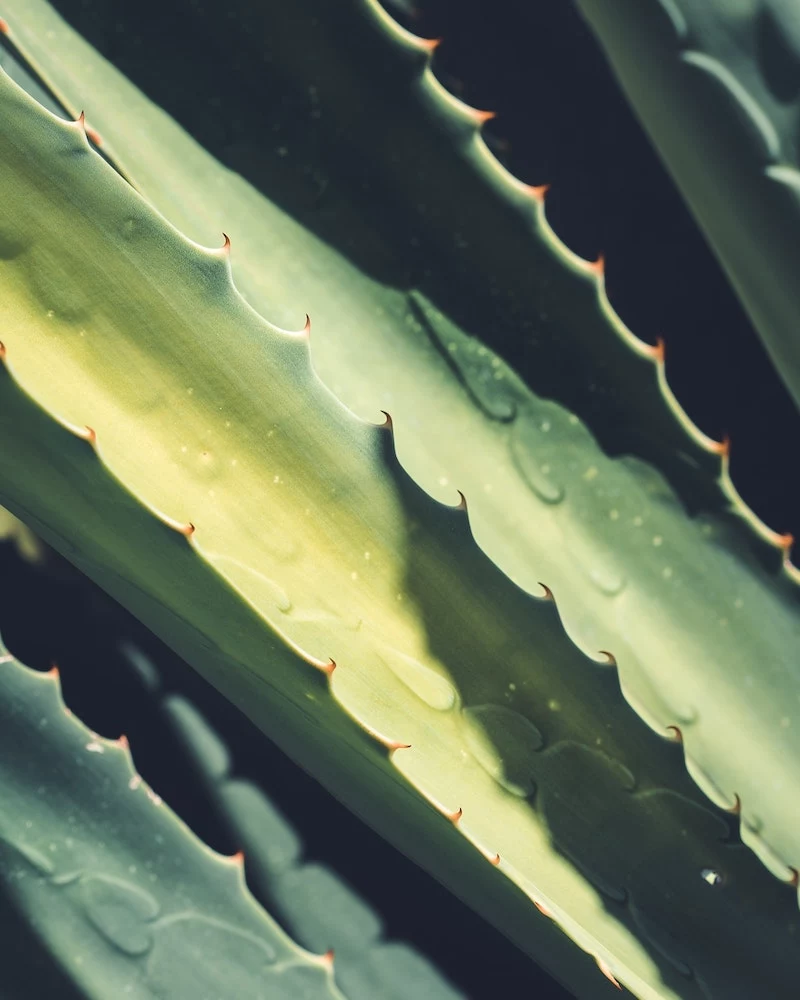
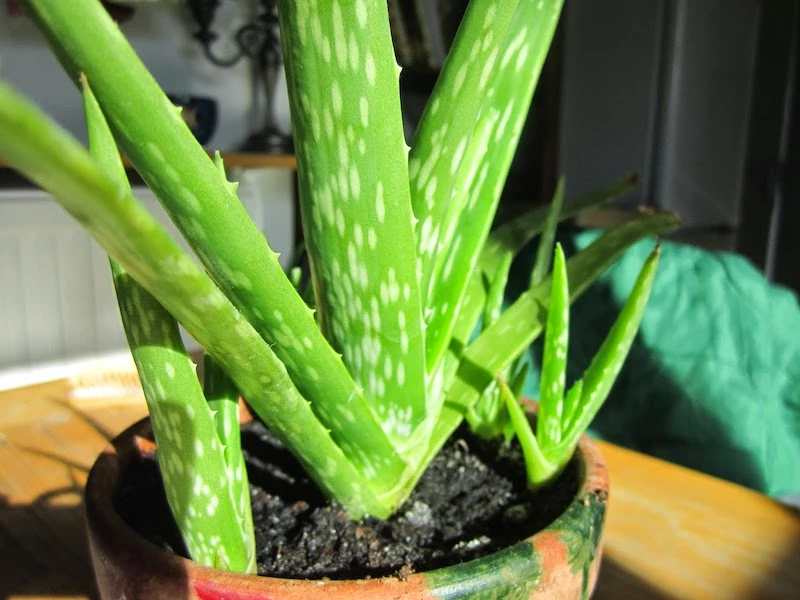
Those thick, chunky leaves? They’re water tanks. The clear gel inside is a special tissue built to soak up and store water for a ridiculously long time. This is how it survives droughts in its natural habitat. It’s also precisely why overwatering is its kryptonite. The plant is engineered for dryness, not a permanent state of damp. When the soil is always wet, the roots just give up.
Here’s a cool fact: Aloes breathe at night. It’s a water-saving strategy. Most plants open their pores during the day to grab carbon dioxide, but that also lets a ton of moisture escape. An aloe is smarter than that. It keeps its pores sealed shut during the hot day and opens them in the cool of the night to take in CO2. It then stores that CO2 to process with sunlight the next day. This is why you hear people call them great bedroom plants—they’re releasing fresh oxygen while you sleep.
And the roots? They’re not deep anchors. They are shallow, fine, and spread out wide, designed to quickly slurp up any rare desert rainfall before it evaporates. This means they need air to function and will rot quickly if they’re stuck in a deep, soggy pot of soil. That’s it. That’s the big secret: don’t let the roots suffocate.
Setting Up Your Aloe’s Perfect Home
If you can get the light, temperature, and pot right, you’ve already won half the battle. This is all about mimicking its natural environment as best you can.
Light: Bright, But Not Scorching
Aloes love bright light, but the advice to give it “as much sun as possible” can be misleading. They really crave bright, indirect light. An east-facing window with gentle morning sun is practically perfect. A spot a few feet back from a sunny south or west-facing window is also a great choice. Direct, harsh afternoon sun can actually scorch the leaves, turning them an ugly reddish-brown. That’s the plant creating a ‘sunscreen’ to protect itself—and it’s a clear sign of stress.
By the way, if you only have a north-facing window, that’s probably not enough light on its own. The aloe will likely get ‘leggy,’ stretching out and looking weak. If that’s your only spot, you’ll want to invest in a small, affordable LED grow light to keep it happy.
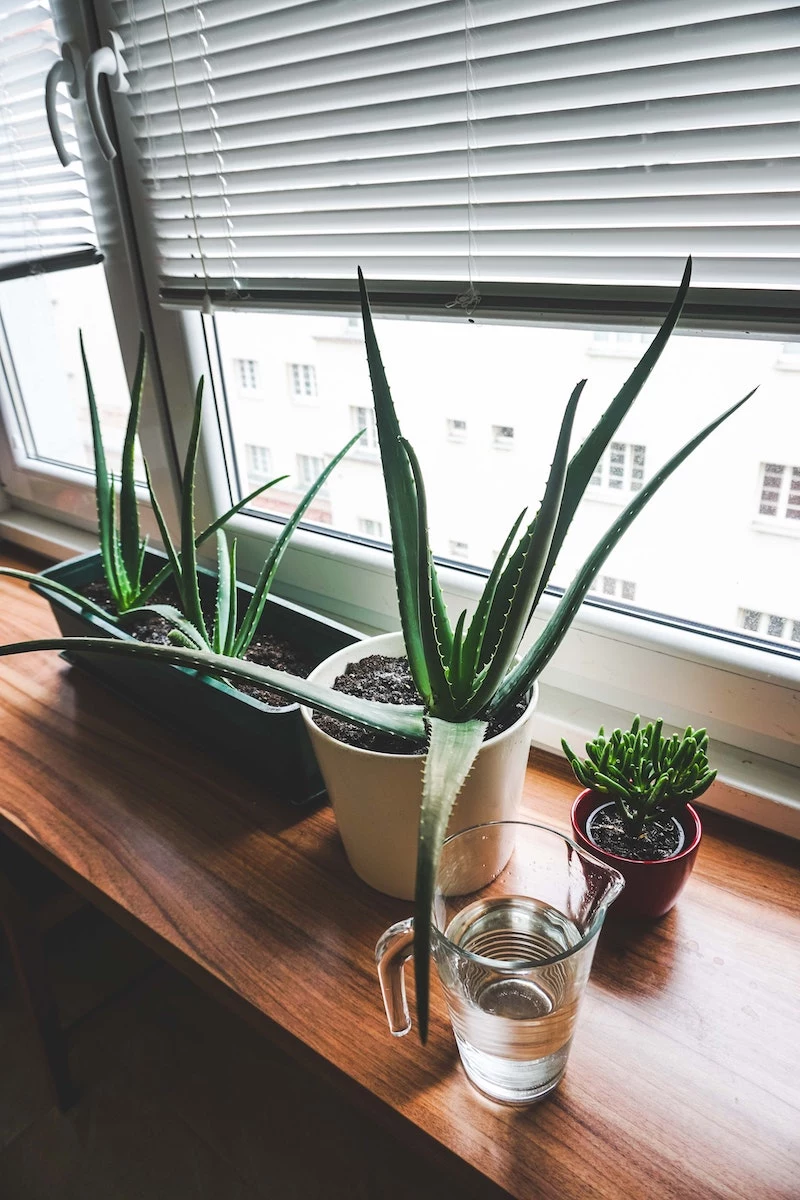
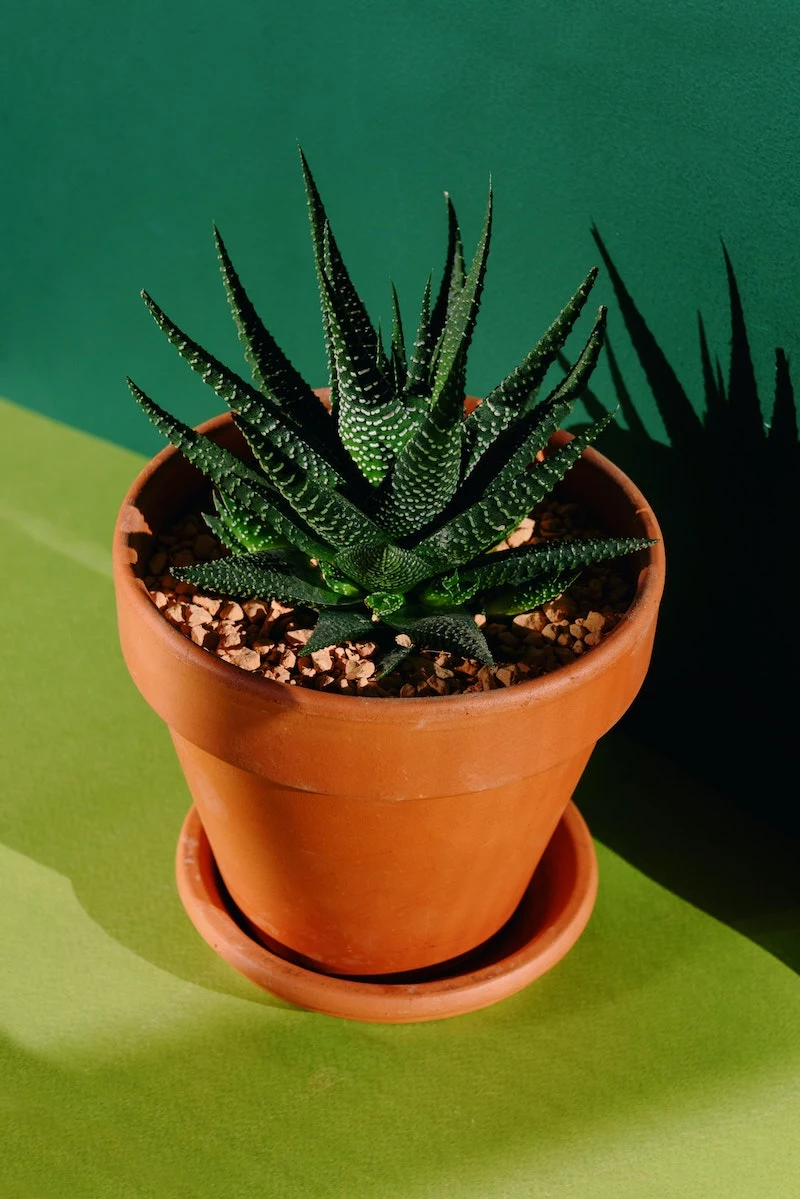
Pots: Why Terracotta is Your Best Friend
I can’t overstate this: the pot matters. I almost always recommend unglazed terracotta (clay) pots for aloes, especially for beginners. Why? Because terracotta is porous. It breathes. This helps the soil dry out much faster and more evenly, giving you a huge buffer against accidental overwatering.
Plastic or glazed ceramic pots look nice, but they’re waterproof. They hold moisture in for a long, long time. If you use one, you have to be way more careful with your watering. For a beginner, it’s like learning to drive in a race car. It’s doable, but the margin for error is tiny.
And no matter what, the pot MUST have a drainage hole. A pot without one is a death sentence. It’s not a planter; it’s a bathtub. If you have a beautiful decorative pot with no hole, just use it as a cover pot. Keep your aloe in a basic terracotta pot and slip it inside the fancy one.
Oh yeah, and don’t put a tiny plant in a giant pot. All that extra soil holds moisture for way too long, creating a swamp around your plant’s small root ball. A pot that’s just an inch or two wider than the root system is perfect.
Your 5-Minute Aloe-Saving Task for Today:
Go check your plant right now. Is it in a pot without a drainage hole? Your mission is to gently slide it out and pop it into a cheap terracotta pot that has one. You’ve just saved it from its number one killer! Seriously, it’s the best thing you can do for it.
Watering: Forget the Schedule, Read the Plant
If you take one thing away from this, let it be this: do not water your aloe on a schedule. Watering every Sunday is a recipe for disaster. The plant’s needs change constantly with the light, season, and even the humidity in your house. You have to learn to check the soil.
The method is called ‘soak and dry.’ When it’s time to water, do it thoroughly. Drench the soil until water pours out of the drainage hole. This ensures all the roots get a drink and also helps flush out mineral buildup from your tap water. Then, and this is the important part, let it completely dry out before you even think about watering it again.
How do you know it’s dry? Don’t just look at the top inch of soil. You need to know what’s happening down below.
- The Finger Test: The classic for a reason. Stick your finger into the soil up to the second knuckle. If you feel even a hint of coolness or moisture, walk away. Wait.
- The Weight Test: Once you get used to your plant, you’ll notice a huge difference in weight between a freshly watered pot and a bone-dry one.
- The Chopstick Trick: Gently push a wooden skewer or chopstick all the way to the bottom of the pot. Leave it for a minute. If it comes out clean and dry, it’s time to water. If it has damp soil clinging to it, you need to wait longer.
From my experience, an aloe in a good pot and the right light might need water every 3-4 weeks in the summer, and maybe only every 6-8 weeks in the winter. But that’s just a ballpark. Always, always check first.
The Right Soil and When to Feed It
Regular potting mix from the garden store is a no-go. It’s designed to hold water for thirsty tropicals. For an aloe, it’s like making it wear a wet coat all winter. You need a gritty, fast-draining mix. You can buy bags of ‘Cactus and Succulent Mix,’ and they’re a good starting point, but I find they’re even better with a little extra grit.
My go-to recipe is super simple. Just mix equal parts:
- One part standard potting soil (for a few nutrients)
- One part perlite or pumice (to create air pockets for drainage)
- One part coarse horticultural sand (for drainage and weight)
You can find all of these at a local nursery or garden center, or online. A quick tip: make sure it’s ‘horticultural sand,’ not fine play sand, which will just compact and turn to concrete. The final mix should feel gritty and fall apart easily in your hands.
When it comes to fertilizer, less is more. Aloes are light feeders. I only fertilize during the spring and summer growing season, and even then, I use a balanced liquid fertilizer diluted to half or even quarter strength, maybe once a month. Don’t fertilize at all in the fall and winter.
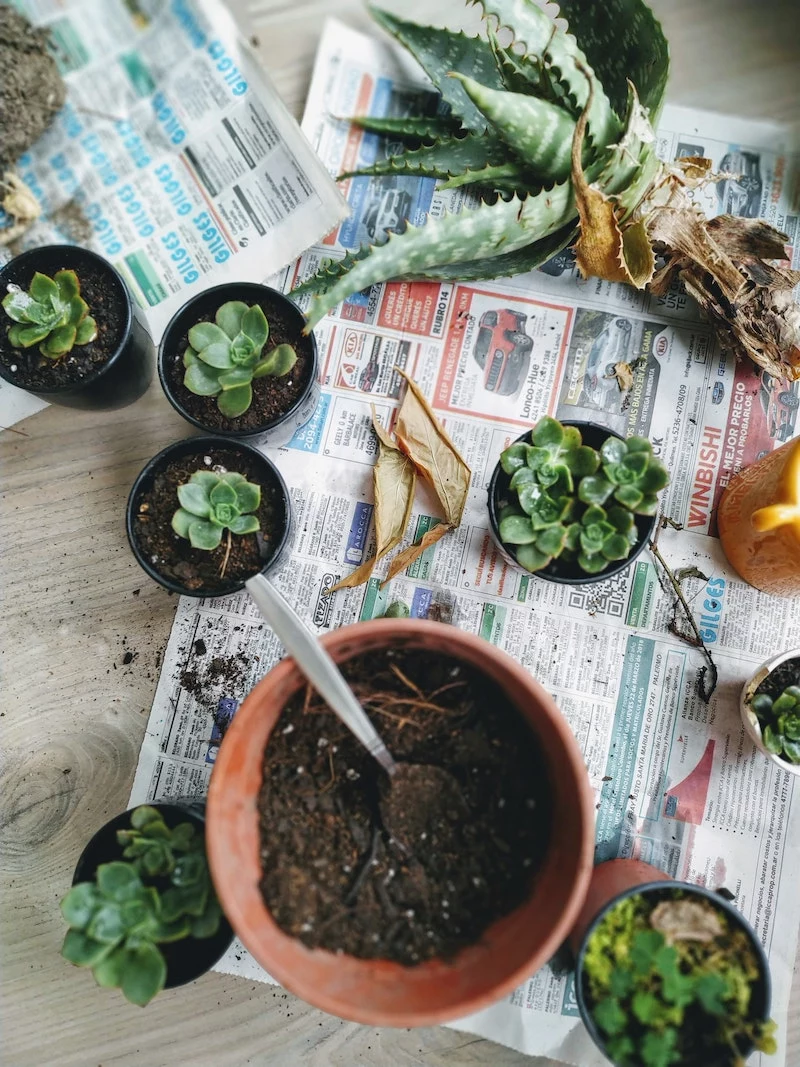
Repotting, Pups, and Other Good Stuff
Eventually, your plant will grow up, and you might want to make more. It’s easy!
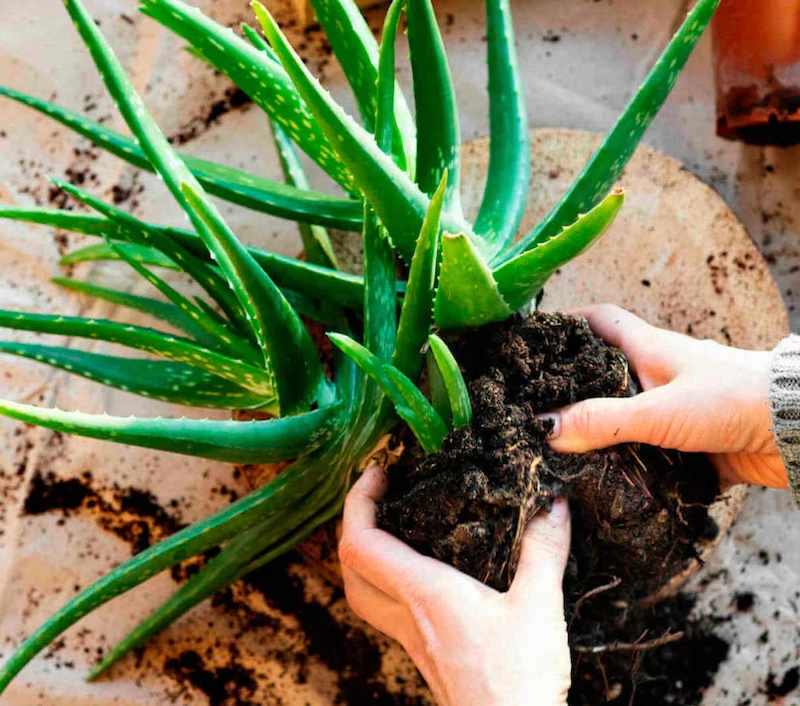
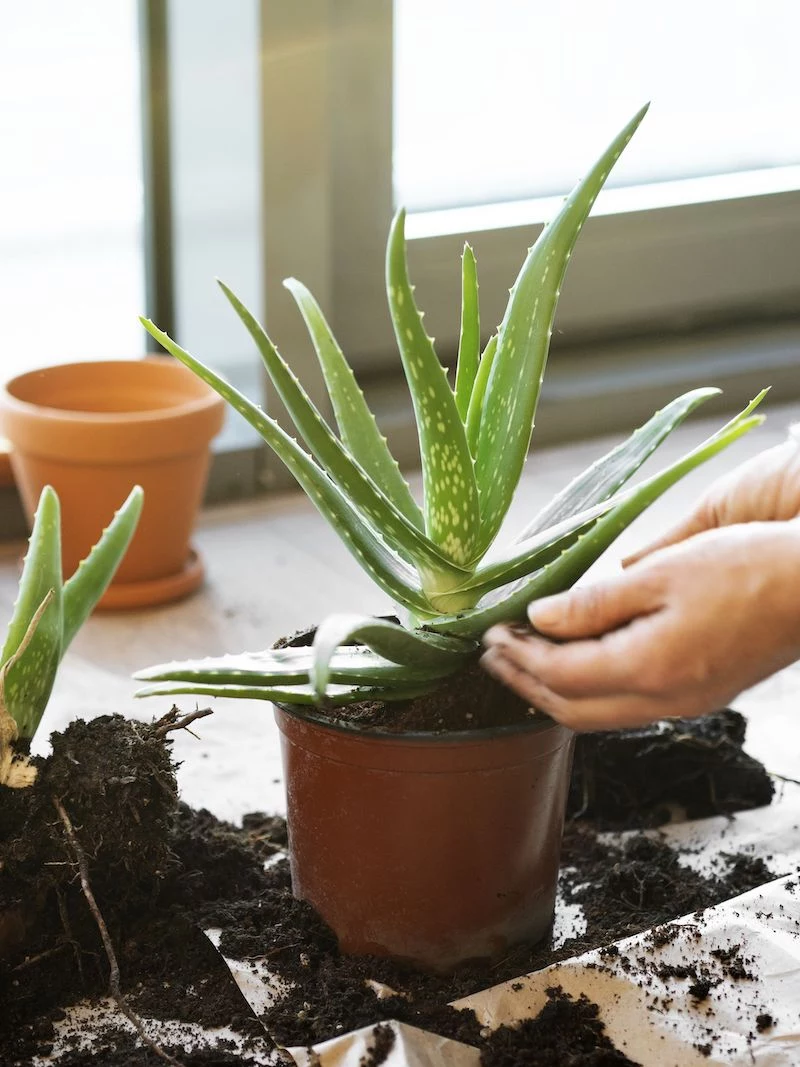
You’ll know it’s time to repot when the plant is top-heavy or when roots are busting out of the drainage hole, usually every 2-3 years. When you do, only go up one pot size (1-2 inches wider). After you gently remove the plant, knock off the old soil and trim any black or mushy roots. Place it in the new pot with your gritty soil mix.
Heads up! This next step is critical. After repotting, DO NOT WATER for at least a week. I know it feels wrong, but any cut or broken roots need time to callous over. Watering right away invites rot. Be patient.
A happy aloe will also produce little babies, or ‘pups,’ around its base. Once a pup is a decent size—I’d wait until it’s at least 3-4 inches tall with its own set of leaves—you can gently separate it from the mother plant with a clean knife. Let the pup’s cut end dry out for a few days until it’s calloused, then pot it in its own small container. And just like with repotting, wait a week before you give it its first sip of water.
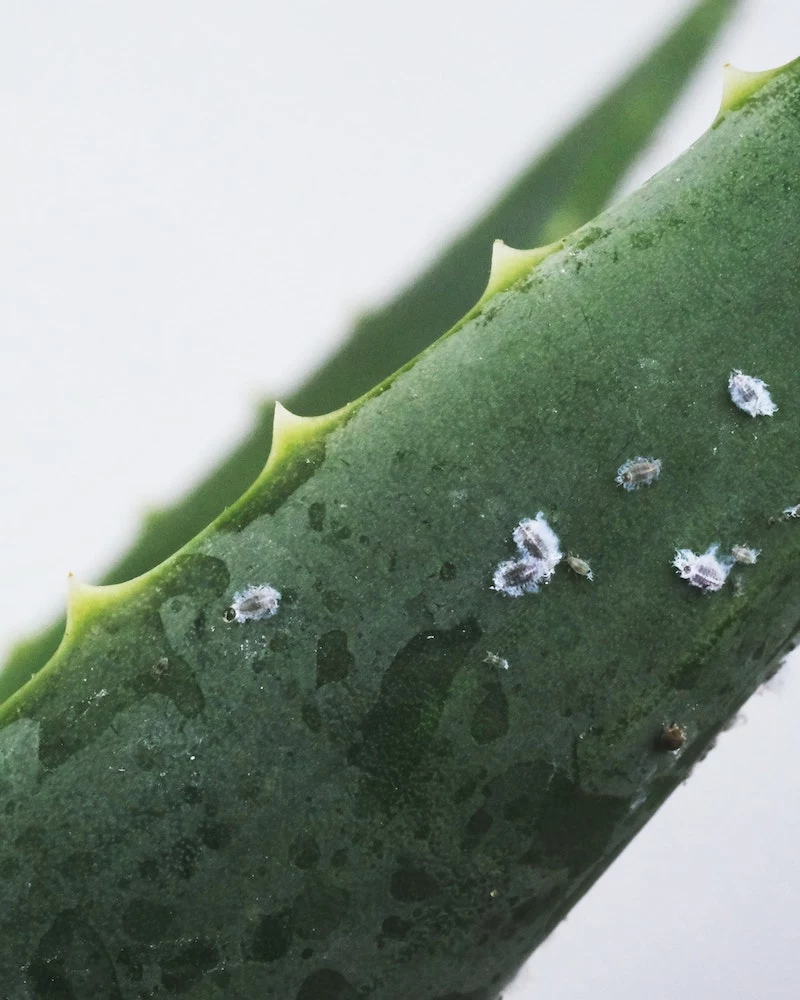
A Serious Warning About Harvesting Aloe Gel
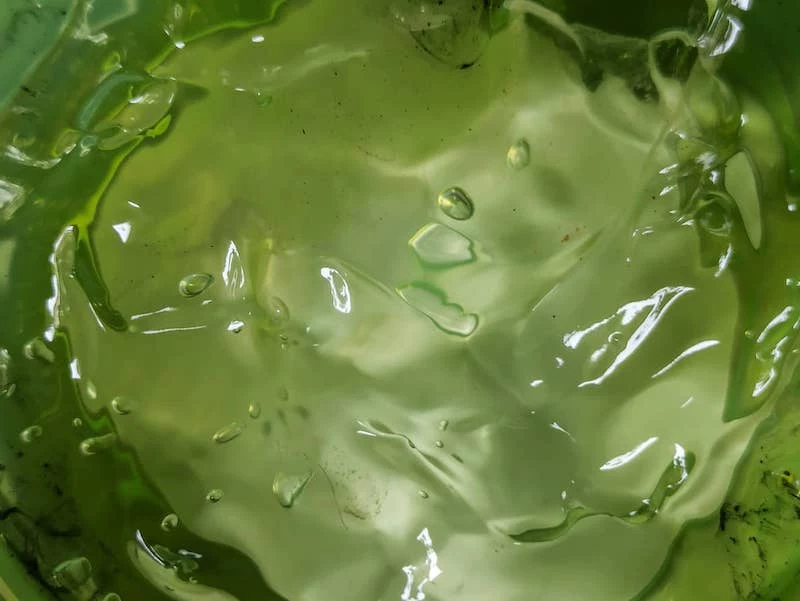
Okay, let’s talk about the famous gel. A lot of people grow aloe for its soothing properties, but you have to be careful. The leaf contains two different substances.
The clear, thick stuff in the middle is the gel you want. But right under the green skin, there’s a thin layer of yellow, bitter liquid called latex or aloin. This stuff is a powerful laxative and can cause some serious stomach upset if you ingest it. The aloe products you buy in a store have been purified to remove it.
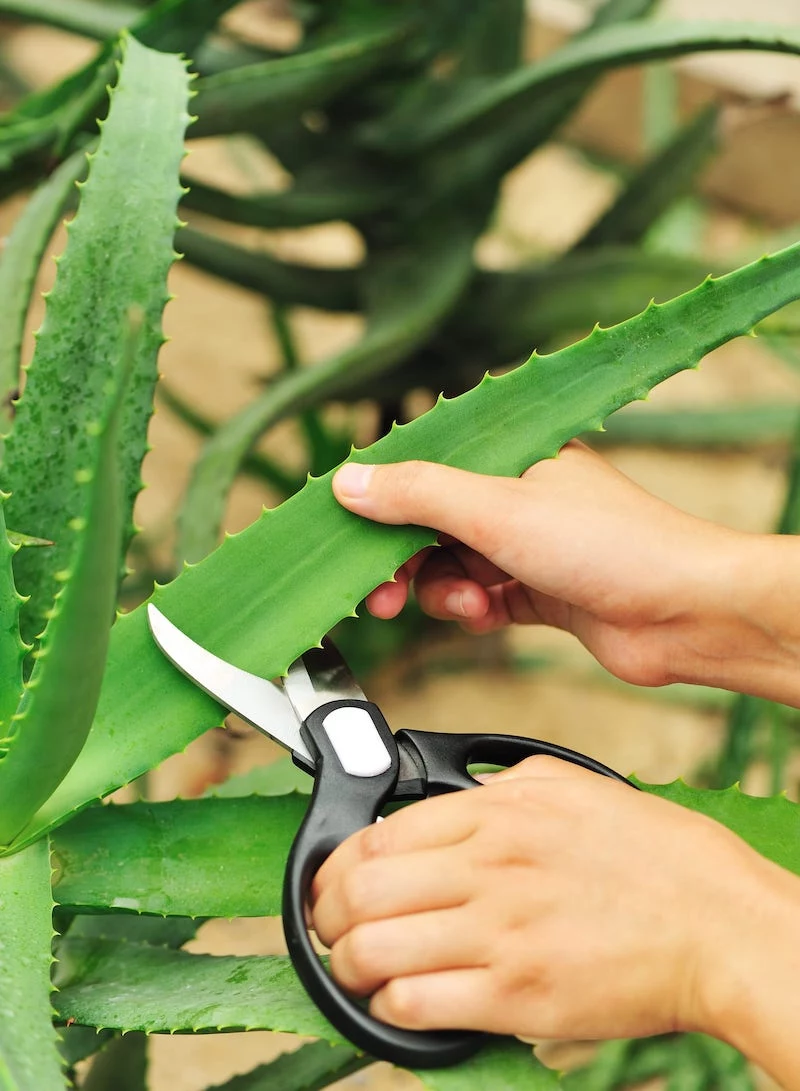
If you want to use the gel topically (on your skin), here’s how to do it safely. First, only harvest from a mature, healthy plant.
- Cut a thick, outer leaf from the base.
- This is the most important step: Stand the cut leaf upright in a jar for about 15 minutes. You’ll see the yellow latex drain out.
- After it’s drained, rinse the leaf, lay it flat, and trim the spiky edges.
- Carefully slice off the top layer of green skin, like filleting a fish.
- Now you can scoop out the pure, clear gel.
A final, important disclaimer: I’m a plant expert, not a doctor. Always test the gel on a small patch of skin first to check for a reaction. And please, never eat homegrown aloe without talking to a medical professional who understands the risks. For anything you’re going to consume, stick to the purified commercial stuff. It’s just not worth the risk.
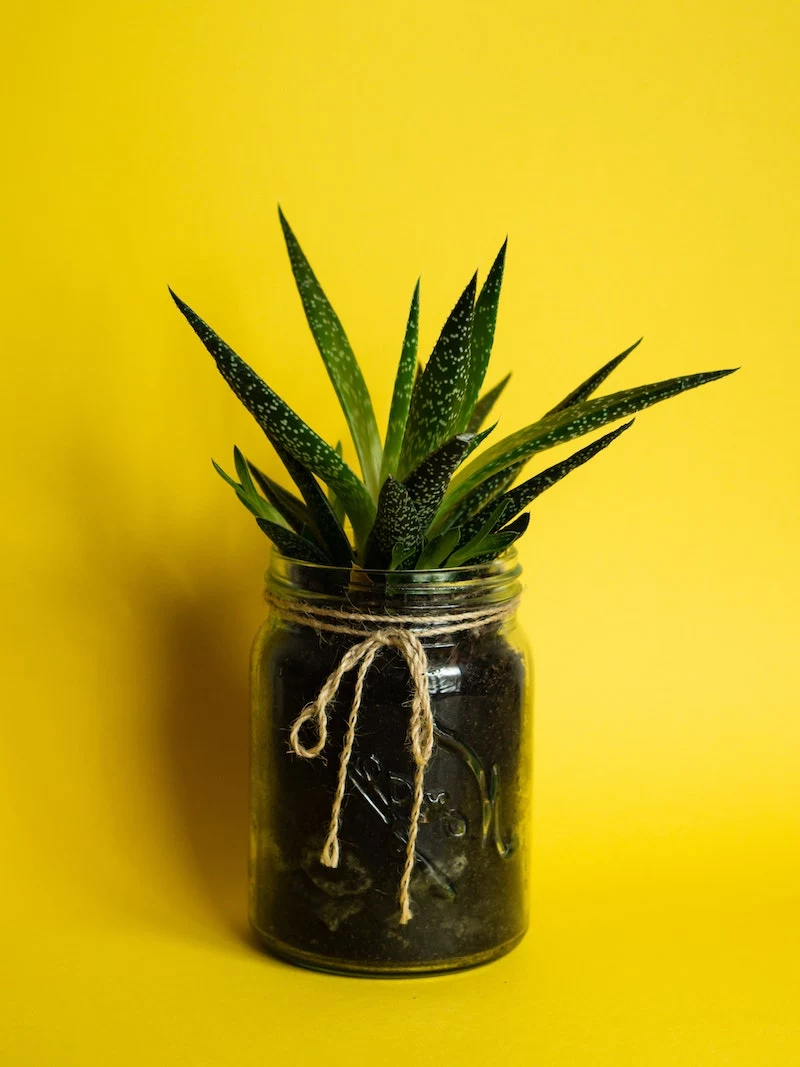
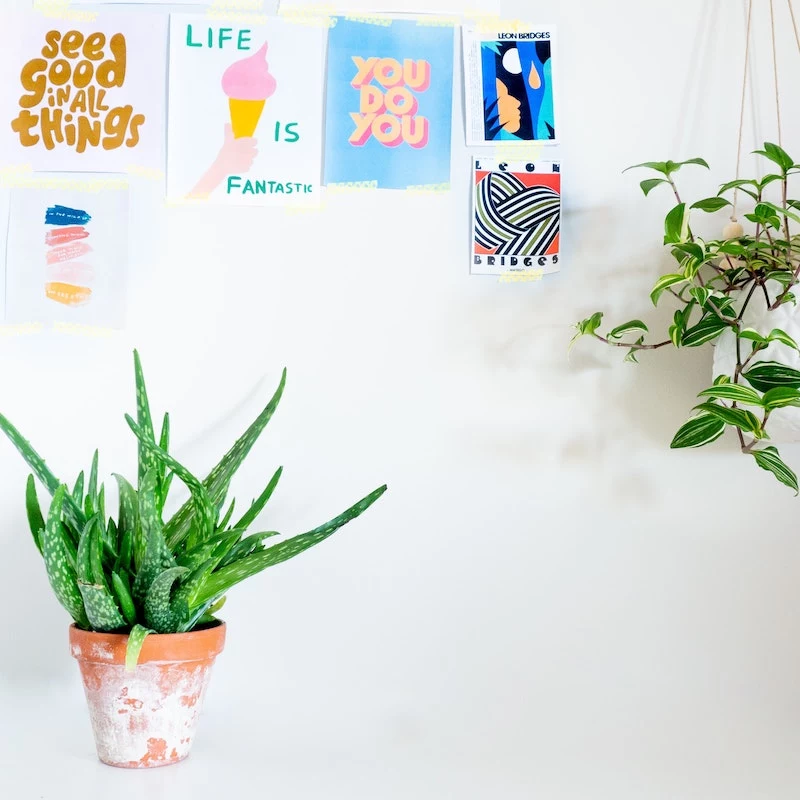
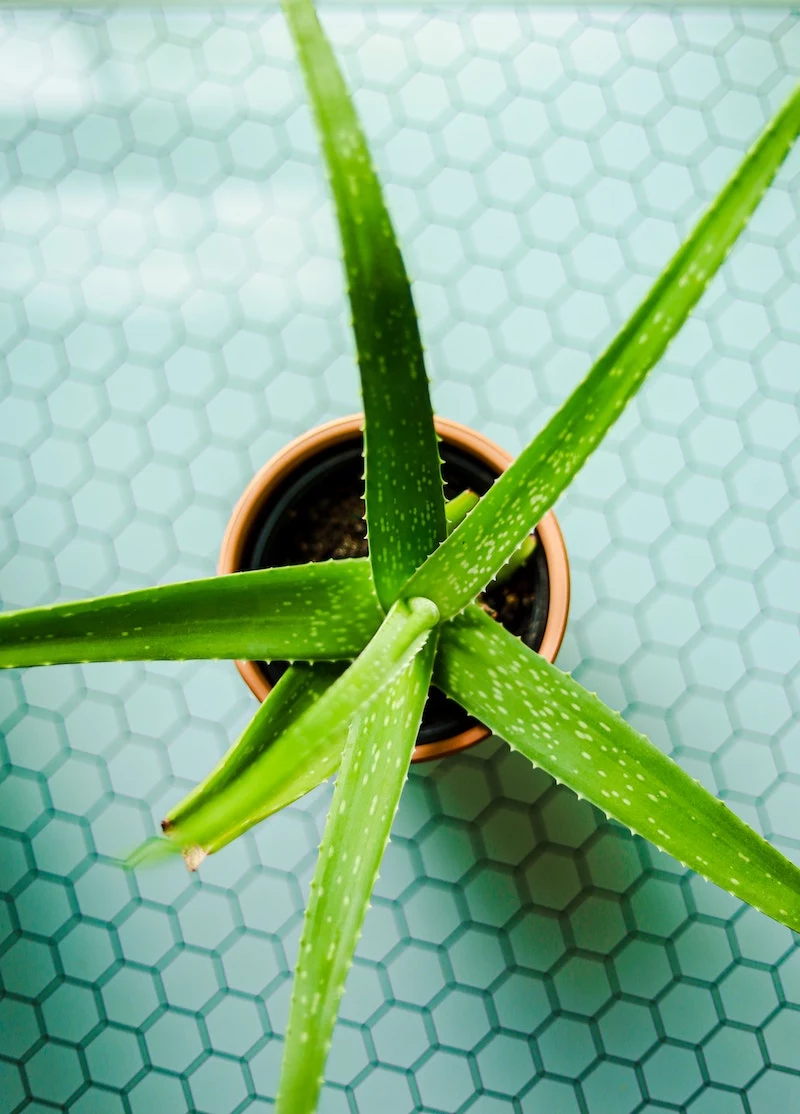
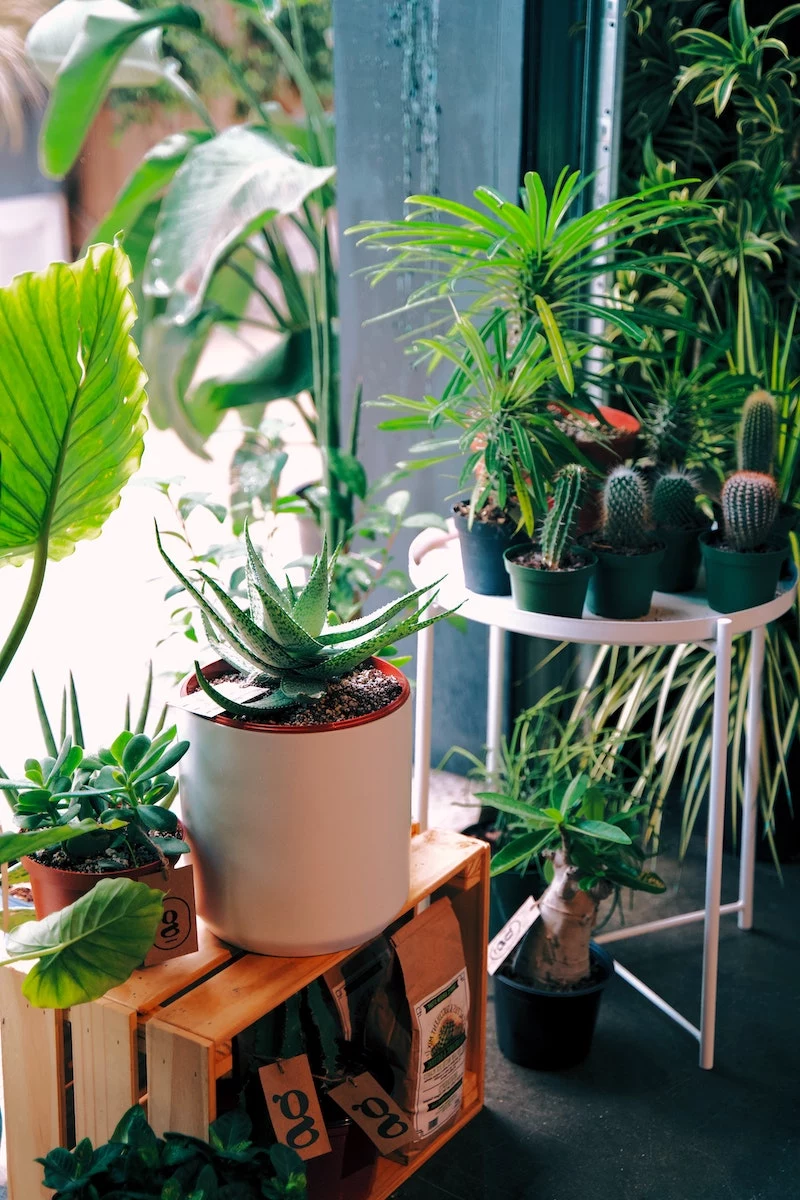
Inspirational Gallery
Why are my aloe’s leaves turning reddish-brown and feeling a bit crisp?
That’s a classic case of sunburn! While aloes are desert plants, intense, direct afternoon sun through a window can be too much, scorching their leaves. It’s their version of a protective tan that can go too far. The solution is simple: move it to a spot that gets bright but indirect light, like a few feet back from a south-facing window or in an east-facing one that only gets the gentler morning sun.
Aloes utilize a special type of photosynthesis (CAM) where they open their pores at night to absorb CO2, unlike most plants which do so during the day.
This is a key water-conservation trick from their desert origins. In practice, this means it’s best to water your aloe in the morning. This gives the soil surface time to dry before the plant becomes most active at night, drastically reducing the risk of fungus gnats and rot near the plant’s base.
The one non-negotiable rule: Your pot MUST have a drainage hole. No exceptions. An aloe sitting in stagnant water is a direct path to root rot. If you fall in love with a decorative pot that lacks a hole, use it as a ‘cachepot’—simply place the aloe in its basic plastic nursery pot inside the decorative one, and remove it for watering.
While the common Aloe barbadensis miller is fantastic, the aloe family is vast and visually diverse. For a stunning collection, consider adding a sculptural Spiral Aloe (Aloe polyphylla) or the compact, toothy Tiger Aloe (Gonialoe variegata). Placing different varieties together creates a beautiful, low-maintenance display of textures and forms.
The right soil is your best insurance against overwatering. While pre-made succulent mixes like those from Espoma or Miracle-Gro work well, you can easily create a superior blend yourself.
- 2 parts standard potting soil
- 1 part perlite (for aeration)
- 1 part coarse sand or fine pumice (for drainage)
Just mix these components thoroughly for a fast-draining medium your aloe will love.
- It prevents the main plant from becoming overcrowded, focusing its energy on strong, healthy growth.
- It provides you with a supply of free, new plants to expand your collection or give as thoughtful gifts.
The secret? Propagating the ‘pups’. These small offsets that sprout from the base can be gently separated and repotted once they reach a few inches in height and have developed their own root systems.
Terracotta Pots: Their porous clay material breathes and wicks moisture away from the soil, allowing it to dry out faster. This is incredibly forgiving and makes it the perfect choice for beginners who are worried about overwatering.
Glazed Ceramic or Plastic Pots: These are non-porous and hold moisture for much longer. They can be beautiful, but are less forgiving. They are better suited for more experienced owners or for aloes kept in very hot, dry environments.
Don’t be surprised if your aloe goes dormant in the winter. Its growth will slow down significantly, and it will need much less water—perhaps only once a month, depending on your home’s humidity.


