Growing a Mango Tree from a Pit: The Honest Truth About What to Expect
I’ve spent a couple of decades with my hands in the dirt, from big commercial nurseries down in Florida to my own chilly back porch trying to keep citrus trees happy. And let me tell you, few things get people more excited—and full of questions—than growing a mango tree from a grocery store seed. It feels like a magic trick, right? Turning a piece of garbage into a living, breathing tree.
In this article
- First, Let’s Talk Budget: What Will This Actually Cost?
- The Seed Itself: A Tale of Two Mangoes
- Heads Up! What to Do with Multiple Sprouts
- Getting the Seed Ready: The Pro Technique
- Three Ways to Sprout Your Mango Seed
- From Sprout to Sapling: The First Couple of Years
- Where Will It Live? Pot vs. Ground
- A Pro Tip: Why We Usually Use Grafting
- Troubleshooting Common Issues
- A Final Word on Patience (and Safety!)
- Inspirational Gallery
It’s absolutely possible. I’ve walked hundreds of people through it. But I’m a big believer in starting with some real talk. This is a project about patience, and the results can be a total crapshoot. So before we get our hands dirty, let’s talk about what’s really going on inside that seed.
First, Let’s Talk Budget: What Will This Actually Cost?
Good news! This is one of the cheapest gardening projects you can tackle. You’re basically starting with trash. Here’s a quick rundown of potential costs:
- The Mango: You have to buy it to eat it, so let’s call the seed free. But if you’re buying one just for this, expect to pay $1 to $3 for a good one.
- Starter Pot: A 1-gallon nursery pot is perfect and usually costs between $2 and $5 at a place like Home Depot or a local garden center. Or, you know, recycle a plastic container from something else—just be sure to poke plenty of drainage holes in the bottom.
- Potting Supplies: A small bag of quality potting mix runs about $8-$12. A bag of perlite, which is essential for drainage, is another $5-$8. These bags will be enough for several projects, so the per-pot cost is super low.
All in, you can get this whole thing started for under $20, and even less if you’re resourceful. Not bad for a potential tree!
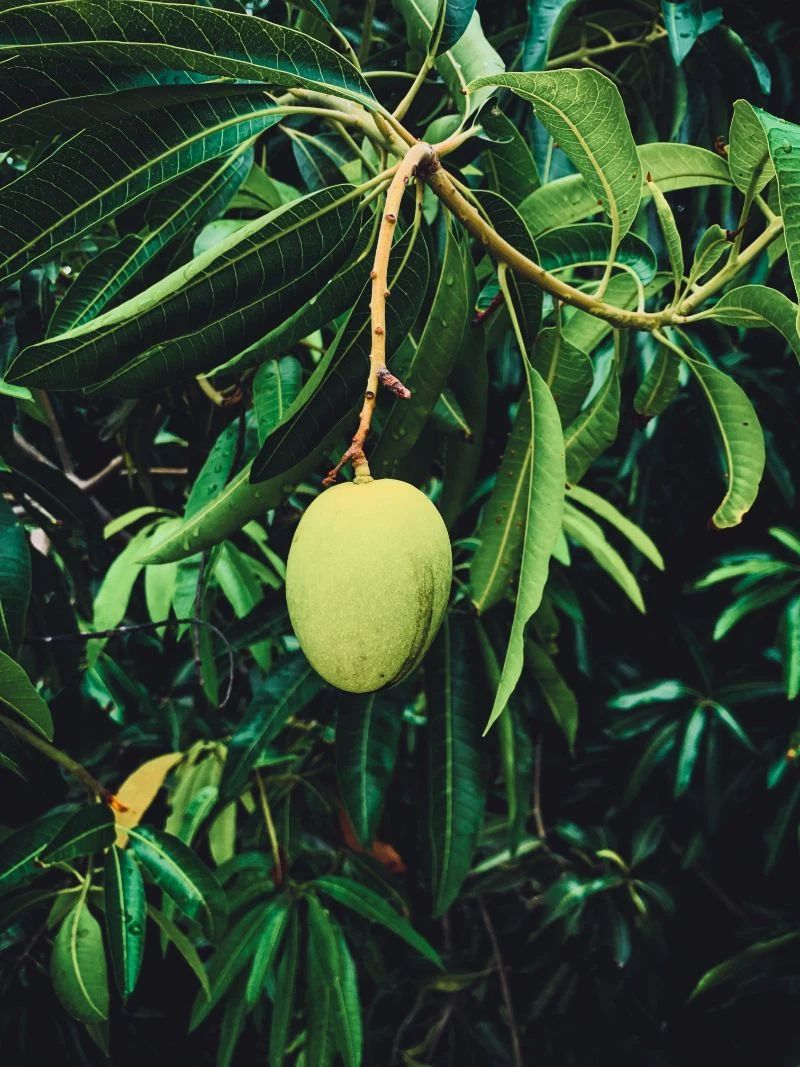
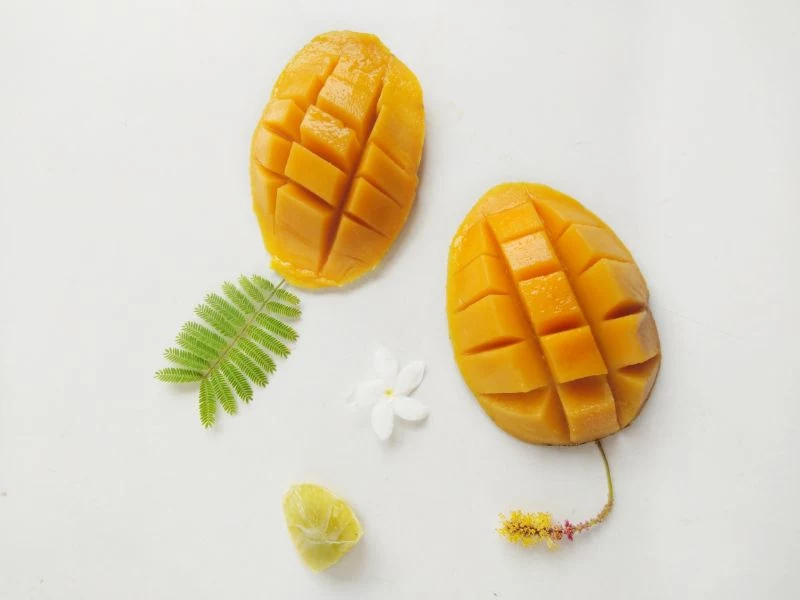
The Seed Itself: A Tale of Two Mangoes
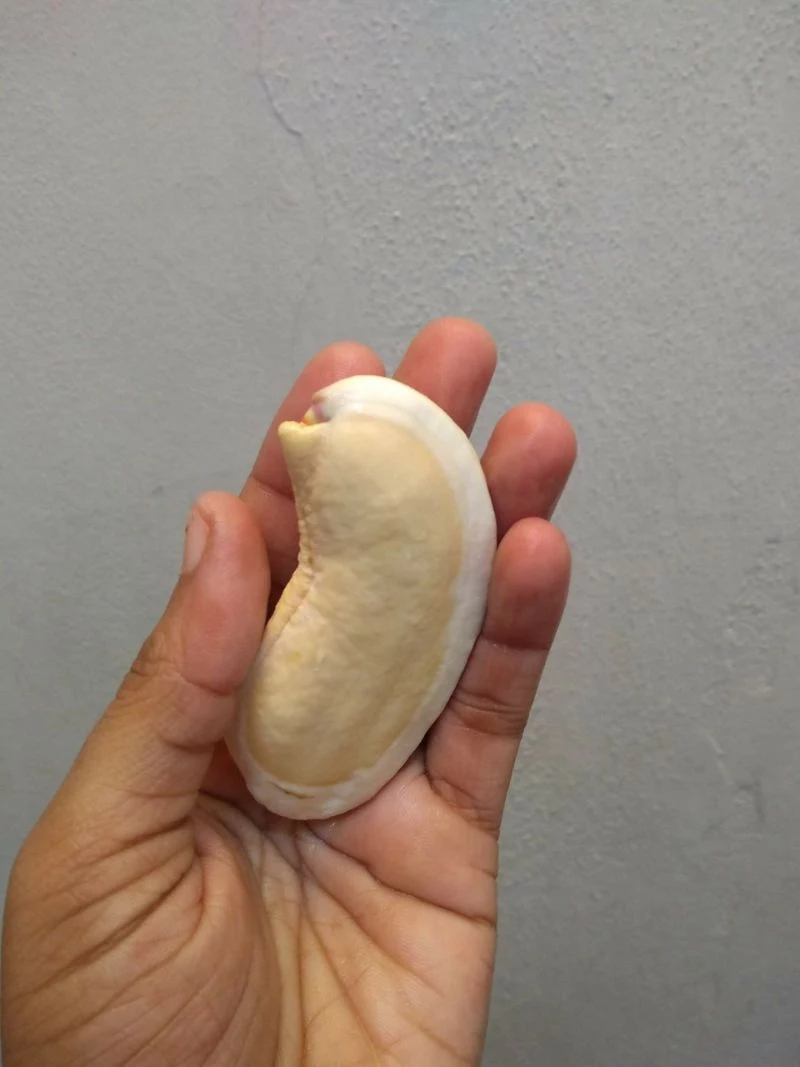
When you crack open that tough, woody mango husk, you’ll find the kernel. This is the blueprint for your new tree. But here’s the secret that the pros know: mango seeds come in two very different types, and which one you have changes everything.
1. The Genetic Gamble (Monoembryonic Seeds)
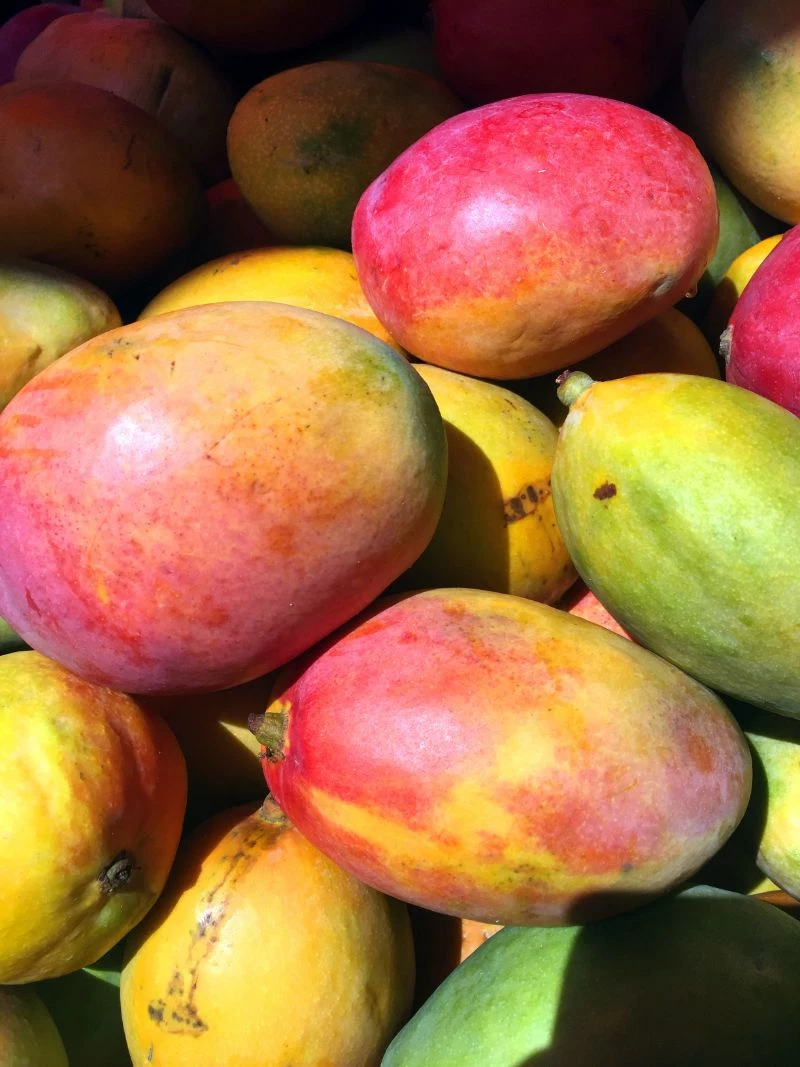
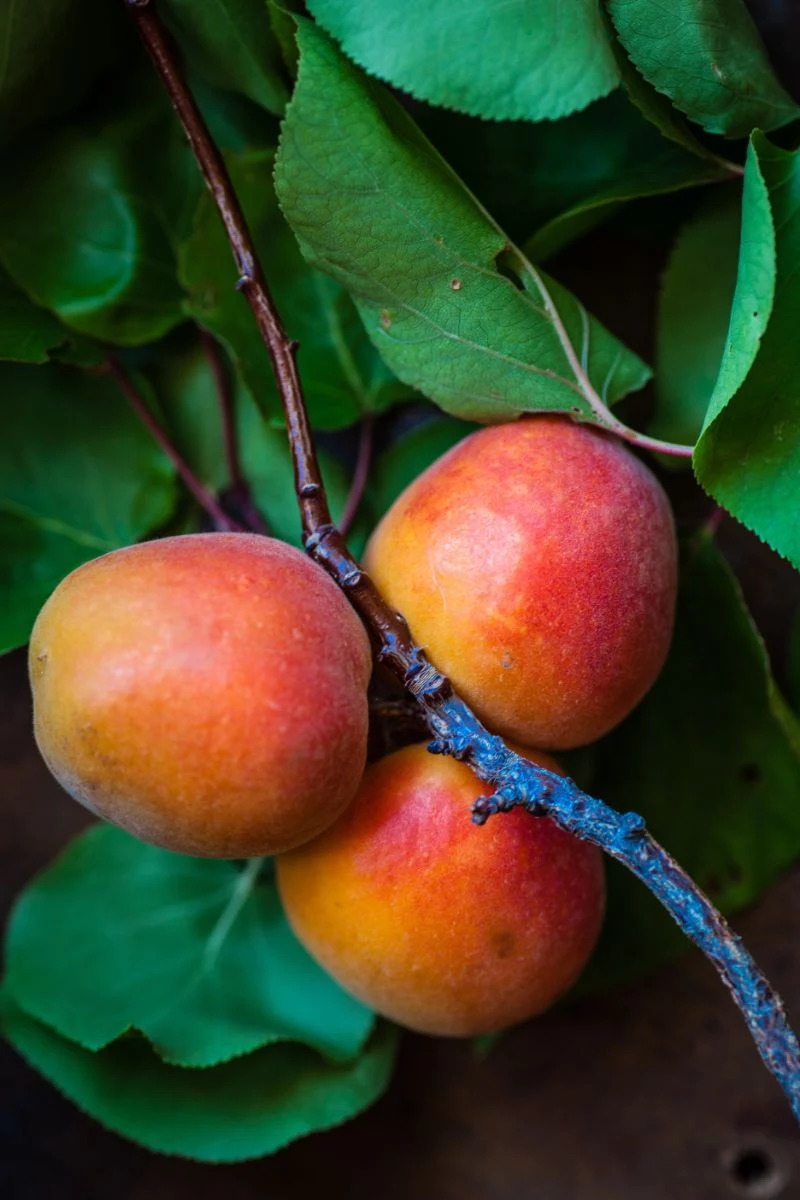
Most of the big, round, red-and-green mangoes you find in a typical supermarket are what we call monoembryonic. ‘Mono’ means one. These seeds have one single embryo inside, which is a genetic mix of its mother tree and whatever tree pollinated the flower. Just like with people, the baby tree won’t be an exact copy of its parent. The fruit it produces years from now—if it ever does—will be a complete surprise. It could be amazing, or it could be stringy and sour. It’s a total lottery ticket.
2. The Reliable Clone (Polyembryonic Seeds)
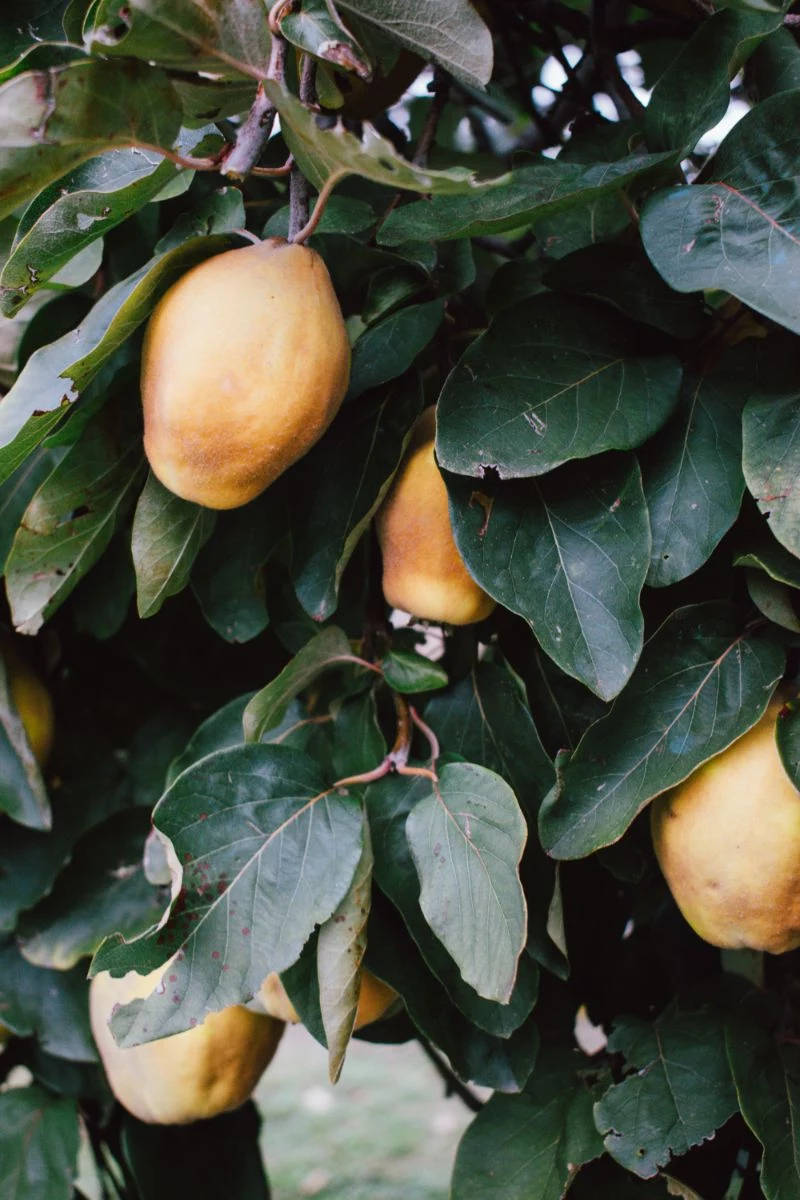
Then you have the other kind, which are called polyembryonic. ‘Poly’ means many. These seeds are more common in the slender, kidney-shaped yellow mangoes often sold as ‘honey’ or ‘champagne’ mangoes. These are the ones I recommend you use! A polyembryonic seed has multiple embryos. One is the genetic lottery ticket, but the others are nucellar embryos—exact clones of the delicious mother tree.
So, how do you know which you have? It’s a pretty good rule of thumb: the big, round, colorful ones are the gamble. The long, flat, yellow ones are your best bet for getting a tree that produces fruit ‘true’ to the one you ate.
Heads Up! What to Do with Multiple Sprouts
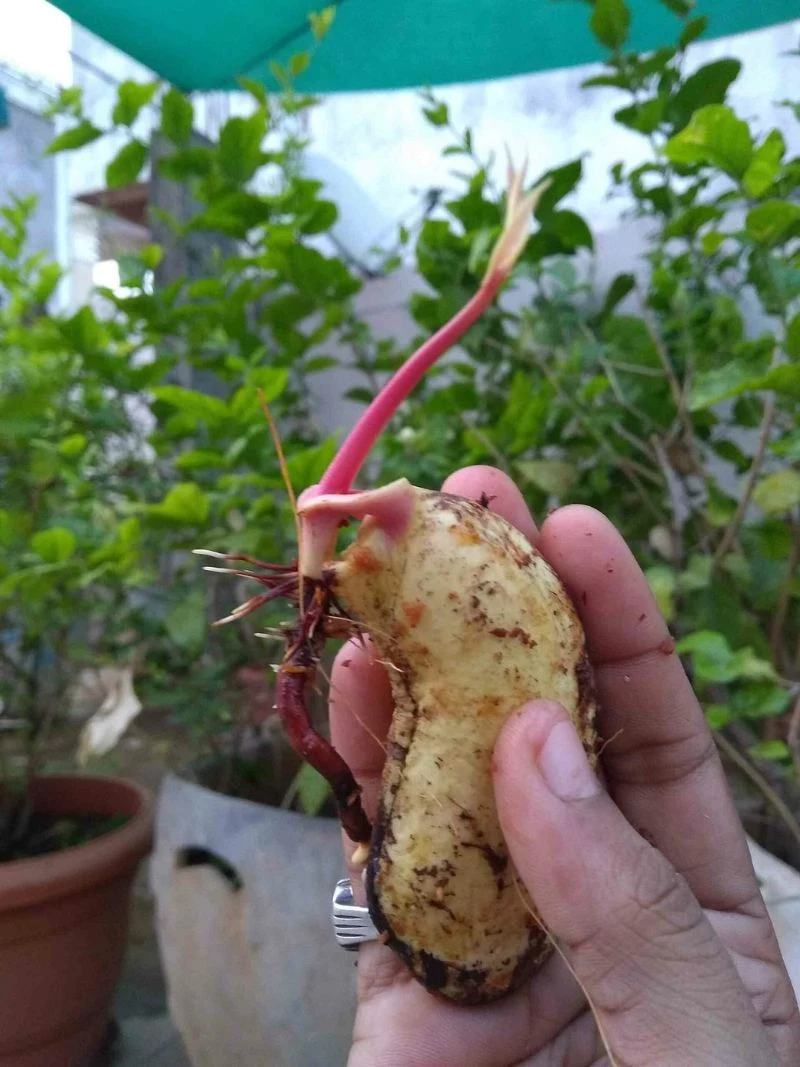
Oh yeah, a quick but important aside. When your polyembryonic seed sprouts, you’ll often see several little shoots pop up. This is a great sign! But you can’t let them all grow together.
Wait until the sprouts are about two or three inches tall. Then, very gently, tip the whole thing out of the pot and wash the soil away from the roots. You’ll see the sprouts are all connected to the single seed. Your job is to pick the winner. Look for the shoot that is the thickest, most vigorous, and healthiest-looking—that’s almost certainly the clone. Using a clean, sharp pair of small scissors, carefully snip off the smaller, weaker sprouts right at the base where they connect to the seed. It feels a bit brutal, but it channels all the energy into the one sprout you want to grow.
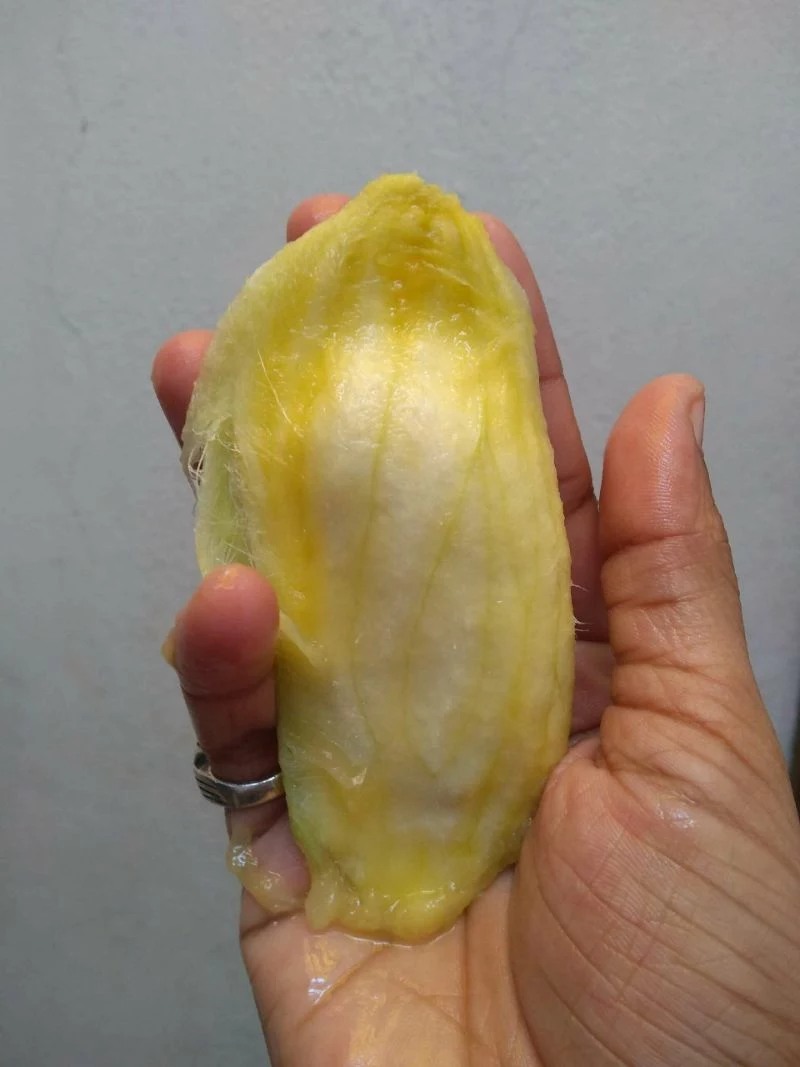
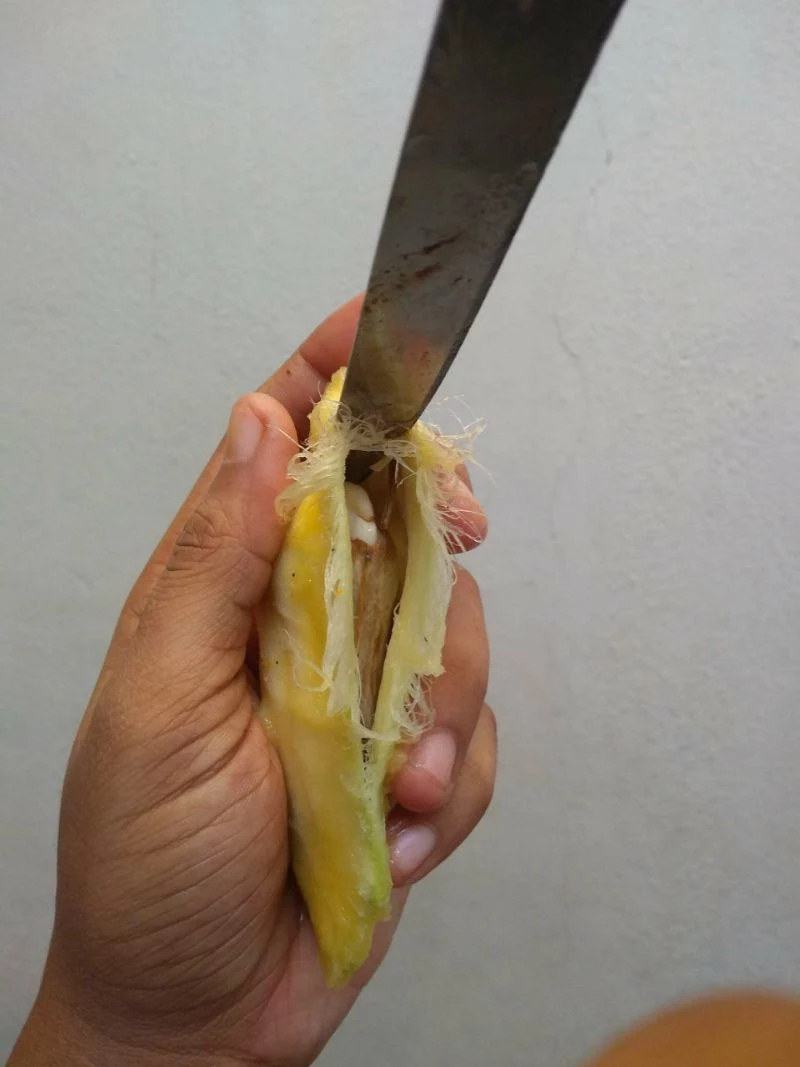
Getting the Seed Ready: The Pro Technique
Okay, let’s get that seed out of its husk. Mold and rot are your biggest enemies here, so a clean extraction is non-negotiable.
A Quick Safety Warning: A fresh mango husk is incredibly slippery, and you’ll be tempted to use a sharp knife. Please don’t. I’ve seen people get nasty cuts this way. Always work on a stable cutting board and use a sturdy butter knife or even a flathead screwdriver to pry, not slice. Better yet, here’s my favorite trick: let the husk dry out on a sunny windowsill for a few days. It gets brittle and you can often crack it open with a gentle squeeze from a pair of pliers.
- Scrub the Husk: After you’ve enjoyed your mango, take that husk to the sink and give it a serious scrub with a stiff brush. Get every last bit of sugary pulp off. I once got lazy with this step and came back a week later to a fuzzy blue science experiment instead of a seed. Lesson learned!
- Pry it Open: Gently work the tip of your butter knife into the seam along the edge and twist. You just want to pop it open enough to slide the kernel out without nicking it.
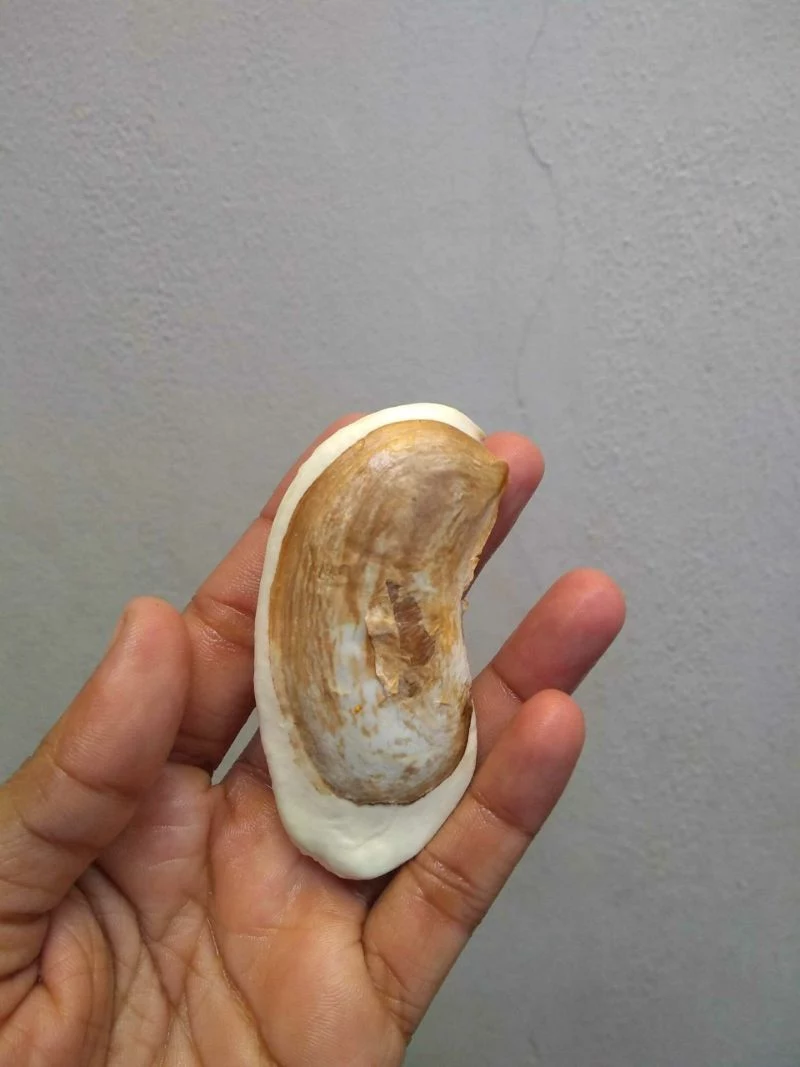
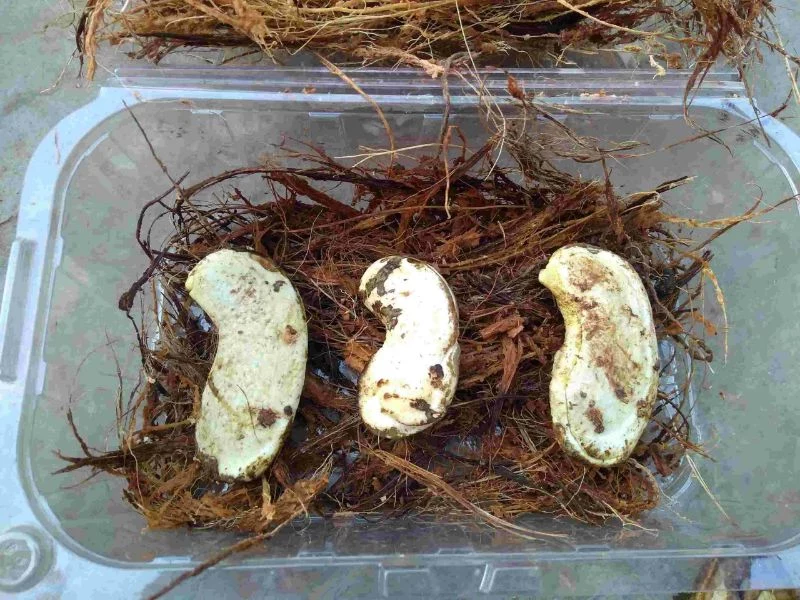
- Inspect the Kernel: The seed inside should look like a giant lima bean—firm and creamy-white or tan. If it’s black, shriveled, or mushy, it’s a dud. Toss it and try again.
- Peel the Skin (Optional, but I always do it): The kernel has a thin, papery brown skin. I recommend peeling this off with your thumbnail. It can trap moisture and promote rot, so getting it off gives you a better shot at success.
Once it’s peeled, you can give it an extra layer of protection. For a home grower, a light dusting of ground cinnamon is perfect. Cinnamon has natural anti-fungal properties and it’s a safe, easy precaution.
Three Ways to Sprout Your Mango Seed
There’s more than one way to do this. Your choice really just depends on how patient you are and how much you want to watch the magic happen.
The Impatient Gardener’s Method (Paper Towel Incubator)
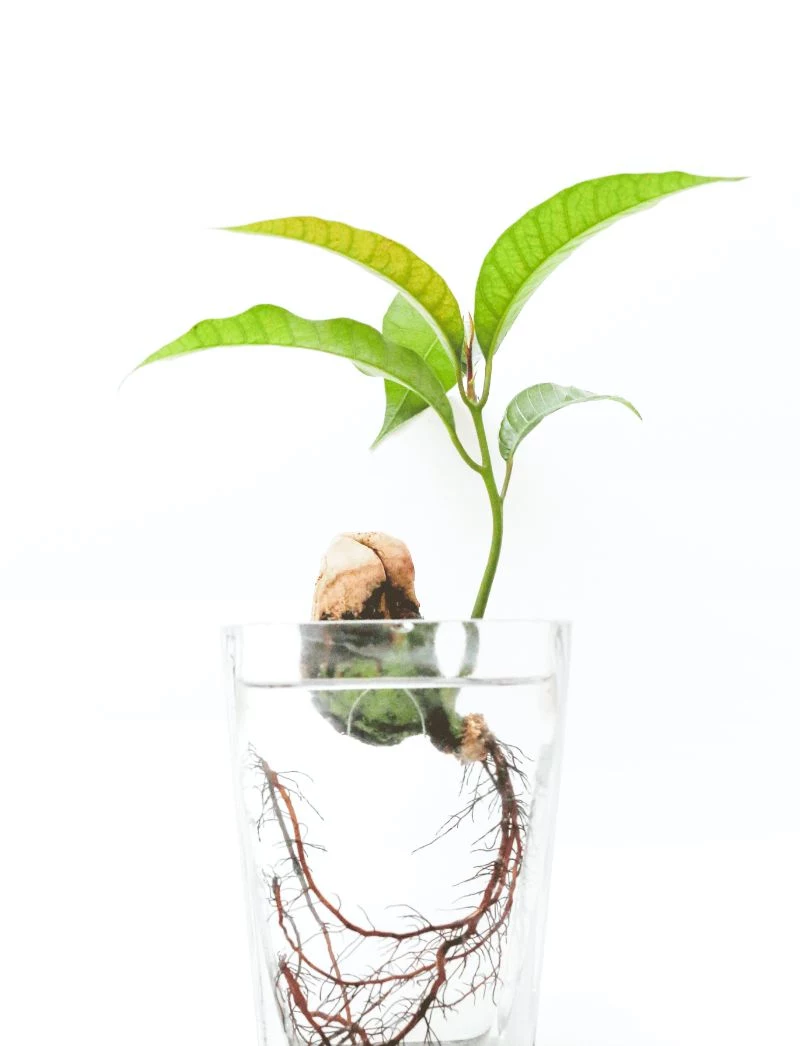
This is my go-to because you can see everything that’s happening. You’ll need a paper towel and a zip-top bag. Dampen the towel so it’s like a wrung-out sponge—not dripping wet! Wrap your kernel in the towel, place it in the bag, and push most of the air out, leaving a tiny corner unsealed for airflow. Stick it somewhere warm and dark, like on top of your fridge. Check it every few days. In one to three weeks, you should see a thick little root emerge. Once that root is about an inch long, it’s ready for planting.
The Natural Way (Direct Sowing)
This is the most straightforward method. You’ll need a 1-gallon pot with great drainage. Mangoes HATE wet feet. Don’t use heavy garden soil. For a standard 1-gallon pot, just mix about 4 cups of good potting soil, 4 cups of perlite or coarse sand, and 4 cups of compost. Plant the seed about 3/4 of an inch deep, with its ‘belly button’ (the little indent on the curved edge) facing down. Keep the soil moist but not soggy in a warm, bright spot. You’ll need patience here; it can take two to six weeks to see a sprout.
The Kick-Start Method (Water Soak)
This isn’t a full method, but more of a booster. Just soak your prepared kernel in a glass of room-temperature water for 24 hours. No longer than that, or it might rot! This hydrates the seed and can shave a week off your germination time. After the soak, you can proceed with either the paper towel or direct sowing method.
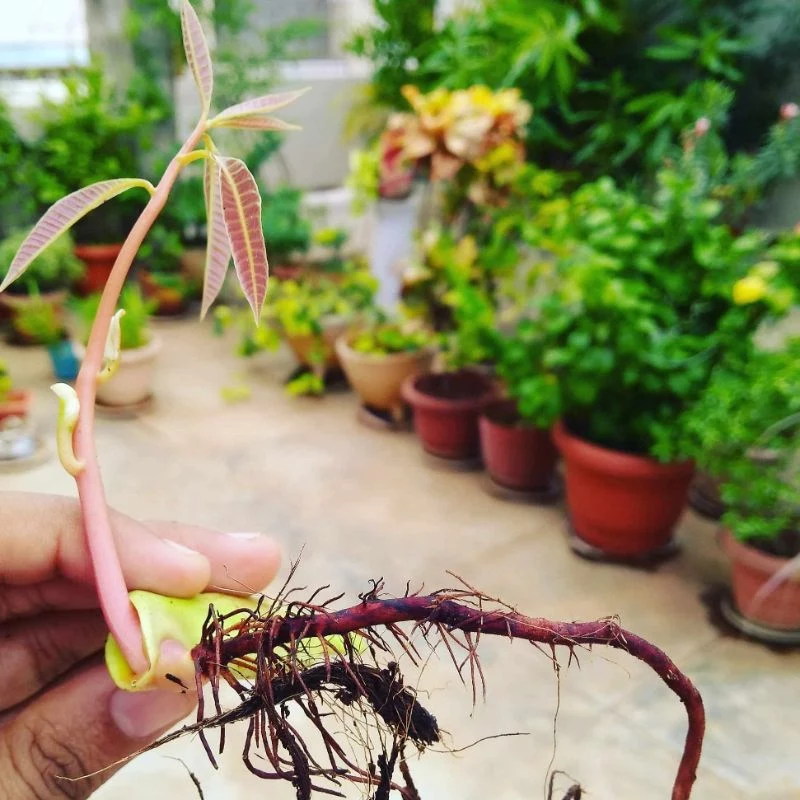
From Sprout to Sapling: The First Couple of Years
Congratulations, you have a baby tree! Now the real work begins. The first two years are critical.
Potting, Light, and Water
Use that well-draining soil mix we talked about in a 1-gallon pot. Young mango leaves are delicate and will scorch in harsh, direct sun. For the first six to eight months, give it bright, indirect light—think of the gentle, dappled light on a forest floor. Now for the most common mistake: watering. Overwatering is the #1 killer of potted mangoes. The rule is simple: water deeply until it runs out the bottom, then let the top inch of soil get completely dry before you water again. Stick your finger in the soil to check!
Feeding Your Tree (Less is More!)
Your little sprout gets all its initial food from the seed kernel, so don’t fertilize for the first three or four months. After that, you can use a balanced liquid fertilizer (like a 10-10-10) or an organic fish emulsion, diluted to half-strength. You can find these at any garden center for about $10-$15 a bottle. Feed it just once a month during spring and summer, and stop completely in the fall and winter.
Where Will It Live? Pot vs. Ground
This decision is made for you by your climate. Mangoes are tropical. They will die in a freeze. Period.
If you live anywhere that gets freezing temperatures (generally USDA Zones 8 and below), your tree must live in a pot forever so you can bring it inside. When temps consistently dip below 40°F (4°C), it’s time to come indoors. Place it by your sunniest window and cut way back on watering. You’ll need to re-pot it into a slightly larger container every 2-3 years.
If you’re in a warm-all-year climate (Zones 9-11), you can plant it in the ground. Pick your sunniest spot—at least 8 hours of direct sun. And remember, a seed-grown mango tree can get huge, like 50 feet tall and 40 feet wide. Plan for its adult size and don’t plant it too close to your house or power lines!
By the way, if you’re not sure about your zone, just do a quick online search for the “USDA Plant Hardiness Zone Map.” It’ll show you exactly what zone you’re in.
A Pro Tip: Why We Usually Use Grafting
I have to be honest with you. If your main goal is to eat delicious mangoes from your own tree in a reasonable amount of time, growing from seed isn’t the best way. Commercial growers and serious hobbyists use a technique called grafting.
Grafting is where you take a cutting from a mature tree that you know makes fantastic fruit, and you attach it to a healthy seedling rootstock (like the one you just grew!). The two heal together and grow as one plant. This guarantees you’ll get the exact same delicious fruit, and it can start producing in just 2-4 years, versus the 5-10+ years (or never) for a seed-grown tree.
So, my advice? Absolutely grow a mango from seed for the fun and the experience! But if you’re serious about fruit, buy a grafted tree from a reputable local nursery or an online tropical plant specialist. They’ve done the hard part for you.
Troubleshooting Common Issues
- Crispy, Brown Leaf Edges: Usually means low humidity or you’ve let the soil get bone dry between waterings. Could also be fertilizer burn.
- Yellowing Leaves: If it’s the new, upper leaves, it might be an iron deficiency. If it’s the old, lower leaves, you’re probably overwatering.
- White Powdery Stuff on Leaves: That’s powdery mildew, a fungus. It loves stagnant air. Increase air circulation and you can treat it with neem oil. A bottle of neem oil concentrate is about $10 and will last you for ages.
- Sticky Leaves & Tiny Bumps: Sounds like scale insects. The sticky stuff is their… uh… waste. You can scrape them off with a fingernail or a cotton swab dipped in rubbing alcohol.
A Final Word on Patience (and Safety!)
One last thing: Mangoes are in the same plant family as poison ivy. The sap, skin, and leaves contain small amounts of the same oil that causes that itchy rash. While most people are fine, if you have sensitive skin, it’s a good idea to wear gloves when you’re pruning your tree or handling any broken parts.
To be frank, the tree you grow may never give you a single edible fruit. It’s a long-term commitment and an act of faith. But the real reward isn’t the harvest. It’s watching that first root crack through the seed, seeing those first shiny leaves unfurl, and knowing you brought this thing to life from a kitchen scrap. And that, right there, is a success. Happy growing.
Inspirational Gallery

The #1 Rookie Mistake: Loving your mango seedling to death with water. Mangoes despise ‘wet feet’ and their roots are extremely susceptible to rot, especially in pots. Before you even think about reaching for the watering can, push your finger an inch deep into the soil. If you feel any moisture, wait another day. When you do water, drench it until water runs out the bottom, then let it dry out almost completely.
Did you know? The most popular mango variety in the U.S., the round and red ‘Tommy Atkins’, is a monoembryonic type.
This means the seed contains one embryo that is a genetic mix of its two parent trees. Growing its pit is a total lottery—you could get a tree with delicious fruit, or one with fibrous, less-tasty mangoes. That’s part of the adventure!
My little tree is growing, but the leaves are turning brown at the tips. What’s wrong?
This is often a sign of salt buildup from tap water and fertilizers, not a disease. Mango trees are sensitive to excess minerals. The solution is to periodically ‘leach’ the soil. Once every couple of months, take the pot to a sink or shower and let lukewarm water run through it for several minutes. This flushes out the accumulated salts and gives the roots a fresh start.
Creating the perfect soil mix is your first big win. Your baby mango needs drainage above all else. Don’t use heavy garden soil. Instead, concoct this ideal blend:
- 50% High-Quality Potting Mix: A brand like Espoma or FoxFarm Ocean Forest provides a nutrient-rich base.
- 30% Perlite or Pumice: This is non-negotiable. It creates air pockets and ensures water never stagnates.
- 20% Orchid Bark: Adds chunky, long-lasting structure that mimics the loose forest floor where mangoes naturally thrive.
Container Mango: If your tree is destined to live in a pot, choose a dwarf or semi-dwarf polyembryonic variety like ‘Nam Doc Mai’ or ‘Ataulfo’ for your seed source. They are genetically predisposed to stay smaller and have a better chance of producing fruit true to the parent.
In-Ground Tree: If you live in USDA zones 10-11 and plan to plant outside, any seed will do, but be prepared for a large tree that can reach over 50 feet if it’s from a vigorous variety like ‘Kent’ or ‘Keitt’.
Knowing your end goal helps you choose your starting mango wisely.


