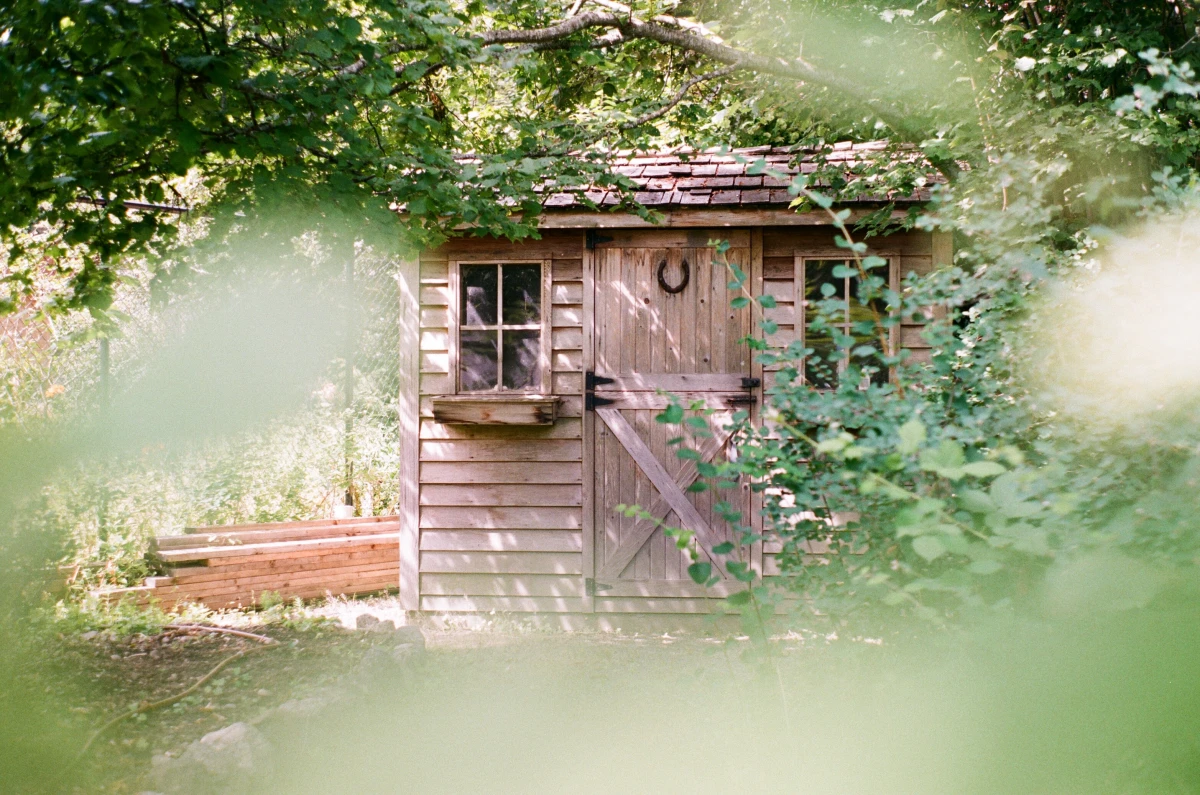
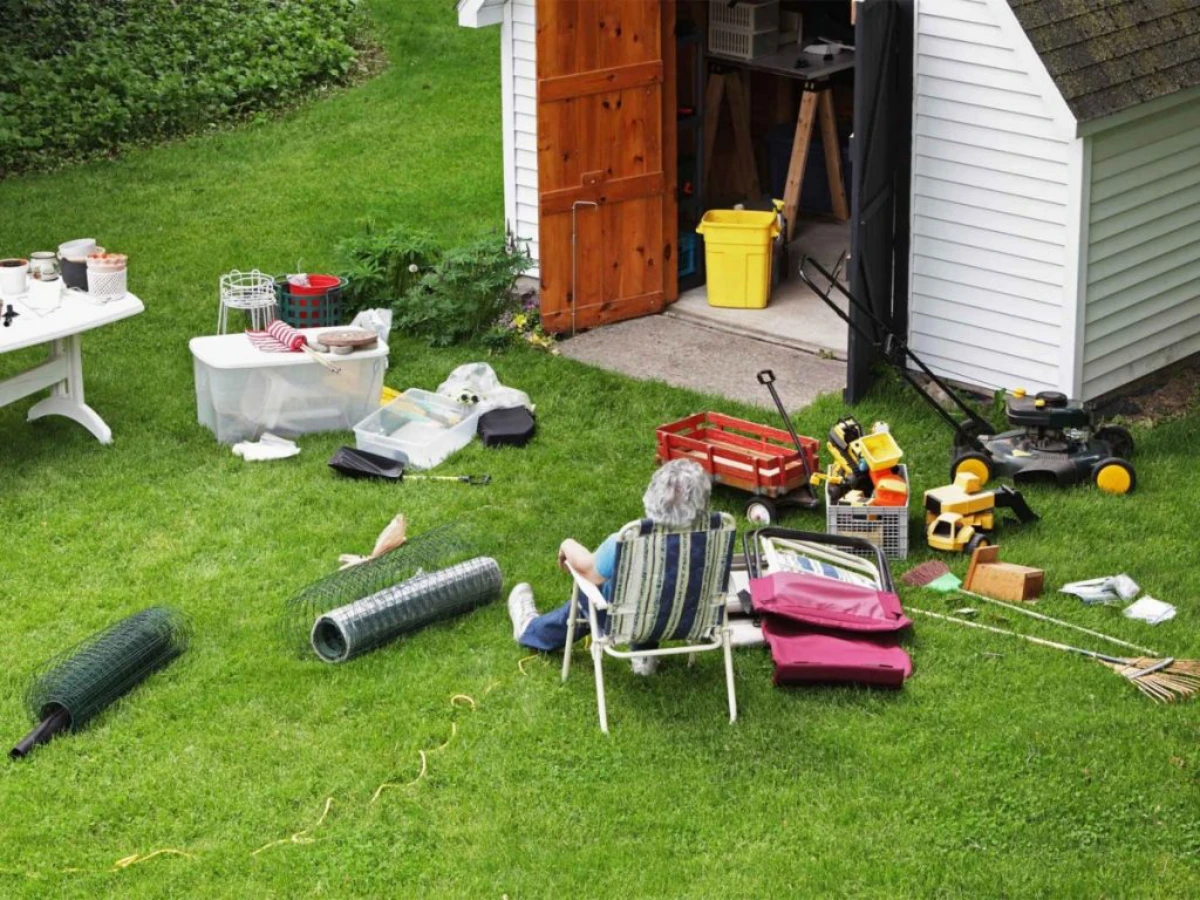
Your Shed’s a Disaster Zone, Isn’t It? Here’s How to Actually Fix It.
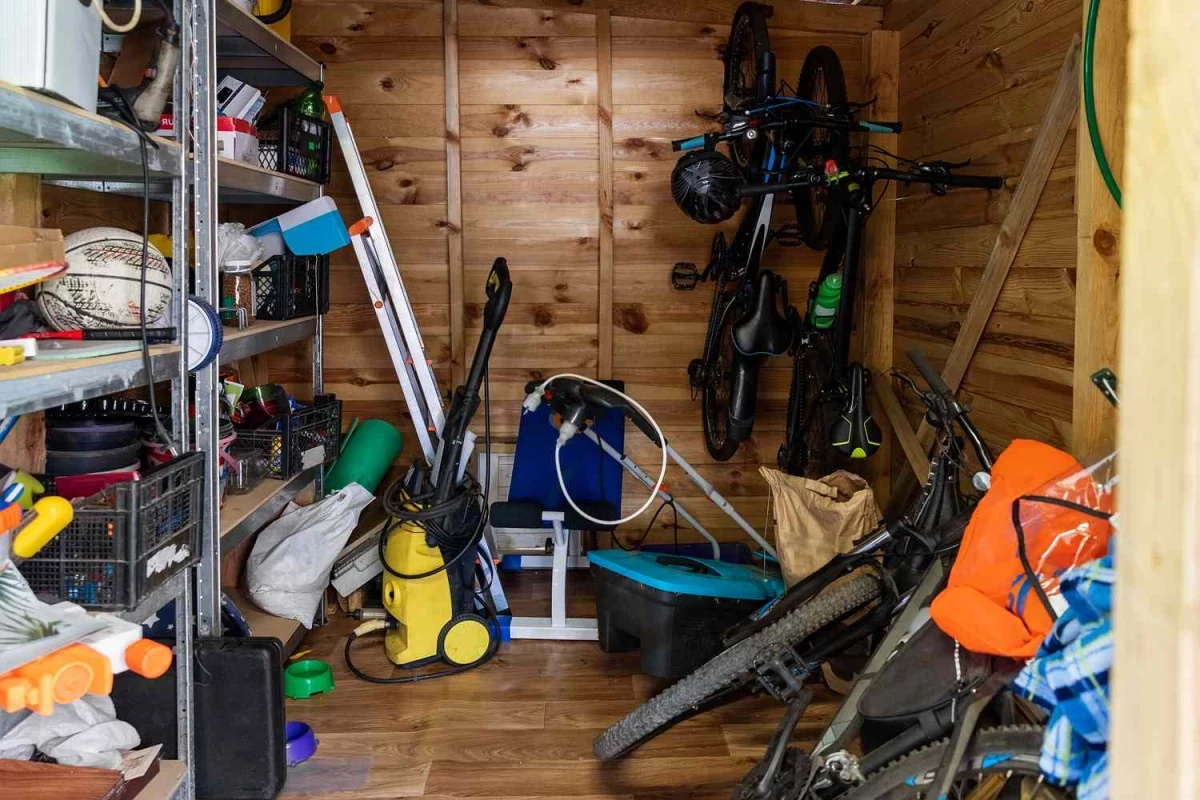
I’ve spent decades working as a contractor and woodworker, which means I’ve been inside more sheds than I can possibly remember. I’ve seen it all—from gorgeous, workshop-level spaces to those terrifyingly cluttered sheds where you’re pretty sure opening the door will cause a junk avalanche. The absolute worst was on a rural property, a shed so packed with forgotten stuff that the walls were literally starting to bow outwards. The owner hadn’t set foot inside in over a decade and was scared to even try. It took two of us a full weekend, a massive dumpster, and some serious protective gear to dig it out. We found rusted antique tools, bags of concrete that had turned to stone, and, I kid you not, a family of raccoons that had moved into a stack of old canvases.
In this article
That whole experience drove home a lesson I’ll never forget: a shed isn’t just a junk drawer for your yard. It’s a real workspace, a storage locker, and an environment that’s constantly under attack from the elements. So many people treat it like a garage or a basement, but it’s totally different. Getting that is the first step to reclaiming your space.
This isn’t just about tidying up. It’s about creating a safe, functional spot where your expensive tools and materials are protected and ready to go when you need them. Let’s walk through this the way a pro would, focusing on what to ditch, what to save, and how to store it so it doesn’t get ruined in six months.
Why Everything in Your Shed Goes Bad (It’s Not Your Fault!)
Before you start hauling junk to the curb, you need to understand what a shed really is: a glorified, uninsulated box. It doesn’t have the climate control of your house, making it a battleground for three destructive forces: temperature, moisture, and sunlight. Once you get this, you’ll know exactly why your stuff is breaking down.
1. The Brutal Temperature Swings
Your shed gets way, way hotter and colder than your house. On a sunny summer day, the inside can easily soar past 120°F. In the winter, it can plunge well below freezing. This non-stop cycle of expansion and contraction is hell on your belongings.
Wood is a prime victim. Think about the wooden handles on your shovels and axes, or that stack of lumber you were saving. The moisture inside the wood expands in the heat and shrinks in the cold, day after day. This constant movement weakens the wood fibers, leading to nasty splits, cracks, and warped boards. You ever pick up a shovel in the spring and find a huge crack in the handle that wasn’t there last fall? That’s what did it.
And liquids? Even worse. Anything water-based, like latex paint or wood glue, is completely destroyed by a single freeze. The water inside forms ice crystals that permanently break down the chemical formula. When it thaws, you’re left with a lumpy, useless sludge. Even stuff that doesn’t freeze can be ruined by extreme heat, which cooks the chemicals and makes them ineffective.
2. Humidity: The Silent Tool Killer
Moisture is probably the number one enemy in any shed. As the temperature drops overnight, the warm, damp air inside cools down. When it hits the dew point, that moisture turns into water droplets on the coolest surfaces around. And what are the coolest surfaces? Yep, your metal tools, your power equipment, and all your nuts and bolts.
This is exactly why you find a fine layer of rust on a handsaw or wrench you left out on the bench. It’s not about rain getting in; it’s the air itself attacking your tools. That same moisture soaks into cardboard boxes, turning them into a soggy mess that’s basically a five-star resort for silverfish and roaches. It also feeds mold and mildew, which can grow on pretty much anything and create that musty smell you can never get rid of.
3. Sun Damage (Even Indoors)
If your shed has windows or a skylight, you’re also dealing with ultraviolet (UV) light. UV rays are incredibly good at breaking down plastics. It’s the reason your plastic storage bins get brittle and crack after just a few seasons in the shed. It’s also why garden hoses, the plastic housing on your weed whacker, and extension cords fade, weaken, and become super easy to damage.

Phase One: Gearing Up and Getting Ready
You can’t sort through chaos while you’re standing in it. The pros always start by prepping the area and thinking about safety first. Seriously, don’t skip this part. I once saw a guy reach into a dark corner without looking and get a nasty spider bite for his trouble. A few minutes of prep can save you a world of hurt.
Your Safety Shopping List
Before you even think about opening that door, get your gear together. You can find all of this at a big box store like Lowe’s or Home Depot.
- Heavy-Duty Work Gloves: Not flimsy gardening gloves. Get thick leather or coated ones to protect your hands from rusty metal, splinters, and whatever might be hiding in the dark. (Cost: ~$20)
- Safety Glasses: Dust, dirt, and spider webs are going to be flying everywhere. A cheap pair is all you need to protect your eyes. (Cost: ~$10)
- A Good Dust Mask: An N95 mask is a must. You’ll be kicking up years of dust, mold spores, and possibly dried-up rodent droppings, which can carry some nasty stuff. (Cost: ~$15 for a box)
- Sturdy Boots: Closed-toe, thick-soled boots are non-negotiable for protecting your feet from stray nails or a dropped tool.
Set Up Your Sorting Zones
Find a clear spot outside the shed, like your driveway or a big tarp on the lawn. For a standard 10×12 foot shed, you should plan for a full day of work—figure 2-3 hours just to empty it, another 2-3 hours to sort and clean, and a final 2 hours to organize everything as you put it back. Mark out four distinct zones with chalk or just by making separate piles:
- KEEP: For things that are in good shape and actually belong in the shed.
- RELOCATE: For items that are fine but shouldn’t be stored in a shed (we’ll cover this).
- DISPOSE: Your pile for trash, recycling, and hazardous waste. Have contractor bags and empty boxes ready.
- UNSURE: Try to keep this pile as small as possible. The goal is to make a final call on everything by the end of the day.
Oh, and try to pick a cool, overcast day for this project. Trust me, doing this in the blazing sun is just miserable.
Feeling Overwhelmed? Start With These 15-Minute Wins
Okay, let’s be real. Sometimes looking at a disastrous shed is so overwhelming you don’t even know where to begin. If that’s you, forget the big plan for a minute and just do this:
The 5-Minute Fire Safety Fix: Walk into your shed right now. Grab every single cordless tool battery and its charger. Take them inside to your garage or basement where the temperature is stable. High heat can cause these batteries to fail catastrophically and catch fire. This is the single most important thing you can do, and it takes less than five minutes.
The 10-Minute Trash Grab: Grab a trash bag. Without moving anything major, just walk through and pick up the obvious garbage—broken pots, empty bags, old rags, busted plastic. You’d be surprised how much better it looks after just a quick sweep.
Phase Two: The Great Shed Triage
Alright, time to get to it. The only way to do this right is to pull everything out. Yes, everything. You can’t clean or organize a space properly with stuff still crammed in the corners. As you take each item out, put it directly into one of your four piles. Be decisive! Here’s the breakdown of what to look for.
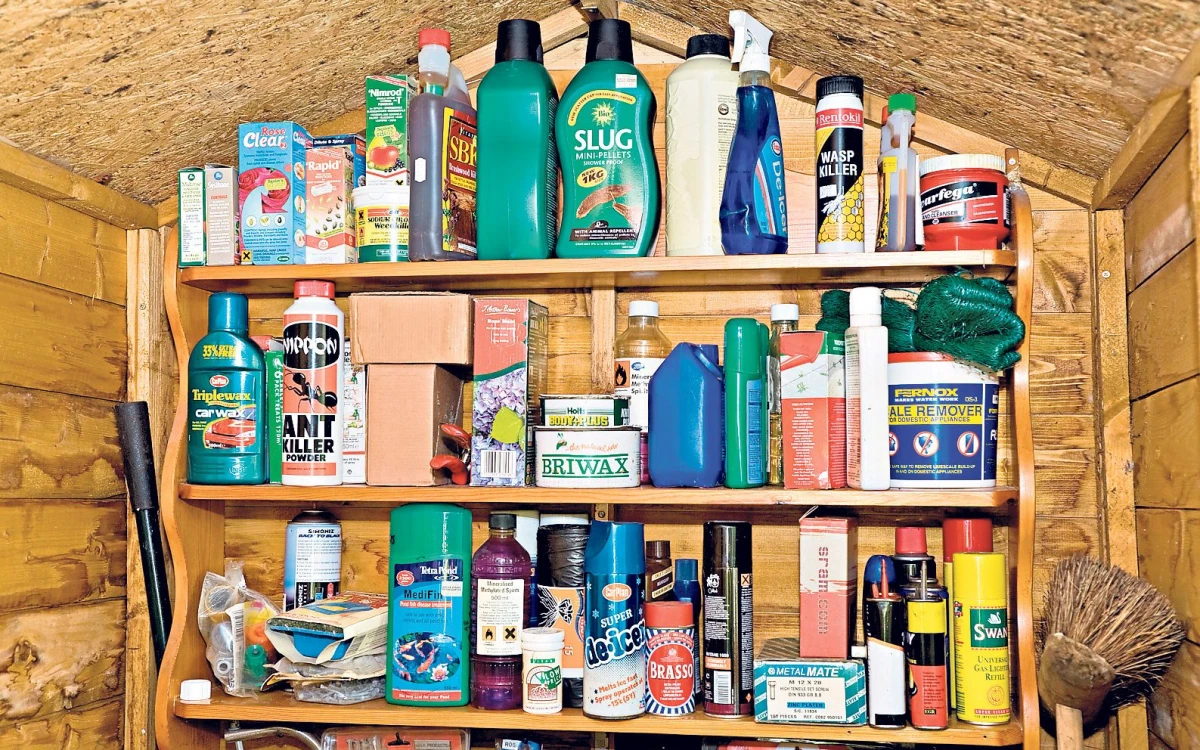
1. Chemicals (Fertilizer, Pesticides, etc.)
Toss It If:
- It’s a Solid Brick: Bags of fertilizer or lawn soil that have absorbed moisture and hardened into a solid clump are useless. The chemical balance is off, and you can’t spread it anyway.
- It’s Unidentifiable: If the label is gone and you have no earthly idea what’s in that jug, it’s a safety hazard. Don’t play guessing games.
- It’s Ancient: Most garden chemicals are only good for a few years. If you know it’s been sitting there forever, it’s time to let it go.
How to Dispose of It Properly: This is a big one. Never, ever pour these chemicals down a drain or into a storm sewer. It’s terrible for the environment and often illegal. Check with your local town or county waste authority. They’ll have a hazardous waste facility or specific collection days. Just keep the chemicals in their original containers for drop-off.

How to Store What You Keep: The best place for chemicals is a locked cabinet in a temperature-controlled garage or basement. If the shed is your only option, get a dedicated, lockable, weatherproof cabinet and keep it off the floor.
2. Paint, Stains, and Solvents
I swear, sheds are where cans of paint go to die. People save them for “touch-ups,” but the shed environment just kills them.
Toss It If:
- It Looks Like Cottage Cheese: This is the classic sign of frozen latex paint. Open the can. If it’s lumpy, stringy, and won’t stir smooth, it’s garbage.
- The Can is a Rust Bomb: If the can itself is super rusty, especially around the rim, it means moisture got in and the paint is ruined.
- It Has a Hard, Cracked Skin: For oil-based paints, a thick, hard skin on top that cracks when you poke it is a bad sign. It’s oxidized beyond saving.
How to Dispose of It Properly: Rules vary, but here’s a great pro tip for old latex paint. To get rid of it fast, just mix in kitty litter or a paint hardener (you can buy a packet for about $10 at a hardware store). Stir it until it’s a solid, oatmeal-like cake. Once it’s solid, most places let you toss it in the regular trash. But always double-check your local rules! Oil-based paints and solvents are always hazardous waste.
How to Store What You Keep: If paint is still good, store it in a cool, dry basement. If it has to be in the shed, hammer the lid on tight. Here’s a trick: turn the sealed can upside down for a few seconds. The paint itself creates an airtight seal against the lid.
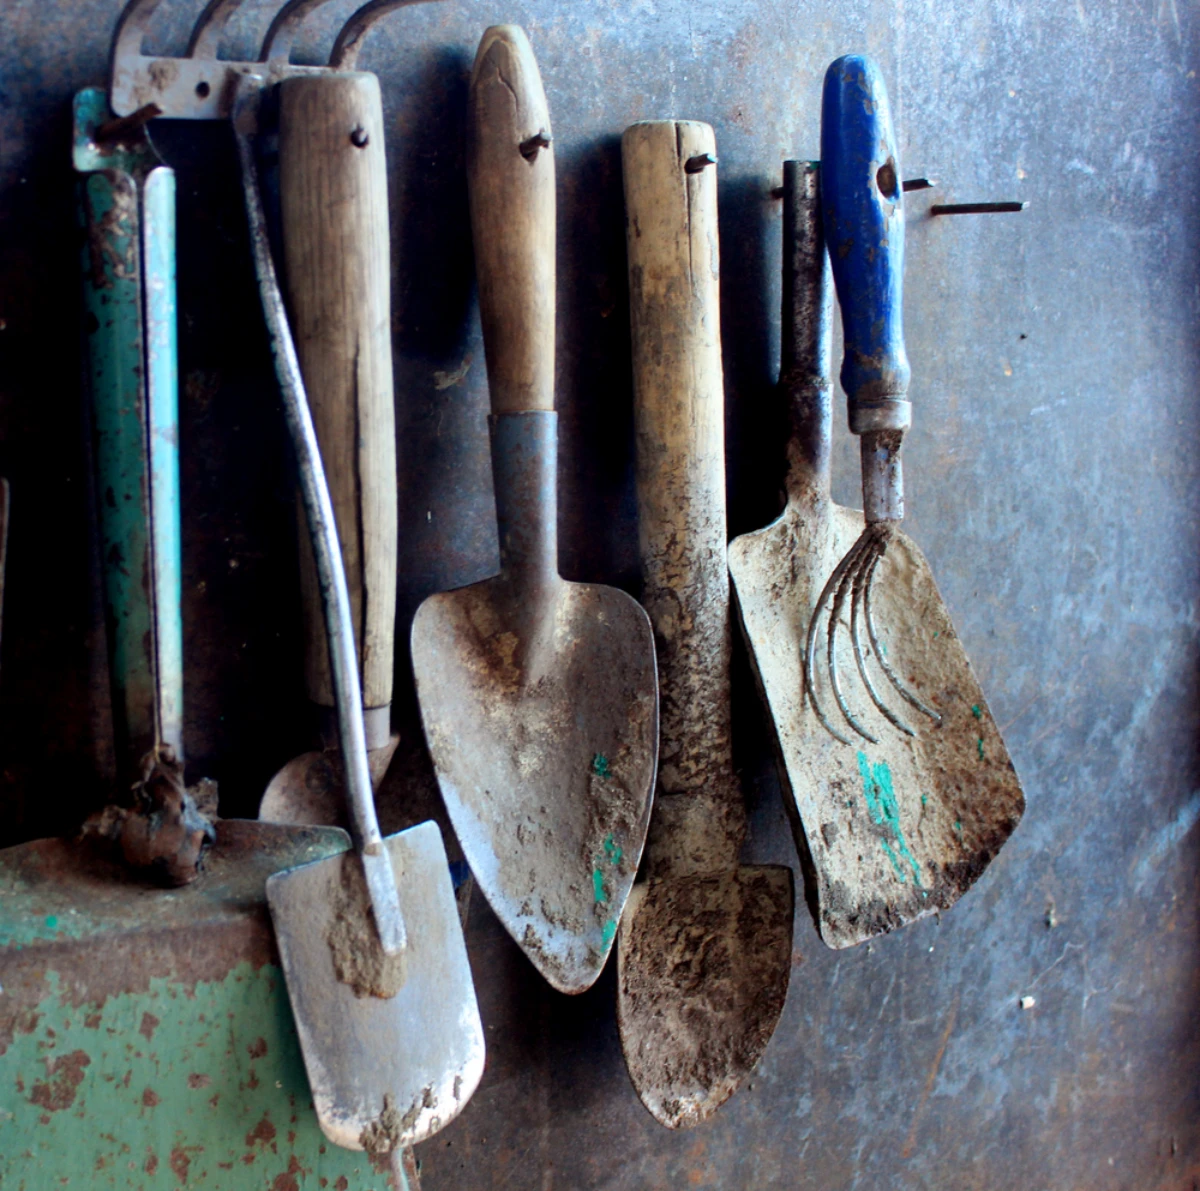
3. Tools (Hand and Power)
Your tools are an investment. A little care goes a long way.
What to Assess:
- Rust: A bit of surface rust is no big deal. You can usually scrub it off with steel wool and some WD-40. But if you see deep, pitted rust that’s eating away at the metal, that tool’s integrity is shot. Toss it.
- Wooden Handles: Look for deep cracks or soft, crumbly spots (dry rot). A broken handle is dangerous. Be honest with yourself—if you say you’ll replace it, will you actually do it?
- Power Tool Cords: Inspect cords for any frays, cracks, or exposed wires. This is a massive fire and shock hazard. Either get it replaced by a pro or get rid of the tool.
How to Store What You Keep:
- Hand Tools: After cleaning off any rust, give the metal parts a quick wipe with a light machine oil or a specialty product like camellia oil (you can find this at woodworking stores or online). Honestly, even a spritz of WD-40 works in a pinch. Then, hang them on a pegboard or tool rack. Don’t just throw them in a bucket where moisture gets trapped.
- Power Tools: Keep them in their original cases if you still have them. Those cases are designed to protect them from bumps and moisture.
- Batteries & Chargers: These belong in your “RELOCATE” pile. As I mentioned before, they are a fire risk in the heat. Store all cordless batteries and their chargers inside your house or a climate-controlled garage.
4. Lumber and Scraps
Every DIYer has a
Inspirational Gallery
Clear Plastic Bins: Great for quickly identifying contents like holiday decorations or sports gear. Their weakness? They can become brittle in extreme cold and may not be as rugged.
Opaque, Heavy-Duty Totes: Think brands like Rubbermaid’s Roughneck series. They protect contents from damaging UV light and withstand being knocked around. Perfect for storing valuable tools, and their uniform shape makes for stable, efficient stacking.
For anything you value or that is sensitive to light, the heavy-duty opaque option is the pro’s choice every time.
A single mouse can produce between 40 and 100 droppings per day and constantly leaves a trail of urine.
This isn’t just gross—it’s destructive. That’s why your first line of defense after decluttering is sealing any gaps. Use expanding foam for larger holes and stuff steel wool into smaller openings around pipes or foundation cracks; rodents can’t chew through it.
Tired of pegboard hooks that fall out every time you grab a tool? The answer is a French cleat system. It’s a surprisingly simple and incredibly strong way to hang heavy items, from circular saws to entire cabinets. All you need is a sheet of sturdy ¾-inch plywood.
- Rip the plywood into 4- or 6-inch strips.
- Cut each strip lengthwise at a 45-degree angle.
- Mount one half of the strip (angle pointing up and away from the wall) securely to your shed studs.
- Attach the other half (angle pointing down) to the back of your tool holders, shelves, or cabinets.
Now you can hang, rearrange, and customize your wall storage endlessly without a single fussy hook.
Crucial Safety Warning: Never store leftover paint, stains, propane tanks, or gasoline in your shed. The extreme temperature swings mentioned in the article are not just bad for tools—they’re dangerous for flammable liquids and pressurized cans. A 120°F shed can increase the pressure in a propane tank to hazardous levels, and temperature cycles can ruin a can of expensive latex paint in a single season. Keep them in a more stable environment like a garage or basement.
- Keep your most-used tools within arm’s reach.
- Free up precious floor space instantly.
- Prevent sharp blades from being a hazard in a drawer.
The secret? A simple magnetic tool bar. Mount one above your workbench for screwdrivers, wrenches, and pliers. It’s a cheap, incredibly satisfying upgrade that makes you feel like you’re working in a real shop, not just a storage box.
Is it really worth the effort to add lighting and power?
Absolutely. A simple battery-powered, motion-activated LED light can be a game-changer, preventing you from tripping in the dark. But for a true workspace, consider running a single, GFCI-protected electrical circuit. It allows you to use a small space heater to take the chill off in winter, run a fan for ventilation in the summer, and, most importantly, keep your cordless tool batteries (like your DeWalt or Milwaukee sets) charged and ready to go right where you use them.
One of the fastest ways to make your shed feel less like a grimy cave and more like a functional workspace is with a can of paint. A coat of simple, high-visibility white or light gray on the interior walls and ceiling will dramatically amplify the available light, making it easier to find what you’re looking for and instantly making the space feel bigger and cleaner. Use a durable exterior-grade latex paint to help it resist moisture and mildew.
Did you know that many tool warranties are voided by damage from rust or corrosion?
The damp environment of a shed is a death sentence for metal. Besides improving ventilation, toss a few reusable desiccant packs, like the Eva-Dry 500, into your main tool chests. They actively pull moisture from the enclosed space. When the indicator turns pink, you simply plug it in to “recharge” it, making it a sustainable, long-term solution to protect your expensive investments.
Once cleared out, don’t just see your shed as a place for lawnmowers. Think of its potential. With smart organization, it can become a dedicated zone for your passions.
- The Gardener’s Nook: Install a potting bench, with hooks for hand tools and bins for different soils and fertilizers.
- The Bike Shop: Use vertical wall mounts to hang bicycles, with a small workstation for maintenance and tire changes.
- The Hobbyist’s Retreat: Set up a sturdy workbench for woodworking, electronics, or other crafts, with dedicated lighting and tool storage.


