Garden Edging That Actually Lasts: A Pro’s Guide to Doing It Right
I’ve been in the landscaping game for a long, long time, and I’ve seen some things. I’ll never forget this one house I visited. The garden itself was full of beautiful plants, but the whole yard just felt… messy. The lawn was staging a hostile takeover of the flowerbeds, mulch was escaping onto the walkway after every single rain, and the whole place looked exhausted.
In this article
The problem? Cheap, flimsy plastic edging. The kind that frost heaves up every winter and shatters the first time a lawnmower looks at it funny. It was a classic case of a good idea ruined by cutting corners on the fundamentals. We spent the better part of a week ripping it all out and putting in a proper paver edge set on a solid gravel foundation. The change was instant. Suddenly, the garden had definition and clean, crisp lines. It looked intentional. It looked cared for.
That job really drives home a truth I’ve learned over and over: garden edging isn’t just a pretty accessory. It’s the literal backbone of your garden design. When you do it right, it holds everything in place, stops that relentless grass from creeping in, and makes mowing a hundred times easier. It’s a real investment in your landscape’s future. So, let’s talk about how to build it right the first time, so you’re not fixing it every spring.
The Real Job of Your Garden Edge
Before you even think about picking up a shovel, you’ve got to understand what you’re up against. Your garden is a living, breathing thing where soil, water, and plants are always on the move. Good edging is your friendly neighborhood dam, wall, and traffic cop, all rolled into one.
Fighting Gravity and Water
Soil, to be frank, is lazy. It doesn’t like to stay put. Even on a flat surface, rain will cause it to spread out. On the slightest slope, gravity is pulling it downhill, day in and day out. A solid border physically contains the soil in your garden beds, stopping that slow-motion erosion. After a big downpour, that soil gets waterlogged, creating a surprising amount of outward pressure that can make a weak border bulge or even break. A properly installed edge with a good base can handle that push without breaking a sweat.
The Biggest Enemy: Frost Heave
If you live anywhere that gets a real winter, your number one enemy is frost heave. This is a seriously powerful force of nature. When water in the soil freezes, it expands by about 9%, pushing everything—soil, rocks, and your poorly installed edging—upwards. Come springtime, that perfectly level border you installed is a crooked, wavy mess.
This is precisely why the pros are obsessed with the foundation. By digging a proper trench and filling it with compacted gravel, you create a drainage channel. Water doesn’t get trapped under the edging, so there’s less water to freeze and expand. Honestly, skipping this step is the single biggest mistake I see in DIY edging projects, and it’s why they fail in a year or two.
Containing Plant Invasion
The other huge job for an edge is to be a root bouncer. Turfgrasses, especially the running kinds, are absolutely relentless. Their underground runners (rhizomes, if you want to get technical) will dive under a shallow border and pop up all over your nice flowerbeds. To stop this, your edge needs to be deep enough to block them. A depth of 4 to 6 inches below ground is usually enough to stop most lawn grasses. Without that barrier, you’re just signing up for a lifetime of pulling grass out of your garden beds. No, thank you.
A Pro’s Guide to Edging Materials (The Good, the Bad, and the Ugly)
The material you pick is a big deal. It affects the look, how much you’ll spend, and how long it will last. Here’s my honest take on the most common options out there.
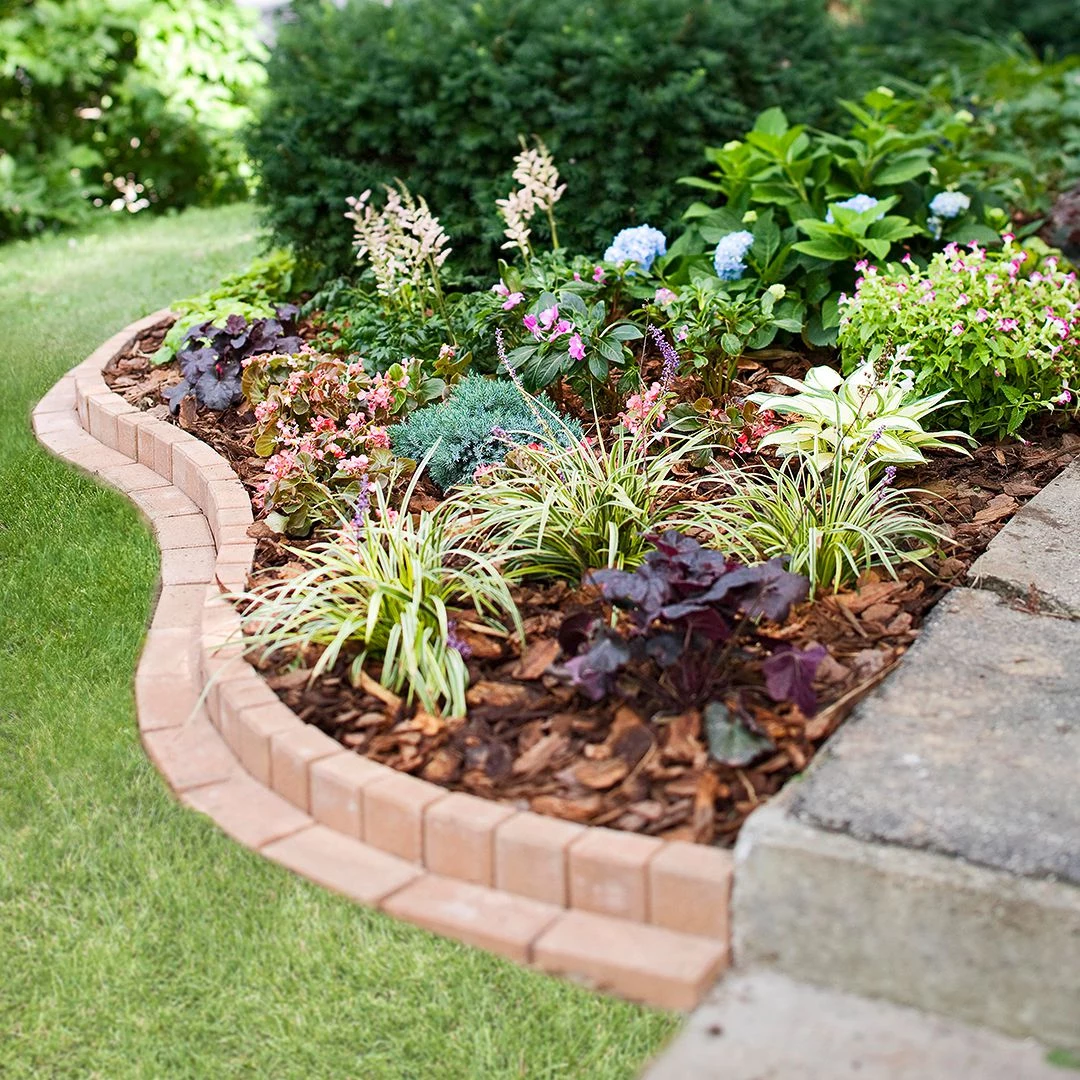
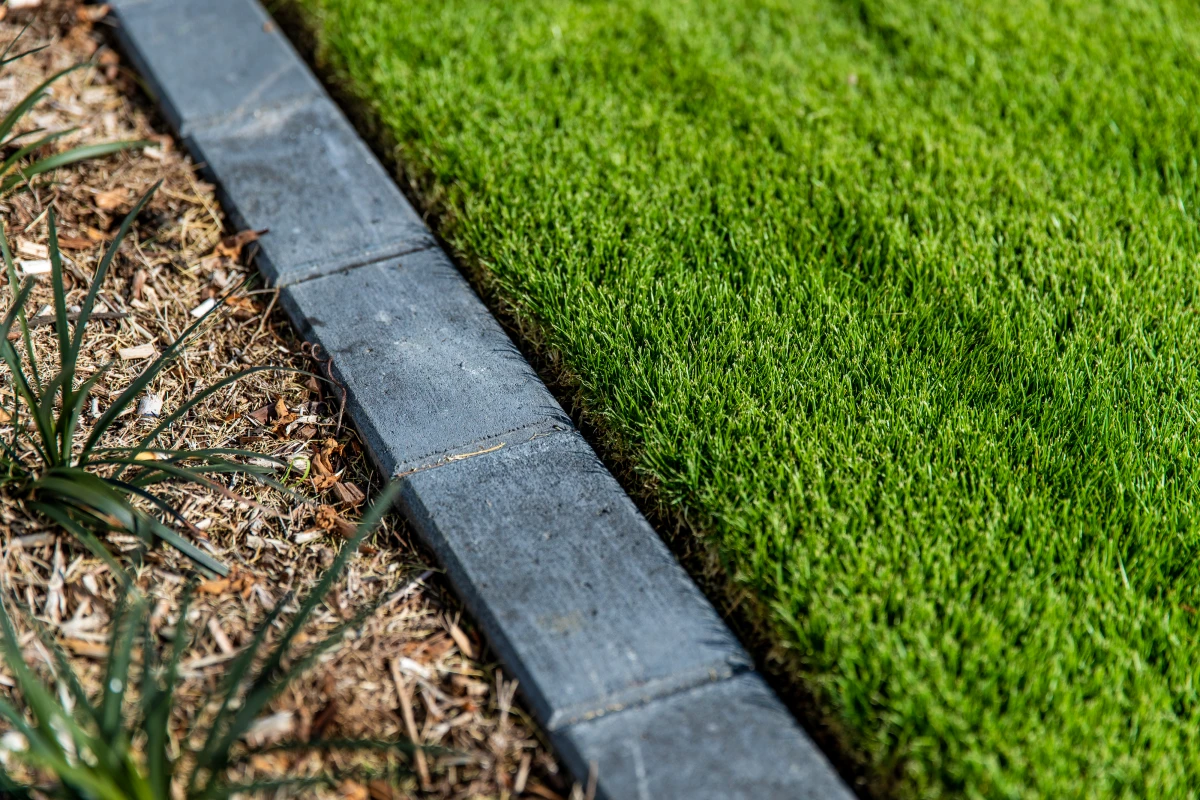
Brick and Pavers: The Timeless Classic
You can’t go wrong with the classic look of brick. It’s durable, widely available, and just works with almost any style. But listen, not all bricks are the same, and how you install them is everything.
Material Options:
- Clay Pavers: These are my top choice. They’re fired at super high temps, making them incredibly dense and strong. They barely absorb any water, so they laugh at freezing weather.
- Concrete Pavers: A great, and often cheaper, alternative. You can find them in a dizzying array of shapes and colors at places like Home Depot or a local masonry supply yard. Just aim for quality ones, as the cheap stuff can fade over time.
- House Bricks: A word of caution: I’d avoid using standard house bricks for ground-level edging. They’re more porous and will soak up water. In a freeze-thaw cycle, they’ll crack and crumble within a few years. Save those leftovers for another project that isn’t sitting in wet dirt.
Pro Installation (The Dry-Lay Method):
A dry-laid edge is strong, flexible enough to handle minor ground shifts, and easy to repair. Here’s how we do it.
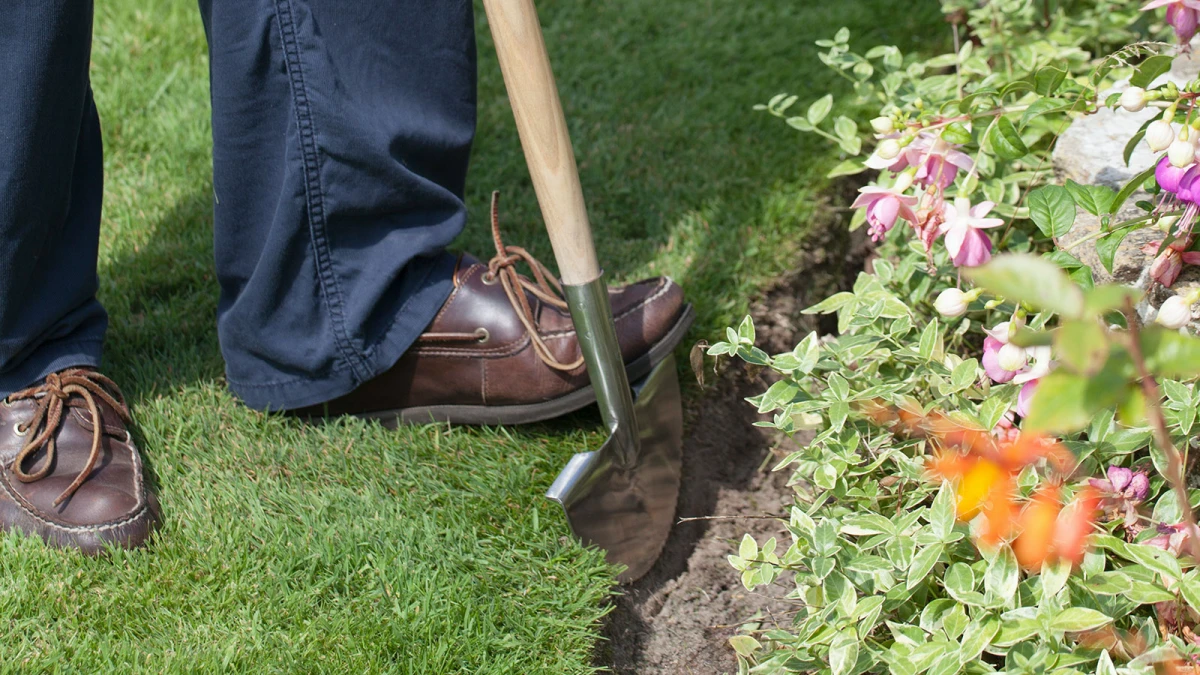
Shopping & Tool List: You’ll need your pavers, of course, plus crushed gravel (ask for #57 stone), coarse sand, and polymeric sand. For tools, grab a flat spade, a hand tamper (you can rent one for about $15 a day), a rubber mallet, a 4-foot level, and a string line with stakes.
The Process: First, dig a trench about 7 inches deep and twice as wide as your paver. Fill it with 4 inches of that crushed gravel. Now, compact it. Here’s a quick tip: keep tamping until the sound changes from a dull thud to a sharper ‘crack’ and the tamper starts to bounce a little. That’s how you know it’s solid. On top of that, add a 1-inch layer of sand for leveling. Place your pavers one by one, tapping them into place with the mallet and checking for level as you go. To finish, sweep polymeric sand into the joints, mist it with water, and it’ll harden up like a flexible grout, locking everything together.
- Cost: For materials only, you’re looking at about $3 to $7 per linear foot, depending on the pavers you choose.
- Time: For a beginner, plan on a solid weekend to properly install a 25-foot straight edge. Curves take longer!
By the way, laying the bricks flat and level with the lawn creates a fantastic “mow strip.” Your lawnmower wheel rides right on top of it, giving you a perfect cut and completely eliminating the need to use a string trimmer. It’s a game-changer.
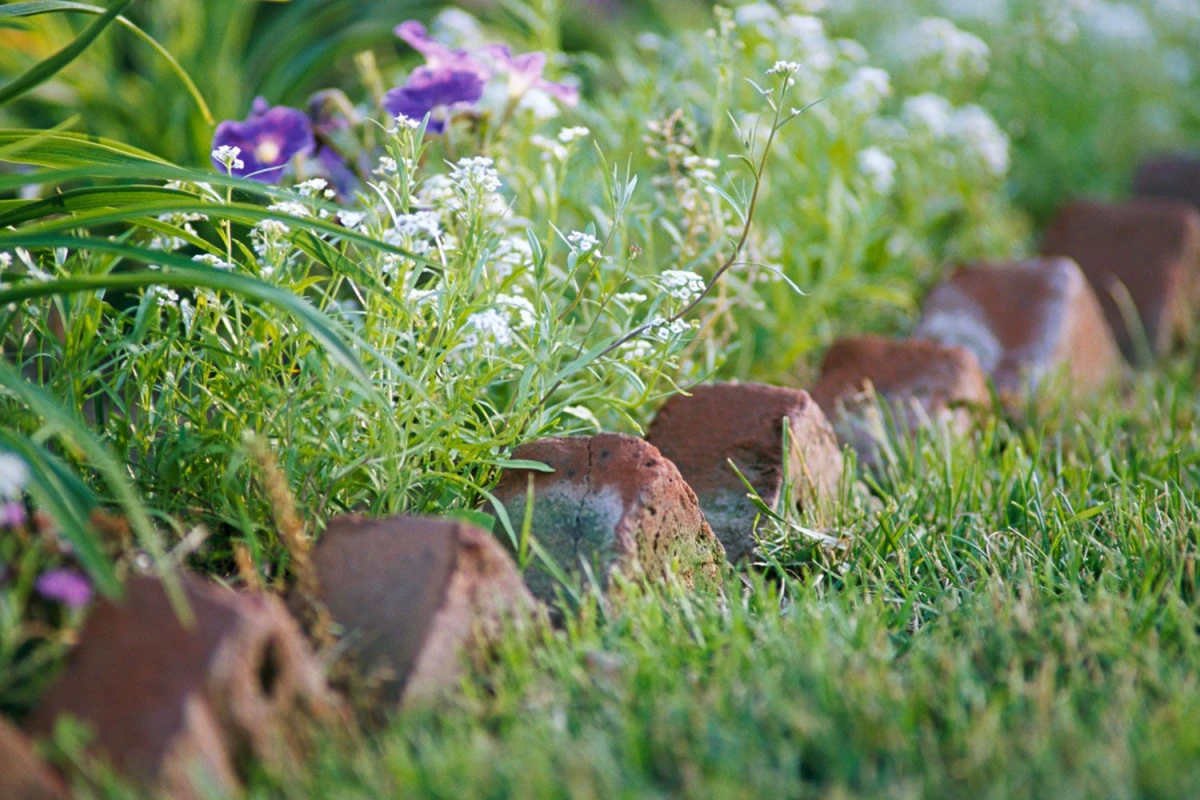
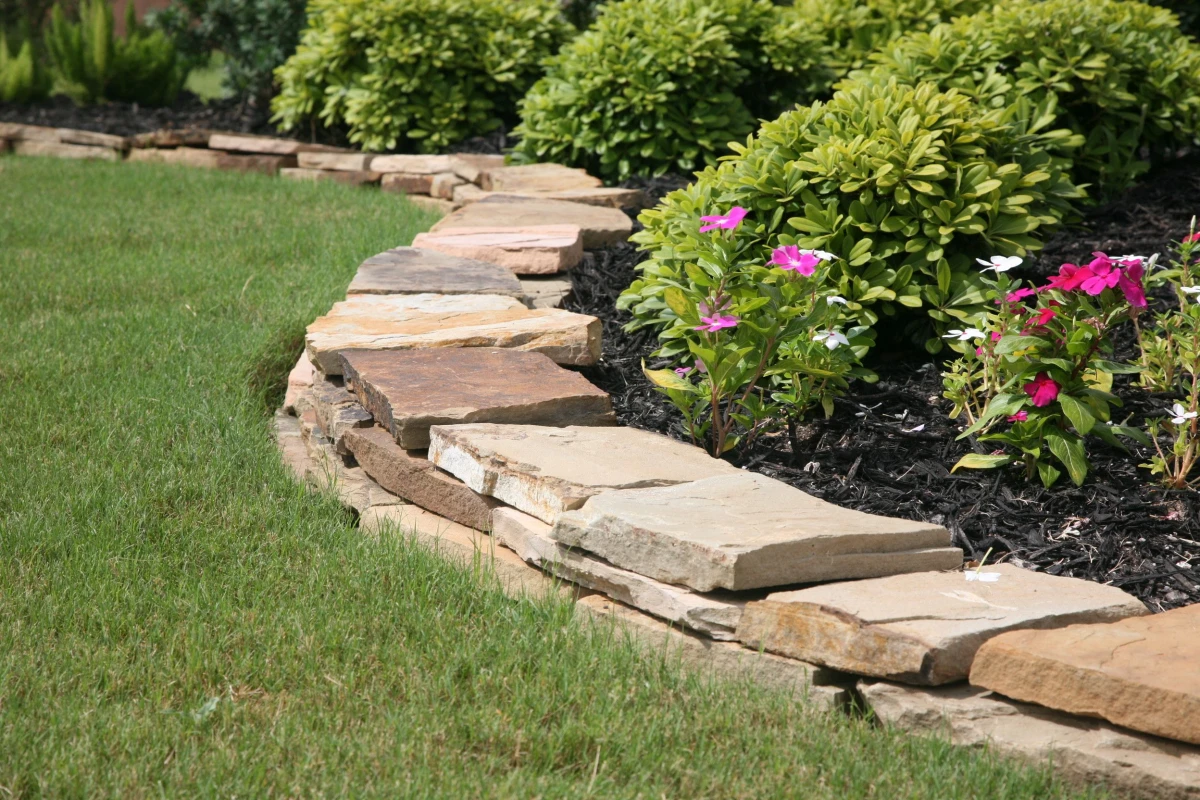
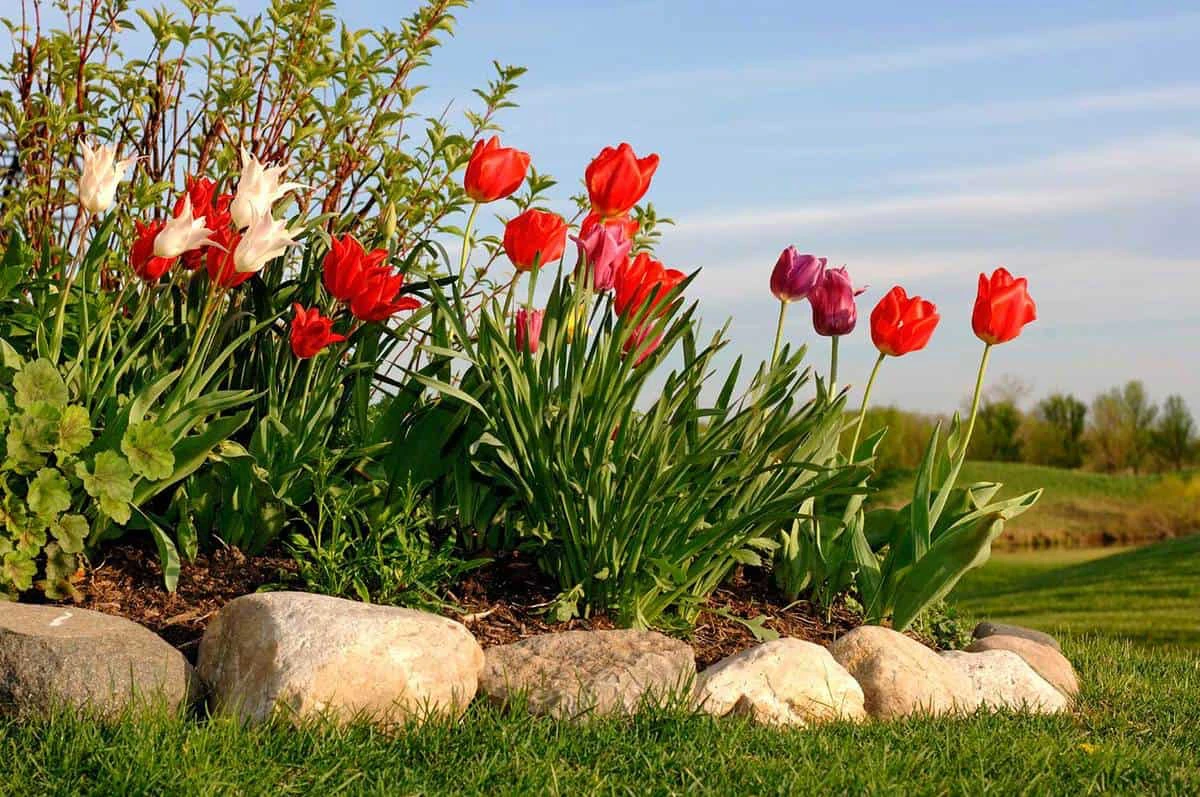
Natural Stone: Rustic and Rugged
A stone border looks like it was always meant to be there. It’s incredibly durable but, be warned, it’s a lot of work.
Material Options: You can use rounded fieldstone for a rustic look or flat flagstone (like bluestone) for a cleaner, stacked edge. Check with a local stone yard to see what holds up best in your area’s soil.
Pro Installation (The Dry-Stack Method):

Just like with pavers, a solid 6-inch-deep gravel footing is non-negotiable. Place your biggest, flattest stones as the base. As you build up, follow the “one over two, two over one” rule, where each stone bridges the joint of the two below it. This knits the wall together. Don’t underestimate the labor here. A beginner should plan on spending an entire weekend to properly install just a 15-foot dry-stack stone border.
- Cost: This varies wildly. It can be free if you have stone on your property, or $10 to $30+ per linear foot if you’re buying premium cut stone.
- Time: It’s slow, heavy work. Block out significantly more time than you think you’ll need. Seriously.
Metal Edging: The Sleek, Modern Line
For a crisp, almost invisible line, nothing beats steel edging. It’s what the pros use for that clean, contemporary look.
Material Options:
- Steel: This is the gold standard. It’s usually 1/8-inch thick, rigid, and holds a perfect line. It’s more expensive but will outlive you.
- Corten Steel: This is a special alloy that forms a stable, rust-colored patina that protects the steel underneath. It’s a beautiful, industrial-chic look.
- Aluminum: It’s cheaper and won’t rust, but it’s less rigid than steel. It’s fine for curves but can get wavy on long straight runs. Heads up: avoid the super-thin, cheapo aluminum that comes in a roll at big-box stores. It bends if you look at it wrong and has zero structural strength.
Pro Installation: This is one of the easier DIY options. Cut a clean trench 4 to 6 inches deep. Place the metal strip in the trench so the top is only about a half-inch above the soil. A common mistake is leaving it too high, creating a tripping hazard. Then, drive the provided steel stakes through the holes to secure it and pack soil firmly against both sides.
- Cost: Expect to pay $8 to $15 per linear foot for good quality steel edging materials.
- Time: It’s pretty quick! You can likely install 50 feet in a single afternoon once you get the hang of it.
Poured Concrete: The Nuclear Option
For a permanent, bomb-proof solution, you can’t beat poured concrete. You’ve probably seen companies with a special machine that extrudes a continuous concrete curb. This is a fantastic service—they can even add color and patterns—but it comes at a premium price, often running $15 to $25 or more per linear foot. A DIY poured edge is a major project that requires building sturdy forms, and if you mess it up, you’re stuck with it. To be frank, this is one I usually recommend leaving to the pros.
The ‘Measure Twice, Buy Once’ Plan
Before you get too excited and head to the store, let’s plan this out so you don’t make three trips.
Quick Homework: Go outside with a garden hose. Lay it on the ground to map out the curve or line of your new edge. It’s the absolute best way to visualize what you want before you dig a single hole. Adjust it, look at it from all angles, and once you love it, you can measure the hose to find your total length.
A Simple Materials Calculator: Let’s say you’re doing a 20-foot-long paver edge using standard 4×8-inch pavers, laid side-by-side. For the pavers themselves, you’d need 3 pavers per foot, so 3 x 20 = 60 pavers. For the base (a 7-inch deep, 8-inch wide trench), you’ll need about 7.8 cubic feet of material. A good rule of thumb is to fill that with 4 inches of gravel and 1 inch of sand, so you’d need about 4.5 cubic feet of gravel and 1.5 cubic feet of sand. Most stores sell these in 0.5 cubic foot bags, making the math easy!
The Boring (But Crucial) Part: Safety & When to Get Help
Alright, let’s have a serious chat. Even a simple project has rules and risks.
- Call Before You Dig: This is not a suggestion, it’s a command. In the US, dial 811. It’s a free service. They’ll come and mark buried utility lines. Trust me on this one. I once saw a crew slice through a fiber optic cable. They took out the internet for the whole neighborhood and faced a massive fine. It’s a free call. Just do it.
- Gear Up: Always wear safety glasses, especially when cutting or tamping. Heavy gloves will save your hands. And if you’re moving heavy stones or concrete bags, steel-toed boots are your best friend.
- Dust Is Dangerous: Cutting stone or concrete creates silica dust, which is nasty stuff for your lungs. Wear a proper N95 respirator and try to wet-cut materials to keep the dust down.
DIY or Hire a Pro?
A small, level garden bed is a perfect weekend project for a dry-laid brick edge or a metal installation. It just takes sweat equity and patience. However, I strongly recommend calling a pro if your project involves a significant slope (that’s a retaining wall, not just edging), is a massive, property-wide job, or involves permanent materials like mortar or poured concrete. A professional has the crew, equipment, and experience to do it right and often faster than you can imagine.
Yes, installing garden edging is hard work. It’s digging and lifting and getting everything just right. But when you step back and see that clean, permanent line you’ve created, all the effort feels worth it. You haven’t just added a decoration; you’ve installed a hardworking, durable part of your landscape that will pay you back with less work and more beauty for years to come.
Inspirational Gallery with Photos
Corten Steel: For a sharp, contemporary look that evolves over time. Brands like EverEdge or Borderline offer pre-formed steel edging that arrives in a steely grey and weathers to a stable, beautiful rust-colored patina. It’s thin, strong, and excellent for creating precise geometric lines or sweeping curves.
Natural Stone: Offers a timeless, organic feel that connects the garden directly to the earth. Fieldstone or river rock provides a rustic, cottage-style border, while cut flagstone or Belgian block creates a more formal, old-world structure. It’s heavier work but offers unparalleled durability and character.
The choice often comes down to architectural style: steel complements modern homes, while stone feels at home with more traditional or rustic designs.
A well-installed dry-laid stone or high-quality concrete paver edge can have a functional lifespan of 50 to 100 years, often outlasting the plants in the garden bed it contains.
How do I make my garden edging feel truly integrated with my property?
Look at your home’s existing materials for inspiration. If you have a brick foundation, a matching brick soldier course border creates a seamless visual transition. For a house with a slate roof or stone chimney, using similar stone for the garden edging provides a powerful sense of unity and permanence. The goal is to make the garden look like a natural extension of the home, not a separate, unrelated element.
Beyond hard materials, a ‘living edge’ can define a space with softness. This technique works best between two garden beds or along a low-traffic path. To achieve it:
- Choose low-growing, clumping perennials that don’t spread aggressively.
- Plant them in a dense, continuous line where the hard edge would normally be.
- Great options include Dwarf Mondo Grass for shady spots, Creeping Thyme for sunny paths, or clumps of Heuchera for a pop of color.
A study by the Landscape Contractors Association revealed that poor site preparation, including inadequate foundation work, is a leading cause of landscape installation failure within the first five years.
This directly applies to garden edging. The most common mistake homeowners make is simply scraping a shallow line and pressing the edging into the topsoil. As the main article notes, this guarantees failure. A proper trench, at least 4-6 inches deep and filled with compacted gravel, provides the stable, well-draining base needed to resist frost heave and soil pressure for decades.
For ultimate inspiration, look to the Japanese art of
Pro Tip for Sourcing Stone: Instead of heading straight to a big-box store, check with local landscape supply yards or even stone quarries. You’ll often find a much wider variety of regional stone types, better-quality materials, and the ability to buy in bulk for larger projects, which can significantly reduce the cost per foot.
- Stops grass from creeping into beds without a visible barrier.
- Creates an ultra-clean, professionally maintained look.
- Allows lawnmowers to get right to the edge, eliminating the need for string trimming.
The secret? Minimalist or ‘invisible’ edging. This is achieved by burying most of the material, leaving only a razor-thin line at ground level. Thin-profile steel, heavy-duty aluminum options like EdgeRight, or even simple composite planks installed vertically are perfect for this sleek, modern aesthetic.
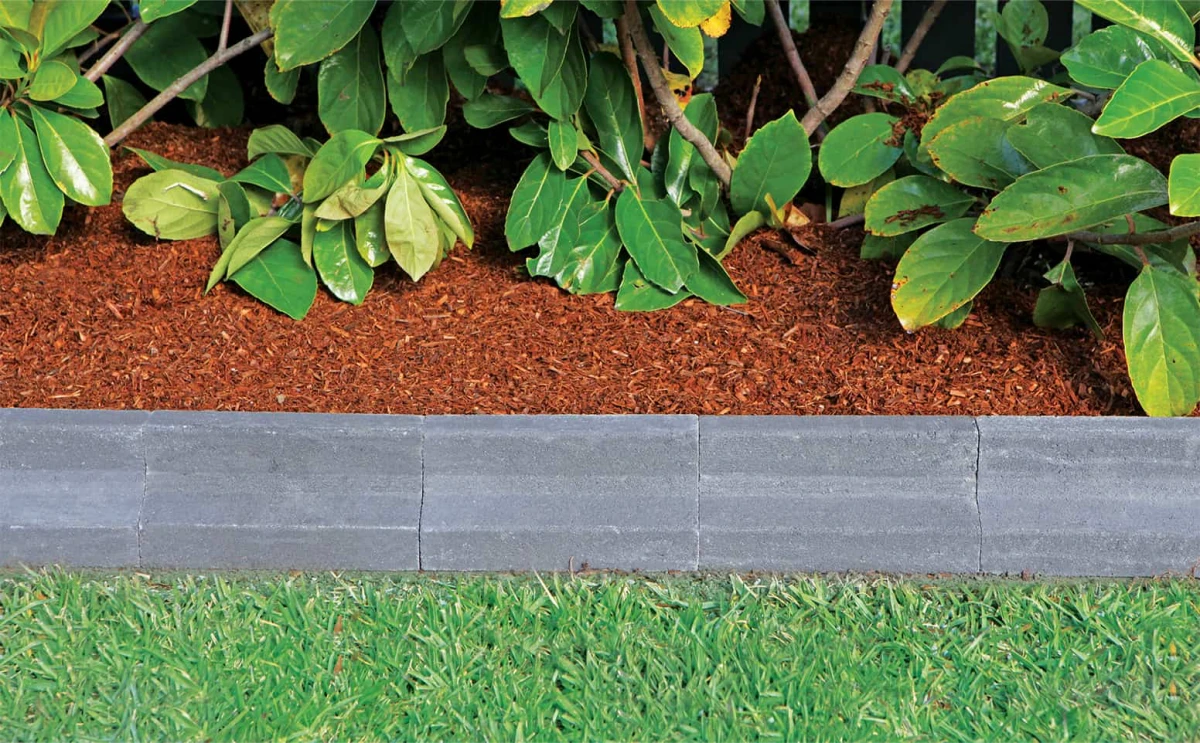
Can my edging also serve as a mowing strip?
Absolutely, and it’s a game-changer for lawn maintenance. A mowing strip is an edge that’s wide and flat enough for a lawnmower wheel to run along it, cutting the grass perfectly to the border. This is typically done with a row of flat-laid pavers, bricks, or specially designed concrete curb blocks. By installing them flush with the lawn level, you create a beautiful frame for your garden and drastically reduce trimming time.


