Landscape Lighting Done Right: A Pro’s Guide for Homeowners
I’ve been installing outdoor lighting for a long, long time. I still remember one of my first big learning moments. A client had this gorgeous, mature oak tree they wanted to feature for evening get-togethers. So, I did the obvious thing: I stuck two massive spotlights at the base and pointed them straight up. From the patio, it looked less like a majestic oak and more like some monster from a B-horror movie. The shadows were terrifying, and the glare was just plain ugly.
In this article
It was a fantastic lesson. Good outdoor lighting isn’t about flooding your yard with brightness. It’s about crafting a mood, making sure people are safe, and highlighting the beauty of your space with a gentle, artistic touch. It’s a blend of art and a little bit of practical science.
So many people just throw up a string of party lights and call it a day. And while those are fun, a properly designed system can genuinely transform your yard into another room of your house. This isn’t about spending a fortune on a complicated setup. It’s about knowing a few key concepts to get those professional-looking results safely. Let’s dig in.
First, Let’s Talk Tech (The Non-Boring Version)
Before you even think about buying a light, you’ve got to know what the specs on the box actually mean. They aren’t just there for decoration; they tell you exactly what a light will do. Getting this right is the first step to not being disappointed later.
Think Lumens, Not Watts
We all grew up thinking in watts. A 60-watt bulb was for a lamp, 100 watts was for the ceiling. But watts measure energy use, not brightness. With today’s super-efficient LEDs, watts are basically irrelevant for this purpose. The magic word now is lumens (lm).
Here’s a quick cheat sheet:
- Subtle Accent Light: 50-100 lumens is all you need for a small ornamental grass or a little garden statue.
- Path Light: Stick to the 100-200 lumen range. You want to see where you’re going, not create an airport runway.
- Spotlight for a Small Tree: 200-400 lumens will nicely wash the trunk and lower leaves in light.
- Floodlight for a Big Wall or Tree: 700-1300 lumens is where you get into serious power for broad, dramatic illumination.
Color Temperature: The Vibe is Everything
Ever notice how some light feels warm and cozy, and other light feels cold and clinical? That’s color temperature, measured in Kelvin (K). Honestly, this might be the most important choice you make. For a yard, you almost always want a warm, inviting feel.
- 2700K: This is my absolute go-to for almost every home. It’s a very warm white, like an old-school incandescent bulb. It just makes a garden feel so welcoming.
- 3000K: This is a slightly crisper soft white. It’s still warm, but it renders the greens in plants a bit more vibrantly. I use this when a client wants things to really pop.
- 4000K and up: Just… don’t. This is cool, blue-toned light. It looks harsh and totally unnatural in a garden. It’s really only for commercial security lighting where you’re trying to scare people away.
Low-Voltage (12V) vs. Line-Voltage (120V)
This one is critical for safety and your sanity. Nearly all DIY and residential landscape lighting is low-voltage (12V). The power in your house outlets is a dangerous 120V.
A 12V system is perfect for homeowners because it uses a transformer. This is a heavy little box that plugs into a standard outdoor GFCI outlet and safely “steps down” the power from 120V to a harmless 12V. Because the voltage is so low, the risk of serious shock is minimal, and you only need to bury the cable a few inches deep. For 99% of you, a 12V system is the only way to go.
Line-voltage (120V) systems are a whole different beast. They require a licensed electrician, buried conduit, and waterproof junction boxes, all according to strict local codes. Leave that to the pros.
IP Ratings: How Waterproof Is It, Really?
Every outdoor light has an IP rating. It’s a two-digit code for how well it’s sealed against dust and water. The second digit is our main concern.
- IP65: This means it’s protected from jets of water. This is the absolute minimum you should accept. It can handle rain and your sprinklers just fine.
- IP67: This means it’s protected from being temporarily dunked in water. I look for this rating for any in-ground lights or fixtures in low spots that might see a puddle or two.
- IP68: Totally submersible. You need this for any light you plan to put inside a pond or fountain.
The Three Layers of a Pro Lighting Design
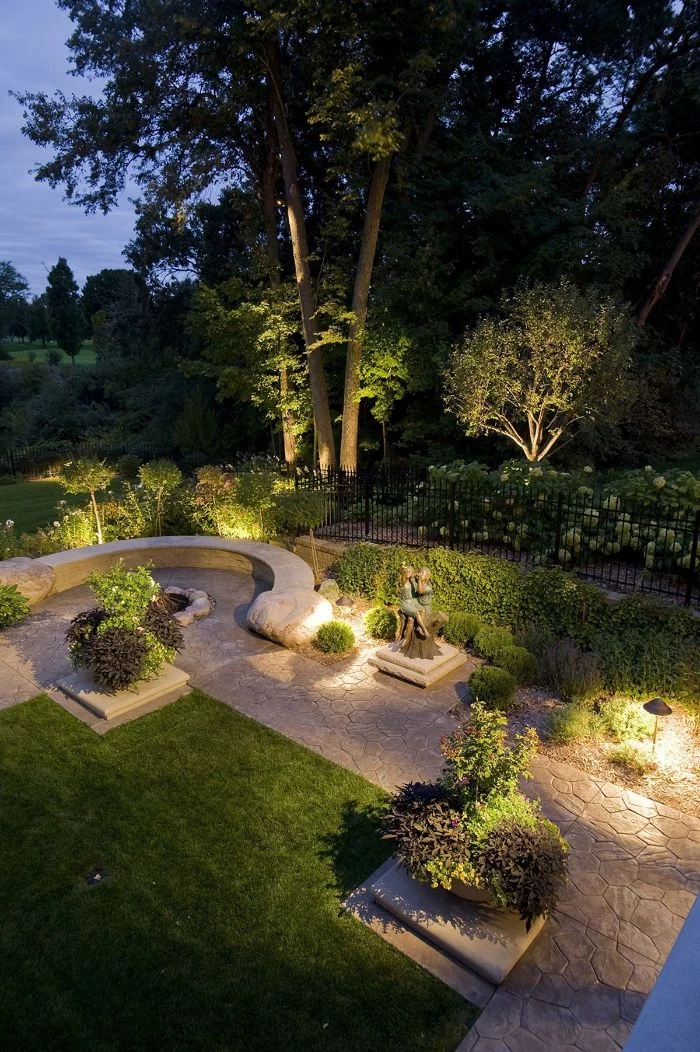
A killer lighting plan isn’t just about making things bright. It’s about using layers to build interest and function. I always think in three distinct layers: ambient, task, and accent.
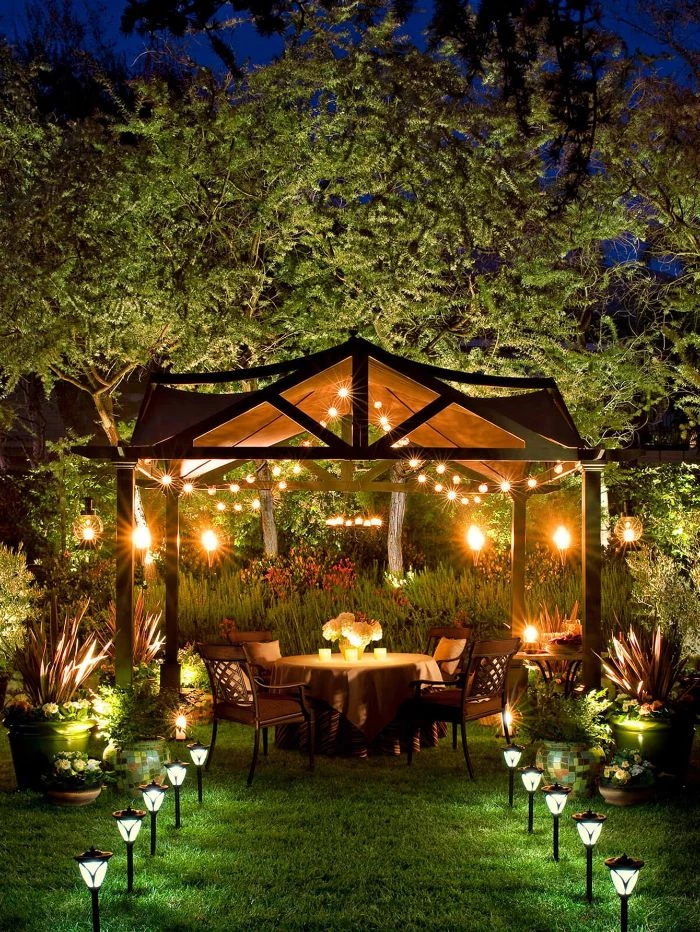
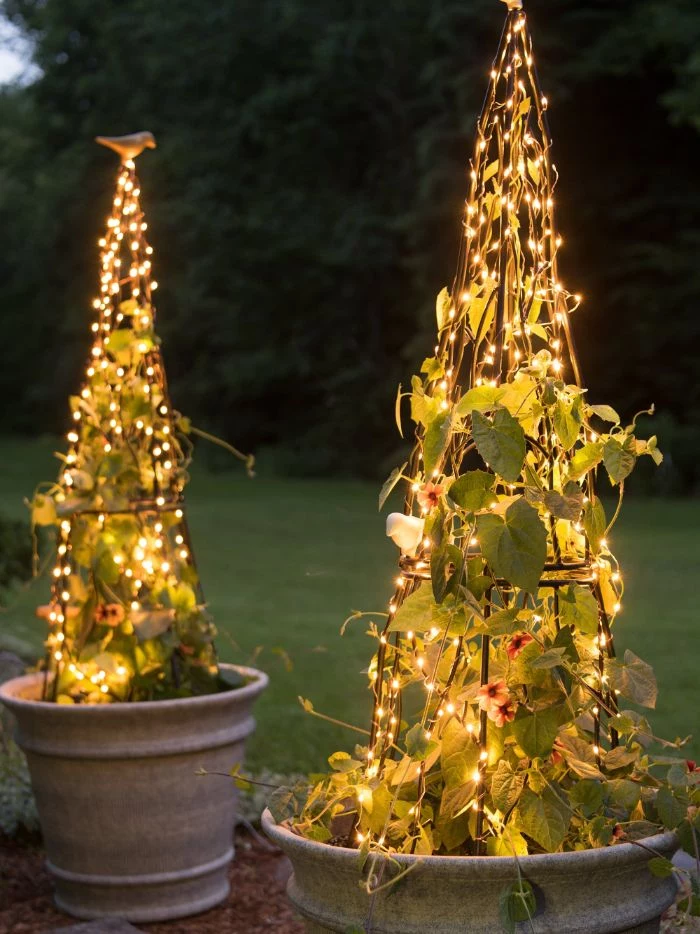
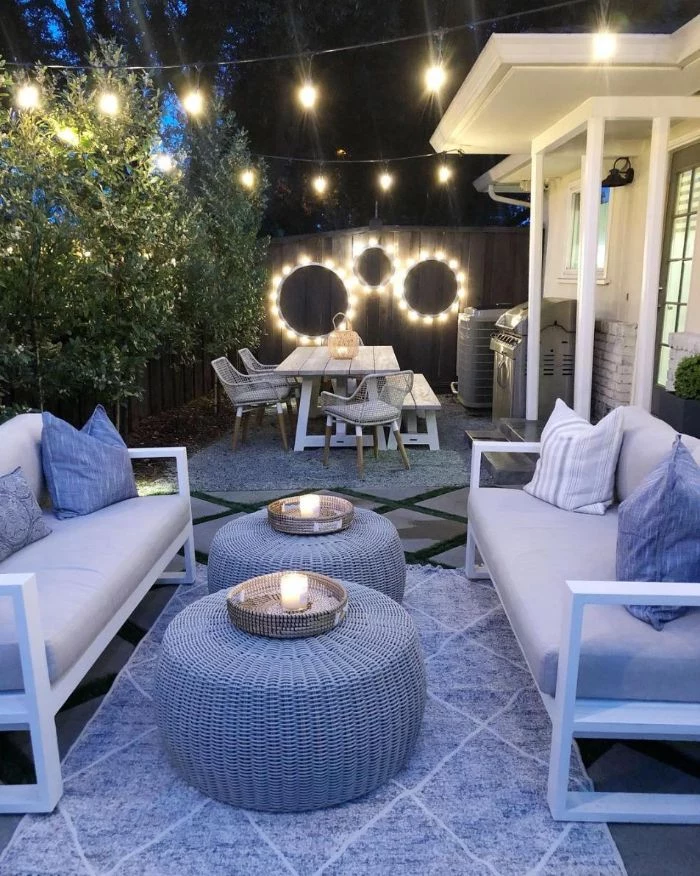
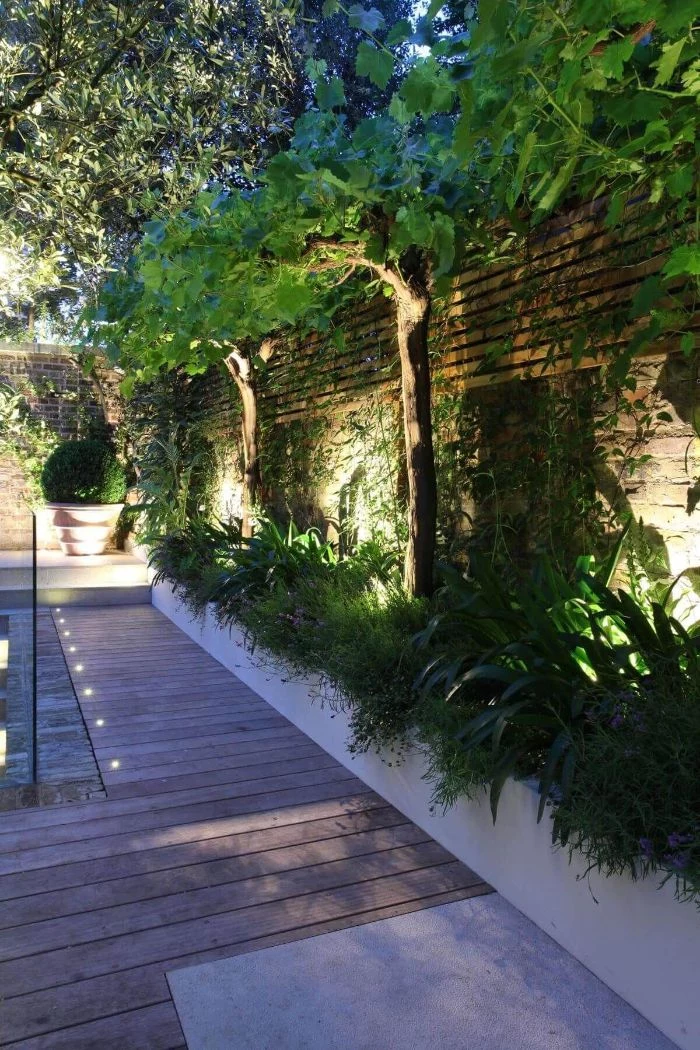
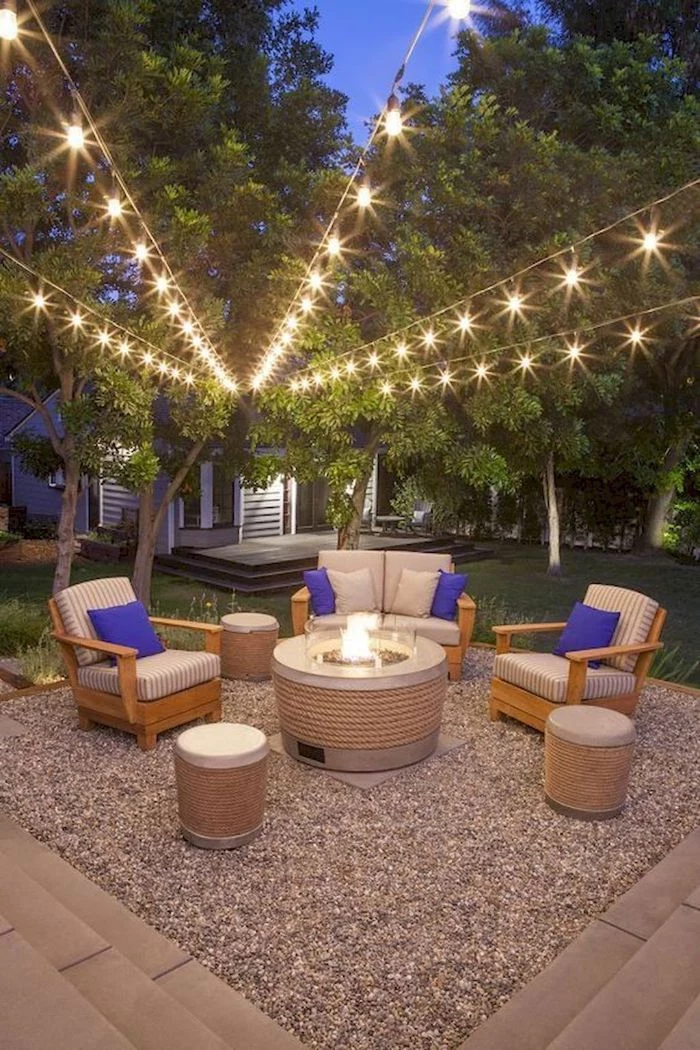
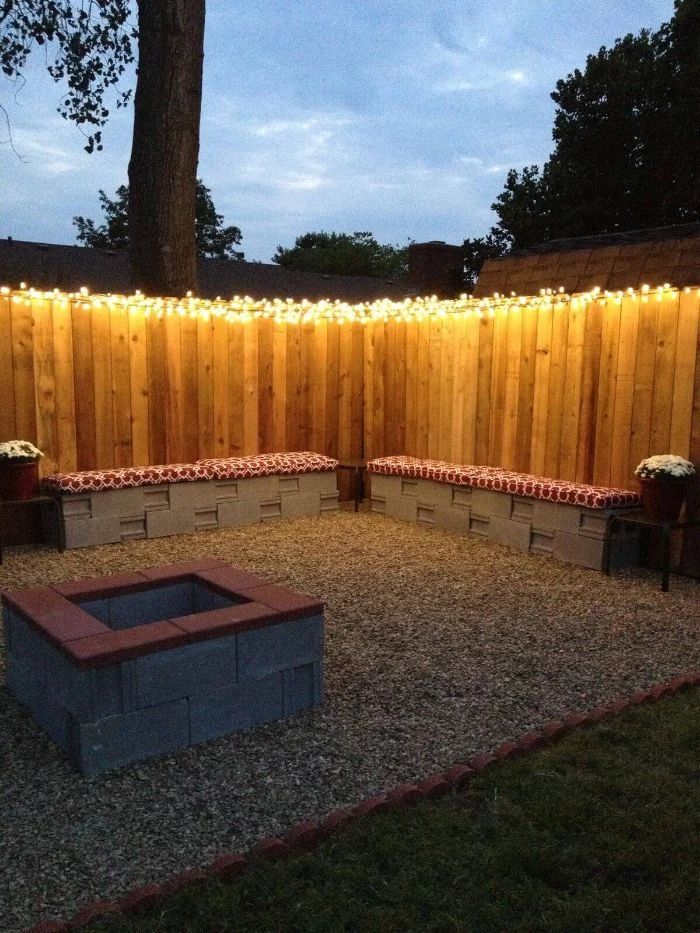
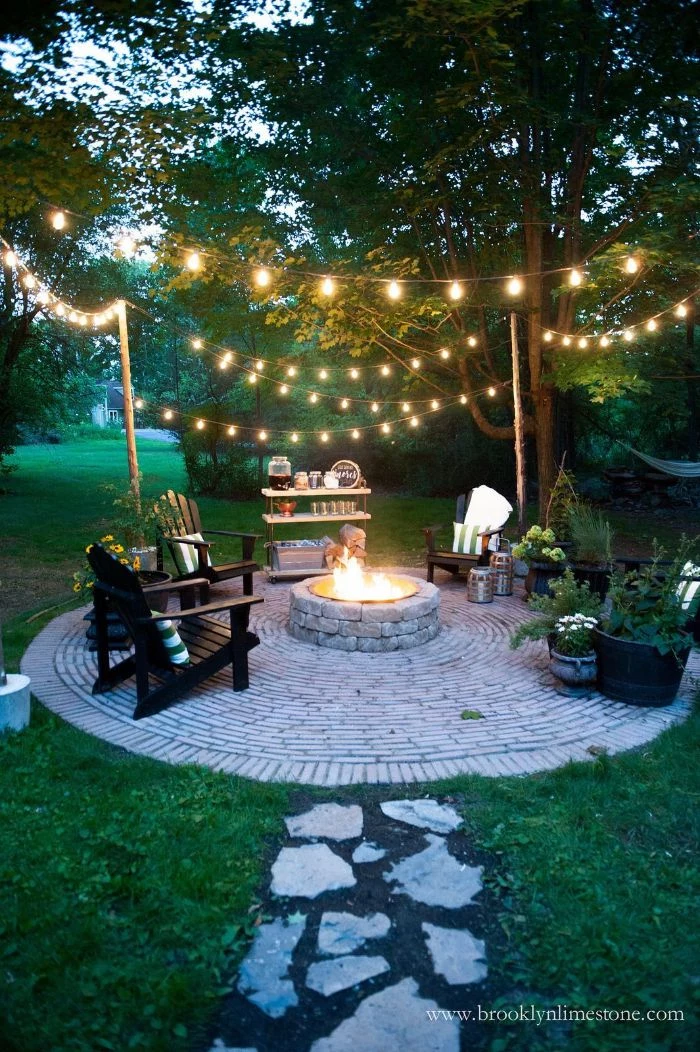
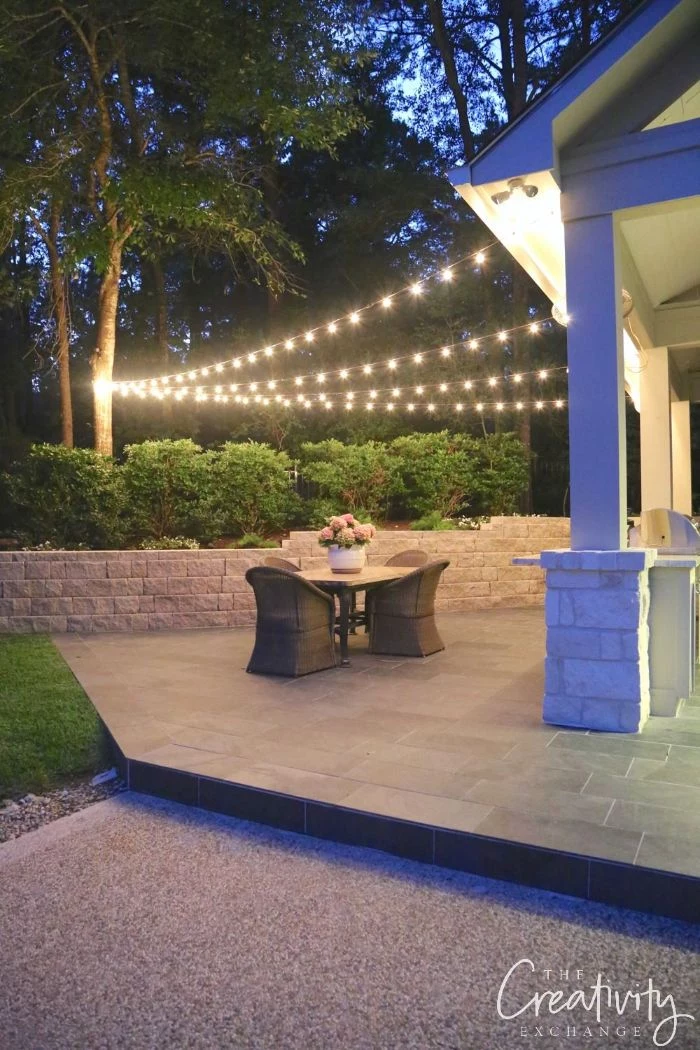
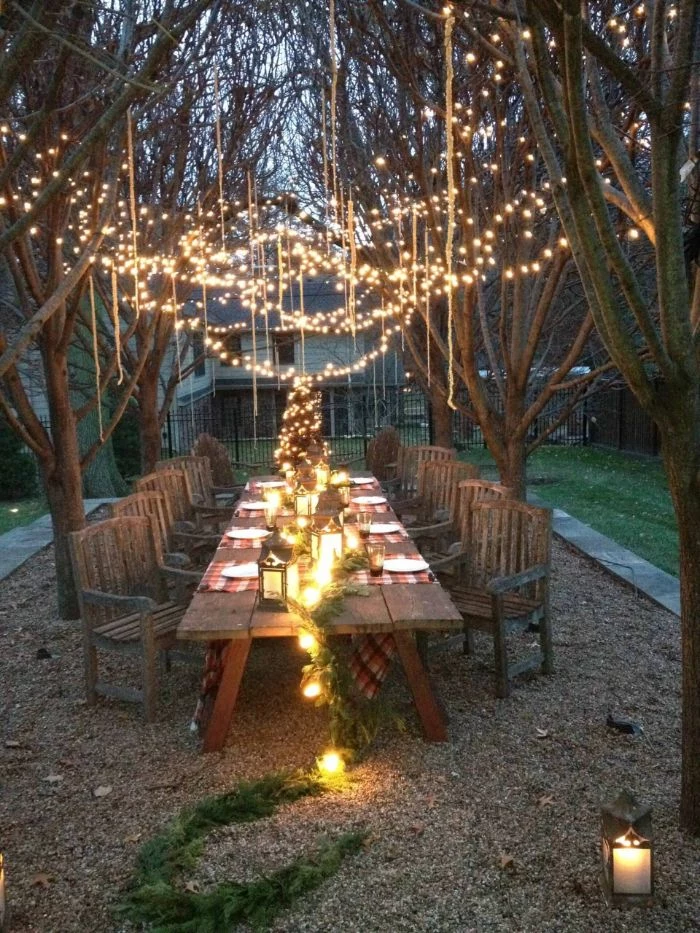
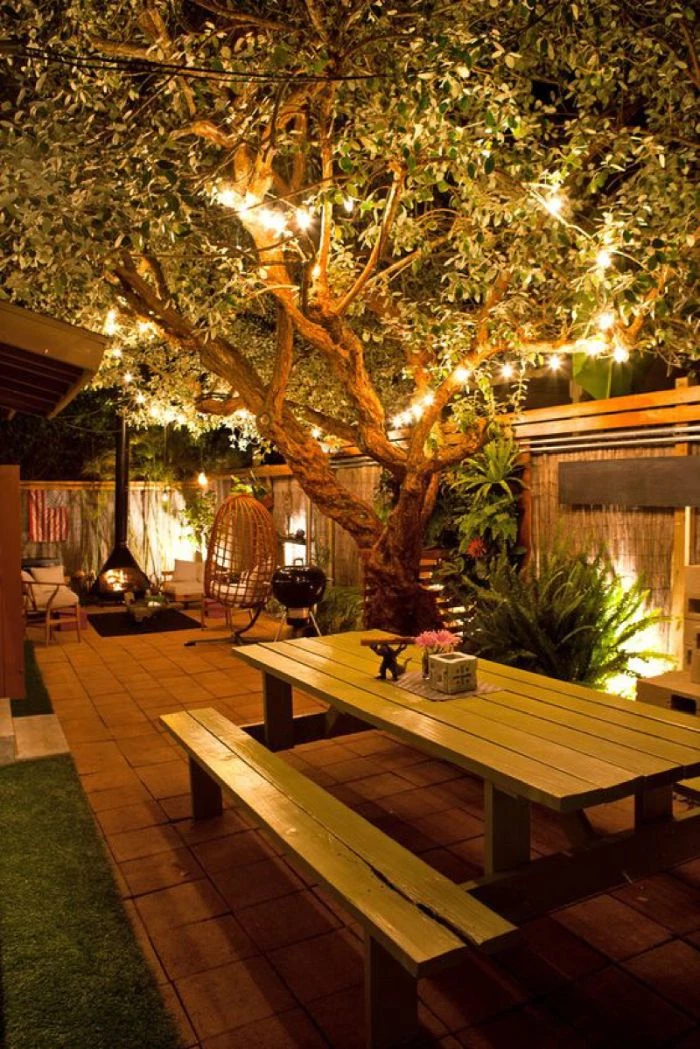
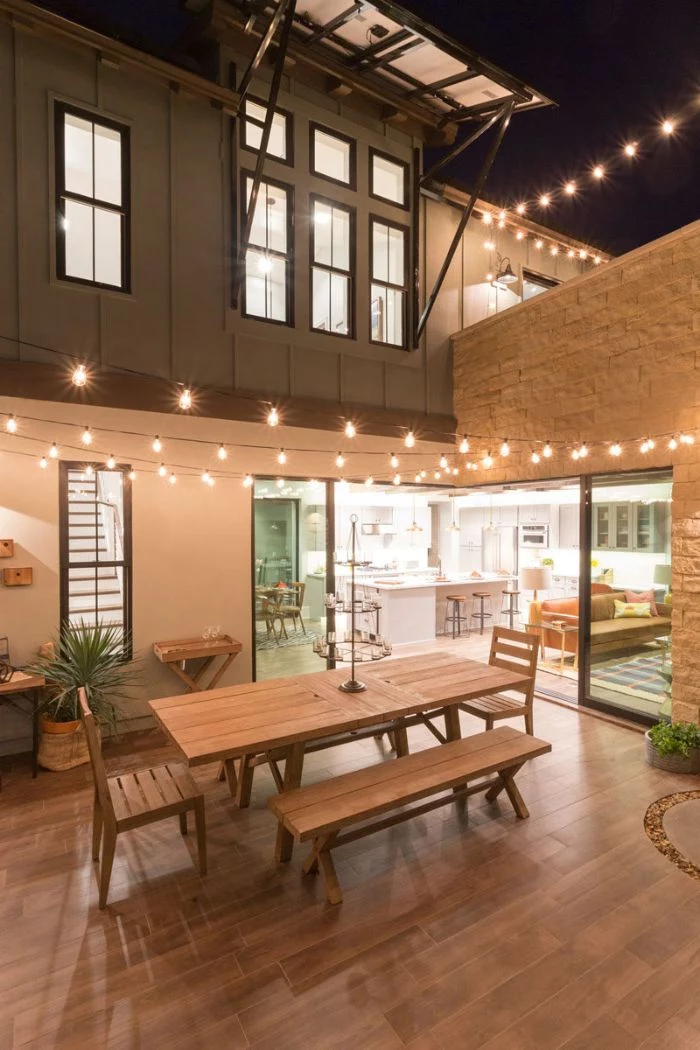
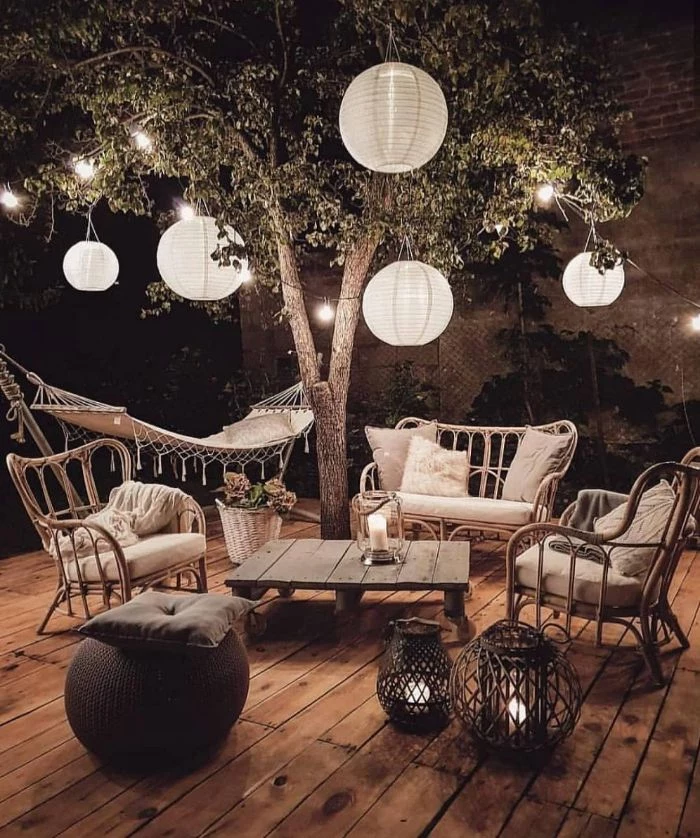
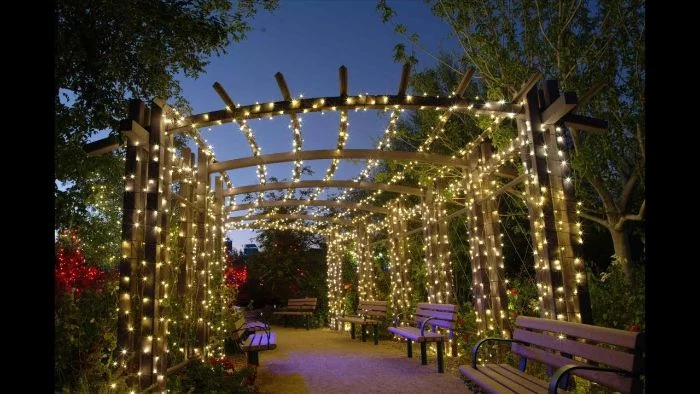
- Ambient Lighting (The General Glow): This is your base layer of soft, general light that makes the whole space feel complete. Think of it as the gentle, indirect light that ties everything together. Good sources are string lights over a patio, post cap lights on a deck, or a technique called ‘moonlighting’ (more on that later).
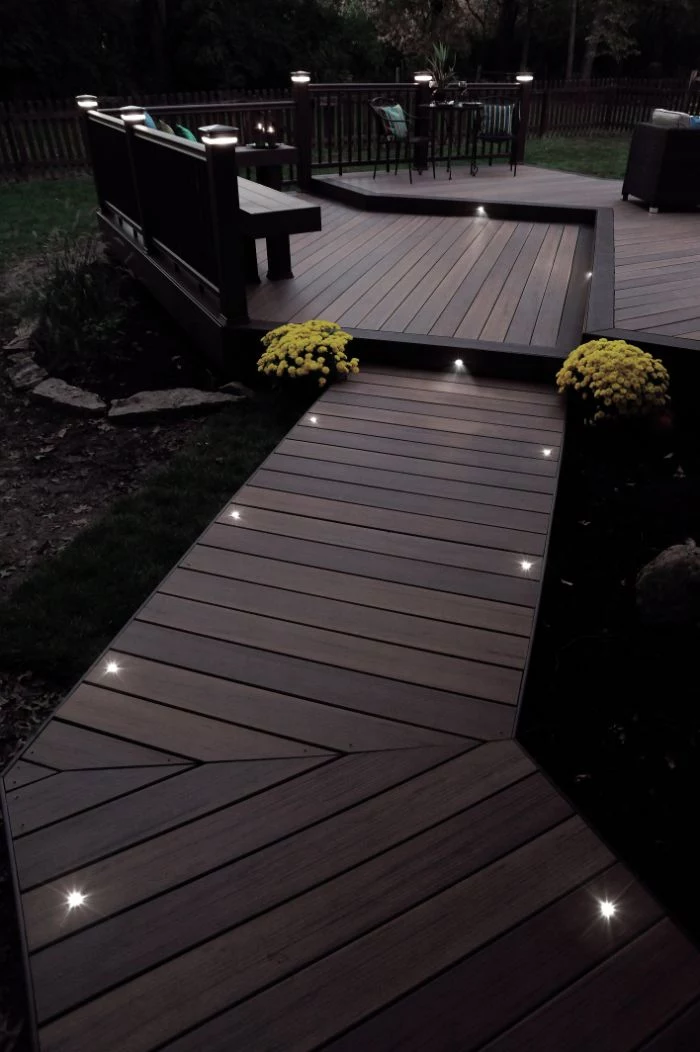
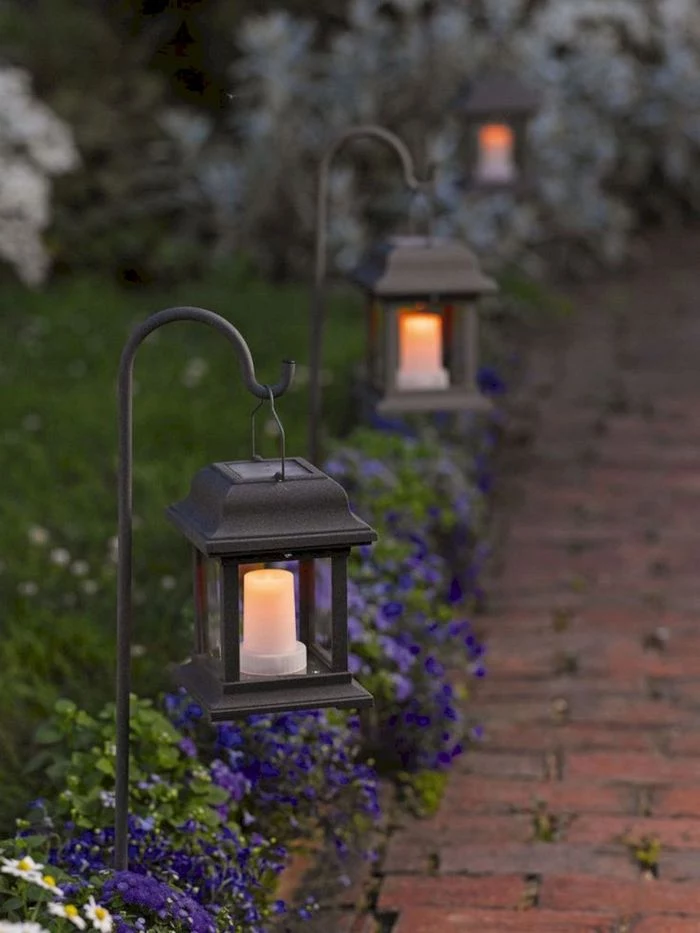
- Task Lighting (Light with a Job): This is all about safety and function. It’s more focused light to help you do stuff. Think path lights for walkways, step lights built into stair risers, or a dedicated light for your grill area so you can see if the burgers are done.
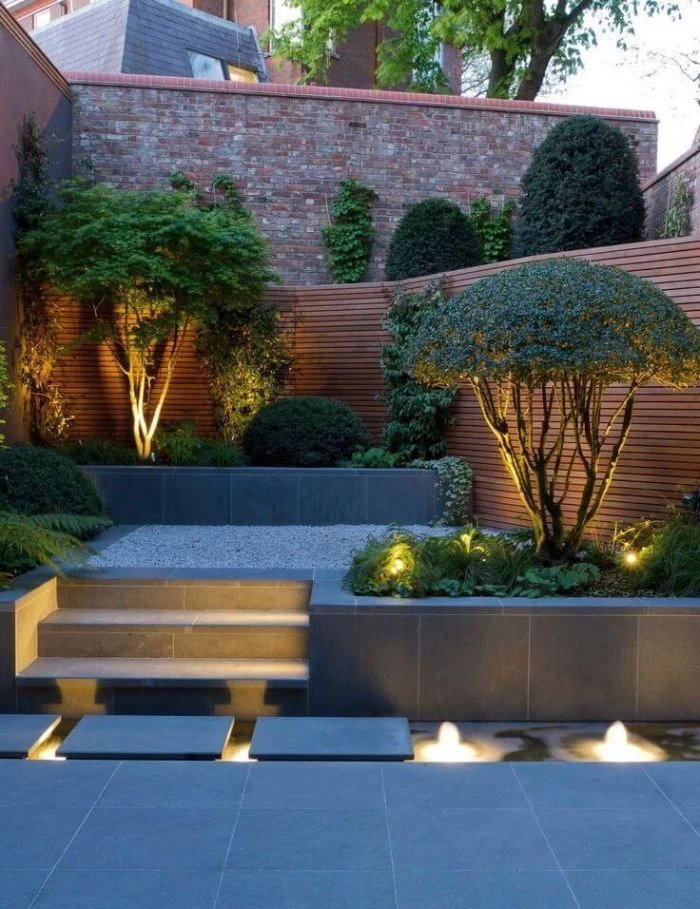
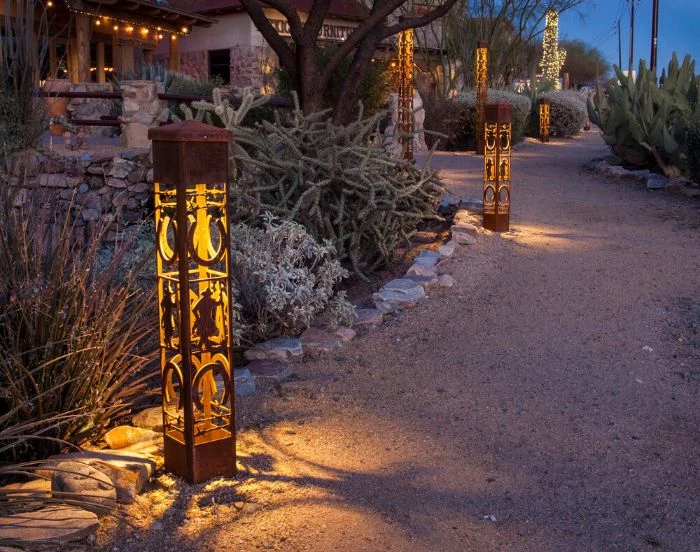
- Accent Lighting (The Drama): Now for the fun part! This is the focused light you use to show off your yard’s best features—a beautiful tree, a stone wall, a cool sculpture. This is how you create real beauty and ‘wow’ factor.
Pro Techniques for Placing Your Lights
Where you put a light is just as important as what light you choose. The trick is to think about the effect you want, not just the thing you’re lighting up.
Uplighting and Grazing for Texture
Uplighting is the classic technique of placing a light on the ground and aiming it up. For a wide tree, use two or three lights to capture the whole canopy. For a beautiful stone or brick wall, try a technique called grazing. Place the light right up against the wall and aim it nearly straight up. This creates dramatic shadows that reveal all the rich, beautiful texture of the material.
Downlighting for a Natural Vibe
My absolute favorite technique is what we call ‘moonlighting.’ For this to work, you need a mature tree. You mount a fixture about 15 to 25 feet up in the tree, aiming it down through the leaves. The result is pure magic. It casts a soft, dappled pattern of light and shadow on the ground below, just like real moonlight. Always use a fixture with a good glare shield so you see the effect, not the bulb.
The Right Way to Do Path Lights
Heads up! The number one mistake people make with path lights is creating an airport runway effect—placing them too close, in a perfect line, on both sides. It looks awful. The pro approach is to stagger them. Put one on the left, then ten feet down, put one on the right. Create overlapping pools of light that are just bright enough to see. Your eyes will follow the path naturally.
Oh, and what about getting wire under a sidewalk? Here’s a classic trick: Take a piece of PVC pipe that’s wider than your wire bundle and a bit longer than the sidewalk’s width. Attach a jet-stream nozzle to your garden hose, stick it in one end of the pipe, and use the water pressure to blast a tunnel right under the concrete. It works like a charm.
Buying Your Gear: Where to Spend Your Money
The quality of your hardware determines how long your system will last. I’ve fixed countless systems that failed after a year or two, and it’s almost always because of cheap materials.
Fixture Materials: Brass vs. Aluminum vs. Plastic
Here’s the real breakdown on what things cost and how long they last. Forget tables; let’s just talk straight.
- Solid Brass: This is the pro standard, and for good reason. It’s heavy, it doesn’t rust, and it develops a beautiful dark patina over time that looks amazing in the garden. Yes, it’s the most expensive, typically running $50 to over $100 per fixture, but a quality brass light can literally last a lifetime. If you live near the coast, this is non-negotiable.
- Powder-Coated Aluminum: This is a great middle-of-the-road choice. It’s lighter and more affordable, usually in the $30 to $60 range. The coating protects it from corrosion, but if it gets chipped by a weed whacker, the metal underneath can start to go. Expect a good 10-15 years out of these.
- Composite (Plastic): This is your budget option, often found in those all-in-one kits at big-box stores for $15 to $30 per light. They’re fine for getting started or for a temporary setup, but sunlight and temperature swings will make them brittle over time. Realistically, you’ll be lucky to get 3-5 years from them.
Where to Buy the Good Stuff
You can find the composite kits at places like Home Depot or Lowe’s, but for the better aluminum and brass fixtures, you’ll need to look elsewhere. The best stuff is usually sold at local landscape supply distributors (the places the pros go) or through specialty online landscape lighting stores. The quality difference is massive.
The Components You Can’t Skimp On
- The Transformer: This is the heart of your system. A good magnetic transformer will be heavy and cost anywhere from $150 to $300, but it’s built like a tank. Make sure it has multiple voltage taps (12V, 13V, 14V, 15V) to help you deal with voltage drop on long runs.
- The Wire: Use direct-burial rated low-voltage cable. For most jobs, 12-gauge (12/2) wire is perfect. It costs around $0.50-$0.75 per foot. For really long runs, upgrade to thicker 10-gauge (10/2) wire to prevent lights at the far end from dimming.
- Waterproof Wire Connectors: This is the #1 failure point of DIY jobs. Do NOT use regular electrical tape or the cheap twist-on nuts. You MUST use silicone-filled, direct-burial wire connectors. They cost a buck or two each, but they will save you so many headaches.
Installation: Let’s Get It Done
With a solid plan and the right gear, the install itself is pretty straightforward. A typical 10-15 light system is a perfect weekend project. Plan for a few hours of design and layout, and a solid 4-6 hours for trenching and making connections.
Quick Tip: How to Make a Perfect Connection
Connecting the fixture to the main cable is the part that intimidates people, but it’s easy. Here’s how you do it with those waterproof connectors:
- Carefully strip about a half-inch of insulation off the two wires from your fixture and the two main cable wires you’re connecting to.
- Hold the two matching bare copper ends together and twist them clockwise until they’re snug.
- Push the twisted wires all the way into the silicone-filled cap.
- Twist the cap on until it’s very tight. The silicone will ooze out and create a perfect waterproof seal around the wires. That’s it! No corrosion, no failures.

Understanding Voltage Drop & The ‘Hub’ Layout
As electricity travels down a wire, it loses a little power. This is called voltage drop, and it can make the lights at the end of a long line look dim. Instead of running one single line (a ‘daisy chain’), the pros use a ‘hub’ layout. Think of it like this: run one fat 10-gauge ‘spine’ of wire to the middle of a big garden bed. From a central point there, ‘branch off’ with smaller 12-gauge wires to each group of 2-3 lights. This ensures every light gets a nice, even amount of power.
Safety First. No Excuses.
- GFCI Outlet is a MUST: Your transformer must plug into a Ground Fault Circuit Interrupter (GFCI) outlet. This is the kind with the ‘test’ and ‘reset’ buttons. It’s a safety device that prevents serious shocks.
- Call 811 Before You Dig: Seriously. It’s a free national service. They’ll send someone to mark all your buried utility lines. Hitting a gas or power line is a catastrophic, life-threatening mistake. Just make the call.
- Bury the Cable: A 6-inch deep trench is the standard for low-voltage wire. This keeps it safe from shovels and lawn aerators.
Want a Quick Win? Try This Weekend Project.
Feeling overwhelmed? Don’t be. Start small and see the impact for yourself. Light up just ONE feature tree in your yard. All you need is one brass spotlight (~$60), a small 45-watt transformer (~$100), and 50ft of 12-gauge cable (~$25). You can have it installed in two hours on a Saturday afternoon for under $200, and that night you’ll be staring out the window thinking, ‘Wow, I did that!’
Common Mistakes & Quick Fixes
From my experience, 90% of problems fall into two categories:
- The Problem: The lights at the far end of the line are dim.
The Fix: You’ve got voltage drop. Open your transformer and move the main wire from the 12V tap to the 13V or 14V tap. This boosts the power down the line. That’s why you bought a good transformer! - The Problem: One single light has stopped working.
The Fix: Nine times out of ten, it’s a bad connection. Dig up the wire connector for that light. I bet you’ll find it’s corroded. Cut it out and replace it with a new silicone-filled waterproof connector. Problem solved.
Putting in a great outdoor lighting system is one of the most satisfying home projects you can do. It literally changes how you see and use your own home. By starting with a good plan, investing in quality gear, and following a few key rules, you can create something that brings you joy for decades. The final result is always worth the effort.
Inspirational Gallery
What’s the difference between warm and cool light?
It’s all about color temperature, measured in Kelvin (K). For a cozy, candle-like glow that mimics traditional incandescent bulbs, look for fixtures or bulbs around 2700K. This is ideal for seating areas. A slightly crisper, more modern but still inviting white is 3000K, perfect for general landscape use to render plant colors naturally. Anything over 4000K starts to feel clinical and blue, like an office space, which can kill the magical atmosphere you’re trying to create.
More than 50% of the light from unshielded outdoor fixtures is wasted, shining up into the sky where it’s not needed.
This is a key principle of the International Dark-Sky Association. To be a good neighbor and preserve the night sky, choose ‘full cutoff’ or ‘dark-sky friendly’ fixtures. These have solid tops and direct all light downwards, illuminating your path or garden bed without creating wasteful and disruptive sky glow.
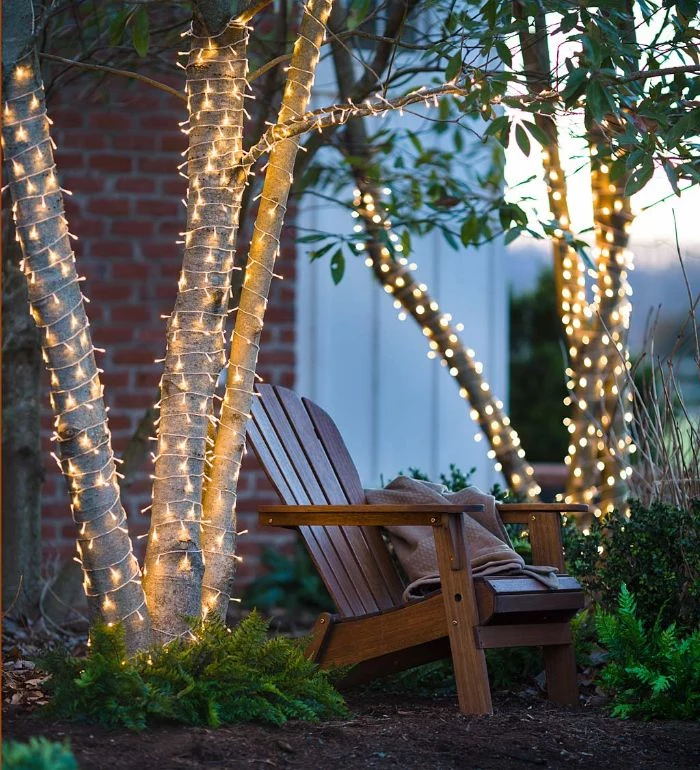
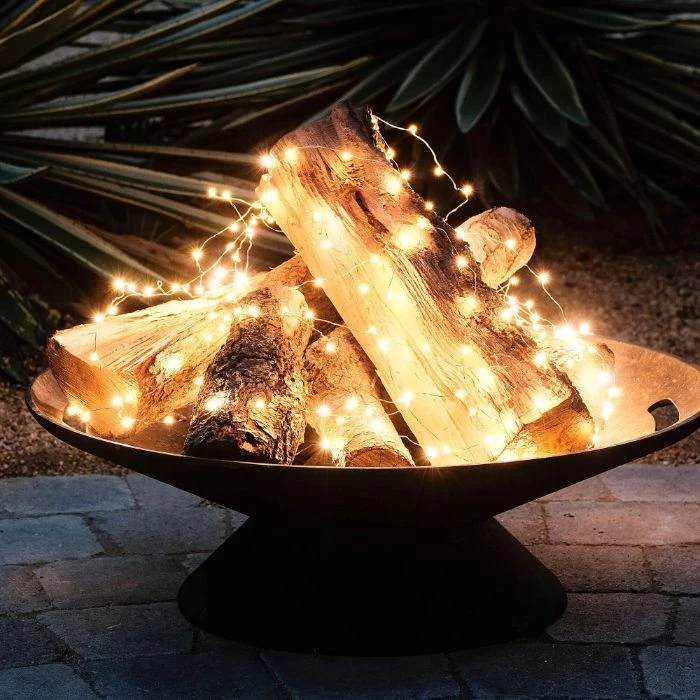
- Creates a soft, natural, and enchanting glow.
- Minimizes harsh shadows and ground-level glare.
- Makes tall trees feel majestic and integrated into the night.
The secret? The ‘moonlighting’ technique. Instead of placing lights at the base of a tree pointing up, a professional will install one or two wide-angle fixtures high up in the branches, pointing down. The light filters through the leaves and branches, simulating the gentle light of a full moon.
Fixture Material: Aluminum vs. Brass
Powder-Coated Aluminum: A great budget-friendly choice available in many colors. It’s lightweight but can chip or fade over time, especially in harsh climates, potentially leading to corrosion.
Solid Brass: The professional’s choice. It’s significantly more expensive upfront but is virtually indestructible. It won’t rust or corrode and develops a beautiful, natural patina over time that blends seamlessly into the landscape.
For lifetime performance, brass is the superior investment.
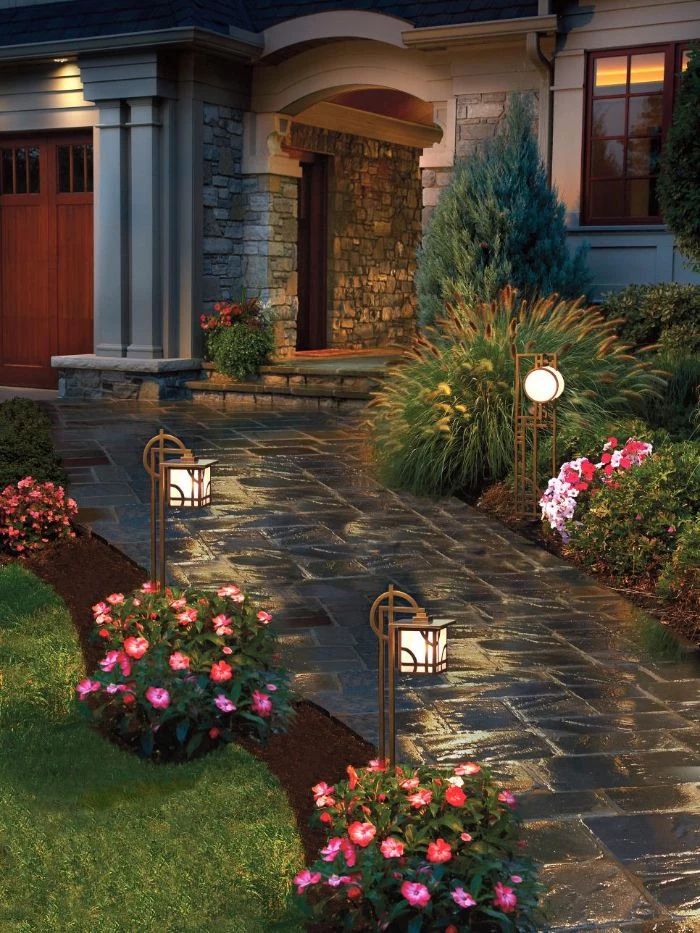
Think of your yard in layers, just like an interior designer would. Your first layer is ‘ambient’ light from string lights or moonlighting. The second is ‘task’ light, like path or stair lights for safety. The final, artistic layer is ‘accent’ light—a spotlight on a Japanese maple, a wash of light on a stone wall, or a small fixture highlighting a planter. Combining these three layers creates depth and interest.
- Silhouetting: Place a light behind an interesting plant or statue, aimed at a wall or fence. This hides the object’s details but showcases its dramatic shape.
- Shadowing: The reverse of silhouetting. Place the light in front of the object, casting its shadow onto the surface behind it for a playful, dramatic effect.
- Grazing: Position a light very close to a textured surface like a stone wall, tree trunk, or brick facade. The tight angle of the light will highlight every tiny detail and texture.
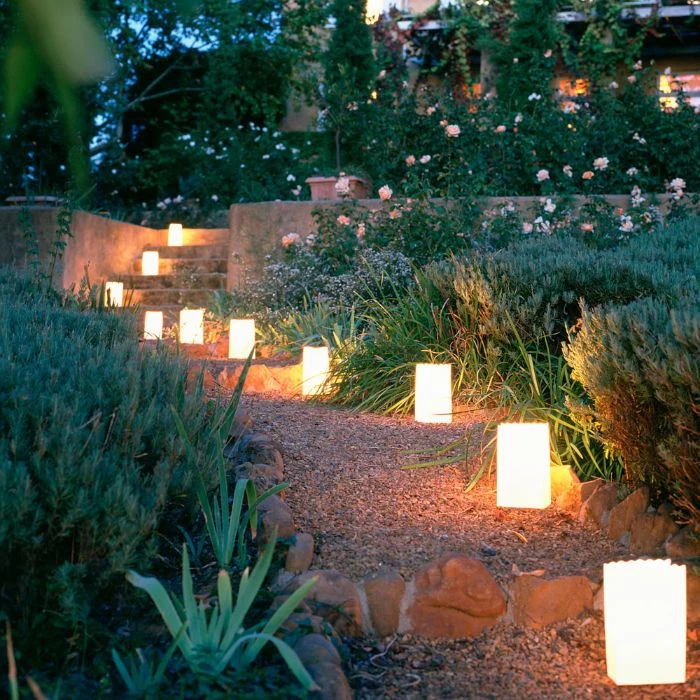
A common mistake: The ‘airport runway’ effect. Placing path lights in a straight line, perfectly spaced, makes a walkway feel rigid and utilitarian. Instead, stagger them on alternating sides of the path. This creates a more natural, meandering feel and provides sufficient light for safe passage without looking over-lit.
Even a well-designed system needs a little TLC. A thin layer of dirt or hard-water deposits on a lens can reduce light output by up to 30%.
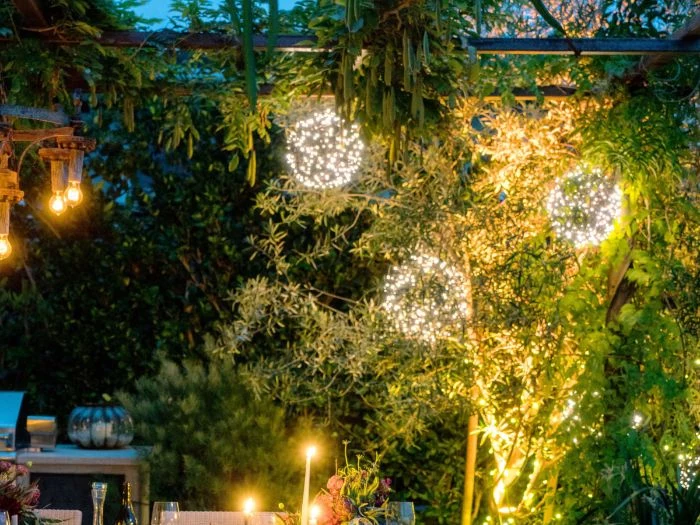
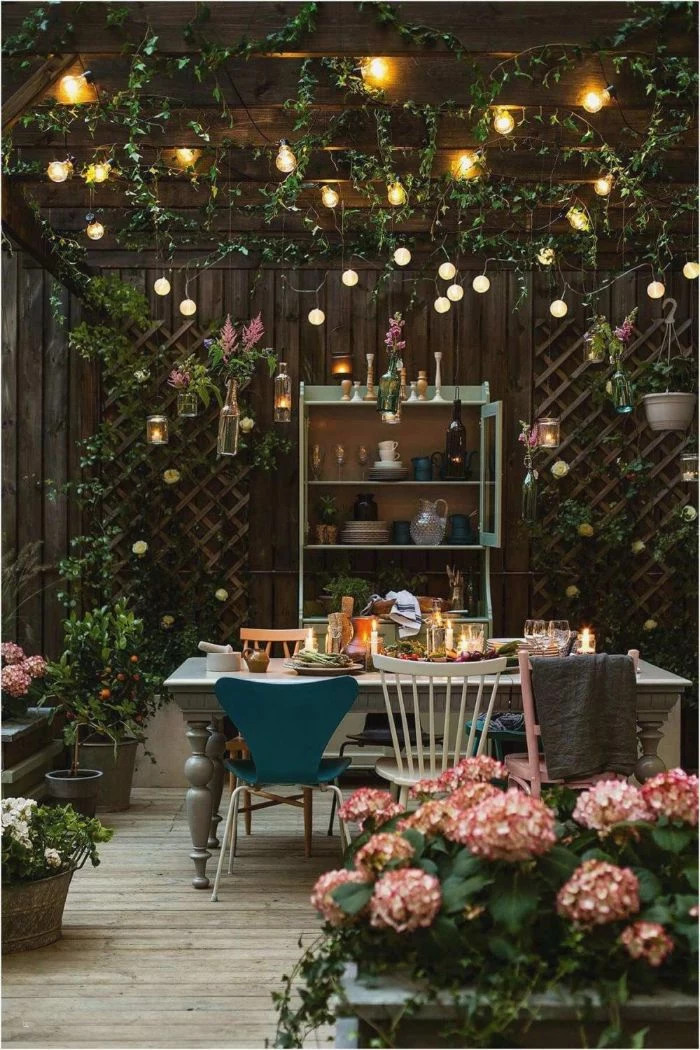
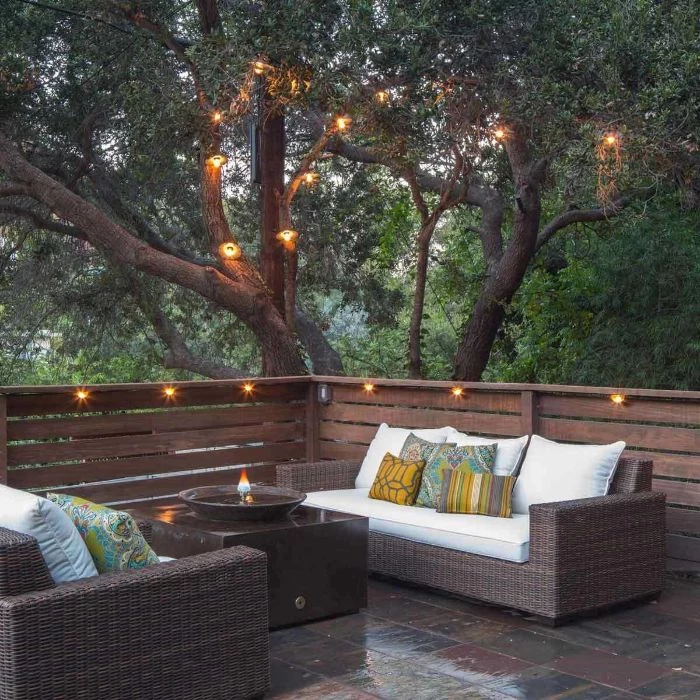
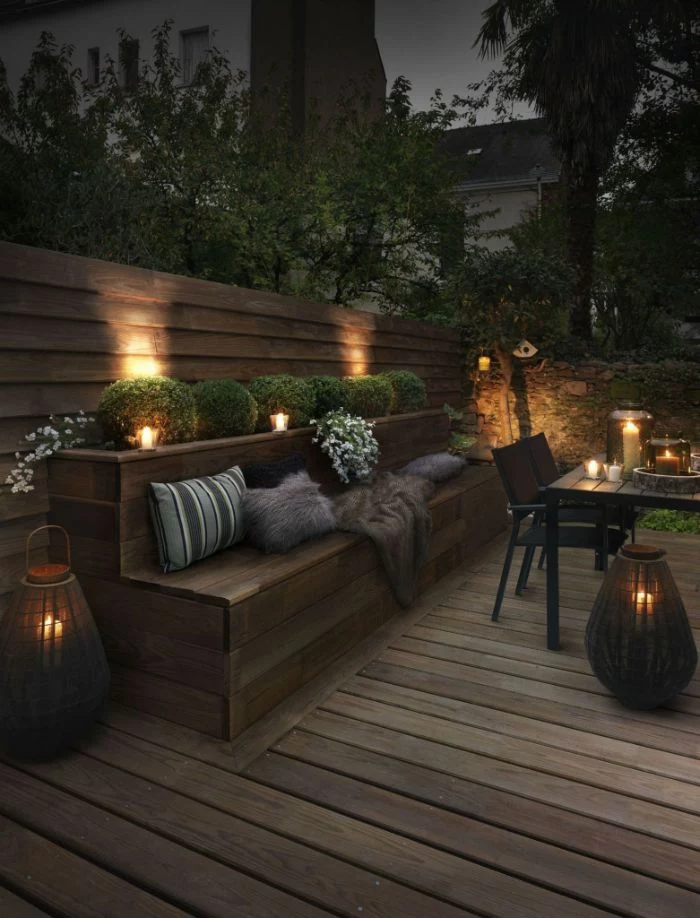
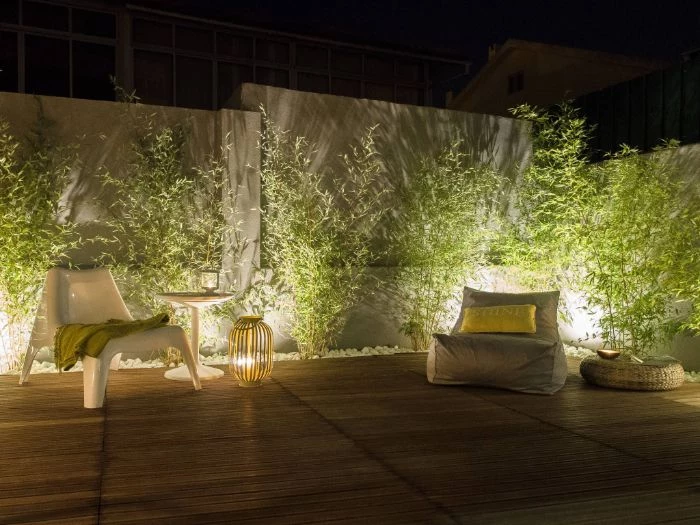
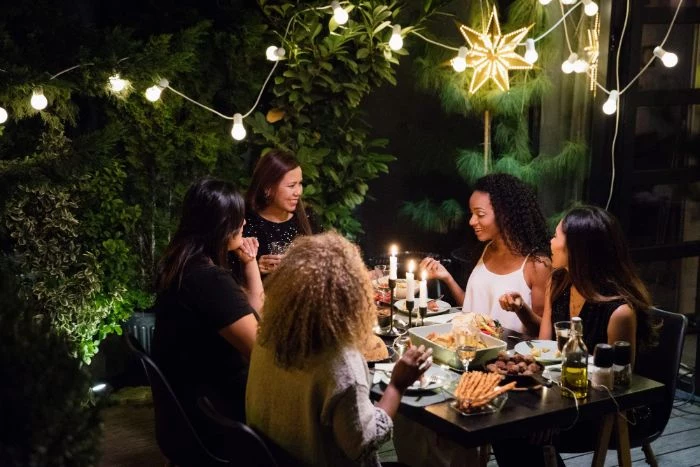
Get inspired by Mediterranean courtyards by focusing on warmth and containment. Use wall-mounted sconces that cast a downward glow on stucco walls, and place small, portable lanterns like the Philips Hue Go on tables or low walls. The key is to keep the light sources low and intimate, creating a cozy, enclosed feeling perfect for late-night conversations.
Are smart lighting systems worth it for the outdoors?
Absolutely. Beyond the ‘wow’ factor, systems like Philips Hue Outdoor or Ring Smart Lighting offer immense practicality. You can set automated schedules based on sunset times, dim the lights for different moods, or even change colors for a party. Most importantly, you can control your entire system from your phone, whether you’re on the couch or on vacation, adding a layer of convenience and security.
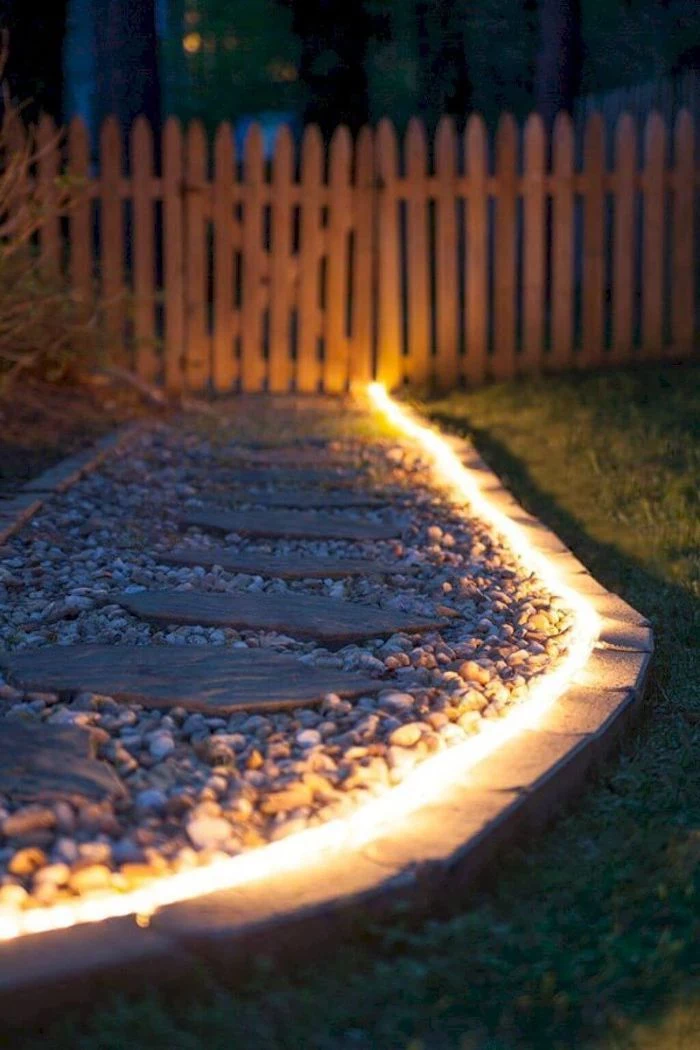
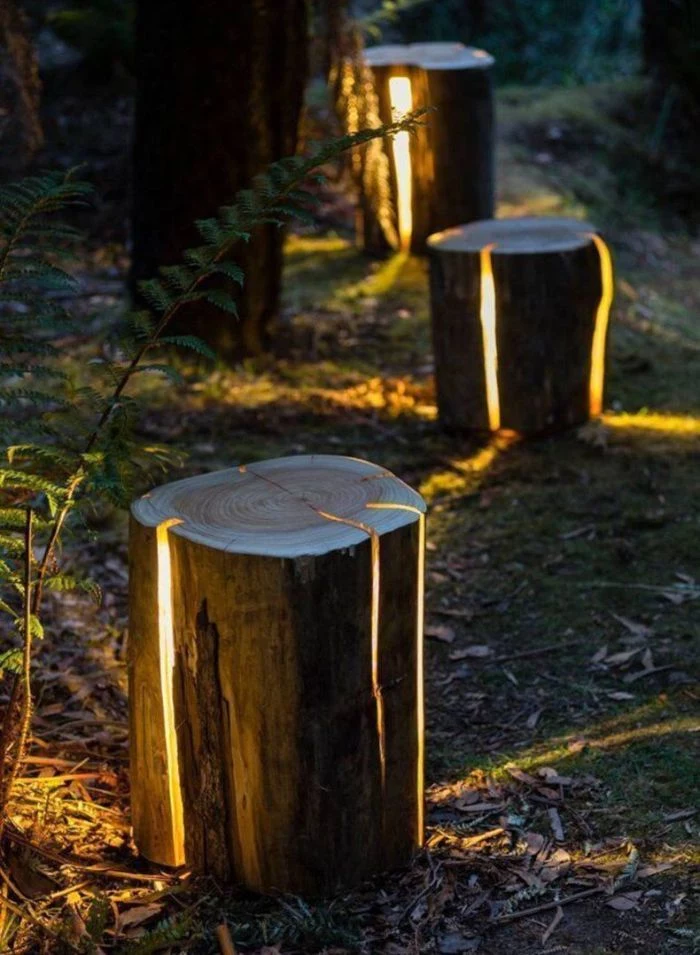
Don’t just light the ground. Consider ‘hardscape’ lighting for a truly integrated, high-end look. These are small, linear LED fixtures designed to be hidden. Brands like Kichler and VOLT Lighting offer models that can be tucked under stair treads, bench seats, or the capstones of a retaining wall. The result is a magical, indirect glow that seems to emanate from the structures themselves.
- You want to highlight a sculpture without a distracting ‘hot spot’.
- You need to illuminate a path without blinding people walking on it.
- You are uplighting a wide tree and want to diffuse the beam.
The solution is often a simple accessory. Ask for a frosted lens to soften the light or a ‘honeycomb louver’ that fits over the bulb to drastically cut down on side glare.
Pro Tip: Most low-voltage lighting kits use a ‘daisy chain’ wiring method. For more consistent brightness across all fixtures, especially on a long run, use the ‘hub’ or ‘T’ method. Run a main heavy-gauge wire from the transformer and then branch off smaller wires to individual lights or small groups. This ensures the last light in the line is just as bright as the first.
The beam angle of a bulb determines if you get a narrow spot or a wide flood. A 15-degree beam is a tight ‘spot’ perfect for highlighting a distant flag pole or a very thin architectural column. A 38 or 40-degree beam is a great all-purpose ‘flood’ for most trees and shrubs. A 60-degree beam provides a very wide wash of light, ideal for illuminating broad walls or large groups of plantings.
A 2021 survey by the National Association of Realtors found that 41% of real estate agents said clients are increasingly interested in homes with landscape lighting.
This data highlights that a well-executed lighting plan isn’t just an expense; it’s an investment. It boosts curb appeal, extends the usability of your outdoor spaces, and can make your property more attractive to potential buyers when it’s time to sell.
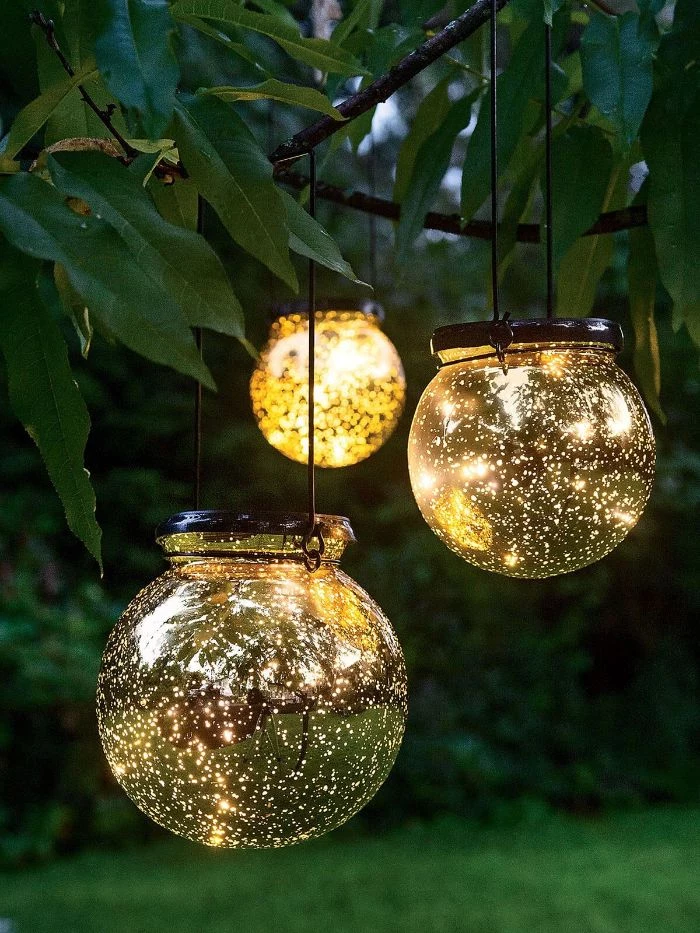
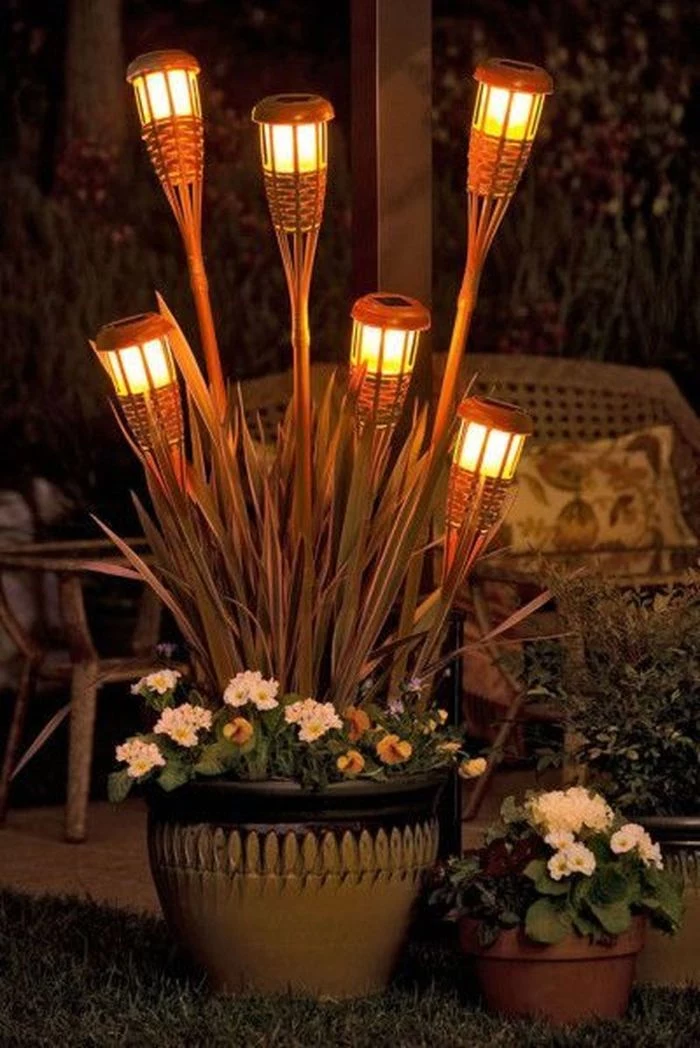
Solar Lights: Once a gimmick, modern solar lights from brands like Ring or Gama Sonic now offer respectable brightness and reliability. They are perfect for areas where running a wire is impossible or for homeowners wanting a simple, no-fuss installation. However, their performance is dependent on daily sunshine, and their brightness rarely matches a low-voltage system.
Low-Voltage (12V): The standard for professional results. It offers consistent power, superior brightness, and the flexibility to use a huge range of fixture types and wattages. It requires a transformer and burying cable but is the most reliable and powerful solution.
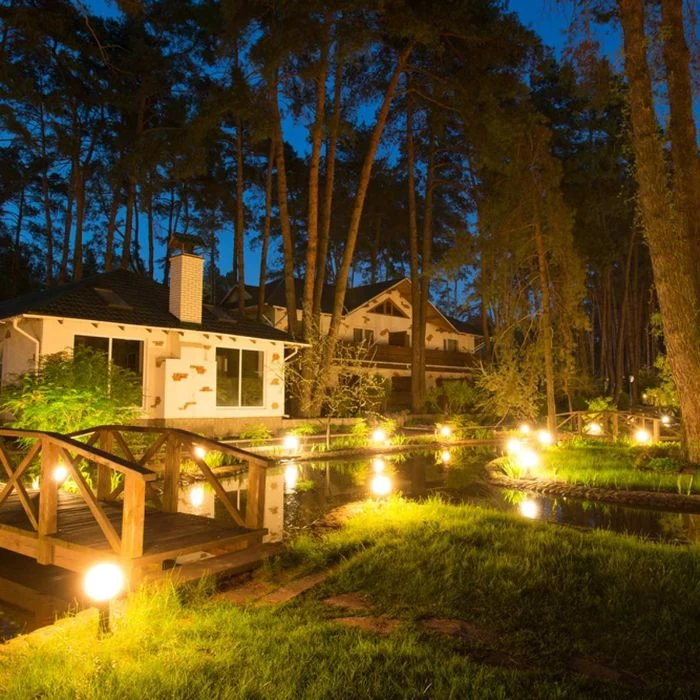
Water features come alive at night, but only if lit correctly. The key is to avoid glare on the surface. For fountains, place a submersible waterproof light directly in the basin, pointing up at the moving water. For ponds or waterfalls, hide spotlights among rocks on the edge, aimed across the water to highlight the far bank or the cascading water itself. This creates reflection and sparkle without blinding the viewer.
How do I choose the right size transformer?
It’s simple math. Add up the total wattage of all the lights you plan to install. For example, ten 5-watt lights equal 50 watts. A good rule of thumb is to choose a transformer where your total load is no more than 70-80% of its maximum capacity. This leaves room for future expansion and prevents the unit from overworking. So, for a 50-watt system, a 75-watt or 100-watt transformer is a safe bet.

Important: When you buy low-voltage landscape wire, pay attention to the gauge (e.g., 12/2, 14/2, 16/2). The lower the number, the thicker the wire and the less voltage drop you’ll have over long distances. For main runs from the transformer, use a thicker 12-gauge or 10-gauge wire. For shorter runs branching off to individual fixtures, a 14- or 16-gauge wire is usually sufficient.
As seasons change, so does your landscape. The perfect placement for a light in the summer might be completely blocked by a snowbank in the winter. And as your shrubs and trees grow year after year, they will inevitably start to cover your fixtures. Plan for an annual walk-around to trim back encroaching foliage and adjust the aim and position of your lights to keep the effect just right.
- Plan for expansion from the start.
- Protect wiring from future digging.
- Ensure connections are waterproof.
A few DIY basics can save major headaches. Even if you’re starting with just a few lights, use a transformer with extra capacity. Bury your wires at least 6 inches deep and lay them inside a conduit where you might dig later for planting. Finally, use silicone-filled wire nuts, like those from DryConn, to ensure your connections stay waterproof and corrosion-free for years.
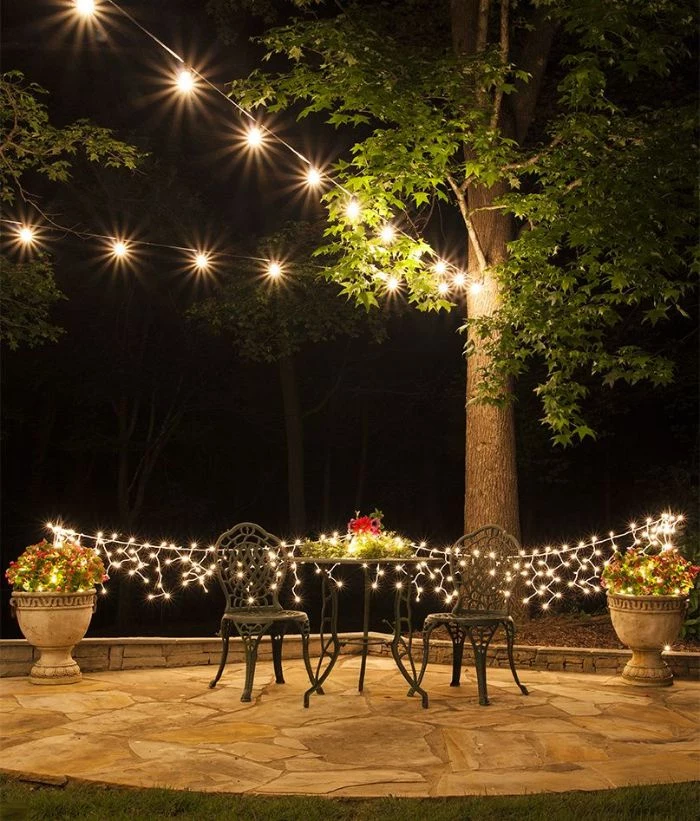
The human eye perceives lighted areas at night as being much brighter than they actually are, due to the contrast with the surrounding darkness.
This is why less is almost always more in landscape lighting. Your goal isn’t to replicate daylight. A few carefully placed, low-lumen fixtures creating pools of light and soft shadows will have a much more powerful and beautiful impact than a single, high-powered floodlight that flattens everything and eliminates all mystery.
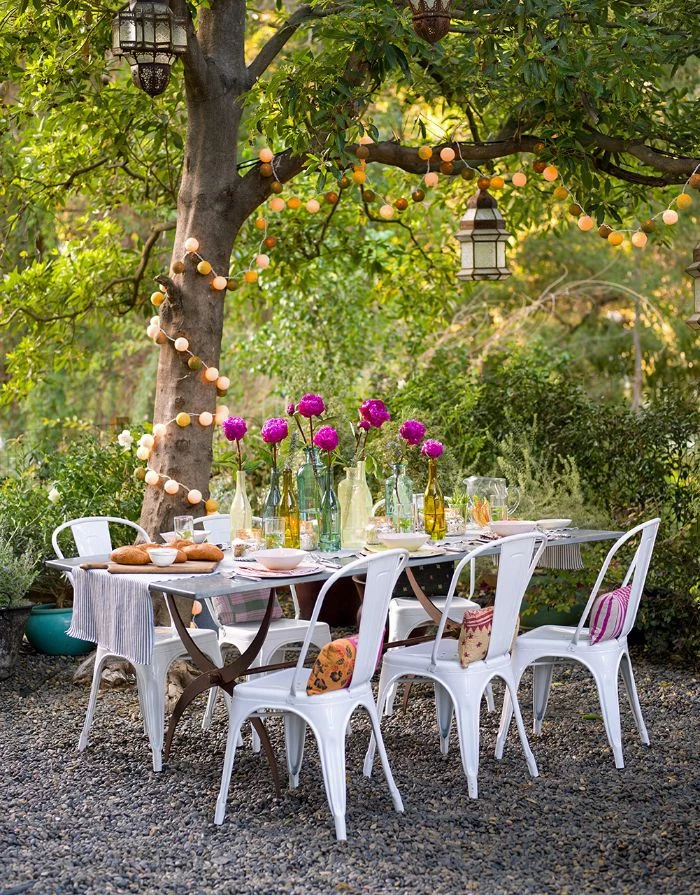
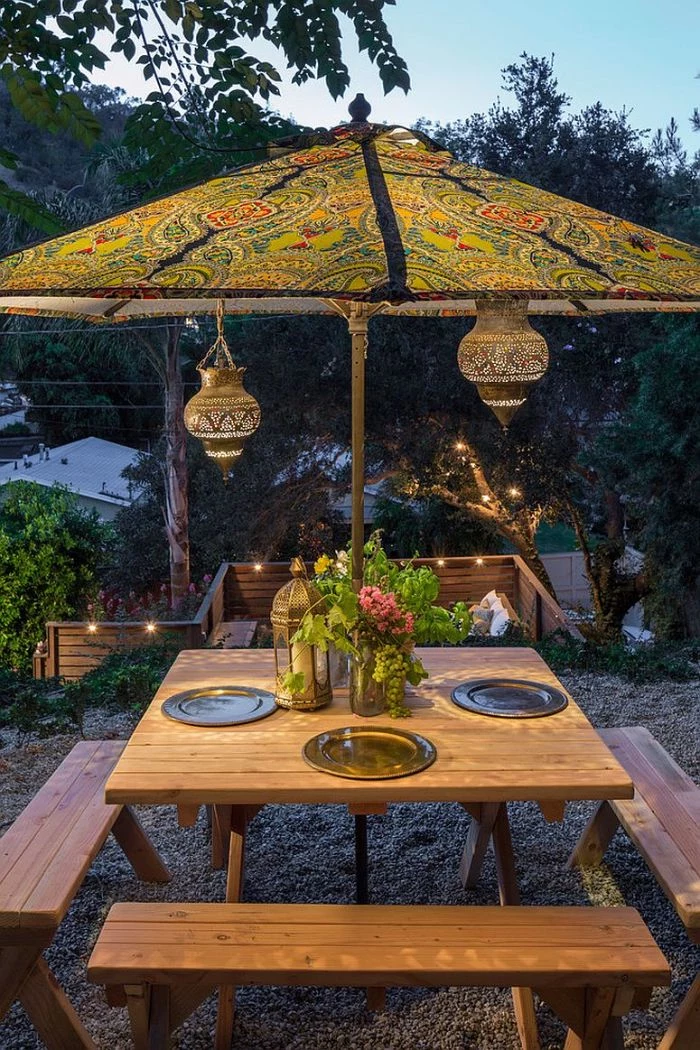
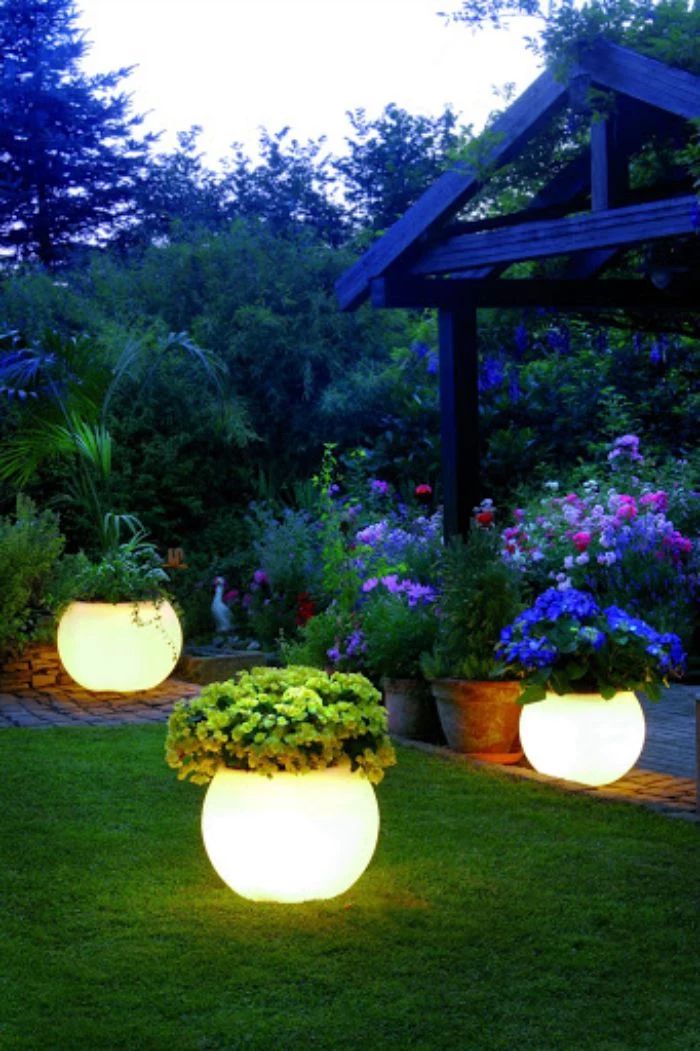
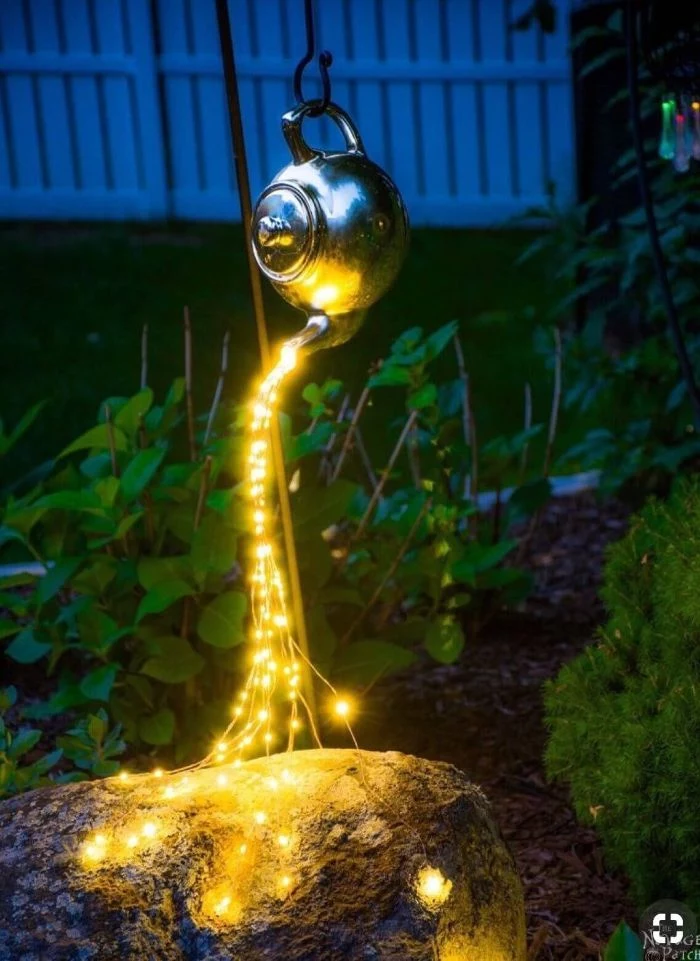
Think beyond fixed installations. A few portable, rechargeable outdoor lamps can be incredibly versatile. Place a Kooduu lamp with a built-in speaker and wine cooler in the center of your conversation pit, or move a few Philips Hue Go lights around to highlight whatever is currently in bloom in your garden. They offer total flexibility for parties or for simply changing the mood on a whim.
What about lighting steps and stairs for safety?
This is a top priority. Avoid placing lights at the top of the stairs shining down, as this can create glare in the eyes of people walking up. The best solution is to illuminate the treads themselves. Use compact hardscape lights tucked under each step’s overhang, or install discreet post lights on either side of the staircase. The goal is to define the edges and surface of each step with soft, indirect light.
For a touch of Japanese garden serenity, focus on suggestion rather than declaration. Use a single, low-wattage uplight to catch the beautiful peeling bark of a paperbark maple. Place a small, shielded light near a stone lantern (Tōrō) so it appears to be the source of the glow. The aim is to create a peaceful, contemplative mood with subtle, hidden light sources that guide the eye without shouting for attention.


