How to Build a Backyard Fire Pit That Actually Lasts
There’s just something about a fire pit. It’s the centerpiece of any good backyard gathering, pulling everyone together with its warmth and crackling light. I’ve seen my fair share of them over the years, from elaborate outdoor kitchens to simple stone circles. I’ve also repaired a ton of pits that crumbled after just a few seasons. The difference between one that lasts and one that doesn’t? It all comes down to the right materials and a solid understanding of what you’re building.
In this article
- First Things First: Planning, Safety, and Budget
- The Tools and Materials You’ll Need
- Method 1: The ‘Forever’ Fire Pit (Pro-Style Build)
- Method 2: The Weekend Warrior’s Fire Pit (Block Kit)
- So, Which Build Is Right for You?
- A Quick Word on Gas Fire Pits
- Using and Caring for Your New Fire Pit
- Inspirational Gallery
Putting together a fire pit is way more than just stacking stones. It’s a project that blends basic masonry with some smart safety planning. When you get it right, you’ve got a beautiful, durable feature that adds serious value to your home. We’re going to skip the shortcuts and focus on the professional methods that ensure your work stands the test of time.
First Things First: Planning, Safety, and Budget
Before you even think about lifting a shovel, you need a plan. Honestly, this is the most critical part. A poorly placed fire pit can be a real hazard, while a well-placed one is pure joy. The pros always start with a site walk and a tape measure, looking at clearance, convenience, and ground conditions.
Check with the Locals
Your first call should be to your local building department or fire marshal. Every town has its own set of rules, and there’s no single national standard. They’ll give you the essential setback distances—that’s the minimum space you need between your pit and any structures like your house, fences, sheds, or your neighbor’s property line. A common rule of thumb is 25 feet, but your local code is the only one that truly matters. Ignoring this can get you fined or, even worse, forced to tear it all down.
Oh yeah, ask about burn bans, too. Some areas have restrictions during dry seasons or on days with bad air quality.
Call Before You Dig. Seriously.
This is a non-negotiable step. Before any digging, call 811. It’s the free national service that sends someone out to mark all the underground utility lines. I once saw a guy hit a shallow electrical line while digging for a simple fire ring. Luckily no one was hurt, but the repair bill was steep and could have been a tragedy. The service takes a few days, so just plan ahead and make the call. It’s not worth the risk.
Picking the Perfect Spot
Once you’re clear on the rules, you can choose your location. Pay attention to the typical wind direction in your yard—you don’t want smoke constantly blowing into your seating area or your neighbor’s open windows. Look for a spot that’s open to the sky, not directly under trees with low-hanging branches. The rising heat can dry them out over time and create a serious fire hazard.
Think about convenience, too. A pit deep in the yard feels like a rustic retreat, but one closer to the patio is better for entertaining. I always recommend having at least a 7-foot radius of non-combustible ground (think gravel, pavers, or dirt) around the pit. This gives you plenty of room for chairs and keeps everyone at a safe distance from the flames.
The Tools and Materials You’ll Need
Let’s talk about what you’ll need to get this done right. Gathering your gear and materials beforehand makes the whole process so much smoother.
Your Tool Checklist
You don’t need a full professional setup, but a few key tools are essential. Some you can buy, others you might want to rent for a day.
The Must-Haves:
- Shovel and Wheelbarrow: For digging and moving materials.
- Tape Measure & Level: Precision is your friend here. A 4-foot level is ideal.
- Mason’s Trowel: For applying mortar. Don’t skimp; a good one feels better in your hand.
- Hand Tamper: For compacting the gravel base. It’s a workout, but crucial for a stable foundation. You can rent these for about $15 a day.
- Caulking Gun: If you go with a block kit, you’ll need this for the construction adhesive.
- String and a Stake: The classic, foolproof way to draw a perfect circle on the ground. Just add a can of spray paint.
Good to Rent:
- Wet Saw with a Diamond Blade: If you’re using fire brick or cutting capstones, renting a wet saw for half a day (around $50-$70) will give you clean, perfect cuts. It’s much better than trying to use a chisel.
The Science of a Safe Pit: Choosing Materials
A fire pit deals with some serious heat—we’re talking over 1,000°F. Then you have thermal shock when cold rain hits the hot stones. Using the wrong materials isn’t just a waste of money; it’s downright dangerous.
Heads up! The single biggest mistake is using the wrong rocks. Never use stones from a river or creek bed. They are often porous and full of trapped moisture. When that water turns to steam, the rock can literally explode, sending hot shrapnel everywhere. The same goes for standard concrete pavers or blocks for the inner ring; they aren’t made for that kind of heat and will crack and fall apart.
A proper fire pit has two walls: an inner one to handle the fire and an outer one for looks and structure. Here’s your shopping list:
- Fire Brick (Inner Wall): These are non-negotiable for the part that touches the flames. They’re dense, yellowish bricks designed to handle intense thermal shock. You’ll find them at a dedicated masonry supply yard, not usually your local big-box store. Expect to pay between $2.50 and $5.00 per brick.
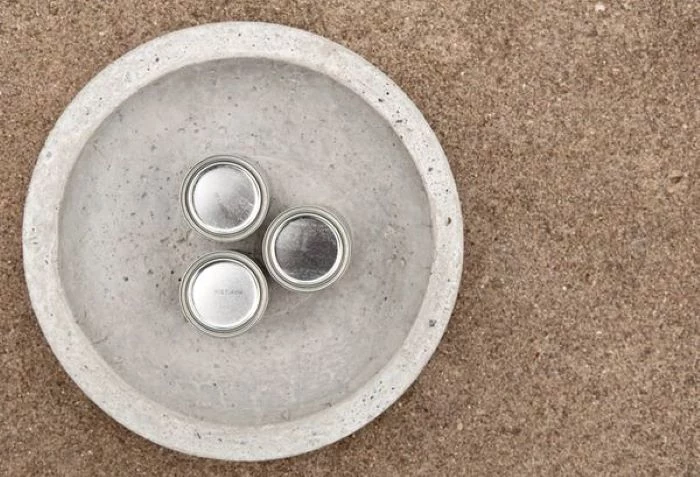
- Refractory Mortar: Regular mortar will crumble. You need this special high-temperature cement to join the fire bricks. A small tub costs around $30-$50 and is well worth it. A fun fact: the first few small fires you have actually cure this mortar and make it even stronger, a process called a ceramic set.
- Structural Block or Stone (Outer Wall): For the visible wall, you can use trapezoid-shaped concrete wall blocks (they make perfect circles easy) or natural stone like granite. Concrete blocks are budget-friendly, often $3-$6 each.
- Type S Mortar: This is for setting your outer wall blocks or stones. It’s strong and good for anything below ground level. A large bag runs about $10. Quick tip: When you mix it, you’re aiming for a consistency like thick peanut butter—it should hold its shape on your trowel.
- Crushed Gravel: Use 3/4-inch clean crushed stone for the foundation. It provides excellent drainage. You can buy it by the bag for about $5 or get a half-yard delivered for around $40-$60 if you have a big project.
Method 1: The ‘Forever’ Fire Pit (Pro-Style Build)
This is the serious, permanent method with a concrete footing and mortared walls. It’s a project that will take a few days, but the result is a structure that will last for decades. Let’s break it down.
A good starting point for a material list, by the way: for a typical 3-foot inner diameter pit that’s about 18 inches high (3 courses of block), you’ll need roughly 40-50 fire bricks and 45-55 standard concrete wall blocks.
The Timeline (Be Realistic!)
- Day 1: Excavation and Pouring the Footing. This is the heavy lifting. (4-6 hours)
- Days 2-4: Waiting. Go do something else. The concrete footing needs at least 2-3 days to cure properly before you build on it. Don’t rush this!
- Day 5: The Build. Laying the fire brick and the outer block wall. (4-5 hours)
Step-by-Step Guide
1. Lay It Out and Dig: First, decide on your size. A 3-foot inside diameter is great for most families. Use your stake, string, and spray paint to mark the outer circle. For a pit with a 1-foot thick wall, your outer circle will be 5 feet across. Now, excavate the entire area inside that circle down about 12 inches. If you’re in a cold climate with a frost line, you’ll need to dig a deeper trench just for the footing where the wall will sit—check with your local code for the required depth.
2. The Foundation: Fill the entire excavated area with 6 inches of your crushed gravel and pack it down tight with the hand tamper. This is your drainage bed. Then, pour your concrete footing into the trench and let it cure for a few days.
3. The Inner Fire Brick Wall: Start with the fire brick. Do a dry run first, laying them out in a circle on your footing to check the spacing. Mix your refractory mortar and lay the bricks with thin, tight joints (about 1/8-inch). Use your level constantly to keep the course perfectly flat.
4. The Outer Structural Wall: Now, build your outer wall using the concrete blocks and Type S mortar. A critical detail: leave about a 1-inch air gap between this wall and your fire brick wall. This gap acts as insulation, protecting the outer blocks from the most intense heat.
5. Drainage & Airflow: Don’t forget to let water out! On the bottom course of your block wall, just leave the mortar out of a few of the vertical joints to create ‘weep holes.’ For a better-burning fire with less smoke, consider adding an air intake pipe—a 2-inch steel pipe running through the base of the wall to feed oxygen to the fire.
6. The Capstone: This is the finishing touch. Use flat flagstone or pre-cast concrete caps to top the wall. It should overhang by an inch or two on both sides to help shed water. Set it in a bed of Type S mortar and level it perfectly.
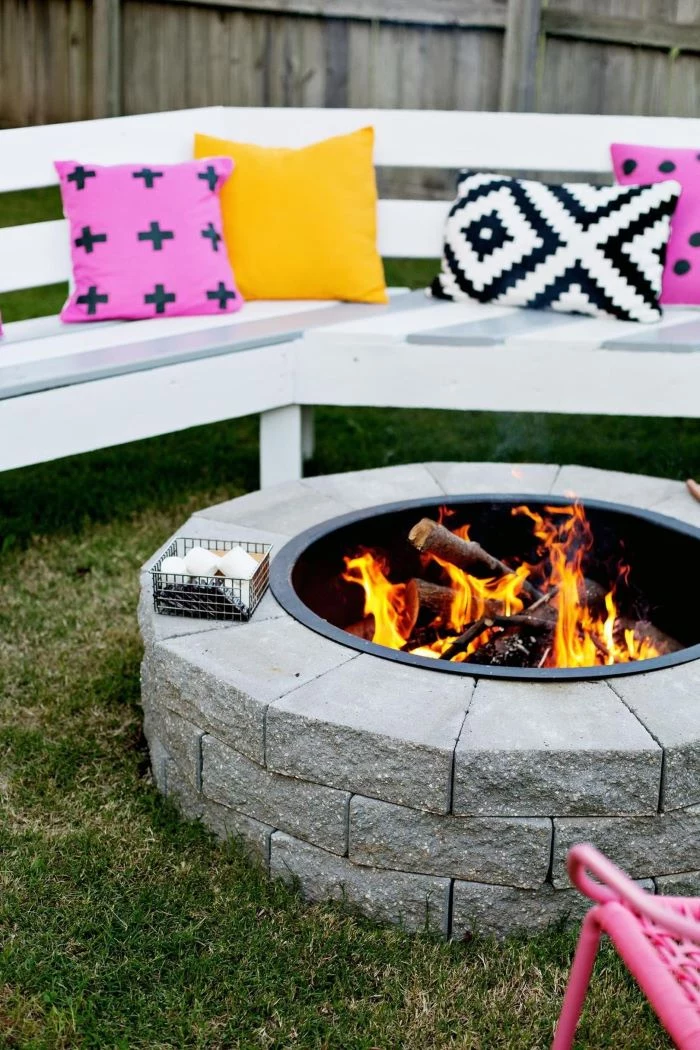
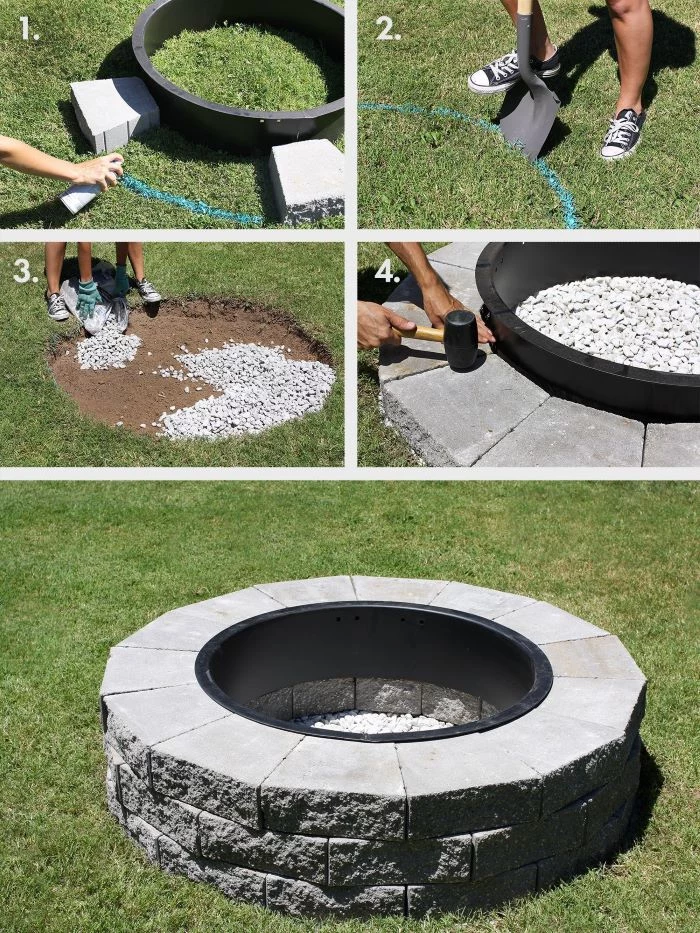
Method 2: The Weekend Warrior’s Fire Pit (Block Kit)
Not everyone needs a permanent, mortared structure. For a simpler project you can knock out in an afternoon, a block kit is a great option. They usually come with wedge-shaped concrete blocks and a heavy steel ring insert.
Even though this is often sold as a ‘no-dig’ project, don’t just stack them on the grass. To make it last, you need to prep the base. Dig out the sod and about 6 inches of topsoil. Fill it with 4 inches of compacted gravel and 2 inches of sand or paver base. Level it perfectly. This one step will prevent your pit from becoming a wobbly mess after a season or two.
When you assemble the blocks, I strongly recommend using a high-temperature construction adhesive between each layer. It comes in a caulk tube and will lock the blocks together, making the whole thing much more stable. That metal ring insert is key—it protects the concrete blocks from direct heat, which would otherwise cause them to crumble.
So, Which Build Is Right for You?
Deciding between the two methods comes down to a few key factors.
A full Pro-Style Build is a fortress. It’s incredibly durable and will withstand frost heave in cold climates, lasting for generations. But, the trade-off is cost and effort. You’re looking at a budget of $500 to $1,200+ in materials, depending on your stone choice, and a significant time commitment. The skill level is moderate; you need to be comfortable mixing and working with mortar.
The Block Kit Build, on the other hand, is all about speed and simplicity. It’s perfect for beginners. You can have it built in a single afternoon for a fraction of the cost—typically between $200 and $450 for a complete kit from a place like Home Depot or Lowe’s. The downside is durability. It’s not anchored, so it will shift over the winters in frosty climates and may need to be re-leveled every few years.
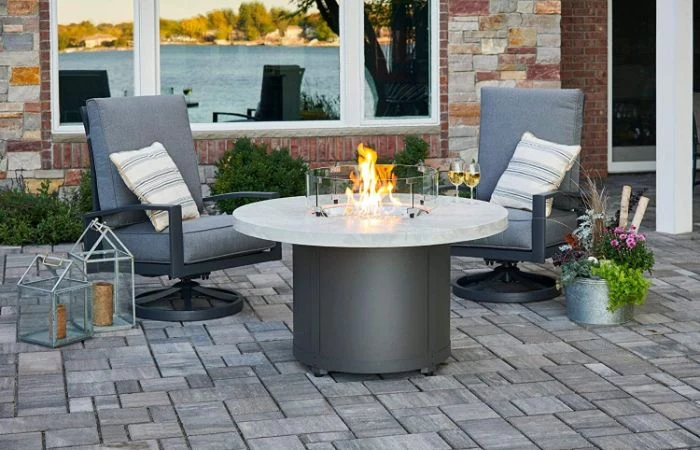
A Quick Word on Gas Fire Pits
Gas pits are the ultimate in convenience—no smoke, no mess, just fire at the turn of a key. But this is one area where DIY is a no-go.
SAFETY WARNING: I can’t say this loudly enough. Any work involving natural gas or propane lines requires a licensed professional. A tiny mistake can lead to a gas leak, explosion, or fire. Please, hire a licensed gas fitter or plumber for this. They’ll ensure it’s installed with the proper shut-off valves and, just as importantly, the correct ventilation to prevent dangerous gas buildup.
Using and Caring for Your New Fire Pit
You did it! Now, let’s keep it safe and in great shape.
Your first few fires in a new mortared pit should be small. This allows that refractory mortar to cure slowly and completely. A huge bonfire right away can crack the fresh joints.
Always have a fire extinguisher, a bucket of sand, or a garden hose ready to go. And never, ever leave a fire unattended. When you’re done, the best method is to let the fire burn down naturally and then spread the embers to cool. Dousing a blazing hot pit with cold water can cause thermal shock and crack your masonry. And yes, you can cook over it! A simple, heavy-duty grill grate works great, but consider a swing-away model so you can move it easily.
Finally, clean out the ashes regularly. A thick layer of ash can trap moisture against the masonry, which is especially damaging during winter’s freeze-thaw cycles.
Building a fire pit is a real investment of time and effort. But that first cool evening, gathered around the fire with family and friends, you’ll know it was absolutely worth it. You haven’t just built a structure; you’ve created a place for making memories.
Inspirational Gallery
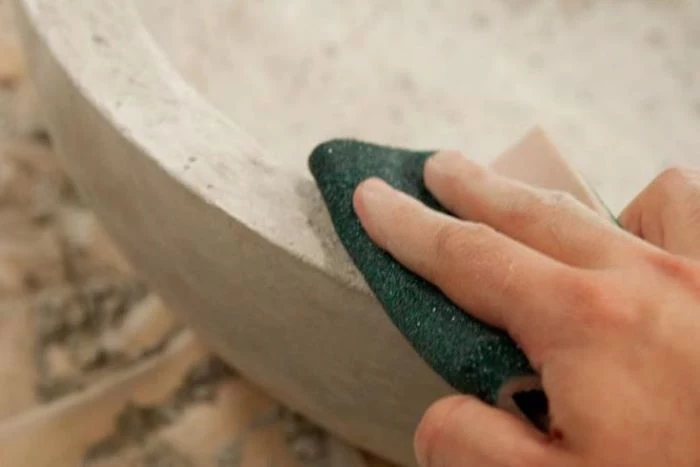
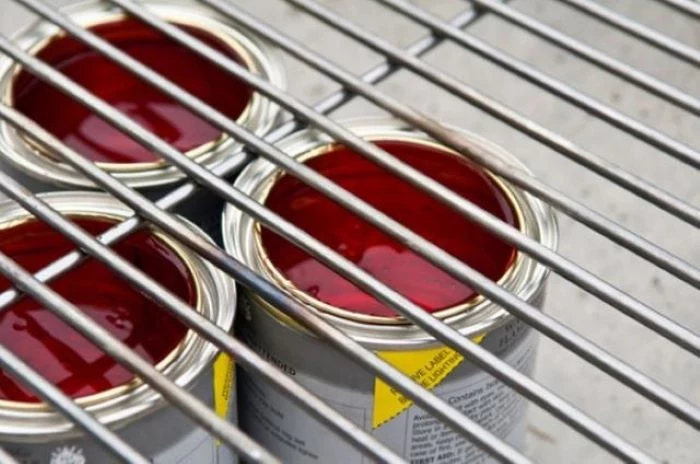
When it comes to the mortar holding your fire pit blocks together, not just any mix will do. Standard concrete can crack and spall under repeated high heat. For true longevity, you need to use a refractory cement, like Rutland’s Castable Refractory Cement, or a high-heat mortar. This type of product is specifically formulated with additives that allow it to withstand extreme temperature fluctuations without degrading, ensuring your structure remains solid season after season.
- Create a more inviting, less smoky fire by using only dry, seasoned hardwoods like oak, hickory, or maple.
- Reduce frustrating flare-ups and ensure a consistent burn for hours.
- Protect the interior of your fire pit from the damaging creosote buildup common with softwoods like pine.
The secret? A simple firewood rack. Keeping your wood off the damp ground allows for proper air circulation, which is the key to perfectly seasoned fuel.
A 2014 study by the University of Alabama found that watching a fire can induce relaxation and even lower blood pressure.
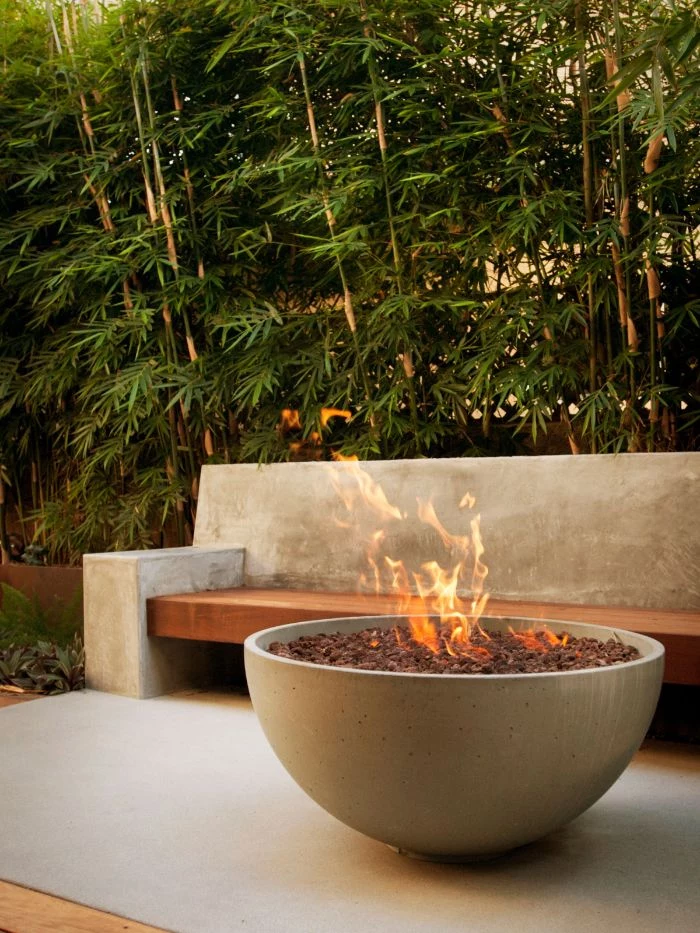
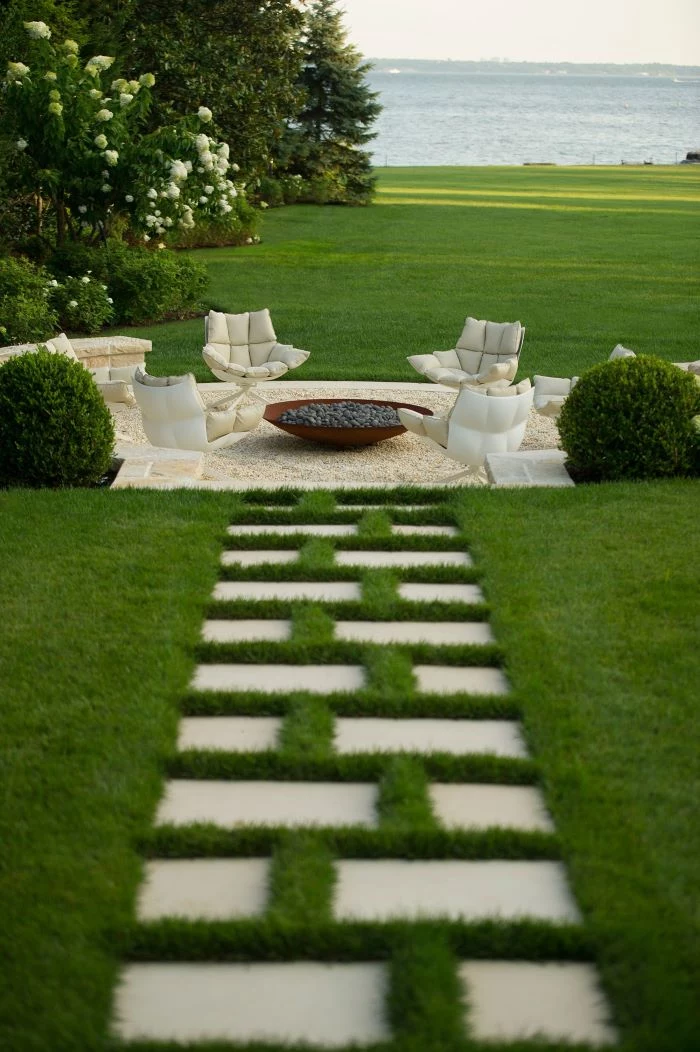
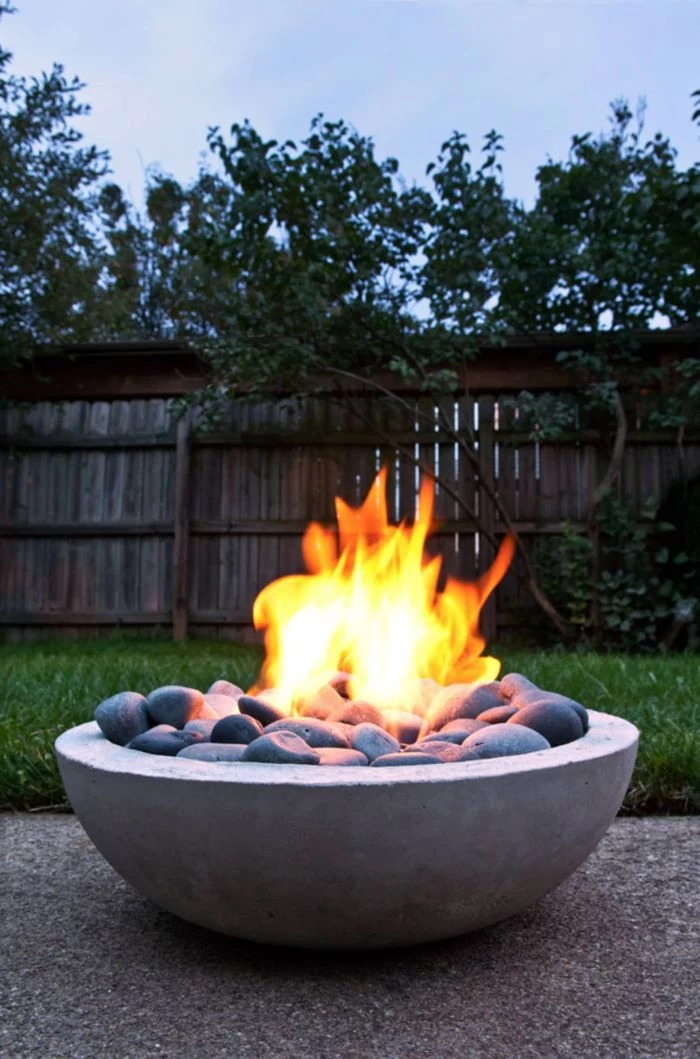
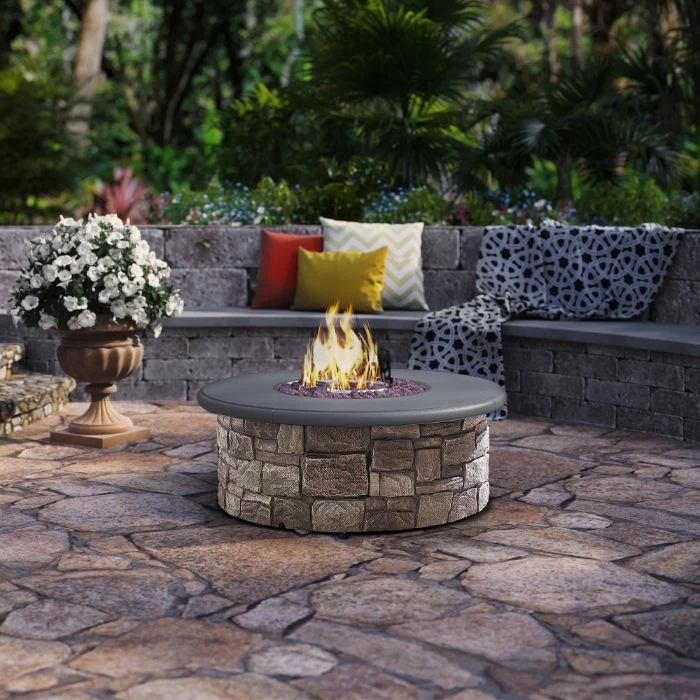
Lava Rock: Porous and lightweight, these volcanic stones provide a rustic, natural look. They are excellent at retaining and radiating heat and are typically the most budget-friendly filler option.
Fire Glass: Made from tempered glass, this option offers a sleek, modern aesthetic with a huge range of colors. It doesn’t produce smoke or ash, reflects the flames beautifully, and is incredibly durable.
For a timeless, earthy vibe, go with lava rock. For a vibrant, contemporary statement, fire glass is the clear winner.
What’s the real story behind ‘smokeless’ fire pits?
They’re not magic, but they are clever engineering. Brands like Solo Stove and Breeo use a dual-wall design. Cool air is drawn in through vents at the bottom, heats up between the walls, and is then injected out over the top of the fire. This superheated oxygen ignites the smoke particles before they can escape, resulting in a ‘secondary burn’ that dramatically reduces smoke and creates more efficient, mesmerizing flames.
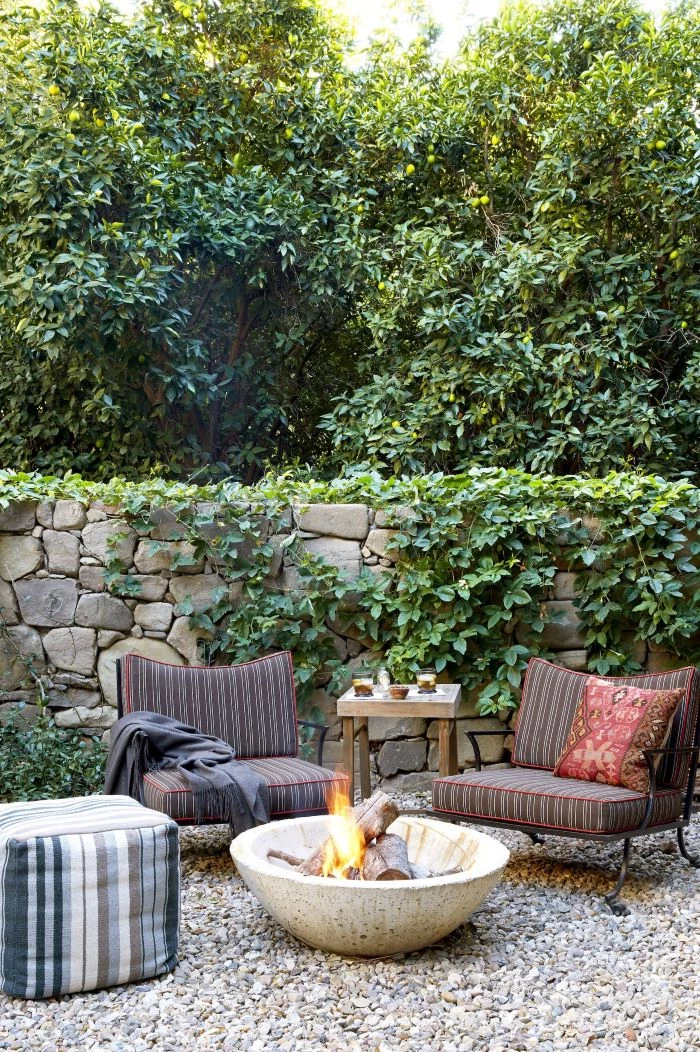
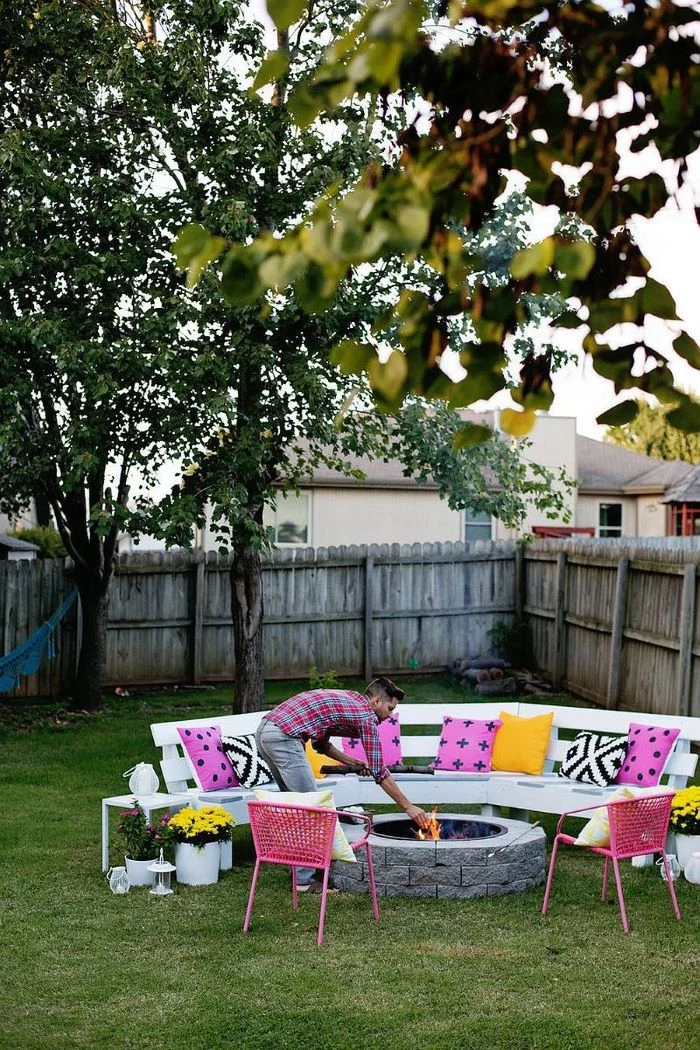
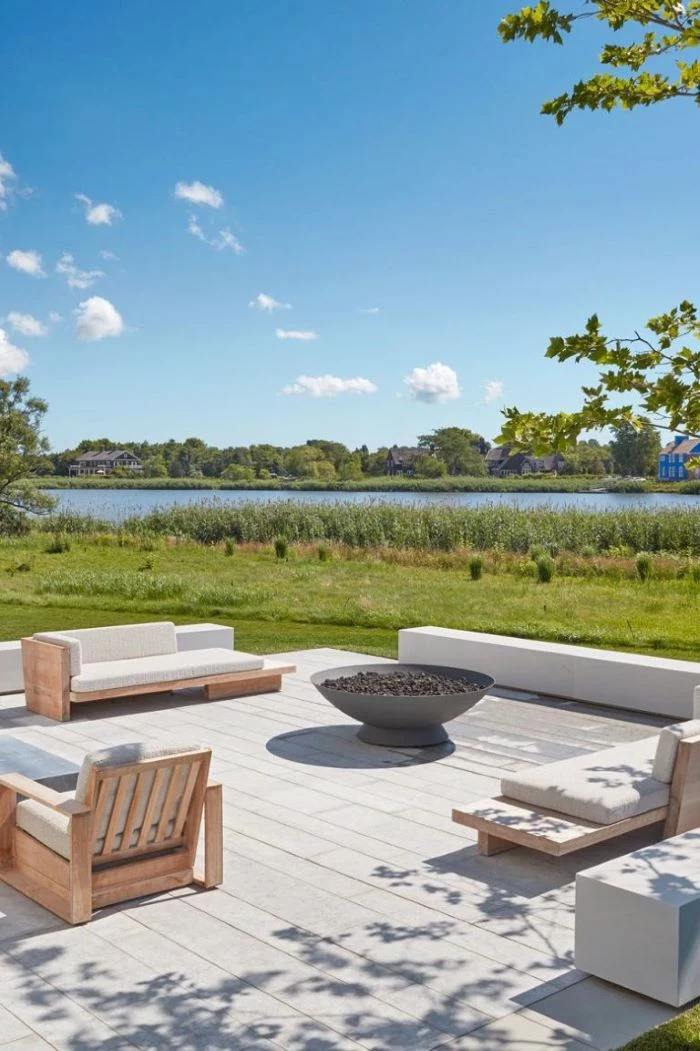
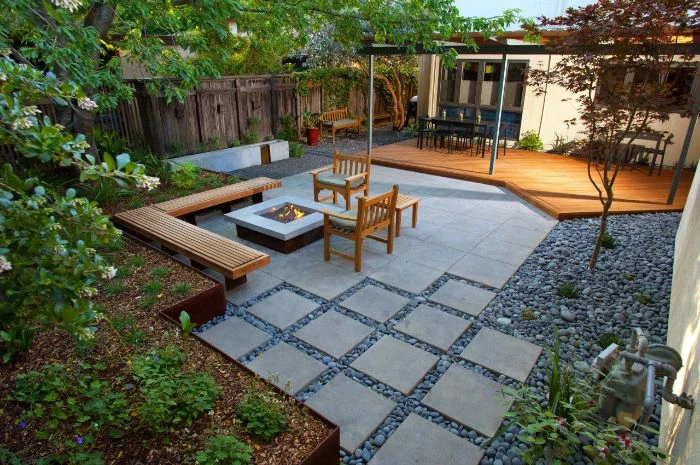
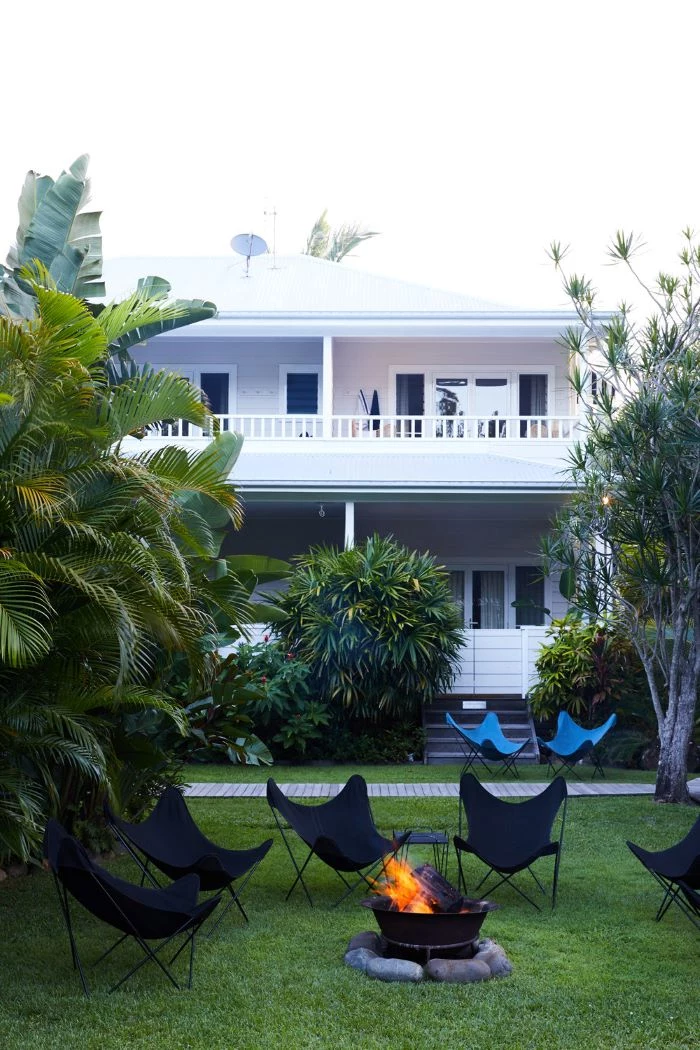
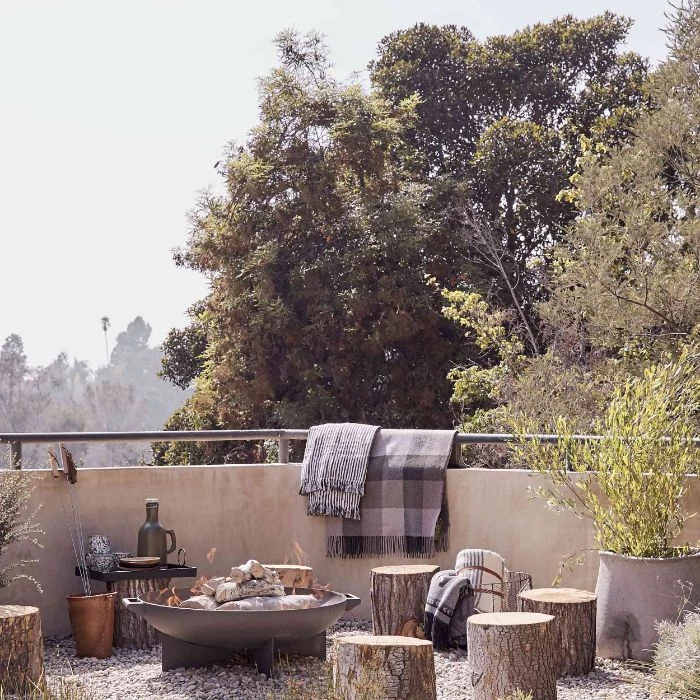
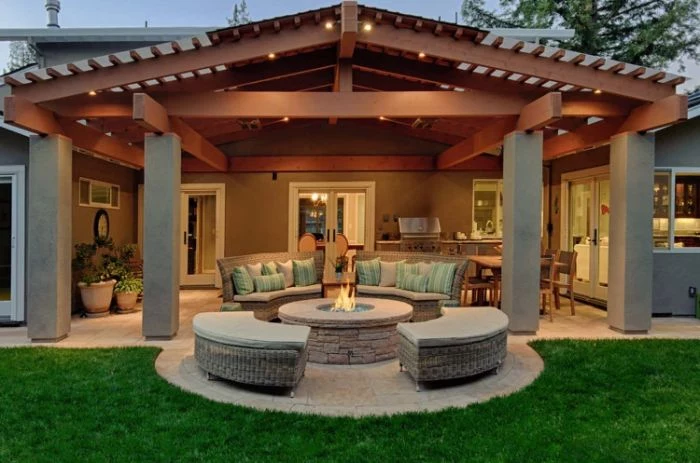
Your seating arrangement is just as important as the pit itself. It defines the social space and dictates the comfort of your guests. Don’t just scatter a few chairs; think about the atmosphere you want to create.
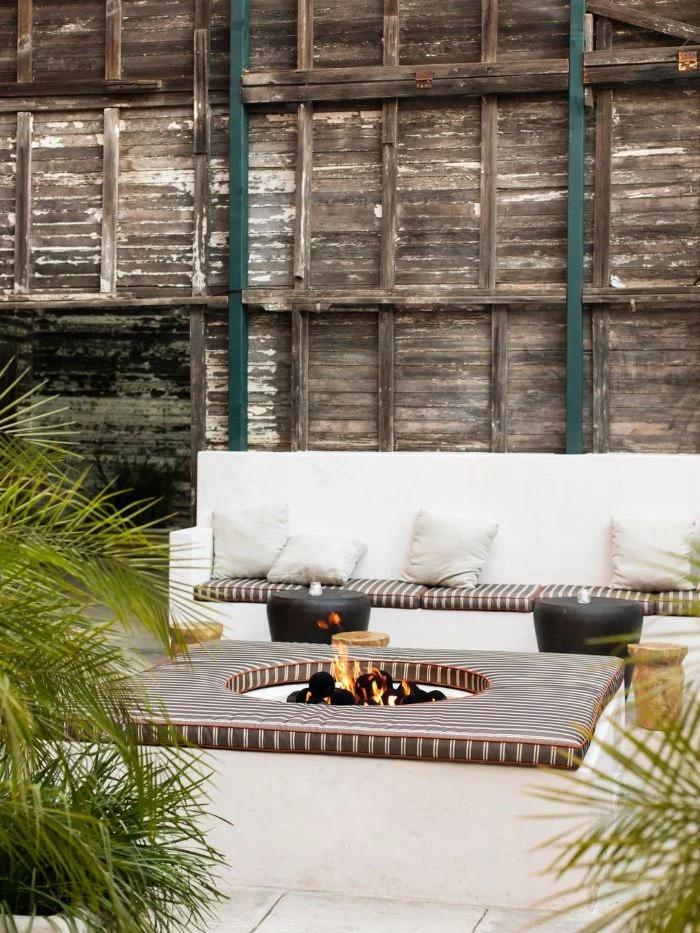
- Built-in Benches: A curved stone or wood bench makes the fire pit feel like an intentional, permanent part of the landscape. Add outdoor cushions for comfort.
- Adirondack Chairs: The classic choice for a reason. Their angled backs are perfect for leaning back and relaxing. Polywood versions offer the look of wood with zero maintenance.
- Modular Seating: For a modern, flexible space, consider an outdoor L-shaped sofa. It’s perfect for larger gatherings and creates a luxurious, lounge-like feel.
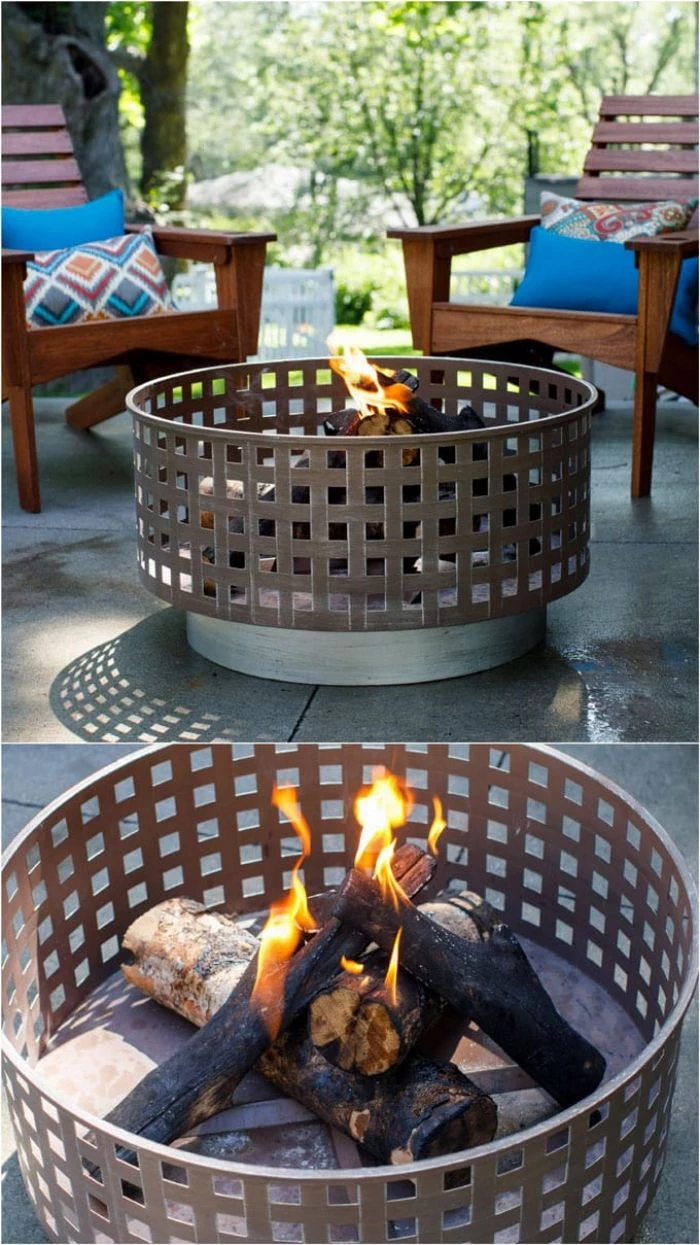
Did you know that Corten steel, the trendy material for modern fire pits and planters, was originally developed in the 1930s for building railroad coal wagons?
Its unique alloy composition allows it to form a stable, rust-like protective layer when exposed to the weather. This ‘living finish’ not only protects the steel from further corrosion but also provides that sought-after warm, industrial-chic patina without the need for paint or maintenance, making it perfect for durable and stylish outdoor features.
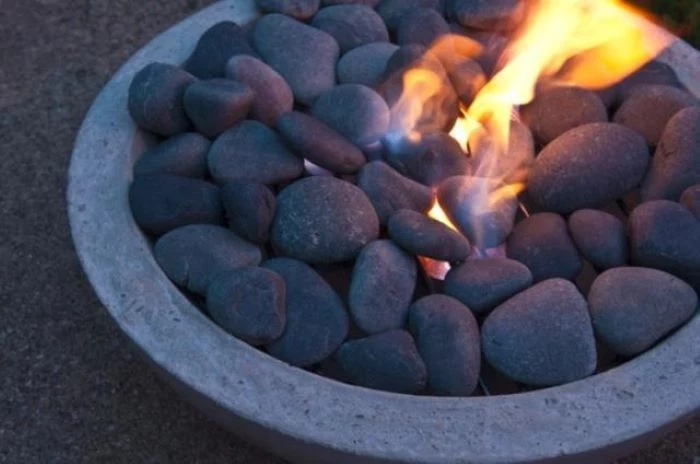
A critical safety warning: Never use smooth, rounded river rocks or any porous, moisture-trapping stones inside or as the capstone for your fire pit. Water can get trapped inside these stones, and when heated, it turns to steam. The pressure builds until the rock can literally explode, sending hot, sharp fragments flying. Always use dry, quarried stone like granite, slate, or designated fire-rated materials for safety.
- After each use, wait 24 hours for ashes to cool completely.
- Use a small shovel or trowel to scoop the cold ashes into a metal bucket. Never use a plastic one.
- Lightly dampen the ashes with water to prevent dust before disposing of them in your non-combustible waste.
- Periodically, use a wire brush to scrub away any soot buildup on the pit’s interior walls.


