Don’t Lift a Shovel: The Real First Step to a Better Backyard
I’ve walked through more backyards than I can count, and the most common mistake I see has nothing to do with a bad plant choice or a dated patio. Honestly, it’s starting in the completely wrong place. So many homeowners get excited, snag a beautiful set of outdoor furniture on sale, and then try to force a whole yard design around it. It’s a bit like buying a fancy doorknob before you’ve even designed the house.
In this article
A truly great backyard—one that actually works for your family and doesn’t become a maintenance nightmare—starts with getting to know the space itself. It’s not about how much money you throw at it. It’s about smart planning based on the land, the sun, and how you genuinely want to live outside.
So, let’s skip the quick-fix ideas and get into the foundational stuff. Think of this as the chat we’d have over a coffee before a single shovel hits the dirt, making sure every move is intentional and every dollar is well spent.
Getting to Know Your Canvas: The Site Analysis
Before you even dream about a fire pit, you have to become an expert on your own property. The pros call this a “site analysis,” and it’s the one thing most DIYers skip. I get it, it’s not the fun part. But trust me, taking a weekend to observe and map out your yard’s quirks will save you thousands of dollars and endless frustration later. This is the difference between a patio that floods every spring and one that stays bone-dry.
Your Most Important Tool is Free: The Sun
The sun’s path across your yard dictates almost everything. It tells you where you’ll actually want to drink your morning coffee, where the kids can play without getting baked, and which plants will thrive versus which will wither.
Here’s a simple trick I have all my new designers do: On a clear day, go outside every two hours from morning to evening. Stand in the same spot and snap a quick photo. Or, if you’re old school, sketch a little map and shade in the sunny and shady spots. The goal is to see how the light changes. Doing this once in summer and once in winter is a game-changer, since the low winter sun creates surprisingly long shadows. This simple map tells you:
- The perfect spot for your patio. An area with morning sun and afternoon shade is the sweet spot for dining and relaxing. A west-facing patio with zero shade becomes a useless heat trap on summer afternoons.
- Where to plant what. Most veggies need at least six hours of direct sun to produce anything. On the flip side, delicate plants like hostas or ferns will get scorched in that same spot.
- Placement for a play structure. You’ll want a spot that gets some shade during the hottest part of the day (usually 1-4 PM) to protect both the kids and the equipment itself.
Water and Slope: The Unseen Boss of Your Yard
Water is the most powerful force in a landscape, and ignoring it is a recipe for disaster. Bad drainage can lead to a swampy lawn, a failing retaining wall, or even water seeping into your home’s foundation. The goal is always the same: get water to flow away from your house.
As a rule of thumb, the ground should slope away from your foundation by at least 2%. What does that even mean? It’s a quarter-inch drop for every foot you move away from the house. Here’s a quick way to check it yourself: Grab a 4-foot level, a tape measure, and any straight board (like a 2×4). Lay the board on the ground sloping away from your house, place the level on top, and lift the low end of the board until the bubble is perfectly centered. Now, measure the gap between the end of the board and the ground. That gap should be at least 1 inch. If it’s less, or if it slopes toward your house, you have what’s called negative grading. To be frank, this is a serious issue that often requires calling in a pro to install a French drain or a swale to redirect the water.
Quick tip for today: The next time it pours rain, grab your phone and go outside. Take a picture of every single puddle in your yard. That’s your instant, free drainage map. It shows you exactly where your low spots are. You can either fix the grade or lean into it by creating a beautiful rain garden with water-loving native plants, turning a problem into a feature.
Get Your Hands Dirty: Know Your Soil
Soil isn’t just dirt; it’s the literal foundation for every plant and structure. The main types are clay, sand, and loam. You don’t need a fancy lab to figure out what you have. Just use the old-school jar test.
Fill a big mason jar about two-thirds full of water, add a hefty scoop of your garden soil, screw on the lid, and shake it like crazy for a minute. Then let it sit undisturbed for a full day. The layers that form will tell you everything:
- Sand is heaviest and settles on the bottom first.
- Silt is the fine, silky layer in the middle.
- Clay particles are the finest and will stay suspended for a while before settling on top.
If you have a thick bottom layer, you’ve got sandy soil—it drains fast but doesn’t hold nutrients. A thick top layer means heavy clay, which holds water and nutrients but gets compacted and waterlogged easily. The dream is a balanced mix of all three, called loam.
So what do you do with this info? If you have heavy clay, DO NOT just dump sand on it. You’ll basically create a low-grade concrete. The fix is to mix in a few inches of good-quality compost to break it up and improve drainage. For sandy soil, amending with compost and peat moss will give it more body and help it hold onto water and nutrients.
The Fun Part: Layout, Flow, and Outdoor Rooms
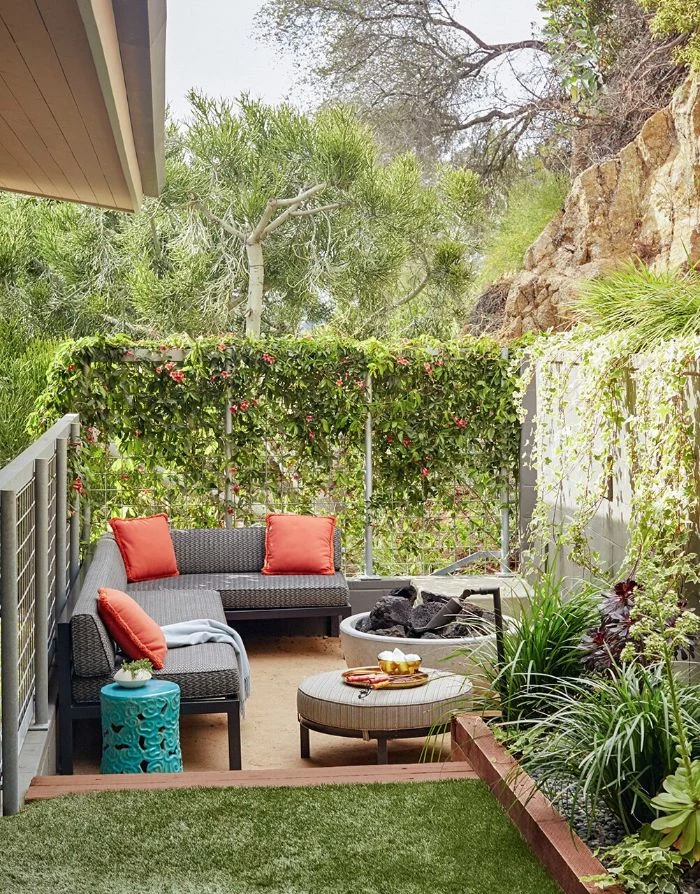
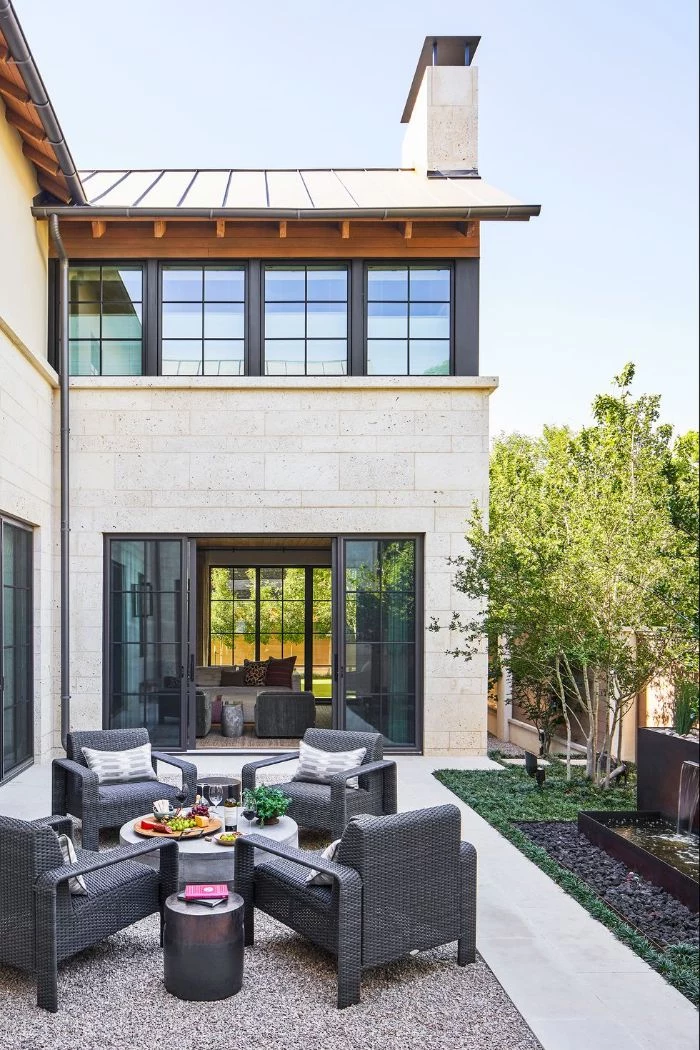
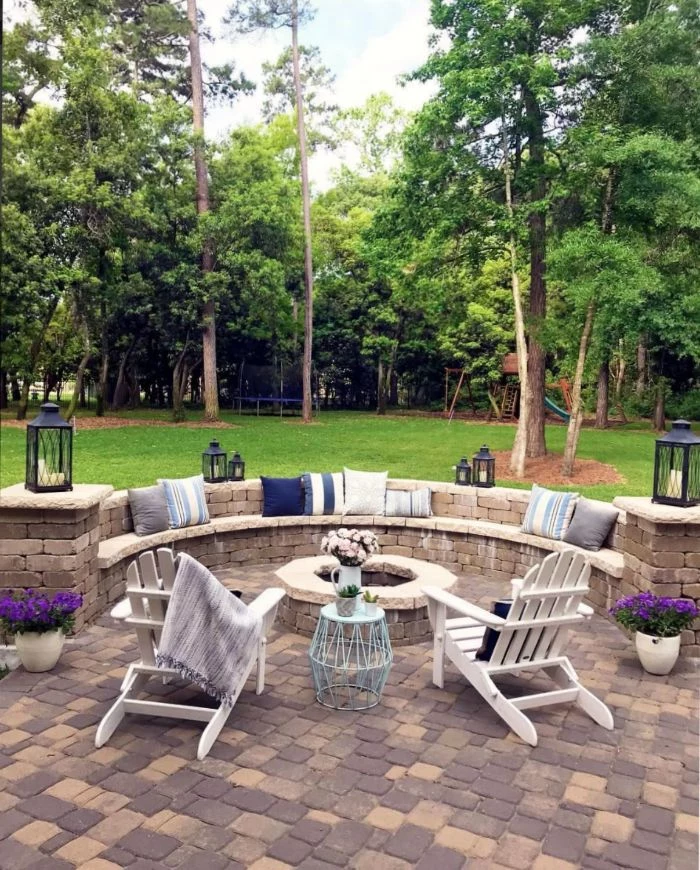
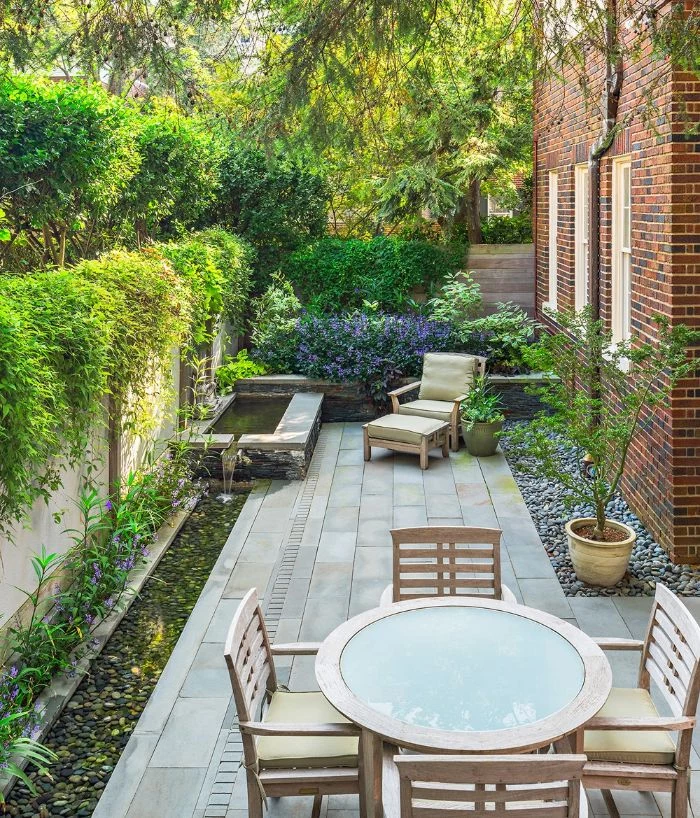
Okay, once you’ve done your homework, you can finally start planning. The best way to think about your yard is as a series of “outdoor rooms”—separate zones for different activities, all connected in a way that makes sense.
Plan with Bubbles, Not Rulers
Before you get bogged down in exact measurements, grab a piece of paper and a pencil. Sketch a rough outline of your property, your house, and anything big you’re keeping, like a mature tree. Now, just draw bubbles or circles to represent the areas you want. Maybe a “Dining” bubble right off the back door, a “Lounge” bubble in that spot with the afternoon shade, a “Play Zone” bubble where you can see it from the kitchen window, and a “Grilling” bubble near the dining area but out of the main walkway.
Don’t worry about making it pretty. This is about relationships. Does it make sense to walk through the lounge area to get to the grill? Probably not. I once had a client who insisted on putting the grill on the far side of the yard because of the view. After two weeks of carrying trays of raw meat and hot food across 50 feet of lawn, they paid us to move it right next to the patio. Plan for how you’ll actually live back there!
Oh, and by the way, don’t forget to draw bubbles for utilities! Where might you want an electrical outlet for string lights or a speaker? Where would a hose spigot be most useful? Thinking about this now can save you a fortune later.
The Skeleton of Your Yard: Hardscaping
The permanent stuff—patios, walkways, decks, and walls—is called the hardscape. This is the skeleton of your design, and it should be planned and installed before you start planting. It defines your outdoor rooms and creates the flow between them.
Choosing materials is a huge decision, so let’s break down the most common options without a boring chart.
For a patio, Concrete Pavers are the workhorse. They are super versatile, and if one gets cracked or stained, you can just pop it out and replace it. A DIY paver patio is totally doable, but you cannot skimp on the base. A solid 4-6 inches of compacted gravel and a layer of sand is non-negotiable if you don’t want a lumpy, bumpy mess in a few years. Expect to pay between $5-$10 per square foot for the materials if you do it yourself. Hiring it out? You’re likely looking at $18-$30 per square foot, all in. You can find basic pavers at a big-box store like Home Depot, but a dedicated landscape supply yard will have a much better selection and higher quality options.
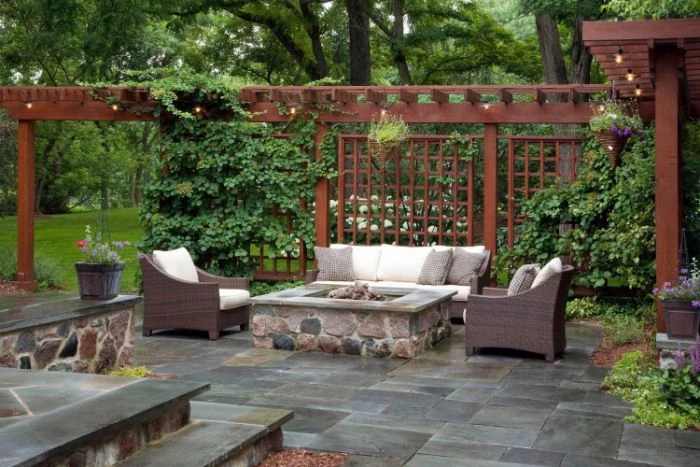
Natural Stone, like flagstone or bluestone, is absolutely gorgeous but comes with a hefty price tag. The material itself is expensive, and installation is more labor-intensive, often pushing the professional cost north of $40 per square foot. Good to know: dark stone can get scorching hot in direct sun—hot enough to be uncomfortable on bare feet.
When it comes to Decks, traditional wood is a classic for a reason. But it requires yearly cleaning and sealing to prevent rot, especially in damp climates. The more modern alternative is Composite Decking. It’s very low-maintenance, but the upfront cost is significantly higher. A heads-up for the DIYers: some composite brands require floor joists to be closer together (12 inches on center instead of the standard 16 for wood), which adds to your framing material costs. Always check the manufacturer’s specs!
Creating Rooms Without Walls
You don’t need a fence to define an outdoor room. Separation can be much more subtle and elegant.
A simple stone pathway does more than just give you a place to walk; it creates a clear border between the lawn and a garden bed. And width matters! A main path should be 4 to 5 feet wide, which comfortably allows two people to walk side-by-side. Anything less feels cramped.
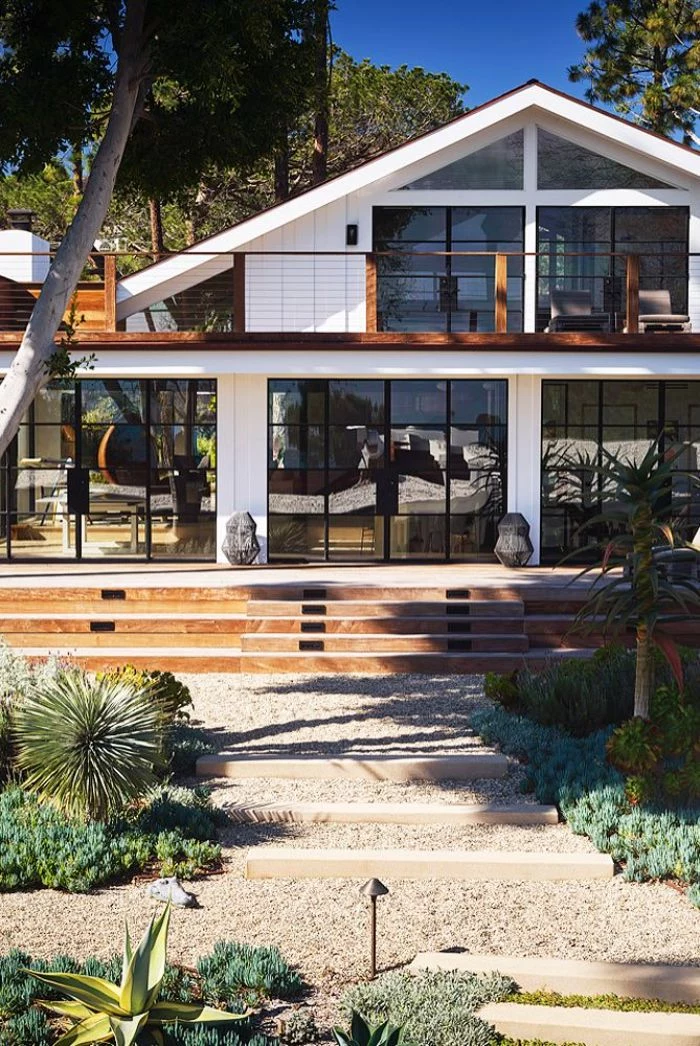
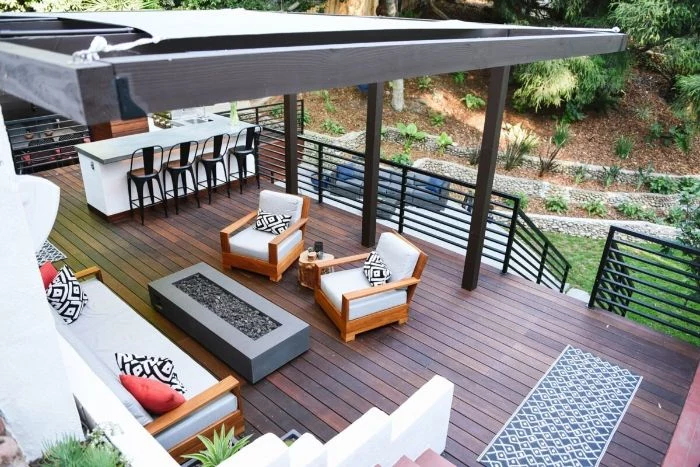
Another powerful tool is a change in level. Just stepping down one or two steps from a deck onto a stone patio creates a distinct feeling of arriving in a new space. It’s a simple but incredibly effective design trick that adds a custom feel to any backyard.
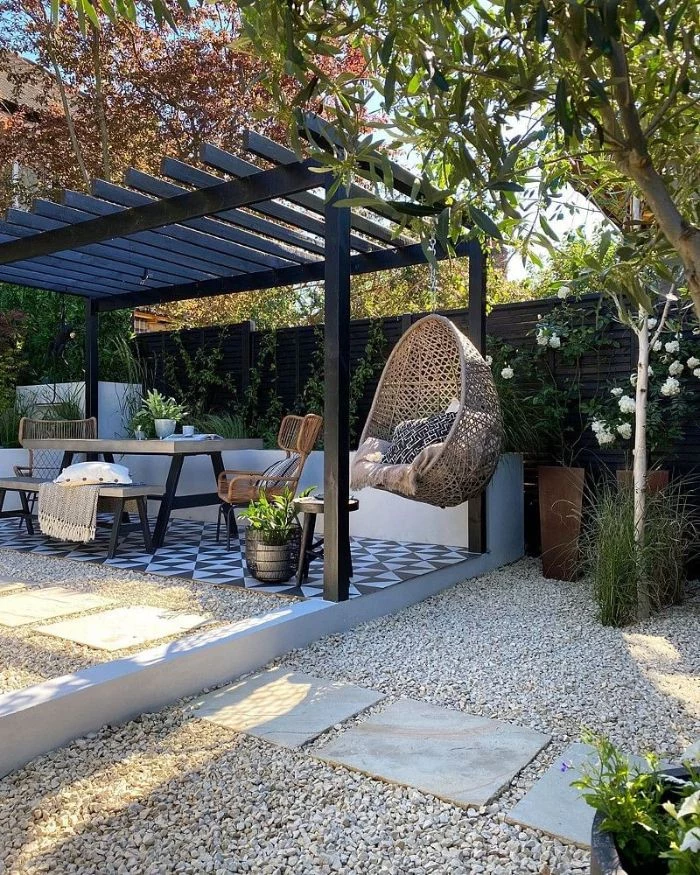
Inspirational Gallery
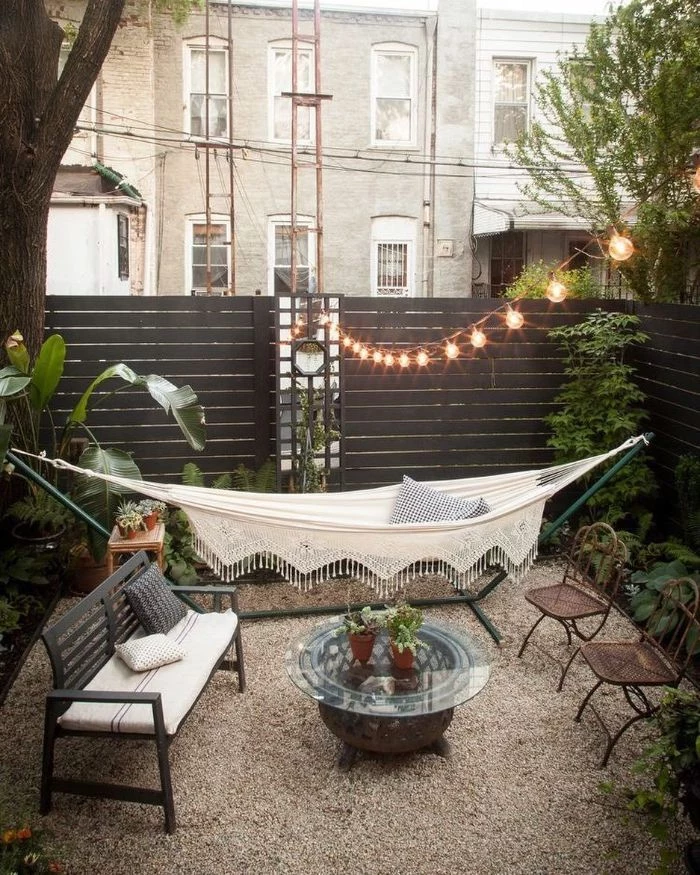
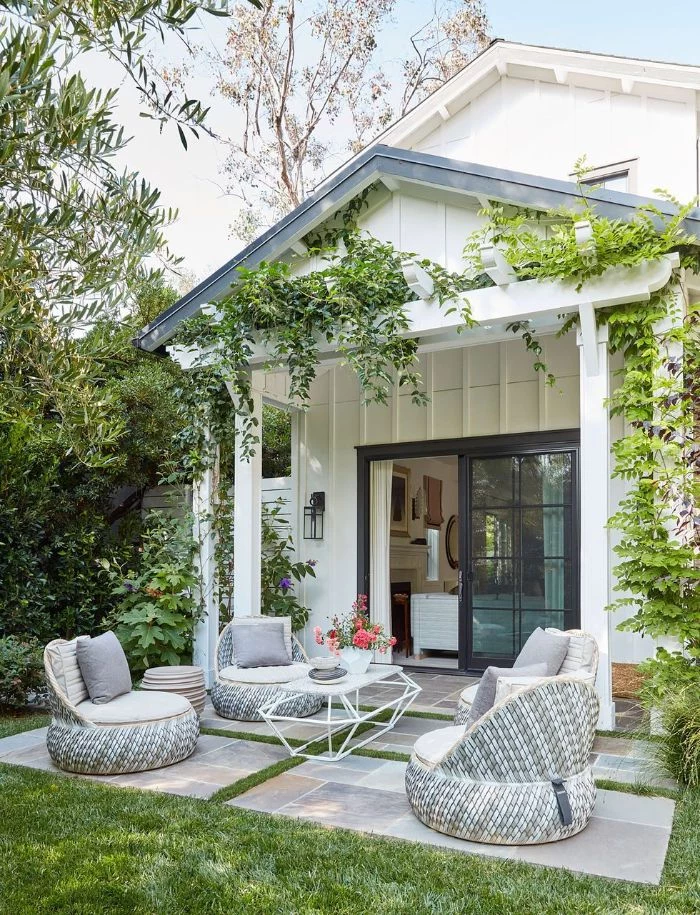
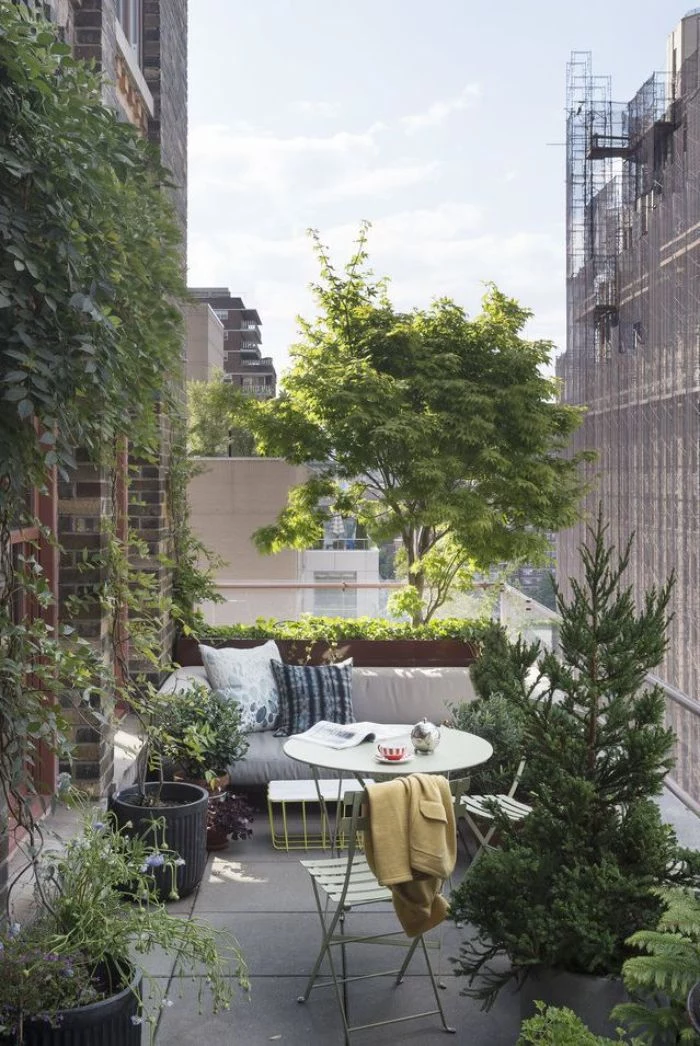
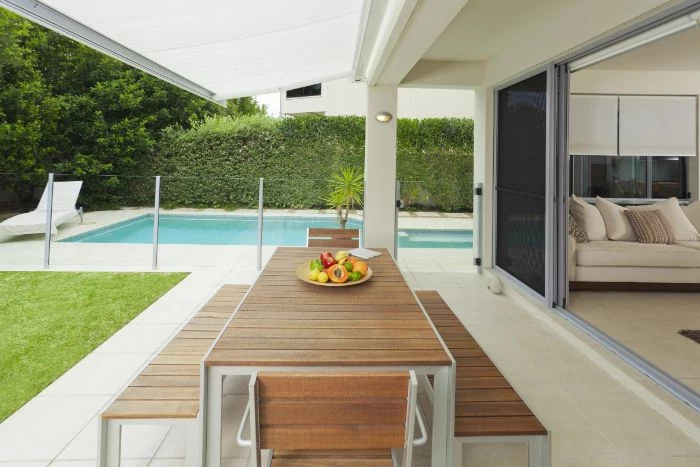
Think in Zones: Before you buy a single planter, sketch your yard and divide it into functional ‘rooms’. Where is the best spot for a quiet morning coffee? Where will the kids play? Where will you entertain guests? Defining these zones first dictates the flow, surfaces, and scale of your entire project.
- Check your property plat for utility easements. You can’t build permanent structures over them.
- Measure the distance from the house to key points, like a property fence or a large tree.
- Note the location of outdoor faucets and electrical outlets.
- Identify any significant slopes or low spots where water might pool.
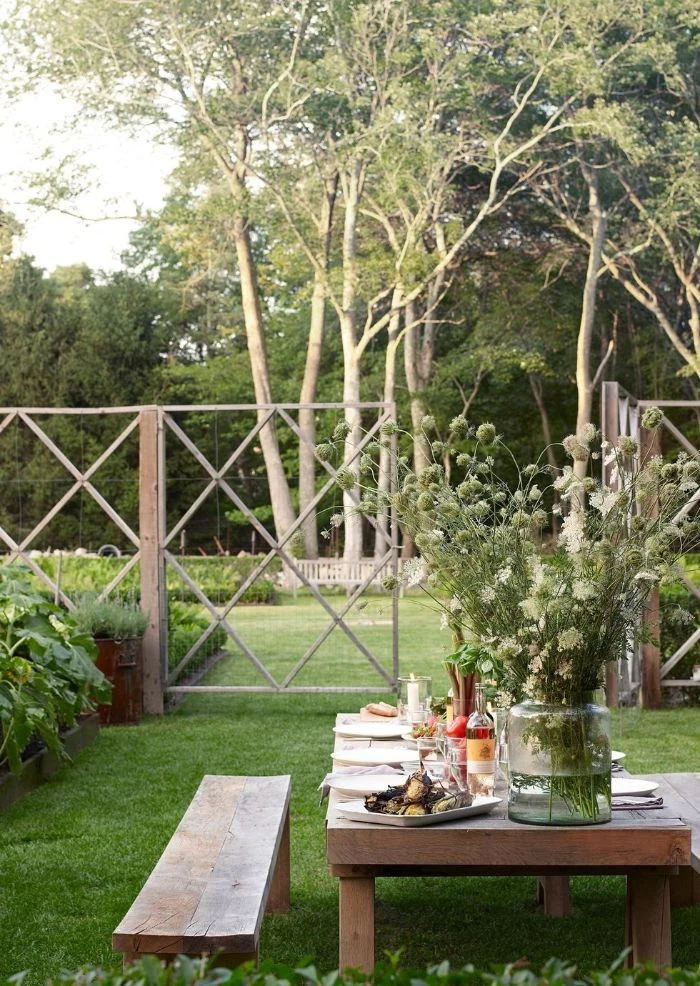
A study by Virginia Tech found that a well-designed landscape can add up to 15% to a home’s value.
This isn’t just about pretty flowers. It reflects a well-maintained, usable extension of the home. Smart planning, like adding a functional patio or solving a drainage issue, provides a tangible return on investment that goes far beyond simple curb appeal.
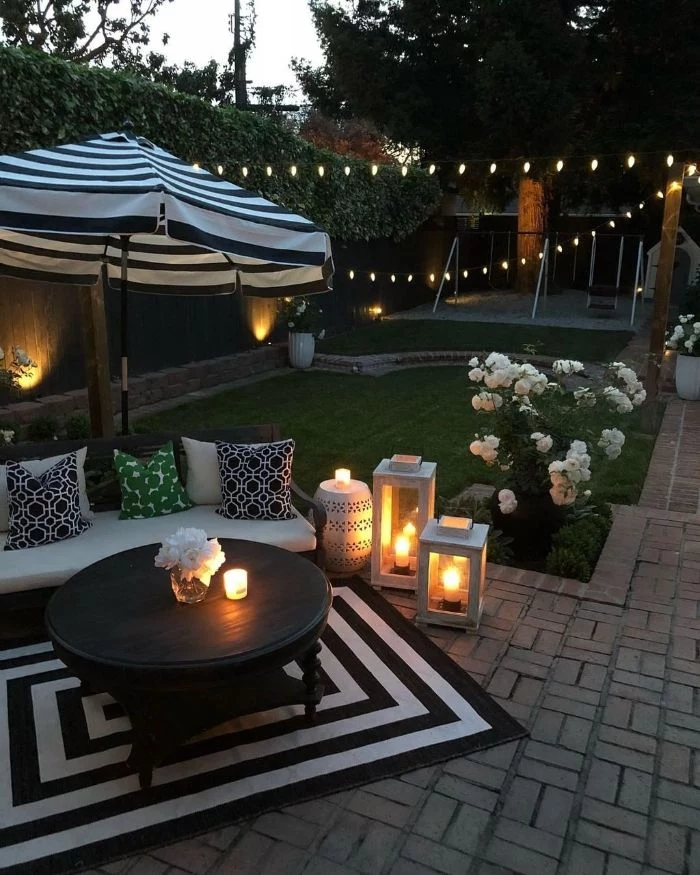
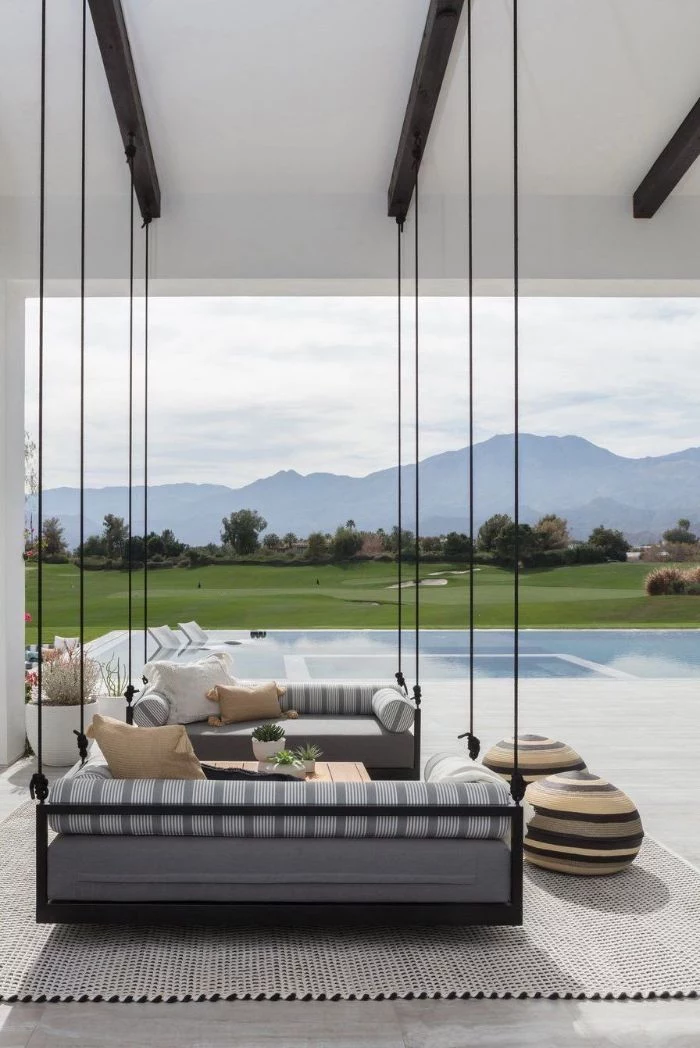
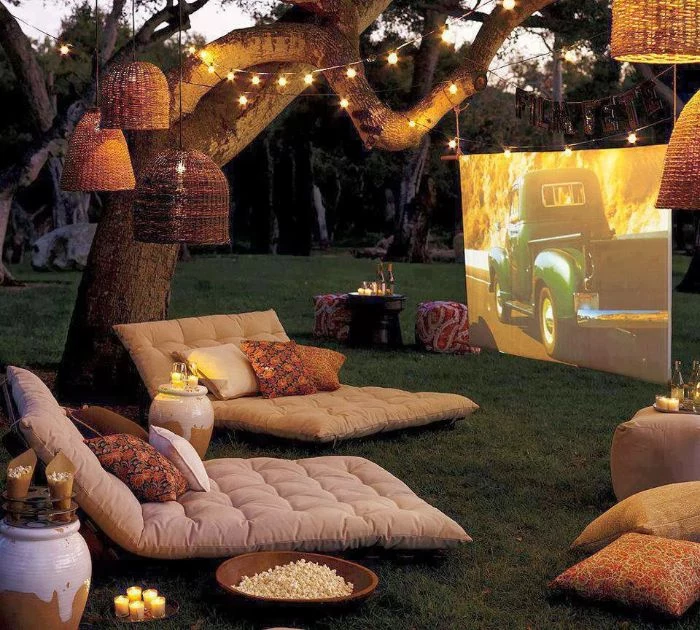
How do I plan for outdoor lighting without it looking like an airport runway?
The key is subtlety and strategy. Instead of flooding the area with light, focus on ‘layers’. Use low-voltage path lights from a brand like Volt Lighting to guide footsteps, uplights to highlight the texture of a stone wall or the canopy of a beautiful tree, and dimmable string lights, such as those from Brightech, to define a seating area. Always aim for warm, downward-facing light to create ambiance and reduce light pollution.

Decomposed Granite (DG): A fine, crushed rock that packs down for a firm, natural-looking surface. It’s great for patios and paths but can be tracked indoors.
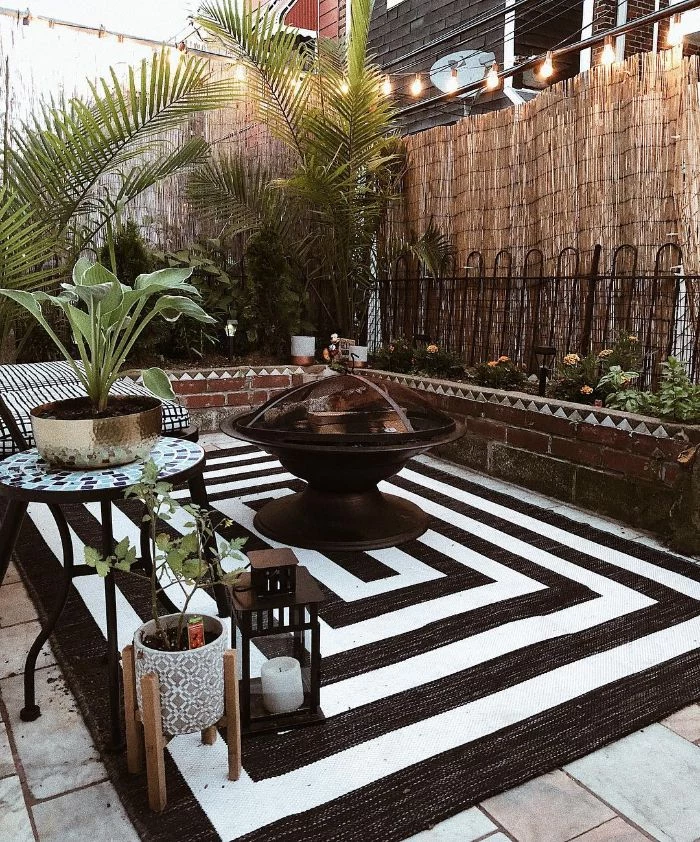
Pea Gravel: Small, rounded stones that create a satisfying crunch underfoot. Excellent for drainage and a more informal look, but can be unstable for furniture.
For a dining area, DG often provides a more stable foundation; for a fire pit surround, pea gravel is a classic, permeable choice.
Don’t forget to look beyond your property lines. The Japanese have a concept called shakkei, or
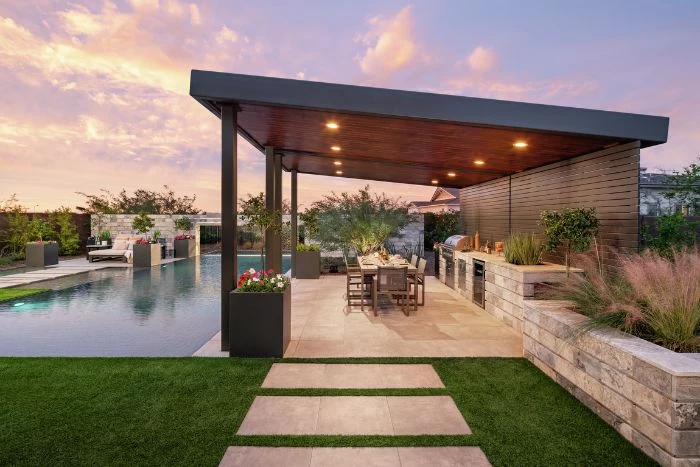
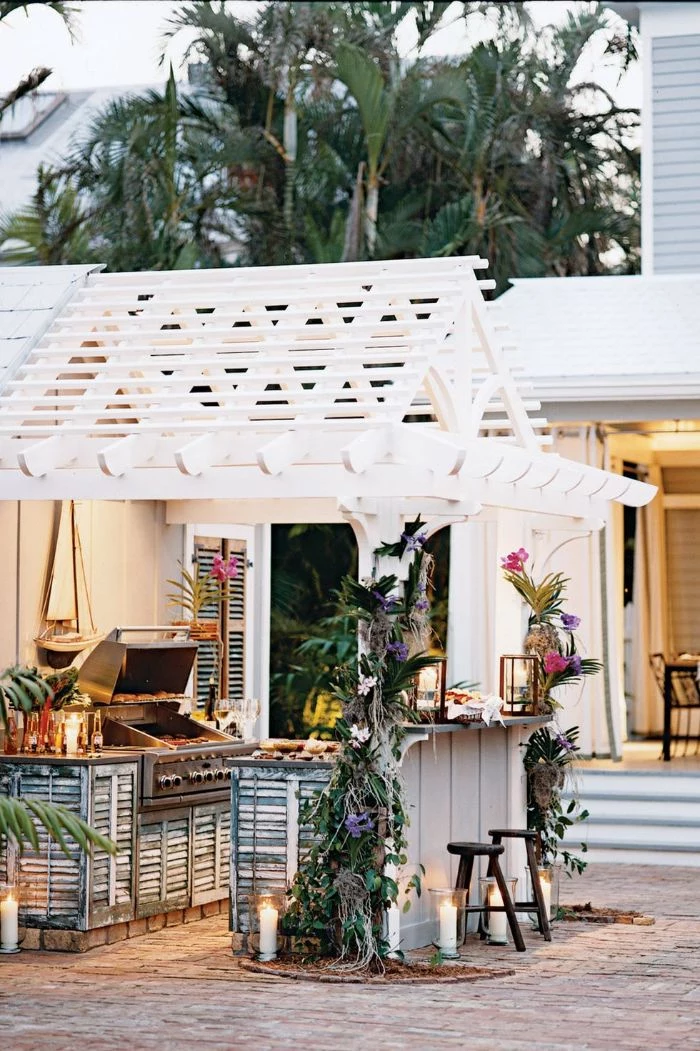
A critical early step: Before you even think about paver patterns, plan for your future electrical and water needs. Want a water feature? A grilling station with task lighting? A powered workshop at the back of the property? It is infinitely easier and cheaper to run PVC conduit for wiring and plumbing *before* you lay a single stone or pour any concrete.
The sound of your garden is as important as its look. The gentle trickle of a small, self-contained fountain can mask traffic noise and create a tranquil atmosphere. Conversely, consider how sound travels. Placing a social fire pit area directly under a bedroom window might not be the best long-term plan for a peaceful home.
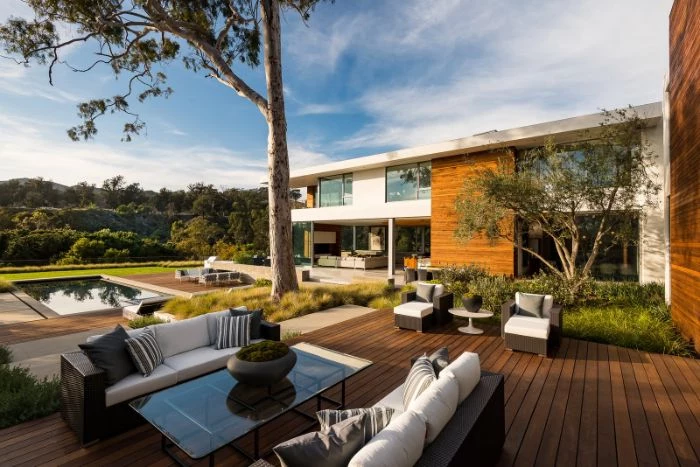
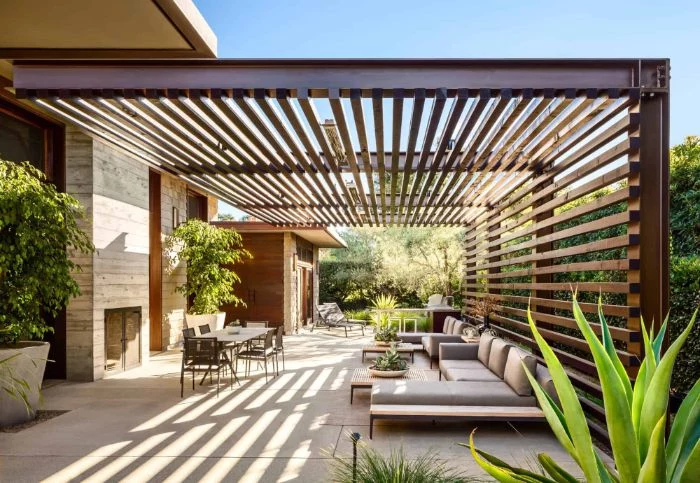
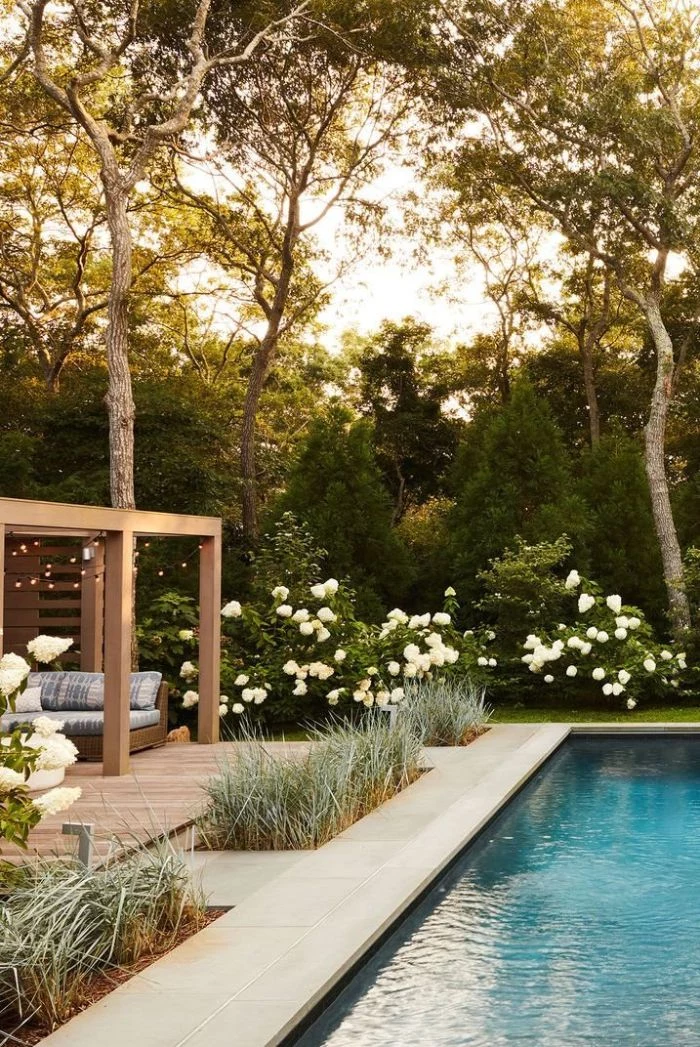
- A durable, beautiful surface that lasts for decades.
- A space that feels seamlessly connected to your indoor living area.
- Significantly less maintenance than a traditional lawn.
The secret? Choosing the right decking. While pressure-treated wood is budget-friendly, composite decking from brands like Trex or Fiberon offers superior longevity and resistance to rot and insects, justifying its upfront cost over time.
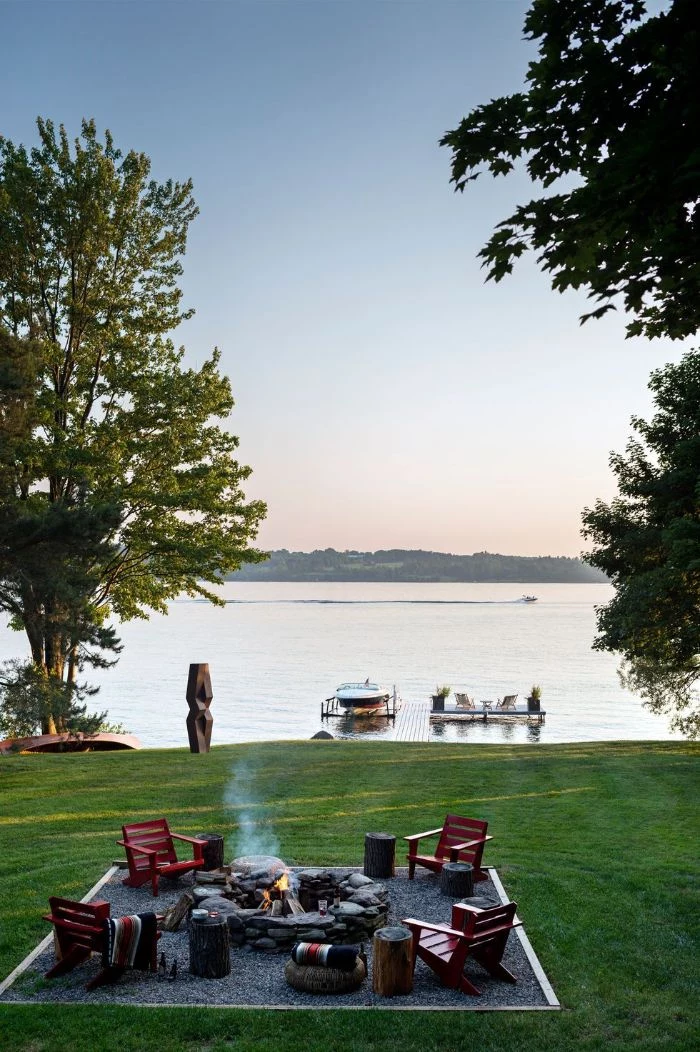
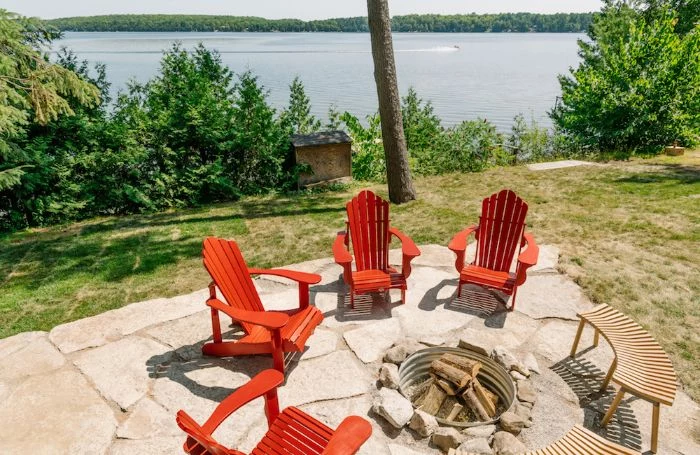
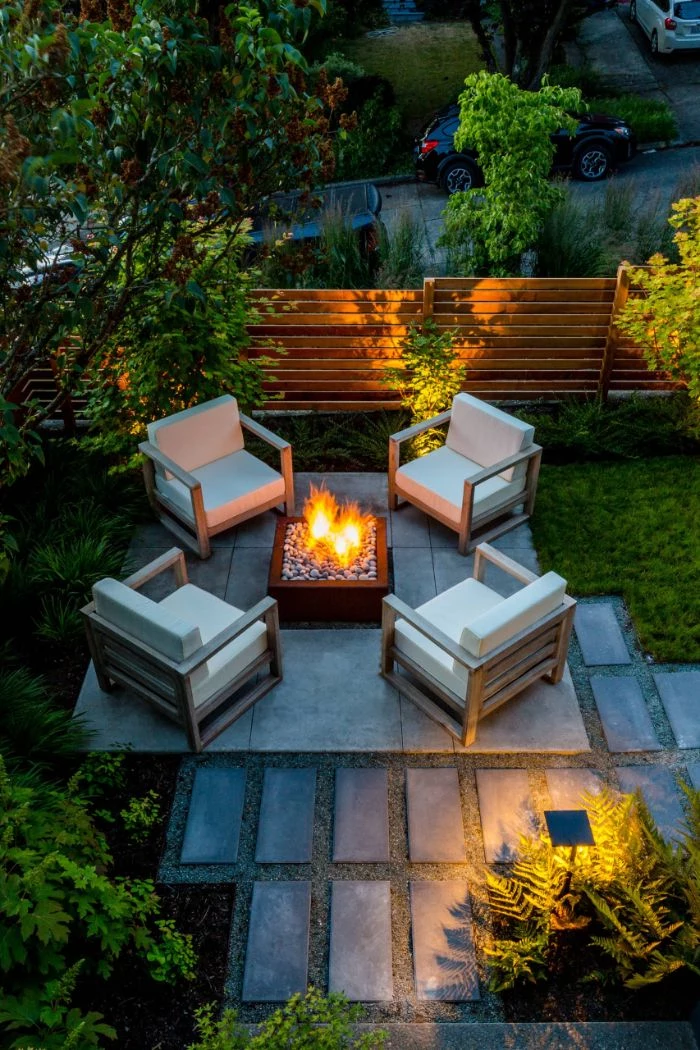
One of the biggest planning mistakes is ignoring the wind. Observe the prevailing winds in your yard for a few days. This will tell you the best place to position a fire pit so smoke doesn’t blow back toward your seating area, and where to plant a screen of hardy grasses or shrubs to create a calm, sheltered nook for dining.
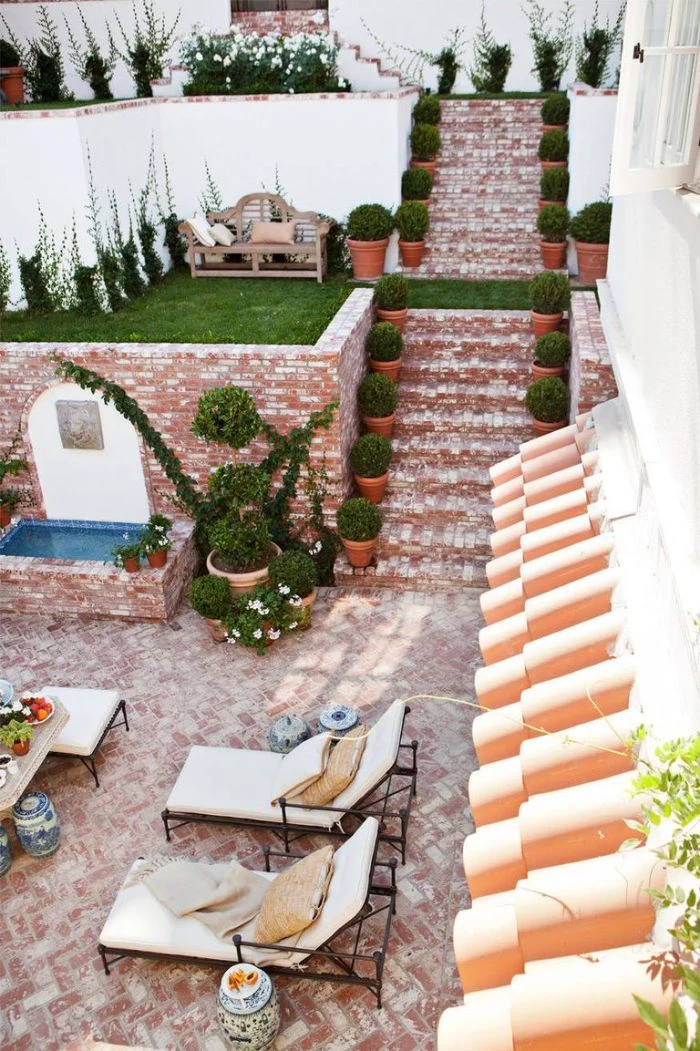
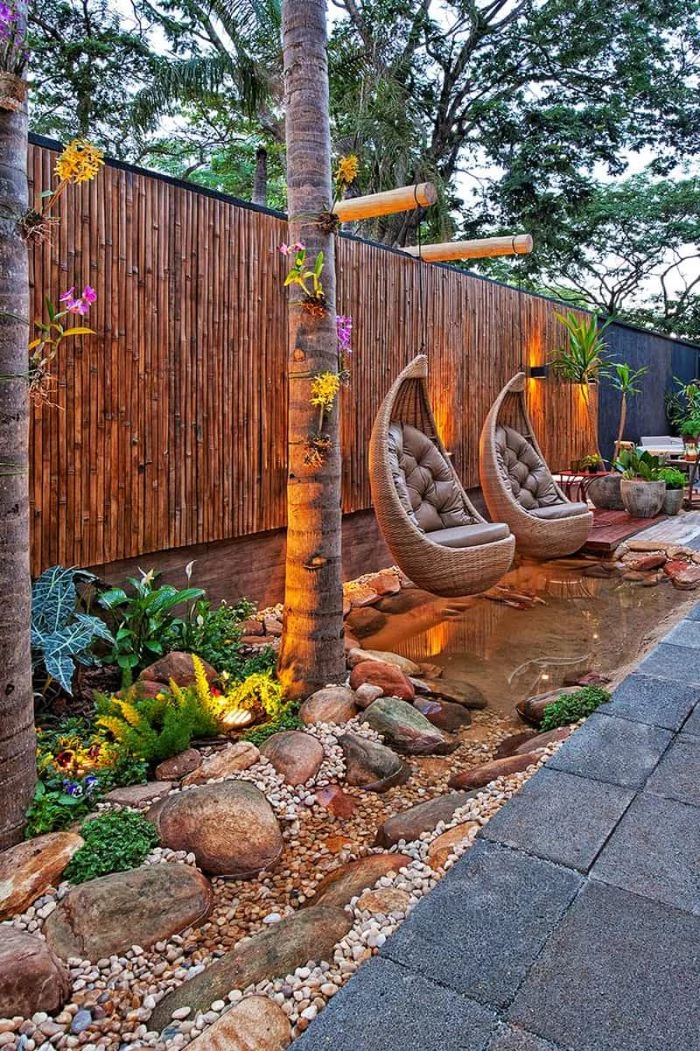
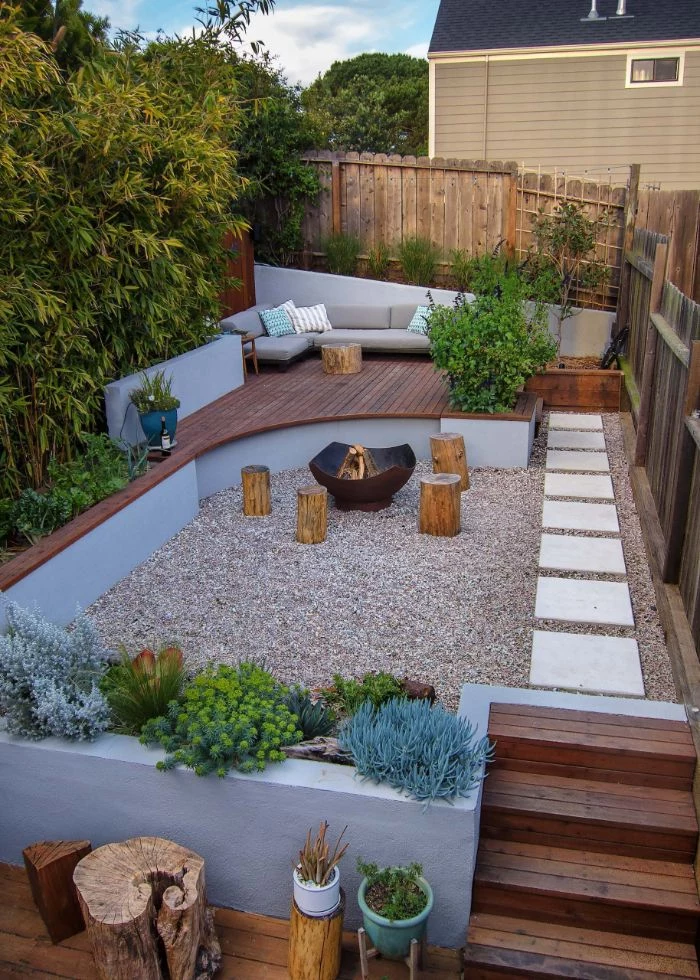
My yard is on a slope. What are my options?
A slope isn’t a problem; it’s an opportunity for dynamic design. Instead of one large, difficult-to-use space, think about creating terraces. Low-profile retaining walls can carve out multiple level areas for different activities—a patio on one level, a garden bed on another. This approach not only solves the usability issue but also adds immense visual interest and character.
Before settling on a design, map out the

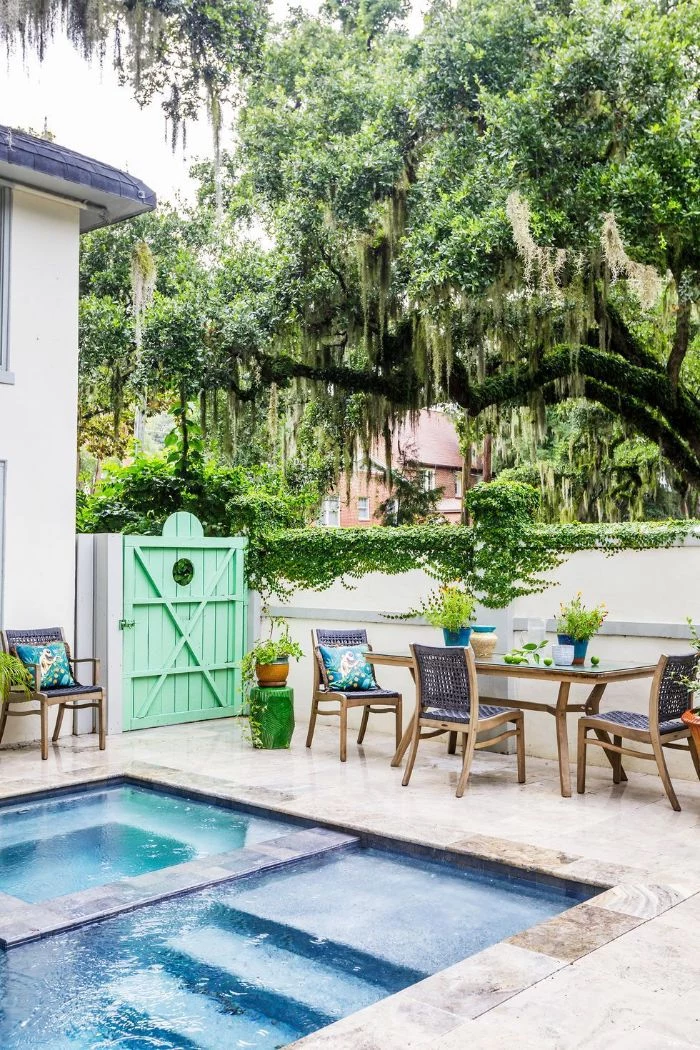
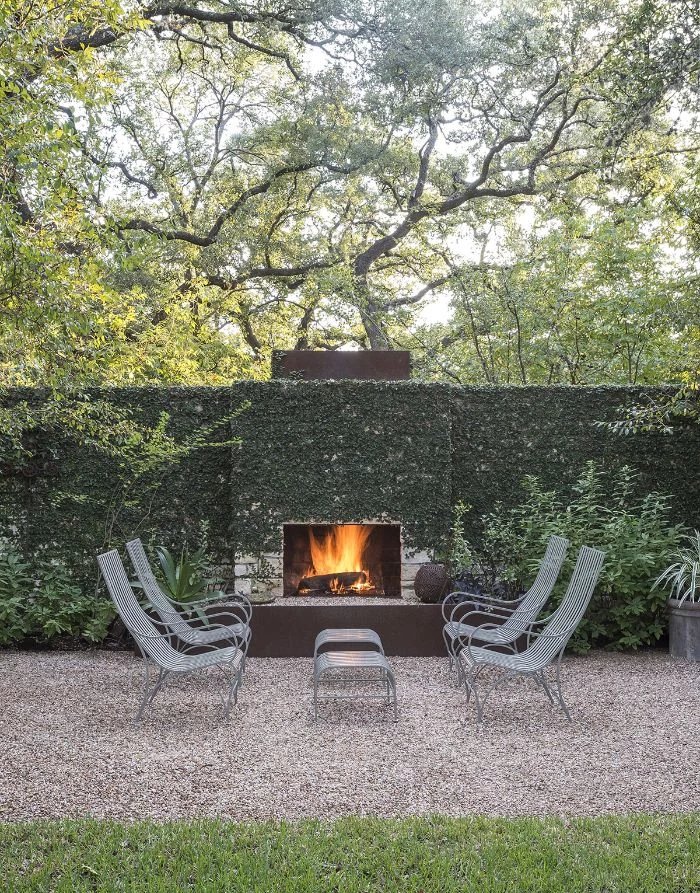
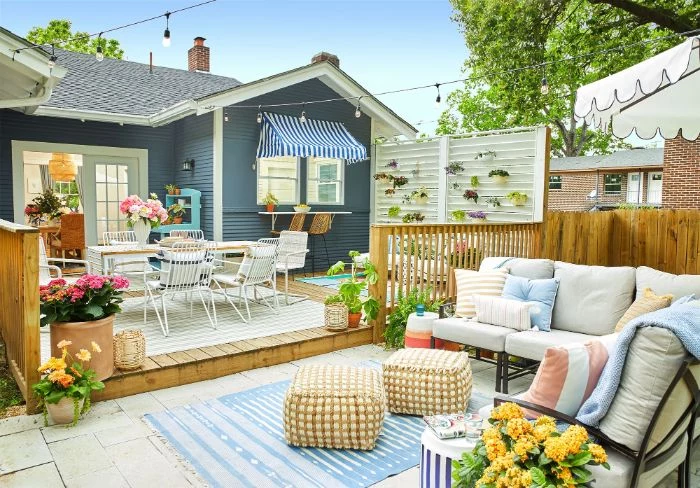
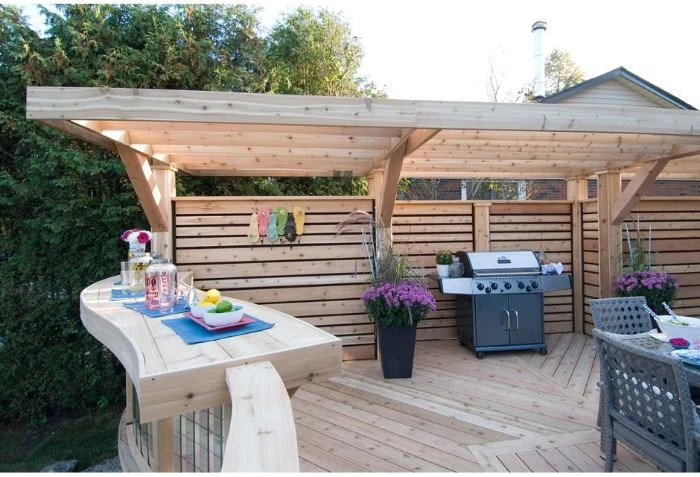
Privacy Hedge: A living wall, using plants like Arborvitae or Boxwood, offers a soft, green screen that changes with the seasons and can support wildlife.
Built Fence/Screen: A modern horizontal slat screen or a classic fence provides instant, solid privacy and a strong architectural element.
A living hedge requires patience and maintenance, while a built structure has a higher initial cost but is immediately effective.
Overwhelmed by a large project? Phase it. Your master plan doesn’t have to be built all at once.
- Year 1: Focus on the hardscaping foundation—the patio or deck.
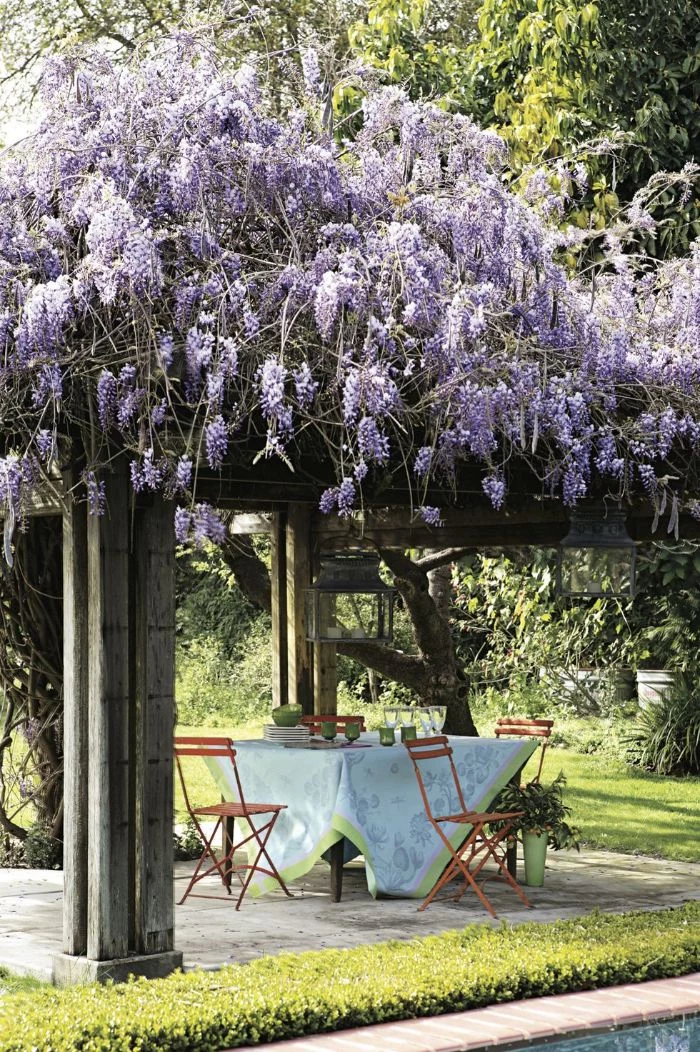
- Year 2: Add the vertical elements, like a pergola or privacy screens.
- Year 3: Install the planting beds and finishing touches like lighting.
This makes the budget more manageable and allows you to live with each stage before committing to the next.
According to the EPA’s WaterSense program, a single gas-powered lawn mower running for an hour emits the same amount of air pollution as 11 new cars.
When planning your backyard, consider how much lawn you truly need. Reducing turf in favor of patios, native plant beds, or groundcovers like creeping thyme not only saves water but also improves local air quality and reduces noise pollution.

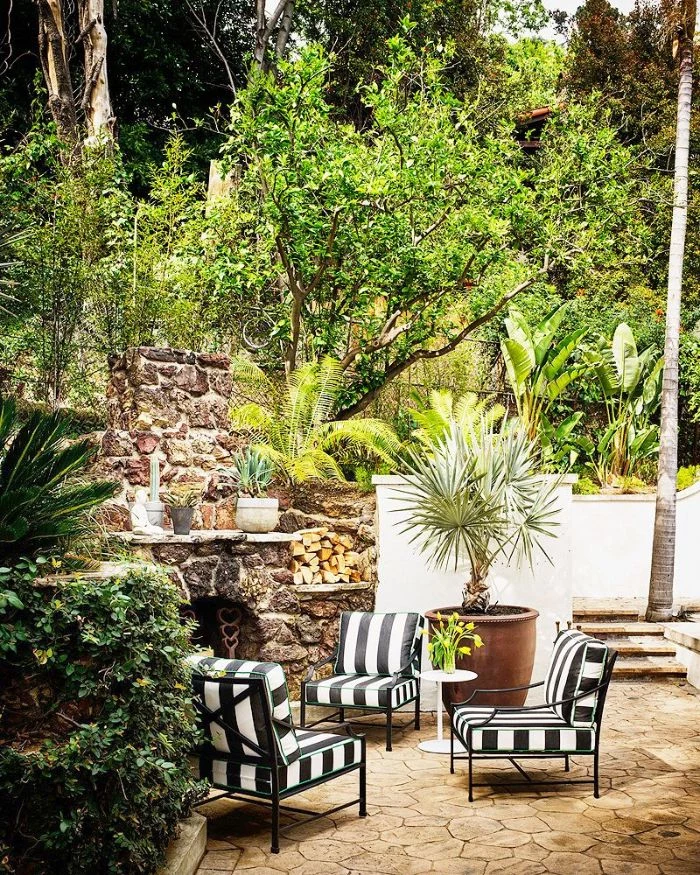
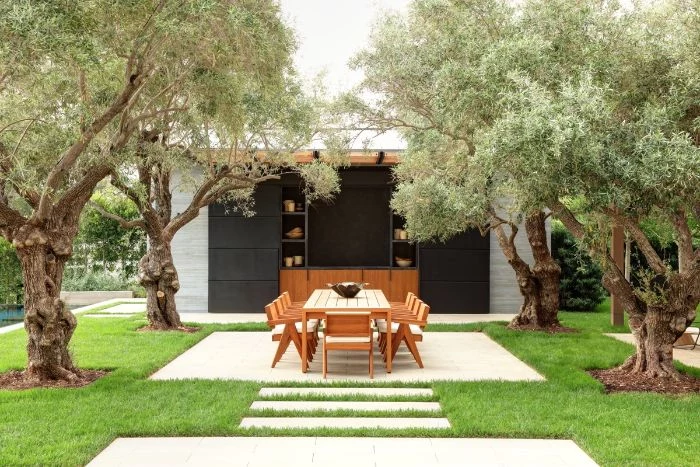
Your home’s architecture is the best clue for your garden’s style. A sleek, modern home pairs well with clean lines, minimalist plantings, and materials like concrete and steel. A rustic farmhouse, on the other hand, calls for softer lines, natural stone, and cottage-style gardens with abundant flowers.
Don’t forget storage: A beautiful backyard can quickly become cluttered. In your initial plan, designate a spot for the less glamorous items. Will you need a shed for the mower? A deck box for cushions? A discreet screen to hide trash bins? Planning for this from the start keeps your oasis looking serene.
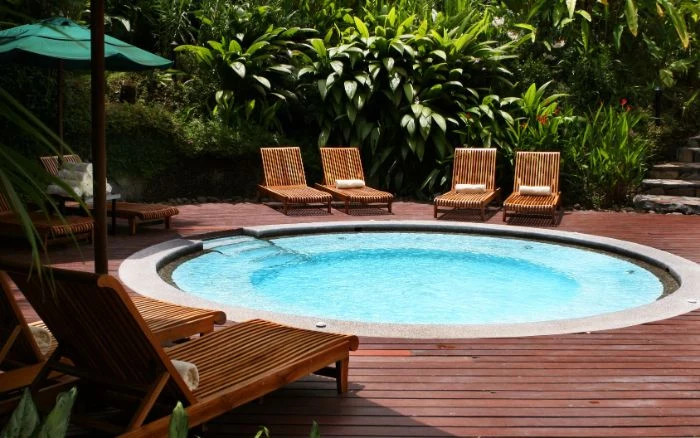
- Dramatically lower water bills.
- A garden that attracts birds and pollinators.
- Far less time spent on fertilizing and pest control.
The approach? Xeriscaping. It’s not just rocks and cacti. It’s about grouping plants with similar water needs and using smart irrigation, creating a lush, beautiful yard that’s in harmony with your local climate.
Create a physical mood board for your project. Don’t just rely on Pinterest. Gather actual samples: a paver stone, a piece of decking, a swatch of outdoor fabric from a brand like Sunbrella, and paint chips that match your home’s exterior. Seeing how the textures and colors interact in natural light is a crucial step that digital screens can’t replicate.
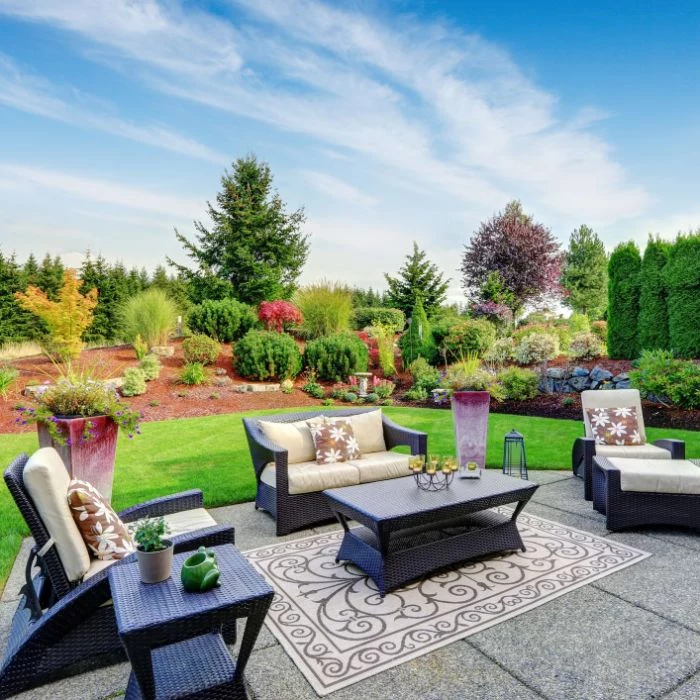
Every great backyard needs a focal point—a single element that draws the eye and anchors the design.
This doesn’t have to be expensive. It could be a sculptural Japanese Maple, a simple birdbath, a brightly colored bench, or a striking container pot. Decide on your focal point early in the planning process and design the rest of the space to complement it.
What’s the best tool for visualizing my plan?
For a low-tech but effective method, use graph paper, with each square representing a square foot. For a digital approach, free software like SketchUp Free allows you to build a 3D model of your space, helping you understand scale and sightlines before you commit. There are also tablet-friendly apps like iScape that let you overlay virtual elements onto a photo of your yard.
The rule of three is a classic design principle that works wonders outdoors. When planting, group plants in odd numbers—threes, fives, or sevens. This creates a more natural and visually appealing arrangement than rigid, symmetrical pairs.
Think about winter interest. A garden that looks great in July can look bleak in January. When planning, include elements that provide structure and beauty year-round. Consider evergreen shrubs, trees with interesting bark like a river birch, or ornamental grasses that look stunning when tipped with frost.
A common mistake: Underestimating the mature size of plants. That cute little spruce in a 3-gallon pot could grow to be 50 feet tall and 20 feet wide, overwhelming your house and blocking all your light. Always read the plant tag and plan for its size in 10 years, not its size on the day you buy it.


