The Real Dirt on Growing Seriously Incredible Tomatoes
I’ve spent more seasons than I can count with my hands in the soil, trying to grow tomatoes in just about every situation you can think of. From a tiny, sun-starved balcony in the city to helping out with community gardens, I’ve seen it all. And you know what? Over and over, I see the same handful of simple mistakes trip people up, whether they’re brand new to gardening or have been at it for a while.
In this article
Getting a bumper crop of tomatoes isn’t about some secret sauce or magic formula. Honestly, it all comes down to understanding what the plant truly needs from the ground up. It’s about seeing your garden as a living, breathing system. So, this isn’t just a list of quick fixes. We’re going to dig into the core practices that I’ve seen lead to consistently healthy plants and a summer full of delicious harvests. We’ll cover the ‘why’ behind the ‘how,’ so you can start thinking like a plant and head off problems before they even start.

First Things First: Soil, Sun, and Space
Everything, and I mean everything, begins with your soil. A plant is only as healthy as the dirt it lives in. It’s so easy to get excited, grab a cute little seedling from the nursery, and just plop it in the ground without a second thought. But to be frank, that’s probably the biggest misstep you can make.
Let’s Talk About Dirt
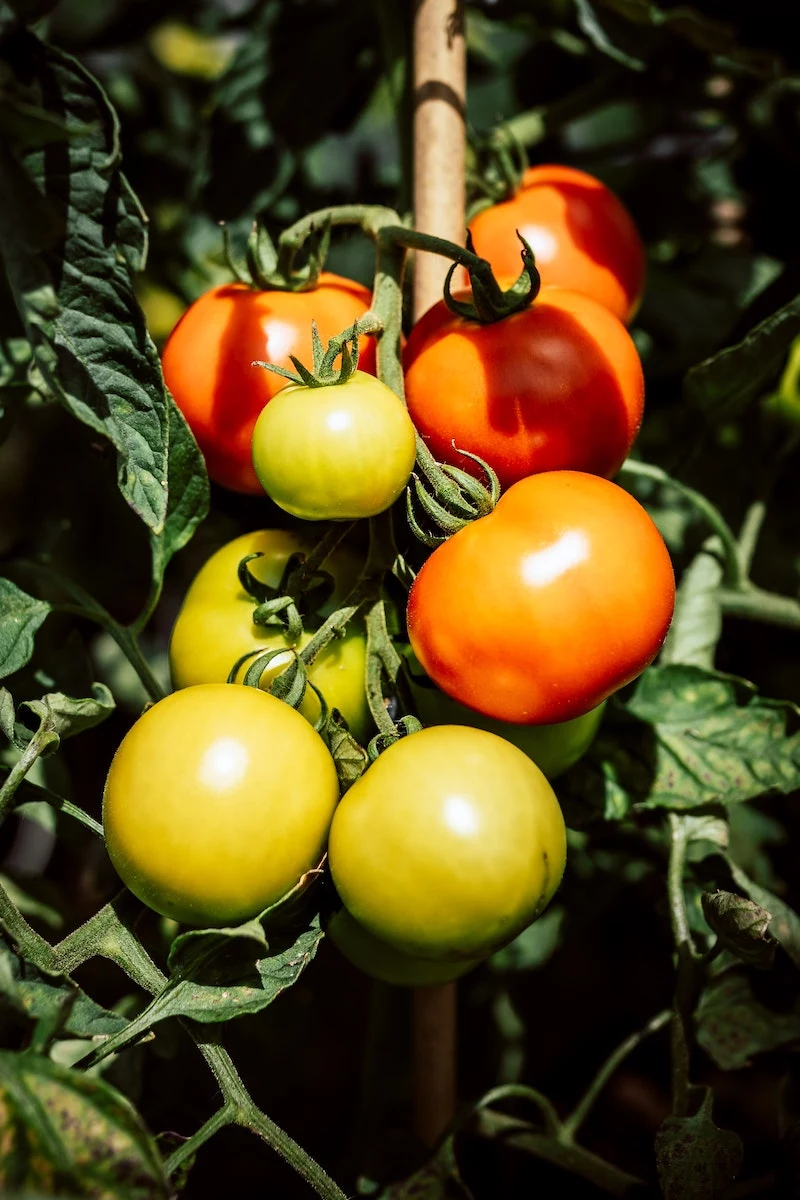
Soil is way more than just brown stuff. It’s a whole ecosystem of minerals, organic matter, water, and air. The texture comes from a mix of sand, silt, and clay, and the right balance determines how well it holds water and nutrients. And tomatoes? Oh yeah, they are hungry plants. They crave soil that’s loaded with organic goodies, drains well, and leans just a little bit acidic—ideally with a pH between 6.2 and 6.8.
Why get so hung up on pH? Think of it like a key that unlocks food for the plant. If your soil is too alkaline or too acidic, essential nutrients like calcium get chemically locked up. They can be right there in the soil, but the plant can’t access them. This leads to all sorts of drama, like weak growth or the dreaded blossom end rot. I once spent a whole frustrating season wondering why my plants looked so sad, dumping fertilizer on them to no avail. A simple soil test showed my pH was way too high. Once I fixed that, the plants practically transformed overnight.
Get the Scoop on Your Soil
You don’t have to guess. The single best investment you can make is a professional soil test. Your local university cooperative extension service usually offers them for a surprisingly small fee, often between $15 and $30. You just mail in a sample, and they send back a detailed report card on your soil’s health, pH, and nutrient levels, along with specific advice on how to fix it. It’s what the pros do, and it takes all the mystery out of soil prep.
If a lab test isn’t in the cards, you can do a quick-and-dirty version yourself. Just fill a big glass jar about a third full with your soil, top it off with water, add a drop of dish soap, and shake it like crazy. Let it settle for a day. The sand will drop to the bottom first, then the silt, and finally the fine clay. This gives you a rough idea of your soil’s texture. Mostly sand? You’ll need lots of compost to hold moisture. Mostly clay? You’ll want compost and maybe some gypsum to break it up and prevent waterlogging.
Good to know: If you’re just starting, a simple shopping list for a healthy soil setup would be a couple of large bags of high-quality compost to mix into your garden bed (a good rule of thumb is to work a 2-inch layer into the top 6 inches of soil) and a box of balanced, organic granular fertilizer.
Location, Location, Location
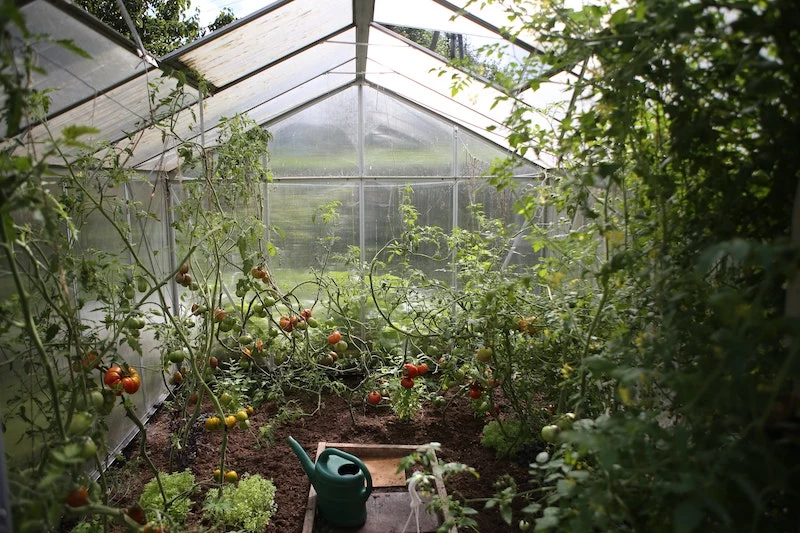
Tomatoes are sun worshippers. They need at least eight hours of direct, unfiltered sunlight every day to really thrive. Sunlight is the fuel for photosynthesis, the engine that powers fruit production. Less sun means a lanky, sad plant that puts all its energy into growing tall instead of making tomatoes.
And please, practice crop rotation. Don’t plant your tomatoes where potatoes, peppers, or eggplants grew in the last three years. They’re all in the same family and share the same soil-borne diseases. Planting them in the same spot year after year is like rolling out the red carpet for pathogens like fusarium wilt. I learned that lesson the hard way and lost an entire crop once. Now, I keep a simple journal to track my planting spots.
But what if you can’t rotate? I hear you. If you have a tiny yard or only one sunny patch, you’re not doomed! Here are a few workarounds:
- Go for Grow Bags: This is my favorite solution. You can buy a 5-pack of 10-gallon fabric grow bags for about $20 online. You start with fresh, clean soil every year, completely sidestepping the disease issue.
- Soil Swap: If you have a small raised bed, you can literally dig out and replace the top foot of soil where you plan to plant. It’s a bit of work, but worth it.
- Plant Disease-Resistant Varieties: Look for letters like ‘V’, ‘F’, or ‘N’ after the tomato name on the plant tag. These indicate resistance to common diseases like Verticillium and Fusarium wilts.
Finally, give them room to breathe! Crowding your plants is a huge mistake. Space indeterminate (vining) types about 24-28 inches apart. When plants are packed too tightly, they compete for everything, and worse, there’s no airflow. Damp, stagnant leaves are a breeding ground for fungal diseases like blight. Good spacing is your best friend in the fight against fungus.
Watering: The Art of a Good Drink
This seems so basic, but getting the watering wrong is the root cause of so many tomato troubles. The classic beginner mistake is watering a little bit every single day. That light sprinkle does way more harm than good.
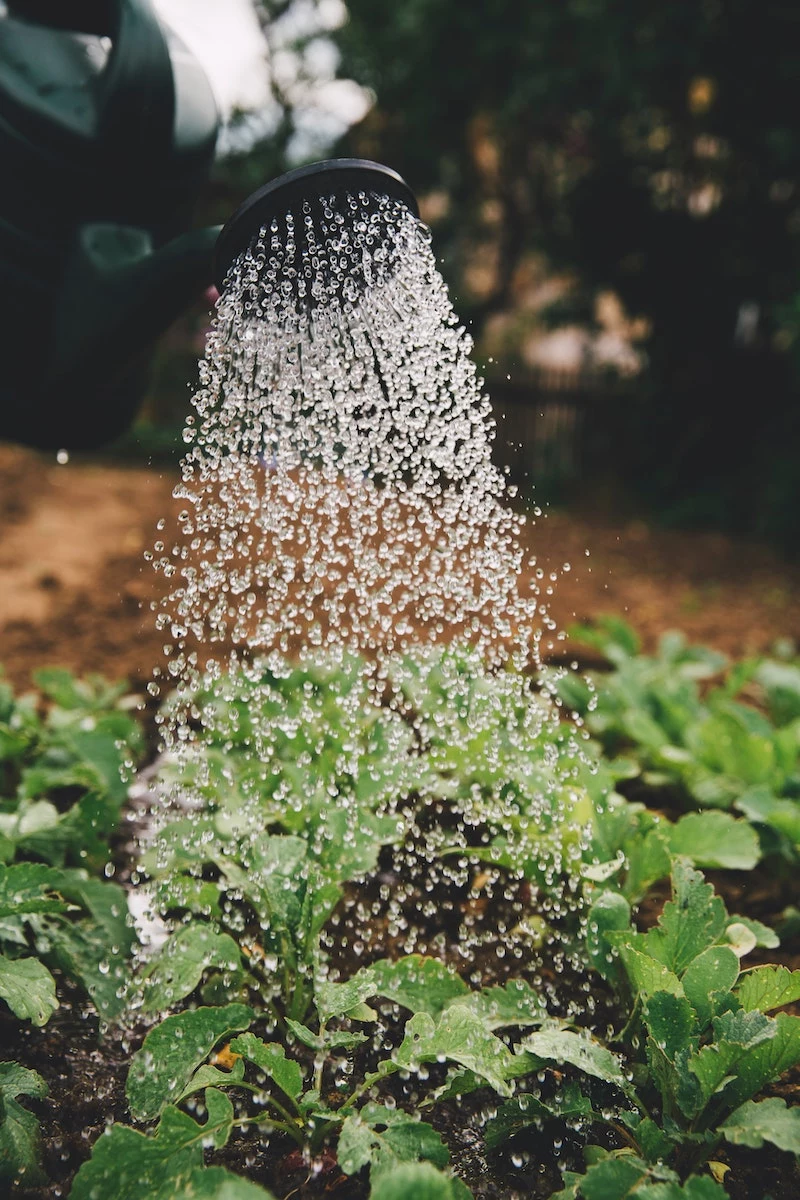
Your goal is to encourage the roots to grow deep, where the soil stays cooler and moisture is more consistent. Shallow watering keeps the roots right at the surface, making the plant weak and prone to wilting on the first hot day. Instead, give your plants a deep, thorough soaking once or twice a week. You want the water to penetrate at least a foot down. The best way to check is to stick your finger a few inches into the soil. If it’s dry 4 inches down, it’s time to water.
And how you water is just as important. Watering from above with a sprinkler is a major no-no. Wet leaves are an open invitation to disease. Always apply water directly to the base of the plant. Drip irrigation or soaker hoses are the gold standard—they deliver water right to the roots with almost no evaporation. If you’re using a hose, get a watering wand so you can place the water gently on the soil. And always try to water in the morning; this gives any accidental splashes on the leaves a full day of sun to dry off.
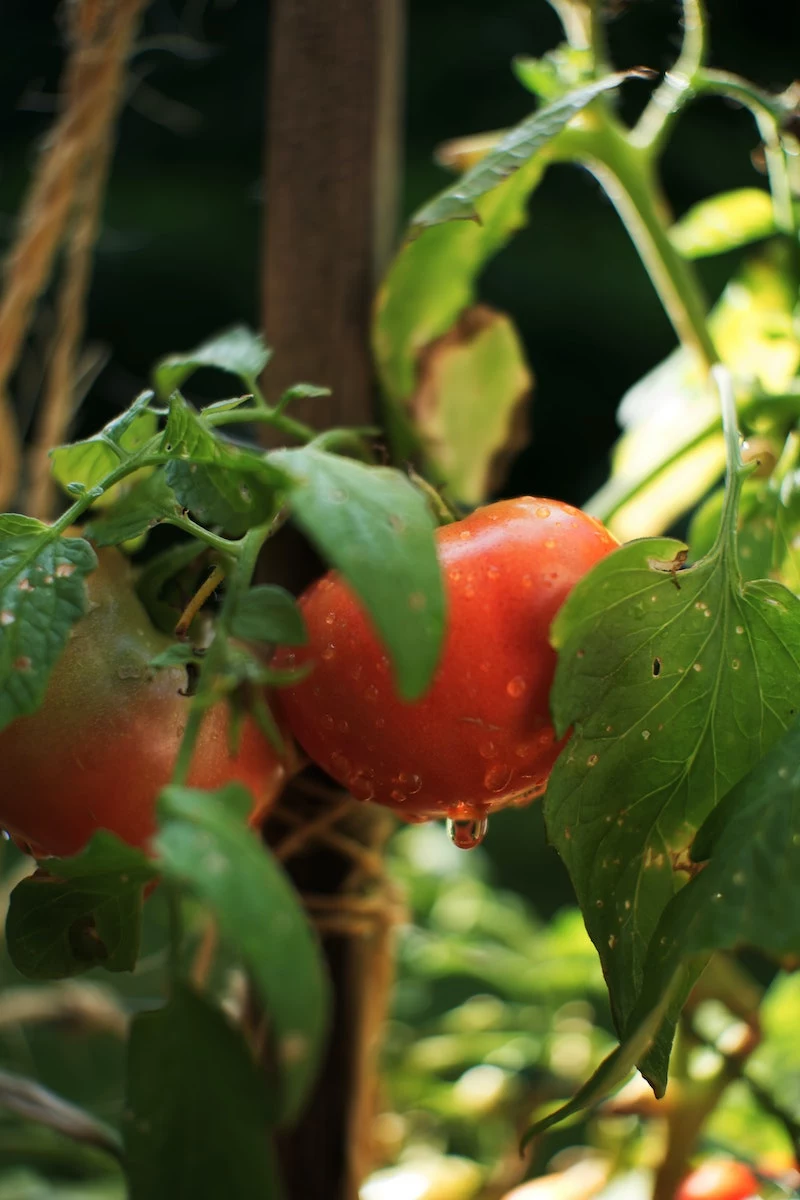
By the way, inconsistent watering is what causes those ugly black bottoms on tomatoes (blossom end rot) and those deep cracks in the skin. The plant needs a steady supply of water to move calcium to the fruit. When a dry spell is followed by a flood, the system gets overwhelmed, and the fruit suffers.
Structure and Pruning: Taming the Beast
Without some guidance, most tomato plants will turn into a sprawling, tangled mess. This is where you, the gardener, come in to provide support and direct the plant’s energy. But first, you have to know what kind of plant you’re dealing with.
Know Your Type: Determinate vs. Indeterminate
This is probably the most critical piece of information for a new tomato grower. They come in two main types:
- Determinate (Bush) Tomatoes: These plants grow to a specific, compact size (usually 3-4 feet tall), produce their entire crop of fruit over a few weeks, and then they’re pretty much done for the season. Think ‘Roma’ or ‘Celebrity’. They’re perfect for containers or for people who want to do a big batch of canning. They need minimal pruning—just remove the leaves below the first flower cluster for better airflow.
- Indeterminate (Vining) Tomatoes: These are the wild ones. They will keep growing and producing fruit all season long until the first frost kills them. Most heirlooms and popular cherry tomatoes like ‘SunGold’ or ‘Brandywine’ are indeterminate. These absolutely require tall, strong support and regular pruning to keep them from becoming a jungle and to focus their energy on making fruit instead of miles of vines.
Better Support Systems
Heads up! Those flimsy, cone-shaped tomato cages you buy at big-box stores are a joke for indeterminate varieties. A healthy plant will topple them by mid-summer. You need something sturdier.
- Staking: Simple and effective. Use a thick 6-7 foot stake (wood or a metal T-post works great and costs about $5-$8) and drive it a foot into the ground next to the plant. Loosely tie the main stem to the stake every 8 inches or so as it grows.
- DIY Cages: For a one-time investment, you can buy a roll of concrete reinforcing mesh for under $100 and make a dozen cages that will last a lifetime. A cage that’s 5 feet tall and about 2 feet in diameter is perfect. They’re way cheaper and stronger than anything you can buy.
- The Florida Weave: This is a cool trick the pros use. You place tall, sturdy stakes every two plants down a row. As the plants grow, you weave twine between the stakes, sandwiching the plants between the lines. Just add a new line of twine for every 8-10 inches of growth.
The Why and How of Pruning
Okay, let’s finish what we started. Pruning is mostly for those indeterminate, vining types. The goal is simple: focus the plant’s energy on fruit, not excess leaves. The things you’ll be removing are called ‘suckers.’ A sucker is the little new stem that forms in the ‘V’—right in the armpit between the main stem and a leaf branch.
If you let them all grow, each sucker will turn into another giant stem, creating a dense, tangled mess with poor airflow and smaller fruit. By removing them, you’re telling the plant, “Hey, stop making more branches and focus on making bigger, better tomatoes!”
When the suckers are small (less than 4 inches), you can just pinch them off with your fingers. If they get a little bigger, use a clean pair of pruners. It’s best to focus on removing the suckers from the bottom two-thirds of the plant, leaving the top a bit bushier to help shade the developing fruit from sunscald. It feels a little brutal at first, but trust me, your plant will thank you for it with a much healthier and more manageable harvest.
A Quick Note for Container Gardeners
Growing on a patio or balcony? Awesome! But you have a slightly different set of rules.
- Pot Size Matters: Go bigger than you think. A 5-gallon bucket is the absolute bare minimum for a determinate variety. For an indeterminate, you really want a 10, 15, or even 20-gallon pot. More soil means more room for roots and less stress on the plant.
- Use Potting Mix, Not Garden Soil: Never, ever use soil from your yard in a pot. It will compact into a solid brick and suffocate the roots. You need a fluffy, well-draining potting mix. I like to add a few extra handfuls of perlite for even better aeration.
- Water, Water, Water: Pots dry out incredibly fast, especially on hot, windy days. Be prepared to water daily during the peak of summer. Just lift the pot—if it feels light, it’s thirsty.
- Feed Them Often: Nutrients wash out of pots with every watering. Plan on feeding your container tomatoes with a diluted liquid fertilizer every week or two to keep them happy and productive.


