Your Guide to Flawless Fall Nails: Pro Secrets for Cozy, Durable Designs
You know, after more than a couple of decades as a nail tech, I can practically feel the seasons change right here in the salon. The moment a little chill hits the air, it’s like a switch flips. Clients pack away the neon pinks and simple summer sheers, and suddenly, everyone is craving depth, texture, and designs that just feel… cozy. It’s more than just a new color palette; it’s about using techniques that can handle the colder, drier weather and show off the richness of the season.
In this article
So many guides out there just chase trends. But let’s be real, trends come and go. The skills behind them? Those are forever. I want to pull back the curtain and share the professional methods we actually use to create gorgeous, long-lasting autumn nails. This isn’t about what’s hot for five minutes. It’s about understanding the ‘why’ behind the art so you can create any look you want, year after year. Let’s get into the real work.
First Things First: Prepping Your Nails for Colder Weather
Before a single drop of polish even thinks about touching the nail, we have to tackle the biggest enemy of the season: dehydration. That combination of cold, crisp air outside and dry, blasting heat inside sucks the moisture out of everything, especially our skin and nails. The nail plate is made up of layers of a protein called keratin, and when it gets thirsty, it gets brittle. That leads to peeling, splitting, and the dreaded “service breakdown,” which is just a fancy way of saying your gel or polish starts lifting way too soon.
I once had a new client who was so frustrated because her gel manicures started chipping within a week every single fall. She was convinced it was the product. But after we chatted for a bit, I found out she wasn’t using any cuticle oil. Her nails were so parched they were literally flexing away from the rigid gel, causing tiny cracks. It was a simple fix, but it changed everything for her.
A solid nail care routine is non-negotiable for a manicure that lasts. And honestly, lotion just doesn’t cut it. The molecules are usually too big to get into the nail plate. What you need is a high-quality cuticle oil. I always recommend looking for one with jojoba oil as a main ingredient—its molecular structure is super similar to our skin’s natural oil, so it absorbs like a dream. Vitamin E is another powerhouse. For my clients, I suggest applying it twice a day. Massage it into the cuticle area and right over the entire nail, even if you have polish on. It makes a HUGE difference.
Quick tip: Don’t have any cuticle oil on hand? No problem. For tonight, just head to your kitchen and grab some olive oil. It’s a great starting point to give your nails a drink!
Mastering Those Deep, Moody Colors
Autumn is the season of deep burgundies, rich chocolates, and moody forest greens. While these colors are absolutely stunning, they can be a bit tricky to work with. The problem is that highly pigmented gel polishes can be tough to cure all the way through. The dark pigments literally block the UV or LED light from reaching the bottom layer of the gel.
If dark gel is under-cured, it might look fine on top, but underneath it’s still liquid. This can cause a couple of major issues. First, your manicure won’t last; it’s going to peel. Second, and way more important, it’s a health risk. Uncured gel can seep into your skin and cause contact dermatitis, which is a nasty allergy you don’t want. I’ve seen it happen when people (both pros and at-home users) glob on dark colors too thickly.
You can avoid all that by following two simple rules:
1. Go for Thin Coats. This is the golden rule for all gel, but it’s CRITICAL with dark colors. Two or three paper-thin coats are infinitely better than one thick one. Each layer needs to be sheer enough for the lamp’s light to penetrate completely. When I’m training new techs, I have them practice on clear swatch sticks just so they can see how little product is actually needed.
2. Try a Flash Cure. For really dark or pigment-packed shades, I use a little trick called flash curing. After painting a thin coat on one nail, I pop it into the lamp for just 5 to 10 seconds. This sets the gel just enough so it won’t shift or wrinkle. I do this for each nail, and then once the whole hand is painted, I do a full 60-second cure. It’s an extra step, but it guarantees a perfect, solid cure every time. Heads up: If you’re using a lower-wattage lamp, you might need to flash cure for 15-20 seconds. The goal is just to set it in place.
Oh, and one more thing: To prevent those deep reds and blues from staining the natural nail, I always, always use two coats of a good base coat. It creates a much stronger barrier.
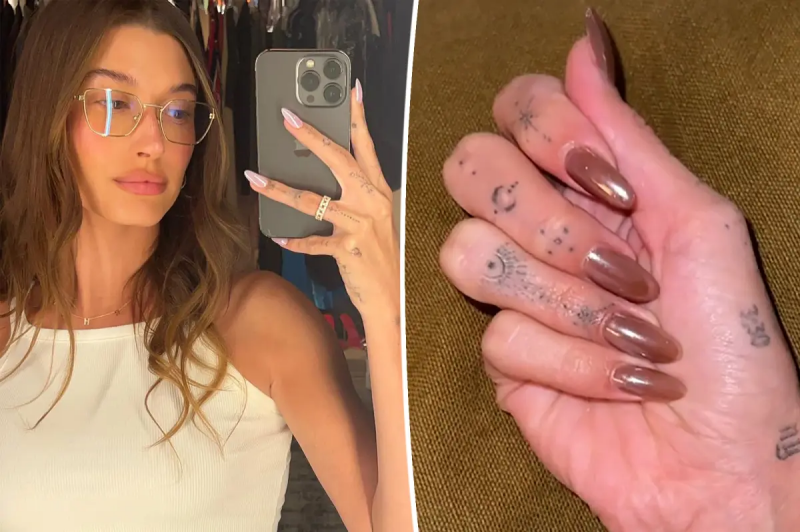
The Secret to That Perfect Glazed & Chrome Finish
That super popular “glazed donut” or chrome nail look is all about technique. You can’t get this effect with regular polish; it requires a special, ultra-fine chrome powder, and getting it right comes down to timing and using the right kind of top coat.
The powder needs a surface that’s not too sticky and not too slick. Here’s the play-by-play:
First, get your base color down and fully cured. Then, apply a thin layer of a “no-wipe” gel top coat. This is non-negotiable. A regular top coat leaves behind a sticky layer that will make your chrome powder look gritty and sad. A no-wipe formula cures to a perfectly smooth finish.
Now for the most important part: the cure time. You do NOT want to cure the no-wipe top coat for the full time. In my 48-watt lamp, a full cure is 60 seconds. For chrome, I only cure it for about 30 seconds. This leaves the top coat dry to the touch but still warm and just receptive enough for the powder to grab on. It’s a bit of a science experiment. From my experience, curing for just 15 seconds will leave it too tacky and the powder will clump. But if you cure for the full 60 seconds, the surface becomes too hard and slick, and the powder will just brush right off without sticking. You may need to play with the timing a bit depending on your lamp, but that 30-second mark is a great place to start.
Once it’s cured just right, grab a tiny bit of chrome powder with a disposable eyeshadow applicator (they work perfectly!) and gently but firmly rub it onto the nail. You’ll see it magically transform from a powder into a liquid-metal, mirror-like finish. It’s so satisfying! You can find these powders online at specialty nail supply stores for anywhere from $3 to $15 a pot, and a little goes a long way.
After you’ve burnished the powder on, take a soft, fluffy brush and dust away ALL the excess, especially around the cuticle. Then, seal it all in with another layer of the no-wipe top coat (and cap the free edge!) and do a full 60-second cure. Done.
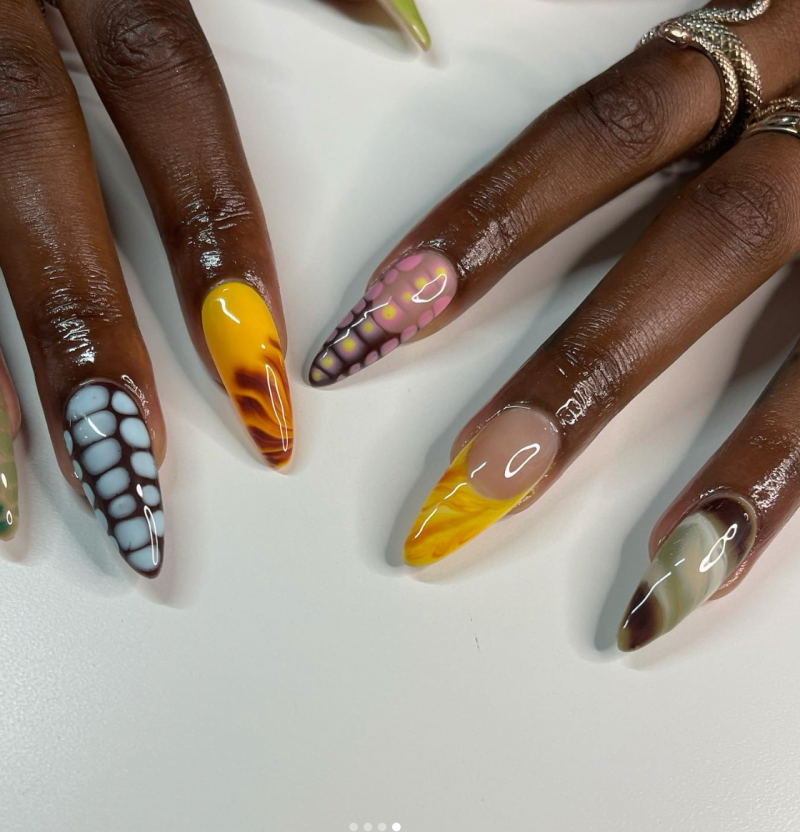
Creating Soft, Blended Looks with Blooming Gel
Ever wonder how people get those soft, dreamy aura nails or a subtle tortoise shell print? The secret is often a product called “blooming gel.” It’s a clear gel with a very thin consistency that’s designed to make other uncured gels spread out, or “bloom.” You can find it online or at places like Sally Beauty for around $10-$25 a bottle.
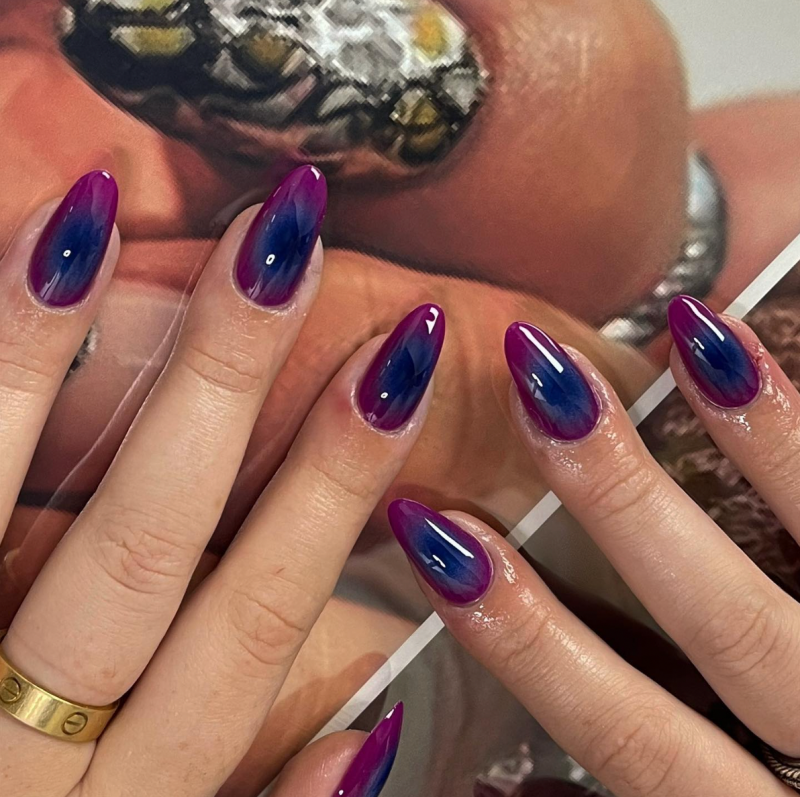
For an aura effect, you apply and cure your base color, then paint on a thin layer of blooming gel (don’t cure it!). Place a dot of your aura color in the center of the nail. Now, just watch! The color will slowly expand into the wet gel. For a small, tight aura, cure it after about 10 seconds. For a bigger, softer bloom, let it spread for 30 seconds or more. You’re in control! Cure when it looks right to you. The biggest mistake I see is using too much blooming gel, which can flood the cuticles. If that happens, no worries—just wipe it all off with some alcohol and start that step over.
You can use a similar idea for a tortoise shell or snakeskin pattern. After your cured base color, apply a generous but even layer of regular gel top coat (don’t cure it!). Then, use a dotting tool to drop blobs of brown and black gel into the wet top coat. They’ll bloom and spread, creating those cool, organic-looking cells. Let them mingle for a bit, then cure. You can even add another layer for more depth before sealing with your final top coat.
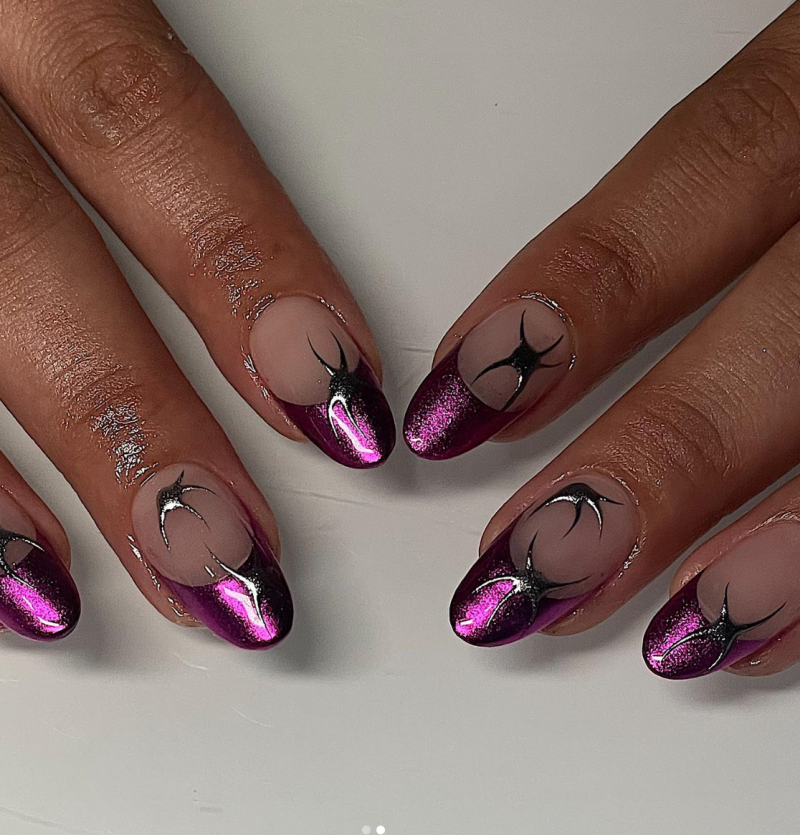
Next-Level Art: The 3D Illusion French
Okay, the optical illusion French is a true test of brush control and understanding light and shadow. It’s definitely an advanced technique, but it’s so cool. The goal is to create the illusion of a raised French tip using only clever color placement.
You’ll need a good liner brush (I like one with 7mm to 9mm bristles), a sheer nude base, and a darker color for the shadow. After your sheer base is cured, paint your classic white French tip and cure that. Now for the magic. Dip your liner brush into a dark, sheer color. A sheer black or dark brown works best.
Lesser-known trick: You can make your own perfect shadow color by mixing a tiny drop of opaque black gel with a bit of clear top coat. This gives you total control over the transparency.
Carefully paint a thin shadow line just under the smile line of your white tip. You want it to be sharpest right against the white and fade out a little as it goes down. To really sell the 3D effect, you can add a super-fine, bright white highlight at the very top edge of the French tip. Finish with a top coat, and you’ve got a seriously impressive manicure.
Let’s Talk Safety and Smart Removal
With all of these fun techniques, being safe is key. Gel allergies are on the rise, and they’re almost always caused by repeated skin contact with uncured gel. So work neatly, and if you get any gel on your skin, wipe it off immediately with alcohol before you cure.
And please, please, please never pick or peel off your gel manicure! It rips off the top layers of your natural nail and causes serious damage. The only safe way to remove gel is to soak it off.
Here’s what you’ll need for a safe removal at home:
- 100% Pure Acetone (about $5 at any drugstore or Target)
- A 180-grit nail file (around $2-$3)
- Cotton balls and aluminum foil
First, gently file the shine off the top coat to break the seal. This lets the acetone do its job. Then, soak a piece of cotton in acetone, place it on the nail, and wrap your fingertip in foil. Let it sit for about 10-15 minutes. The gel should be soft and practically falling off. If it’s not, re-wrap it and wait another 5 minutes. Never force or scrape it! Your nails will thank you.
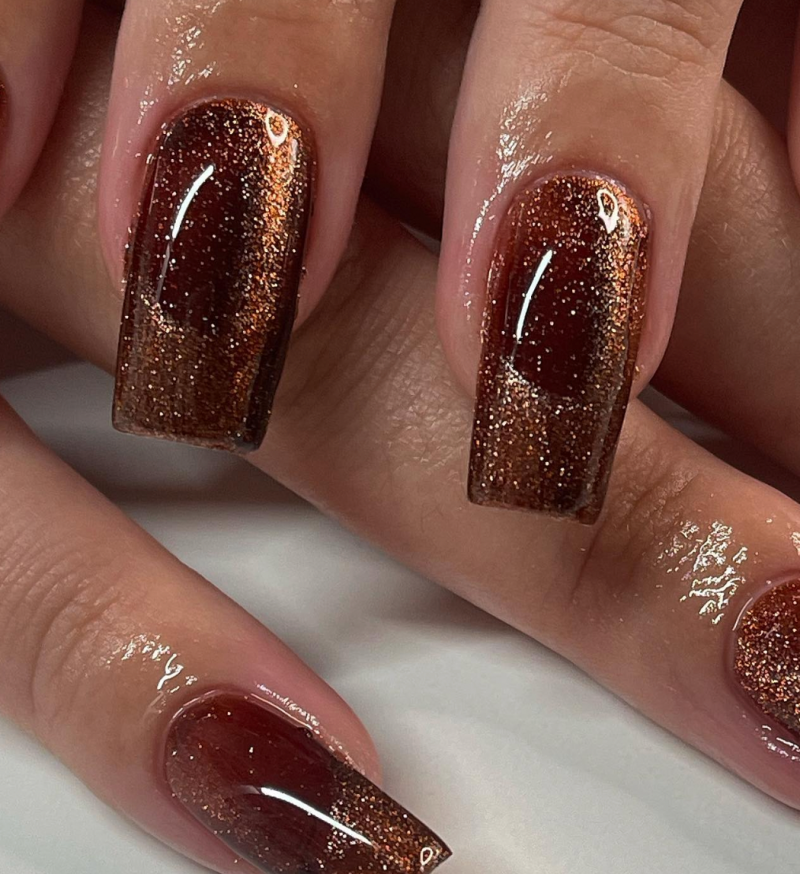
Inspirational Gallery with Photos
Beyond the polish, a professional-level autumn manicure relies on the right support system. To truly elevate your home setup, ensure you have these three essentials on hand:
- A glass or crystal nail file for sealing the nail edge to prevent peeling.
- A liquid latex barrier, like Pueen’s Latex Tape, for creating flawless, clean edges around your nail during intricate art.
- A dense, fluffy brush to whisk away dust after filing and buffing without leaving behind oils or lint.
The Understated Power of Matte: While glossy finishes are timeless, a matte top coat is autumn’s secret weapon. It instantly gives deep colors like burgundy, forest green, and navy a velvety, cashmere-like texture. This finish diffuses light, making the color appear richer and deeper, perfectly echoing the soft textures of fall fashion. A single coat of a product like OPI’s Matte Top Coat over your favorite shade can completely transform the mood of your manicure from bright to sophisticated.
According to dermatological studies, the nail plate can absorb oils but not water-based lotions effectively, making oil-based hydration essential for flexibility and strength.
This is why the article’s emphasis on cuticle oil is so critical. While hand cream feels nice, it’s the dedicated oil that truly nourishes the keratin layers. For an extra boost, apply a product rich in jojoba oil, like the industry-favorite CND SolarOil, right before bed. This gives it hours to penetrate deeply, combating the brittleness caused by dry indoor heating.
Looking for a design that feels as cozy as it looks?
Try the
Gel Polish: Offers unmatched durability, often lasting two to three weeks without chipping. Its hard, non-porous finish is ideal for protecting brittle nails during colder months.
High-Quality Lacquer: Provides flexibility for those who love changing colors frequently. Brands like Zoya or Essie offer formulas rich in pigments that are less prone to chipping than cheaper alternatives, especially when paired with a quality base and top coat.
Ultimately, the best choice depends on your lifestyle and how often you crave a color change.
- Perfectly clean lines for geometric patterns.
- A flawless, crisp smile line on a modern French manicure.
- Intricate, multi-color designs without any smudging or bleeding.
The secret? Nail art striping tape. This ultra-thin adhesive tape is the key to sectioning off parts of the nail, allowing you to paint with precision. Apply it after your base color is completely dry, paint your second color over it, and remove the tape while the polish is still wet for the sharpest edge.
Tortoiseshell isn’t just for glasses. The pattern, with its warm blend of amber, brown, and black, is a sophisticated and organic-looking choice for autumn nails.
To capture the deep, moody vibe of autumn, experiment with
Why do my deep fall polishes—like navy and oxblood—leave a yellow or blue stain on my natural nails?
This happens due to a chemical reaction between the polish pigments and the nail plate. It’s completely harmless but can be unsightly. The non-negotiable solution is to always use a high-quality base coat. Look for one specifically designed to be a ‘stain-blocker,’ like Orly’s Bonder Base Coat. It creates an impermeable barrier that keeps your natural nails pristine, no matter how dark you go.


