Thinking About Lip Fillers? Here’s What You Actually Need to Know
I’ve been in the world of cosmetic injectables for a long time, and I’ve seen plenty of trends come and go. But lip augmentation? That one’s here to stay. The good news is that the tools and techniques have gotten so much better, moving away from unpredictable outcomes to something that can look incredibly natural.
In this article
- So, What Exactly Is This Hyaluronic Acid Stuff?
- The Consultation: The Most Important 30 Minutes of the Process
- The Technique: It’s More Art Than Science
- The Procedure: What to Expect on the Day
- The First Two Weeks: Healing and Settling
- The Serious Stuff: Risks We Have to Talk About
- Longevity, Cost, and Maintenance
- Inspirational Gallery
Honestly, the game changed completely with the introduction of hyaluronic acid (HA) fillers. When they’re in the right hands, the results can be beautiful. My goal here isn’t to sell you on anything. It’s to give you the real, unfiltered information I’d share with a friend or a patient in my own office. This is a medical treatment, not just a quick beauty fix, and knowing what you’re getting into is the most important step. A great result starts with great information.
So, What Exactly Is This Hyaluronic Acid Stuff?
Before we even talk about lips, let’s talk about the material itself. Hyaluronic acid is a type of sugar molecule that your body already produces naturally. It’s found all over—in your skin, your joints, your eyes. Its superpower is attracting and holding onto water, which is what gives your skin that plump, hydrated look. The HA your body makes is pretty temporary, though; it gets broken down and recycled in just a day or two.

The HA used in dermal fillers is specially engineered to stick around a lot longer. Through a process called cross-linking, the individual molecules are linked together to form a durable gel. This makes it last for months instead of days.
Here’s a bit of insider info: injectors talk a lot about a filler’s “G-Prime.” Think of it like mattress firmness. It’s a technical measure of how firm or soft a gel is and how well it can hold its shape. Getting this right is critical for a natural look.
- Firm, High G-Prime Fillers: These are the heavy lifters. They’re designed for building structure, like sculpting cheekbones or defining a jawline. Using one of these in the lips would feel stiff and look totally unnatural. No thank you.
- Soft, Low G-Prime Fillers: This is the good stuff for lips. These fillers are soft, flexible, and designed to move with you when you talk, smile, and eat. They integrate smoothly into the delicate lip tissue. For instance, a product like Restylane Kysse is known for its incredible flexibility and ability to add definition, while something like Juvéderm Volbella is amazing for soft, subtle hydration and smoothing out those tiny lines around the mouth. They just feel more natural.
And that’s why you can’t have a one-size-fits-all approach. A great injector has a whole toolbox of different fillers and knows exactly which one to use for your specific lips and goals.

The Consultation: The Most Important 30 Minutes of the Process
I can’t say this enough: the single biggest factor in getting a safe, beautiful result is who you choose to do the injecting. With the popularity of fillers, you see injections being offered everywhere, from salons to people’s basements. Heads up! This is incredibly risky.
Who Should You Trust With Your Face?
This is a medical procedure. Your injector needs a deep, working knowledge of facial anatomy—muscles, skin layers, and especially the complex network of blood vessels. In the U.S., your best bet is to find one of these professionals:
- Board-Certified Dermatologists
- Board-Certified Plastic Surgeons
In many top-tier practices, you’ll also find highly skilled Nurse Practitioners (NPs) or Physician Assistants (PAs) performing injections. That’s perfectly fine, as long as they are working directly under the supervision of a board-certified physician who is on-site.
Quick tip: Don’t just trust an Instagram bio. You can verify a doctor’s credentials by searching for them on the official websites for the American Board of Dermatology or the American Society of Plastic Surgeons. It takes two minutes and gives you total peace of mind.
What a Good Consultation Looks and Feels Like
A real consultation is a conversation, not a sales pitch. It should be thorough and never feel rushed. Here’s what you should be able to check off your list:
- They ask about your health. A full medical history is a non-negotiable safety check.
- They study your whole face. A pro will watch you talk and smile to see how your lips move and how they balance with your nose, chin, and other features.
- They listen to your goals. They should then give you honest feedback, even if it means telling you that what you want isn’t realistic or won’t look good. That honesty is a very good sign.
- They have a clear plan. They should tell you exactly which product they recommend and why, how much they plan to use (usually 1mL or less to start), and what you can expect.
- They talk about risks. They MUST cover everything from common bruising to the rare but serious stuff, and they should be able to tell you their emergency plan on the spot.
- They show you their own work. Ask to see before-and-after photos of their actual patients. Be wary if they only show you stock photos from the filler company.
Red Flags to Watch Out For
If you see any of these, please just walk away. It’s not worth it.
- High-pressure sales tactics or feeling rushed.
- Bargain-basement prices. A syringe of quality filler from a top-tier provider in a major city will typically run between $700 and $1,200. If you see a deal for $300 on a discount site, that’s a massive red flag. You’re paying for skill and safety, not just the product.
- A non-medical setting like a spa without an on-site medical director, a salon, or someone’s home.
- A one-size-fits-all approach, like pushing one trendy technique (like the “Russian Lip”) on every single person.
The Technique: It’s More Art Than Science
Injecting filler is where medical anatomy meets artistry. The injector has two main tools to get the job done: the traditional needle and a nifty little tool called a microcannula.
A needle is super precise, which is great for detailed work like defining the lip border (the vermilion border) or shaping the Cupid’s bow. The downside? It’s sharp, so it’s more likely to hit a blood vessel, which means more bruising. A microcannula, on the other hand, has a blunt, rounded tip. It’s inserted through a single little poke and then glides through the tissue, pushing vessels and nerves aside instead of piercing them. This means way less bruising, swelling, and risk. Many pros, myself included, often use a combination of both to get the best of both worlds.
The “Start Low and Go Slow” Rule
One of the biggest mistakes is trying to get your dream lips in a single appointment. The gold standard is to build volume gradually. For a first-timer, I almost always suggest starting with just half a syringe (0.5 mL) or, at most, one full syringe (1.0 mL).
I had a patient recently who was so scared of looking “fake” or “done.” We started with just 0.5 mL, focusing on hydration and a tiny bit of definition. She came back two weeks later absolutely glowing. It was exactly the subtle confidence boost she wanted. You can always add more at your follow-up appointment in 2-4 weeks. It’s much harder to take it away!
The Procedure: What to Expect on the Day
Knowing what’s coming can really help with the nerves. The whole thing usually takes about 30-45 minutes.
First, you’ll need to do a little prep work. To minimize bruising, it’s super important to avoid blood thinners for about a week before your appointment. This means no aspirin, ibuprofen, fish oil, Vitamin E, or alcohol. Good to know: Tylenol (acetaminophen) is generally fine if you need something for pain.

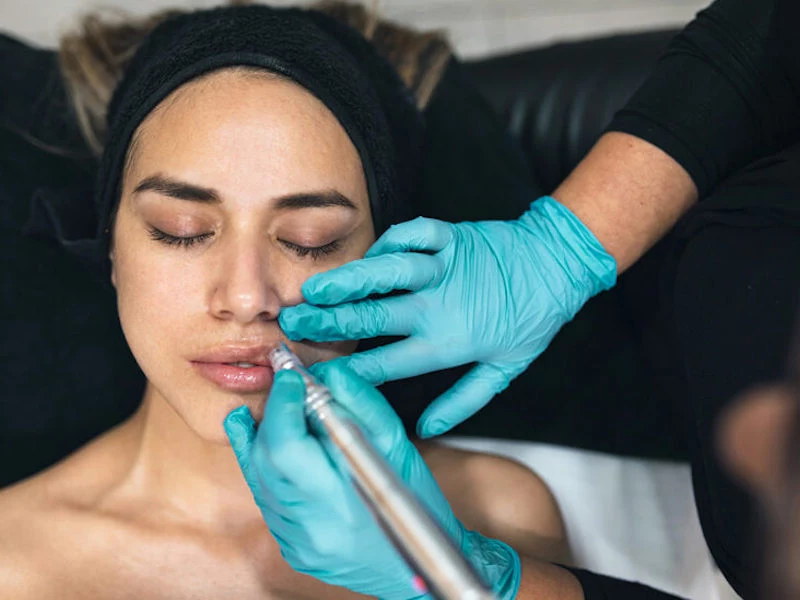
On the day, your provider will cleanse your lips and apply a strong topical numbing cream. Let that sit for a good 15-20 minutes—it makes a huge difference! Then, they’ll do the injections. You’ll feel some little pinches and pressure. Most modern fillers also have lidocaine mixed in, so the area gets even number as they go. We’ll give you a cool compress right after to help with swelling. You’ll see a change right away, but remember, what you see is a mix of filler and swelling. The final result comes later!
The First Two Weeks: Healing and Settling
Okay, let’s get real about recovery. Your lips are going to be swollen. The first 48 hours are when the swelling is at its peak, and they might feel weirdly firm or even a little lumpy. This is totally normal!
By day 3 or 4, the swelling will start to go down, and any bruising will become more obvious. After a full week, you’re getting much closer to the final look. By the end of week two, the filler should be fully settled and integrated. Your lips should feel soft, and you shouldn’t be able to feel the filler at all. It just feels like… your lips. And yes, kissing should feel completely normal once everything has settled.

Your Post-Care To-Do List:
- Ice, ice, baby. Apply a cold compress gently for 10-15 minutes at a time during the first 24-48 hours. It’s your best friend for controlling swelling.
- Sleep propped up on an extra pillow the first night.
- For 24 hours, avoid: Strenuous exercise, super hot saunas, and alcohol. These all make swelling worse.
- Hands off! Please, don’t aggressively massage your lips. You might feel a small lump, but it’s usually just swelling. Massaging can move the filler and ruin the shape. If you feel a distinct lump after a few days, call your provider. They’ll tell you what to do.
- Skip the straw. For the first day or two, avoid drinking through a straw, as the pursing motion can be uncomfortable and might affect the filler placement.
The Serious Stuff: Risks We Have to Talk About
HA fillers are very safe in the right hands, but no procedure is risk-free. Common issues like bruising, swelling, and temporary asymmetry are expected and usually resolve on their own. But there is one very rare but serious risk that everyone needs to know about: vascular occlusion.
This is when filler is accidentally injected into an artery, blocking blood flow. It’s a true medical emergency. The signs are immediate and distinct: sudden, intense pain and the skin turning pale or developing a blotchy, purple pattern. This is precisely why you pay for an expert. A qualified medical professional will have an enzyme called hyaluronidase on hand, which instantly dissolves the filler. They are trained to recognize the signs and act immediately to prevent any permanent damage. An injector working out of their home is not prepared for this.
Longevity, Cost, and Maintenance
The results aren’t permanent, which is actually a good thing! Your face changes over time, and this allows you to adjust your look as you age. Generally, softer fillers for hydration last about 6-9 months, while slightly more robust lip fillers for volume can last 9-12 months, or even longer. Many people find that after the first treatment, their results last longer with each touch-up.

And while it’s reassuring to know filler can be dissolved, it’s not a simple “undo” button. The process can cause significant swelling and bruising itself. We reserve it for emergencies or for fixing genuinely bad work from an unqualified injector.
So, when you’re making your decision, remember that lip filler is an investment in yourself. Do your homework, choose a board-certified provider with a great reputation, and focus on a natural, beautiful result that makes you feel amazing. Your safety and your confidence are worth it.
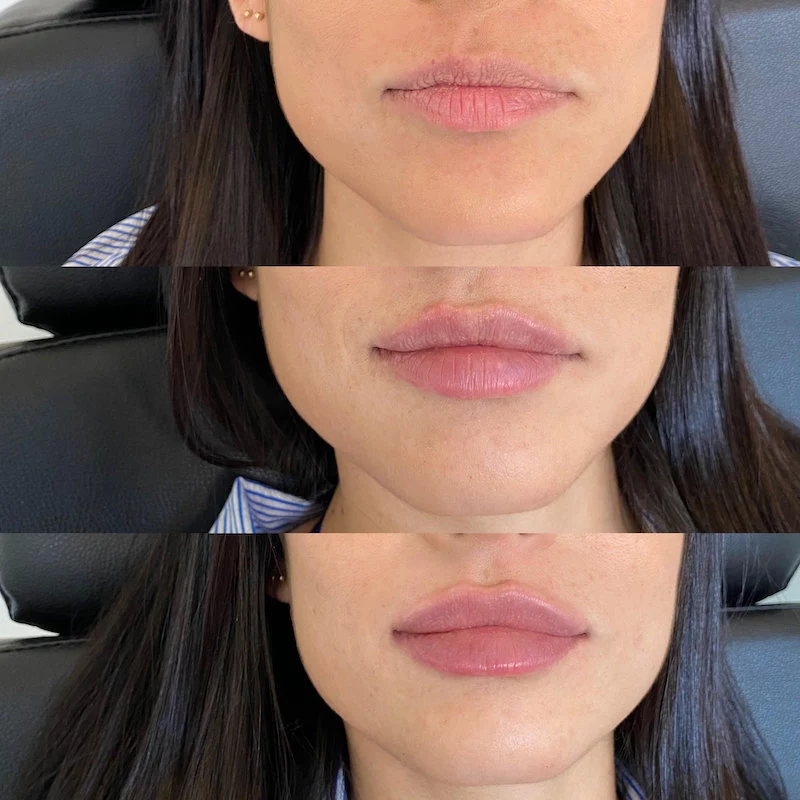
Inspirational Gallery


Will it hurt? That’s the number one question.
Honestly, it’s more discomfort than pain. Most clinics apply a potent topical numbing cream about 20-30 minutes before the procedure, which significantly dulls the sensation. Plus, many modern fillers, like those in the Juvéderm family, come premixed with lidocaine, a local anesthetic. You’ll feel a few initial pricks and a strange pressure sensation as the filler is injected, but it’s typically very manageable and over quickly.

A 2020 study by the American Society of Plastic Surgeons found that soft tissue fillers were the second most popular minimally invasive procedure, with over 3.4 million treatments performed.
This surge in popularity isn’t just about volume. The trend has shifted dramatically towards ‘structural hydration’—using very soft, flexible fillers not to create size, but to erase fine lines, boost moisture from within, and restore the crisp, defined border you had in your youth. It’s about rejuvenation, not just augmentation.
The Golden Rule: Don’t go for a bargain. A significantly low price can be a red flag for an inexperienced injector, a diluted product, or even a counterfeit filler. You are paying for the injector’s skill, experience, and artistic eye as much as you are for the product itself. Remember, this is your face—invest in a qualified medical professional with a portfolio of results you admire.

Preparing for your appointment starts 48 hours before you even walk in the door. For the best results and minimal bruising, you should:
- Avoid blood-thinning medications and supplements like aspirin, ibuprofen, vitamin E, and fish oil.
- Skip alcoholic beverages for at least 24 hours beforehand, as alcohol can increase your chances of bruising.
- Arrive with a clean, makeup-free face to reduce the risk of infection.

Restylane Kysse: Known for its XpresHAn Technology™, this filler is designed for dynamic expression. It integrates into the lip tissue, allowing for natural movement when you talk and smile. It’s excellent for defining the vermillion border (the edge of your lips) and adding soft, flexible volume.
Juvéderm Volbella: This one is all about subtle enhancement. It’s a much softer, thinner gel, perfect for smoothing vertical lip lines (smoker’s lines) and providing a ‘lip gloss’ effect of hydration and slight plumpness without adding significant size.
Your injector will help you choose based on whether your goal is structure and definition (Kysse) or smoothness and hydration (Volbella).

- Less swelling and a more uniform look.
- Reduced risk of lumps or nodules forming.
The secret? A gentle post-injection massage. Some injectors will do this in-office, but they might also advise you on how to gently massage your lips at home for a few days. This helps the hyaluronic acid gel integrate smoothly with your natural tissue, ensuring a soft, seamless result. Always follow your provider’s specific aftercare instructions!
Heard of a ‘Lip Flip’? It’s not a filler. This technique uses a tiny amount of a neuromodulator, like Botox or Dysport, injected into the muscle just above the upper lip. It relaxes the muscle, causing the lip to gently roll outward, creating the illusion of more volume and a more defined ‘pout’ without adding any substance. It’s a subtle, shorter-lasting alternative for those not ready for fillers.


