The Insider’s Guide to Carving Pumpkins That Don’t Immediately Rot
I’ve carved more pumpkins than I can count. Seriously. From simple, goofy faces for the kids to super detailed displays for local shops, I’ve seen it all. For me, that first whiff of a freshly cut pumpkin is what really kicks off the autumn season. And through all that carving, I’ve learned a secret: the difference between a sad, droopy jack-o’-lantern and a crisp, glowing masterpiece isn’t about being a great artist. Not at all.
In this article
It’s about treating the pumpkin like a proper craft project. It’s about the prep work and the tools. So many people grab a pumpkin and one of those cheap carving kits from the grocery store aisle, and then they wonder why their tools snap and the whole thing turns to a pile of mush in three days. It’s a recipe for frustration.
So, let’s go through the methods the pros use. This is how you get a clean, impressive result that actually lasts long enough for everyone to enjoy it. We’ll cover everything from picking the perfect pumpkin to the simple science of keeping it fresh.
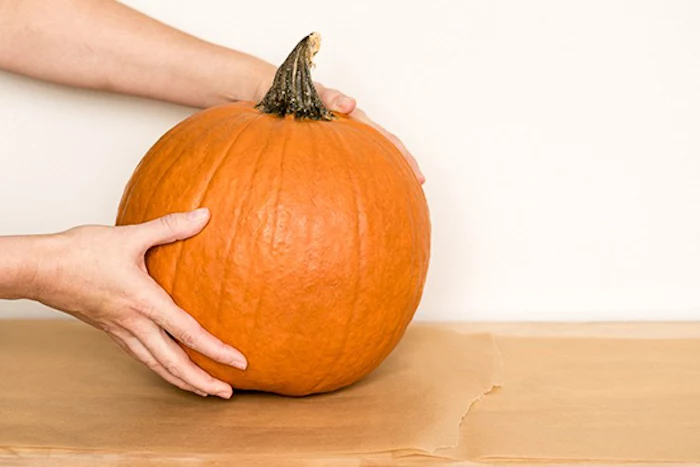
The Foundation: Choosing Your Canvas
You can’t create a masterpiece on a bad canvas, right? Rushing this first step is probably the most common mistake I see. People just grab the biggest, roundest one and call it a day. But honestly, I spend more time picking my pumpkins than I do making the first cuts.
Here’s what you should be looking for:
- A Solid Stem: Think of the stem as the pumpkin’s life-support system. You want one that’s thick, firm, and still has a bit of green to it. If the stem is dry, brittle, or missing entirely, that pumpkin is probably old and already starting to go bad from the inside.
- Consistent Color: A deep, even orange is a great sign. Big green patches mean it’s not fully ripe, so the flesh will be tough and a pain to carve. Weird pale or yellowish spots could be a sign of sun-scald or disease.
- Feel for Firmness: Give it a good press with your thumb all over. It should feel like a rock. Any soft spots, even tiny ones, are red flags for rot that will spread like wildfire once you cut into it.
- The Sound Test: Give it a solid thump with your palm. You’re listening for a deep, hollow sound. That tells you the inside has a good-sized cavity. If it makes a dull thud, the walls might be way too thick or the inside is just a pulpy mess.
- A Flat Bottom: This is a simple safety check. A wobbly pumpkin is a nightmare when you’re pushing on it with sharp tools. If you find the perfect pumpkin but it’s a bit tippy, no worries—you can just shave the bottom a bit with a knife to create a flat, stable base before you start.
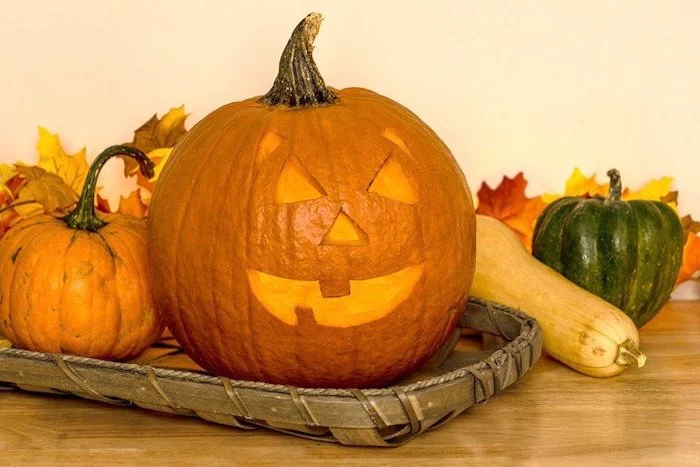
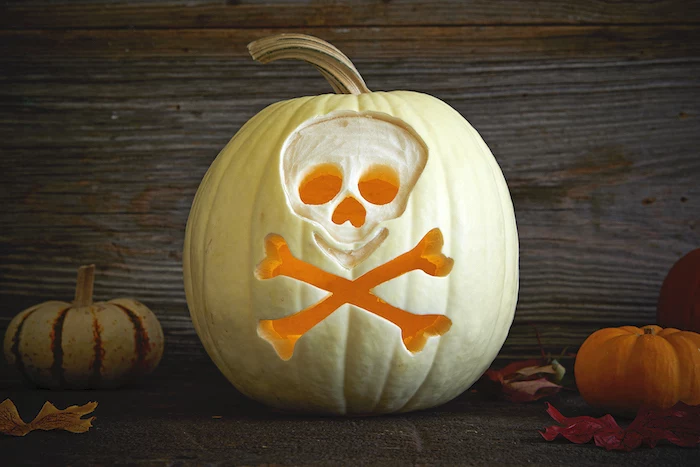
By the way, not all pumpkins are the same. The classic orange ones you see in giant bins are usually bred for their traditional shape and size, making them perfect for beginners. But if you see other kinds, don’t be shy! Smaller sugar pumpkins have denser, smoother flesh that’s amazing for carving fine details. Some of those pale “ghost” pumpkins have thick walls that are incredible for 3D sculpting effects.
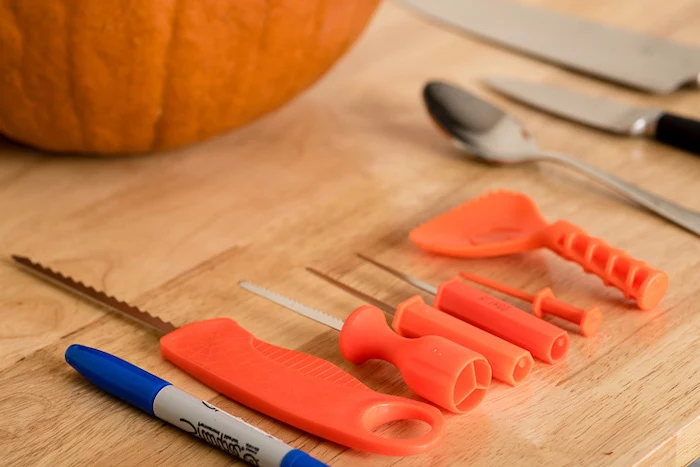
The Right Tools for the Job (and Your Budget)
Okay, let’s be real. Those little orange-handled carving kits sold in plastic bags are just plain awful. The saws are flimsy, the scoops bend, and the blades are so dull they’re actually more dangerous than a sharp tool. Why? Because a dull tool makes you use brute force, and that’s when accidents happen.
Investing just a little bit in proper tools will completely change your carving game. You don’t need to spend a fortune. Here’s a breakdown of what works, from a bare-bones upgrade to a full-on enthusiast kit.
My Recommended ‘Beginner Pro’ Shopping List:
- The Scoop: An ice cream scoop or a big, sturdy metal spoon. A serrated grapefruit spoon is also a fantastic secret weapon for scraping the walls clean. The key is finding something that won’t bend under pressure.
- The Saw: This is the single most important upgrade. Get a keyhole saw or a drywall saw from a hardware store like Home Depot. It’ll cost you under $15 and will last you for years. The control you get is night and day compared to the flimsy kit saws.
- The Detailer: For fine lines and advanced techniques, clay sculpting loop tools are the secret. You can get a basic set of 6-8 tools from an art supply store or online for about $10-$15. They let you scrape the skin off without cutting all the way through.
- The Poker: A simple awl or even a sturdy nail from your toolbox is perfect for transferring patterns. It’s way cleaner than using a marker.
If you only have $15 to spend, buy the drywall saw. It will make the biggest difference. If you have another $10, get the clay loop tools. Those two items alone will elevate your carving from a simple cutout to a piece of art.

A quick heads-up on safety: Always cut away from your body and the hand that’s holding the pumpkin. A cut-resistant kitchen glove on your non-dominant hand isn’t a bad idea, either. If a blade gets stuck, don’t just yank it. Wiggle it out gently. Patience with a sharp tool is always safer than force with a dull one.
Preparation is Everything: The Gutting Process
A properly prepped pumpkin is easier to carve and lasts twice as long. This part isn’t pretty, but it’s the most critical step. Plan to spend a solid 30-45 minutes on this stage alone—it’s worth it.
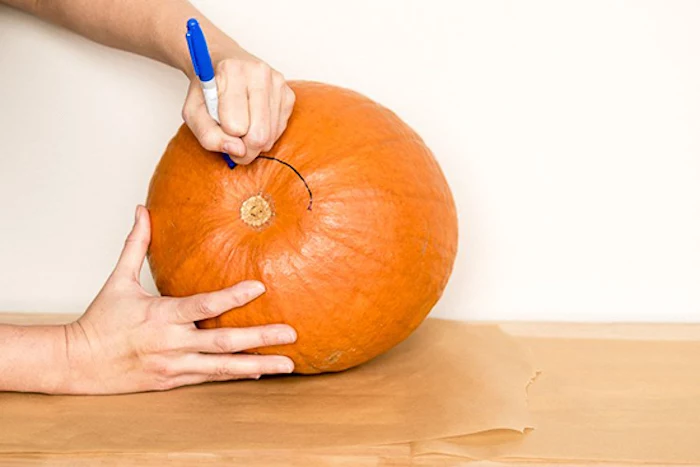
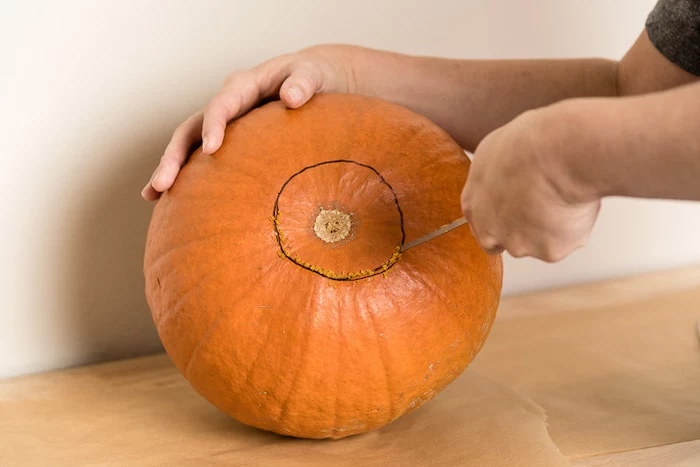
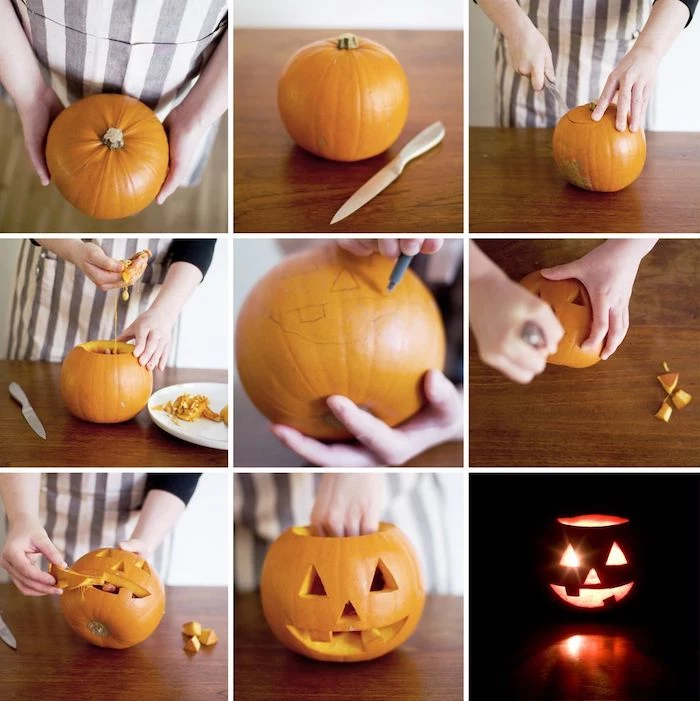
First, where to cut the opening? The traditional way is to cut a lid around the stem, but I stopped doing that years ago. The lid shrinks after a day or two and inevitably falls inside. The better way? Cut your opening on the bottom. A big, circular hole in the base lets you just sit the pumpkin down over your light source, and any moisture from condensation will weep out instead of pooling inside and causing rot.
Now for the scooping. Did you know a pumpkin is technically a fruit? And all that stringy, slimy stuff inside is basically its placenta. This material is loaded with moisture and is the first thing that grows mold. So get it ALL out. Use your sturdy scoop and scrape the inner walls until they feel smooth. Any leftover strings are just fuel for mold.
Here’s a step most people skip: thinning the carving wall. For a brilliant glow, you want the wall you’re carving to be about one inch thick. Use your big spoon or a clay loop tool to scrape the inside down to a uniform thickness. You can check your progress by poking a toothpick through a few spots. This not only makes the carving itself feel like cutting through butter, but it’s essential for getting a bright, even glow.
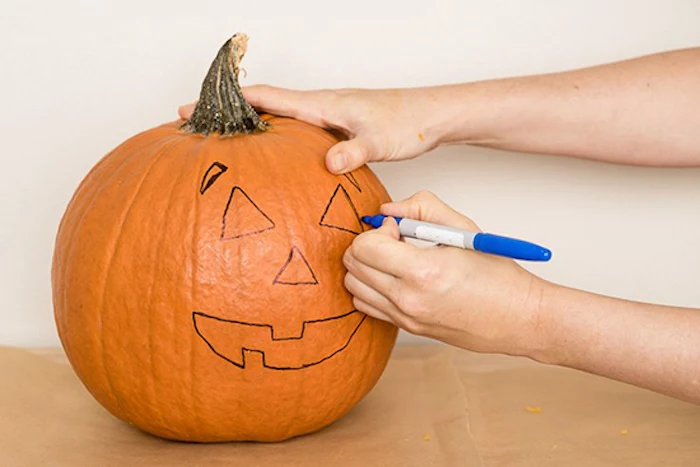
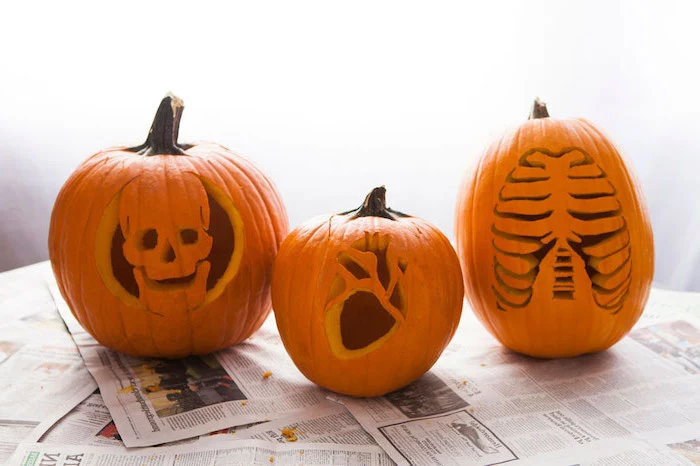
Bringing Your Design to Life: From Transfer to Cut
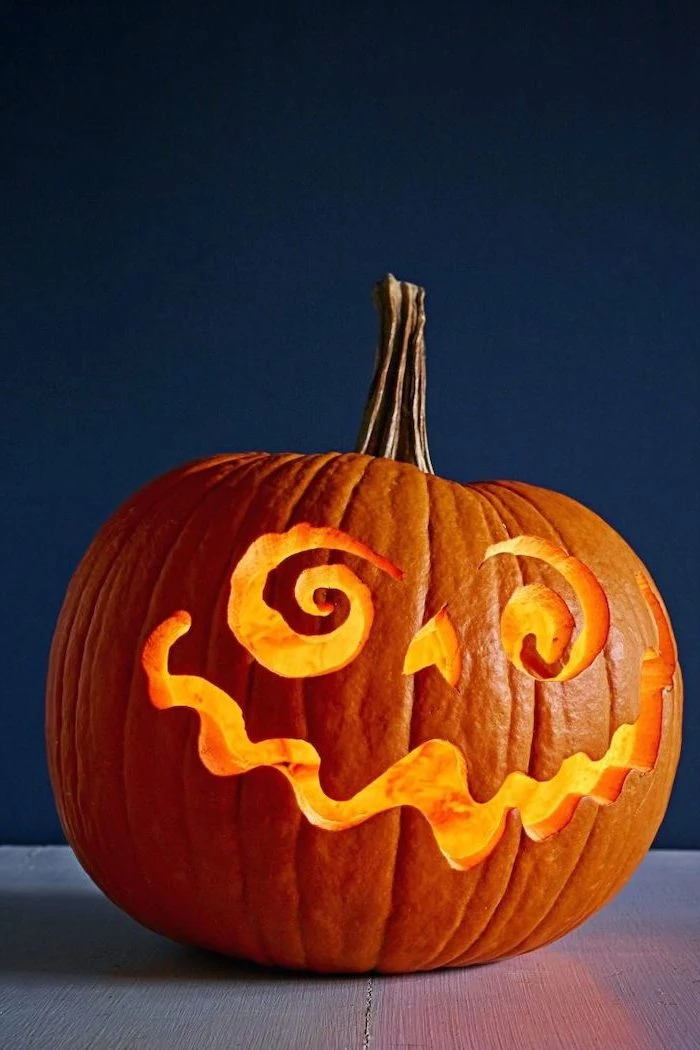
With a prepped pumpkin, carving is the fun part. If you’re using a pattern, tape it on and use your poker tool to punch holes along the lines every eighth of an inch or so. Then, connect the dots with your saw.
A lesser-known trick: If you’re having trouble seeing the little holes, just lightly dust the surface with flour or cornstarch and wipe off the excess. The powder will fill the holes and make your pattern pop.
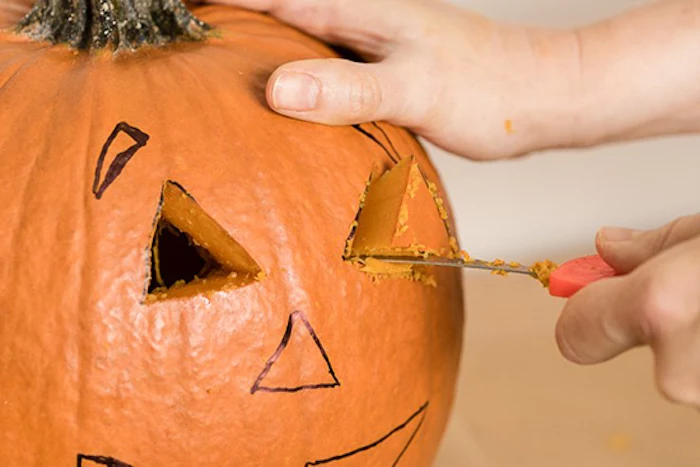
When you start cutting, let the saw do the work. Use gentle, steady strokes. Always start with the smallest, most detailed pieces in the center of your design. This keeps the pumpkin’s structure strong. If you cut the big holes out first, the surface can flex and break while you’re trying to do the delicate work.
Oh, and what if a small piece accidentally breaks off? Don’t panic! You can usually pin it back in place with a piece of a toothpick. It’s a classic fix that works like a charm.
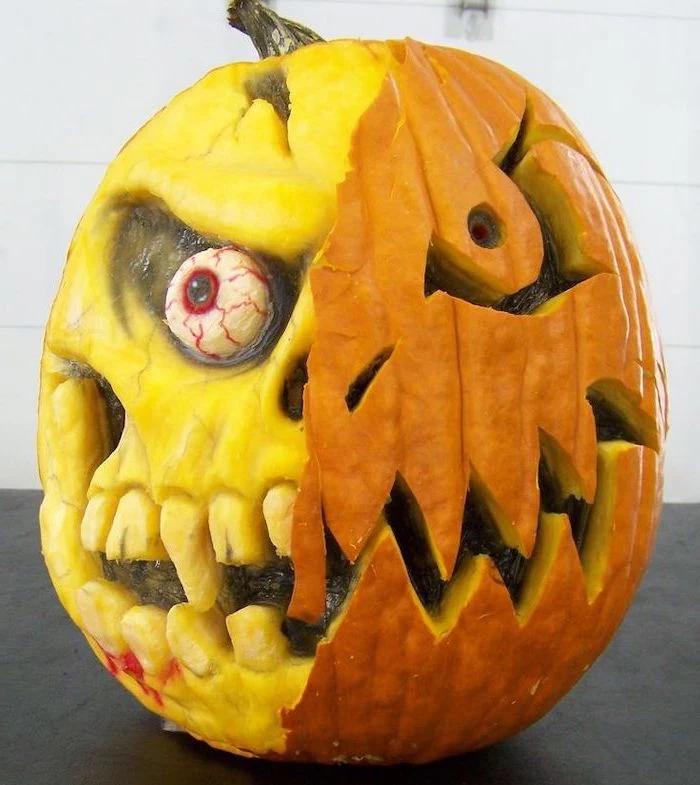
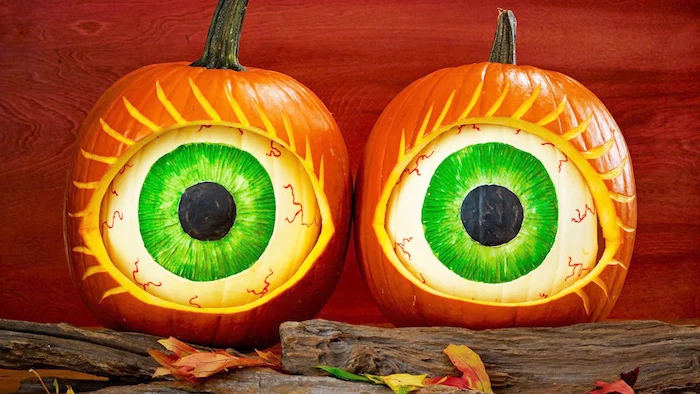
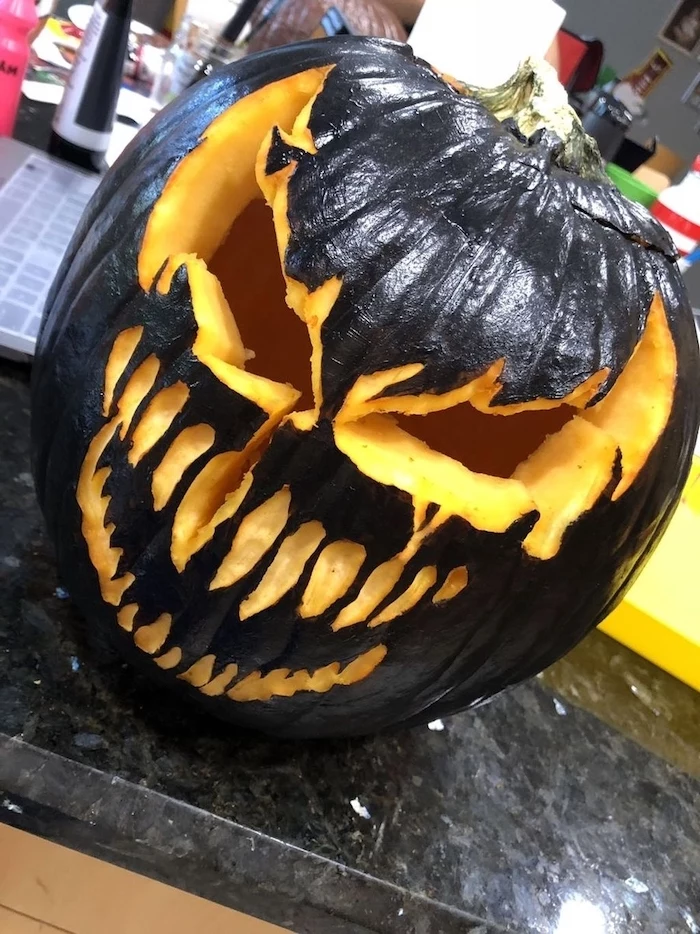
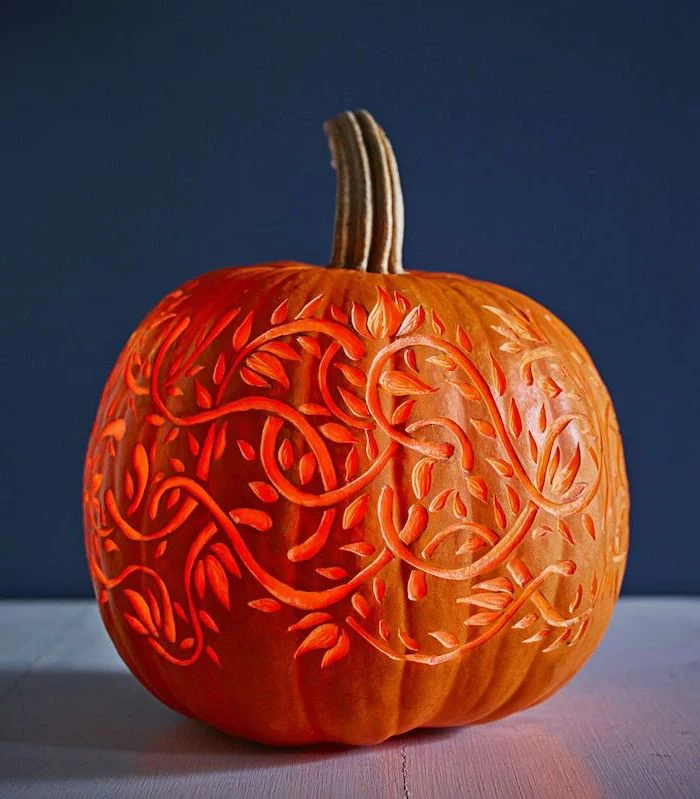
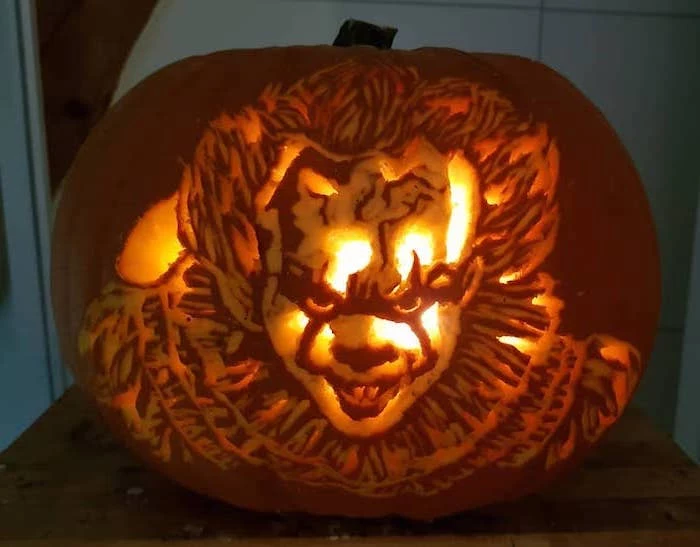
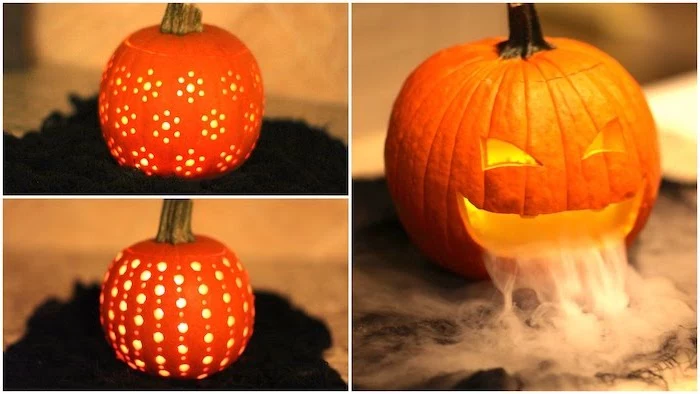
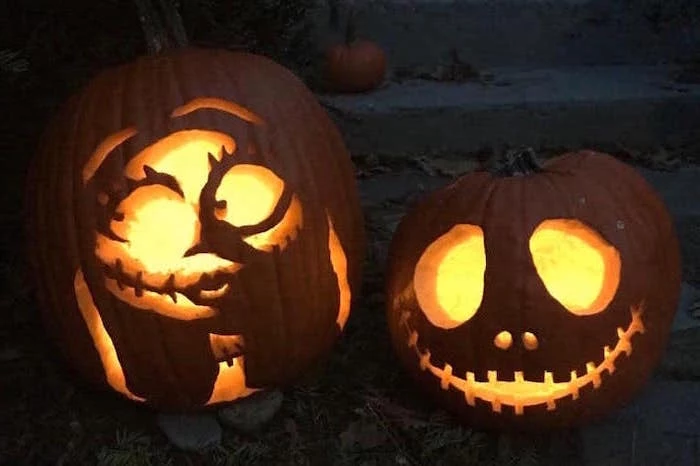
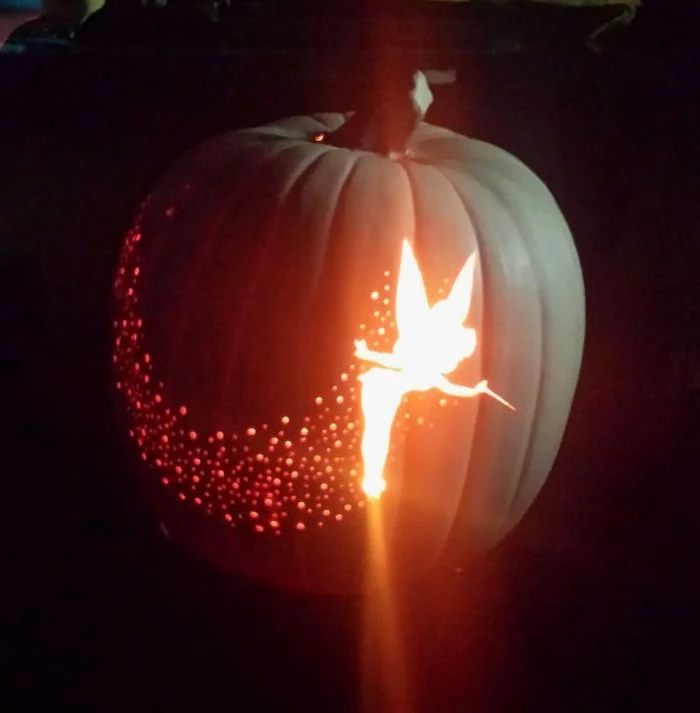
Ready to try etching? This is how you get those incredible shaded designs. Instead of cutting all the way through, you use clay loop tools to scrape off the orange skin, revealing the lighter flesh underneath. The deeper you scrape, the brighter that area will glow. For your first try, go for a simple design like a moon. You can practice making deeper scrapes for bright craters and shallower scrapes for the dim surface. It takes patience, but the result is stunning.
Preservation: The Secret to a Long-Lasting Jack-o’-Lantern
You’ve done all this work; the last thing you want is a shriveled, moldy mess on your porch. The key is to kill microbes and slow down dehydration. Forget the myths about hairspray—they don’t work.
Here’s the professional method:
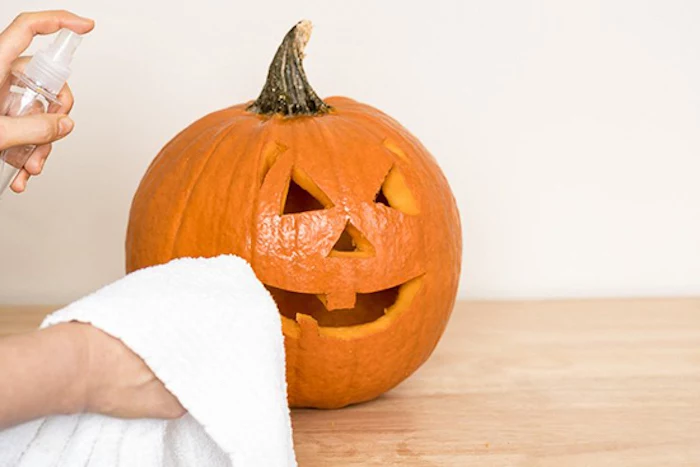
- The Bleach Bath: First, you need to sterilize it. Mix one tablespoon of household bleach in a gallon of cold water. Wear gloves, and in a well-ventilated area, fully submerge your pumpkin for about 2-5 minutes. If it’s too big, use a spray bottle to douse every single surface, inside and out.
- Dry It Thoroughly: Let it air dry completely. Pat it down with paper towels or even set it in front of a fan for an hour. Mold needs moisture to grow, so this step is crucial.
- Seal the Cuts: To stop it from drying out, you need to seal the raw edges. Apply a thin layer of petroleum jelly to every cut surface. This locks the moisture in.
Quick Win: No time for a full bleach bath? Just sealing the cut edges with petroleum jelly will still add days to your pumpkin’s life!
For daily care, a light spritz with your bleach-water solution can help. And when you’re not showing it off, store it in a cool place like a garage or even the fridge. These steps can easily make your carving last for a week or even two.
By the way, when you’re done with the bleach water, just dilute it with more tap water and pour it down a sink or toilet drain. It’s safe to dispose of that way.
The Final Glow-Up
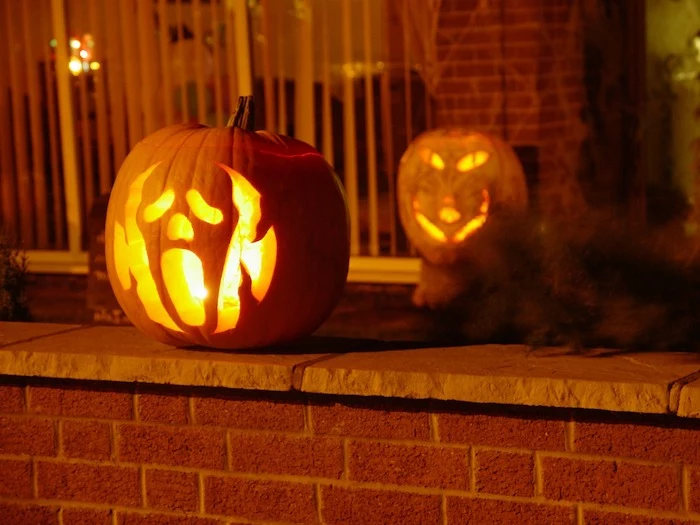
How you light your pumpkin is the final touch. While a real candle is traditional, I honestly advise against it. It’s a fire hazard, and the heat literally cooks your pumpkin from the inside out, causing it to collapse way faster. If you must use a flame, cut a small chimney hole in the back to vent the heat.
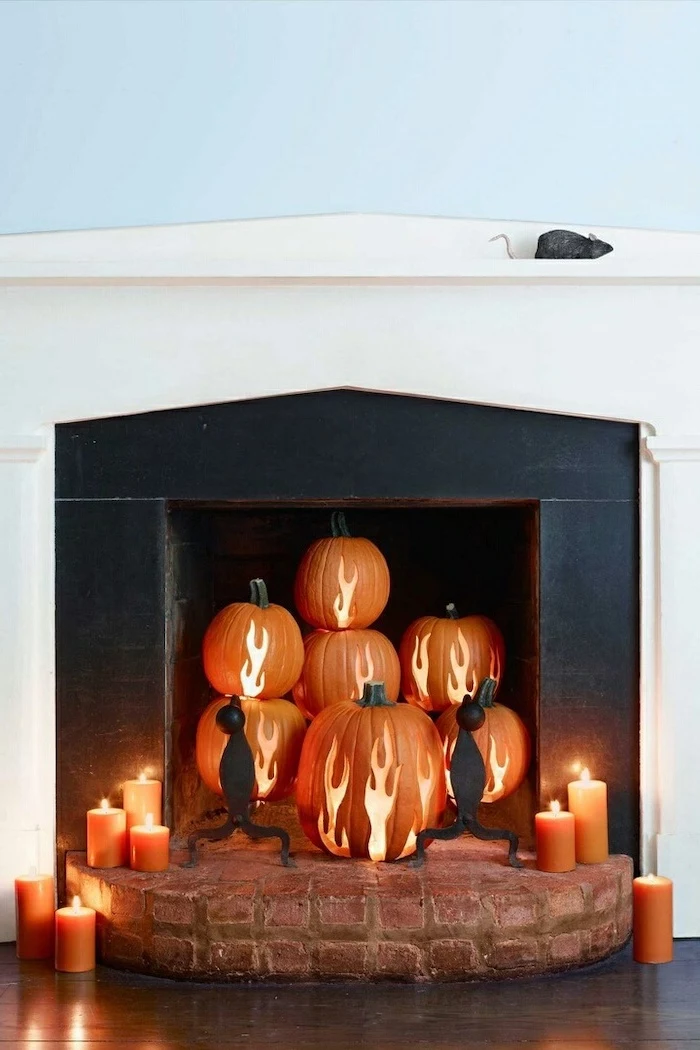
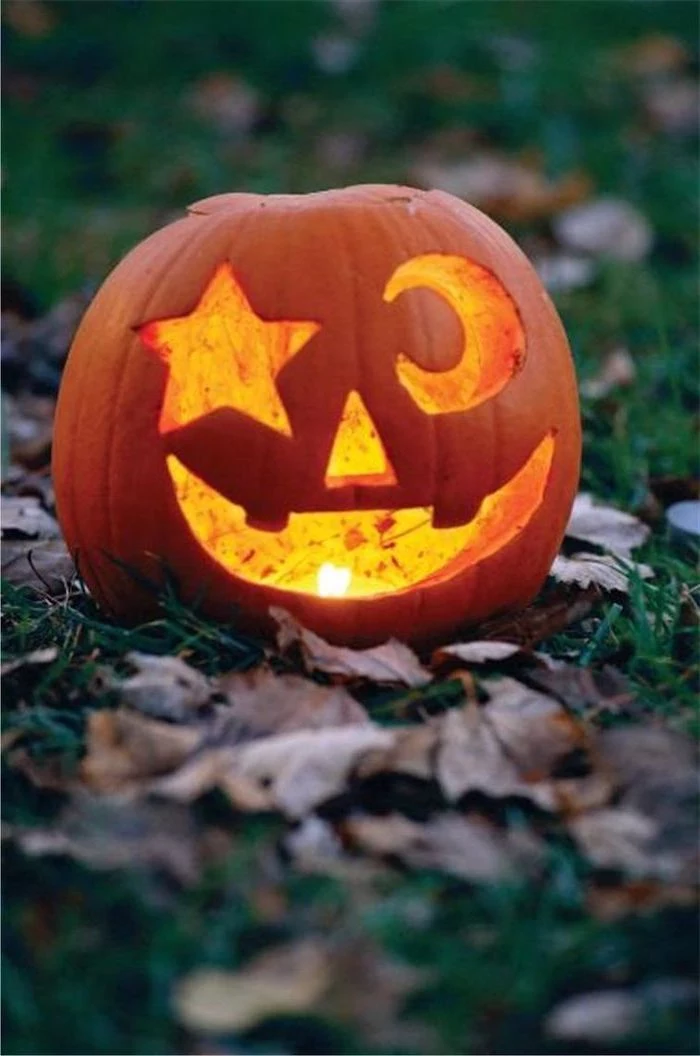
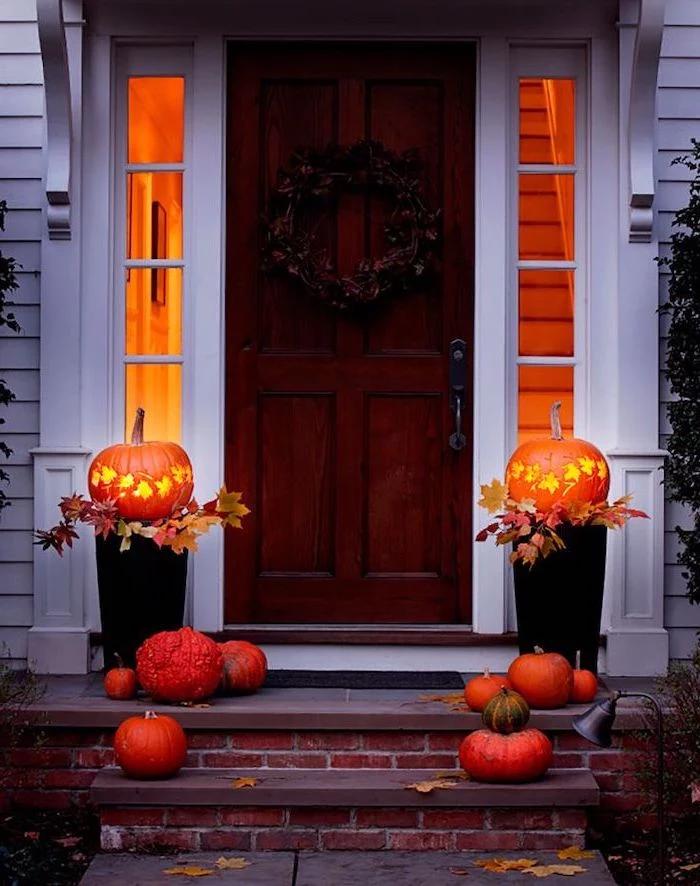
But the best choice, hands down, is battery-operated LED lights. They’re bright, they make flicker-effect ones that look just like a real flame, and they produce zero heat. They are safer and will make your hard work last longer. It’s a no-brainer.
When you put your pumpkin out, think about the background. A jack-o’-lantern against a dark wall always looks more dramatic. Have fun with it! Pumpkin carving is a fantastic way to get creative and connect with the season. Start with these fundamentals, and you’ll be able to create something you’re truly proud of.
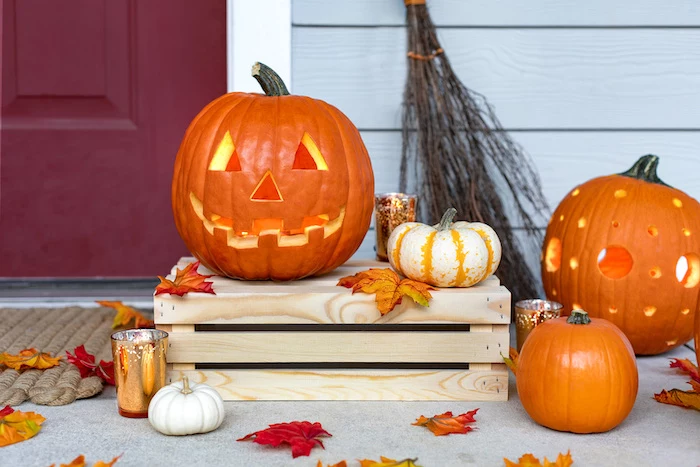
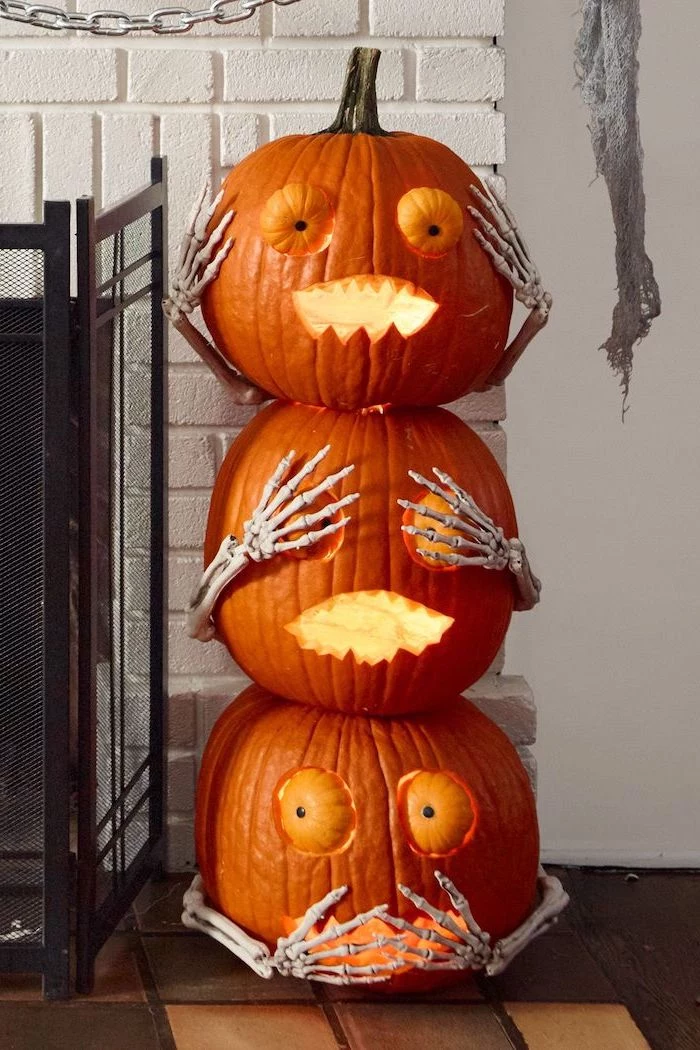
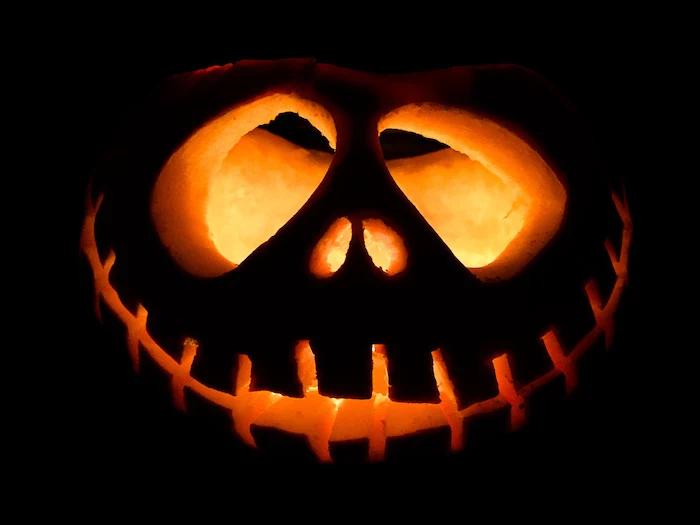
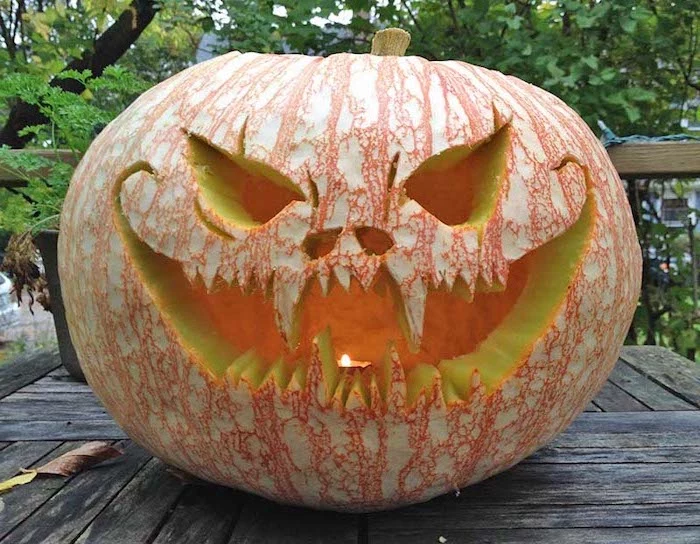
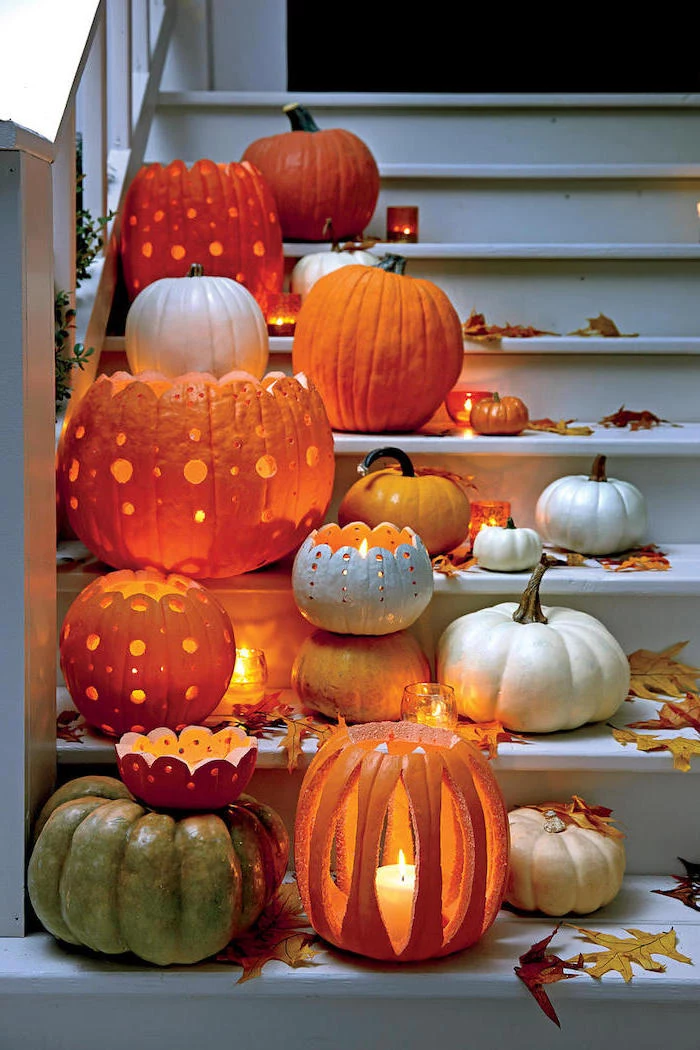
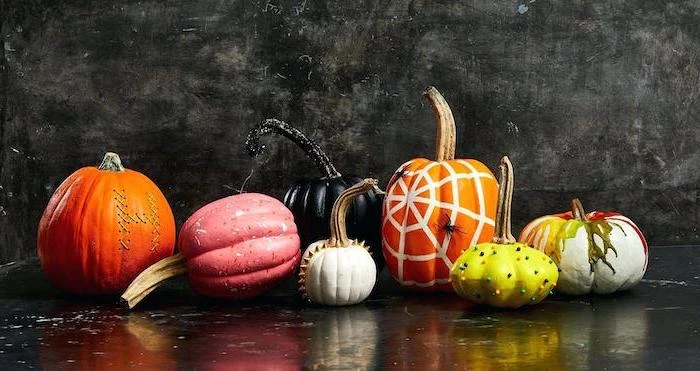
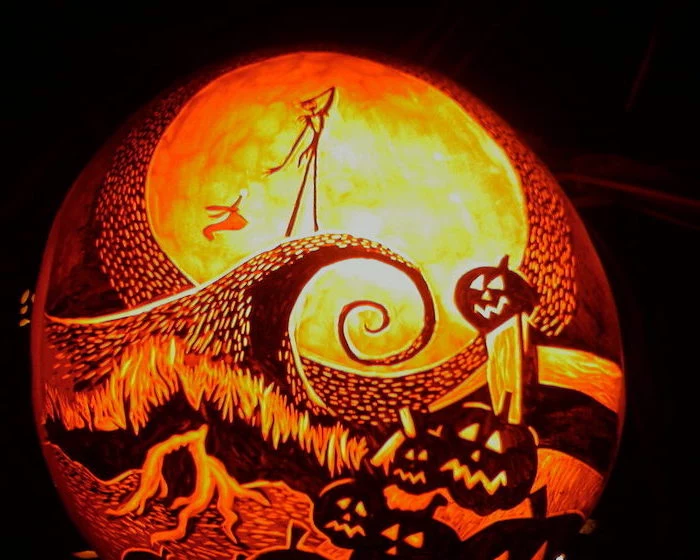
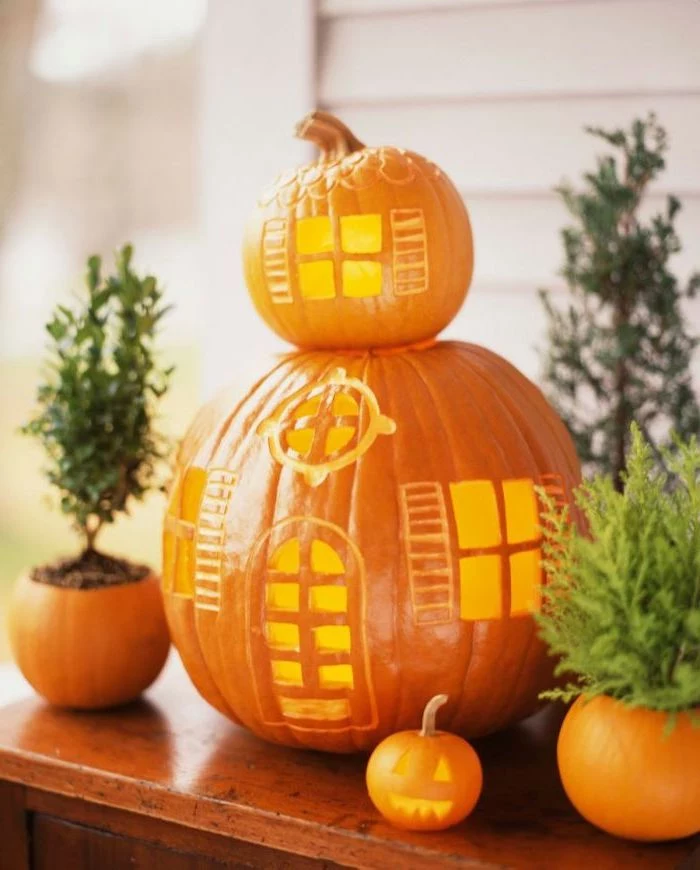
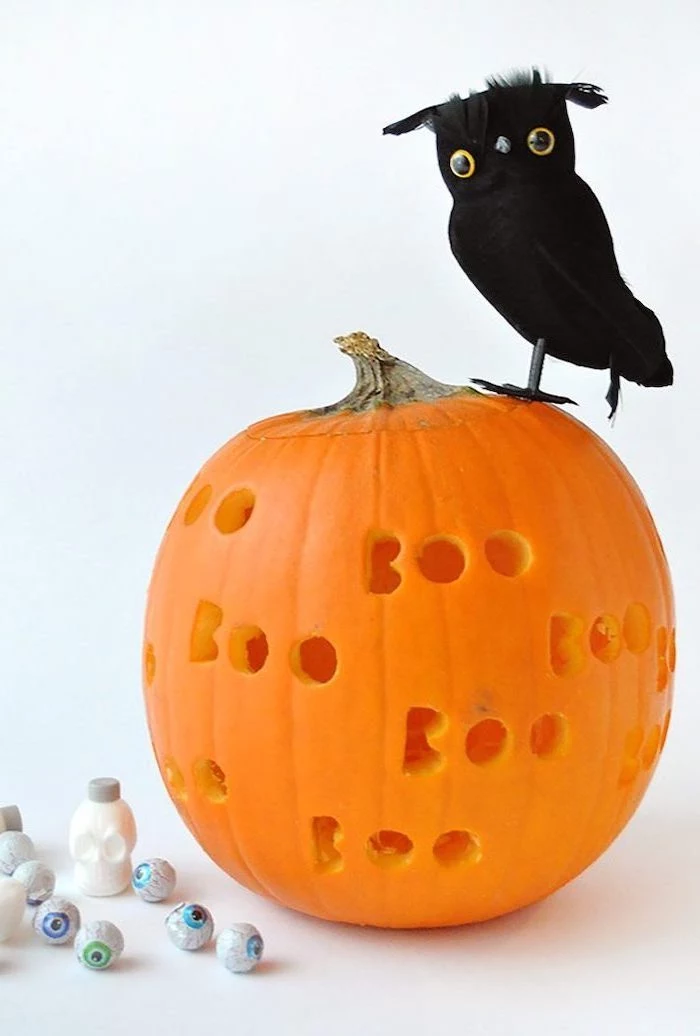
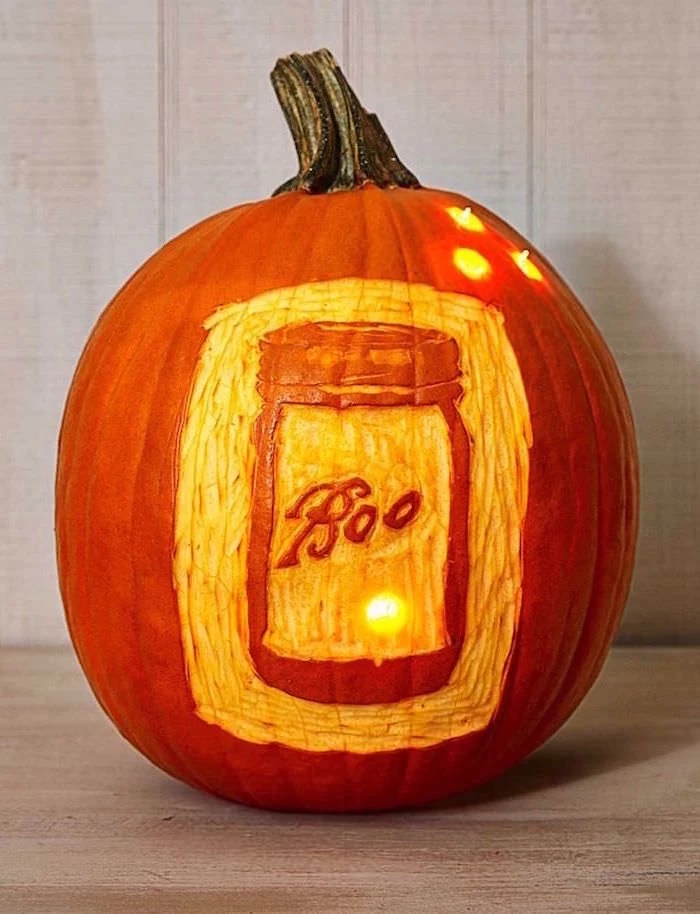
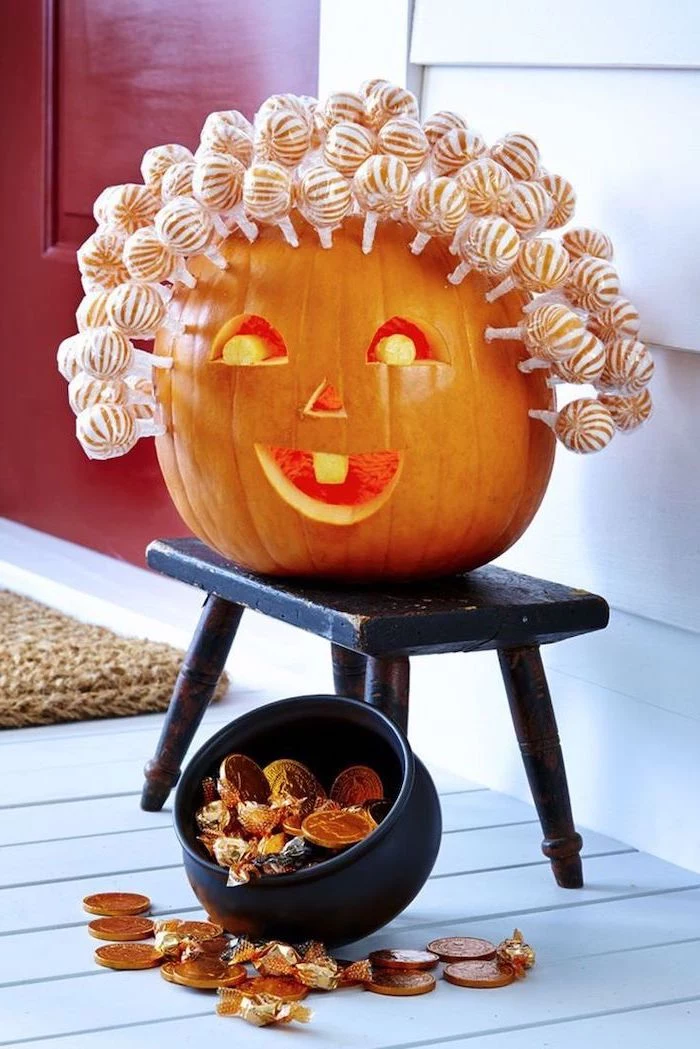
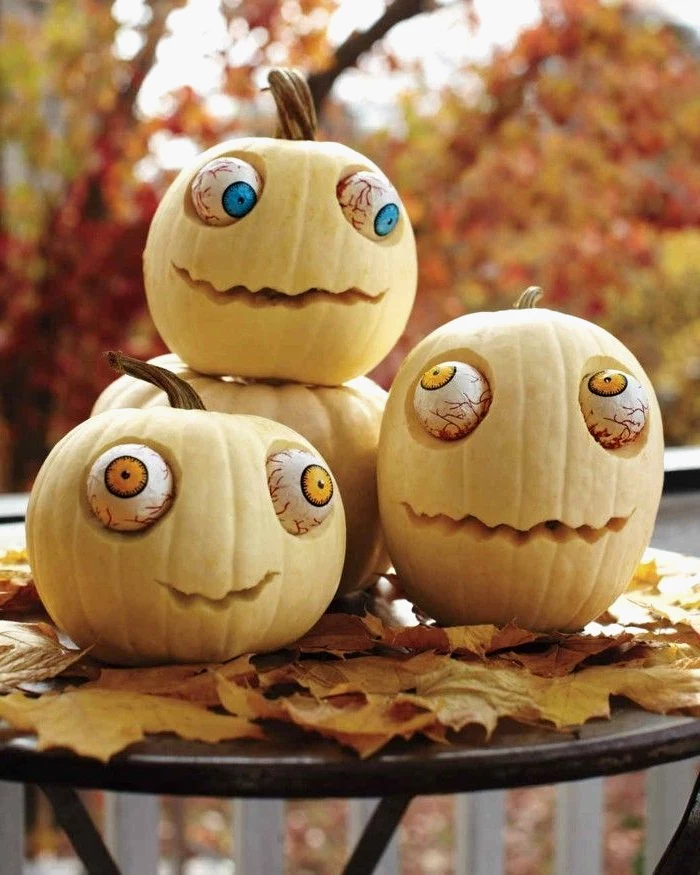
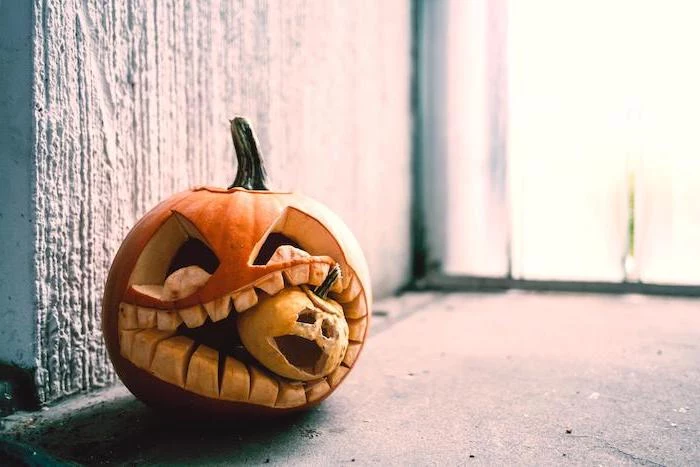
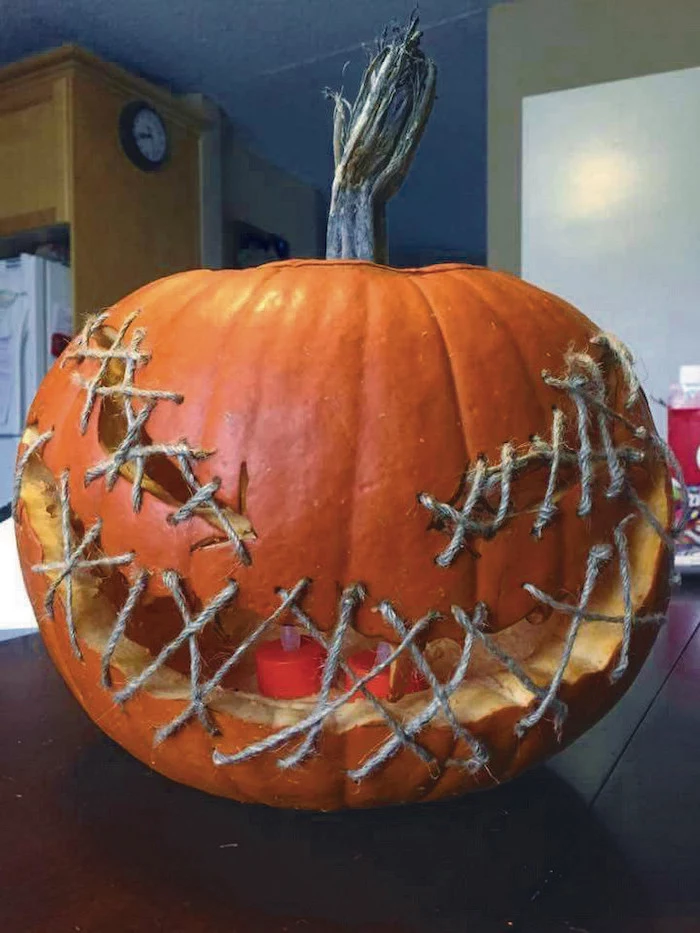
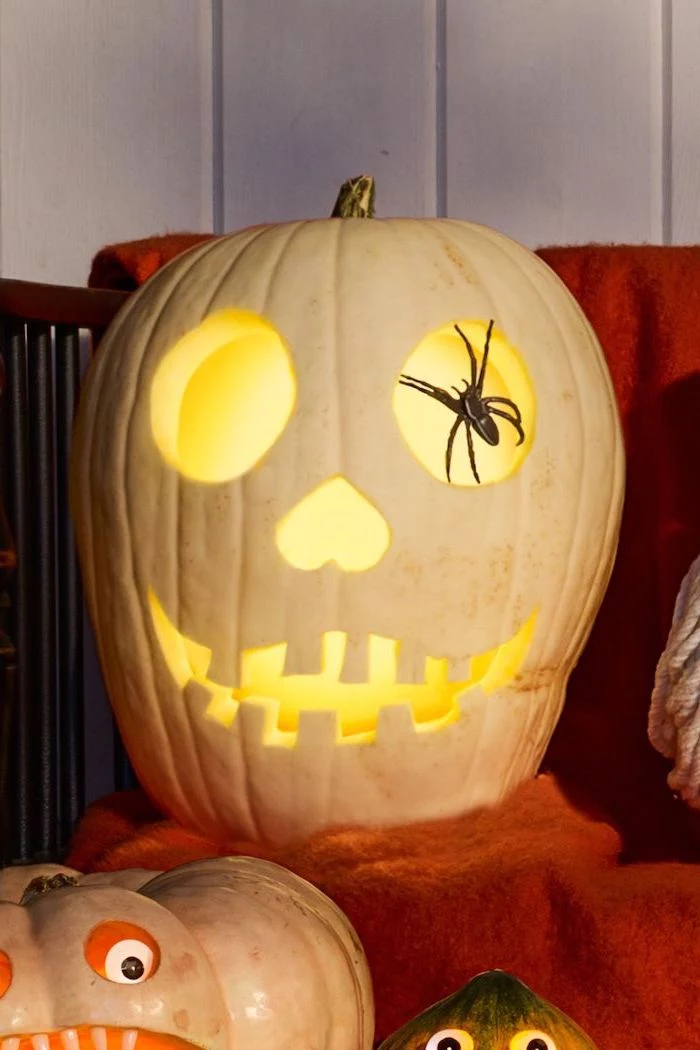
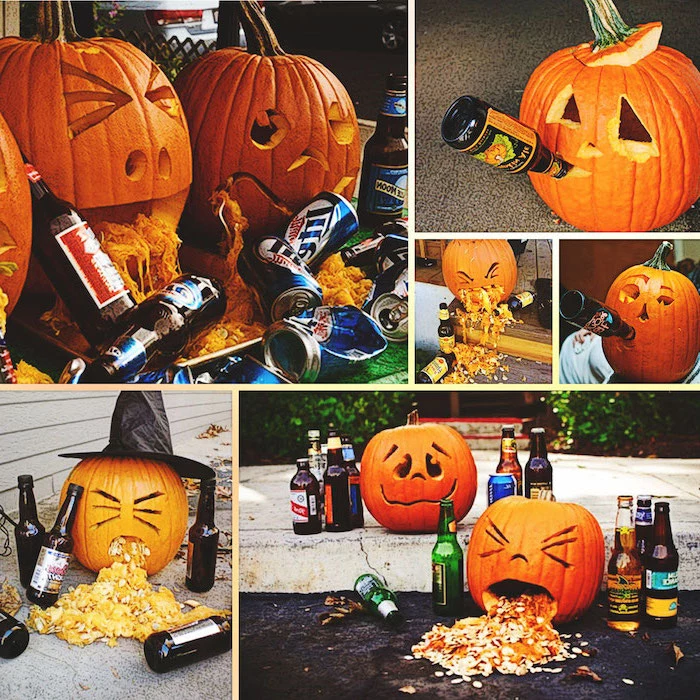
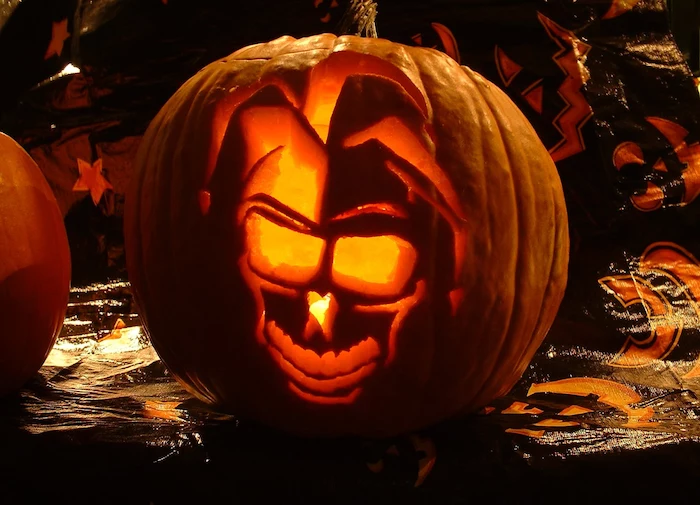
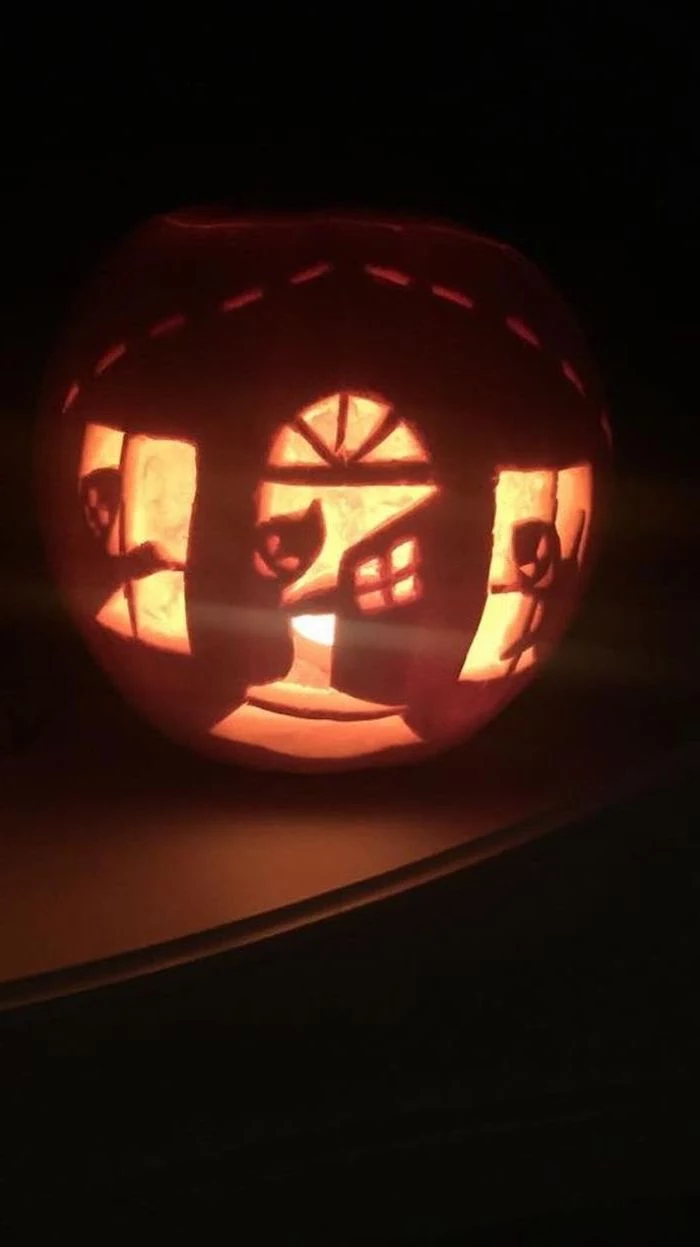
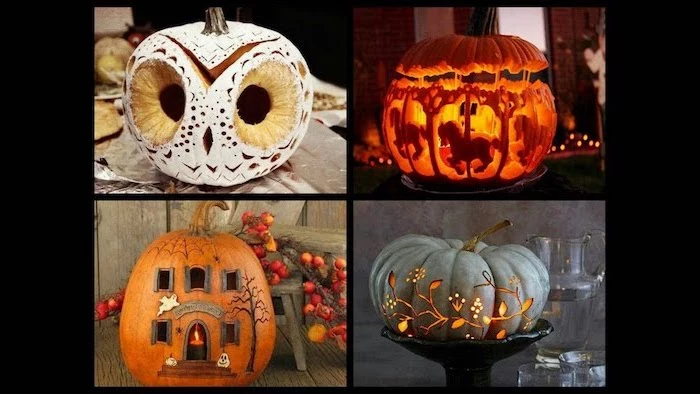
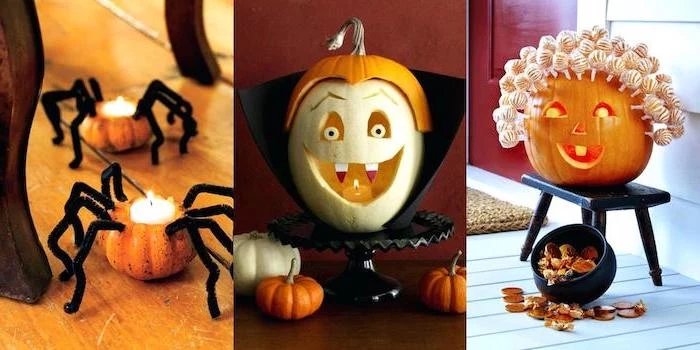
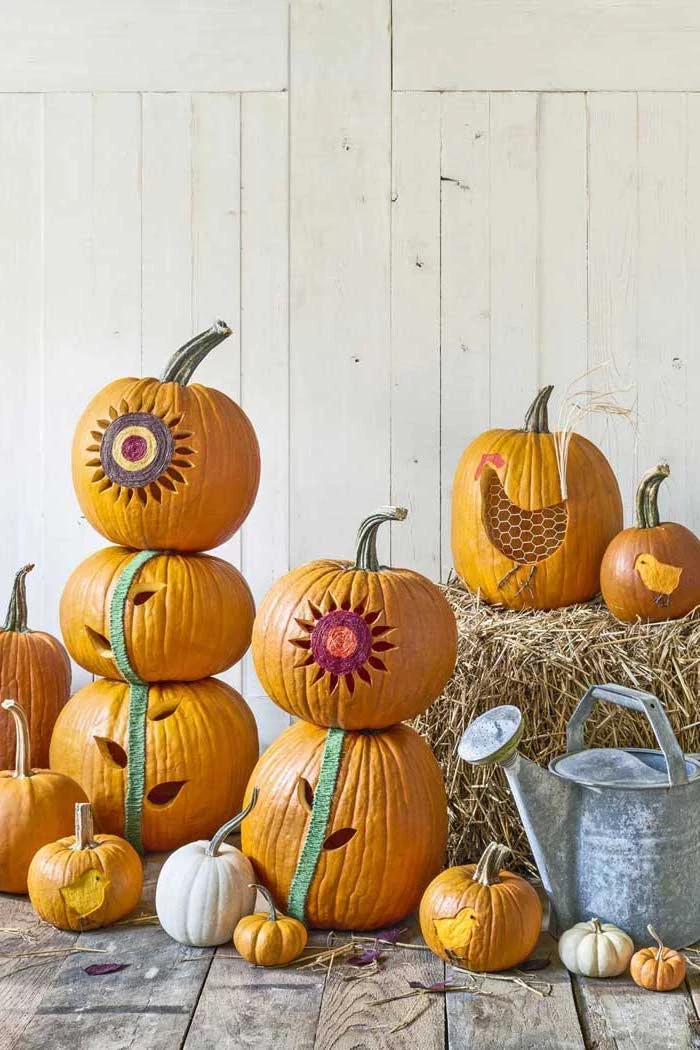
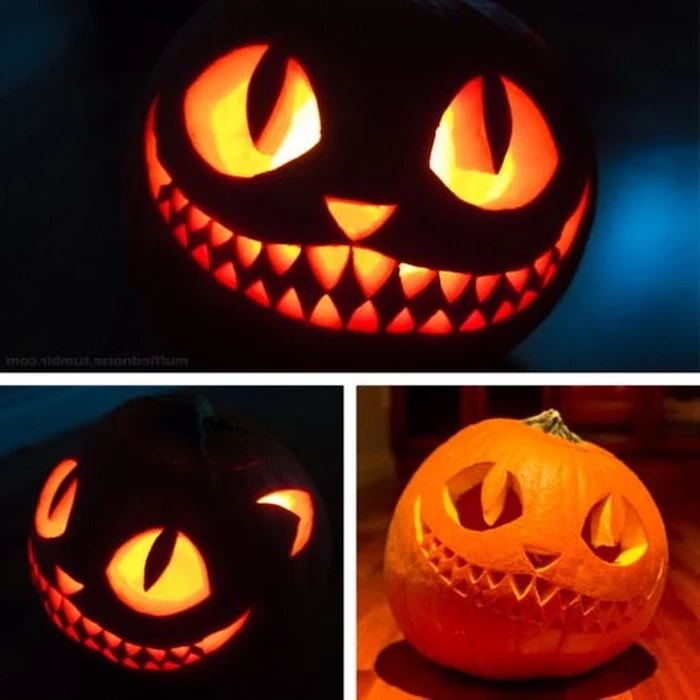
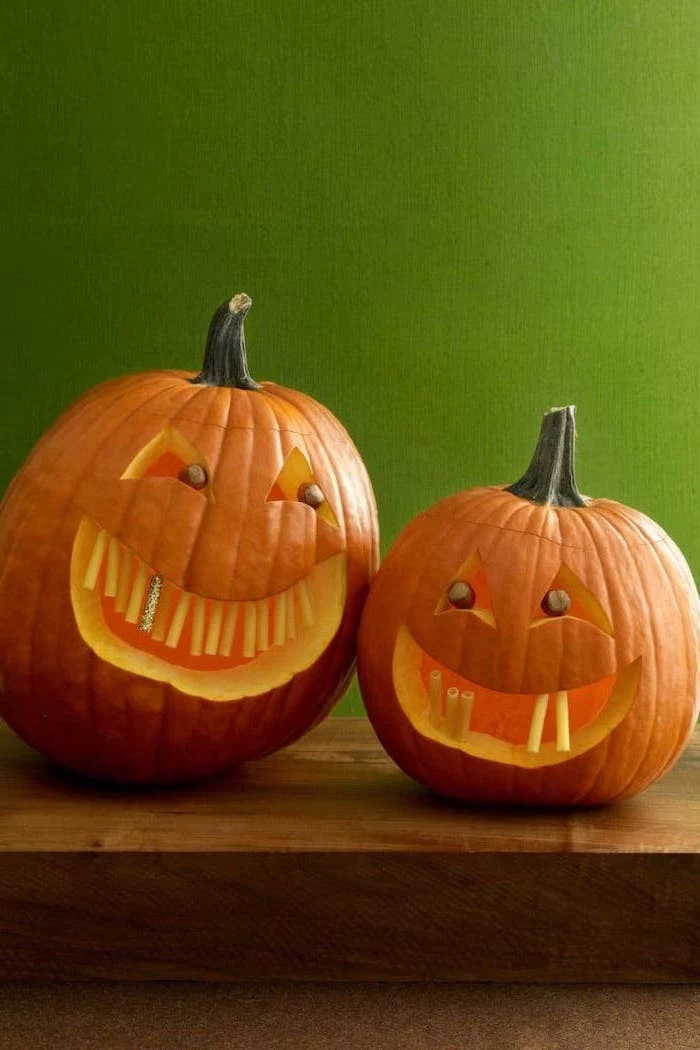
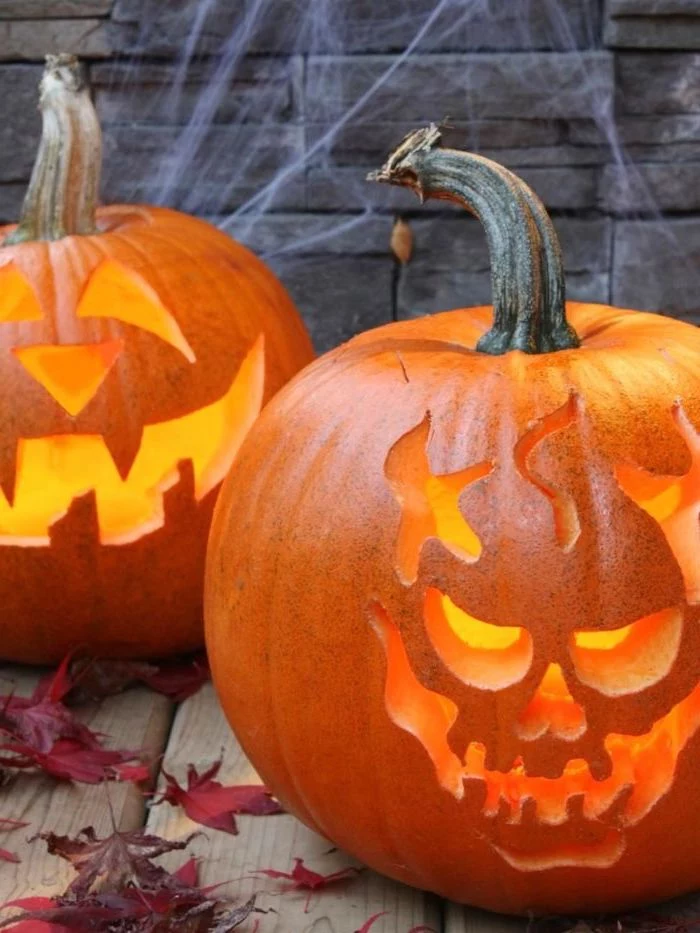
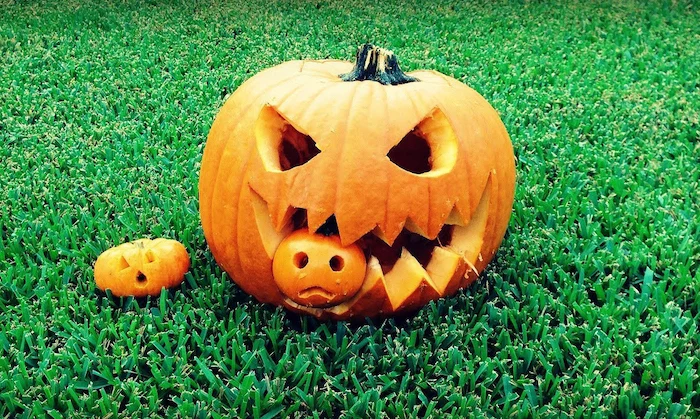
Inspiration Gallery
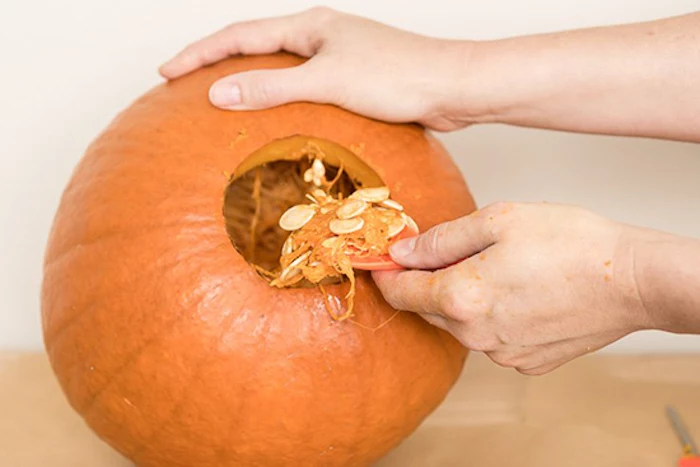
Once you’ve scooped out the stringy pulp, take an extra five minutes to scrape the inner walls with a large, sturdy metal spoon or a specialized pumpkin scraper. Your goal is to get the interior wall smooth and even, ideally about one inch thick. This not only makes carving easier but also removes the bacteria-rich pulp that accelerates rot.
- Create stunningly detailed portraits or landscapes.
- Achieve subtle shading and gradients.
- Preserve the pumpkin’s structural integrity, making it last longer.
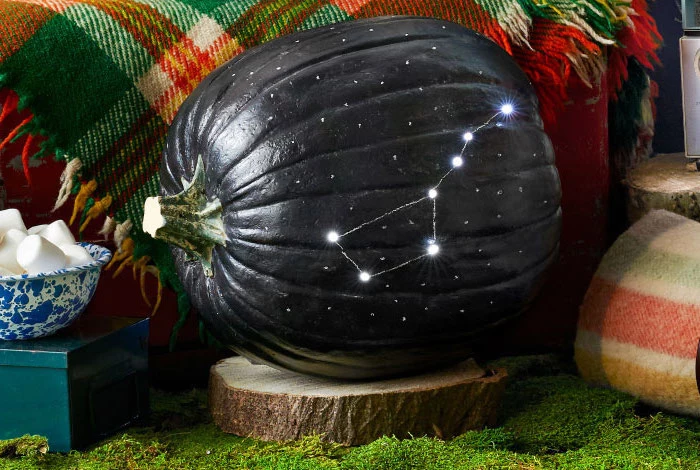
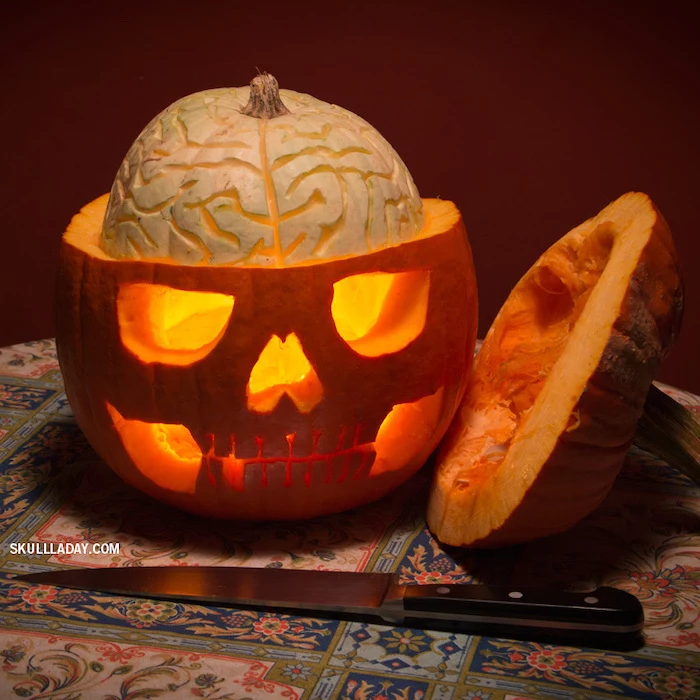
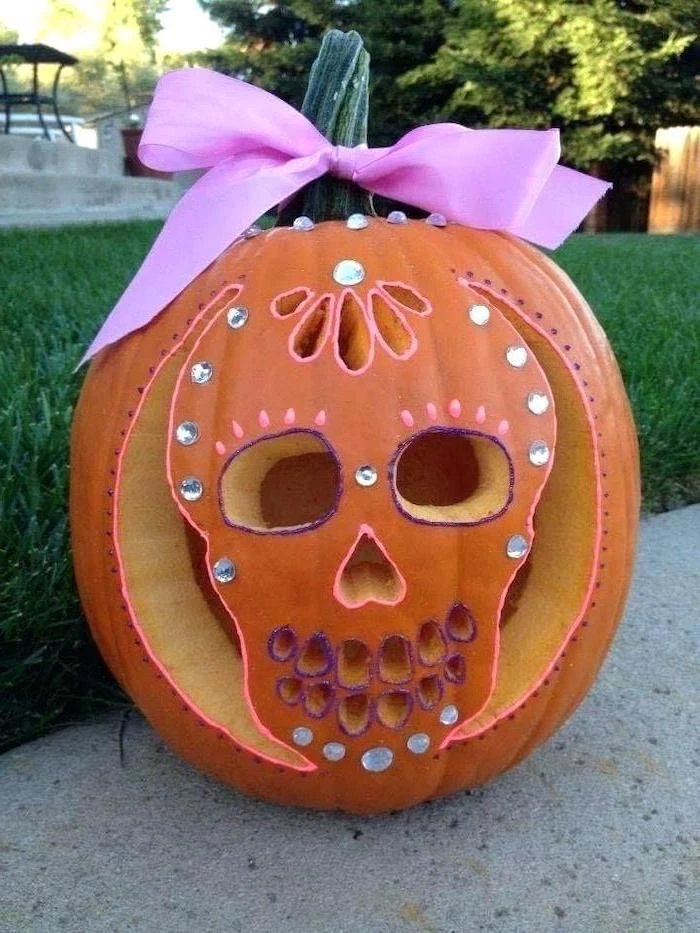
The secret? Etching. Instead of cutting all the way through, use linoleum cutters or a Dremel tool to just remove the orange outer skin, revealing the lighter flesh underneath. The effect when lit is magical.

The original Jack-o’-Lanterns in Ireland and Scotland weren’t pumpkins at all, but rather turnips or large potatoes.
When Irish immigrants arrived in America, they discovered that pumpkins, a native fruit, were much larger and easier to carve. They adapted their tradition, and the iconic Halloween pumpkin was born, forever linking the American gourd to the ancient Celtic festival of Samhain.
Think beyond the basic kit: A true carver’s toolkit often borrows from other crafts. Consider adding these to your arsenal for pro-level results:
- Pottery Loop Tools: Perfect for controlled scraping and shaping concave areas.
- Linoleum Cutters (V-gouge): The key to fine lines and etching detailed designs without punching through.
- A Keyhole Saw: Its thin, flexible blade is ideal for cutting tight curves and complex shapes cleanly.

How do the pros keep their masterpieces from shriveling overnight?
Hydration is key. After carving, submerge your entire pumpkin in a large bucket of cold water for 2-8 hours. This allows the flesh to absorb a huge amount of water, making it firm and turgid. After its bath, pat it completely dry, inside and out, before applying any sealant.

Important point: Never cut a perfectly round circle for your lid. Always cut a five or six-sided shape (like a pentagon or hexagon) and angle your knife inwards, towards the center of the pumpkin. This creates a conical lid that won’t fall inside when you put it back on.

LED Puck Light: Safe, long-lasting, and won’t cook your pumpkin from the inside. Many, like those from a brand like Luminara, come with remote controls and flicker effects to mimic a real flame.
Traditional Votive Candle: Offers an authentic, warm, and flickering glow. However, it’s a fire hazard, produces soot, and the heat can speed up the decomposition process.
For longevity and safety, LEDs are the clear winner.


According to a 2021 survey, nearly 45% of Americans carve a pumpkin for Halloween.
This tradition means millions of pumpkins are cut open in a very short period. The biggest challenge for all of them is the same: fighting off mold and dehydration. A daily spritz with a solution of 1 tablespoon of bleach in a quart of water can be a game-changer, killing surface mold and bacteria before they take hold.


Don’t throw away those guts and seeds! The seeds, when cleaned, tossed with olive oil and salt, and roasted at 300°F (150°C) for about 20-30 minutes, make a delicious snack. The stringy pulp can be boiled down with vegetable scraps to create a surprisingly flavorful base for an autumn soup stock.


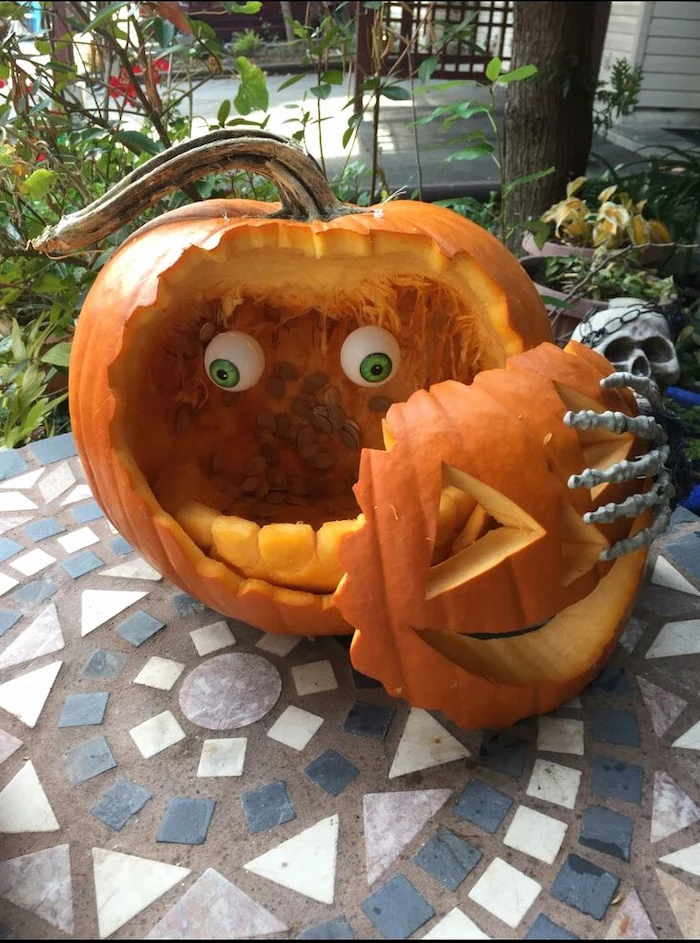
- Repair a piece that broke off during carving.
- Secure a delicate, thin piece of your design.
- Reattach a tooth that you accidentally snapped.
The trick? A simple wooden toothpick. For clean breaks, you can often just jam a toothpick into both pieces to pin them together. For a stronger, more permanent fix on a dry pumpkin, a dot of super glue can work wonders.
To lock in moisture and create a barrier against airborne mold, coat all the cut surfaces of your pumpkin with a thin layer of petroleum jelly (Vaseline works perfectly). Use a fingertip or a small brush to apply it to the edges of your design and all over the inside. It’s a simple, cheap step that can add days to your jack-o’-lantern’s life.


Can I get intricate designs without being an artist?
Absolutely. The ‘poke and connect’ method is your best friend. Print out a pattern you like, tape it securely to the smoothest side of your pumpkin, and use a push-pin or a special poking tool (often found in higher-end carving kits) to transfer the design by poking holes along all the lines. Remove the paper, and then use a sharp knife to simply ‘connect the dots’.


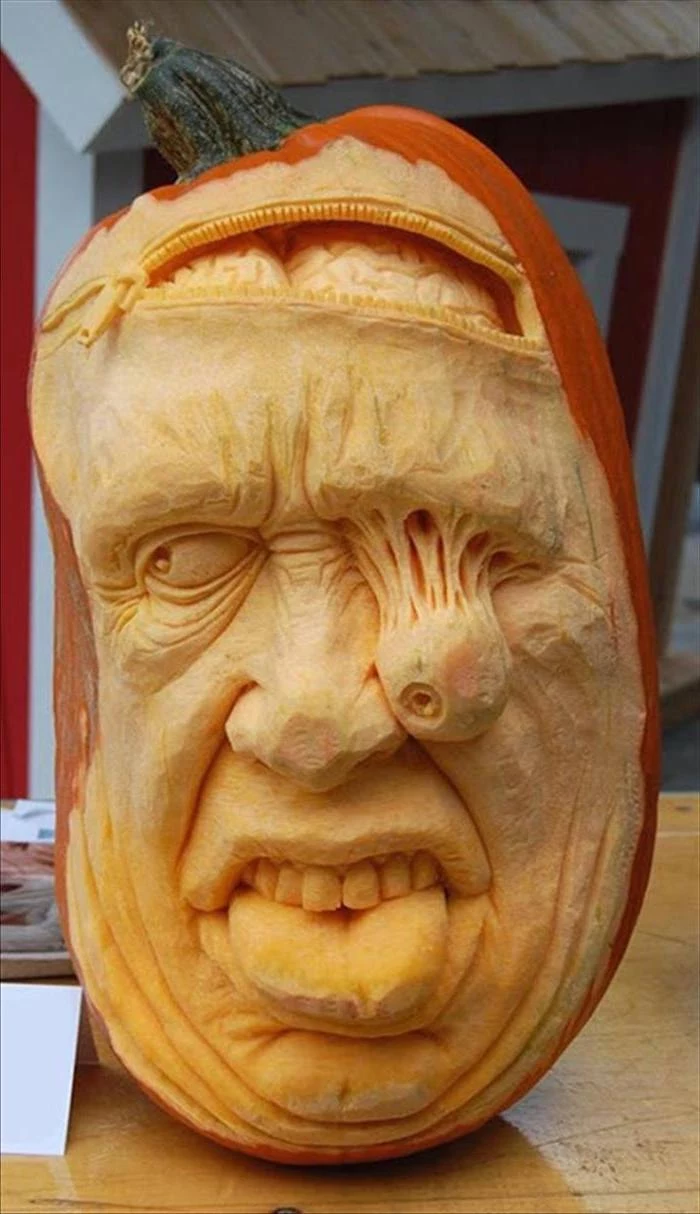
For truly next-level carving, especially etching and shading, nothing beats a rotary tool. A Dremel, for instance, equipped with a small grinding or sanding bit, allows you to ‘shave’ the pumpkin’s skin off with incredible precision. It gives you control over the depth of the cut, creating different levels of light for a stunning 3D effect.
Create a full sensory experience by tapping into the scent of autumn. Before you place a light inside, sprinkle the inner lid of your pumpkin with these spices:
- Cinnamon
- Nutmeg
- A pinch of cloves
The gentle heat from the light will warm the spices, releasing a classic pumpkin spice fragrance that fills the air around your creation.
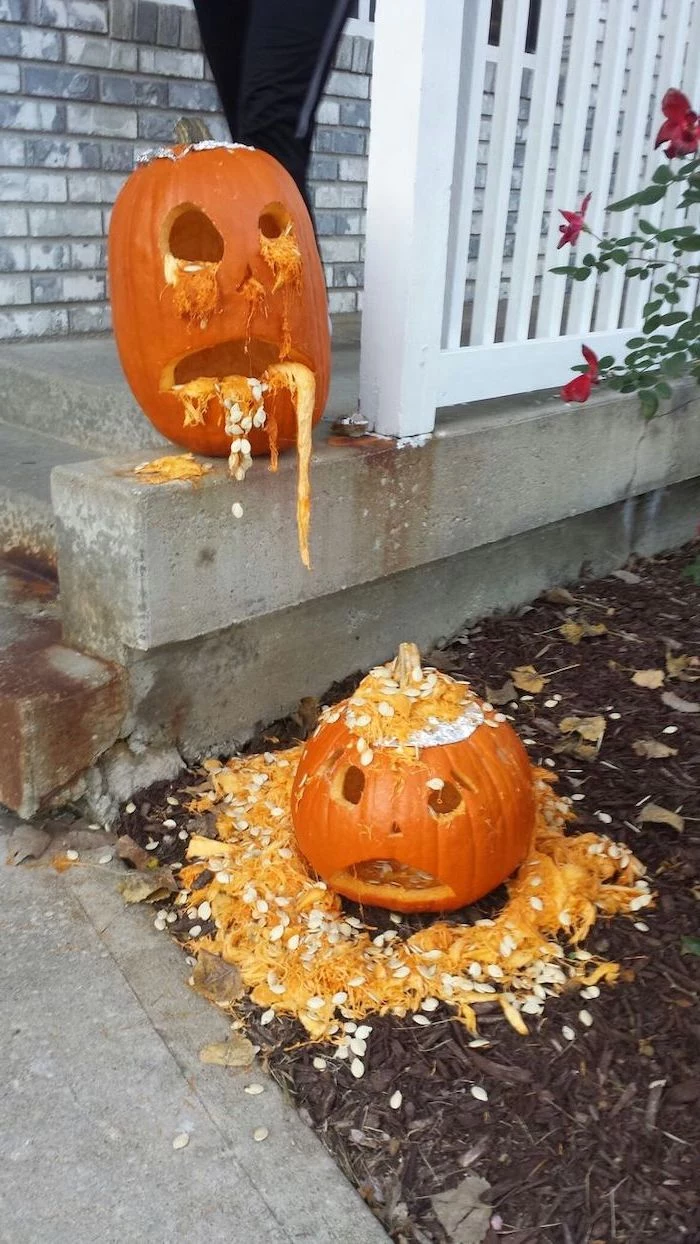
Common Mistake: Leaving the pumpkin outside in freezing temperatures. If the temperature drops below 32°F (0°C), bring your pumpkin inside or into a garage. A frozen pumpkin, when it thaws, will turn into a mushy, weeping mess almost instantly.

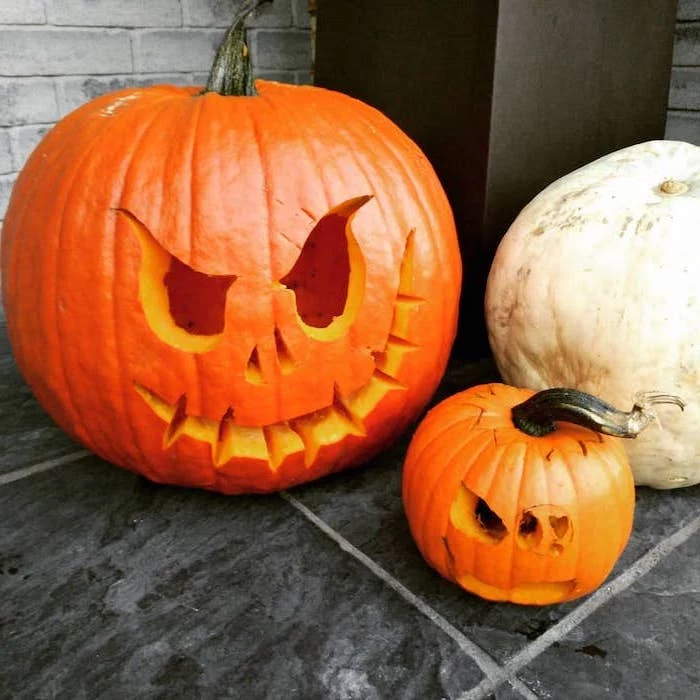
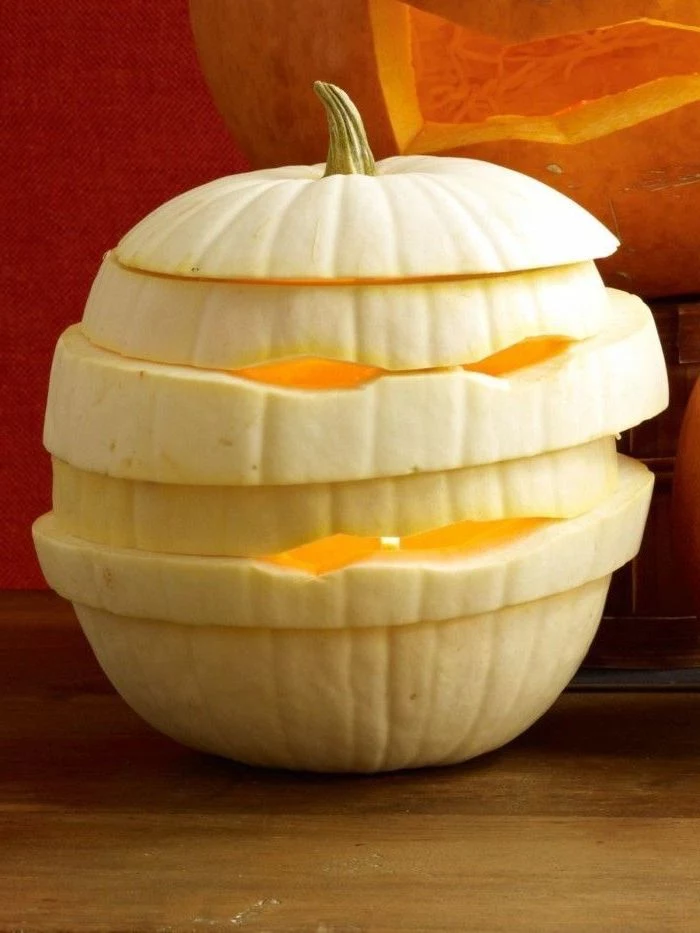
Orange ‘Connecticut Field’ Pumpkin: The classic choice. Its vibrant color is iconic, but the flesh can be stringy and the wall thickness inconsistent.
White ‘Lumina’ Pumpkin: Offers a ghostly, elegant look. The flesh is typically denser and less stringy, making it a dream for detailed carving and etching. The contrast between the white skin and the orange-yellow flesh inside is striking.
- It looks freshly carved, even on day four.
- It effectively stops mold in its tracks.
- It prevents the delicate, thin parts of your design from curling.
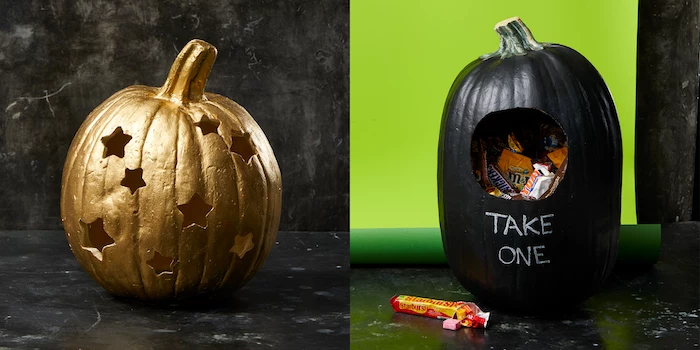
The secret is a commercial finishing spray. Products like Pumpkin Fresh or a clear acrylic craft spray create a sealant that locks in moisture and protects the cut surfaces from the elements. A quick spray inside and out is the final step many pros use.
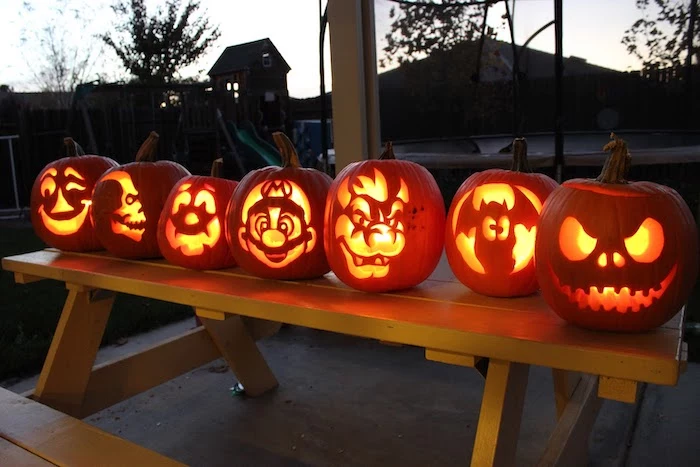
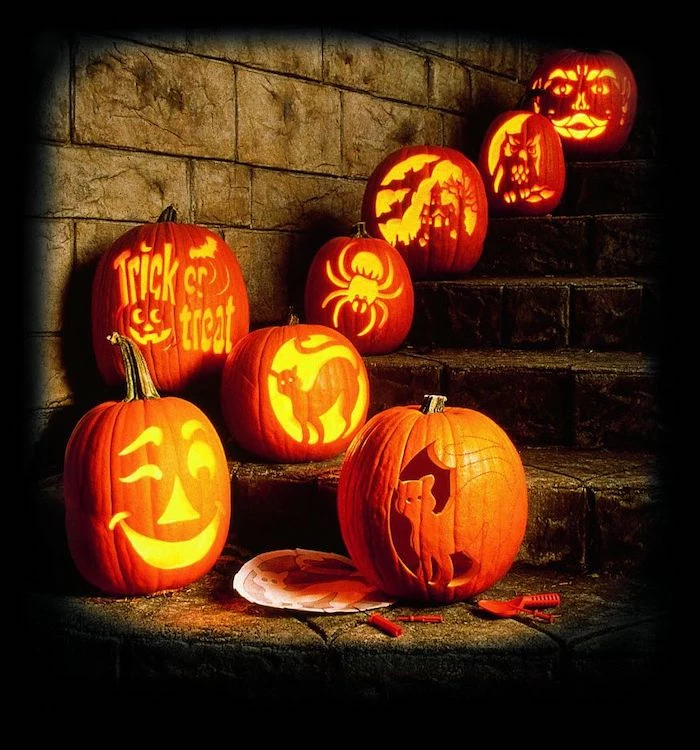
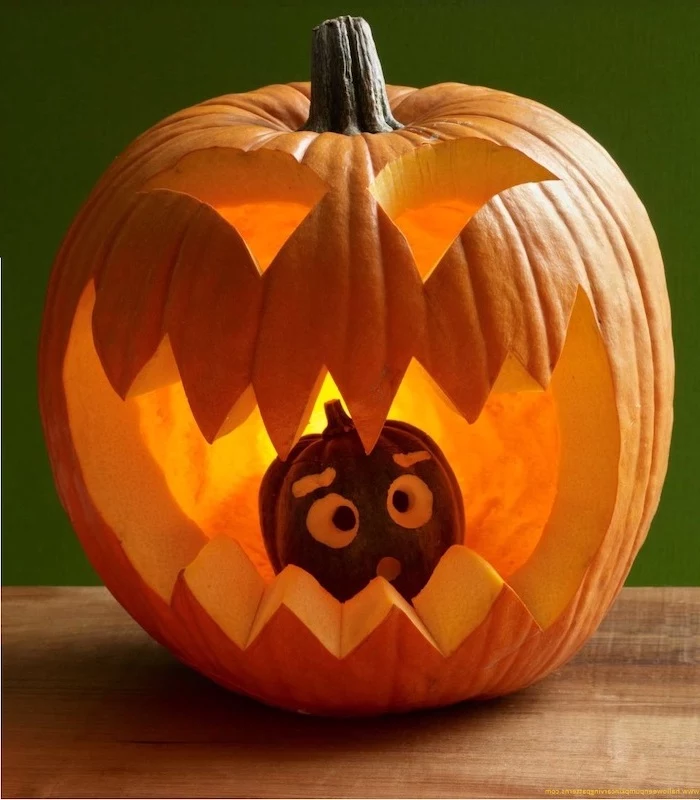
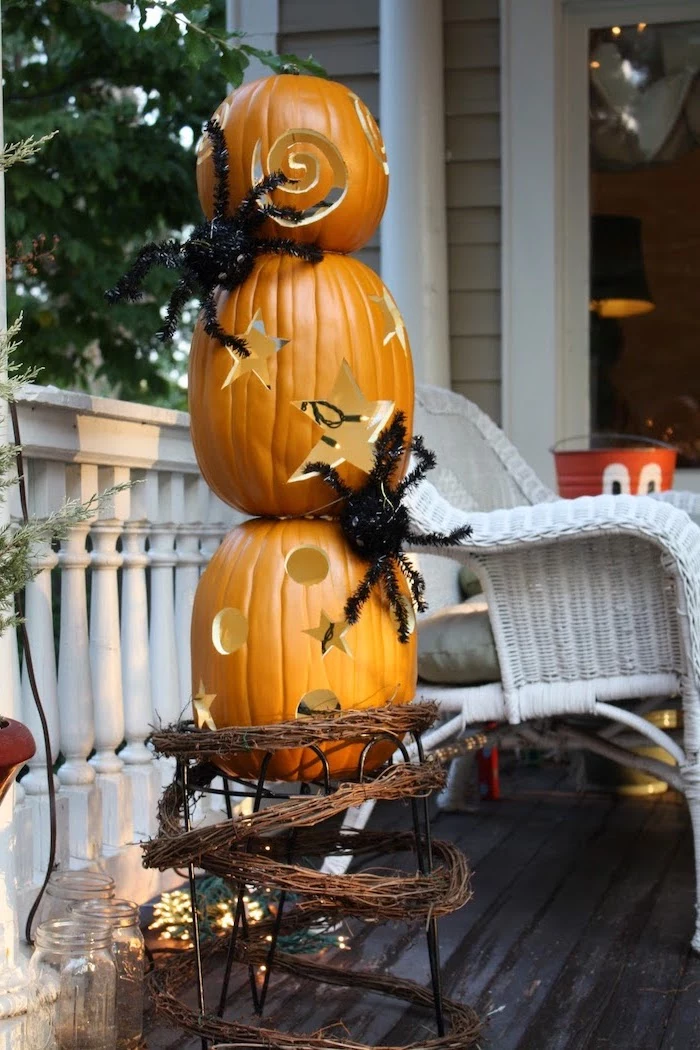
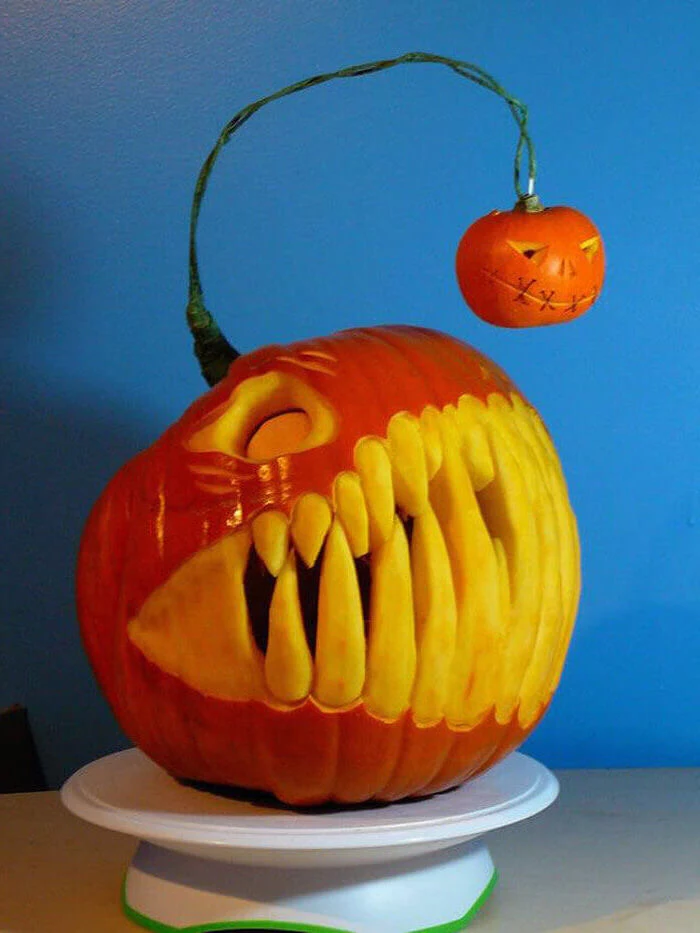
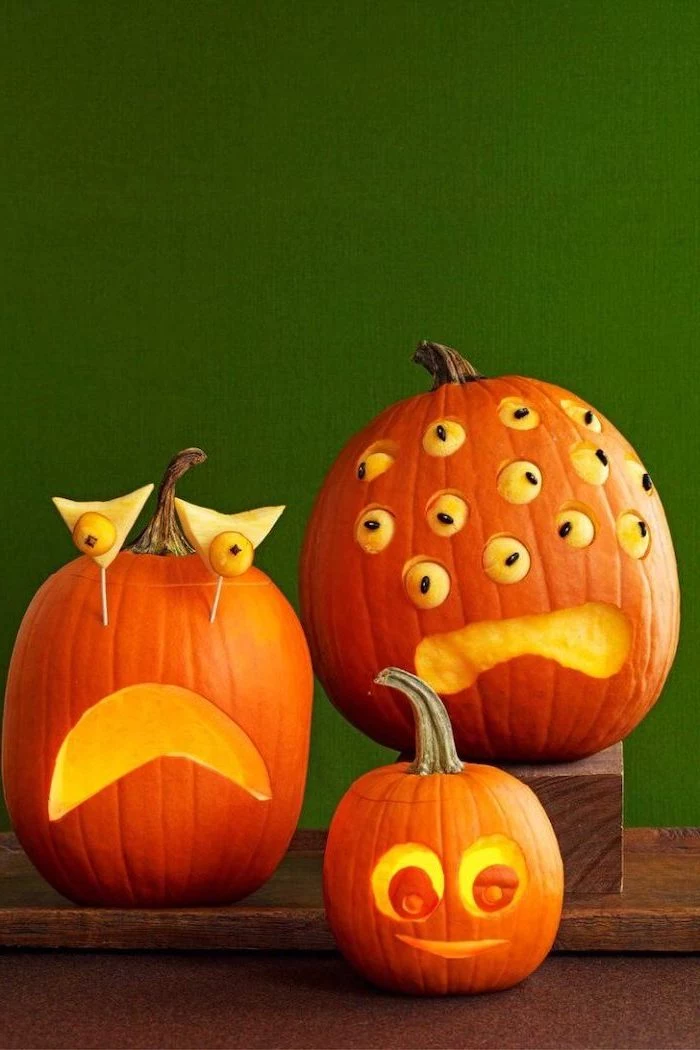
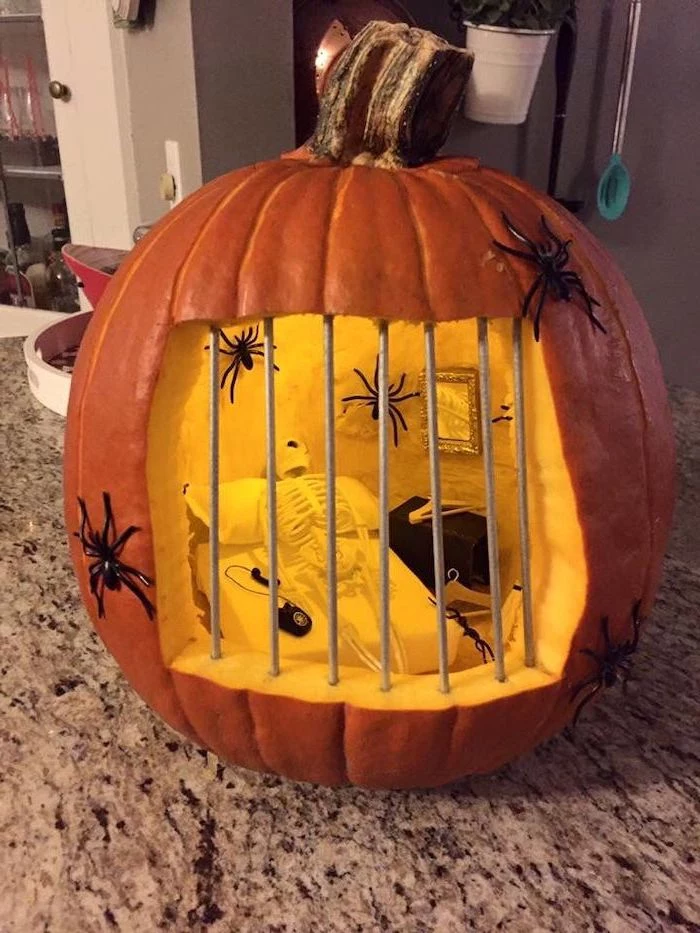
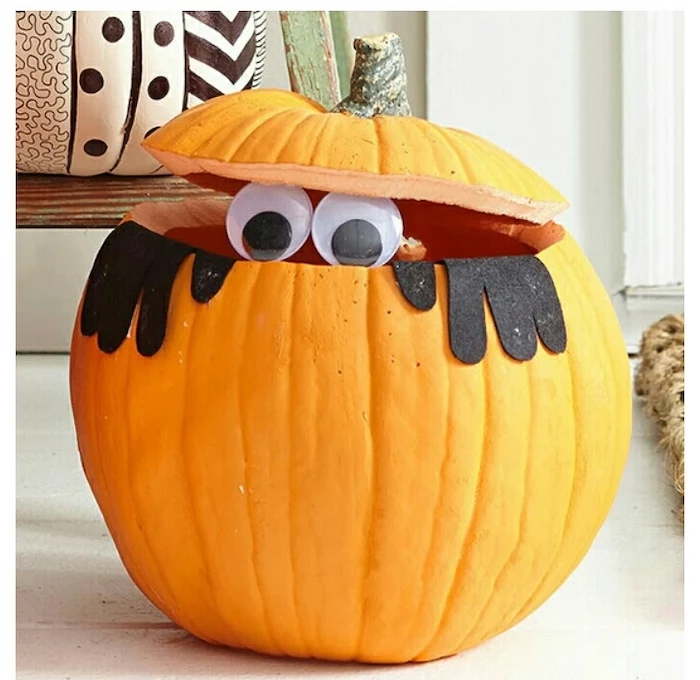
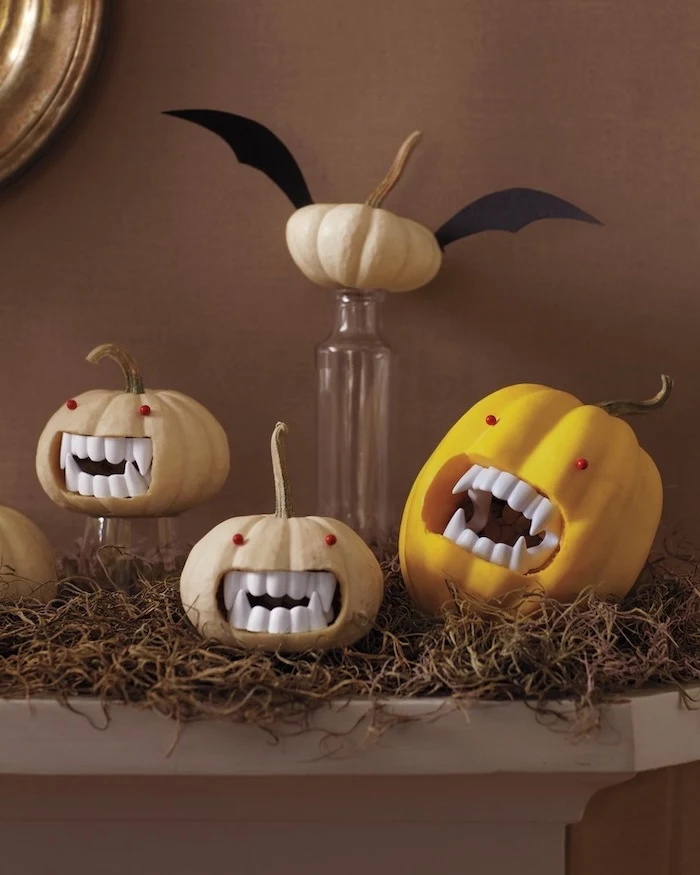
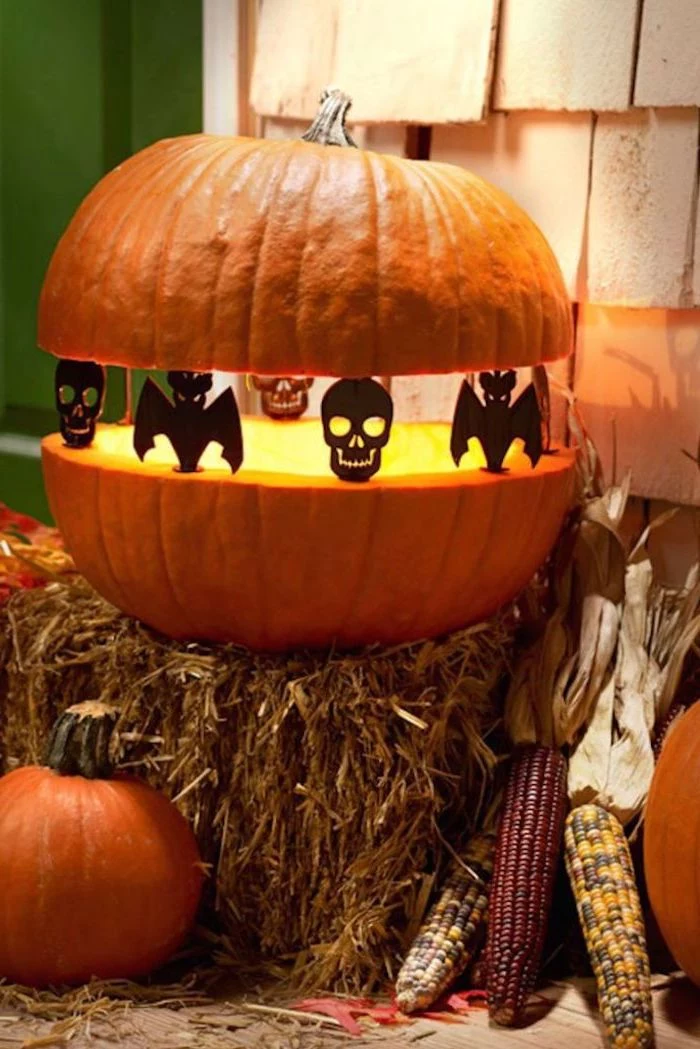
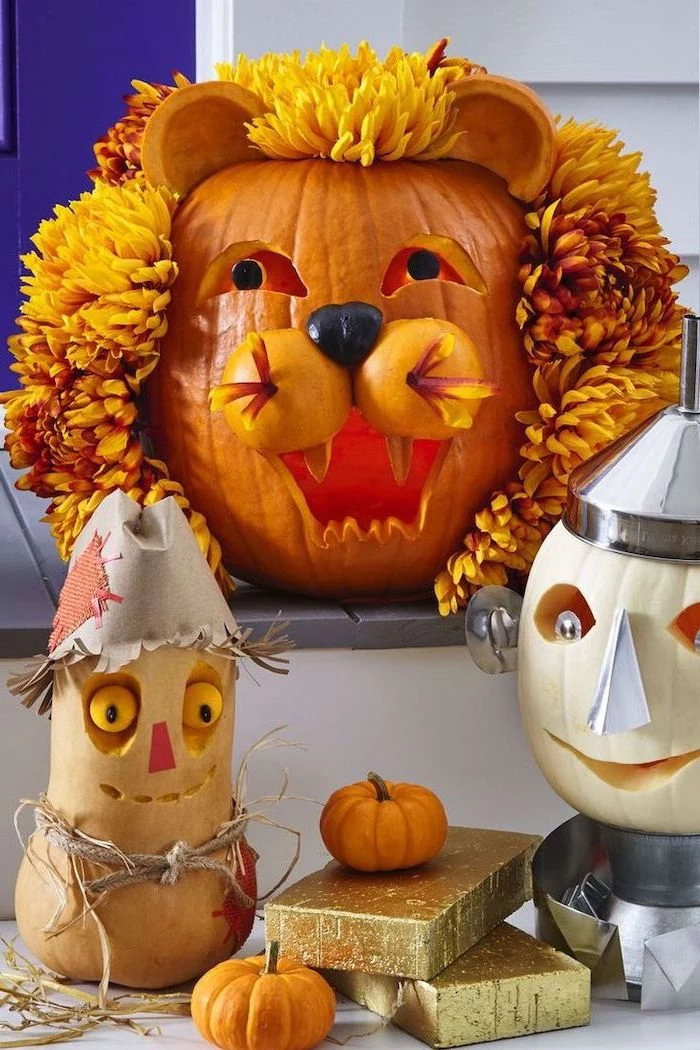
Don’t feel limited to a single pumpkin. Create a more dynamic display by telling a story. Carve a terrified face on a small pumpkin and place it in front of a larger, more menacing jack-o’-lantern. Or, carve a trail of tiny pumpkin ‘minions’ leading up your walkway to a main centerpiece. Grouping pumpkins of different sizes adds depth and personality.
Looking for great carving patterns without spending a dime?
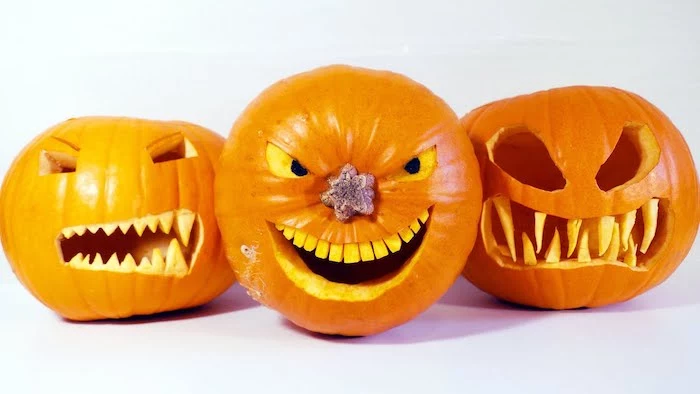
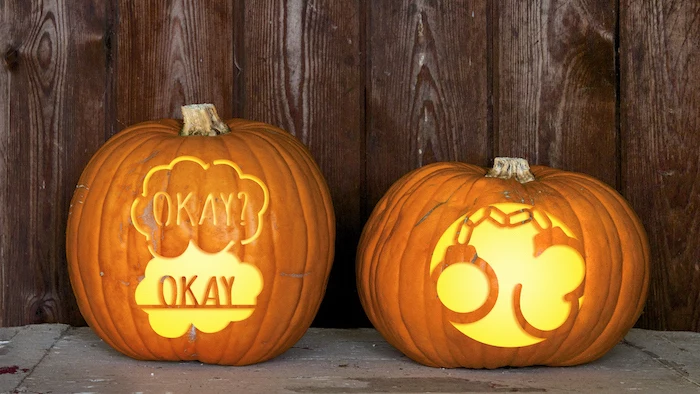
The internet is a treasure trove. Websites like The Pumpkin Lady and ZOMBIE Pumpkins offer hundreds of free stencils, from simple cartoon faces for kids to breathtakingly complex celebrity portraits and pop culture scenes. Just download, print, and you’re ready to carve.
Did you know a pumpkin is over 90% water?
This is why a carved pumpkin is in a constant race against dehydration. Every cut surface you create is an escape route for moisture. This is why sealing those cuts, whether with petroleum jelly or a commercial spray, is so critical to preventing a shriveled, sad-looking jack-o’-lantern.

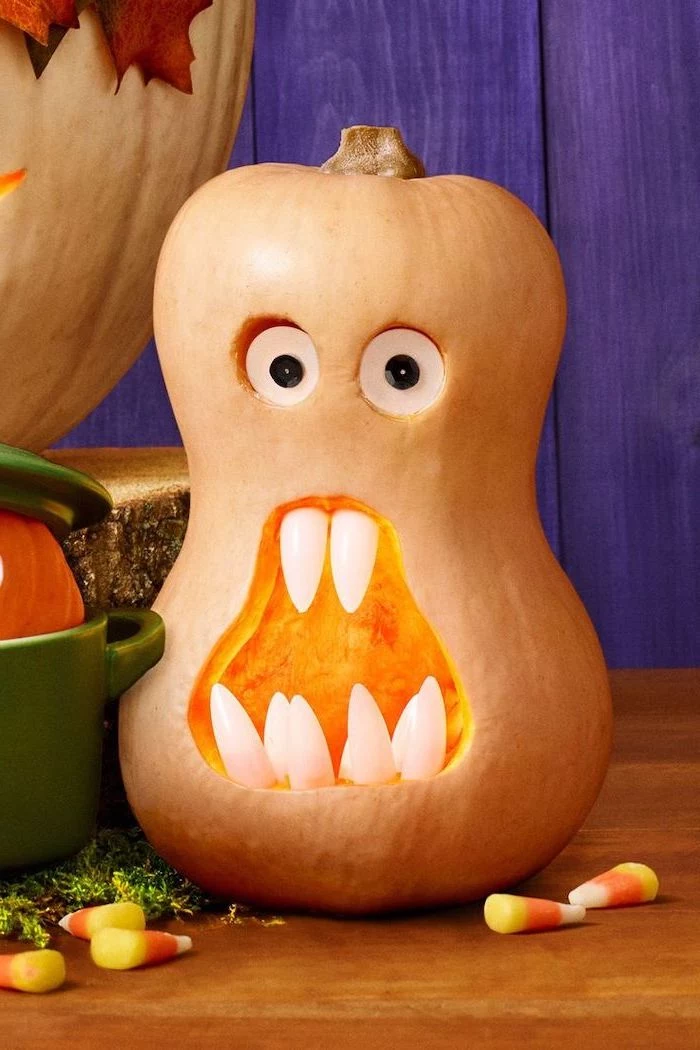
Go beyond the traditional pumpkin! For a unique and challenging project, try carving a butternut squash. Its dense, less watery flesh holds fine details exceptionally well, making it perfect for intricate etching. Its long, two-part shape also inspires creative designs, like carving a face in the top bulb and a scene on the elongated body.
A Sturdy Metal Ice Cream Scoop: Its strong handle won’t bend, and its sharp, serrated edge tears through the stringy pulp and seeds with ease, saving you time and frustration.
The Flimsy Plastic Scooper from a Kit: Often bends or snaps under pressure. Its dull edge makes cleaning the inside a slow, messy chore.
Invest in the ice cream scoop. Your wrists will thank you.

Important consideration: Safety first. Always carve on a dry, stable surface, like a newspaper-covered kitchen table. Ensure your hands and tools are completely dry to prevent slips. And most importantly, always cut in a direction away from your body. A sharp knife can easily slip on a pumpkin’s tough skin.
After Halloween, don’t just trash your pumpkin. If it’s unpainted and unbleached, break it into smaller pieces and add it to your compost pile. Pumpkins are rich in nitrogen and decompose quickly, enriching the soil for next year’s garden. You can also leave it in a discrete spot in your yard for squirrels and other wildlife to enjoy.