Your First Macrame Plant Hanger: A No-Stress Guide to Getting It Right
I’ve been playing with fiber and knots for what feels like a lifetime. My journey started in a little community workshop, where I learned from an older woman who could tie the most intricate knots without even looking. She taught me that macrame is so much more than just tying ropes together—it’s about tension, structure, and really feeling the cord in your hands. It’s a craft with deep roots, popping up in everything from old nautical traditions to the iconic bohemian styles we all know.
In this article
Today, I want to pass that practical magic on to you. Forget those confusing diagrams you find online. We’re going to make a plant hanger that’s not just pretty, but genuinely strong enough to hold your favorite plant without a second thought.
We’ll build this thing from start to finish. I’ll explain the ‘why’ behind each step, share some hard-won tips, and point out the common slip-ups so you can dodge them completely. Let’s make something solid and beautiful.
First Things First: Your Project Shopping List
Before we get lost in the fun of knotting, let’s talk about what you actually need to buy. Nothing’s worse than starting a project only to realize you’re missing a key piece. This is your simple, no-fuss recipe.
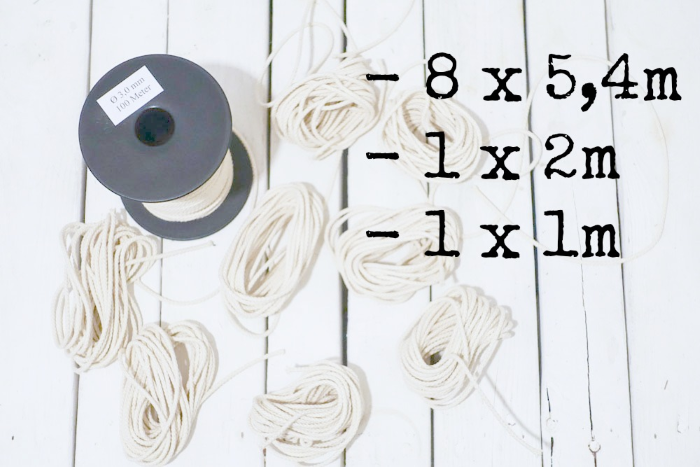
- The Cord: You’ll want a 4mm 3-ply natural cotton cord. For a standard hanger, you’ll need to cut 8 pieces of cord, each 15 feet long. That’s a total of 120 feet. It sounds like a lot, but trust me, the knots eat up length fast!
- The Ring: Grab one 2-inch wooden or metal ring. You can find these at any craft store or even a hardware store in the plumbing or drapery section.
- The Tools: You’ll need a good pair of sharp scissors and a measuring tape.
Heads up on cost: For all your initial supplies, you can expect to spend somewhere between $20 and $30. The big roll of cotton cord will be your main expense, but you’ll have plenty left over for another project.
And how long will this take? For your first time, set aside a good 2 to 3 hours. Put on some music, pour a cup of tea, and enjoy the process. It’s not a race!
Let’s Talk Materials: Getting the Right Stuff
The cord you choose is, honestly, the foundation of your entire project. I once had a student use this super soft, stretchy yarn because it looked pretty. The hanger was gorgeous… until she put a pot in it. It stretched nearly two feet and completely lost its shape. A great lesson in material science, right?
Choosing Your Cord
When you’re staring at the wall of rope in a craft store, here’s the lowdown on what you’re seeing:
- 3-Ply Cotton Rope: This is my top pick for beginners and for any hanger that needs to be sturdy. It’s made of three strands twisted together, so it’s strong, holds its shape, and makes your knots look really defined. The 4mm or 5mm size is perfect. When you’re done, the ends unravel into a lovely, wavy fringe. It’s just a fantastic, all-around choice.
- Single-Strand Cotton Cord: This one is incredibly soft and gives you a more gentle, modern look. Because it’s just a single bundle of fine threads, it’s a bit trickier to work with—you have to keep your tension really even. But oh, the fringe! When you comb it out, it creates this beautiful, feathery brush. I save this for wall hangings or hangers for very light air plants.
- Braided Cord: Think of the texture of a shoelace. This cord has a woven outside, making it super strong and clean-looking. The big difference? It doesn’t unravel into a fringe. So, if you want a sleek, no-fuss finish, this is your guy. The synthetic polypropylene versions are also amazing for outdoor hangers since they resist mildew and moisture.
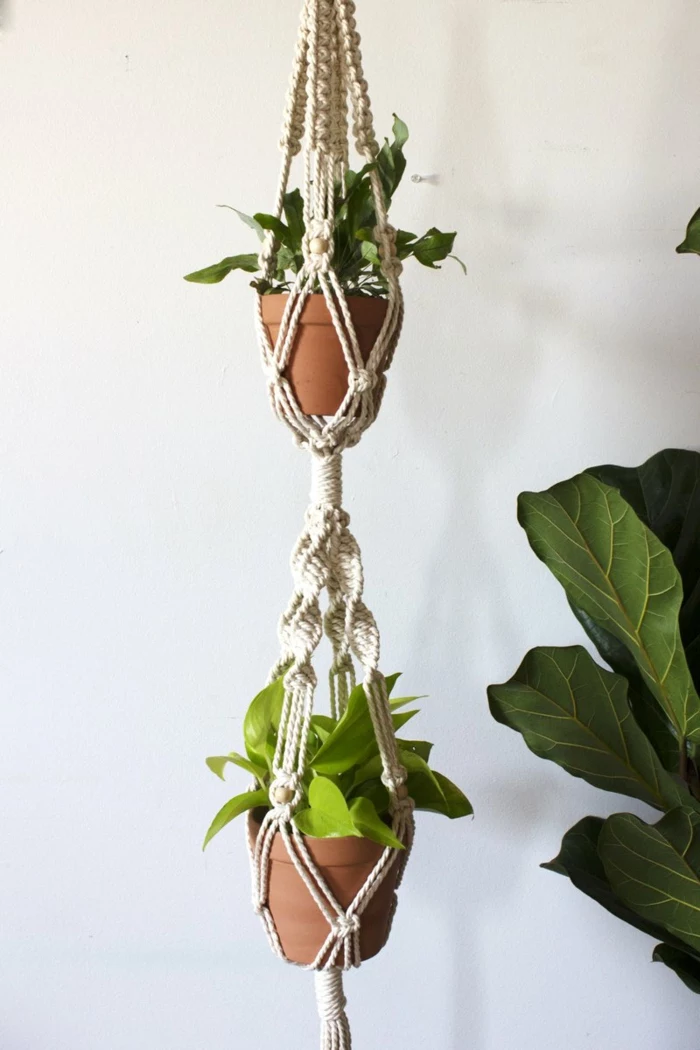
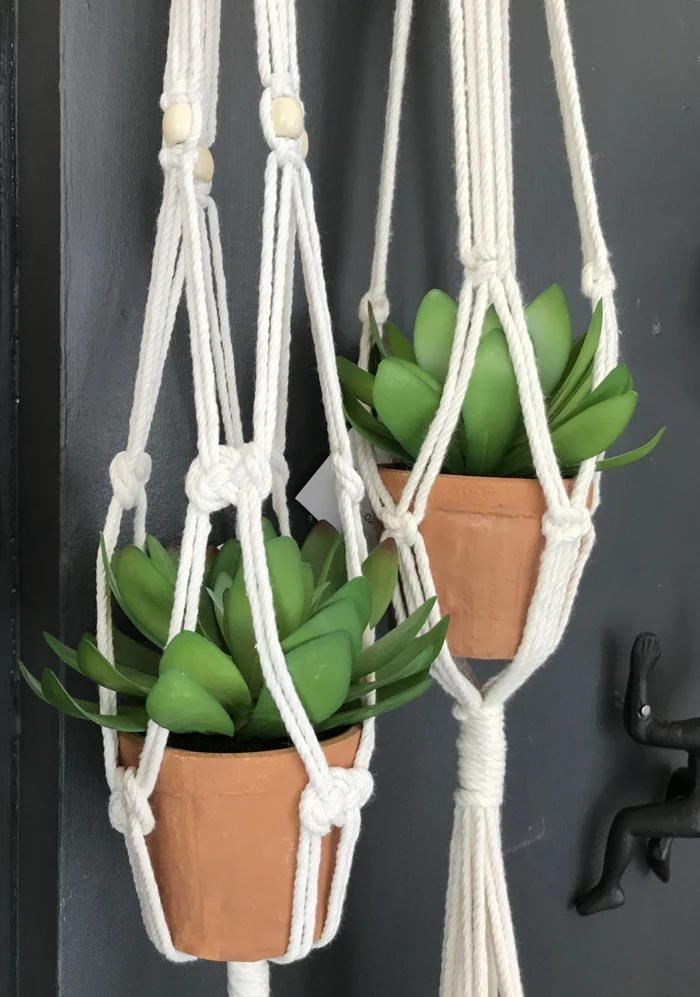
- Jute or Hemp: For that earthy, rustic vibe, you can’t beat jute. It’s a natural plant fiber, strong, and usually very affordable. The downside? It can be a little rough on your hands and sheds a bit. But it looks stunning paired with classic terracotta pots.
For this project, stick with the 4mm 3-ply natural cotton. It’s the most forgiving and will give you a result you’re proud of.
Essential Tools (No Fancy Gadgets Needed)
You really don’t need much to get started, but these three things are non-negotiable.
- A Sturdy Hook or Rack: You have to hang your project while you work. Gravity is your best friend here, keeping everything straight. An S-hook over the top of a door, a closet rod, or a portable garment rack works perfectly. Working with your project hanging at eye level saves your neck and back from a world of pain.
- Sharp Scissors: Please, don’t use your regular kitchen or paper scissors. They’ll just crush and fray the cord. A decent pair of fabric or craft shears will give you a clean, professional-looking cut every time.
- A Measuring Tape: Being off by a few inches when you first cut your cords can lead to a lopsided hanger later. A simple retractable measuring tape is all you need for accuracy.
Setting Up for a Tangle-Free Afternoon
Okay, before you cut a single thing, let’s get your space ready. The biggest headache in macrame is managing all that cord. A 15-foot cord turns into a tangled nightmare on the floor if you let it.
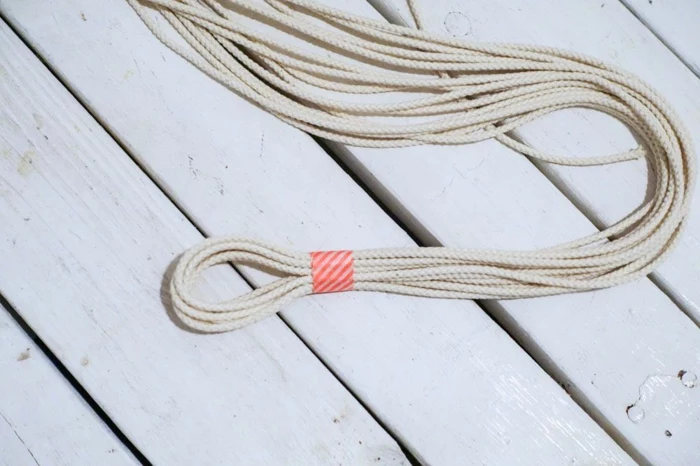
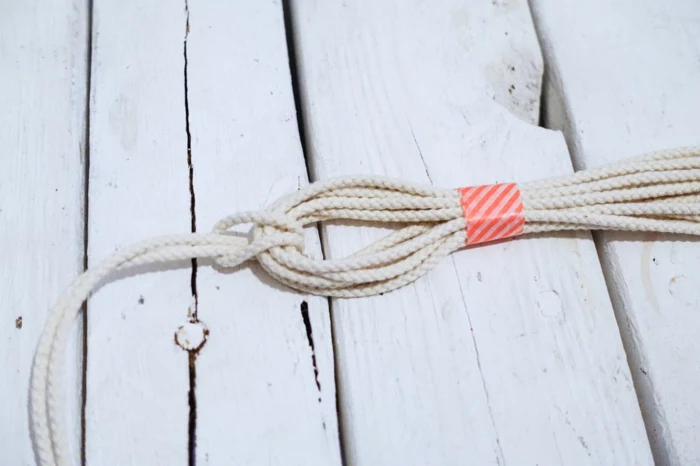
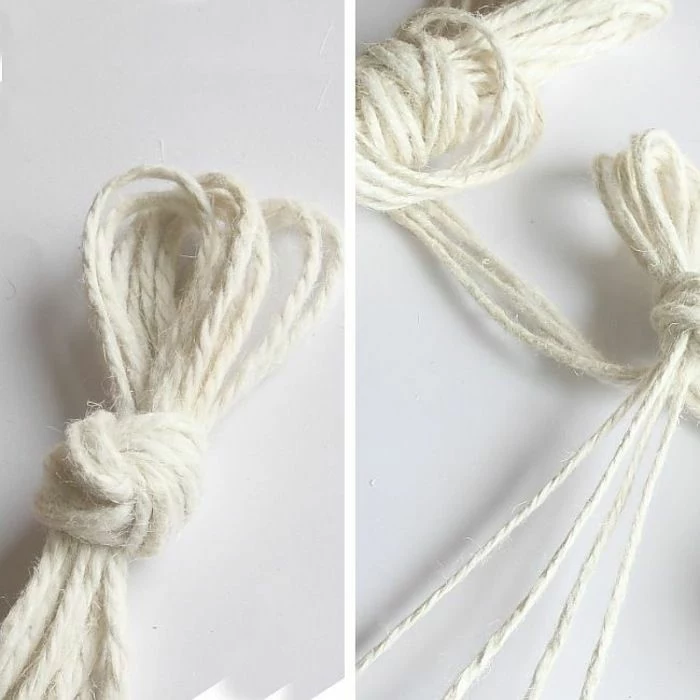
Find a comfy spot and hang your S-hook. Now, for the real pro tip on managing those long cords. After you cut your 8 pieces, take each one and create a ‘cord butterfly.’ Here’s how: hold one end of the cord in your palm. Then, wrap the cord in a figure-8 pattern around your thumb and pinky finger until you have about a foot of tail left. Slip the bundle off your hand, and wrap the tail tightly around the middle of the ‘8’ a few times, tucking the end through the last loop to secure it. Voila! A neat little bundle that will unravel easily as you need more cord.
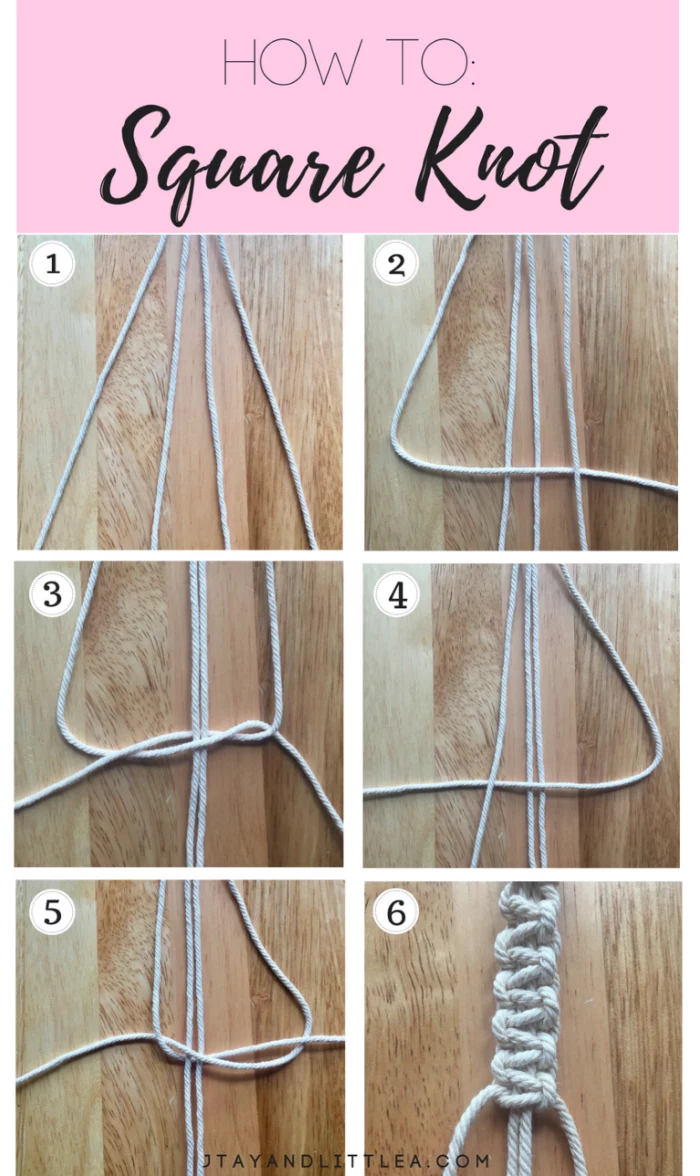
A Quick Win: Master the Square Knot
Before we jump into the full hanger, let’s practice the one knot you’ll be using the most: the Square Knot. This little exercise builds so much confidence.
Grab a short scrap of cord (maybe 3 feet long), fold it in half, and loop it over your hook. You now have two hanging cords. Now, take two more scraps (about 2 feet each) and tie them onto the first two cords with a simple knot, giving you four strands to work with. The two middle cords are your ‘fillers,’ and the two outer cords are your ‘working’ cords.
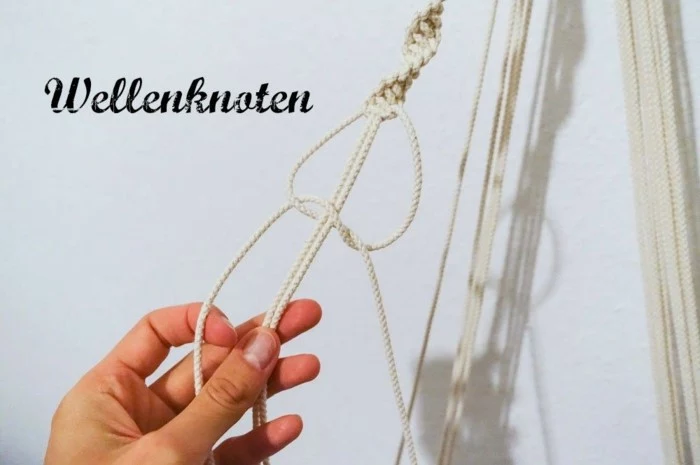
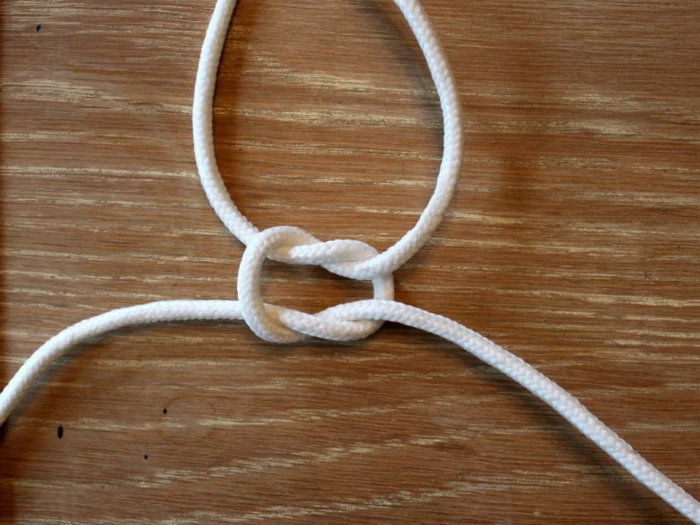
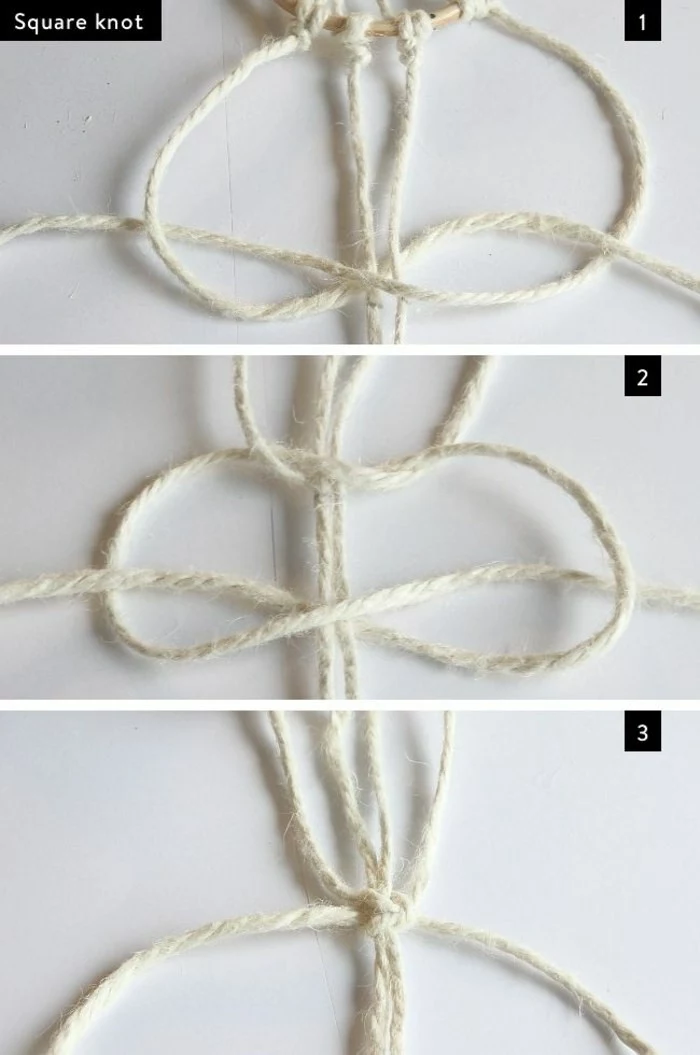
- Take the left working cord and make a ‘4’ shape over the two middle filler cords.
- Place the right working cord over the tail of that ‘4’.
- Now, bring that same right cord under the two middle filler cords and up through the loop of the ‘4’ on the left side.
- Pull both working cords to tighten the knot. That’s a Half Knot!
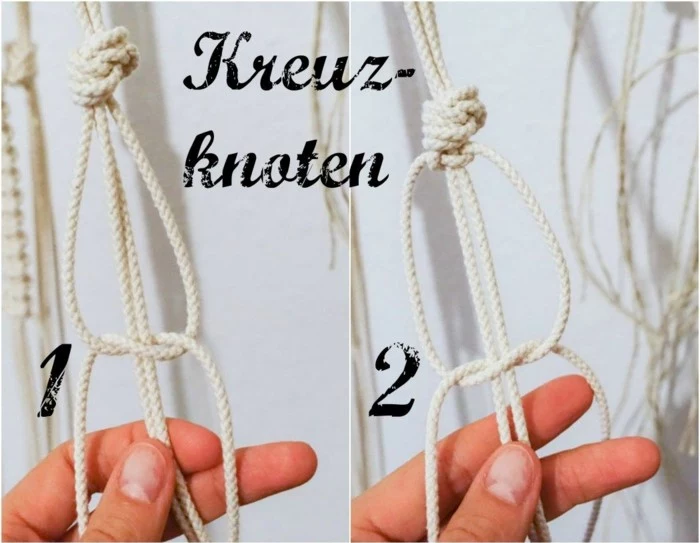
- To complete the Square Knot, just repeat the process in reverse: start with the right cord making a backward ‘4’.
Practice a few of these until the tension feels even. See? You’ve got this.
Let’s Build Your Hanger, Step-by-Step
Alright, it’s go-time. Grab your 8 long cords and your ring.
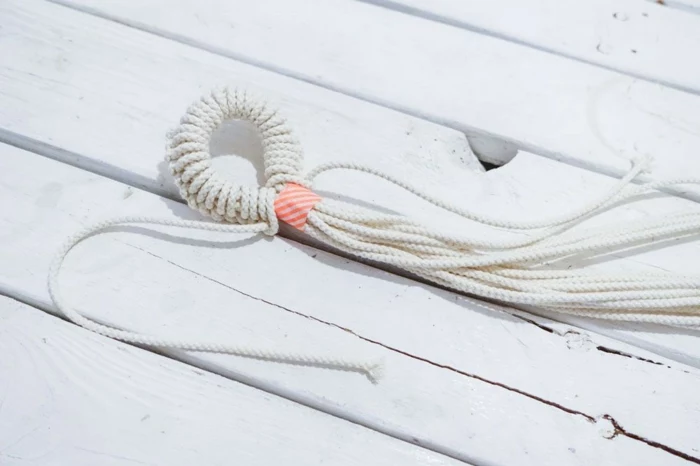
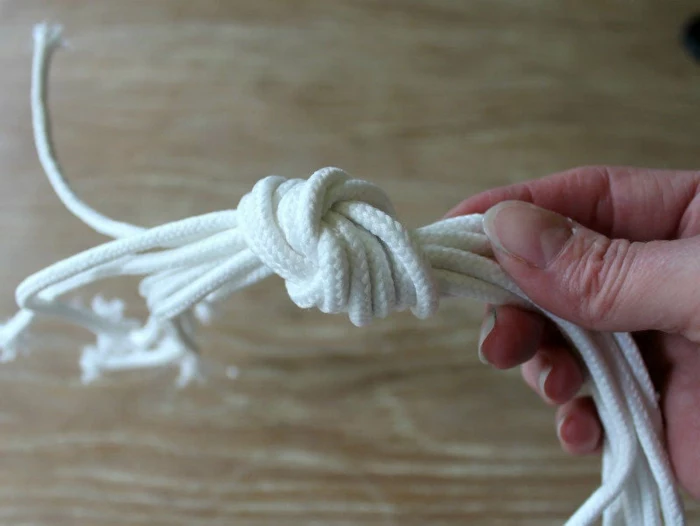
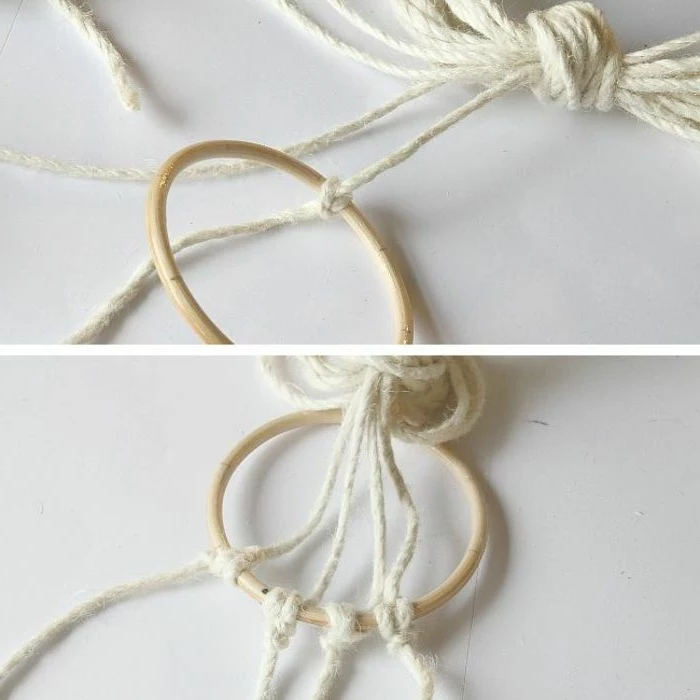
- The Gathering Knot: Take all 8 of your 15-foot cords, find their center, and fold them in half over your ring. You should now have 16 cords hanging down. Cut an extra piece of cord about 3 feet long. Make a long ‘U’ shape against the bundle of 16 cords, with the loop of the ‘U’ pointing down. Now, take the long end of your extra cord and wrap it tightly around the bundle (and the ‘U’) about 8-10 times. To finish, thread the end of your wrapping cord through the loop at the bottom, and pull the tail at the top to snug the loop up underneath the wraps. Snip the extra ends. This is called a Gathering Knot, and it’s a super clean way to start.
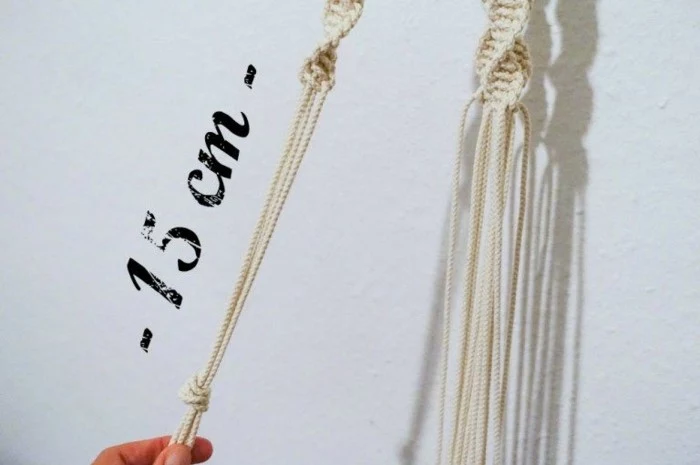
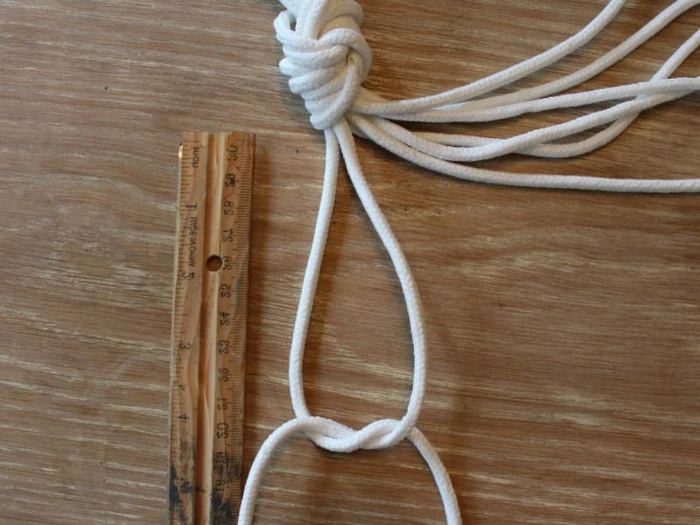
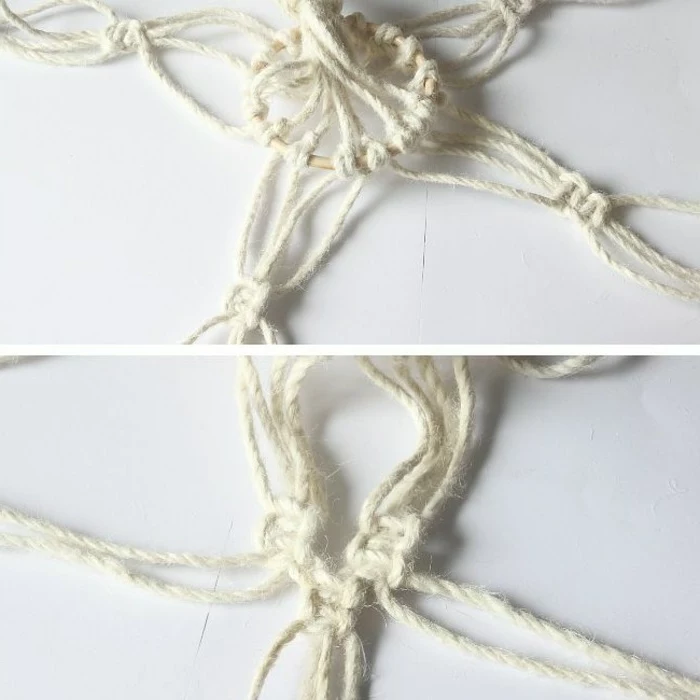
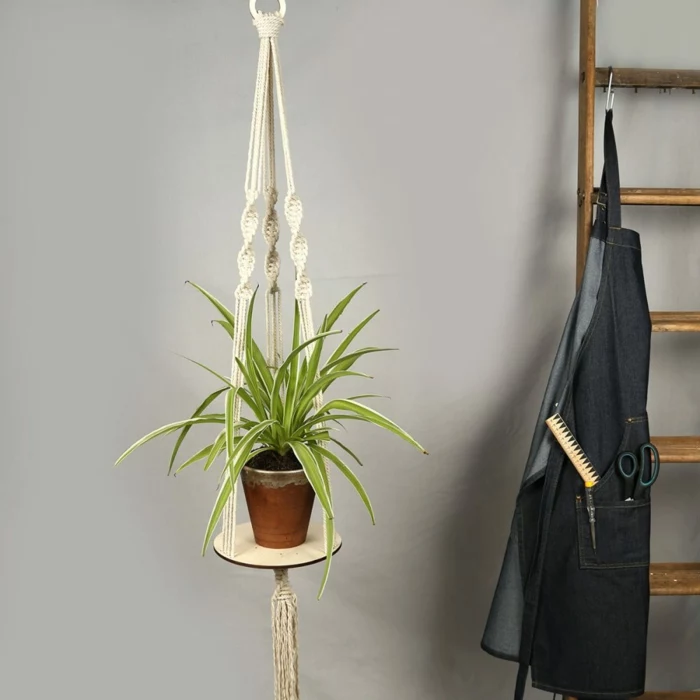
- Creating the Arms: Separate your 16 cords into four groups of four. We’re going to make four ‘arms’ for our hanger. Take one group of four cords and, leaving about a 10-inch gap from your big gathering knot, tie a series of Square Knots. Let’s aim for about 12 to 15 Square Knots in a row. Repeat this for the other three groups of four cords. Try to keep the starting point and the number of knots the same for all four arms.
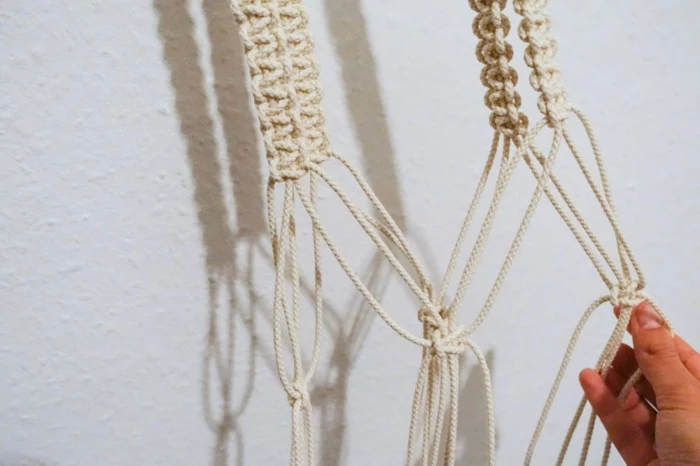
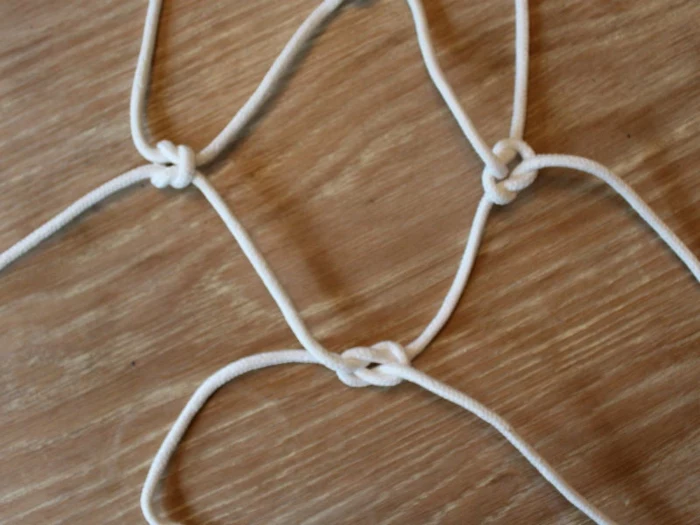
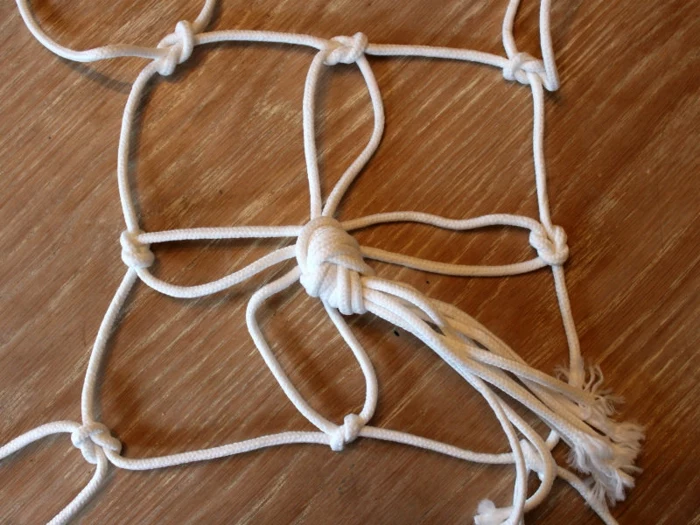
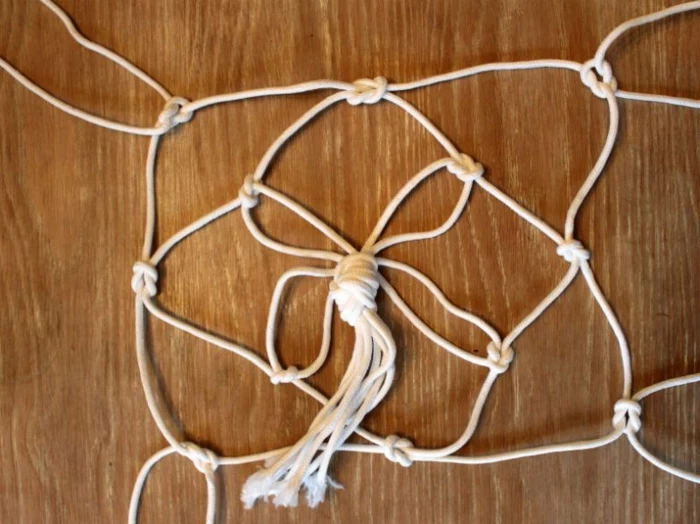
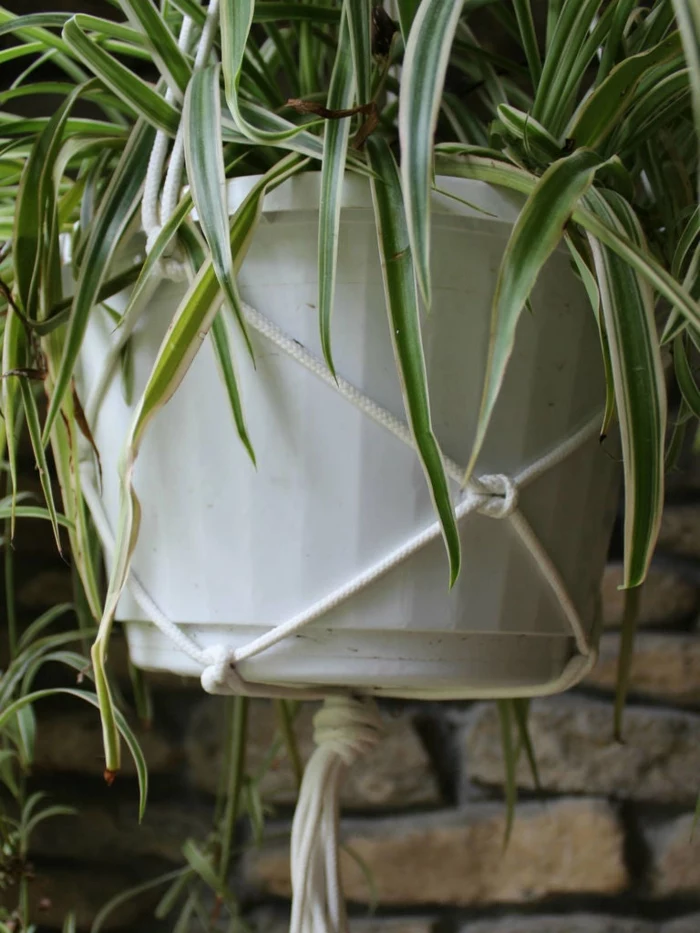
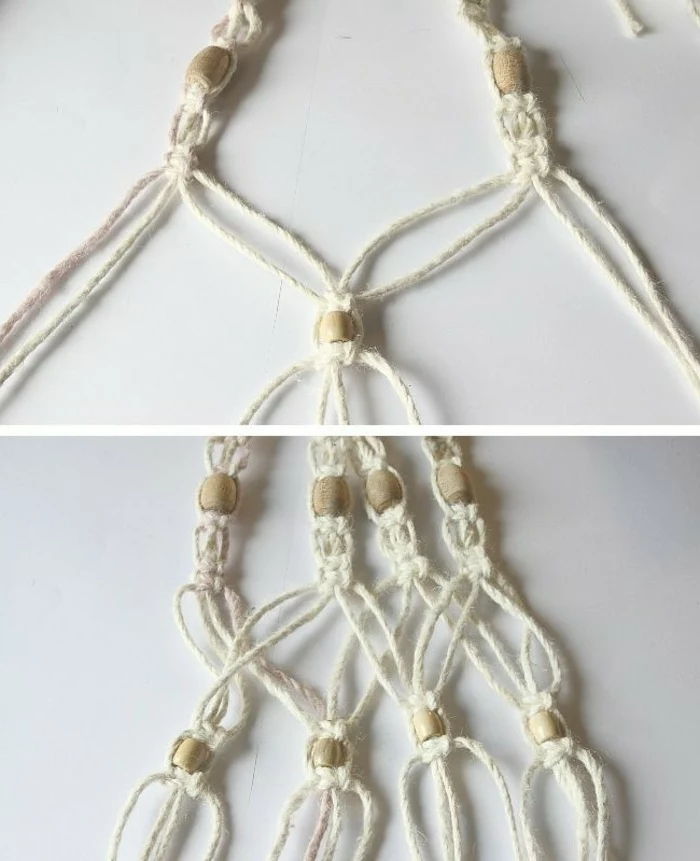
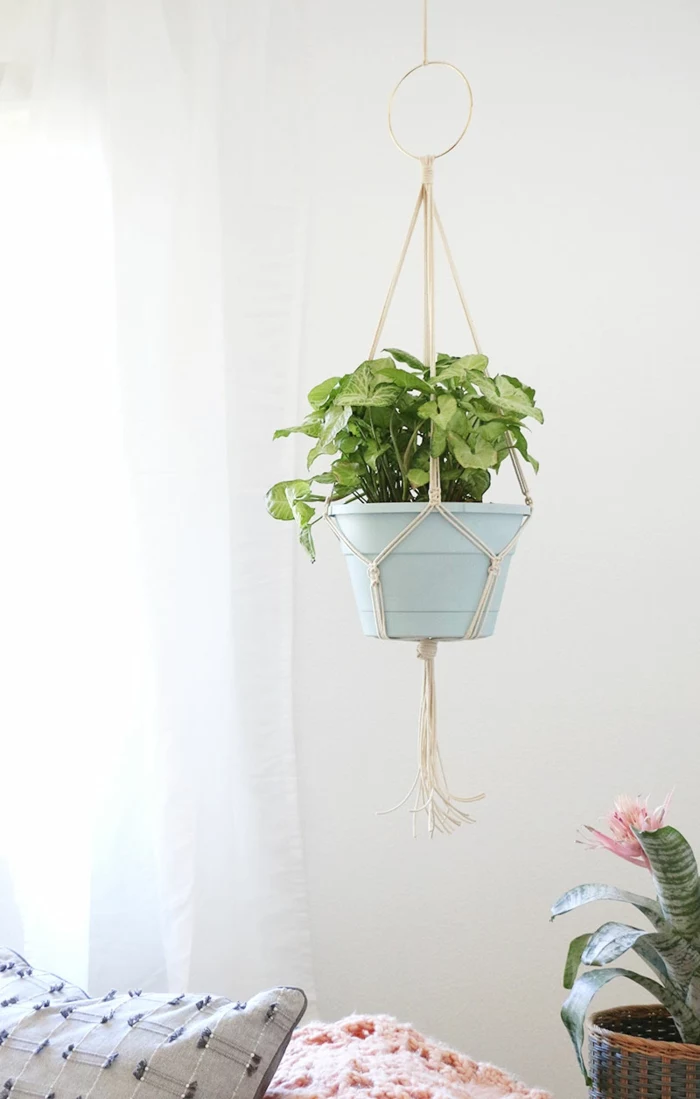
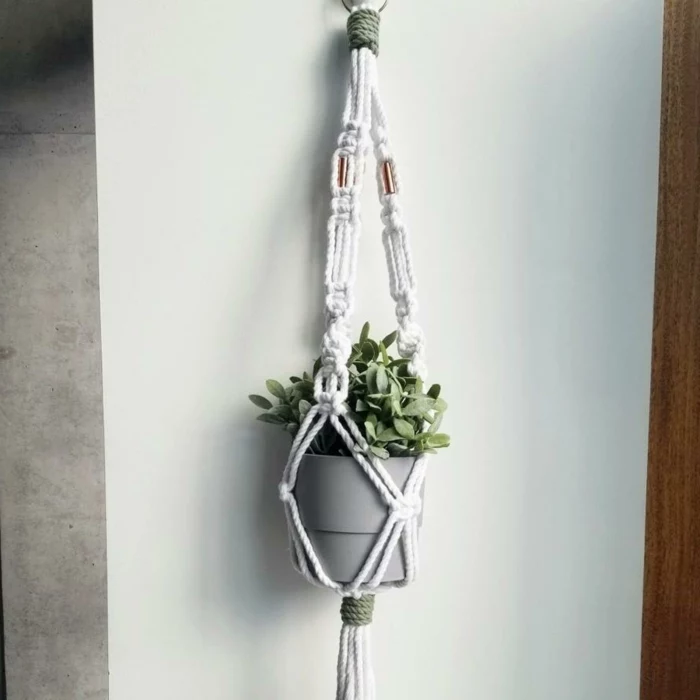
- Forming the Basket: This is where the magic happens! Let the four knotted arms hang down. About 4-5 inches below your last knot, you’re going to connect the arms. Take two cords from one arm and the two adjacent cords from the arm next to it. Tie a single Square Knot with these four cords. Now, move around the circle and do the same thing, connecting all the arms into a net. Drop down another 3-4 inches and repeat this process one more time, using the newly formed groups of four. This creates the basket that will cradle your pot.
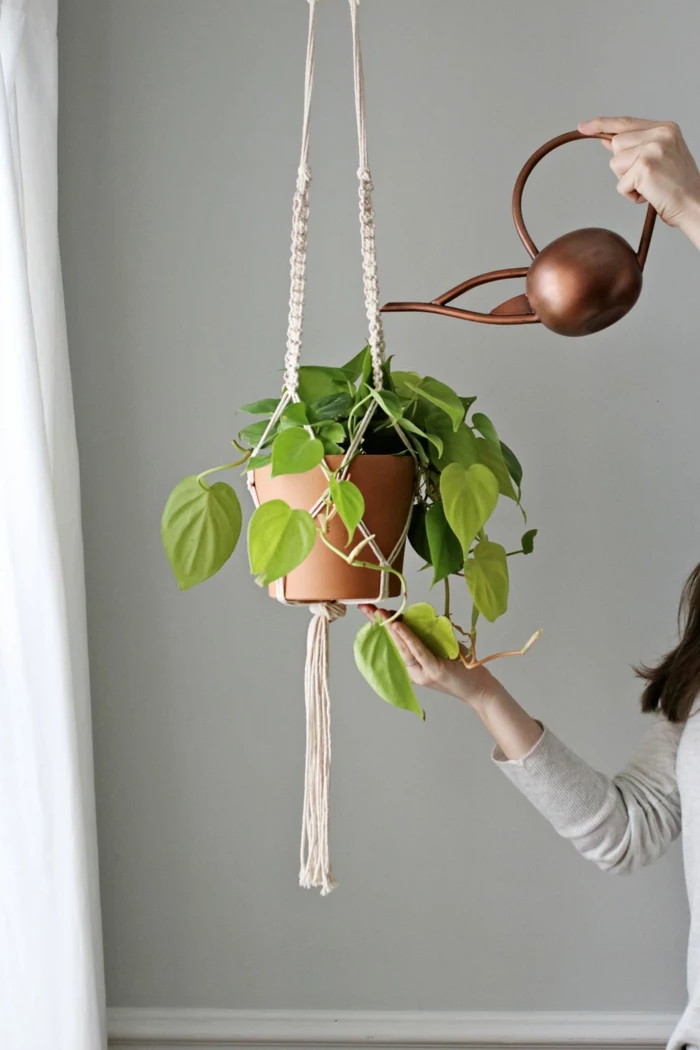
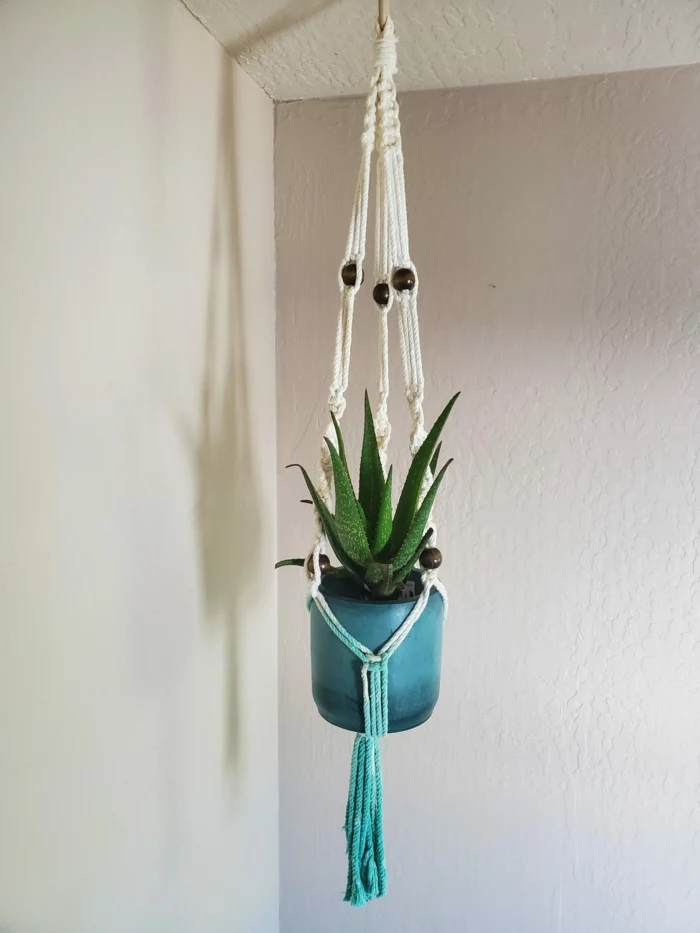
- The Final Knot & Fringe: All that’s left is to gather all 16 cords together under the basket. Make one last big Gathering Knot (just like in step 1) to secure everything. Make sure it’s tight! Now, trim the ends of your cords to your desired length. You can leave them as is, or you can take a few minutes to unravel the 3-ply cords and comb them out with a simple pet brush or a comb for that full, fluffy fringe.
Common Mistakes to Sidestep
Every crafter has made these mistakes. Now you don’t have to!
- The Stretch-Out: As I mentioned, avoid super stretchy yarns meant for knitting or crochet. They just can’t handle the weight.
- The ‘Too Short’ Tragedy: A classic rookie mistake is cutting your cords too short. My rule of thumb is to estimate how much cord you think you need, and then add another 2-3 feet just in case. You can always trim the excess, but you can’t add length back.
- Wonky Tension: If you pull some knots tighter than others, your hanger will look a little twisted. Don’t stress about perfection on your first try, but just be mindful of pulling with consistent pressure. Your practice knots will help with this!
Caring for Your Creation
Your beautiful new hanger is pretty low-maintenance. If it gets a little dusty, just give it a good shake outside. If it gets a small smudge, you can spot-clean it with a damp cloth and a tiny bit of mild soap. I’d avoid tossing it in the washing machine. And if it’s hanging outside, try to keep it under a covered porch to protect the natural cotton from the elements.
And that’s it! You’ve made a strong, functional, and beautiful piece of decor. Now, go find the perfect plant for it!
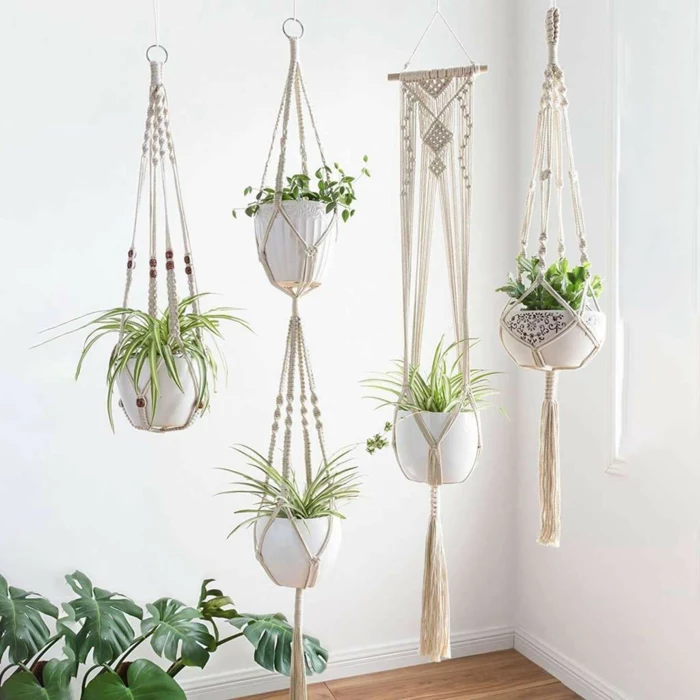
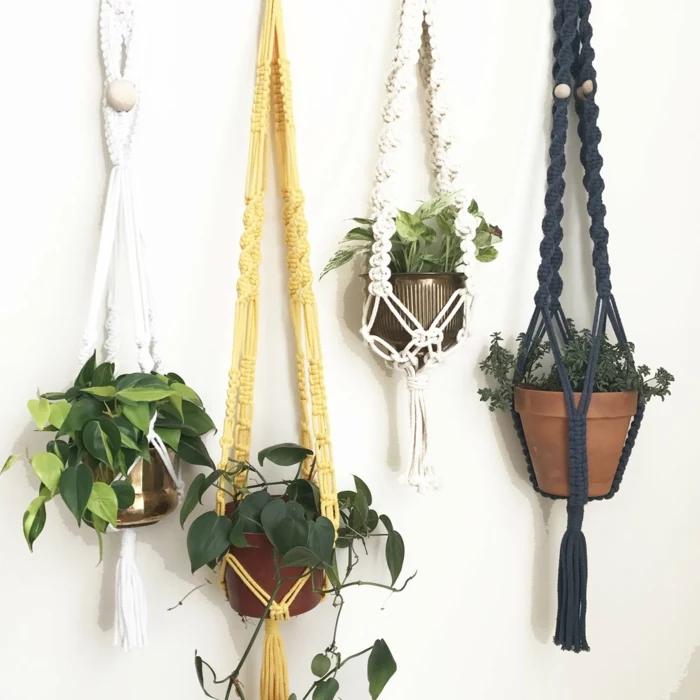
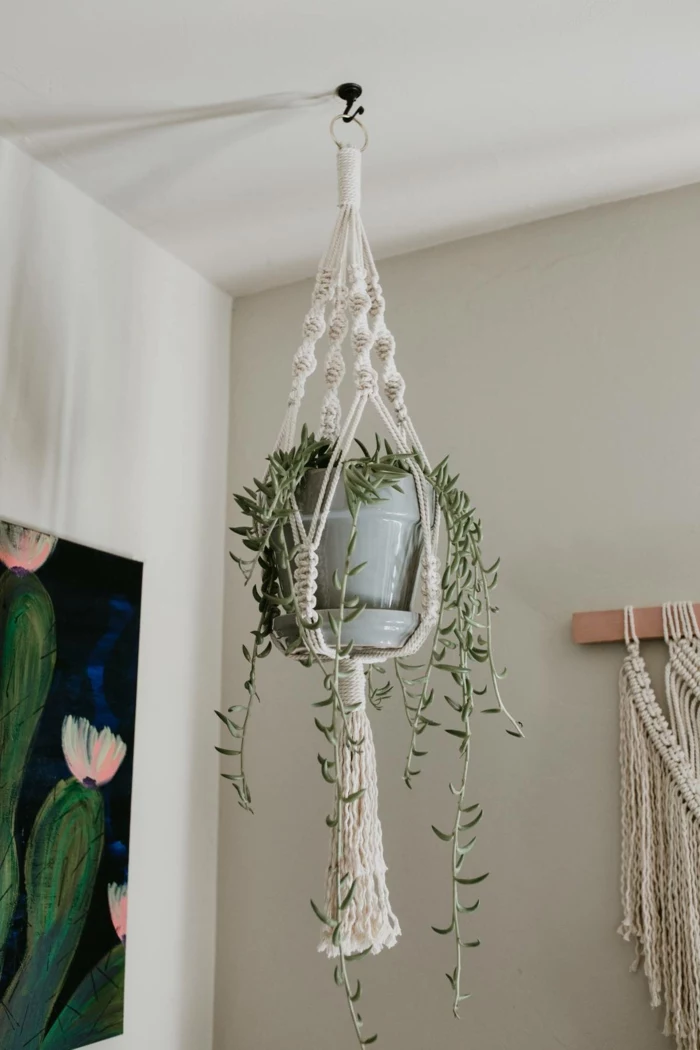
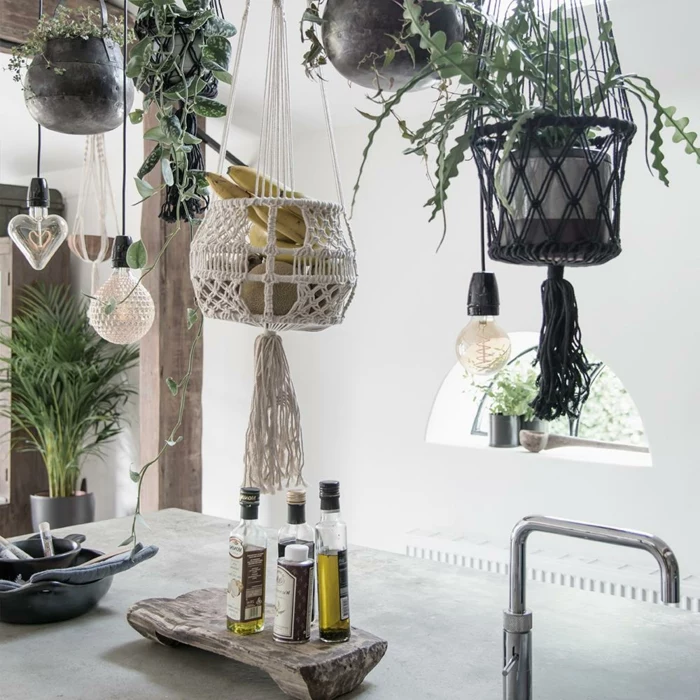
Inspirational Gallery
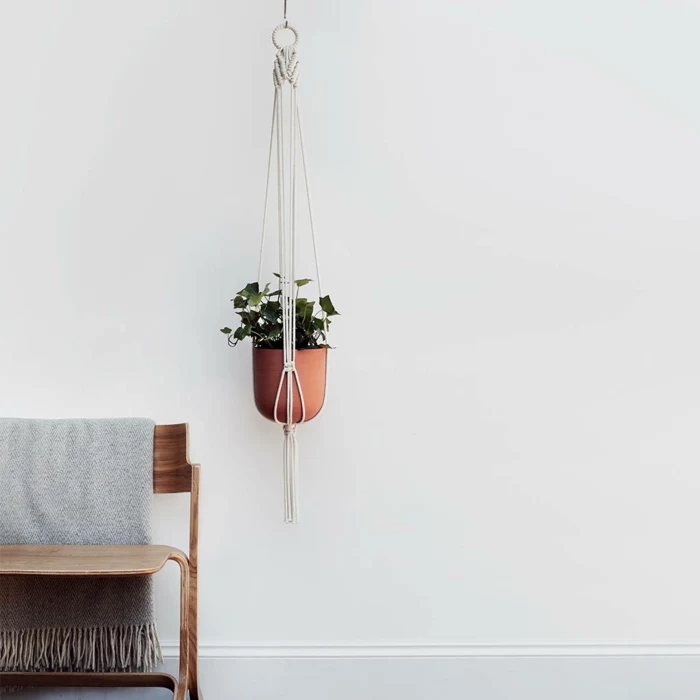
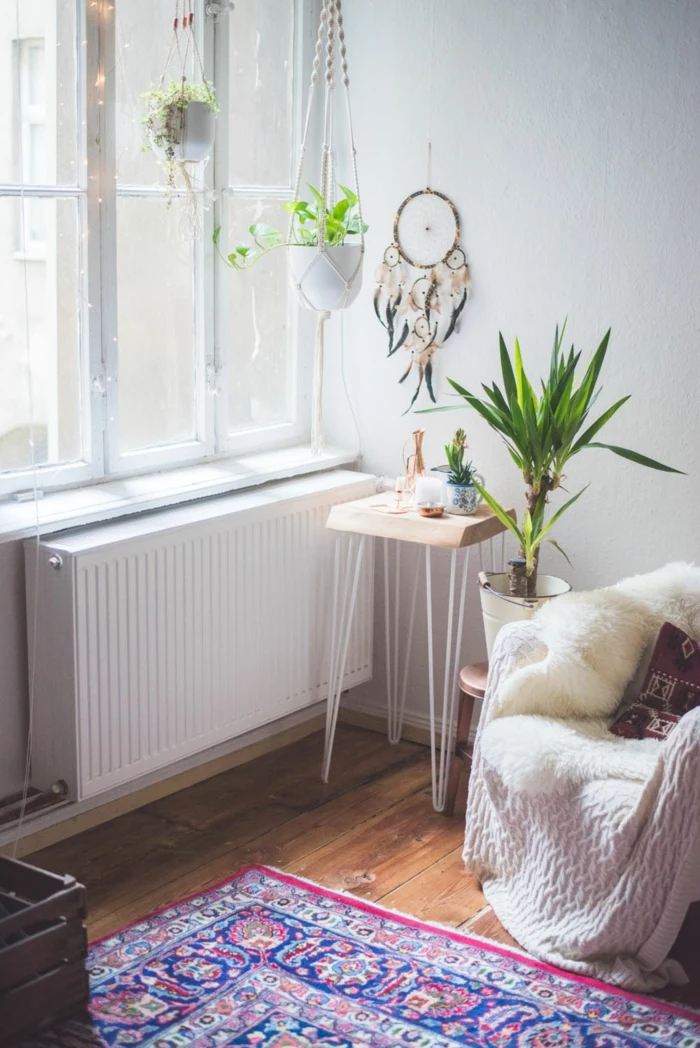
Once your hanger is complete, think about how you’ll display it. A simple ceiling hook screwed into a joist is the most secure option for heavier plants. For lighter pots, a sturdy wall-mounted bracket can create a beautiful cascading effect, especially when placed near a window.
Want to personalize your creation? It’s easy to add a little extra flair.
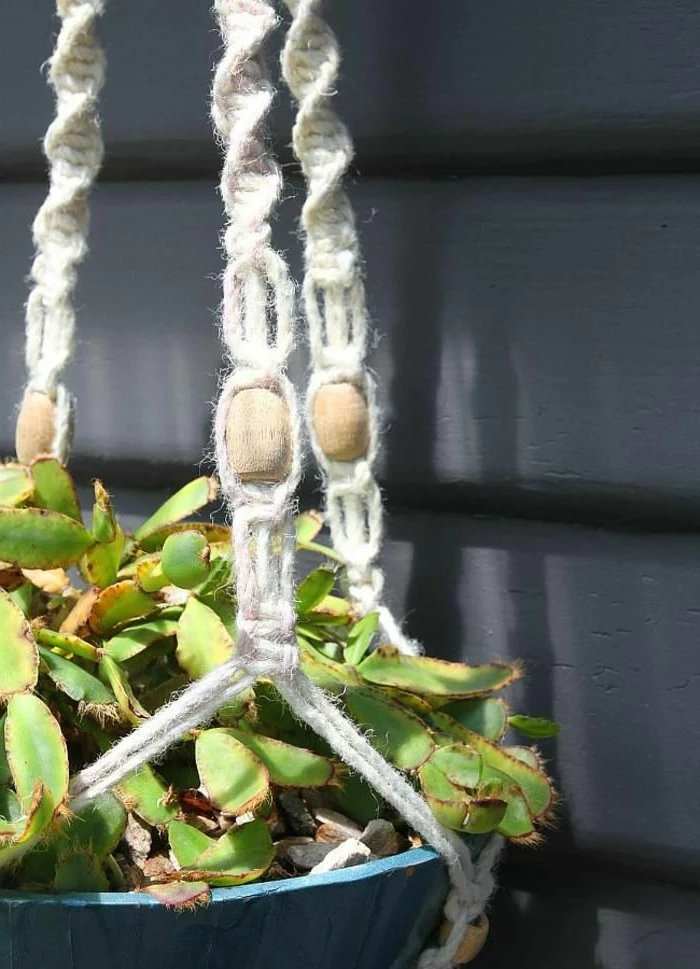
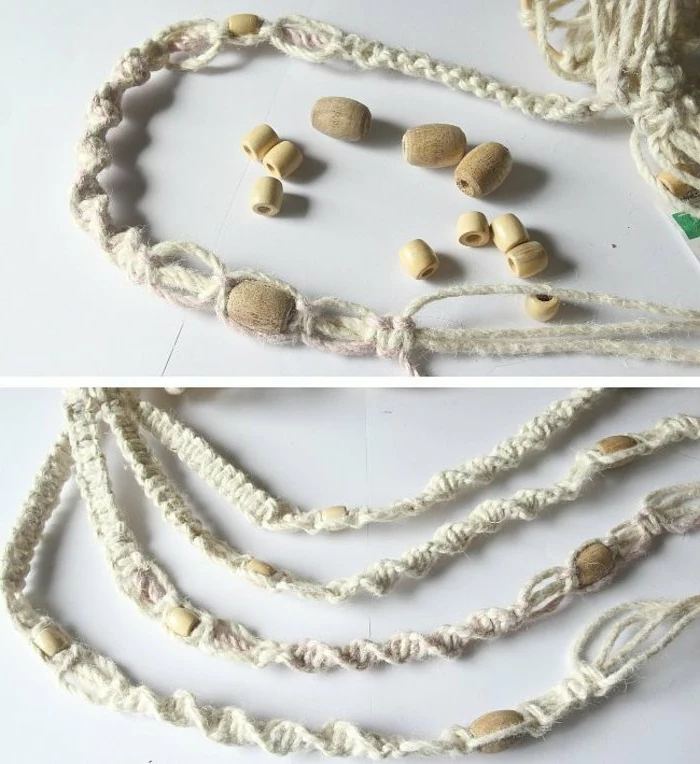
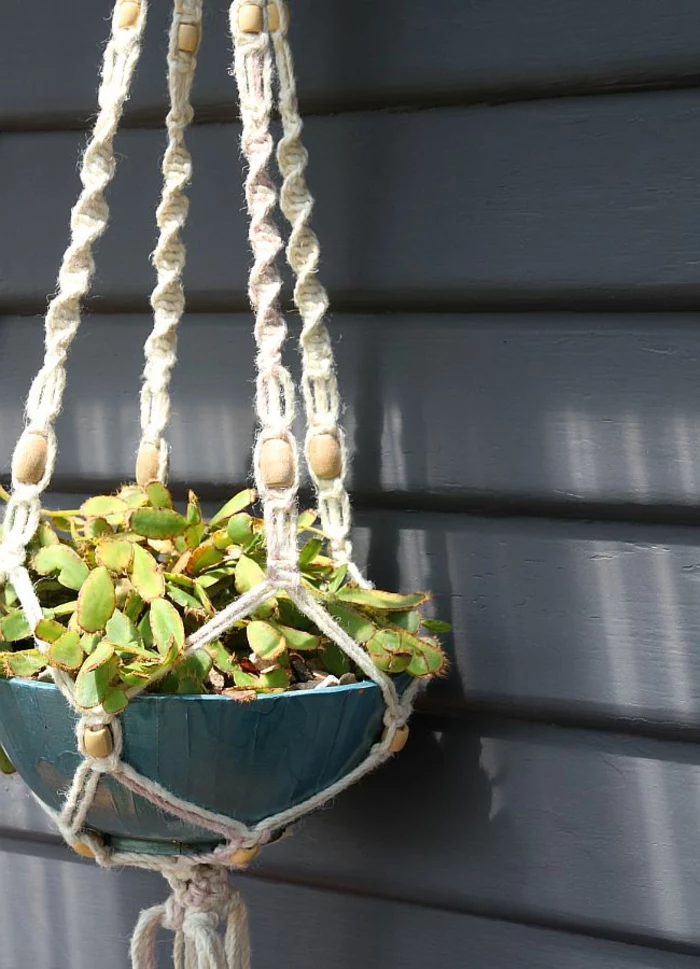
- Slide large-hole wooden beads onto your cords before tying the gathering knot at the bottom.
- Wrap a few sections with colorful embroidery floss for a pop of color.
- Unravel the ends of your tassel and comb them out with a pet brush for a soft, feathery finish.

The secret to a professional look: Consistent tension. If your knots look uneven or your hanger twists, it’s likely due to pulling some cords tighter than others. Try to be mindful of your hands and apply the same pressure for every single square knot and half hitch.
Macrame is believed to have originated with 13th-century Arab weavers. The word itself comes from the Arabic ‘migramah’, meaning ‘fringe’. These decorative fringes were used on camels and horses to help keep flies away.
While natural cotton is perfect for beginners, other fibers offer different aesthetics.
- Jute or Hemp: Creates a rustic, earthy look. It’s very strong but can be rougher on the hands.
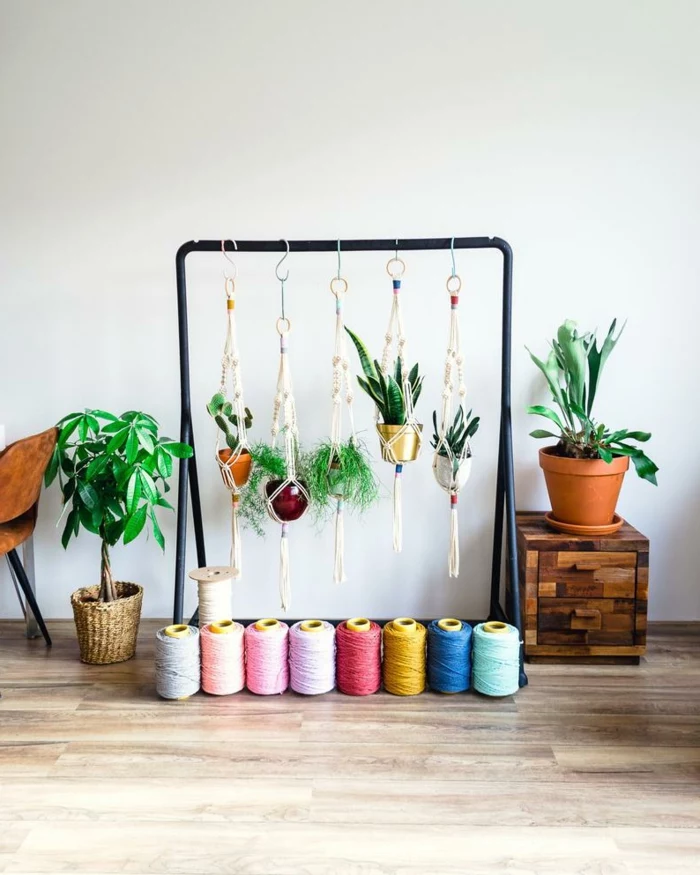
- Recycled Cotton Cord: Brands like Bobbiny offer single-twist cords in dozens of colors. They are incredibly soft and create beautiful, defined knots.
- Synthetic Cord: Polypropylene is durable and water-resistant, making it a great choice for outdoor plant hangers.
Love color but want a more custom look?
You can easily dye your natural cotton cord before you start knotting. Use a fiber-reactive dye like those from Rit or Dylon for vibrant, lasting color. Simply follow the package instructions for a tub dye, submerge your cut cords, and let them soak. Rinse thoroughly and hang to dry completely before you begin your project.
Wooden Ring: Offers a warm, natural, and classic boho feel. It pairs perfectly with neutral cotton cords and complements most interior styles.
Metal Ring: A brass or copper ring can add a touch of modern or industrial elegance. It provides a striking contrast and a more polished finish.
Both are equally strong; the choice is purely about the style you want to achieve.
Cotton is a water-intensive crop, requiring over 2,700 liters of water to produce the cotton needed for a single t-shirt.
This is why choosing your cord matters. Opting for recycled cotton cord, like those from ethical suppliers such as Ganxxet, significantly reduces the environmental footprint of your craft. It gives new life to textile waste and uses far less water and energy to produce.
- It reduces stress and anxiety.
- It improves focus and concentration.
- It provides a screen-free creative outlet.
The hidden benefit of macrame? The rhythm of knotting. Focusing on the simple, repetitive motions can be a powerful form of mindfulness, allowing your mind to quiet down as your hands stay busy.
To keep your macrame hanger looking fresh, avoid putting it in the washing machine. Instead, spot clean any marks with a mild soap and water. For a general dusting, you can take it outside and give it a gentle shake or use the upholstery attachment on your vacuum cleaner on a low setting.
Stuck in a creative rut? Get inspired by modern macrame masters on Instagram.
- @crossing.threads for intricate wall hangings.
- @windychien for her innovative and artistic knot explorations.
- @niromastudio for stunning, large-scale installations and minimalist patterns.
A tip for saving on supplies: The cord is the biggest expense, but the ring doesn’t have to be. Check out thrift stores for old wooden or brass curtain rings. You can often find them for a fraction of the price of new ones at a craft store, and they add a unique, vintage character to your work.
Ready for a dramatic statement piece? Try working with oversized cord.
- Use a 9mm or even 12mm thick cord for a bold, textural effect.
- You’ll need far less length, and the project works up incredibly fast.
- It’s perfect for holding larger, heavier pots and creates an instant focal point in any room.
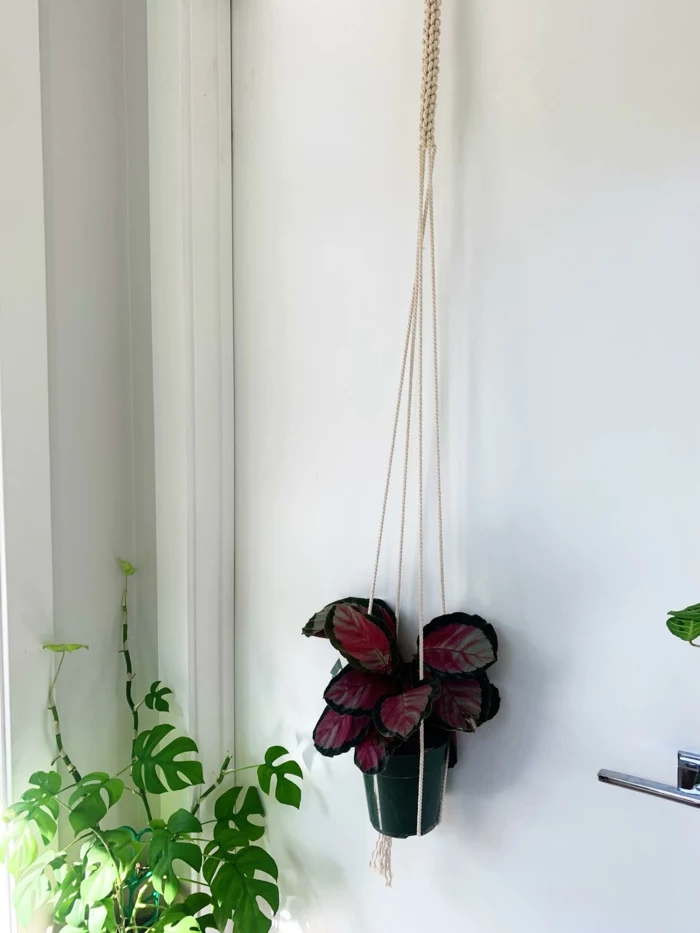
Does the pot shape matter for the hanger?
Absolutely! The ‘basket’ portion of your hanger is flexible, but it’s designed with a specific shape in mind. A standard tapered pot is the easiest to fit. If you’re using a pot with straight sides, like a cylinder, make sure the final gathering knot is tied very securely underneath to prevent it from slipping through.
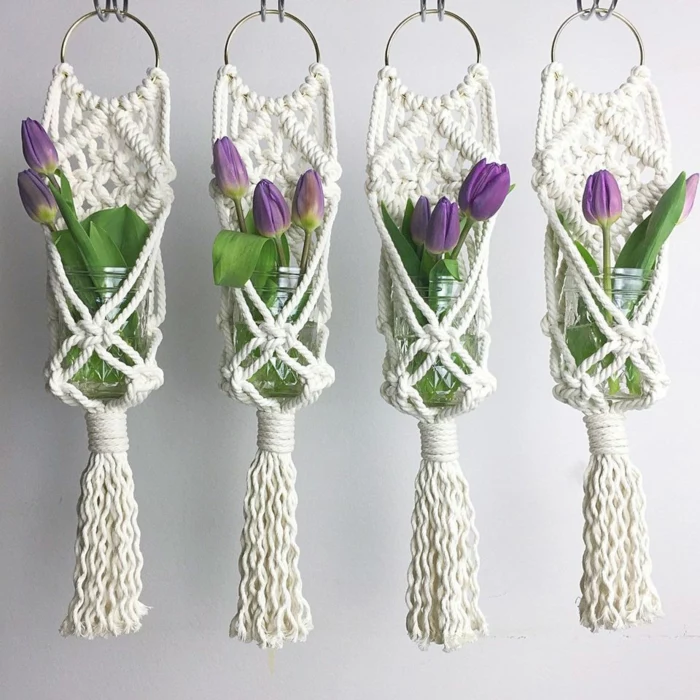
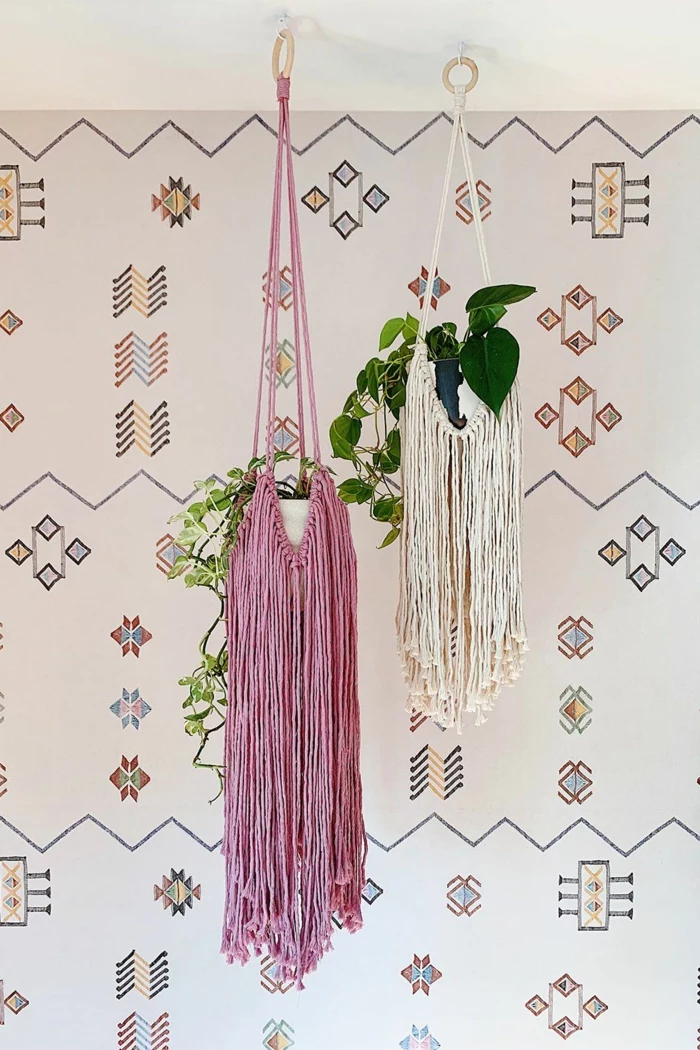
Dip-Dyeing: Dyeing the finished tassel of your hanger creates a beautiful ombré effect. It’s a quick way to add a pop of color with minimal effort.
Using Colored Cord: Incorporating a few strands of colored cord alongside your natural cord from the beginning creates stripes and patterns throughout the entire piece.
Dip-dyeing is great for a subtle touch, while using colored cord makes a bolder statement.
A single, well-tied square knot can be incredibly strong, but the hanger’s strength depends on the cord’s breaking strain and the hook it’s hung from.
A standard 4mm cotton cord can typically hold around 20-30 lbs, more than enough for most houseplants. The real weak point is often the ceiling hook. Always use a hook rated for at least twice the weight of your potted plant and ensure it’s anchored into a ceiling joist, not just the drywall.
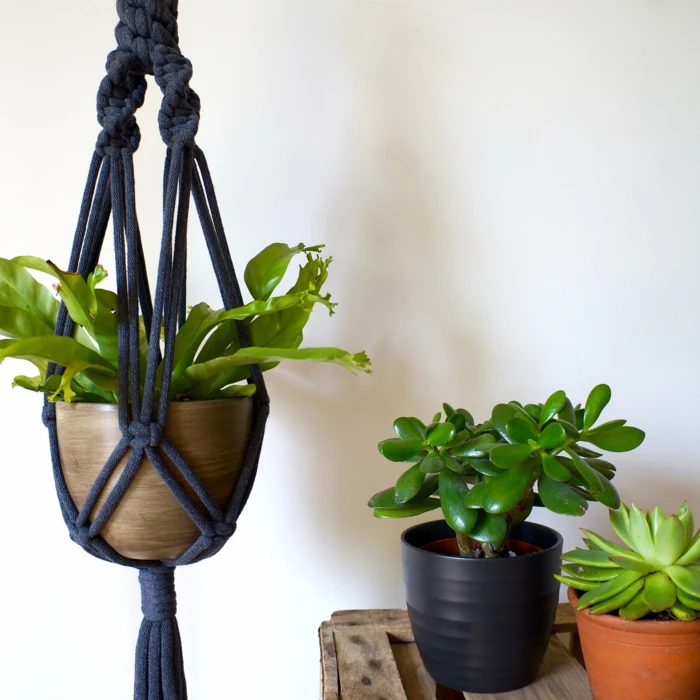
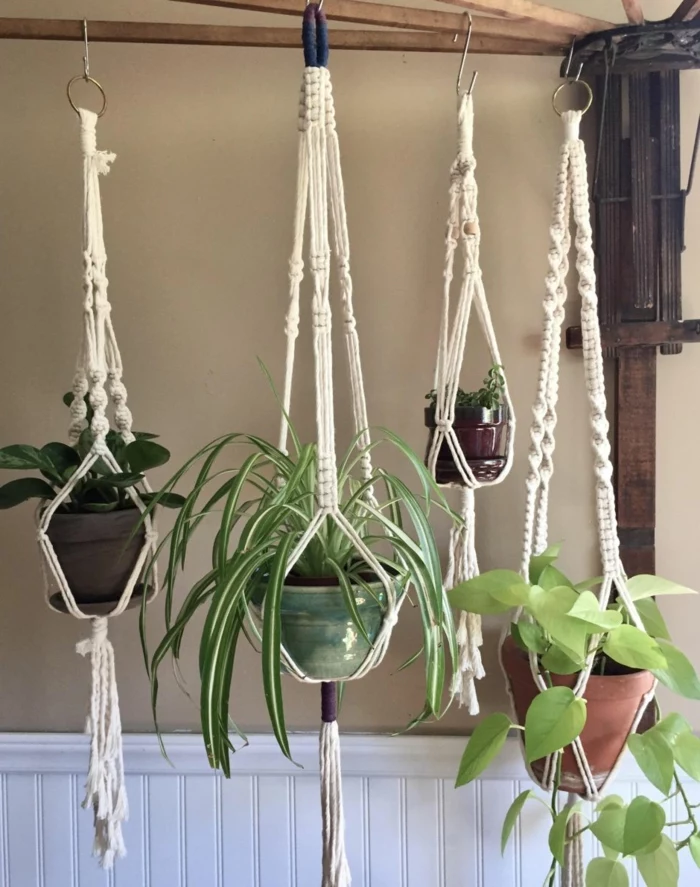
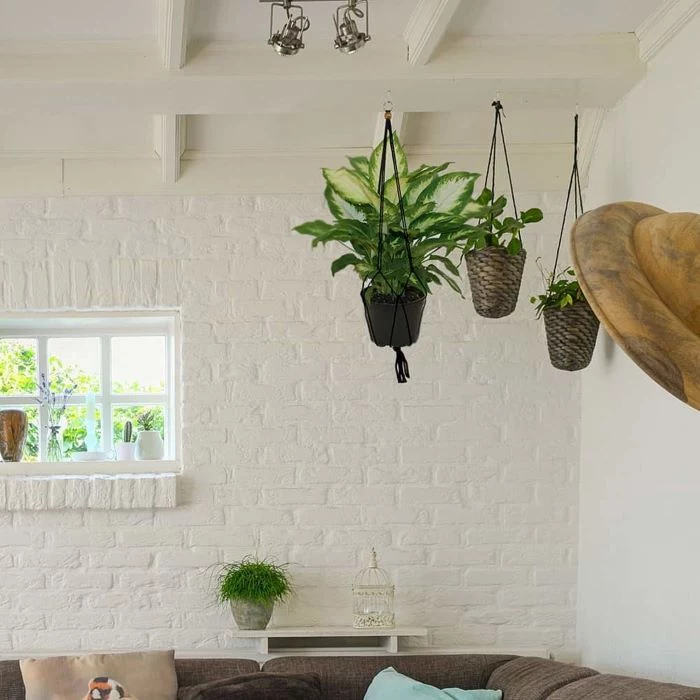
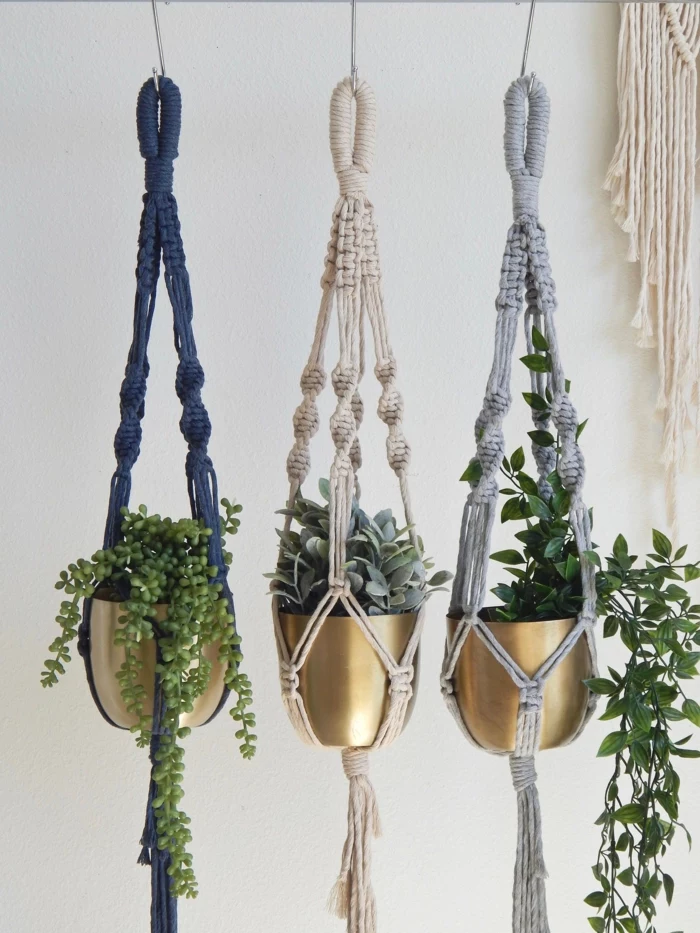
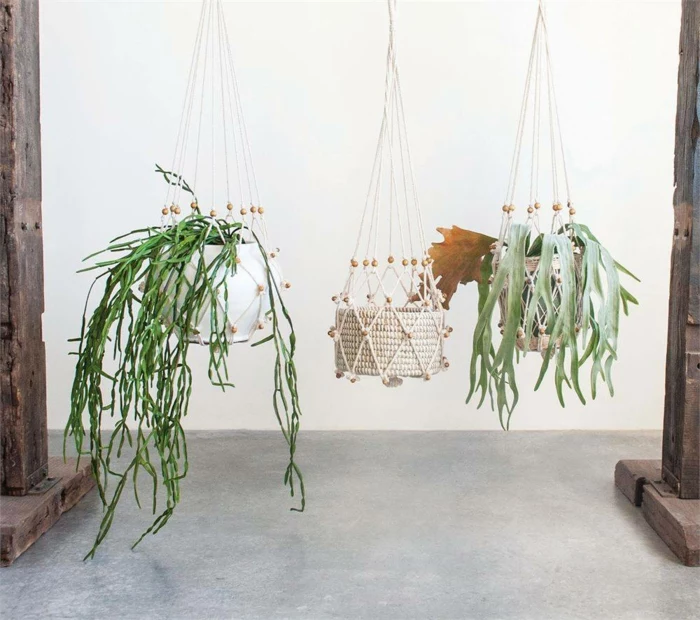
- It adds depth and dimension to your decor.
- It creates a lush, ‘jungle’ feeling.
- It draws the eye upward, making a room feel taller.
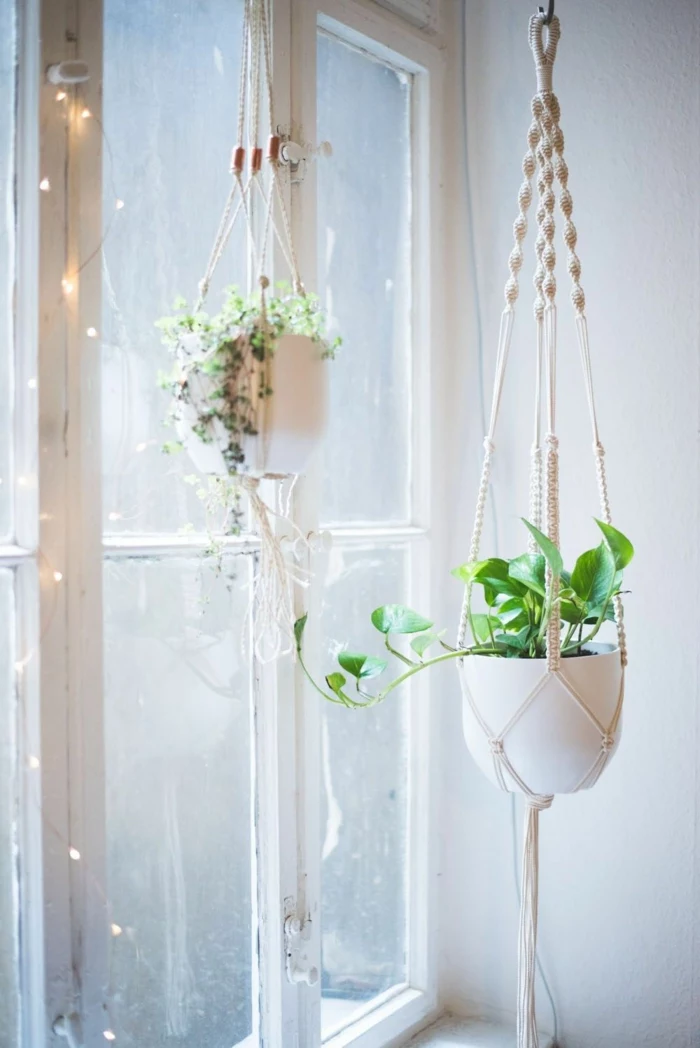
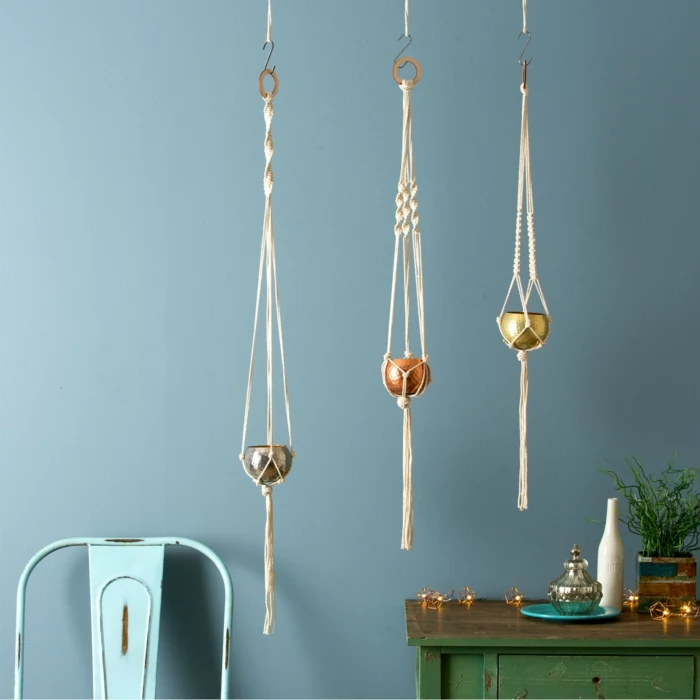
The secret to a stunning plant display? Don’t stop at one. Grouping three macrame hangers together at slightly different heights creates a dynamic and visually interesting focal point.
If you’re aiming for a more rustic or coastal vibe, consider making your next hanger with jute cord. It’s a natural vegetable fiber that’s very durable and holds its shape well. While a bit scratchier to work with than cotton, the finished product has a wonderfully raw and organic texture that pairs beautifully with terracotta pots.
The main article mentions you’ll have cord left over. Don’t let it go to waste!
- Make a simple macrame keychain using a few square knots.
- Create a small wall hanging on a piece of dowel or driftwood.
- Tie a few decorative knots around a plain glass jar to turn it into a stylish vase or candle holder.
Common mistake alert: If your chain of square knots starts to spiral, you’re not alternating your starting cord. A true square knot is made of two halves. You must start the first half on one side (e.g., left over right) and the second half on the *other* side (right over left). Forgetting to alternate creates a spiral stitch—which is a cool design, but not if you wanted a flat panel!
In a world of mass production, a handmade object is a small celebration of our own humanity. It’s a story, a moment of focus, and a piece of the maker’s spirit.
Want to hang a plant on your porch or balcony?
- Natural cotton is not ideal, as it can absorb moisture and develop mildew over time.
- Choose a synthetic cord made from polypropylene or nylon. These materials are weather-resistant and won’t rot.
- They also come in a wide range of bright, UV-stable colors that won’t fade in the sun.
Can I use yarn or other fibers I find at a thrift store?
You can, but with caution. Standard knitting yarn is not designed to bear weight and can stretch or break over time. Look for thick, non-stretchy fibers. A cone of old weaving cotton or even thin rope could be a fantastic and unique find for a decorative, lightweight hanger, but test its strength before trusting it with your favorite plant.
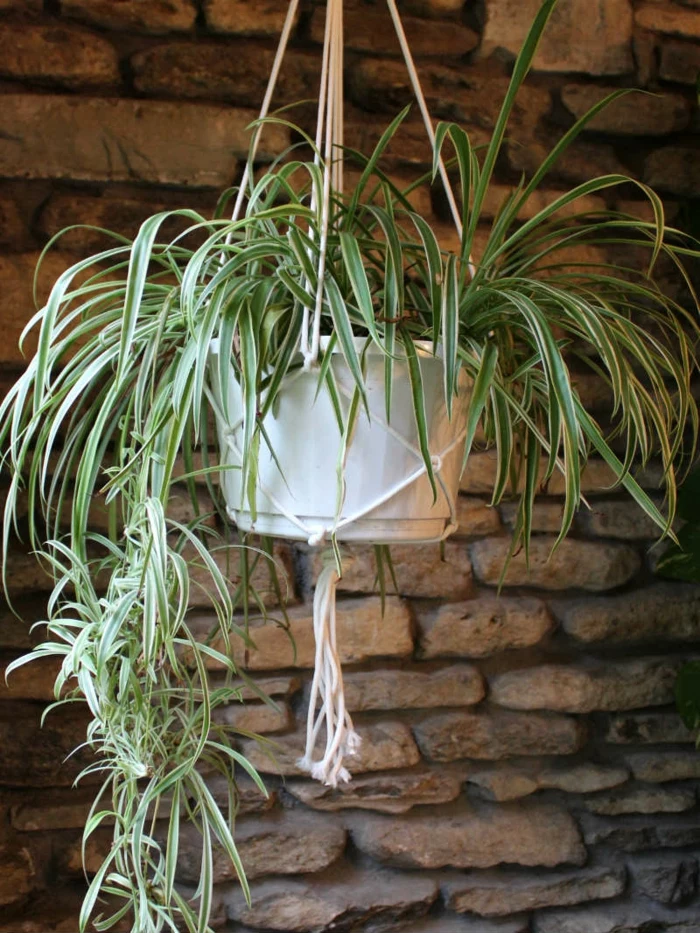
A handmade macrame plant hanger is one of the most thoughtful gifts you can give. It’s personal, stylish, and shows you invested your time and creativity. Pair it with a small, easy-care plant like a Pothos or Spider Plant for a complete, ready-to-hang present that anyone would be thrilled to receive.