Your Guide to Crafting Paper Flowers That Actually Look Real
I still have the very first paper rose I ever made. It’s tucked away in a little box, and honestly, it’s a mess. The petals are clumsy, you can see the glue, and the stem is totally crooked. But I keep it to remind me that every single craft starts with a first, imperfect attempt. It’s a journey.
In this article
Over the years, I’ve twisted and glued thousands of these flowers for everything from wedding bouquets to huge event backdrops. And I’ve learned that making a truly beautiful paper flower isn’t about some secret trick. It’s about getting to know your materials and enjoying the process.
So, this guide isn’t just a list of quick projects. It’s a collection of the foundational know-how that makes all the difference. We’ll get into the paper itself, the tools that actually matter, and the techniques that turn a flat sheet into something that feels alive. This does take patience, so your first few flowers might look like my first rose. But with a solid foundation, your tenth will be something you’ll be genuinely proud of. Let’s start with the most important part: the paper.
The Foundation: Picking the Right Paper
Choosing the right paper is, without a doubt, the most important decision you’ll make. It dictates everything—the flower’s final look, its feel, and how long it will last. So many beginners just grab the first colorful sheet they see, which usually leads to frustration when it tears or won’t hold a shape. The pros know that it’s all about the paper’s weight, texture, and grain.
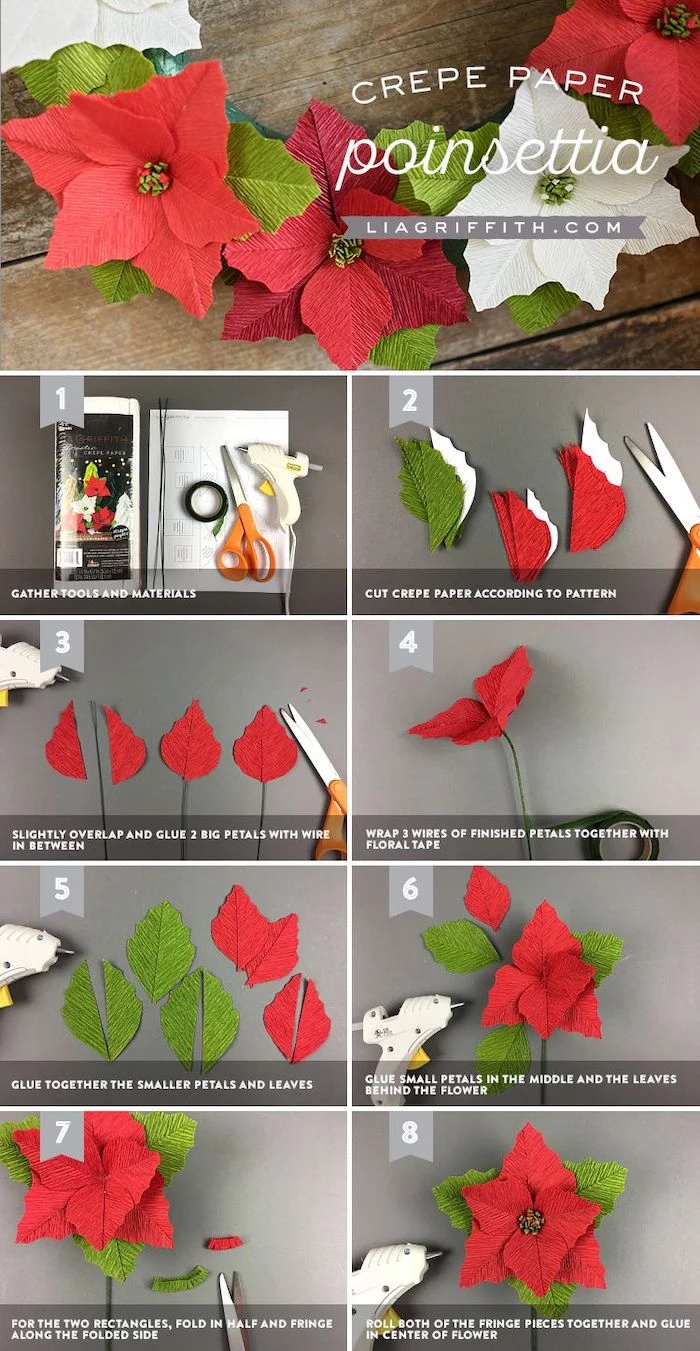
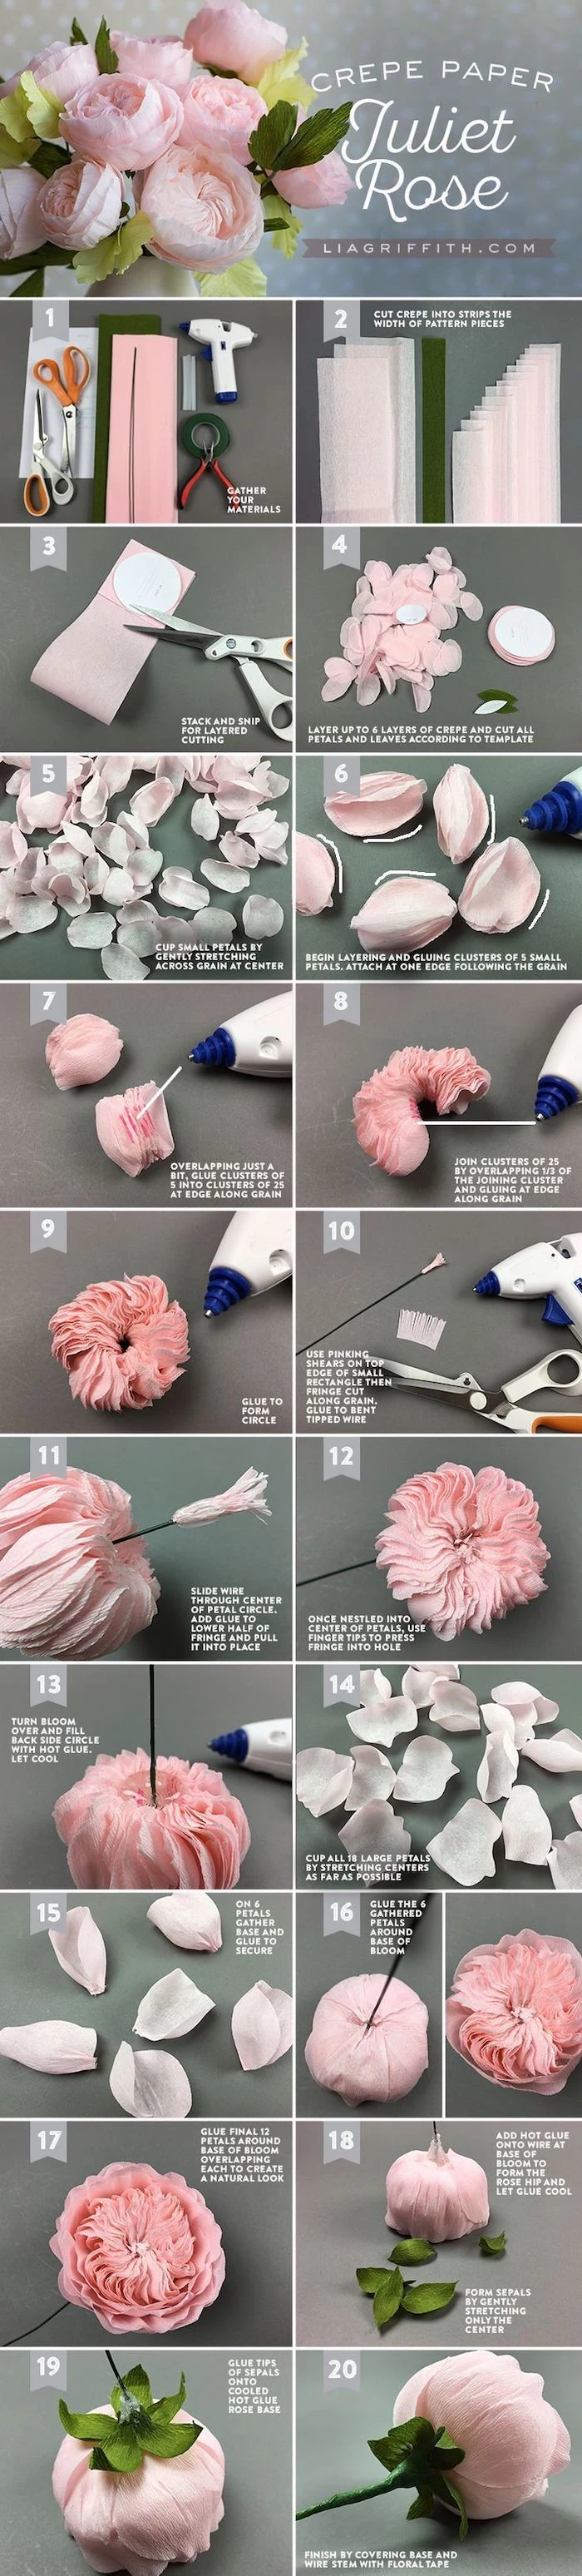
The Magic of Crepe Paper
For realistic flowers, crepe paper is the gold standard. Its unique crinkled texture and ability to stretch are what set it apart. This stretch, called the ‘crepe,’ lets you cup, ruffle, and shape petals to mimic nature in a way other papers just can’t.
But heads up, not all crepe paper is created equal. It’s graded by weight, usually in grams per square meter (GSM).
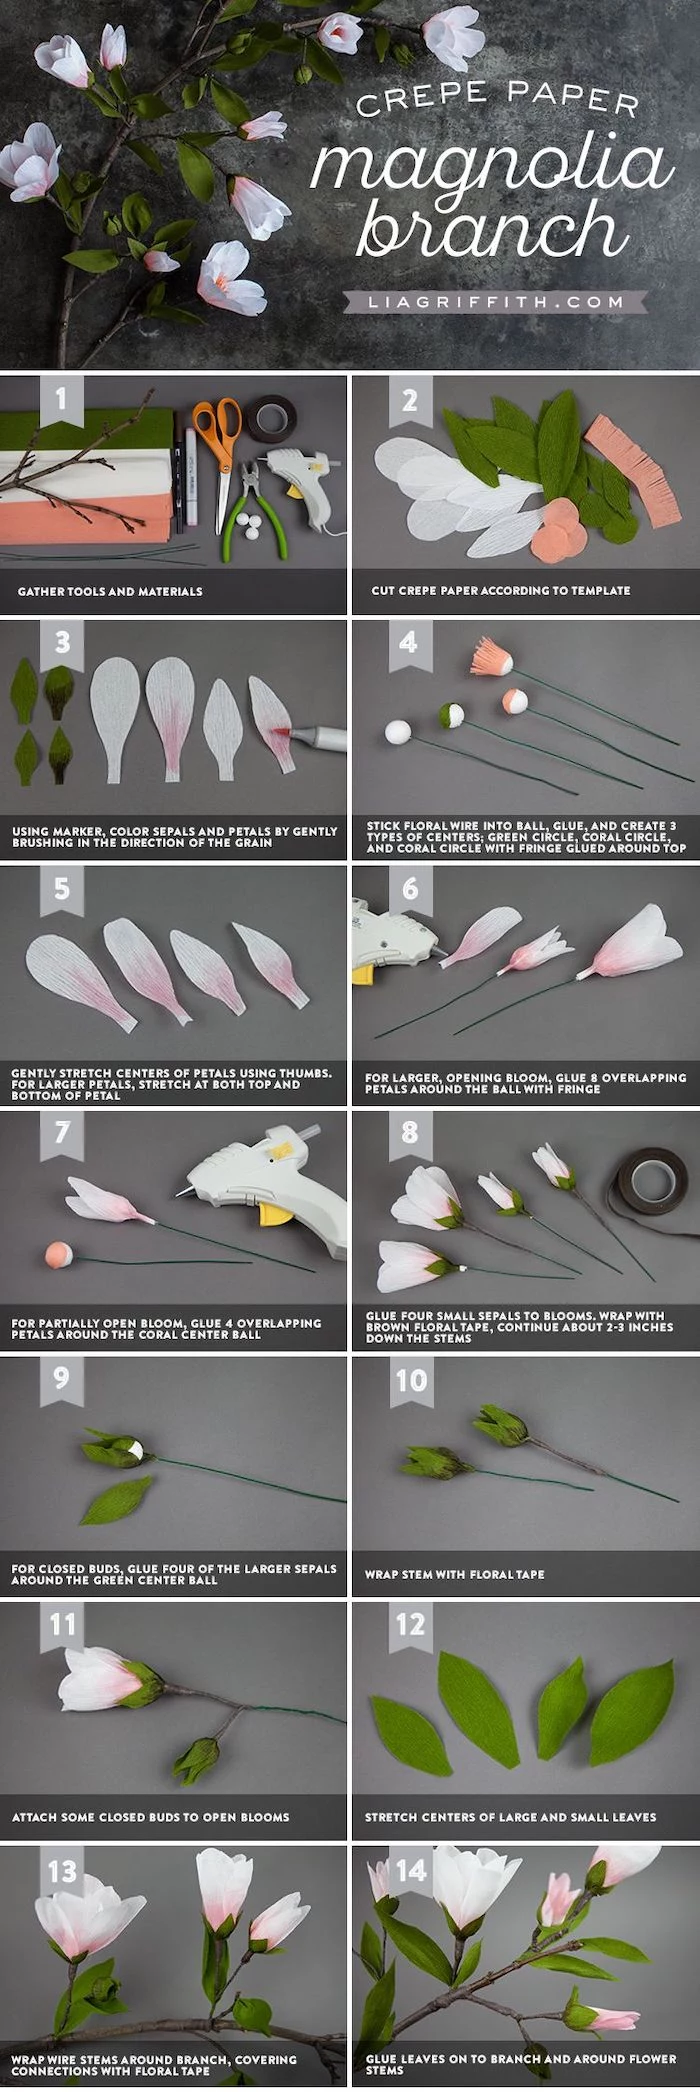
A lightweight crepe (around 60 GSM) is super delicate and almost see-through. It’s perfect for airy flowers like poppies or anemones. On the other hand, heavyweight crepe (180 GSM) is my personal favorite for substantial flowers like roses, peonies, and magnolias. It’s thick, opaque, and holds its shape like a dream, feeling more like a fabric. When you stretch it, it forms these deep, lasting curves. You can find high-quality Italian-style crepe paper online at specialty paper websites or sometimes in well-stocked craft stores. A roll typically costs between $5 and $8 and can make several large flowers, so it’s a great value.
A critical detail here is the grain. Just like wood, crepe paper has fine, crinkled lines running along the roll. You must always cut your petals with the grain running vertically. This is non-negotiable! It ensures you can stretch the petal horizontally across its middle to create that natural, cupped shape.
Cardstock and Other Papers
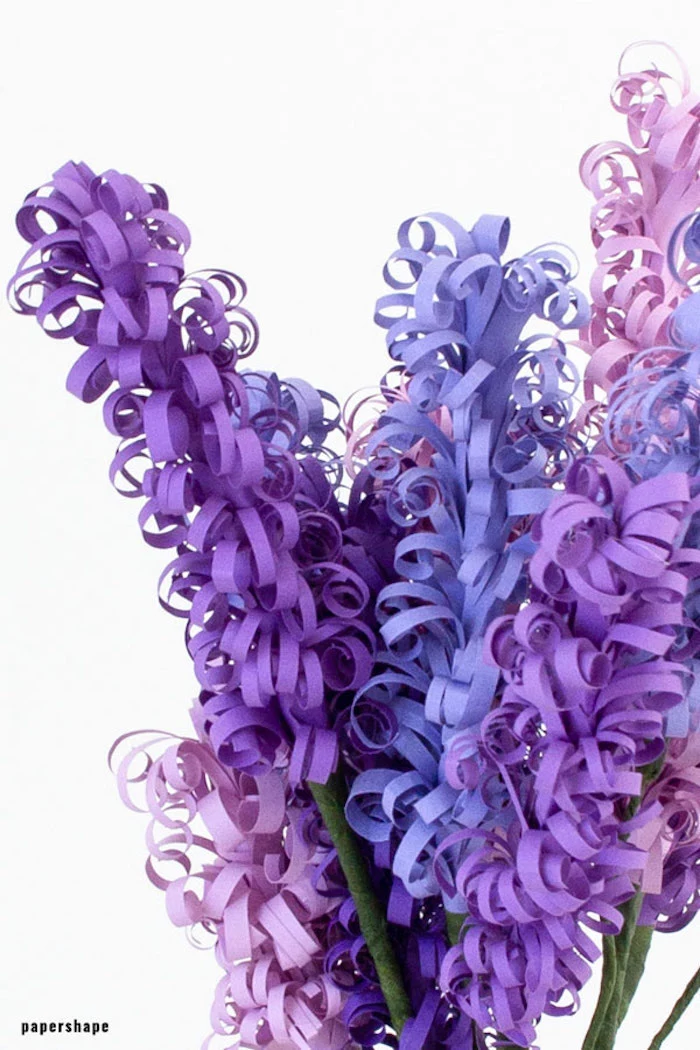
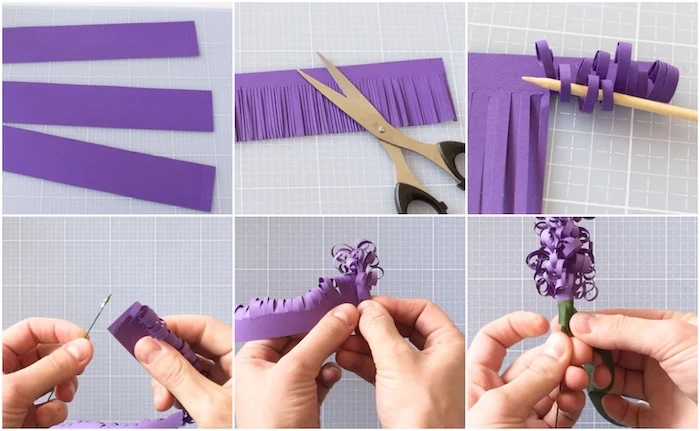
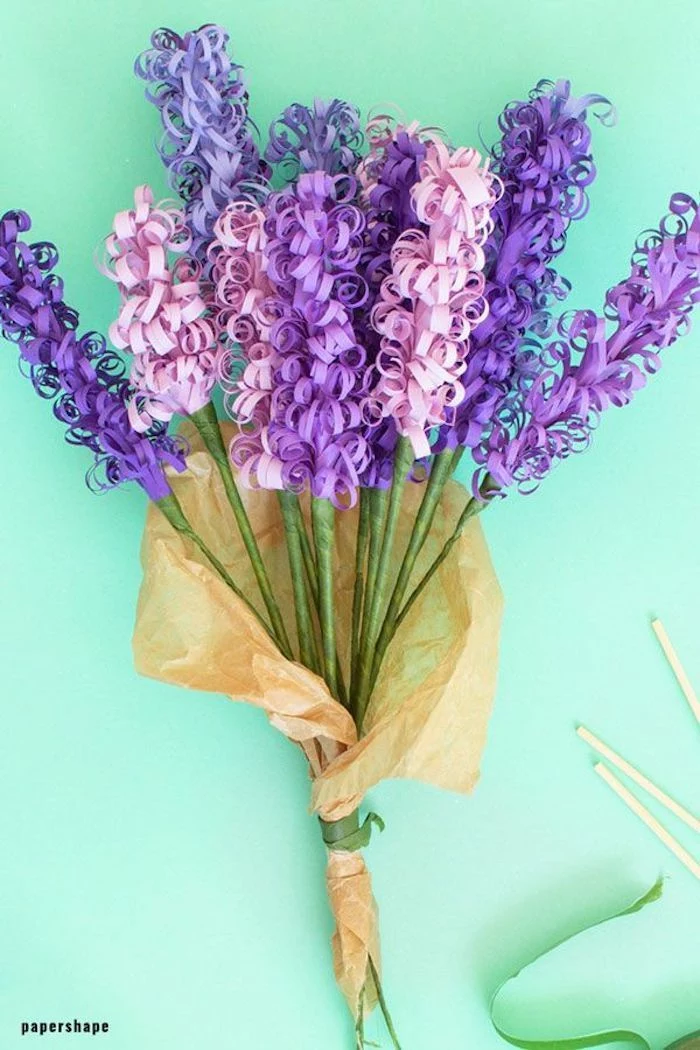
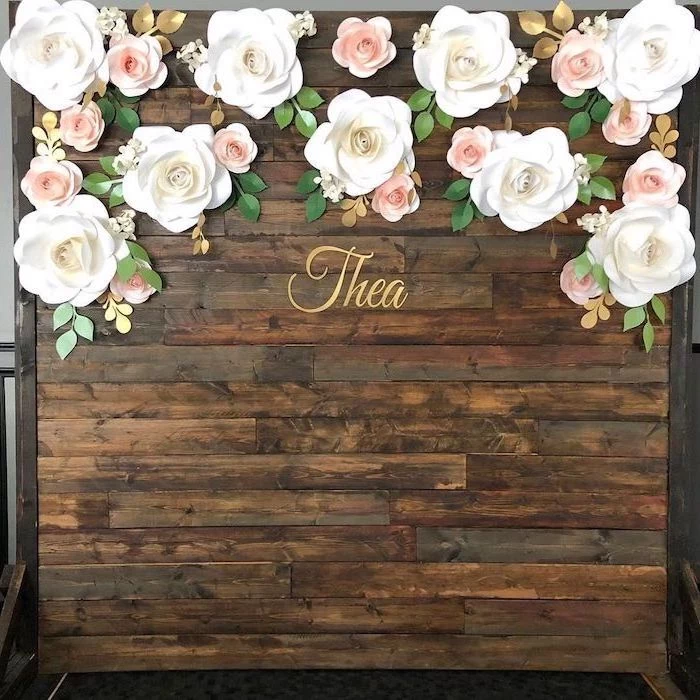
Cardstock is your go-to for structure. It’s stiff and smooth, and while it doesn’t stretch, it’s perfect for flowers with flat, graphic petals like daisies or zinnias. A 65 lb (176 GSM) cardstock is flexible enough for small petals, while a heavy 110 lb (300 GSM) cardstock is rigid and best for the bases of those giant flowers you see in backdrops. Text weight paper, which is like a fancy letterhead, is great for small, delicate flowers with lots of tiny layers, like hyacinths.
Getting Your Supplies in Order
The right tools can make or break your flower project. A weak glue means your masterpiece falls apart, and one that’s too wet will just warp the paper. Here’s what you actually need.
A Beginner’s Shopping List:
- Crepe Paper (180 GSM): Your workhorse paper. Expect to pay $5-$8 for a roll online or at a craft store.
- Floral Wire: Get a pack of 18-gauge for stems and maybe 24-gauge for delicate details. A multi-pack is usually around $5.
- Floral Tape: One roll in green will last you a while. It’s about $2-$4.
- Good Craft Glue: A quality PVA tacky glue is essential. A bottle costs about $3-$5 and is a must-have.
- A Low-Temp Hot Glue Gun: A mini one is fine and will run you $10-$15 at any craft or hardware store.
A Word on Glue…
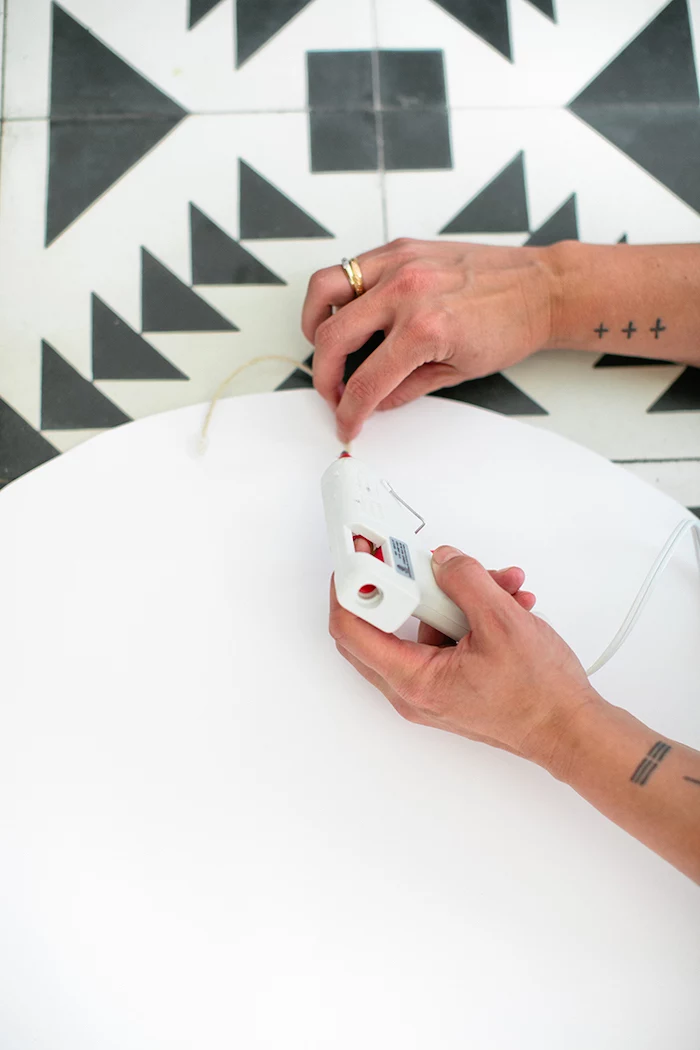
A hot glue gun is the fastest and strongest option for many steps. I strongly recommend a low-temperature one. It’s much kinder to delicate papers and your fingers. Oh yeah, and keep a small bowl of cold water on your workbench just in case. I learned that lesson the hard way a long time ago and have a tiny scar on my thumb to prove it.
For more delicate work, a good quality PVA tacky craft glue is essential. It’s thick, grabs quickly, and dries clear. It gives you a few precious seconds to reposition things, which is a lifesaver when you’re starting out. It’s my choice for attaching petals where a big glob of hot glue would look clumsy.
The Skeleton: Wire and Tape
Floral wire is the skeleton of your flower. It comes in different thicknesses, or gauges. The rule is simple: the lower the gauge number, the thicker and stronger the wire. An 18-gauge wire is perfect for a main stem. A super-fine 24 or 26-gauge wire is flexible and great for wiring individual petals that need extra support.
And then there’s floral tape. This stuff confuses everyone at first because it isn’t sticky! It’s a wax-coated paper strip that only sticks to itself when you stretch it. To use it right, you have to pull the tape as you wrap it around the wire. The stretching activates the wax and creates a tight, clean seal. You’ll know you’re doing it right when it feels slightly tacky and forms a smooth skin over the wire.
Setting Up Your Workspace
You don’t need a fancy studio. A clear table with good light is plenty. But a few key tools will take your work to the next level.
Cutting Tools: Get a pair of sharp scissors and use them only for paper. I use a standard pair for big cuts and some small, pointy detail scissors for fringe and tiny shapes. A craft knife is also amazing for precision. Always use it with a self-healing cutting mat to protect your table and your blade. And a serious safety tip: always cut away from your body and replace your blades often. A dull blade is dangerous because you have to push harder, increasing the risk of it slipping.
Shaping Tools: The real magic comes from the shape. You can achieve this with simple tools. Ball stylus tools, often used for clay, are fantastic for cupping petals. You just place a petal on a soft foam mat and press the ball into its center to create a gentle curve. By the way, if you don’t have one, the rounded end of a pen or even a marble works in a pinch! For curling petal edges, gently pull the paper over the blade of your scissors, just like you’d curl a ribbon. And never underestimate a simple wooden skewer or dowel for rolling the edges of petals to get that soft, turned-out look on a rose.
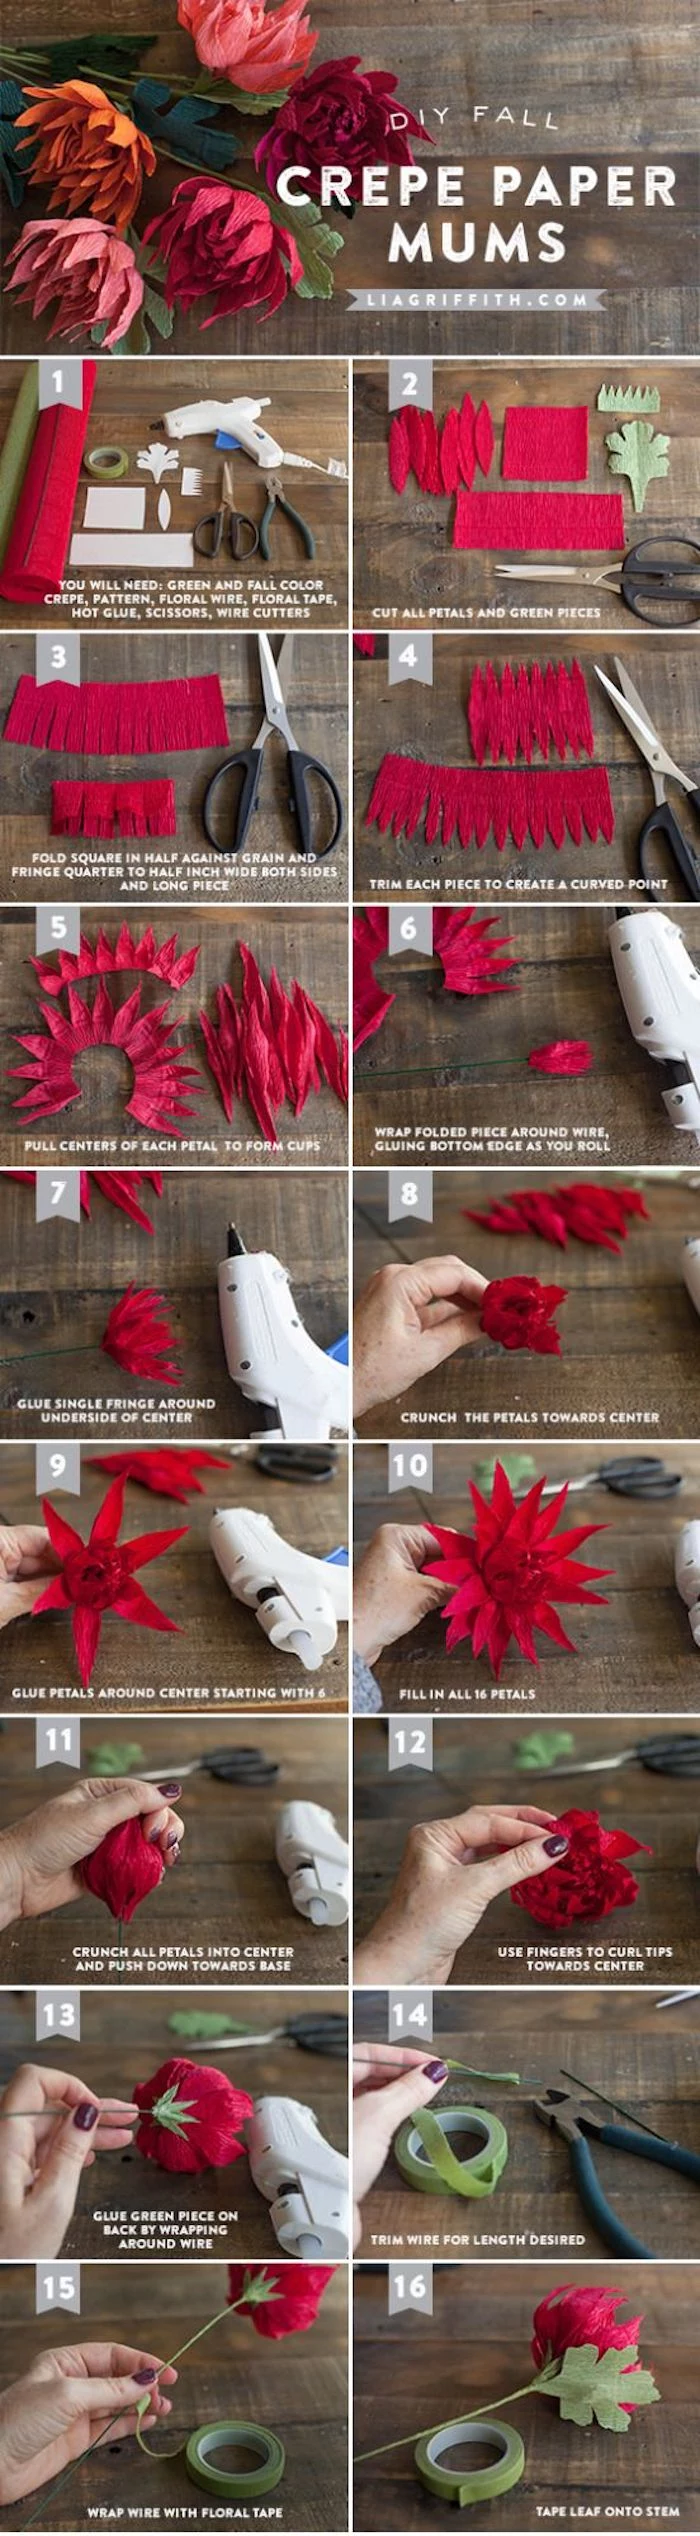
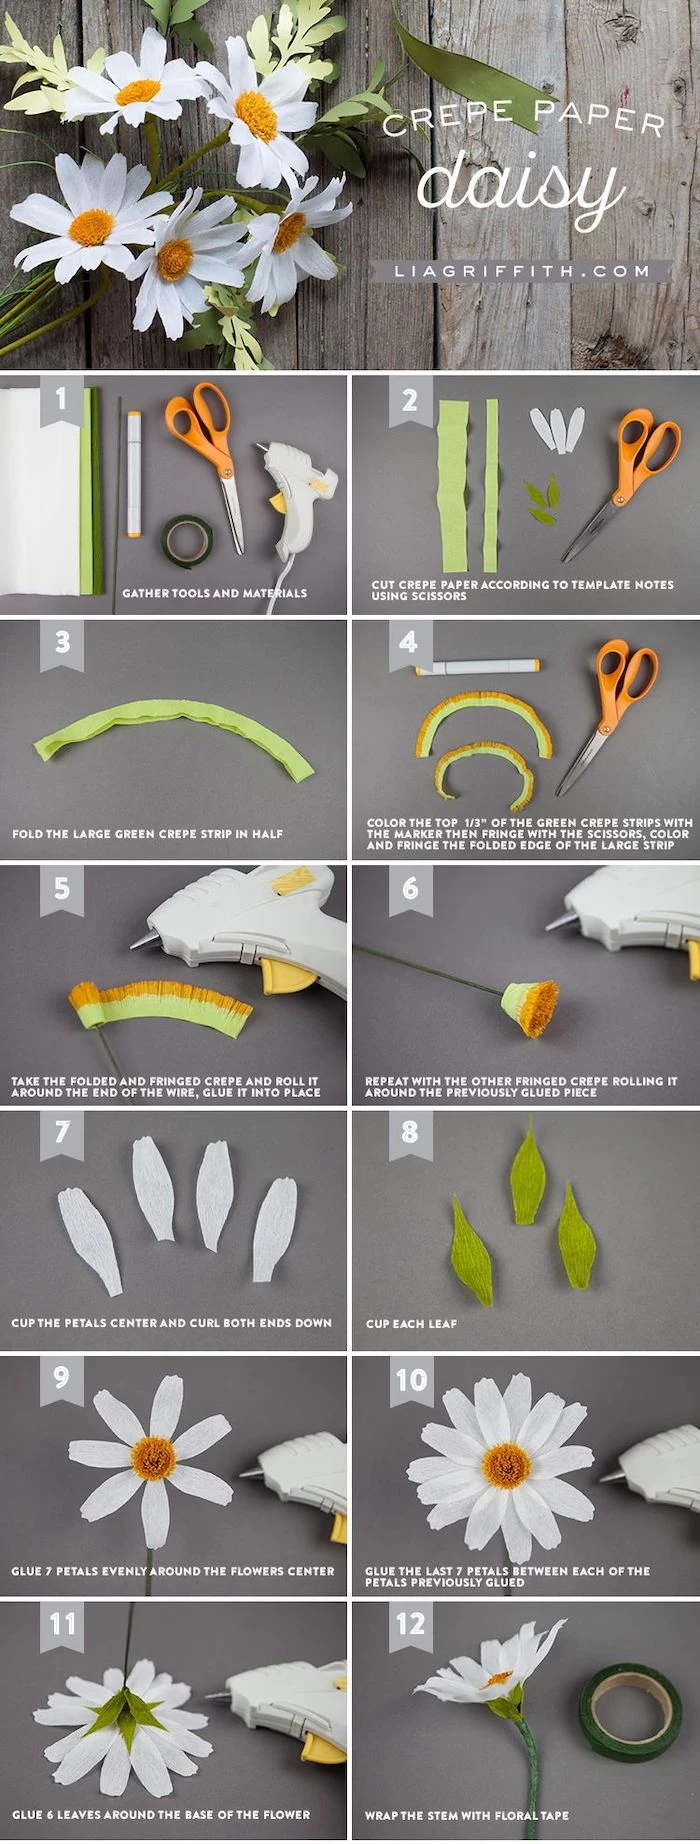
Project 1: The Simple Spider Mum (Beginner Friendly)
This project is perfect for getting the hang of crepe paper. It’s super forgiving and the result is stunning. Plan for about an hour for this one—it’s a great afternoon craft.
Materials:
- One roll of 180 GSM crepe paper
- A 3-inch circle of cardstock for the base
- Low-temp hot glue gun
- Sharp scissors
Instructions:
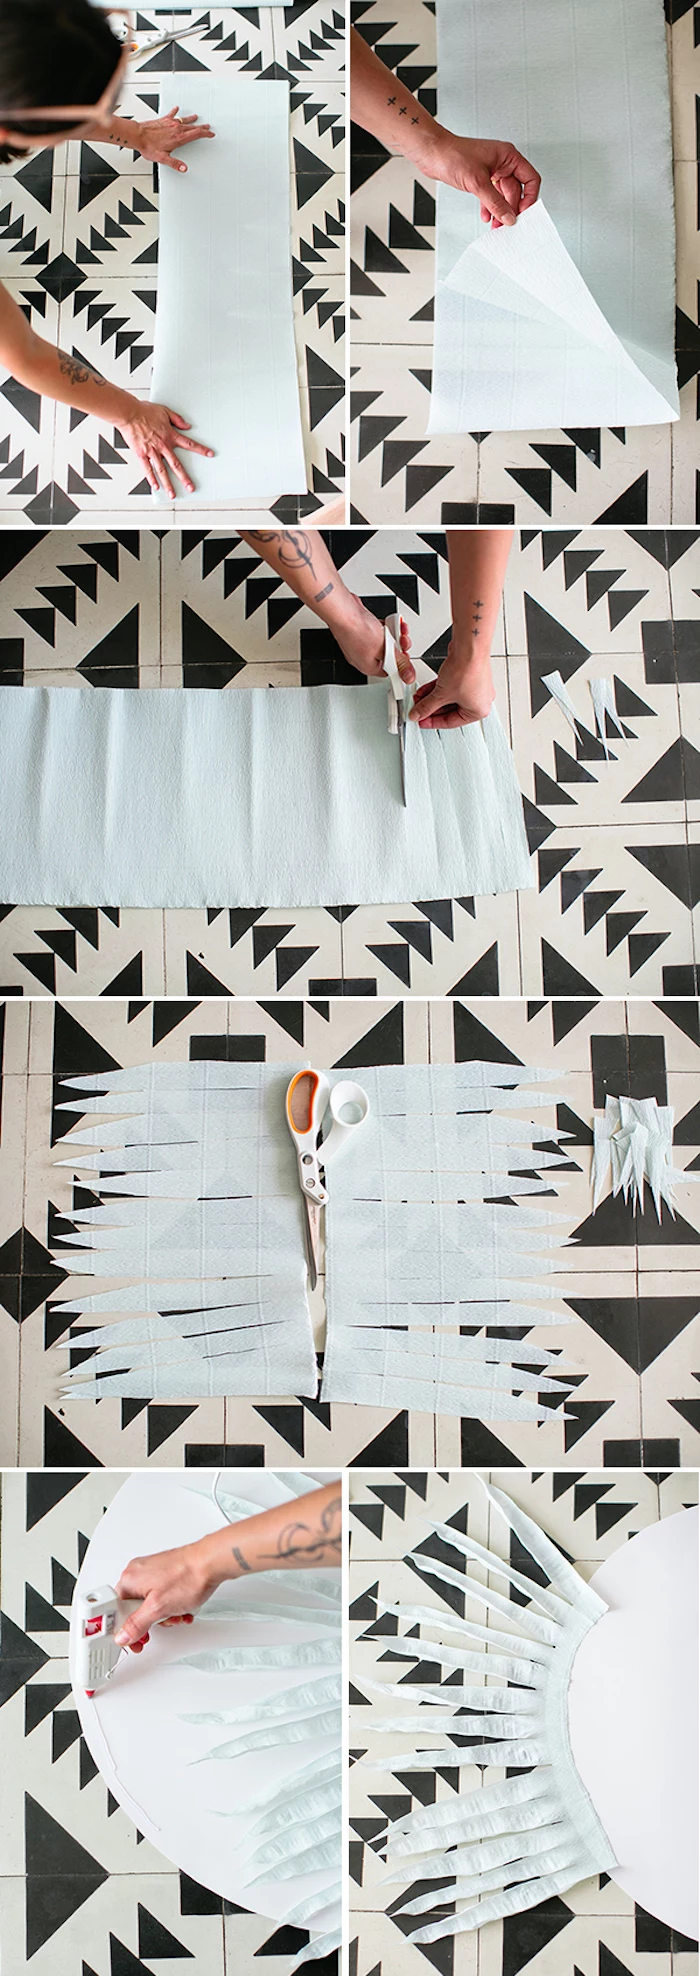
1. Cut your crepe paper into 5 or 6 strips, each about 4 inches wide. Cut these strips against the grain (the short way across the roll).
2. Fold each strip in half lengthwise, so you have folded strips that are 2 inches wide.
3. Time to make the fringe. Using your sharp scissors, cut narrow slits into the folded edge of the paper, stopping about a half-inch from the bottom edge. The finer your cuts, the more delicate it will look. Time-saving hack: If your scissors are sharp, you can stack two folded strips and cut them at the same time!
4. Gently fluff the fringe with your fingers to separate the loops and give them some volume.
5. Start gluing. Take your cardstock circle and apply a line of hot glue around the outer edge. Press the solid bottom edge of a fringed strip onto the glue. Keep going in a spiral, working your way toward the center.
6. As you move inward, start bunching up the paper strips as you glue them. This creates height and that full, rounded mum shape. The center should be the most densely packed part.
7. Give it a final check. If you see any bald spots, just cut a small piece of fringed paper and tuck it in with a dot of glue.
Troubleshooting Tip: If your mum looks flat, you probably didn’t bunch the paper enough in the middle. Don’t be shy—really pack it in there!
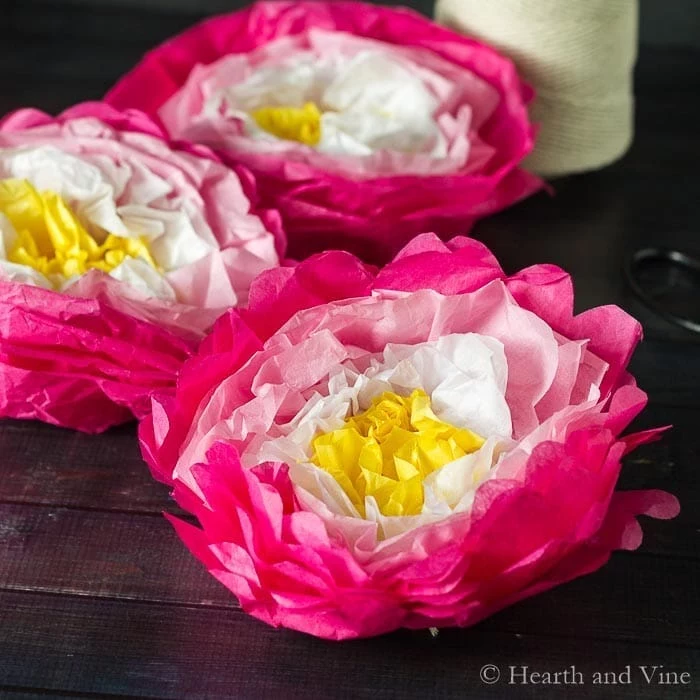
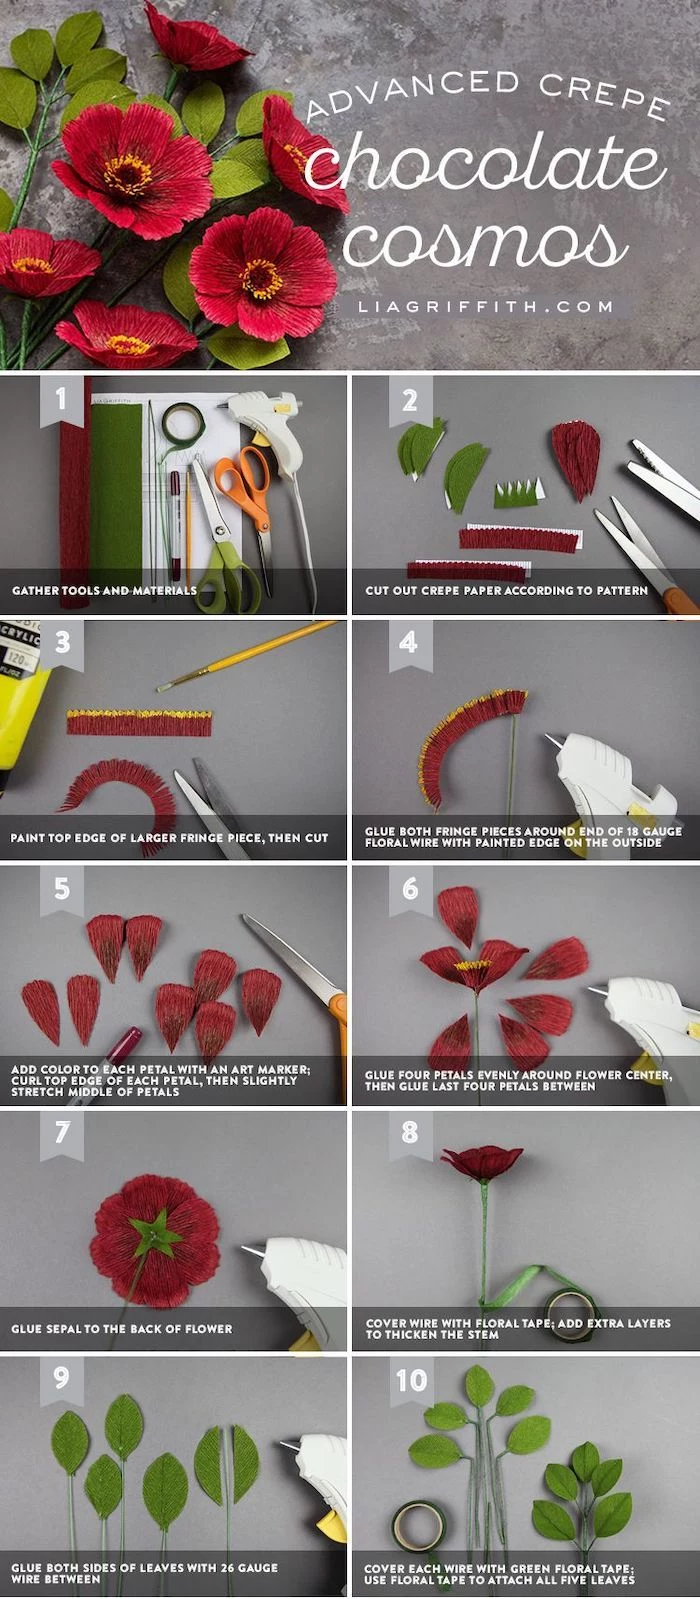
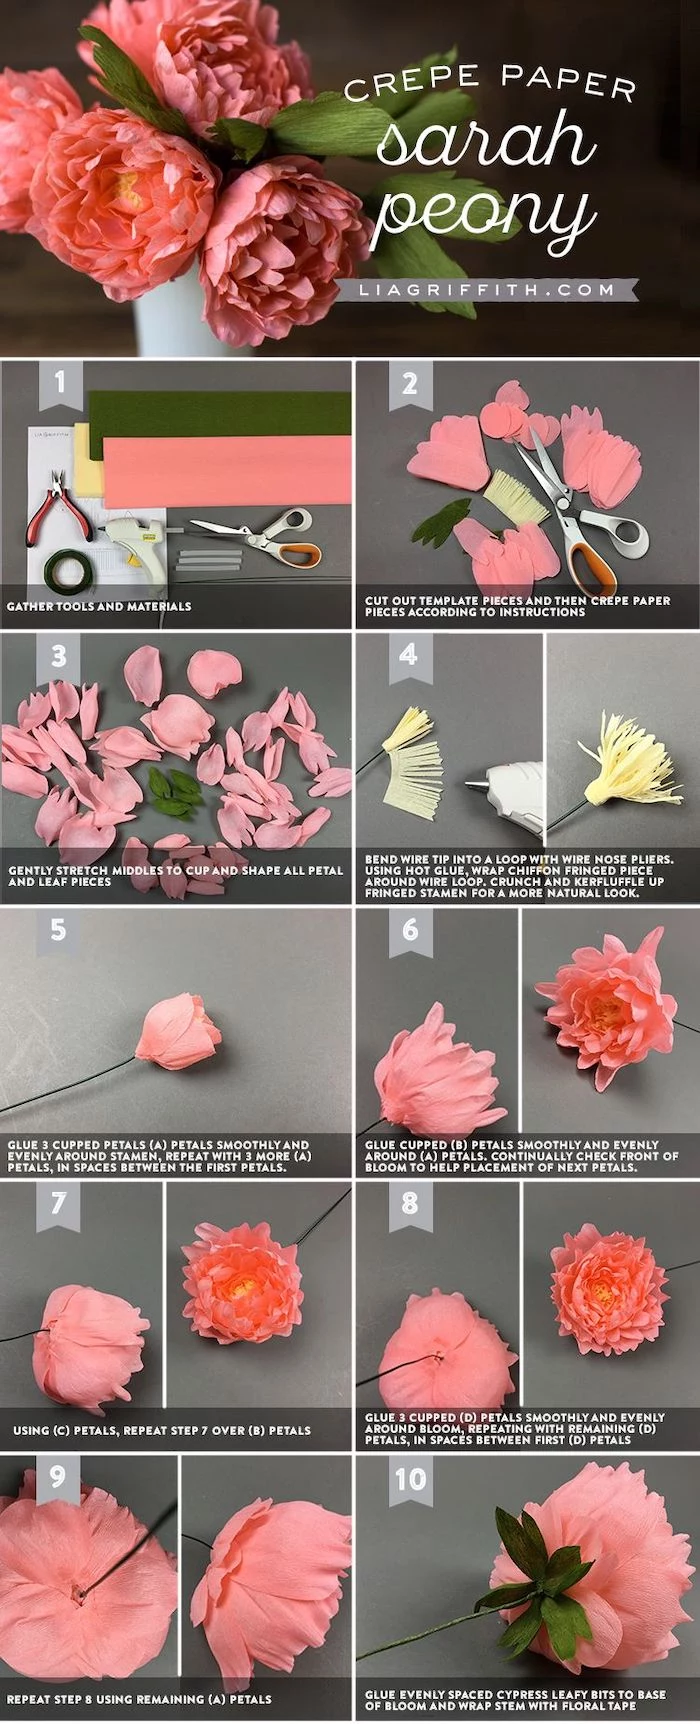
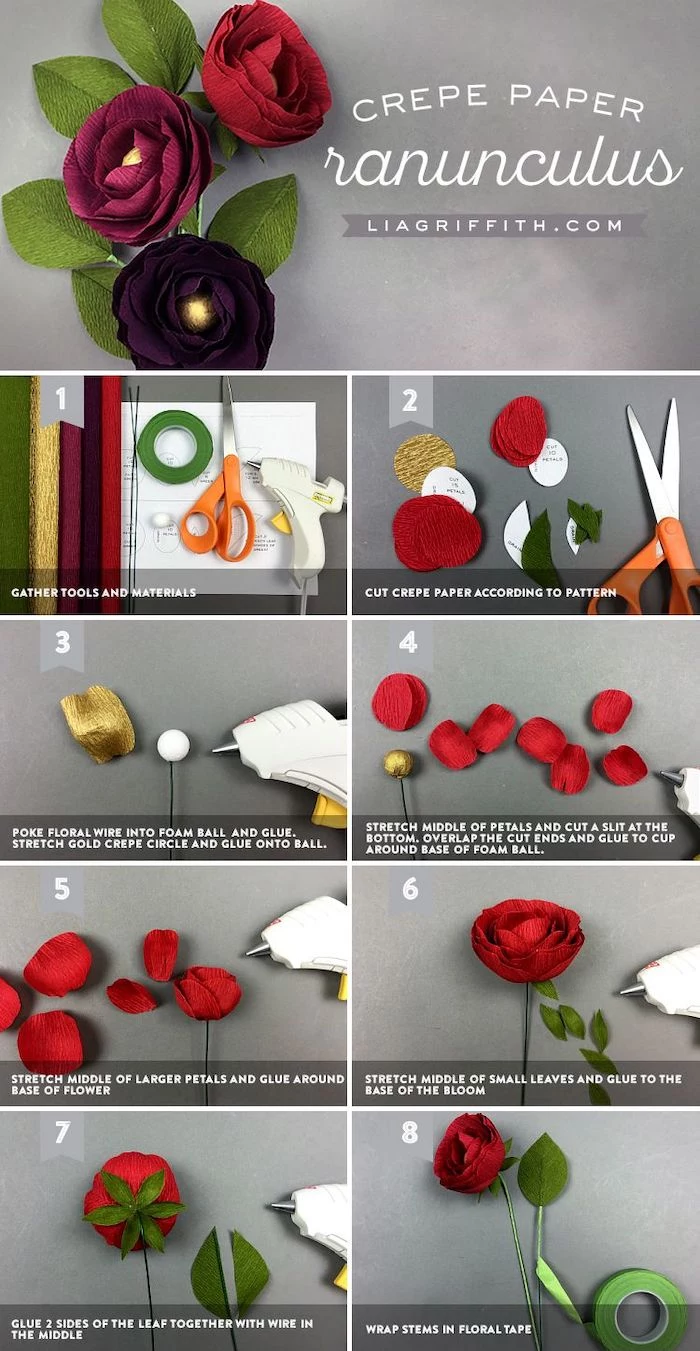
Project 2: The Classic Peony (Intermediate)
The peony is where you start to feel like a real sculptor. It involves multiple petal shapes and careful assembly. Set aside about 2-3 hours for this one, and don’t rush the shaping step!
Materials:
- 180 GSM crepe paper in a petal color (like blush pink or cream)
- A small scrap of 60 GSM crepe in yellow for the center
- One 8-inch piece of 18-gauge floral wire
- Green floral tape
- Tacky glue and a hot glue gun
- Detail scissors and a shaping tool
Instructions:
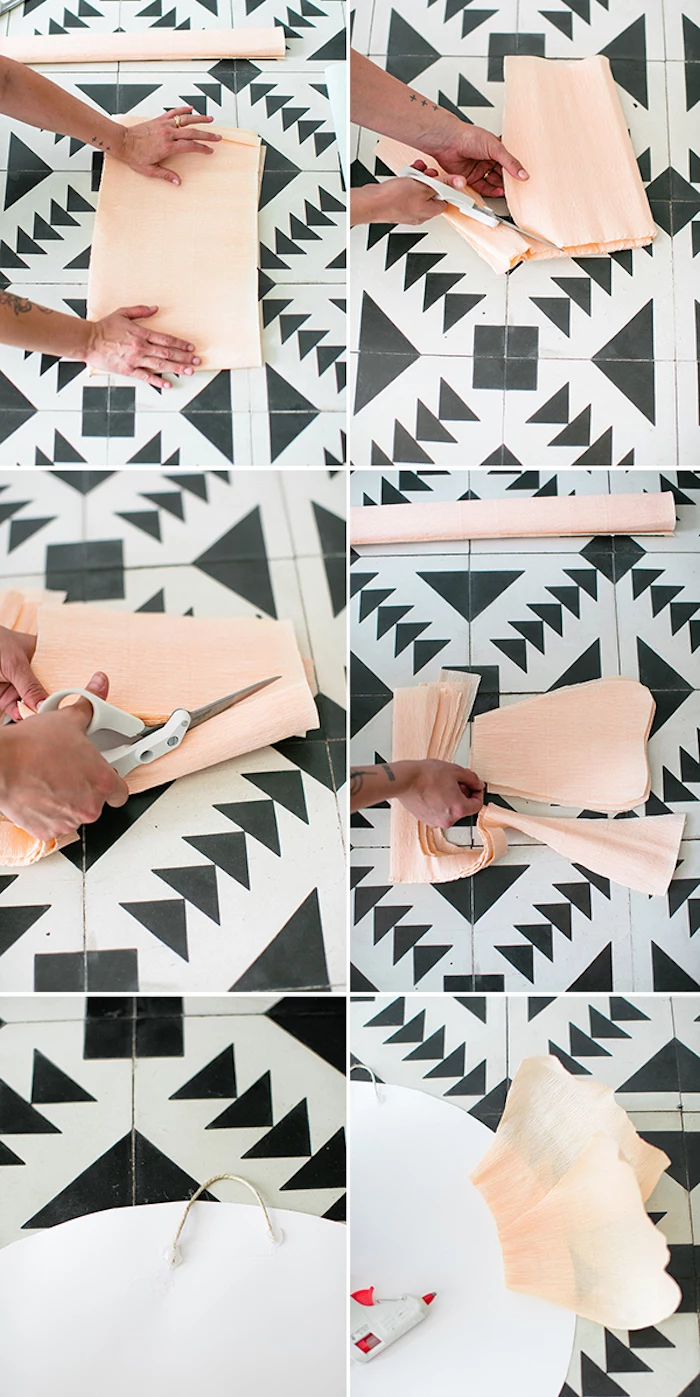
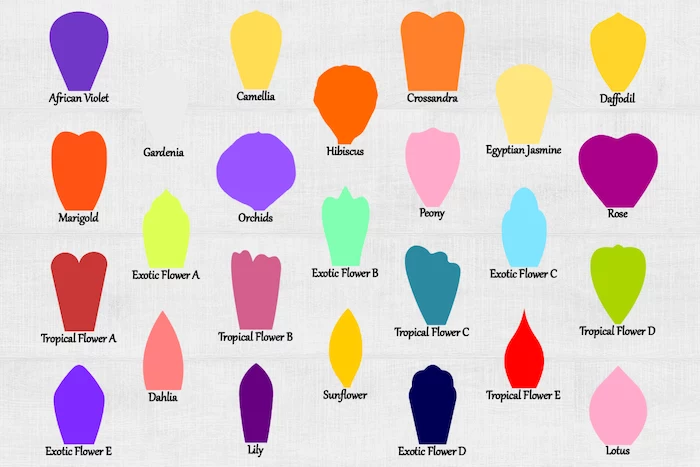
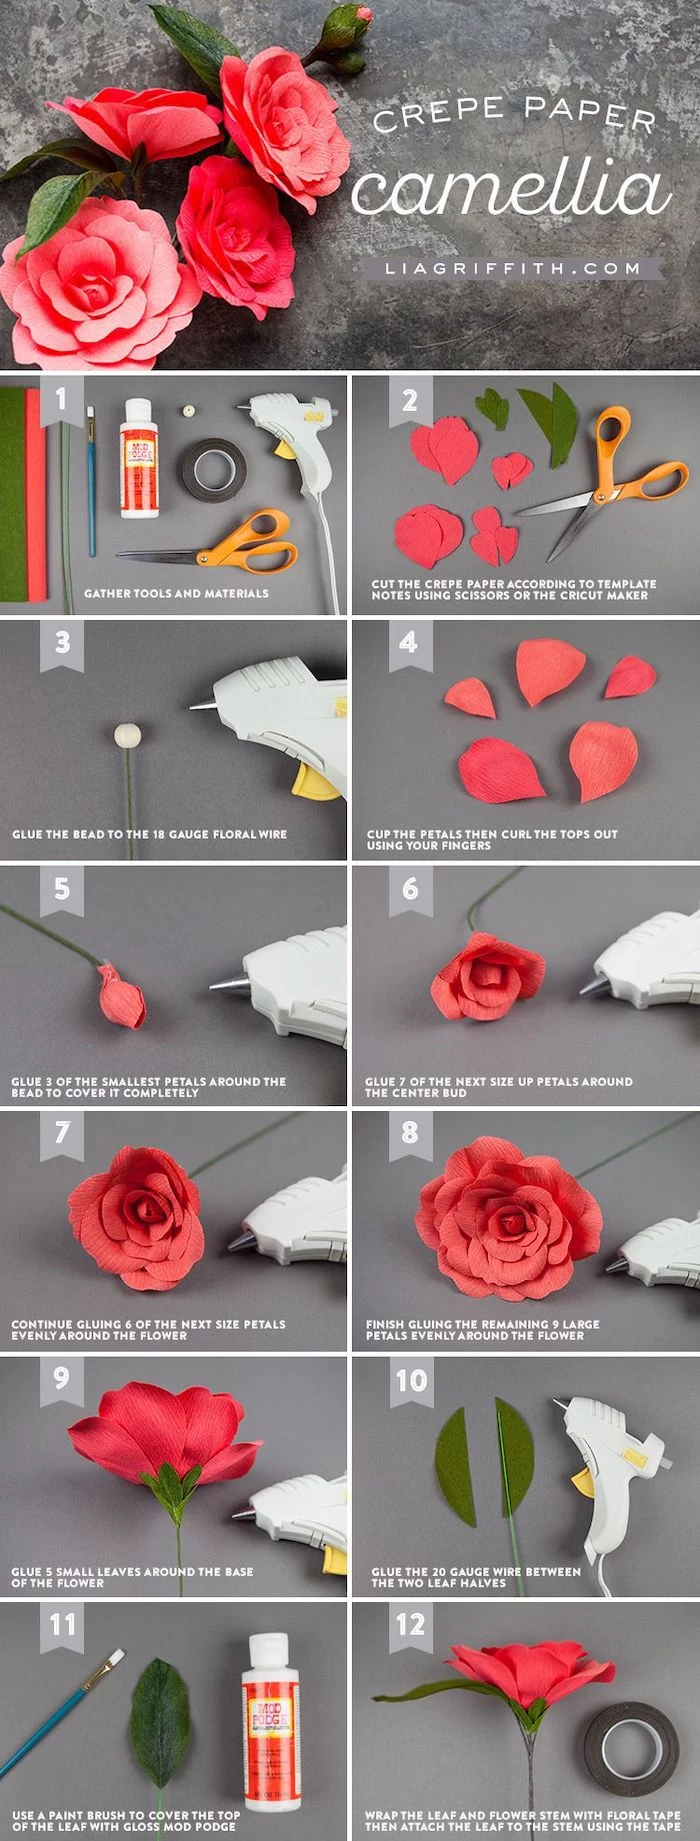
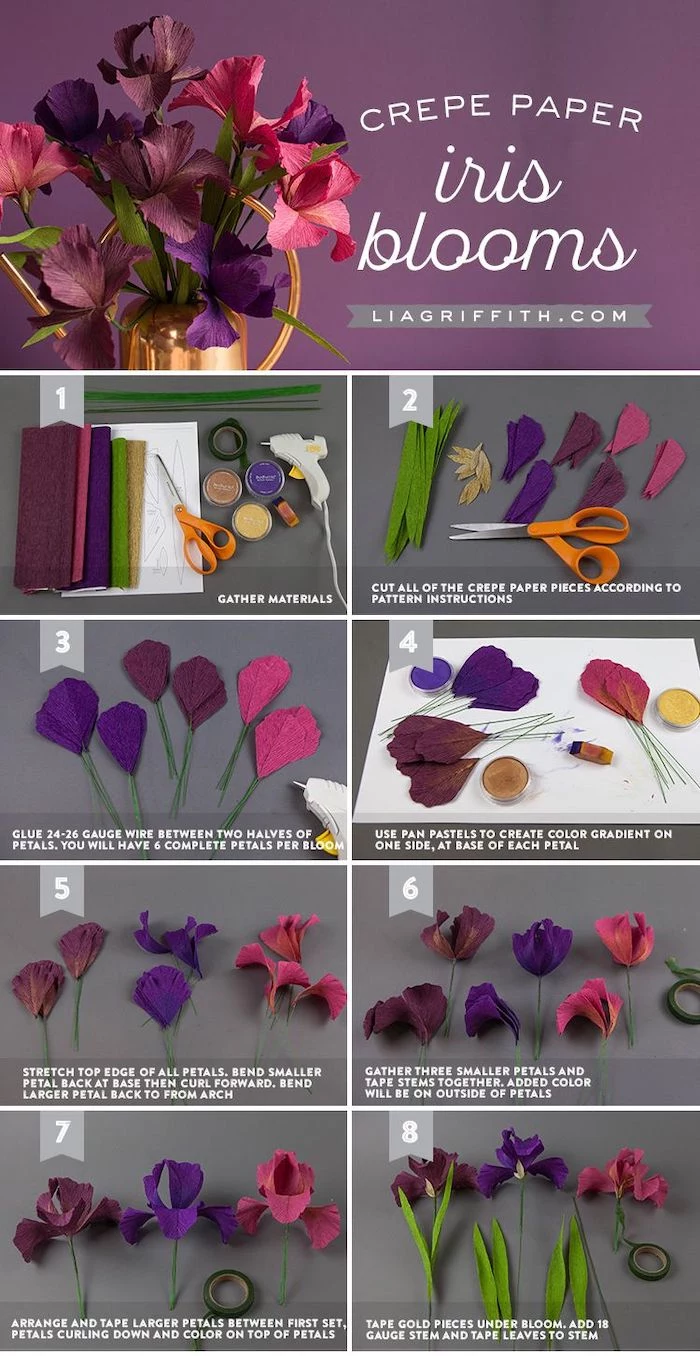
1. Make Petal Shapes. You can freehand this! Just cut three basic shapes from scrap paper: a small heart shape (1.5 in tall), a medium rounded shape (2.5 in tall), and a large, wide petal (3 in tall). If free-handing feels scary, a quick search online for a “free paper peony template” will give you a great starting point. You’ll need about 15 small, 20 medium, and 10 large petals.
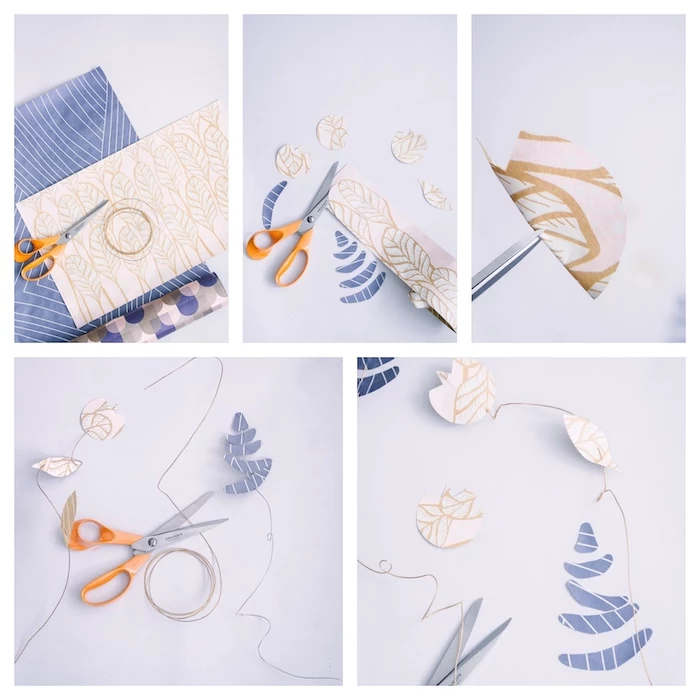
2. Cut the Petals. Remember the golden rule: cut with the crepe paper grain running vertically on every single petal.
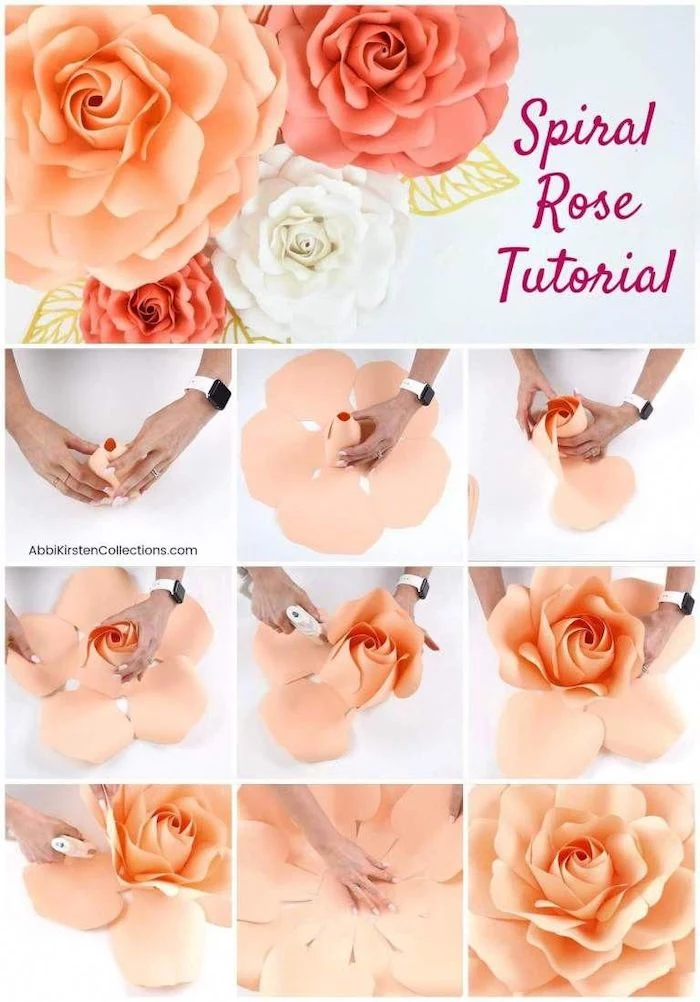
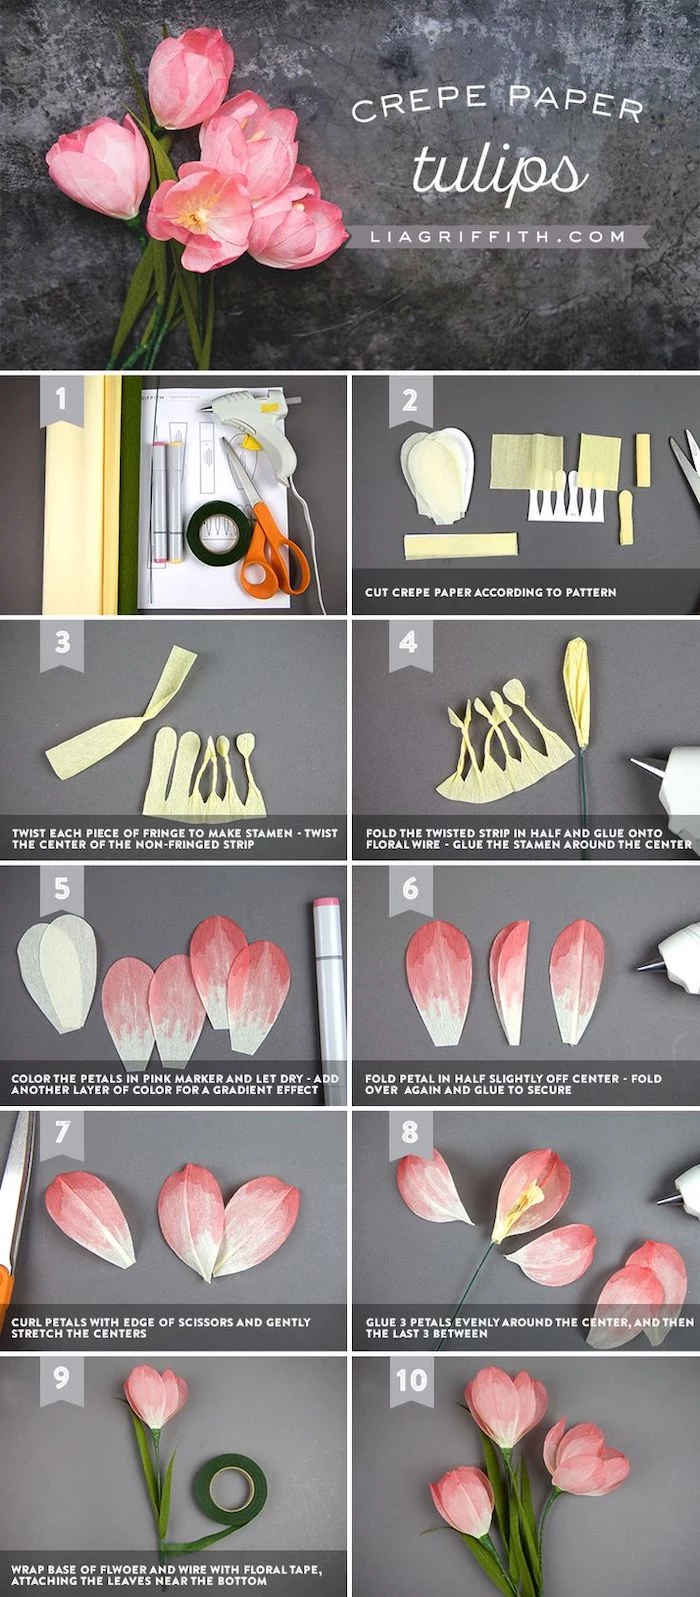
3. Shape Them! This is the soul of the project. Place your thumbs in the center of a petal and gently push outward, stretching the paper to create a cup. For the larger petals, gently ruffle and curl the top edges. A little variation makes them look more real.
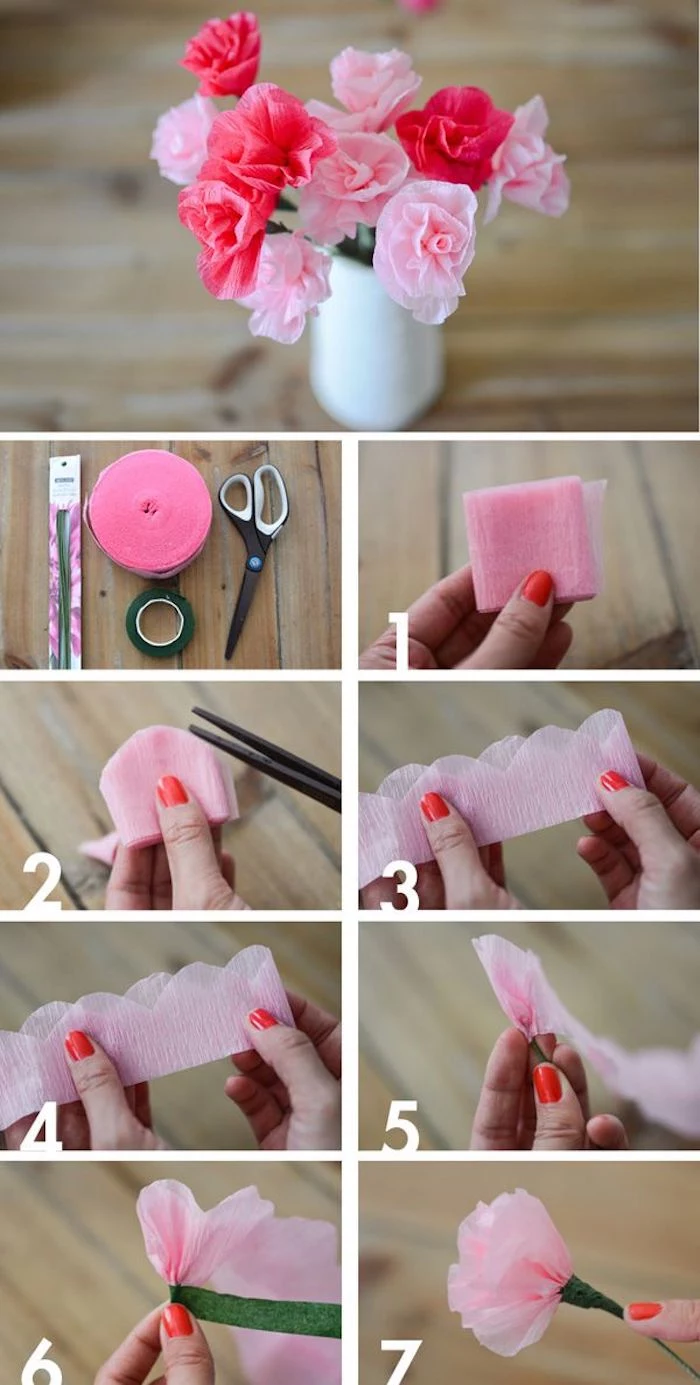
4. Make the Center. Cut a 2×3 inch rectangle of yellow crepe, fringe it, and then use a dot of hot glue to wrap it tightly around the tip of your floral wire.
5. Assemble the Bloom. Using tacky glue for a clean finish, start gluing the small petals around the center, overlapping each one. These first petals should hug the center tightly.
6. Build Outward. Next, add the medium petals, letting them open up a bit. Add the largest petals last, angling them almost fully outward to create that big, full bloom.
7. Finish the Stem. Cut a star-like shape from green crepe paper for the calyx (the green part at the flower’s base). Poke a hole, slide it up the wire, and glue it to the bottom. Finally, wrap the entire stem with green floral tape, stretching as you go for a smooth, professional finish.
Final Thoughts on Safety and Care
It’s easy to get lost in the zone and get careless. I’ve seen it happen. Respect the heat from that glue gun. And your craft knife is a real blade—always cap it. One more thing I learned the hard way: cutting hundreds of petals can be tough on your hands. Take breaks and stretch your wrists. This is a marathon, not a sprint.
Your paper flowers are pretty durable, but keep them out of direct sunlight to prevent fading and away from high humidity, which can make them droop. A gentle dusting now and then is all they need. With a little care, they can bring you joy for years.
Your journey into paper flowers is all about learning. Be patient, observe real flowers, and most importantly, have fun with it. That attention to detail and curiosity are what will turn your paper and glue into a little piece of art.
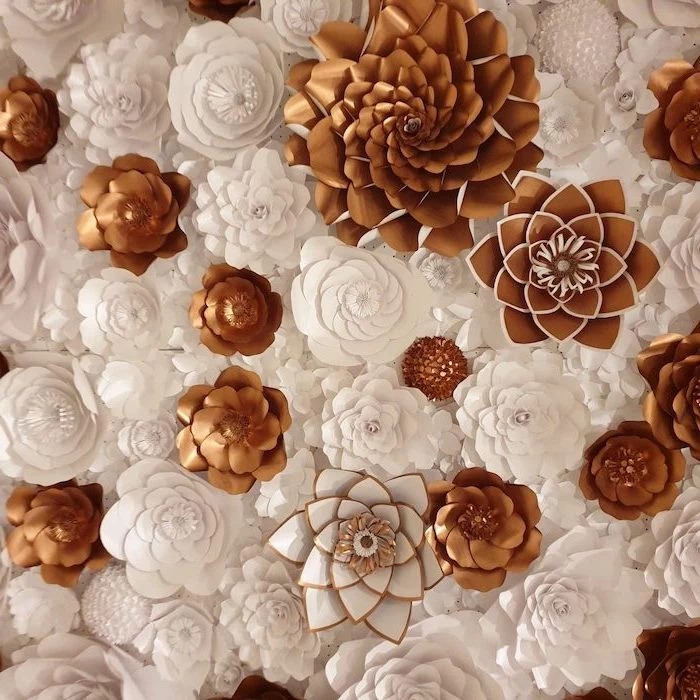
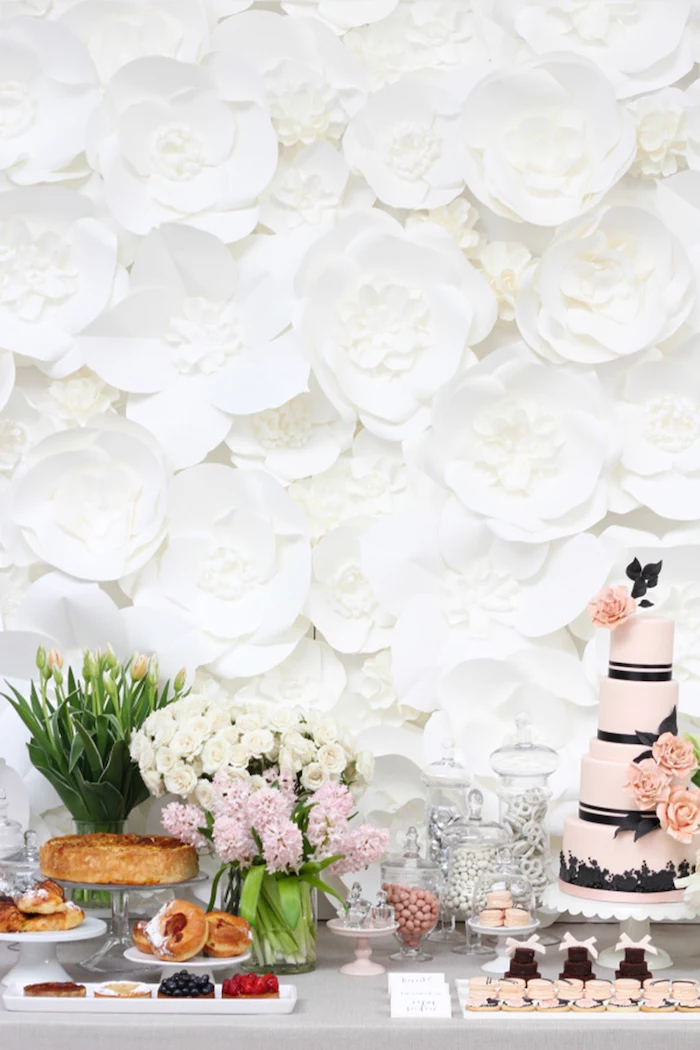
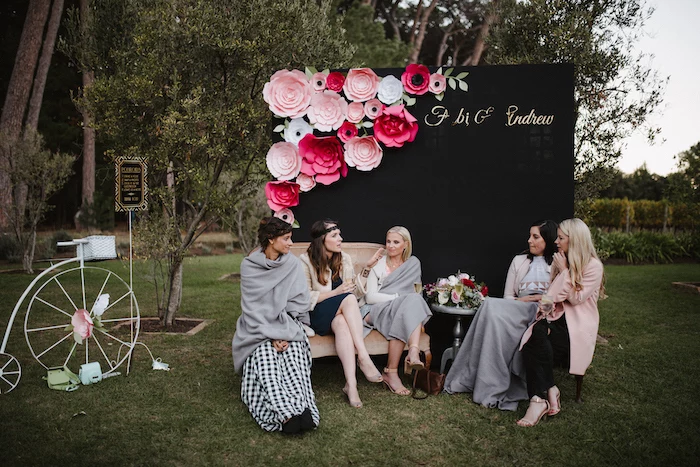
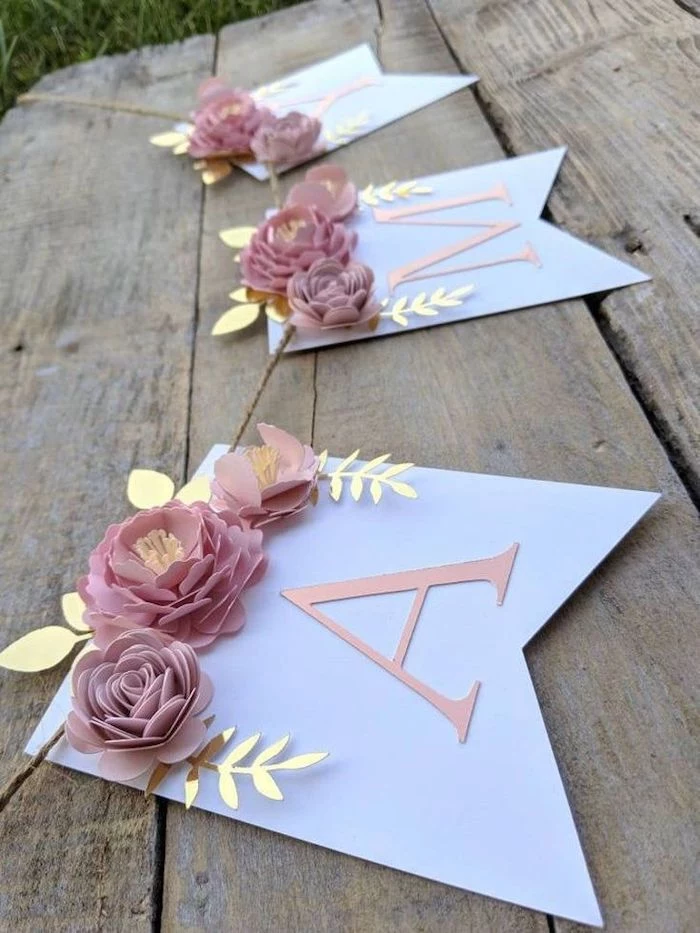
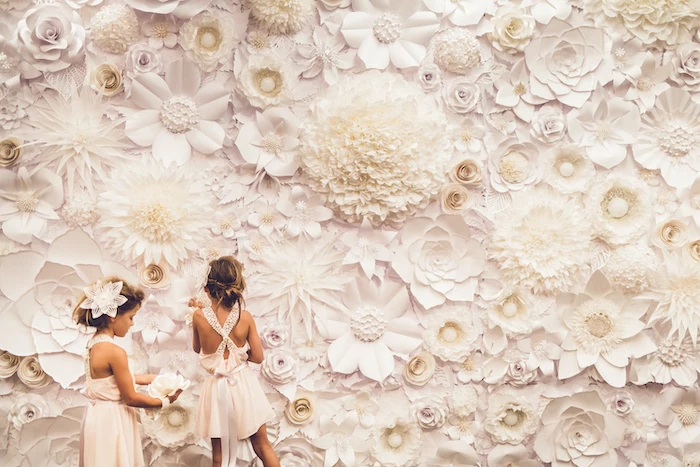
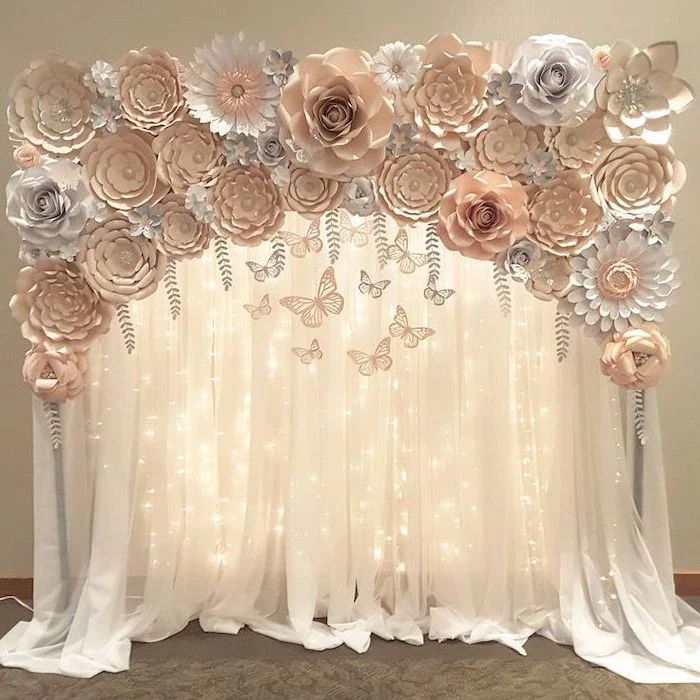
Inspiration Gallery
The Glue Debate: While a hot glue gun offers instant bonding, perfect for securing heavy petals or bases, don’t underestimate the power of a good craft glue. For delicate work, like attaching tiny stamens or layering vellum, a clear-drying adhesive like Aleene’s Tacky Glue provides precision and forgiveness, letting you reposition elements before they set permanently.
- Create a natural, sun-bleached effect on petal edges.
- Add a touch of blush to the center of a rose.
- Deepen the veins on a realistic leaf.
The secret? A simple set of artist’s pastels. Just scrape a small amount of pigment onto a piece of scrap paper, pick it up with a cotton swab or a soft brush, and gently dust it onto your cut petals before assembly. It adds a layer of depth that’s truly breathtaking.
The art of making paper flowers, or ‘papper-blombuketter’, was a popular pastime for gentlewomen in 18th-century Sweden, long before the trend re-emerged in modern crafting circles.
My flower centers always look a bit messy. What’s a simple way to create a polished, professional-looking center?
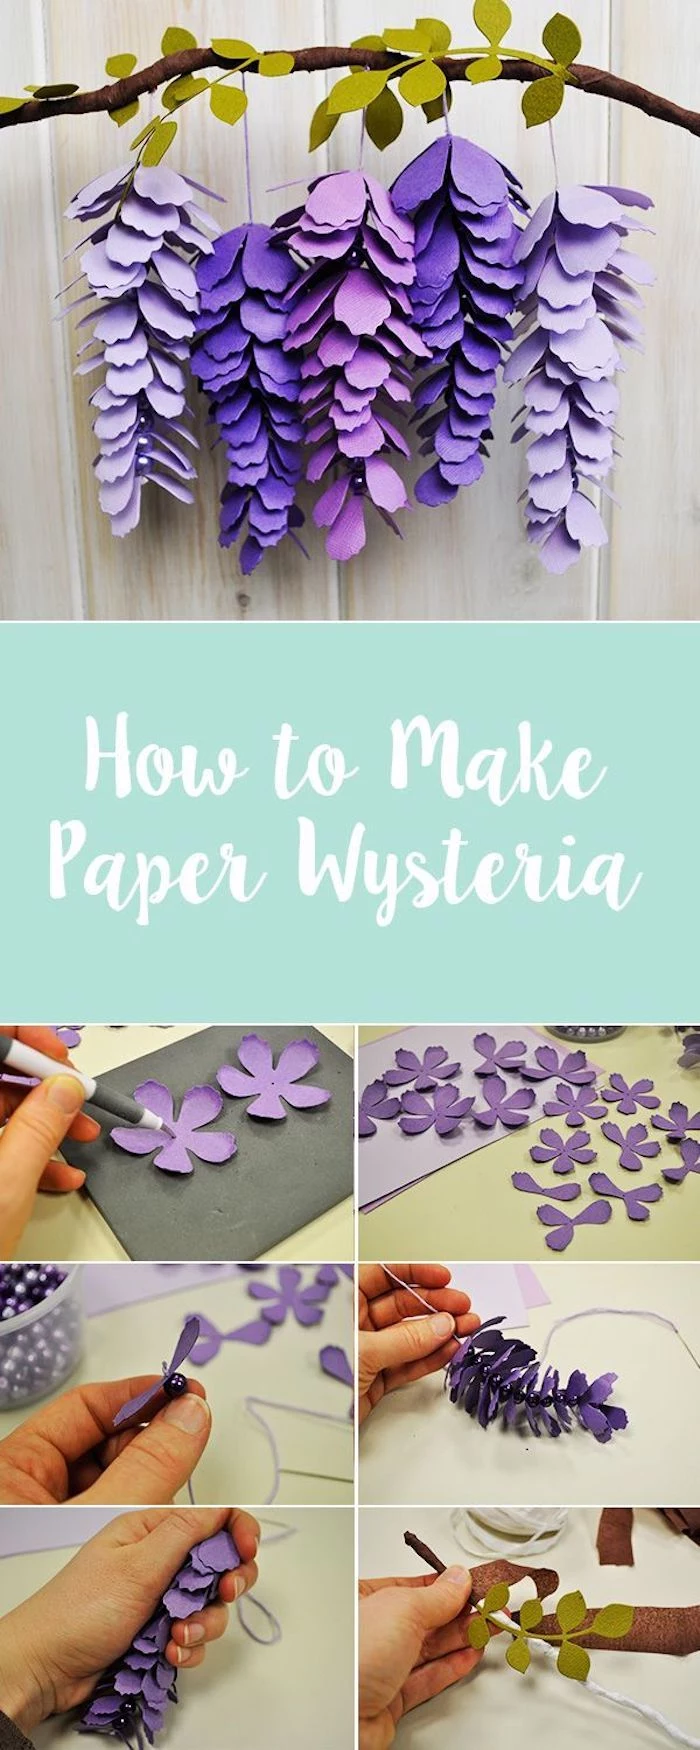
Try the fringed-strip method. Take a narrow strip of crepe paper (yellow or black works well for many flower types), and cut fine slits along one edge, almost to the bottom. Then, roll the strip tightly, securing the end with a dot of glue. You can brush the fringed tips with a bit of brown or gold pastel for extra realism before attaching it to the center of your flower wire.
For flowers that require a bit more structure, like large dahlias or gardenias, consider using 110 lb cardstock. While it doesn’t stretch like crepe, its rigidity is an advantage. Use the edge of your scissors or a bone folder to gently curl each petal before assembly. This breaks down the paper fibers just enough to create a soft, lasting curve that holds its shape beautifully in larger arrangements.
- Floral Wire: The backbone of your flower. 18-gauge is sturdy enough for heavy blooms like peonies, while a more flexible 22- or 24-gauge is perfect for delicate sweet peas or cosmos.
- Floral Tape: This slightly waxy tape magically sticks to itself when stretched. It’s essential for wrapping wires and creating seamless, natural-looking stems.
- Detail Scissors: A pair of small, sharp-pointed scissors, like Fiskars Micro-Tip, is a game-changer for cutting intricate petals and tiny leaves.
A common pitfall for beginners: Making every single petal identical in size and shape. Nature is perfectly imperfect. For a more organic look, slightly vary the width and cupping of your petals. When you assemble the flower, this subtle variation will create a much more lifelike and less ‘manufactured’ result.

The next time you’re crafting, pay attention to the grain of your crepe paper. Think of it like the grain in wood. For petals, you should almost always cut so the fine, crinkly lines run vertically. This allows you to stretch the paper outwards from the center, forming the natural cup shape of a real petal. Cutting on the horizontal will prevent any meaningful stretch, leading to flat, lifeless flowers.

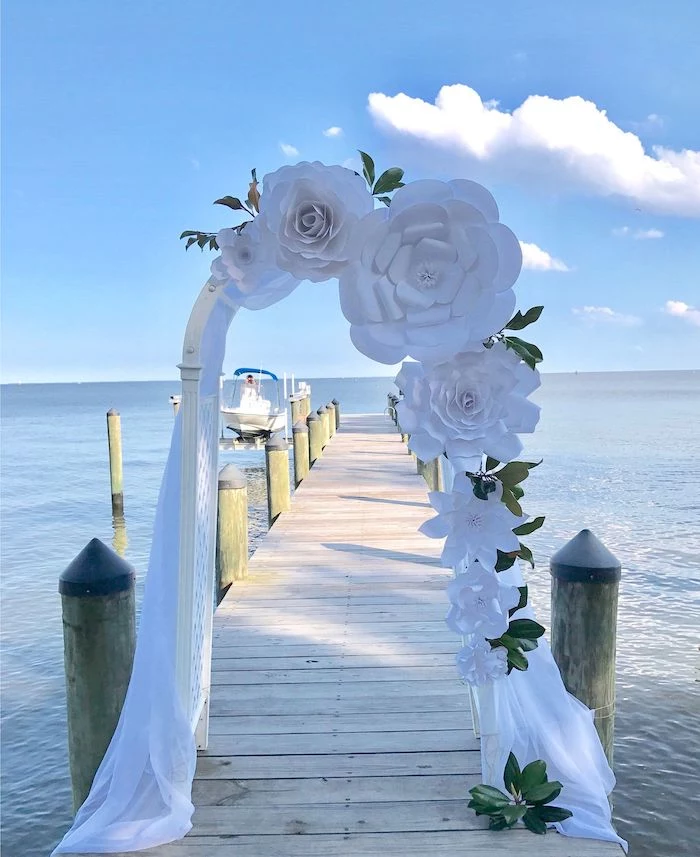
Paper artist Tiffanie Turner is known for creating botanically accurate paper flowers so large they can span several feet, proving that this craft can be elevated to fine art.
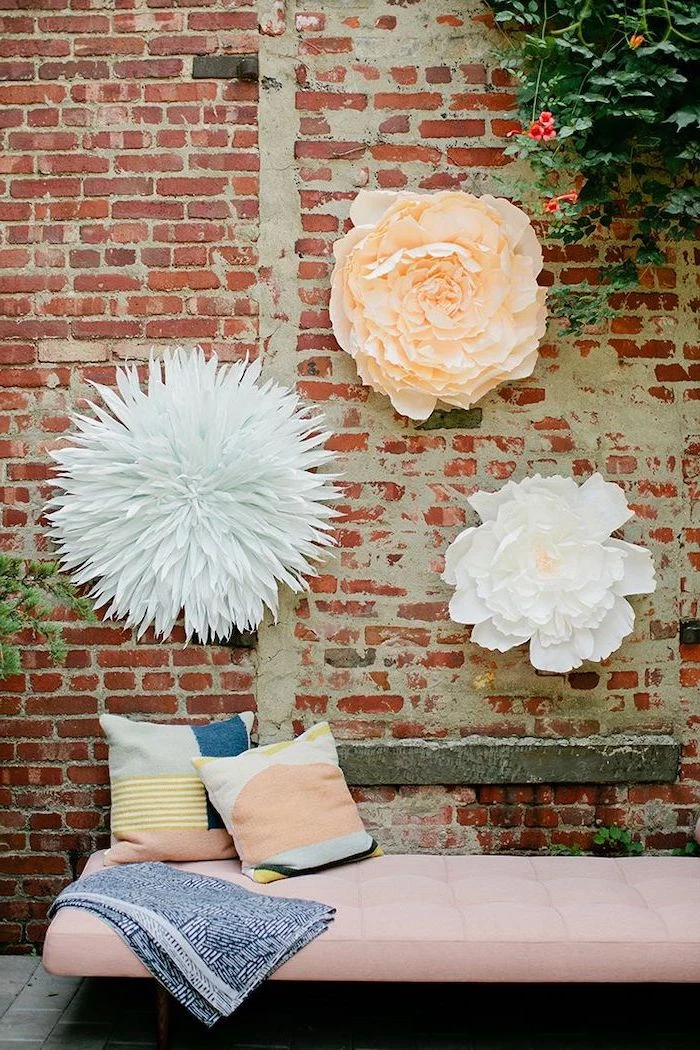
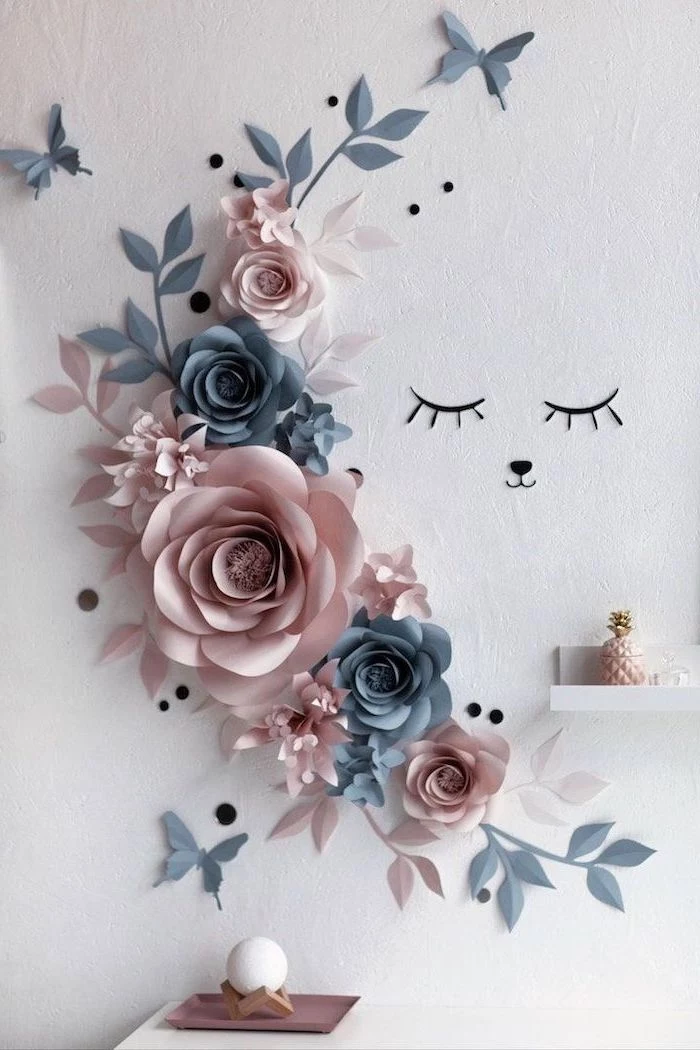
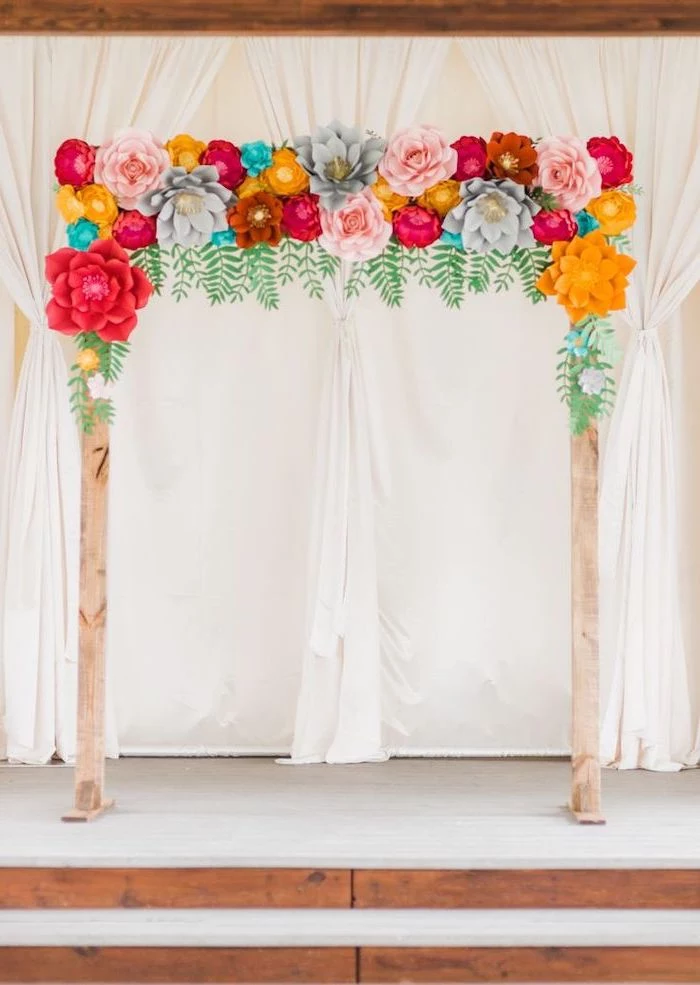
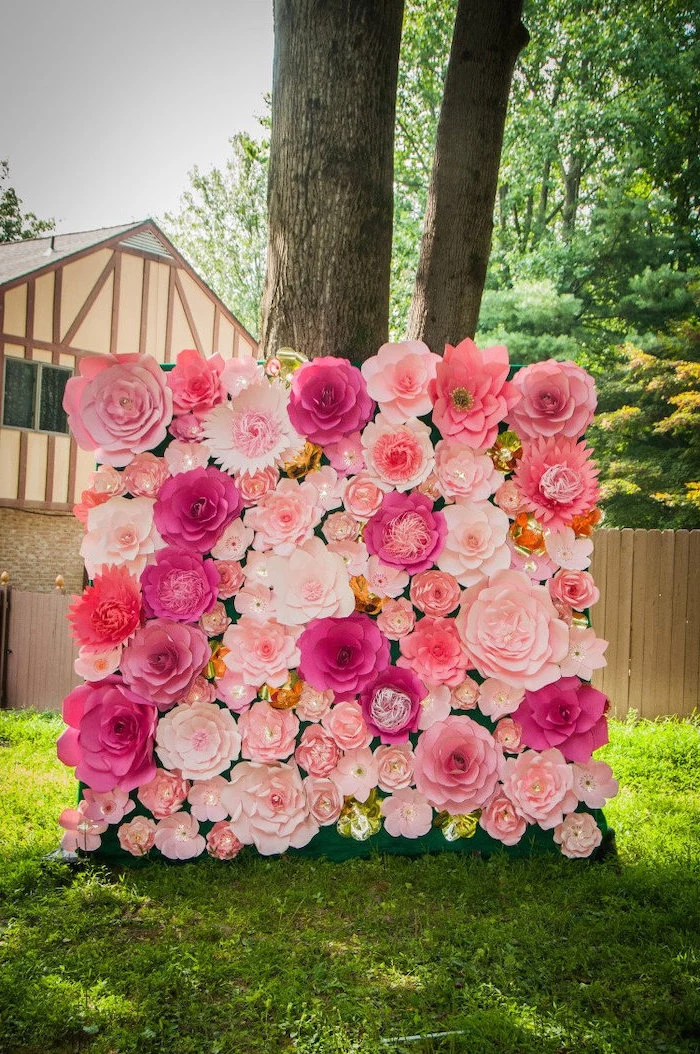
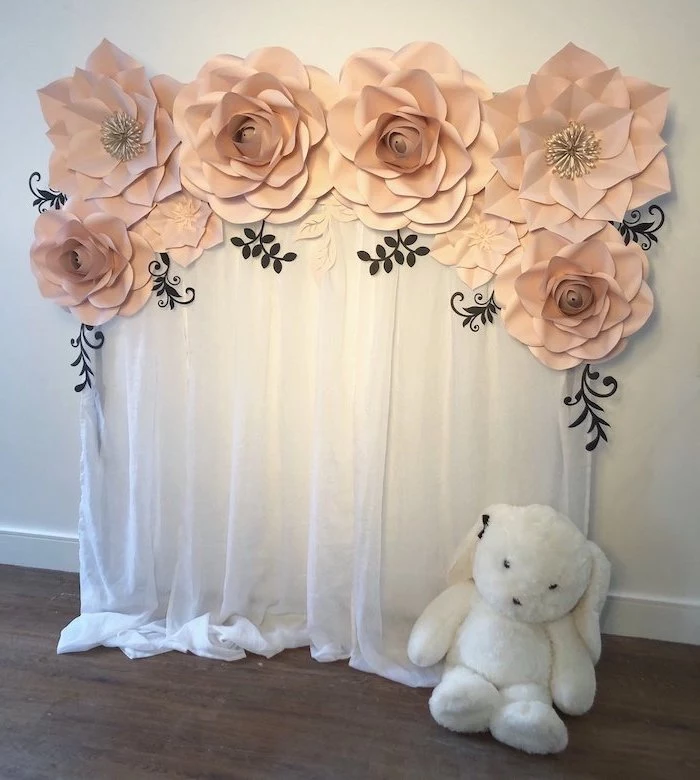
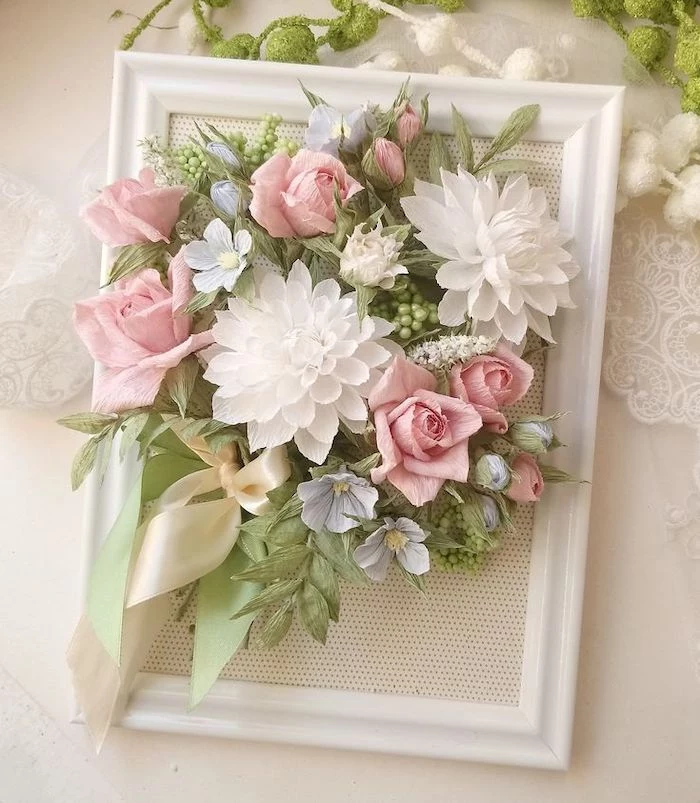
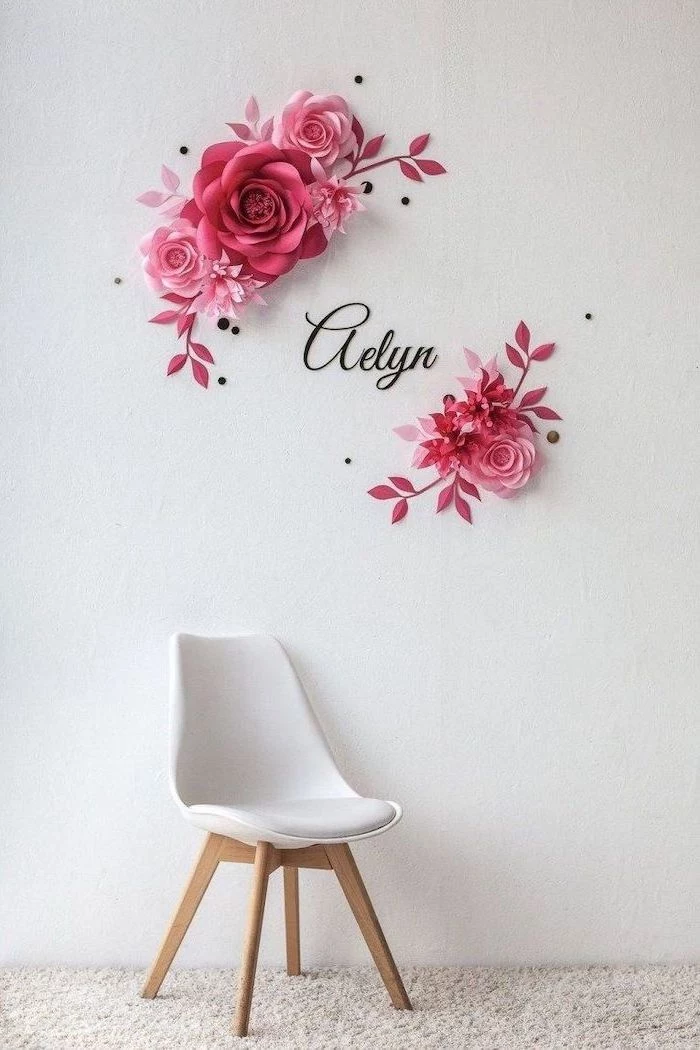
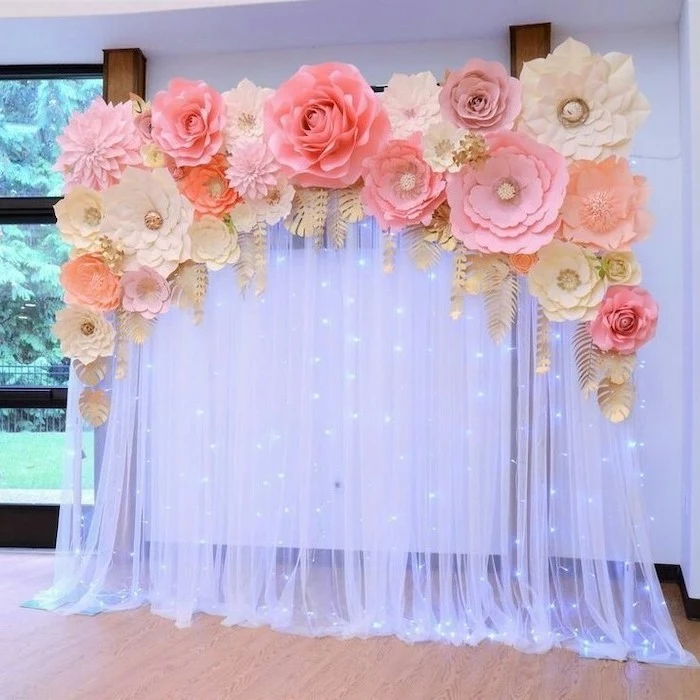
This grand scale reminds us that paper flowers aren’t just for bouquets. Consider creating a single, oversized statement bloom to hang as a piece of art above a console table or bed. It’s a high-impact decor choice that celebrates the beauty of a single flower in all its intricate detail.

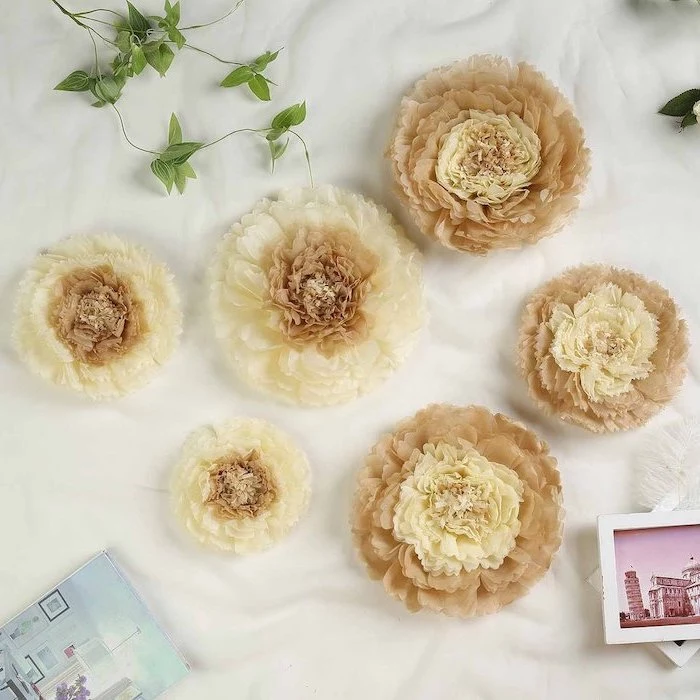
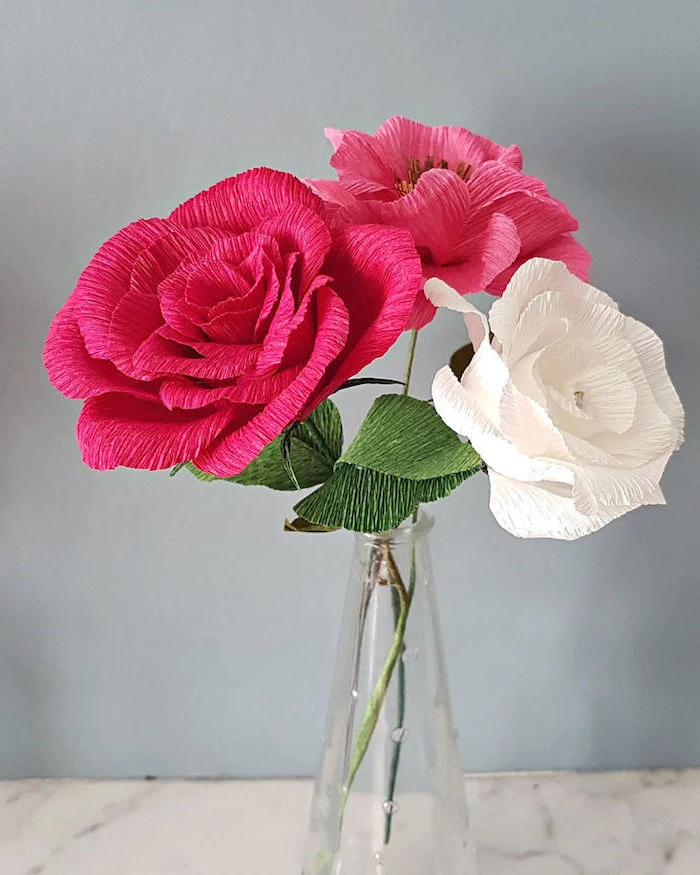
Italian Crepe Paper: This is the heavyweight champion (often 180 gsm) mentioned in the article. It feels more like fabric, has incredible stretch (up to 260%), and is ideal for dramatic, sculptural flowers like roses and peonies. Brands like Cartotecnica Rossi are the go-to for serious artists.
German Crepe Paper: Often double-sided or featuring a finer crepe, this paper is lighter and more delicate. It’s perfect for creating realistic, crinkly flowers like poppies and for projects where you want a more vintage, papery feel.
For beginners, starting with Italian crepe is often easier as it’s more forgiving and holds its shape exceptionally well.
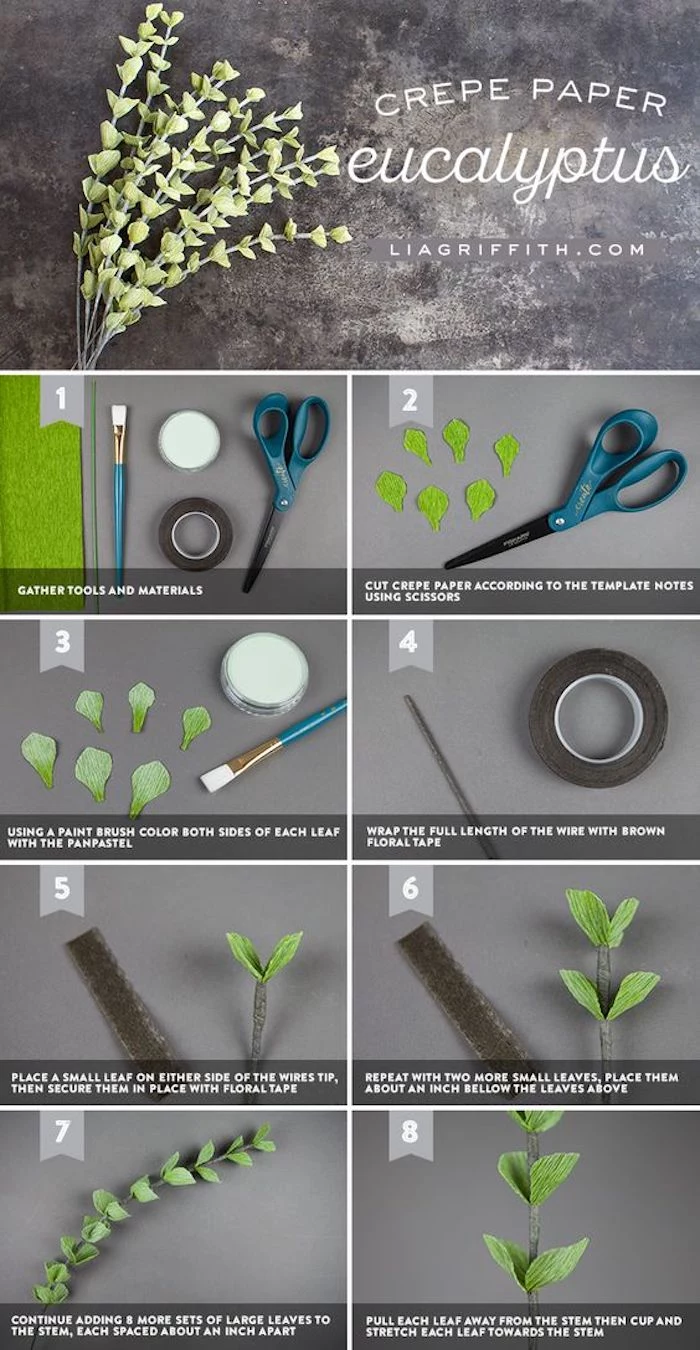
Don’t be afraid to mix your media. Adding a stem of preserved eucalyptus or a few dried billy balls to a bouquet of your handmade paper peonies can elevate the entire arrangement. The contrast in textures between the crafted paper and the natural elements makes the flowers look even more realistic and intentional.
How do I keep my beautiful creations from gathering dust and getting crushed?
For dusting, a can of compressed air (used for keyboards) held at a distance is your best friend. A gentle puff will dislodge dust without damaging delicate petals. For long-term storage, acid-free archival boxes are ideal. Gently nestle the flowers in tissue paper, giving each bloom enough space to avoid being flattened.
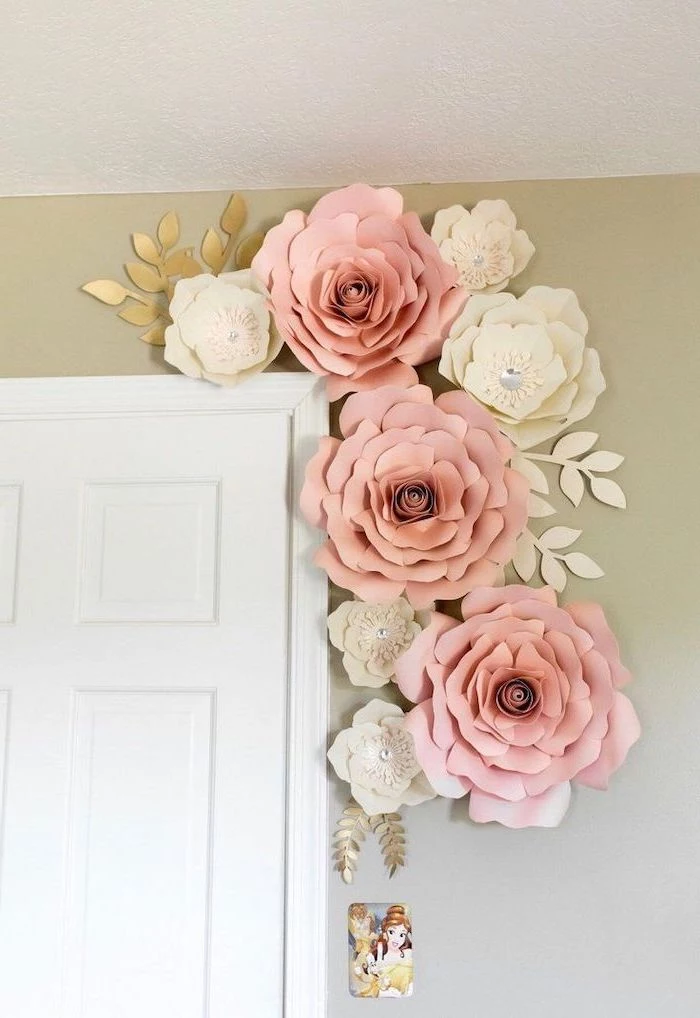
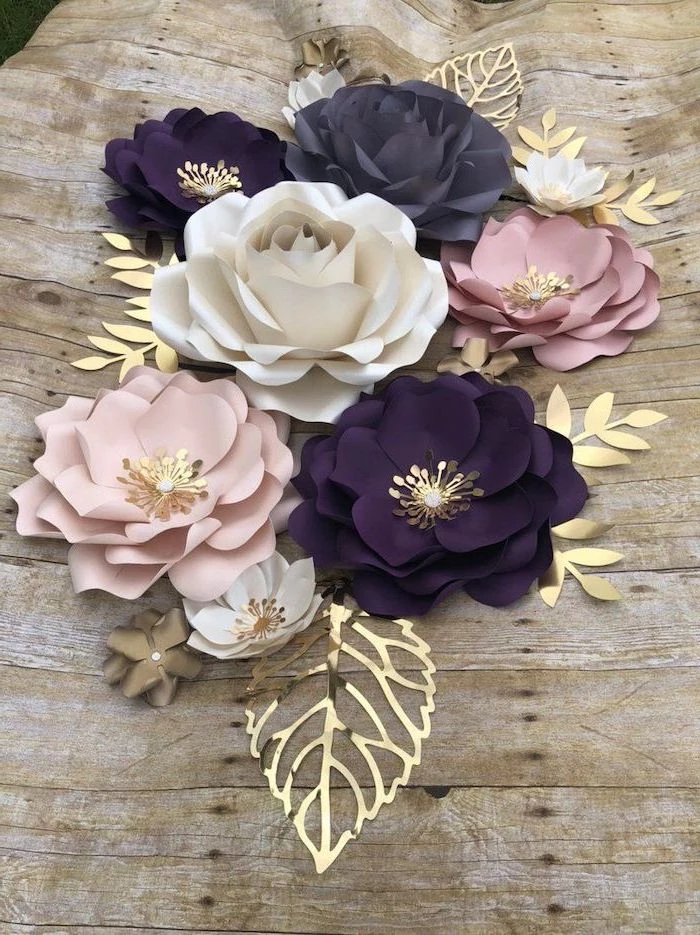
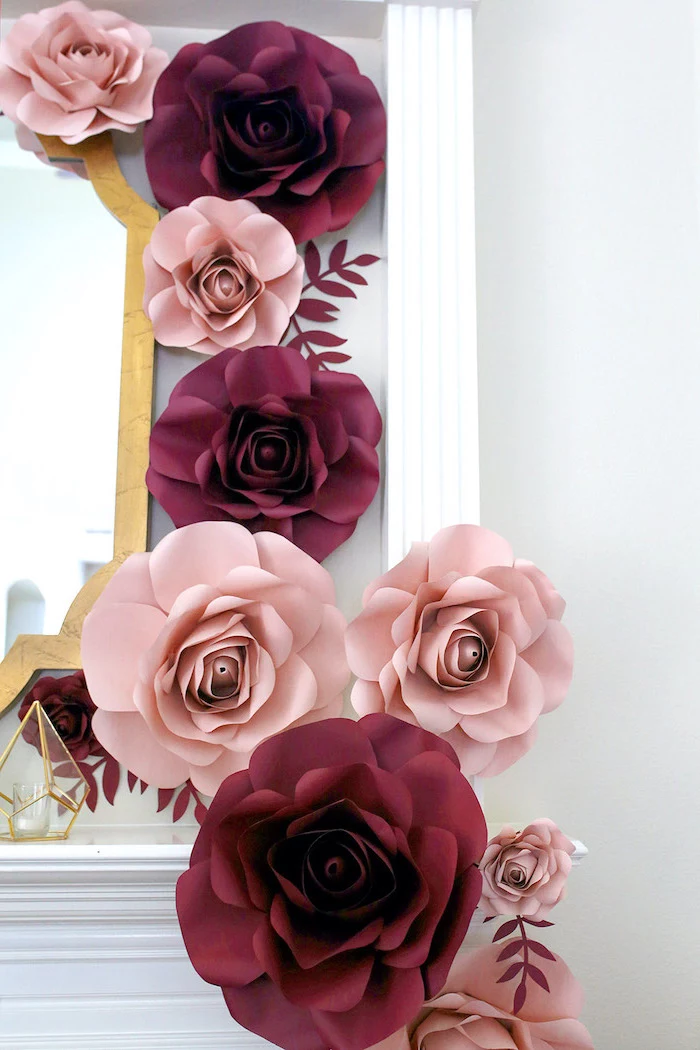
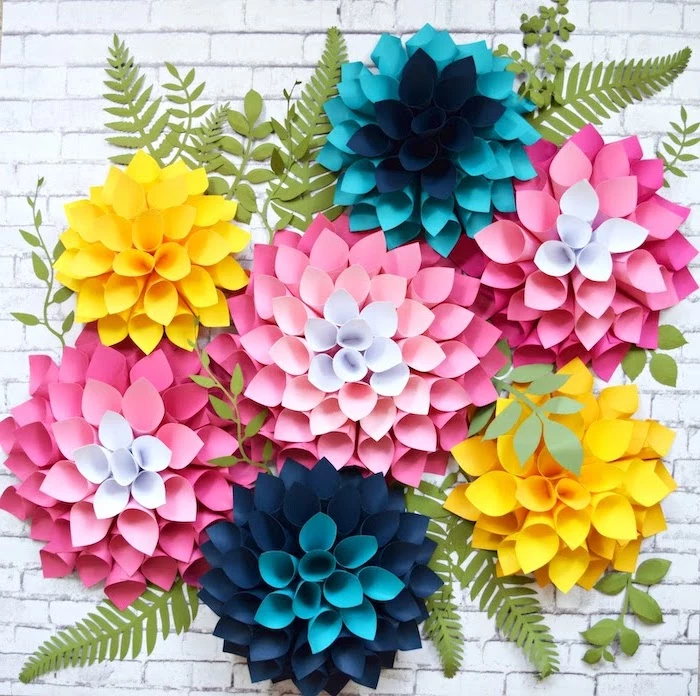
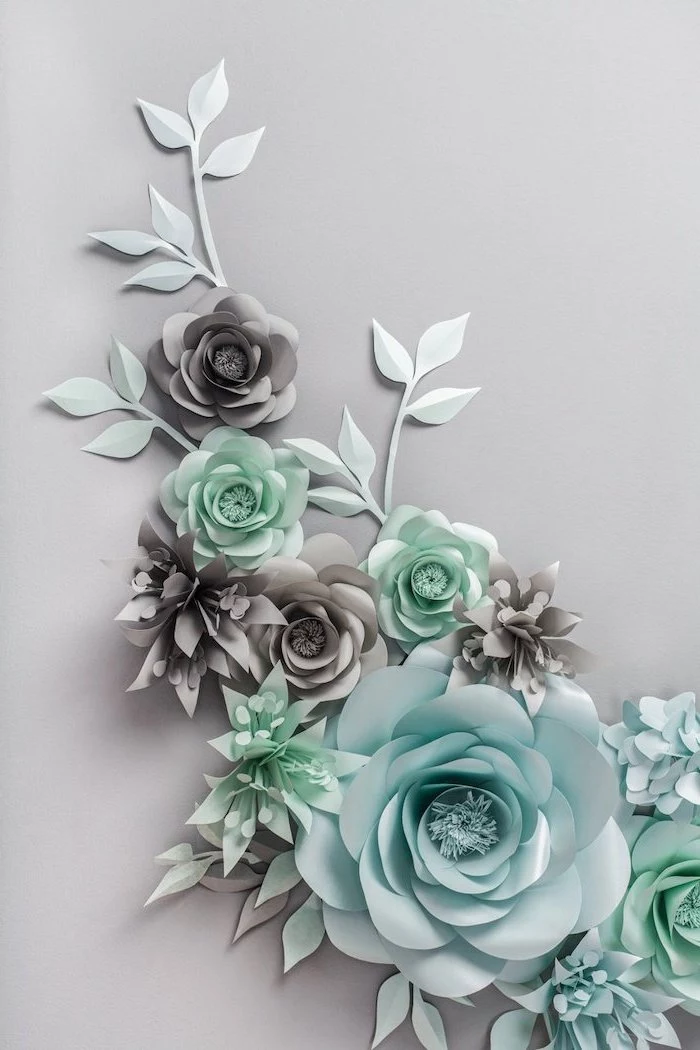
- The Classic Trio: Blush, Cream, and Sage Green. This timeless combination is perfect for romantic arrangements like wedding bouquets.
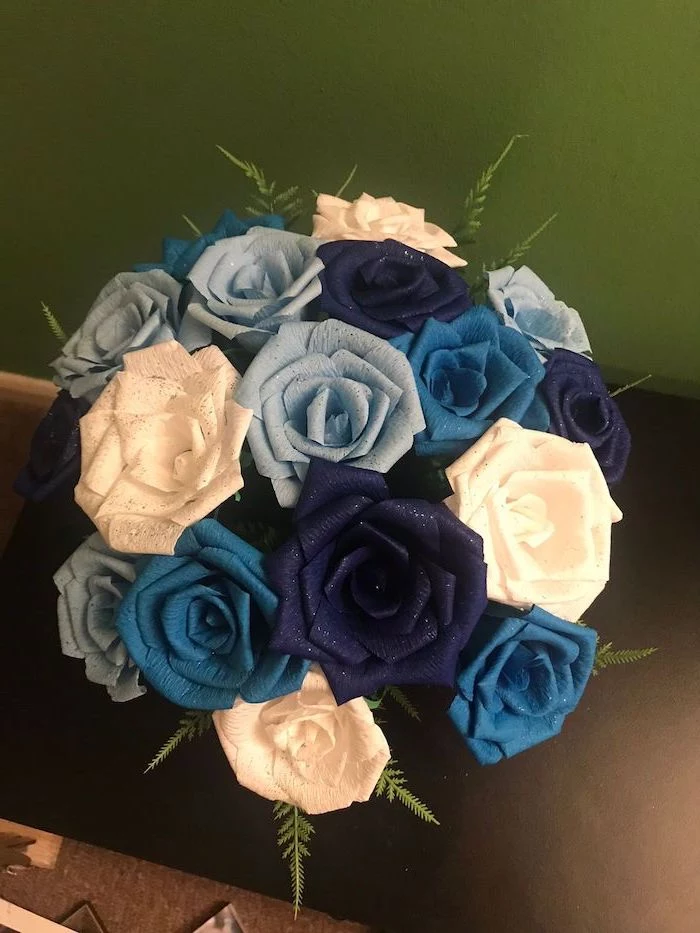
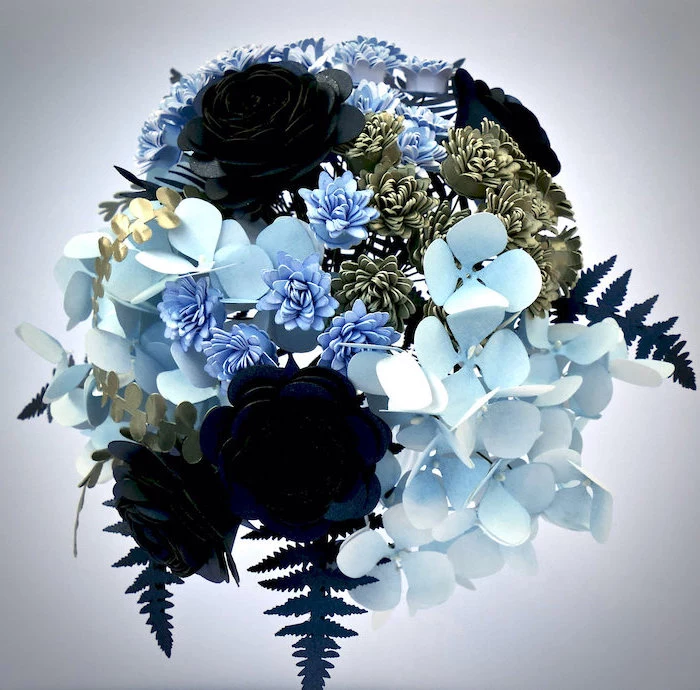
- Moody Jewel Tones: Deep Burgundy, Navy, and Emerald, with a pop of gold for the stamens. Think dramatic winter decor.
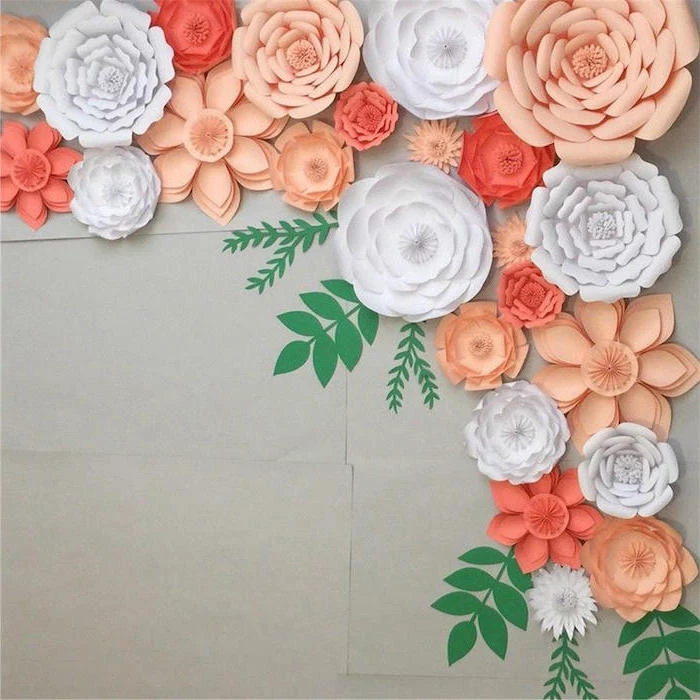
- Zesty Citrus: Coral, Lemon Yellow, and Bright Orange. A vibrant mix that’s perfect for a cheerful summer party centerpiece.
When selecting your paper, grab a few more shades than you think you’ll need. Holding the rolls together will give you a much better sense of the final palette.

Quick Tip for Realism: After you’ve shaped your petals, go back and add one or two tiny imperfections. A small, gentle fold near the edge, a slight crinkle, or even a tiny, carefully placed tear can mimic the natural wear of a flower petal and make your creation paradoxically more perfect.
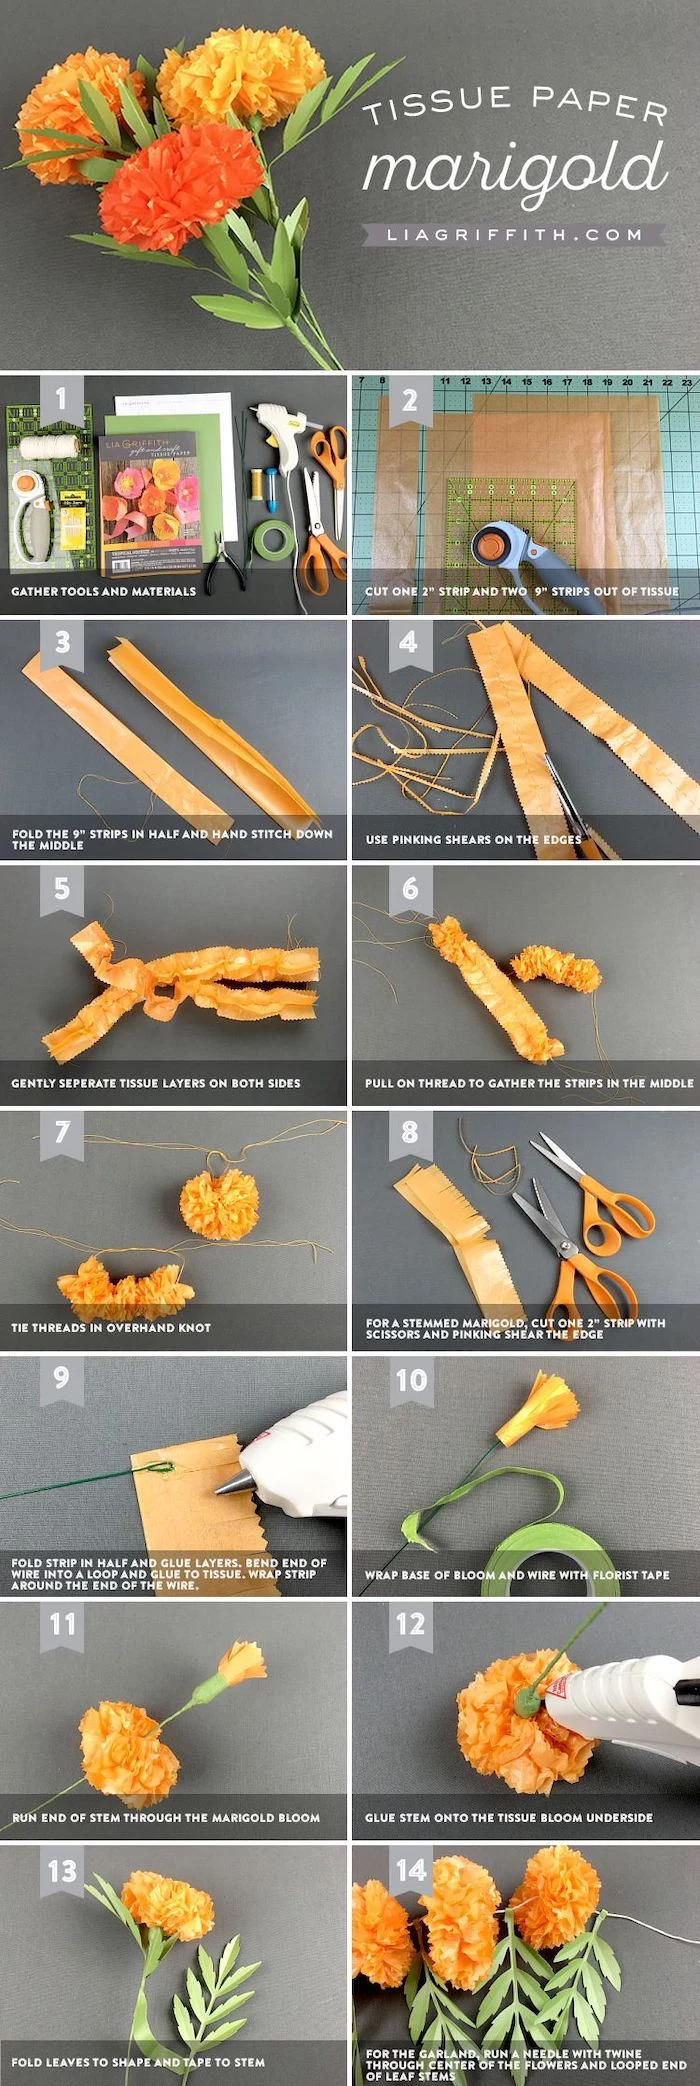
For the Día de los Muertos (Day of the Dead) in Mexico, altars are lavishly decorated with cempasúchil, or marigolds, often crafted from bright orange and yellow tissue paper to guide the spirits home with their vibrant color and scent.
Looking for an alternative to crepe paper? Try experimenting with watercolor paper. Paint a sheet with soft, blended washes of color, let it dry completely, and then cut your petals. The paper is stiff enough to hold a curl, and the unique, painterly look gives your flowers a beautiful, artistic quality that’s impossible to achieve with solid-colored paper.

- A perfectly smooth, professional-looking stem.
- Securely attached leaves that won’t wobble or slide down.
- A clean finish where the flower meets the stem.
The trick? It’s all in how you use floral tape. The key is to stretch it as you wrap. This activates the adhesive and ensures it bonds tightly to itself and the wire, creating a seamless, durable finish from calyx to cut end.
An easy mistake to make: using too much glue. A large glob of hot glue can create unsightly bumps, weigh down petals, and even melt through delicate crepe paper. The rule of thumb is to use the smallest amount possible. A tiny dot is often enough to create a strong bond without adding bulk or shine where you don’t want it.
The rhythm of cutting, shaping, and assembling petals can be incredibly meditative. Put on some music, focus on the feel of the paper in your hands, and allow yourself to get lost in the process. Crafting isn’t just about the final product; it’s a mindful practice that provides a welcome escape from the digital noise of daily life.

I want to try making my own templates. Where do I start?
Begin by deconstructing a real flower (or find a good photo online). Gently pull off the petals one by one and notice how they change in size and shape from the center outwards. Trace these onto a piece of cardstock to create your master set. Don’t worry about perfect symmetry—nature rarely is!
A 2021 study found that engaging in creative hobbies like crafting for just a few hours a week can significantly reduce stress and improve overall mood.
So, the next time you feel overwhelmed, remember that your box of paper and glue isn’t just for making pretty things. It’s a powerful tool for self-care. The focus required for crafting gives your brain a break from other worries, and the satisfaction of creating something with your own hands provides a tangible sense of accomplishment.
For truly delicate blooms: Think outside the craft store. White coffee filters are an amazing and inexpensive material. Their porous, slightly crinkled texture is perfect for flowers like cherry blossoms or hydrangeas. You can even dye them with watercolors or food coloring to achieve custom pastel shades. Once dry, they are feather-light and beautifully translucent.

A pro touch for leaves: Don’t just cut out a flat leaf shape. To make it truly realistic, add a central vein. You can do this by lightly scoring the center with a bone folder or, for a more robust leaf, by gluing a fine-gauge wire down the middle of the back with craft glue. This not only adds a visual detail but also allows you to bend and shape the leaf into a more natural position.
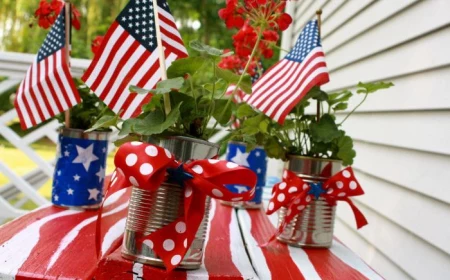
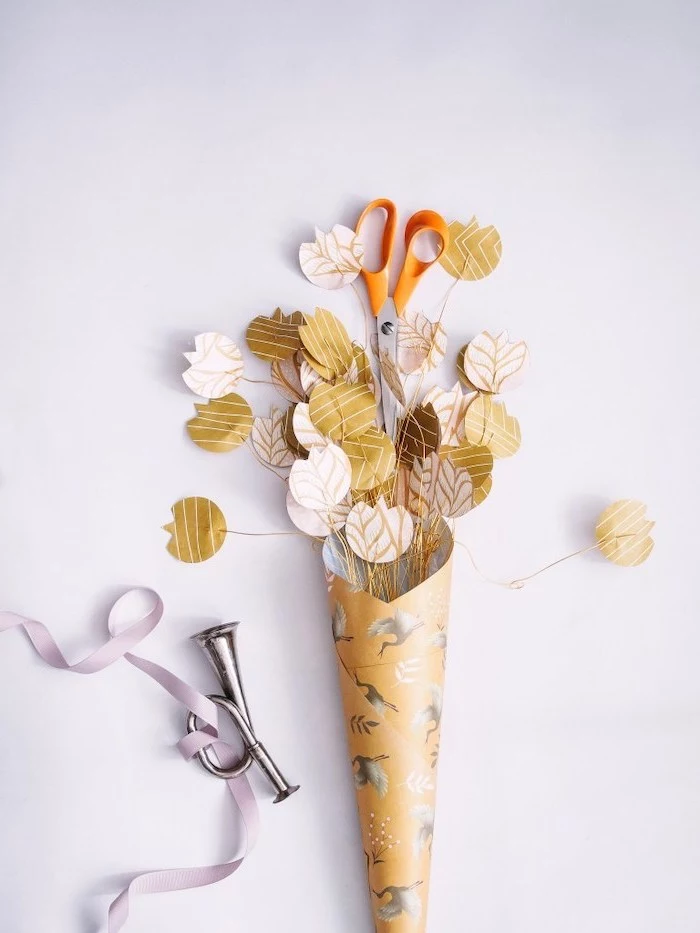
- As a chic, reusable gift topper instead of a disposable bow.
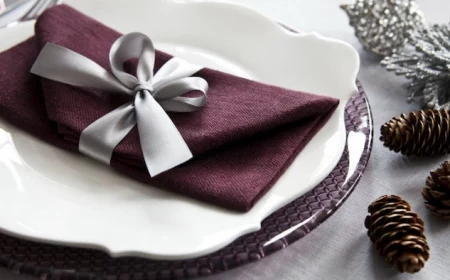
- Tucked into a napkin ring for an elegant dinner party place setting.
- Glued to a simple hair comb or bobby pin for a special occasion accessory.
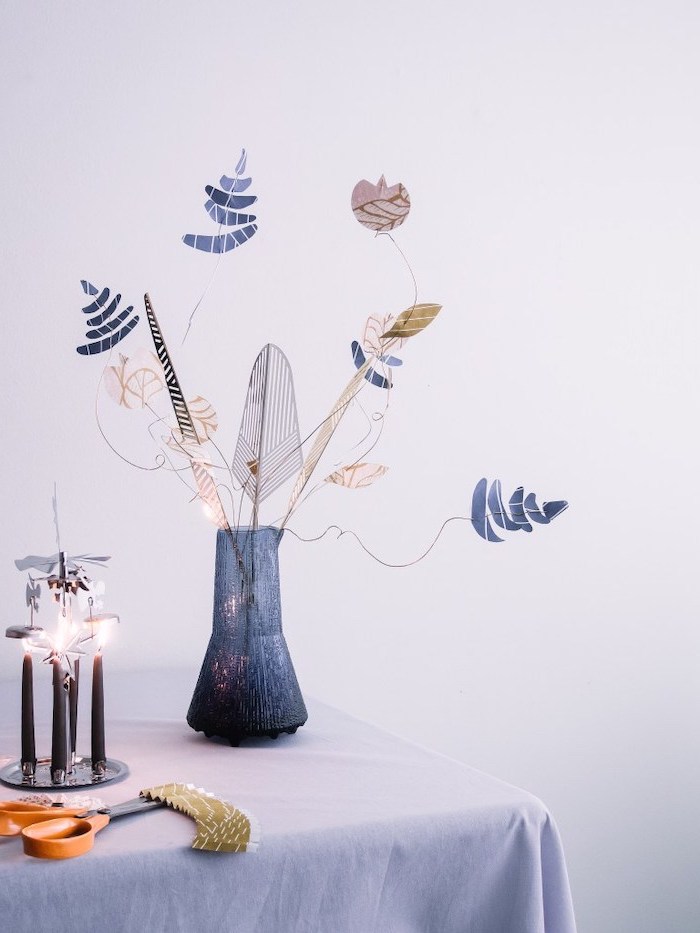
- Arranged in a collection of small bud vases on a windowsill.
To prevent your paper flowers from fading, especially if they are in a sunny room, give them a light coat of a UV-resistant clear matte spray. Krylon’s UV-Resistant Clear Acrylic Coating is a popular choice among crafters. Test it on a scrap piece of paper first to ensure it doesn’t alter the color, and apply it in a well-ventilated area.