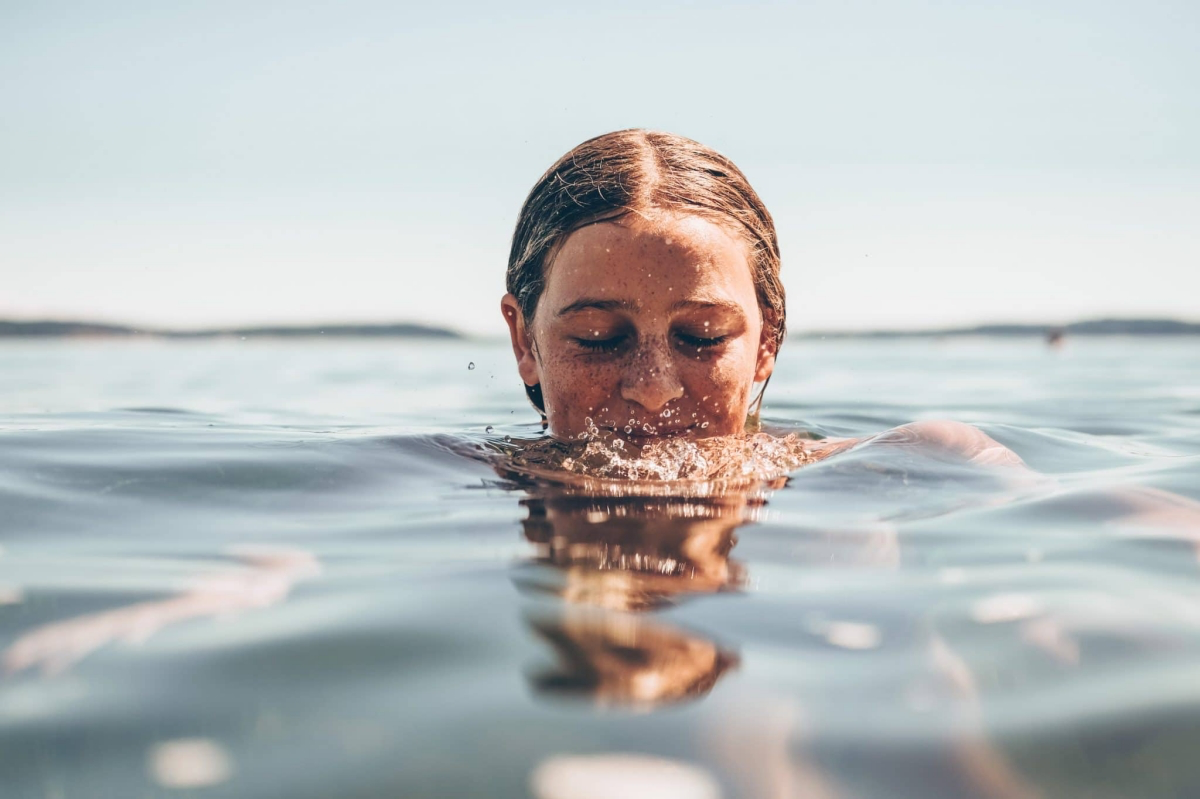
That Annoying Plugged-Ear Feeling After Swimming? Here’s How to Fix It Safely
I’ve spent more time on a pool deck than I can count, coaching everyone from nervous beginners to national-level swimmers. And in all that time, the most common complaint I hear isn’t about sore muscles—it’s that annoying, frustrating feeling of having water trapped in your ear.
In this article
It’s a familiar story. You get out of the water, and one ear feels full. Your hearing is muffled, like someone stuffed a cotton ball in there. It’s more than just distracting; if you don’t get that water out, it can lead to a seriously painful infection we all know as “swimmer’s ear.” I’ve seen it sideline amazing athletes and put a damper on more than a few family vacations.
The internet is overflowing with weird hacks and questionable advice. My goal here is different. I want to walk you through the safe, proven methods we teach in the swimming world—the stuff that actually works without putting your hearing at risk. We’ll cover the simple physics of why water gets stuck, the gentle tricks I teach every new swimmer, and the absolute red flags that mean it’s time to call a doctor.

So, Why Does Water Get Stuck in There Anyway?
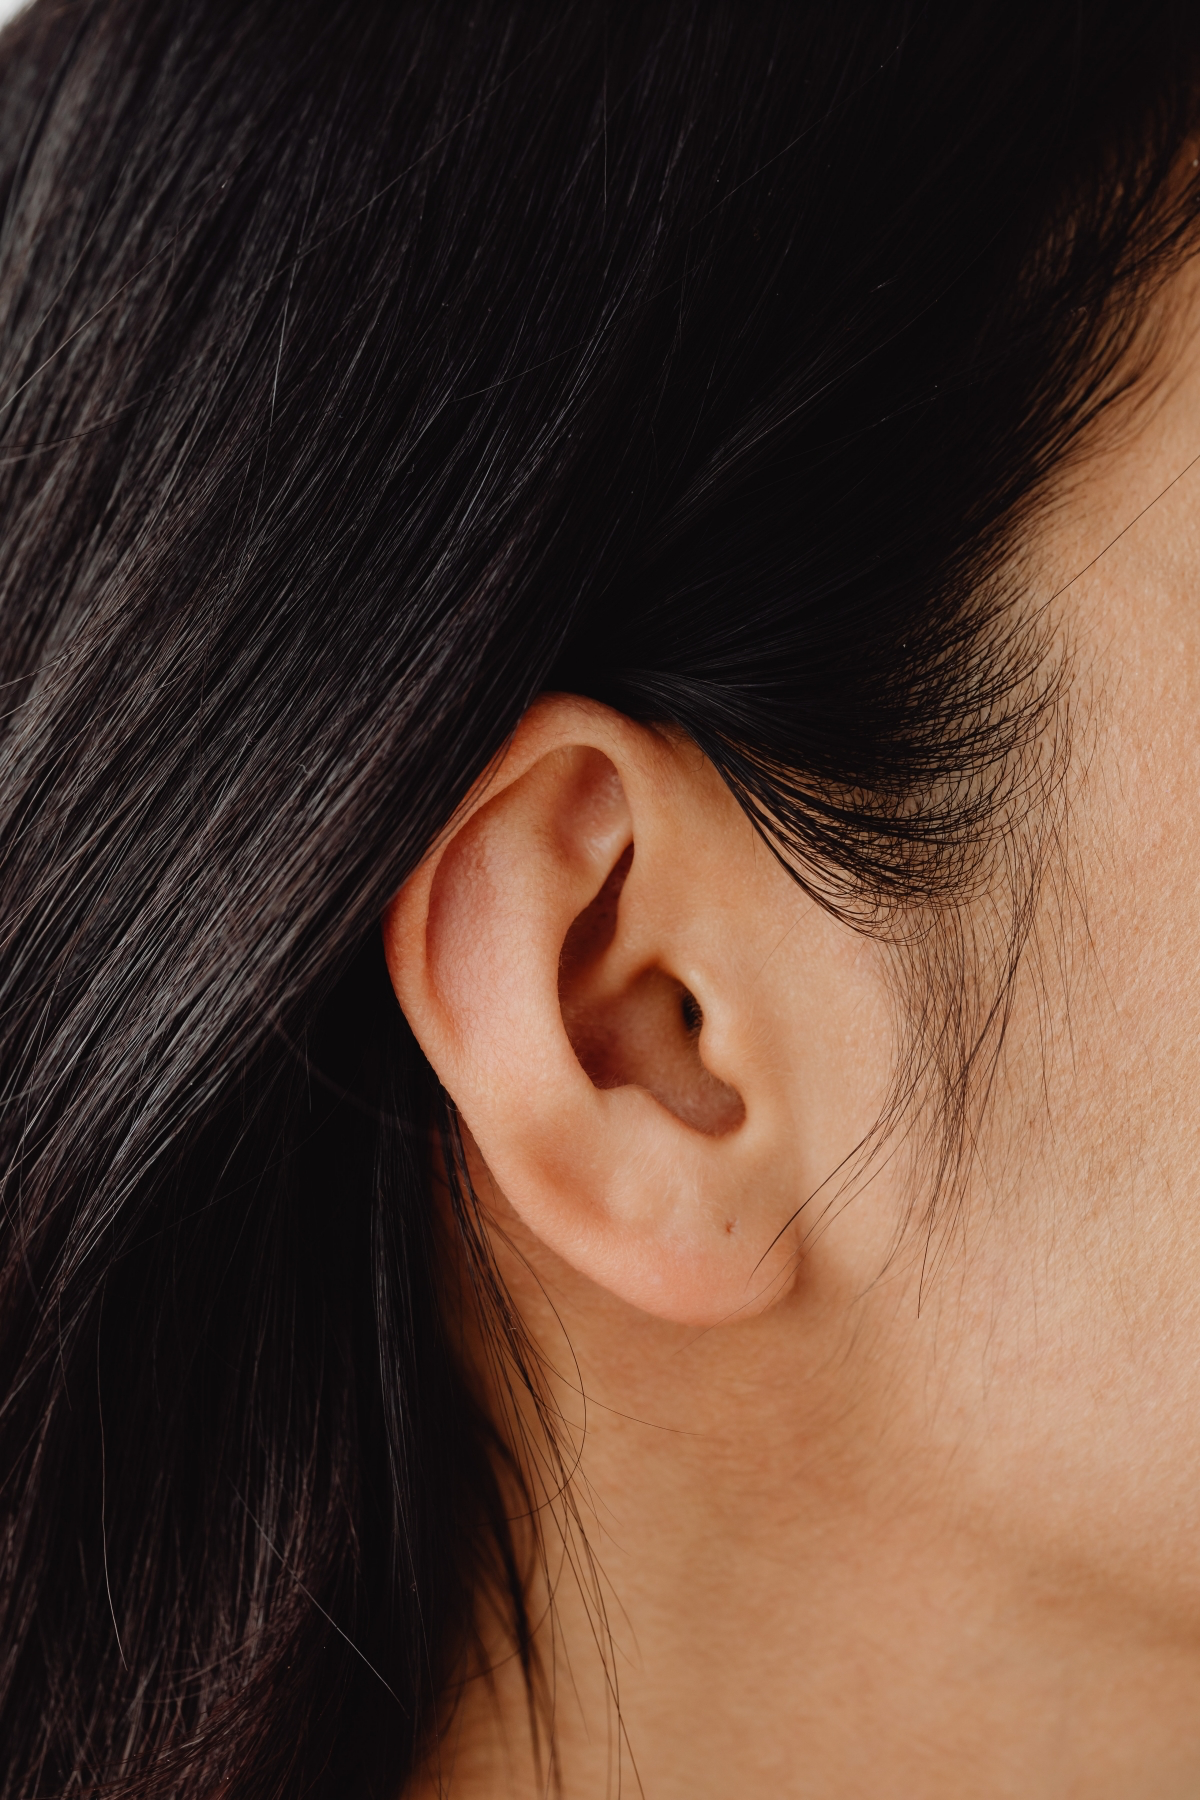
To get water out, it helps to know what you’re dealing with. Your outer ear canal isn’t just a straight tube; it has a slight curve and leads to your eardrum. It’s also lined with super-sensitive skin and glands that produce earwax.
By the way, earwax gets a bad rap, but it’s actually your friend. It creates a slightly acidic, waterproof barrier that helps water roll right out. The problem usually starts when water gets trapped behind a little bit of wax or just can’t escape the canal’s shape.
The real culprit here is a simple physics principle: surface tension. It’s the same force that makes a water droplet cling to a countertop. In the tight, curved space of your ear canal, surface tension can hold a bubble of water tight against the skin. Our main goal is to break that tension or just use good old gravity to our advantage.

Your First Moves: The Gentle Techniques
Before you do anything else, always start with the basics. These are the first things I show the kids on my team because they’re safe, easy, and, honestly, they work most of the time.
1. The Gravity Drain
This is your go-to, number one move. Gravity is your best friend.
Tilt your head completely to the side, so the plugged ear is pointing straight down at the ground. Then, with your other hand, reach over your head and gently pull the top of your earlobe up and back. This simple move helps straighten out the ear canal’s curve, creating a clearer path for the water to escape.
Hold it for about 30 seconds. I often tell my swimmers to hop gently on one foot while they do this. A little vibration can be just what you need to break that water’s seal.
Quick Win: Feeling clogged right now? Pause reading and try this for 30 seconds. Hop a little. Seriously. You might feel a little trickle or a “pop” as it releases.
2. The Jaw Wiggle
If the gravity drain doesn’t quite do it, don’t give up. The next step is just as simple. While keeping your head tilted, open your mouth wide like you’re doing a massive yawn, then move your jaw around like you’re chewing. Your ear canal is surprisingly flexible and sits right next to your jaw joint. These movements can shift the shape of the canal just enough to dislodge the water bubble.
When the Simple Stuff Isn’t Enough
Okay, so you’ve tilted, hopped, and wiggled, but you still feel plugged. Don’t panic. We have a few more tricks up our sleeve, but these require a bit more caution.
The Gentle Palm Vacuum
I’ve seen people slap the side of their heads to get water out. Please, don’t do that. It can hurt and cause real damage. Instead, try this controlled, gentle version. Tilt your head, cover your ear completely with the palm of your hand to create a tight seal, and then gently push and pull your palm. The motion is like a soft plunger, not a slap. The idea is to create a mild suction to coax the water out. If you feel any pain, stop immediately. It’s about finesse, not force.

The Valsalva Maneuver (Done Right)
This is a technique divers use to equalize pressure, and it can help here, too. Pinch your nose shut, close your mouth, and then try to exhale gently through your closed nose. You’re not trying to blow your head off! You should feel a gentle “pop” in your ears. This tiny shift can be enough to move the water.
Heads up! I can’t stress the word gently enough. Blowing too hard can damage your eardrum. And if you have a cold or sinus congestion, skip this one entirely—you could force gunk into your middle ear and cause a nasty infection.
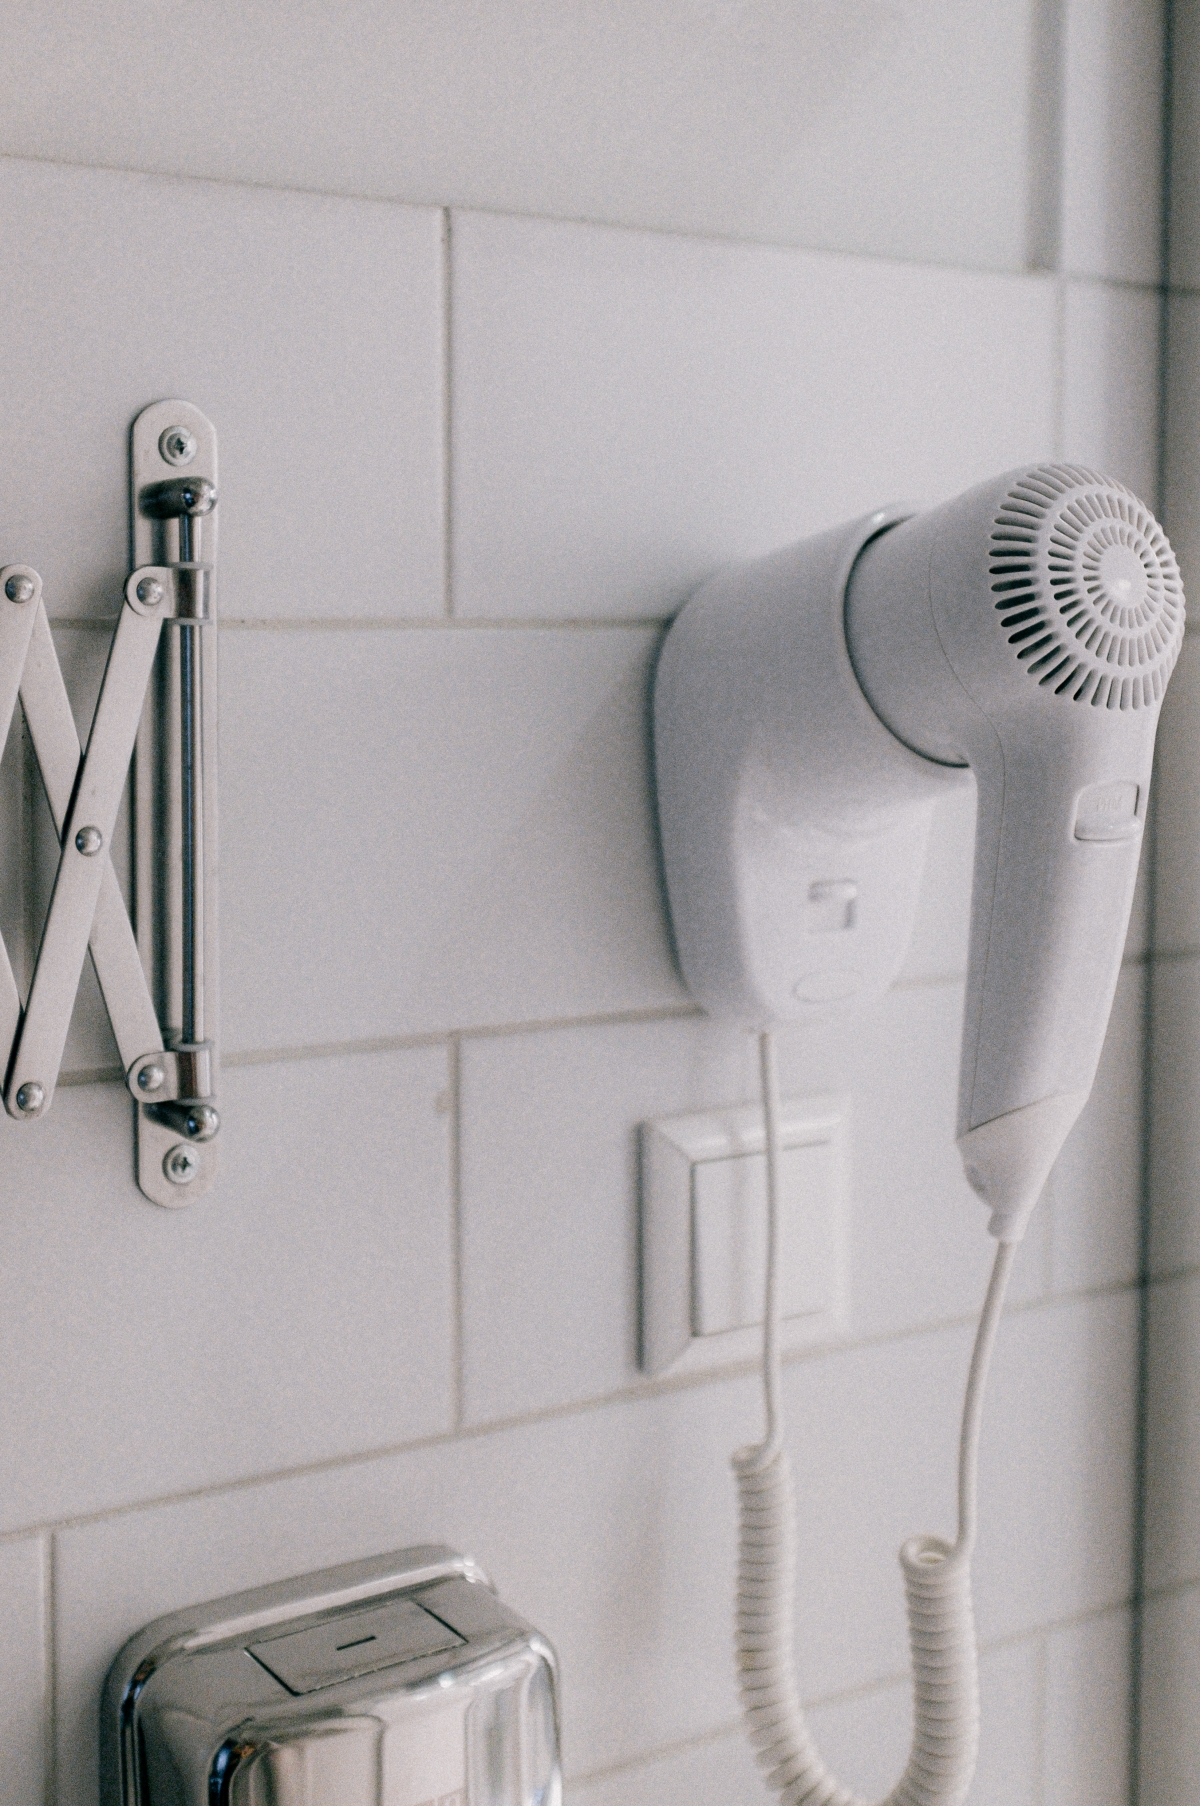
The Hair Dryer Method (Use Extreme Caution)
Some people swear by this, but I see it as a last resort. The idea is to evaporate the water, but the risk of burning the delicate skin in your ear is high. I once had a parent who thought the ‘coolest setting’ was still too chilly and used low heat instead… let’s just say it ended with a very unhappy kid and a call to the doctor. If you absolutely must try it, set the dryer to its LOWEST speed and COOLEST setting. Hold it at least a foot away from your ear and just wave it back and forth for 30 seconds, max.

The Coach’s Shopping List: Over-the-Counter Solutions
For my regular swimmers, I always recommend keeping a bottle of ear-drying drops in their bag. They are incredibly effective and you can grab them at any pharmacy for about $5 to $10. Look for brands like Swim-Ear or Auro-Dri.
These drops usually have an isopropyl alcohol base, which breaks water’s surface tension and helps it evaporate quickly. The good ones also contain glycerin, which is a huge plus because it moisturizes the skin and prevents the alcohol from drying it out too much.
A common question I get: “Can I just make my own with rubbing alcohol?” While you technically can (some old-school remedies mix it with white vinegar), I advise against it. You miss out on the glycerin, which protects your skin from getting dry, itchy, and prone to infection. For a few bucks, the professionally formulated stuff is just safer and better for your ears.
Crucial Disclaimer: Never, ever use ear drops if you have ear pain, discharge, or think you might have a perforated eardrum or ear tubes. If there’s any doubt, see a doctor first.
Things You Should NEVER Do
Part of my job is protecting my athletes from bad advice. Please, avoid these common but dangerous practices.
- Cotton Swabs: If you take away one thing, let it be this: do not stick cotton swabs in your ear canal. They just push wax and water deeper, packing it against your eardrum. It’s the fastest way to cause a blockage, an infection, or even a perforated eardrum.
- Hydrogen Peroxide: While sometimes used by doctors to soften impacted wax, it’s too harsh for simple trapped water. It can irritate the skin and throw off the natural balance of your ear canal.
- Ear Candling: This is pure snake oil. It’s been proven to be completely ineffective and dangerous. You’re far more likely to get hot wax dripped in your ear than to get anything sucked out of it. Just don’t.

Prevention Is Always the Best Medicine
The easiest way to deal with water in your ear is to stop it from getting trapped in the first place.
For swimmers, earplugs are a game-changer. Here’s a quick rundown:
- Silicone Putty Plugs: These are my top recommendation for kids and casual swimmers. You just mold the soft putty over your outer ear opening. They’re comfortable, create a great seal, and are cheap—you can get a pack from brands like Mack’s for around $5.
- Pre-Molded (Flanged) Plugs: These are reusable plugs that fit inside your ear canal. They’re great for regular swimmers but finding the perfect fit is key. Expect to pay between $10 and $20.
- Custom-Molded Plugs: For competitors or anyone with chronic ear issues, these are the gold standard. An audiologist makes a mold of your ear for a perfect fit. They’re the most expensive option, often costing $150 or more, but they’re unbeatable for comfort and protection.
Finally, I drill this into my team: every single time you get out of the water, tilt your head to each side for a few seconds and gently dry the outside of your ears with the corner of your towel. It’s a simple two-minute habit that can save you a world of trouble.
When to Stop and Call a Doctor
It’s vital to know when you’re dealing with simple trapped water versus a budding infection. Don’t panic if the plugged feeling lasts for a couple of hours—try the gentle methods again after your next shower. But if you wake up the next morning and it’s still there, that’s when you need to pay close attention.
See a medical professional if you experience any of the following:
- The fullness or muffled hearing lasts for more than a day.
- You develop any ear pain, especially pain that gets worse when you tug on your earlobe.
- Your ear starts to itch like crazy or feel hot.
- You notice any redness, swelling, or fluid draining from the ear.
- You develop a fever.
Your ears are delicate. Always start with the gentlest methods first. By focusing on prevention and knowing when to seek help, you can keep your ears happy and enjoy every minute in the water.

Inspirational Gallery
Prevention over cure: While knowing how to get water out is crucial, stopping it from entering in the first place is the pro move. For frequent swimmers, custom-molded earplugs from an audiologist offer a perfect, comfortable seal. For casual dips, high-quality silicone putty plugs, like Mack’s Pillow Soft, are a fantastic and affordable option that molds to the outer ear, creating a reliable barrier without entering the canal itself.
- Keep them clean and hygienic.
- Ensure they last all season long.
- Prevent introducing bacteria into your ear.
The secret? Proper care for your reusable earplugs. After each swim, simply rinse your silicone plugs (like those from Speedo or TYR) with clean, lukewarm water and a mild, non-moisturizing soap. Let them air dry completely before storing them in their protective case to avoid trapping moisture.
According to the U.S. Centers for Disease Control and Prevention (CDC), acute otitis externa, or swimmer’s ear, results in an estimated 2.4 million health care visits every year.
This statistic highlights just how common the problem is. That post-swim muffled feeling isn’t just an annoyance; it’s the first step on a path that sends millions of people to the doctor. Taking a moment to properly dry your ears is a small investment to avoid becoming part of that statistic.
Is it ever okay to use a cotton swab to dry a wet ear?
Absolutely not. It’s one of the most dangerous things you can do. Instead of absorbing the water, the swab often acts like a plunger, pushing the water droplet and any earwax deeper into the ear canal, potentially right up against the eardrum. Worse, you risk scratching the delicate skin of the ear canal, creating an entry point for bacteria, or even perforating your eardrum. It’s a tool for makeup, not for ears.
Over-the-Counter Drops: Products like Auro-Dri or Swim-Ear contain 95% isopropyl alcohol, which acts as a powerful drying agent, breaking water’s surface tension and helping it evaporate.
Homemade Solution: A 50/50 mixture of white vinegar and rubbing alcohol does a similar job. The alcohol dries the water, while the vinegar’s acidity helps restore the ear canal’s natural pH, discouraging bacterial growth.
While the homemade version is cost-effective, commercial drops come in a sterile, specially designed dropper bottle for safe and easy application.
Don’t underestimate your swim cap. While its main jobs are to reduce drag and protect hair from chlorine, a well-fitted silicone cap pulled down snugly over your ears creates an excellent secondary barrier. It won’t make your ears completely waterproof, but it dramatically reduces the amount of water that can splash directly into the ear canal, giving you a powerful head start against that trapped-water feeling.
“The worst thing you can do for your ear is to try to aggressively clean it, especially after swimming. You’re often removing the very thing—earwax—that protects you.” – Dr. Ana Kim, ENT specialist
Listen to your body. Trapped water is usually a temporary, muffled annoyance. But if you start to notice these other signs, it’s time to stop home remedies and see a doctor, as you may be developing swimmer’s ear:
- A persistent itching sensation deep inside the ear.
- Pain that gets worse when you tug on your earlobe.
- A feeling of significant pressure or fullness.
- Any fluid or pus draining from the ear.
For swimmers who brave colder waters, there’s another condition to be aware of: exostosis, or
- Silicone putty plugs are soft, moldable, and seal the outer ear opening. They are incredibly comfortable and ideal for kids or those who dislike the feeling of in-canal plugs.
- Flanged plugs are pre-molded and fit inside the ear canal. Their flexible tiers create multiple seals, offering a very secure fit for vigorous swimming or diving.


