The No-Waste Kitchen: How to Regrow Groceries on Your Windowsill
I’ve spent a good chunk of my life with my hands in the dirt, and if there’s one thing gardening teaches you, it’s how to watch and wait. But you know, one of the most powerful lessons I ever learned didn’t come from a seed packet. It came from watching what most people throw in the trash.
In this article
My grandfather used to keep this little glass on his kitchen windowsill. Inside, the white ends of a few green onions were standing in an inch of water, stretching up toward the light. It wasn’t really about saving a buck; it was about this simple, amazing act of continuation—respecting the life that’s still in our food. It’s stuck with me ever since.
Regrowing veggies from kitchen scraps is more than just a neat party trick. It’s a fantastic, hands-on way to see how plants work, connect with your food, and cut down on waste. And honestly, there’s a deep satisfaction in snipping off a few fresh greens you grew yourself. So let’s get into it—not just the how, but the why, and what to do when things get a little… slimy.
First Things First: What You’ll Actually Need
Before you start raiding your compost bin, let’s talk gear. The good news? You probably have everything you need right now.
For the bare-bones basics, you just need:
- Scraps: The bottoms of green onions, lettuce hearts, that garlic clove that started sprouting, etc.
- Containers: Think small jars, shot glasses, shallow bowls. Whatever holds a bit of water.
- Water: Regular tap water is usually fine.
- A decent spot: You’re looking for what the pros call “bright, indirect light.” What does that actually mean? Basically, a spot near a window where the sun doesn’t scorch your plant all day. If you can comfortably read a book there in the afternoon without turning on a lamp, you’re golden.
And if you want to take it to the next level and get some real, sustained growth, you’ll eventually need:
- Pots: A few small 4-inch pots with drainage holes are perfect. You can find these for about $3 a pop at a hardware store.
- Potting Mix: Grab a small bag of all-purpose potting mix for about $7. A single bag will last you for tons of these little projects. Quick tip: Don’t use dirt from your yard! It’s too dense, has poor drainage, and is often full of bugs you don’t want in your house.
The Easiest Wins for Building Confidence
So, where should you start? If you want a quick, almost guaranteed success, green onions are your best friend. They grow so fast it’s incredibly rewarding. Romaine lettuce is also pretty speedy, giving you tender leaves in a couple of weeks. Sweet potatoes are a different beast—they’re more of a long-term project in patience, but the beautiful leafy vines you get are totally worth it.
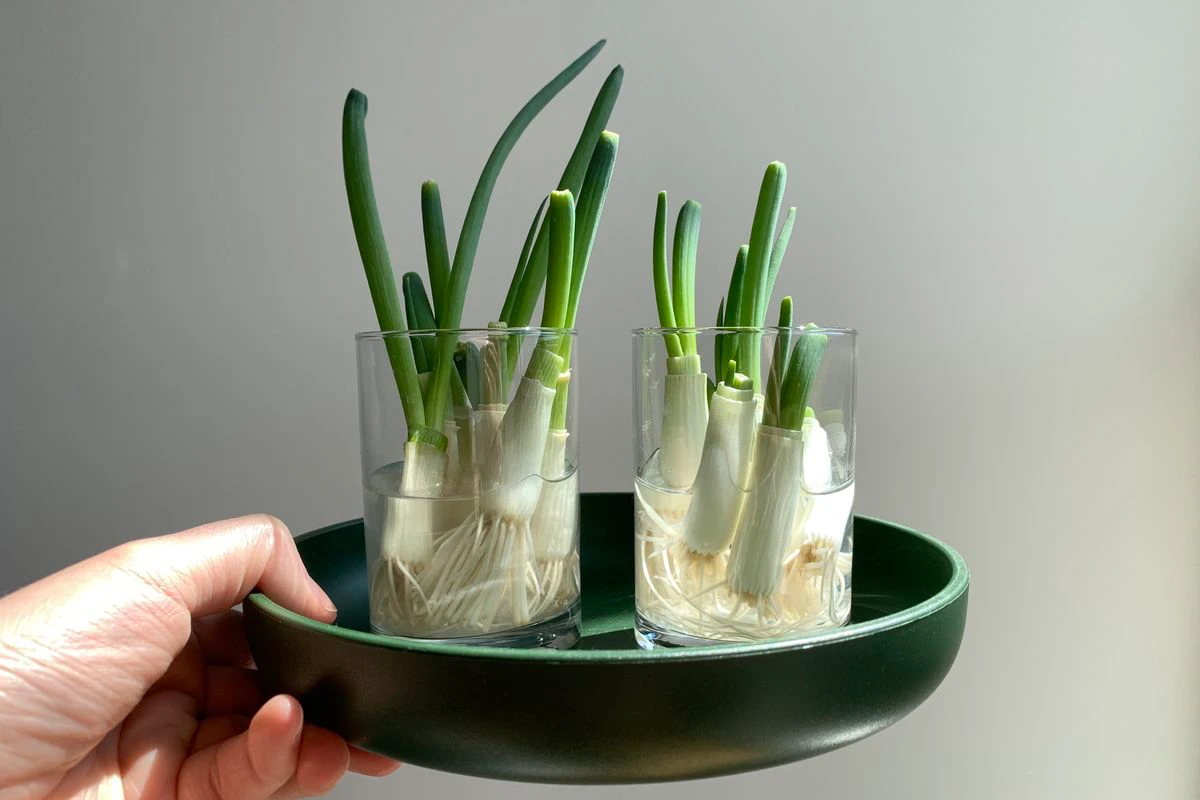
Green Onions: Your First 3-Day Miracle
The allium family—onions, leeks, garlic—is practically designed for this. They are, by far, the most forgiving group to start with.
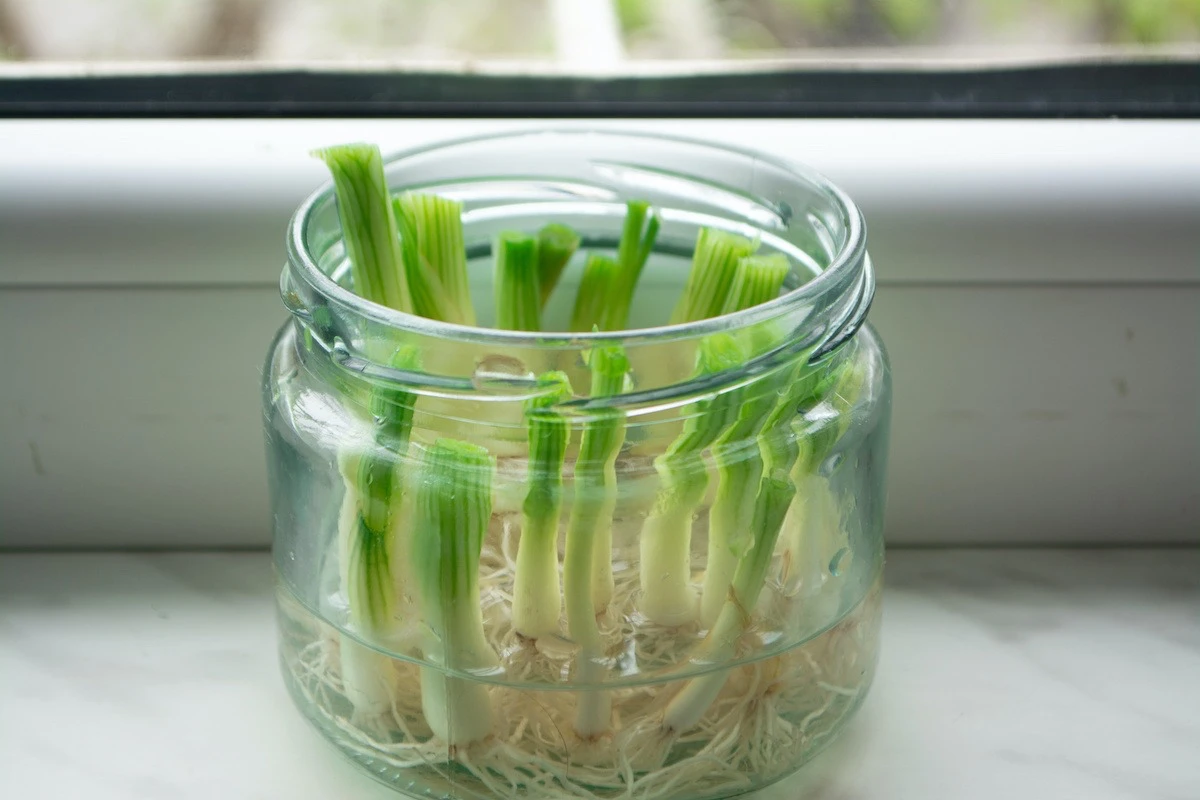
When you use your green onions (or scallions), just save the last inch or two of the white part with the little stringy roots still attached. Make a clean cut; a jagged edge is more likely to rot. Pop them upright in a narrow glass like a shot glass so they don’t fall over. Add just enough water to cover the roots and the very bottom of the white base.
Now for the fun part. Put the glass in that bright spot and change the water daily. You’ll see it get a little cloudy—that’s your cue.
Challenge: I’m serious, go grab the bottom of a green onion from your fridge and put it in a glass of water RIGHT NOW. I bet you’ll see a tiny spear of new green growth in just three days. In about a week, you’ll have enough to snip with scissors for your tacos or eggs.
The Reality Check: You can do this two or three times in water, but each new growth cycle will be a bit thinner and less flavorful because the plant is running out of stored energy. For stronger, continuous growth, plant the rooted base in a small pot of soil after that first harvest. Just bury it deep enough to cover the white part and keep the soil moist.
Variations: Leeks and Garlic Greens
This exact method works for leeks, too, you’ll just need a wider jar to hold the bigger base. And garlic? Oh yeah. You can’t regrow a full bulb on your windowsill, but if you have a clove that’s already sprouting a little green shoot, you’re in business. Just place the clove in a small dish with a tiny bit of water covering the bottom. That green shoot will take off, and you can snip the “garlic greens” to use like chives. They have a fantastic, mild garlic flavor.
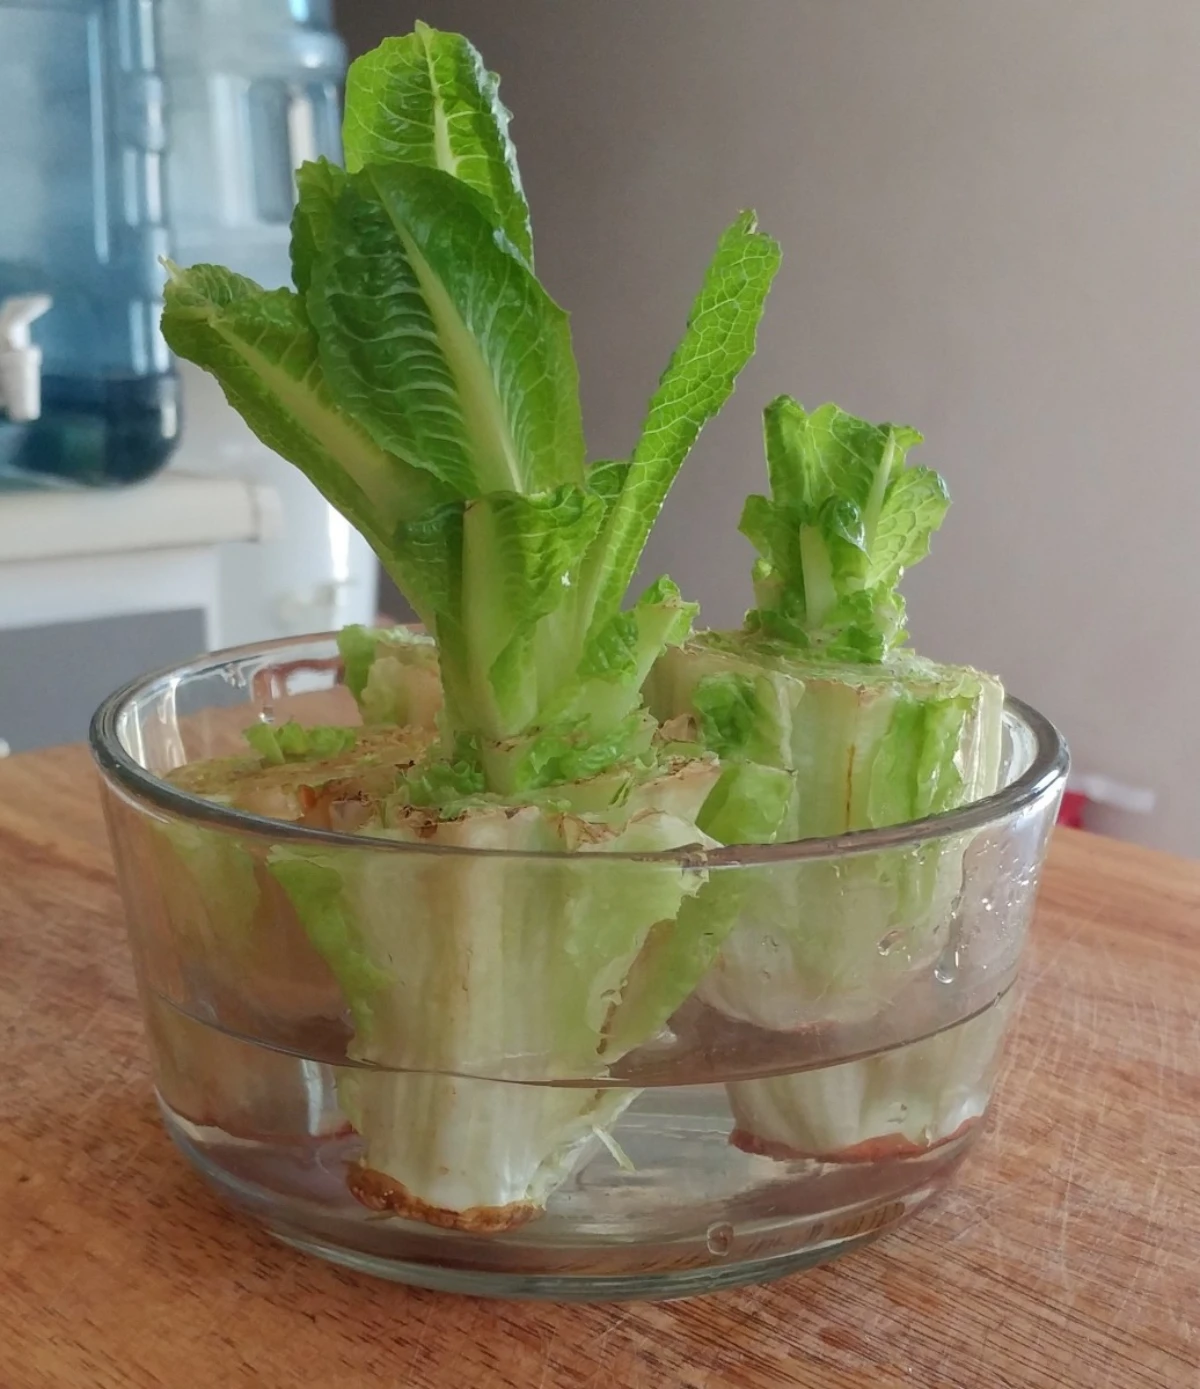
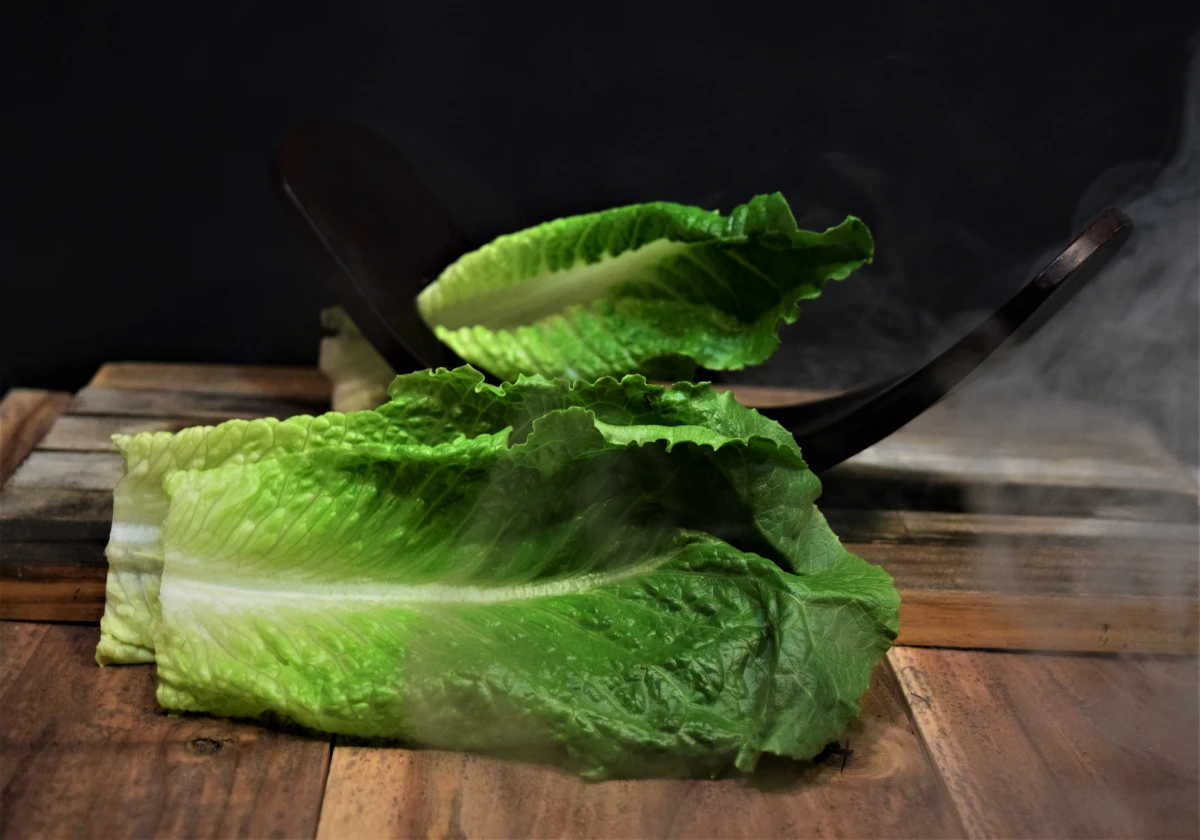
Leafy Hearts: Romaine, Bok Choy, and Cabbage
This is another super easy one, but it’s all about managing expectations. You are NOT going to grow a dense, crunchy head of lettuce like you buy at the store. What you will get is a lovely cluster of tender, loose leaves perfect for a sandwich or a small side salad.
Leave a base of about two or three inches on your head of romaine. I find a taller base works better. Place it cut-side up in a shallow bowl with about a half-inch of water. Crucially, don’t let the water cover the top of the scrap, or it’ll rot from the inside out.
Change the water every single day. Trust me on this. I once left a cabbage base for three days, and the sulfur smell was… memorable. Daily fresh water is non-negotiable. After a few days, you’ll see tiny new leaves sprouting from the center while the outer leaves of the base start to decay. That’s normal—just peel off the old ones. In about two weeks, you’ll have a nice little harvest.
By the way, this works great for bok choy (which grows really fast!) and cabbage, too.
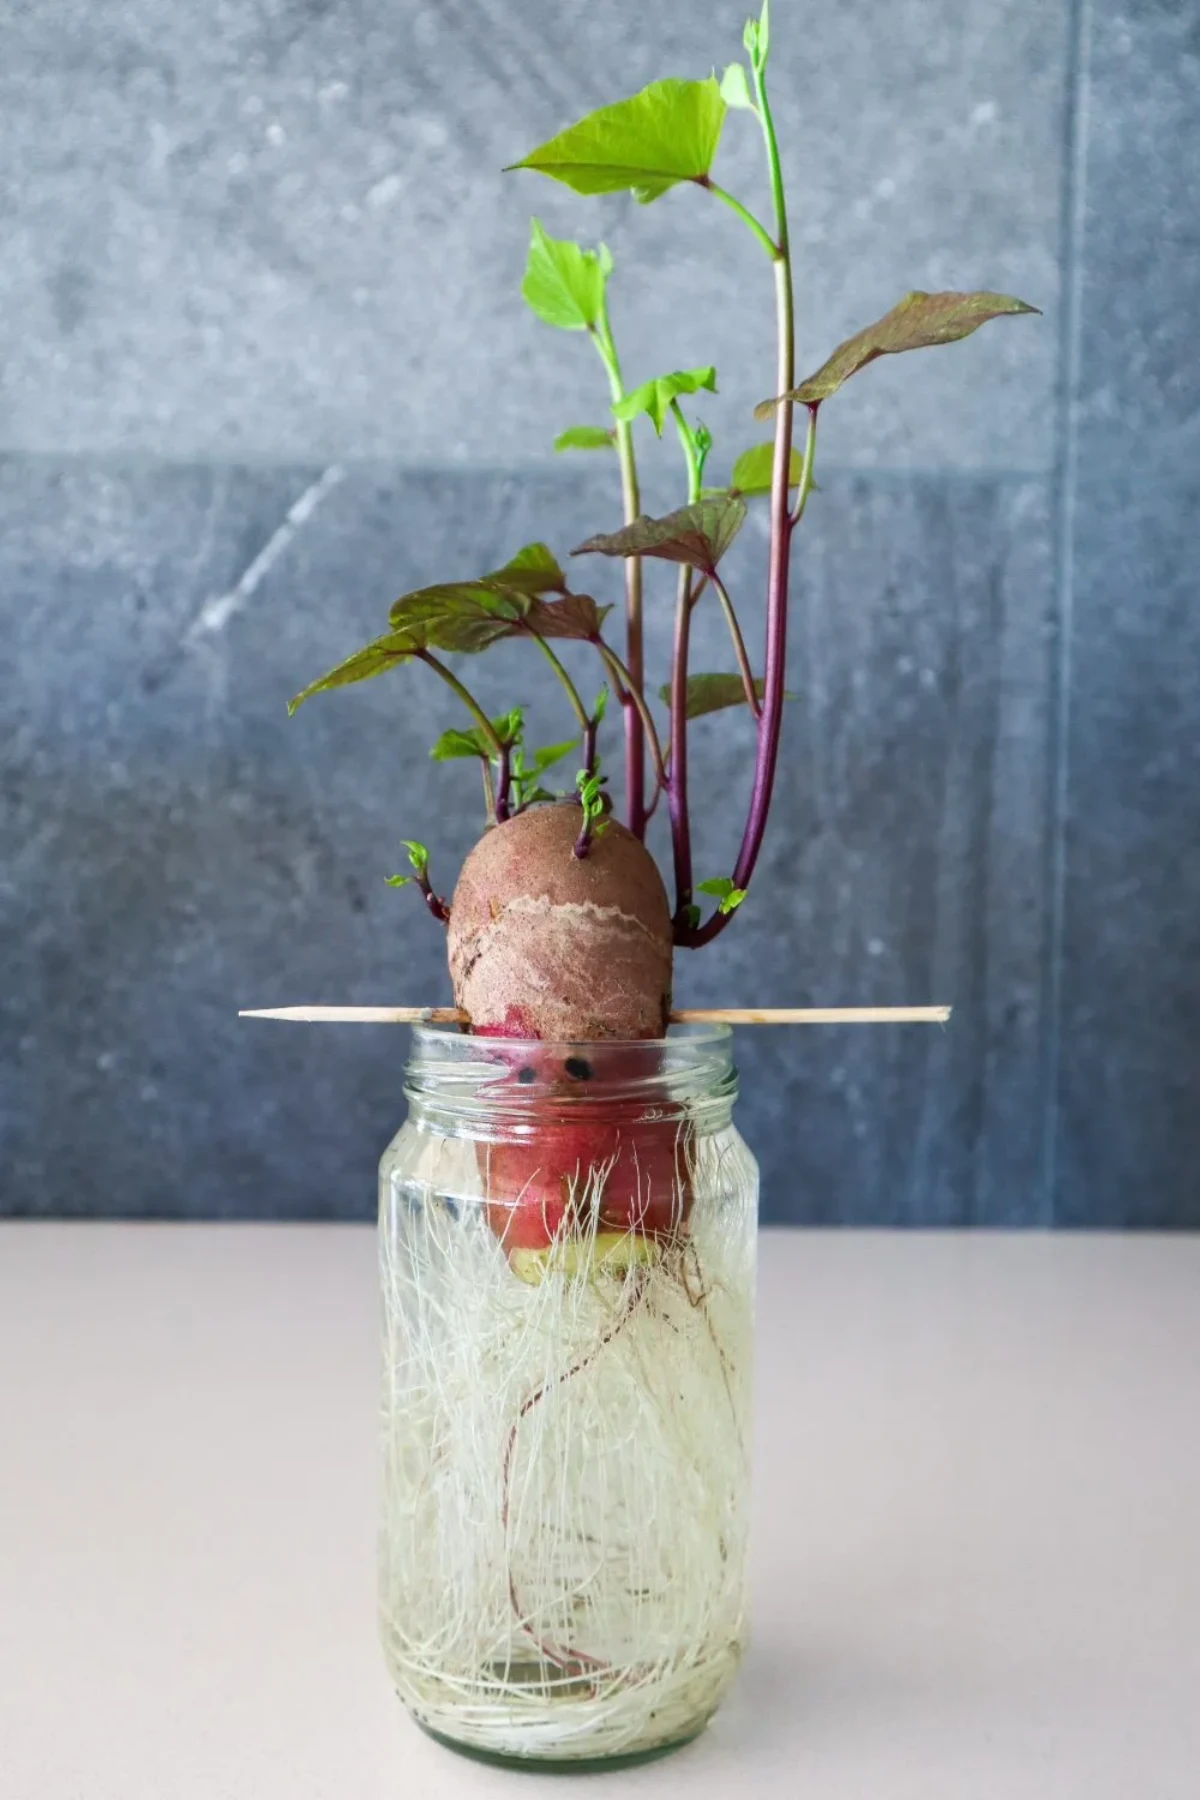
The Patient Project: Growing Sweet Potato Vines
Okay, so regrowing a sweet potato is a different game. The goal isn’t to get another potato but to grow “slips”—leafy vines that can be planted to grow new sweet potatoes (if you have a long, warm growing season). For most of us, though, this is just a wonderful way to grow a stunning, trailing houseplant for free.
Start with a healthy, organic sweet potato. Some commercial ones are treated to prevent sprouting, so look for one with little buds or roots already forming. You can suspend it over a jar of water using three or four toothpicks poked into its middle, so the bottom half is submerged.
Put it in a warm, sunny spot and be patient. This can take a few weeks. Keep the water fresh. First, you’ll see roots, then leafy sprouts (the slips) will grow from the top. Once a slip is about four to six inches long, gently twist it off the potato. Don’t cut it! Place these slips in their own jar of water, and within a week, they’ll grow their own roots. Once the roots are an inch long, they’re ready to be planted in a pot.
Want to keep it as a houseplant? It’s super easy. Just plant the whole rooted potato in a 6-inch pot with potting mix. Water it when the top inch of soil feels dry, and let those gorgeous vines go wild!
Fresh Herbs on Demand
Turning one bunch of store-bought herbs into a never-ending supply is a serious kitchen hack. It works best with soft-stemmed herbs like basil, mint, and cilantro.
Take a four-inch cutting from a healthy stem, making your cut just below a leaf node (the little bump where leaves grow). This spot is packed with natural rooting hormones. Gently strip the leaves off the bottom two inches of the stem—any leaves left underwater will just rot and spoil everything. This is the #1 mistake people make.
Pop the cuttings in a glass of water, put it in a bright spot out of direct sun, and change the water every couple of days. In a week or two, you’ll see little white roots. When they’re about an inch long, you can plant them in a pot of soil.
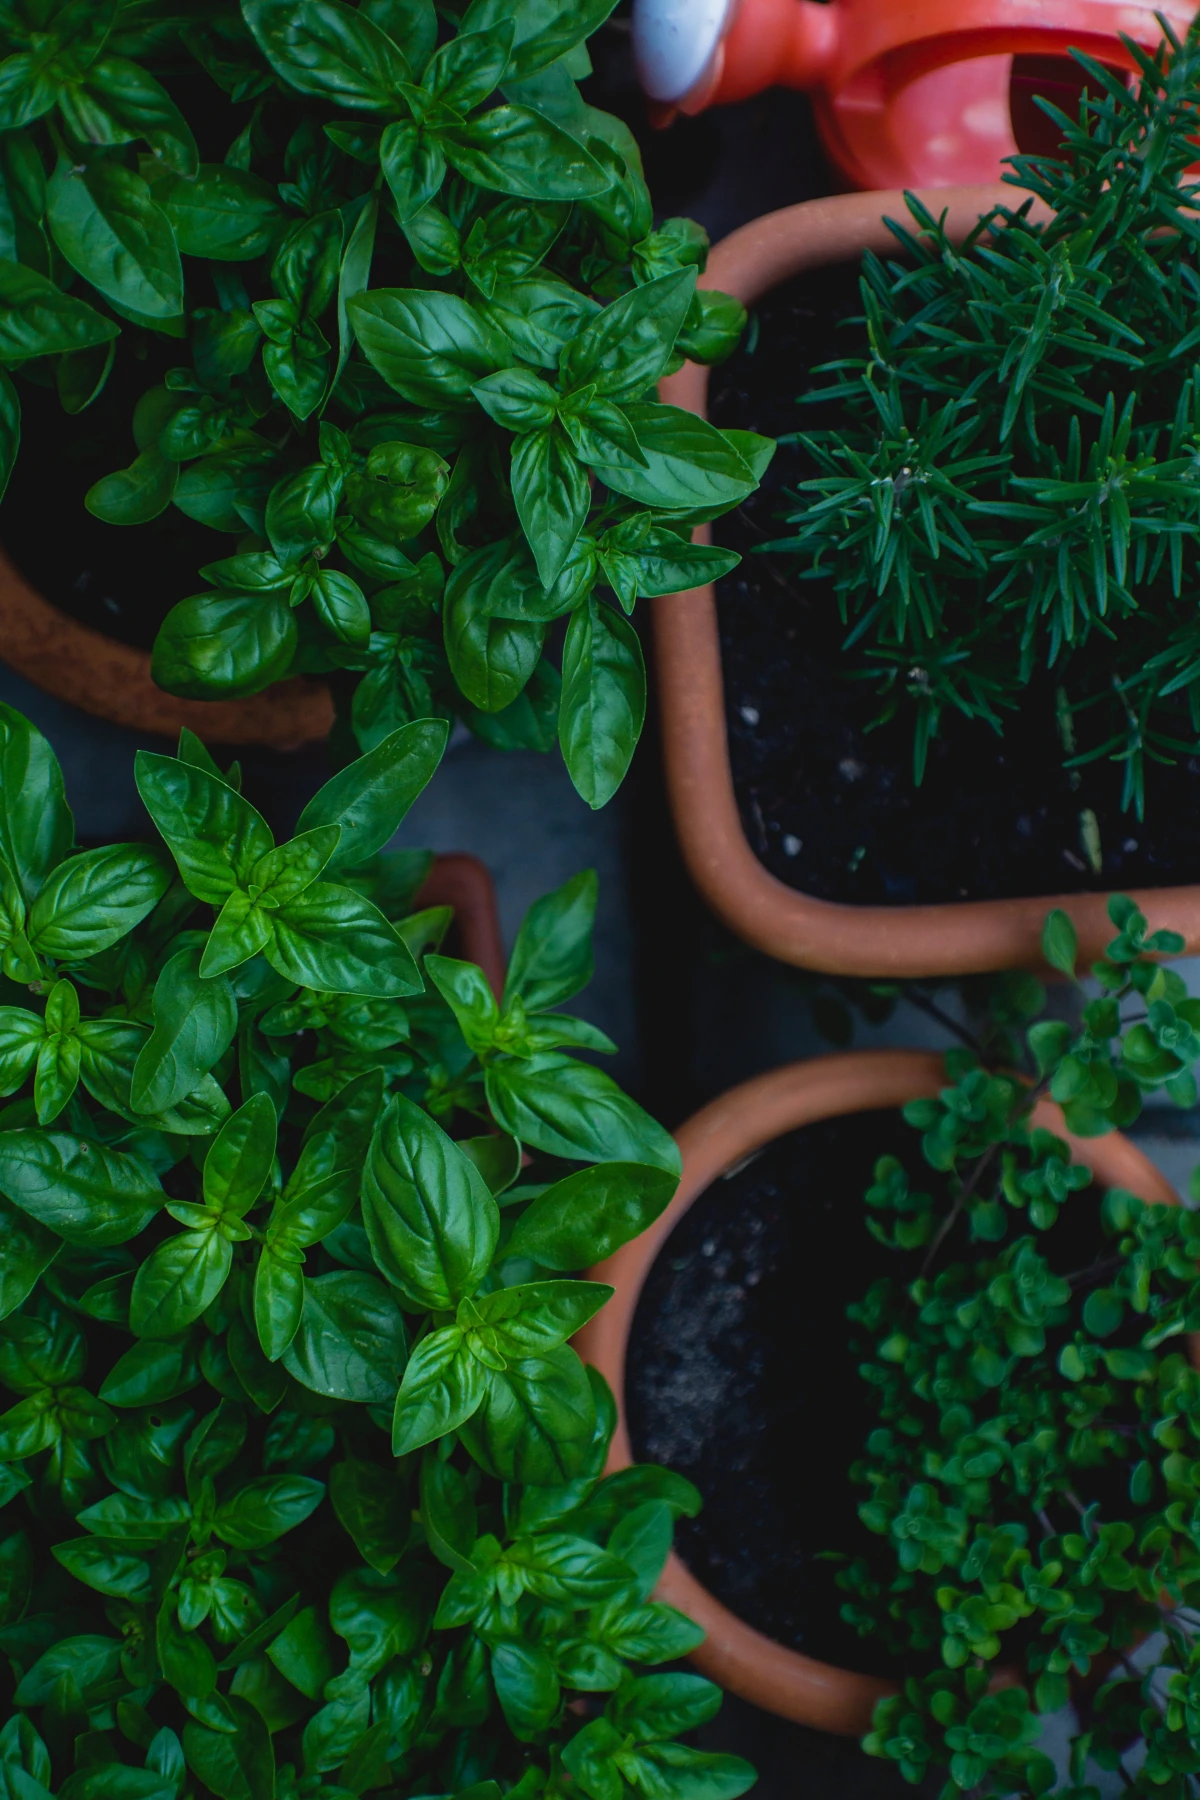
A quick note on woody herbs: Things like rosemary and thyme are tougher to root in water. It’s possible, but for a better shot, dip the cut end in a rooting hormone powder (you can get it for about $5 at any garden center) and plant it directly into moist, sandy soil.
What to Do When It Goes Wrong
Even with the best intentions, things can fail. Here are the most common culprits and how to fix them.
Problem: My project is slimy, stinky, and rotten.
This is almost always about dirty water. Be disciplined and change it daily. Hate the chore? Here’s a hack: Line up 3-4 clean jars and just move your scrap to a fresh one each morning. Wash them all at once every few days. If a scrap feels soft or slimy, toss it. It’s not going to recover.
Problem: It’s been a week and… nothing.
Patience, first of all! But also, check your source. A fresh, healthy veggie will give you a healthy scrap. A sad, wilted one won’t have the energy. Also, check your light. If it’s too dark, nothing will happen. Move it to a brighter spot.
Problem: The new growth is pale and skinny.
A classic sign of not enough light. The plant is desperately stretching to find the sun. Move it to a sunnier location. It could also mean the scrap has used up all its stored energy and is starving. That’s your signal that it’s time to move it to soil.
A Final Bit of Honest Advice
This is a fun, safe activity, but keep a couple of things in mind. Only use scraps from fresh, healthy vegetables. If you see any fuzzy mold, throw the whole thing out and wash the container well. Don’t risk it.
And remember, the main reward here is the process. You’re cultivating tender shoots and leaves for a little garnish or a small salad, not replacing your grocery bill. It’s about the small wonder of watching life spring from something you were about to throw away. It costs almost nothing, and the pride you feel when you finish a meal with something you grew is a simple, honest-to-goodness pleasure.
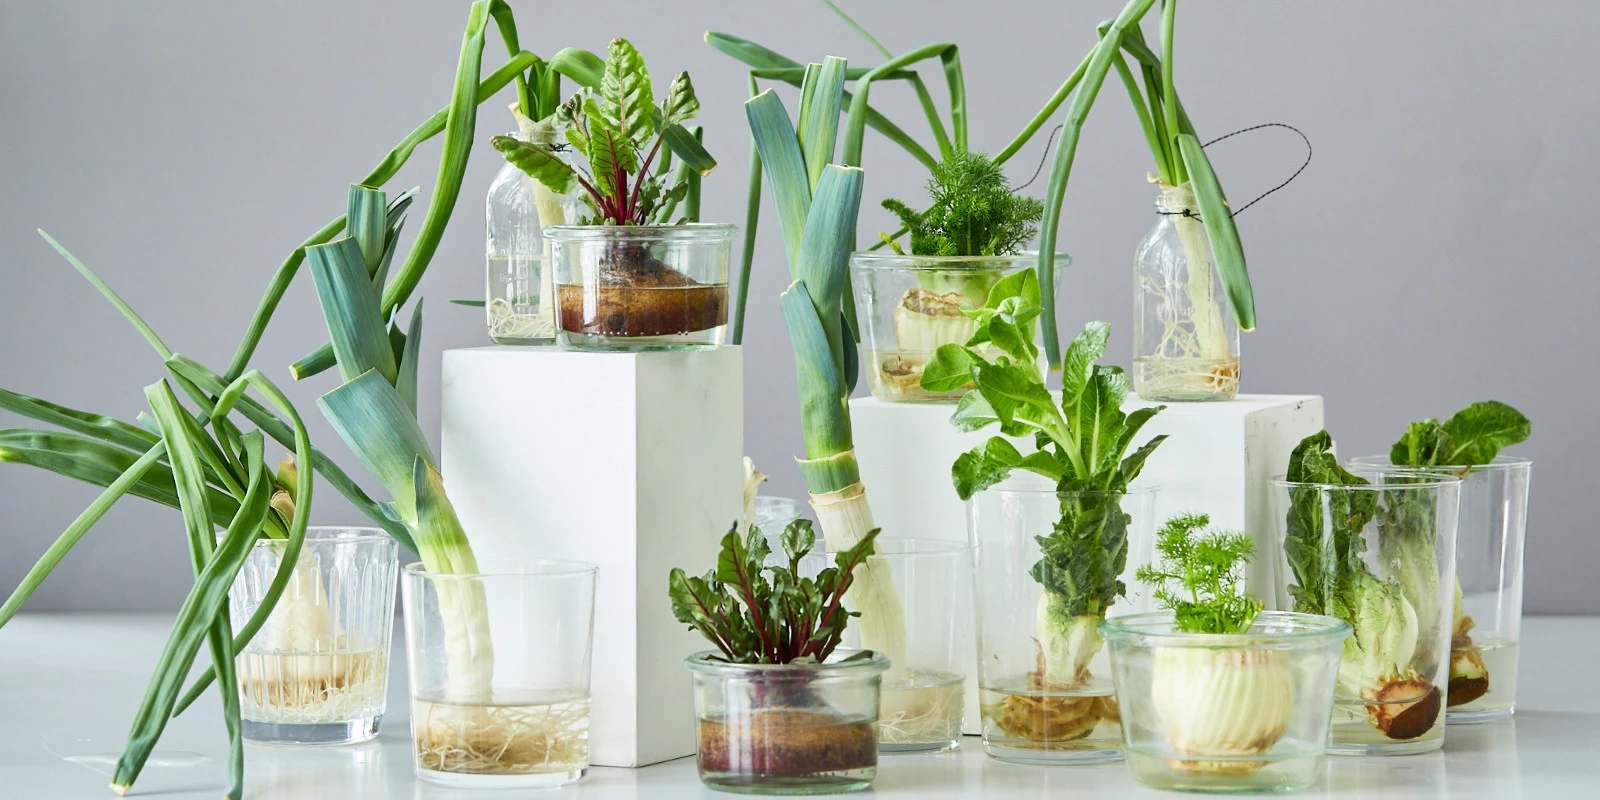
Inspirational Gallery with Photos
Tap Water vs. Filtered Water: For most hardy scraps like green onions and leeks, regular tap water is perfectly fine. Change it daily to keep it fresh.
For Sensitive Roots: If you notice slow growth or browning tips on things like lettuce or herbs, try using filtered or distilled water. Tap water in some areas contains chlorine, which can sometimes inhibit delicate new root development.
The difference is subtle, but it can be the key to success for fussier plants.
- Keep your water crystal clear.
- Ensure good air circulation around your jars.
- Remove any leaves or parts that fall below the waterline immediately.
The goal? To prevent the dreaded fuzzy mold and rot that can quickly end your windowsill experiment. Cleanliness is the simple secret.
Why is my regrown lettuce or celery so bitter?
You’re likely experiencing ‘bolting.’ When a plant is regrown this way, it’s often in a hurry to reproduce. This hormonal shift sends up a flower stalk and can turn the leaves bitter. The trick is to harvest the new growth while it’s still young and tender, usually within 1-2 weeks, before the plant has a chance to bolt. Enjoy it as a quick, fresh garnish rather than waiting for a full head to form.
The U.S. Department of Agriculture estimates that between 30-40 percent of the total food supply goes to waste.
While regrowing a few scallions won’t solve the whole problem, it’s a powerful mental shift. This small act turns a waste product into a source of food, fundamentally changing how we view the items in our refrigerator. It’s a daily, visible reminder of the potential we usually throw away.
The number one sign of trouble: Slimy, cloudy, or smelly water. This isn’t just unpleasant; it’s a breeding ground for bacteria that will rot your plant cutting from the base up. Change the water every single day, or every other day at a minimum. If you see any slime forming on the scrap itself, take it out and rinse it gently under cool water before placing it in a clean jar with fresh water.
Elevate your regrowing station from a science experiment to a design feature. Ditch the mismatched jam jars and opt for a cohesive look. A set of small, clear glass votive holders or simple ceramic ramekins creates a clean, intentional display. For a more rustic feel, look for small amber or green glass jars that beautifully filter the light and hide water lines, making your windowsill feel less like a project and more like a living pantry.
Go beyond the usual suspects and create a windowsill ‘soup base’ garden. It’s the perfect way to have fresh flavorings on hand.
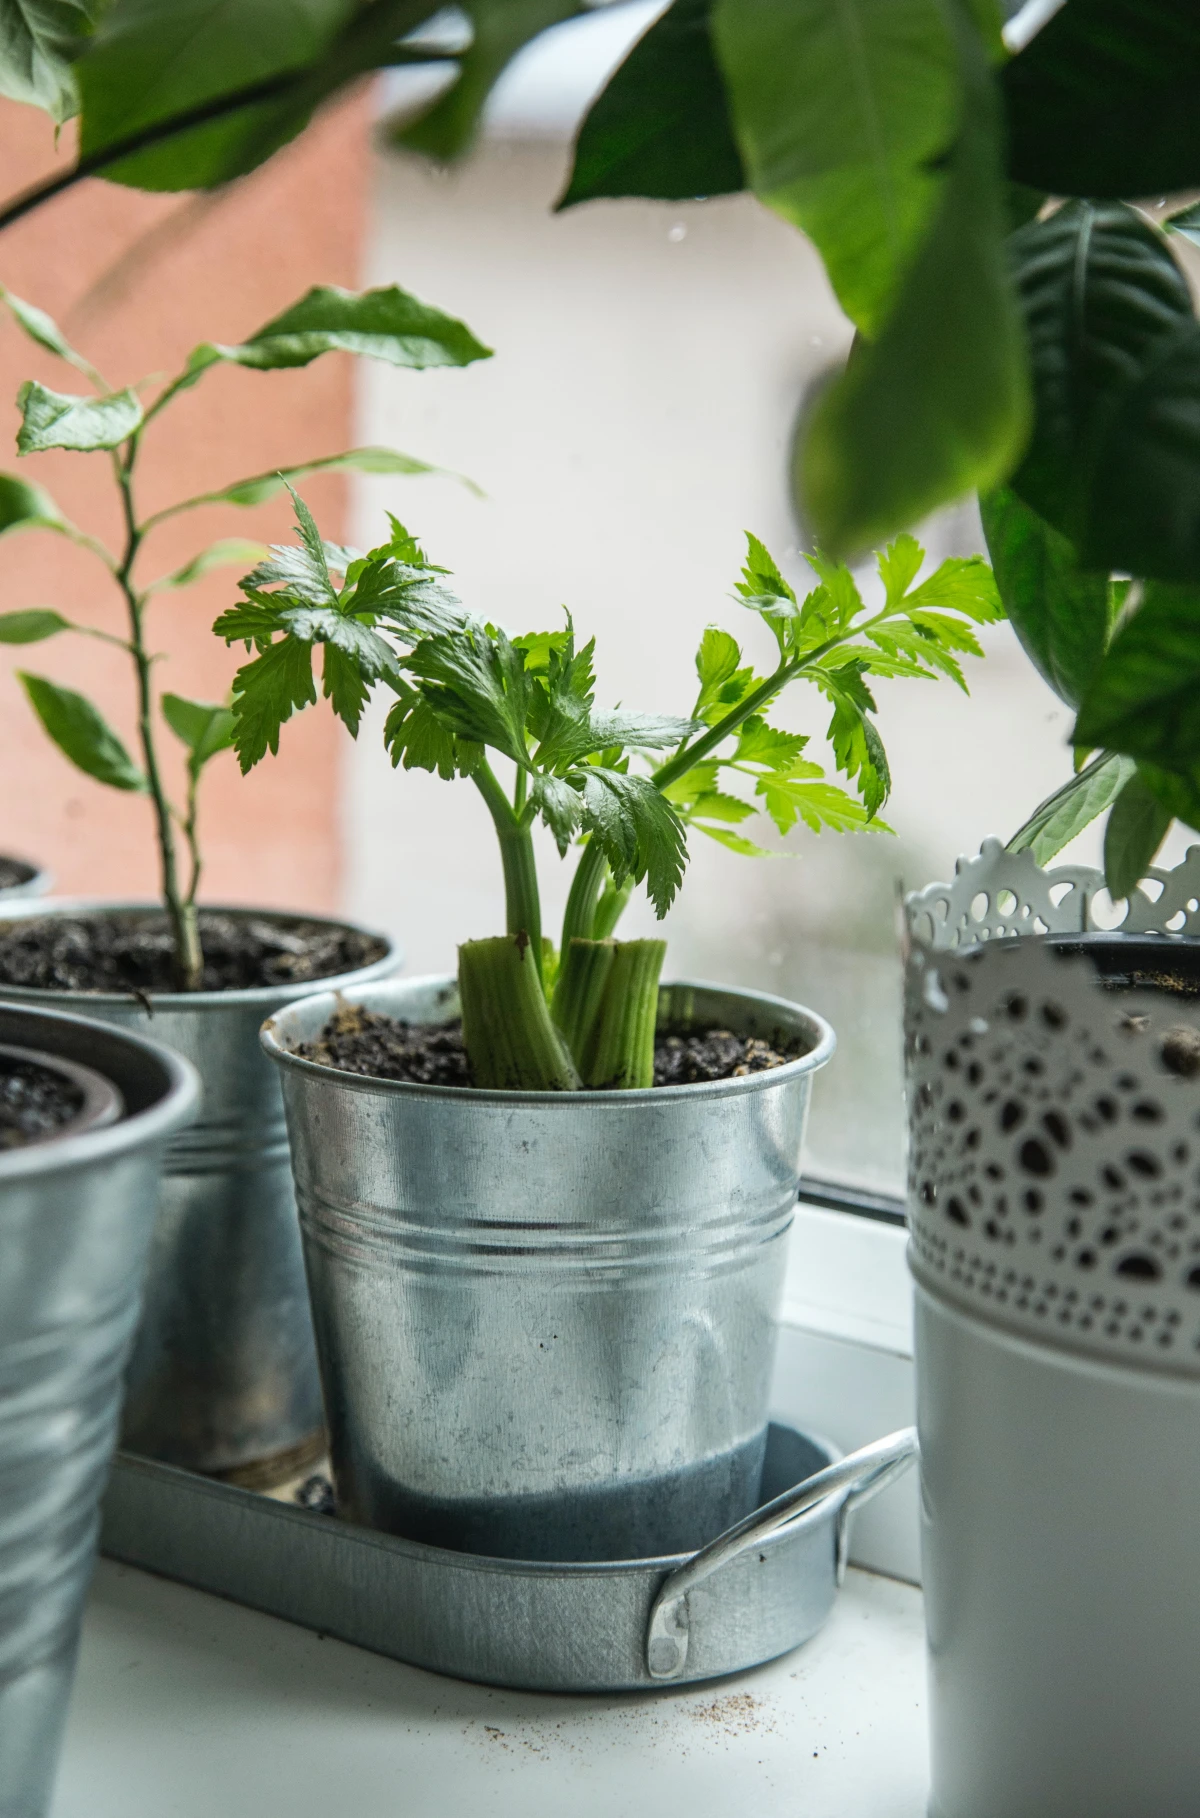
- Celery: Place the base in a shallow bowl of water. New leaves and tender stalks will sprout from the center.
- Leeks: Just like green onions, the white root end will regrow several times over.
- Carrot Tops: Grow the orange tops in water not for new carrots, but for their feathery, parsley-like greens. They’re delicious chopped into salads or used as a garnish.
A single plant cell contains all the genetic information needed to regenerate into a whole new plant. This principle, called totipotency, is the botanical magic you’re witnessing on your windowsill.
Ready for an upgrade? While recycled jars are fantastic for starting out, moving to a dedicated self-watering pot can be a game-changer for long-term growth, especially for herbs like basil or mint. A small pot from a brand like Lechuza or a simple wick-system planter ensures your plant gets consistent moisture without the risk of overwatering or daily top-ups, turning your scrap into a genuine, long-lasting houseplant.
- Crisper, more intense flavor.
- Vibrant, deep green color.
- A satisfyingly tender texture.
The secret? Don’t wait too long. The best-tasting greens from your regrown vegetables are the youngest ones. Harvest them when they’re just a few inches tall for a potent burst of freshness.


