Your Recycling Bin Is a Goldmine: Turning Plastic Bottles into Genuinely Useful Gear
My workshop recycling bin used to be a one-way street for a constant parade of plastic bottles. Soda bottles, milk jugs, detergent containers… I’d rinse them and send them off without a second thought. But then, I started looking at them differently—not as trash, but as a stockpile of raw material. A free, endless supply of stuff just waiting for a new job.
In this article
- First Things First: Getting Your Bottles Workshop-Ready
- Know Your Plastic: Why a Soda Bottle Isn’t a Milk Jug
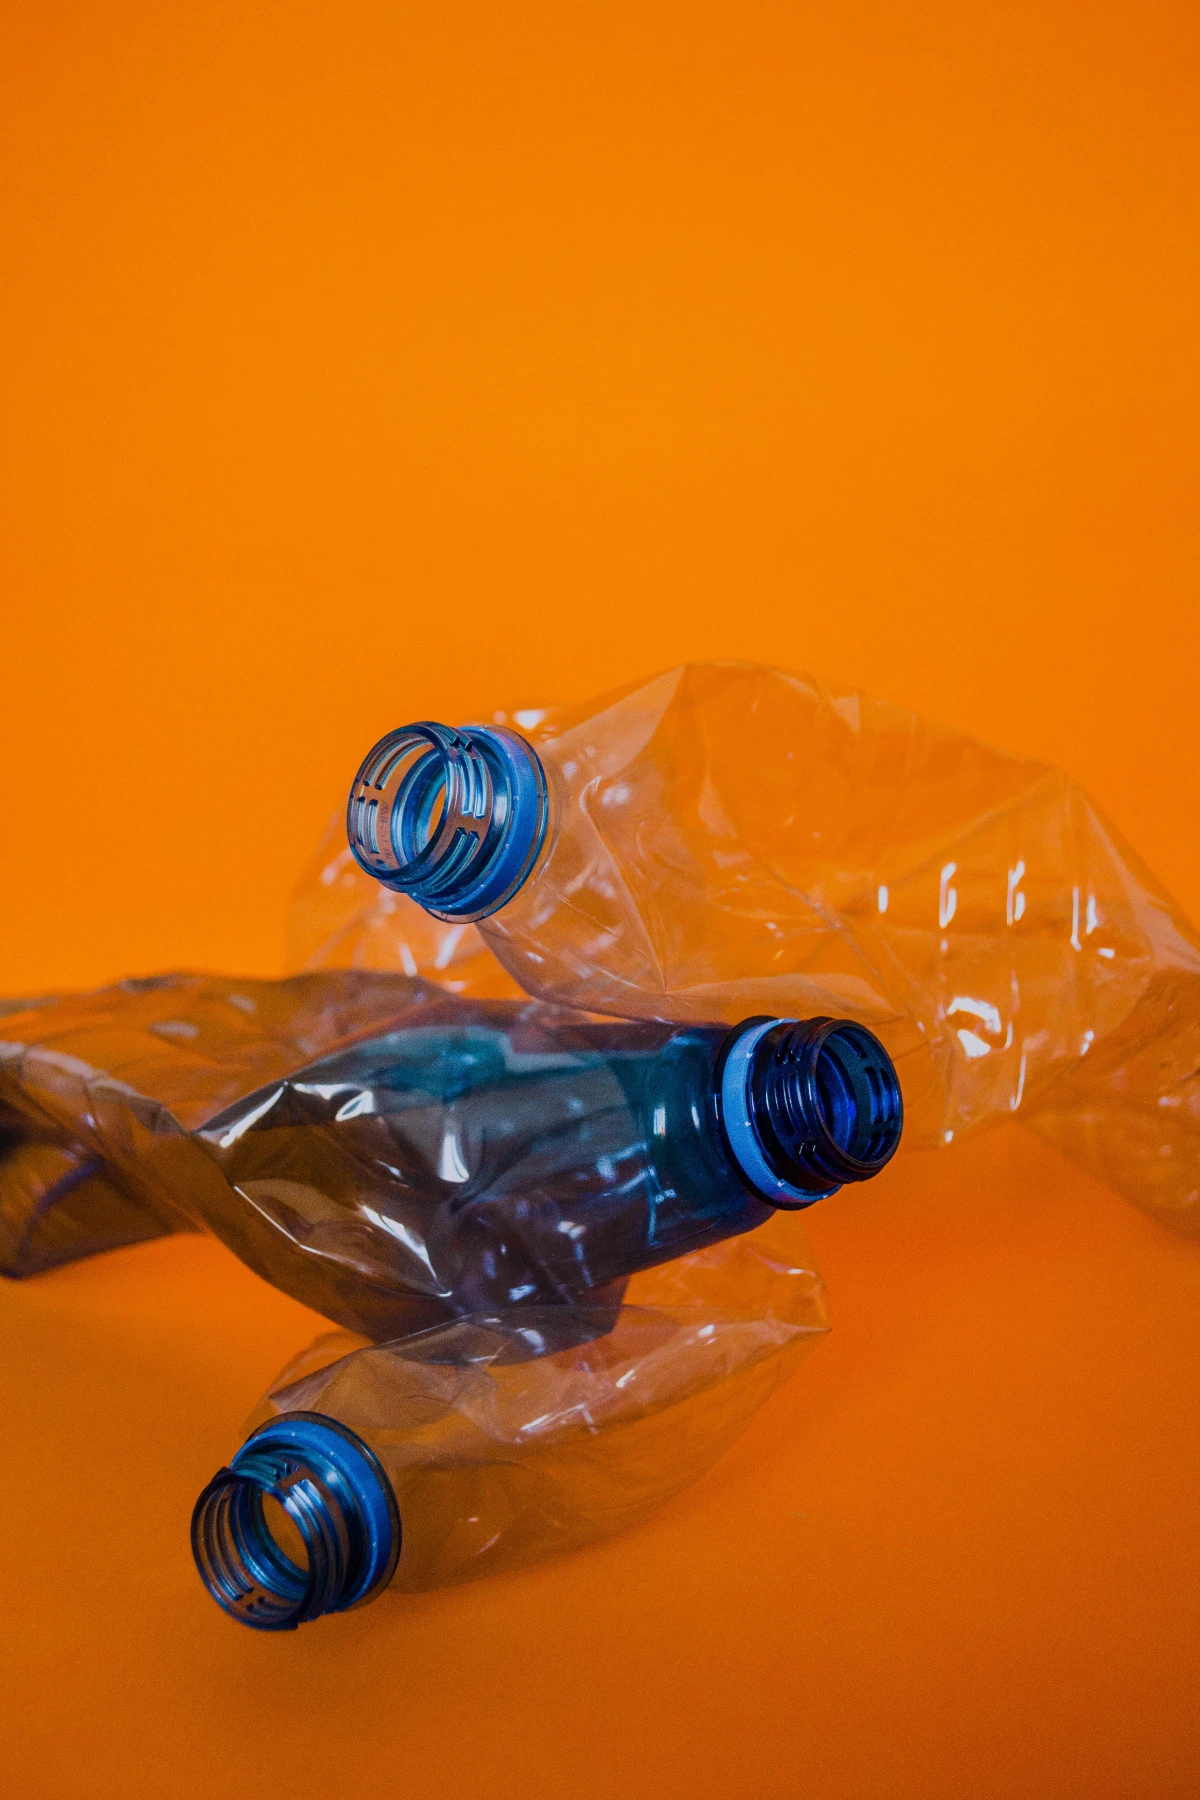
- 1 Plastic (PETE): This is your standard clear soda and water bottle plastic. It’s lightweight and pretty strong, but it has a major weakness: the sun. UV light absolutely wrecks it. Leave a PETE project outside, and within a season or two, it’ll get hazy, brittle, and crack. It’s fantastic for indoor or temporary projects, but a total fail for long-term outdoor tools.
- 5 (yogurt cups, etc.). While you can certainly experiment, they often have different properties—some are more brittle, some don’t hold up as well. For the projects we’re doing here, sticking to
- The Essential Toolkit and Staying Safe
- Project 1: The 10-Minute Garden Sprinkler (Beginner)
- Project 2: The Indestructible HDPE Scoop (Intermediate)
- Project 3: The ‘Set-It-and-Forget-It’ Drip Irrigator
- Project 4: The Modular Vertical Garden (Advanced)
- A Final Thought… and a Challenge
- Inspiration:
Look, this isn’t about single-handedly solving the world’s plastic problem from your garage. It’s about being resourceful. It’s about that deeply satisfying feeling of looking at a piece of junk and seeing its hidden potential. It’s about making something useful with your own two hands, for next to nothing.
I’ve spent a ton of time figuring out what works and what really, really doesn’t. This guide is all the hard-won lessons, shortcuts, and ‘aha!’ moments rolled into one. We’re going to skip the flimsy crafts and get straight to making practical, durable items you’ll actually use.
First Things First: Getting Your Bottles Workshop-Ready
Before you even think about making a cut, you’ve got to clean your materials. Seriously, don’t skip this. Trying to work with a sticky, smelly bottle is just asking for trouble.
For soda or water bottles (PETE), a good rinse with hot, soapy water is usually enough. If you’ve got some stubborn sticky residue from the label, a little bit of cooking oil or Goo Gone on a rag works wonders.
For the tougher jugs, like for milk or laundry detergent (HDPE), you need to be a bit more thorough. Rinse them out several times with hot water until you can’t smell any lingering soap or sour milk. The goal is a clean, dry, and scent-free bottle before you start.
Know Your Plastic: Why a Soda Bottle Isn’t a Milk Jug
Okay, this is probably the most important lesson I learned. Not all plastic is created equal. The type of plastic dictates its strength, flexibility, and how it handles the elements. You can figure out what you’re holding by looking for that little recycling triangle with a number inside, usually on the bottom.
We’re going to focus on the two most common and useful types you’ll find.
1 Plastic (PETE):
This is your standard clear soda and water bottle plastic. It’s lightweight and pretty strong, but it has a major weakness: the sun. UV light absolutely wrecks it. Leave a PETE project outside, and within a season or two, it’ll get hazy, brittle, and crack. It’s fantastic for indoor or temporary projects, but a total fail for long-term outdoor tools.-
2 Plastic (HDPE):
This is the good stuff. Think milk jugs, laundry detergent bottles, and shampoo containers. It’s usually opaque, a bit more flexible, and way, way more resistant to UV damage. An HDPE project can live in your garden for years without giving up. It’s a bit tougher to cut, but the durability is 100% worth it.
A classic rookie mistake is building a garden tool out of a clear soda bottle. It looks great for a month, then shatters the first time you try to use it. Match the plastic to the job!
By the way, you’ll also see other numbers, like
5 (yogurt cups, etc.). While you can certainly experiment, they often have different properties—some are more brittle, some don’t hold up as well. For the projects we’re doing here, sticking to
1 and #2 gives you the most predictable and reliable results.
The Essential Toolkit and Staying Safe
You don’t need a high-tech workshop to do this. Honestly, you can get started for under $20 if you need to buy everything. But you do need the right tools and a healthy respect for the material.
Here’s my go-to kit:
- Safety Glasses: This is non-negotiable. Plastic can snap and send sharp little shards flying. I’ve had them bounce off my glasses more times than I can count.
- Leather Work Gloves: A good pair of gloves protects you when a sharp blade inevitably slips on a curved surface.
- A SHARP Utility Knife: And sharp is the key word. A dull blade is a dangerous blade because you have to push too hard. I recommend a basic retractable box cutter, like a classic Stanley 99E. A pack of replacement blades is only a few bucks—change them often.
- Sturdy Scissors: Great for trimming and for cutting the thinner PETE plastic.
- Permanent Marker: For drawing your cut lines. Measure twice, cut once, right?
- Sandpaper: A couple sheets of medium (120-grit) and fine (220-grit) are crucial for a professional finish. A rough, sharp edge is unsafe and looks amateur.
Heads Up: A Few Safety Rules
I learned this the hard way with a nasty cut on my thumb from a knife that slipped on a wet bottle. It taught me to slow down and never get complacent.
1. Always Cut Away From Yourself. Brace the bottle on a workbench. Your free hand, wearing a glove, should always be behind the path of the blade. Never, ever hold it in your lap and cut towards your body.
2. Score, Don’t Force. Don’t try to muscle through thick plastic in one pass. Make two or three shallow passes along your marked line. This creates a groove that guides your blade for a cleaner, safer final cut.
3. Don’t Breathe the Fumes. Some guides might suggest using heat to shape plastic. I strongly advise against this unless you have professional-grade ventilation. If you can smell melting plastic, you are breathing in some nasty stuff. The only time I use heat is a quick, gentle tap with an iron on an edge to smooth it, and I always do it outdoors.
4. A Note on Food Safety. These plastics are food-safe for their original contents, but once you cut them, you create micro-scratches that can harbor bacteria. I stick to using these projects for tools, planters, and other non-edible applications. Better safe than sorry.
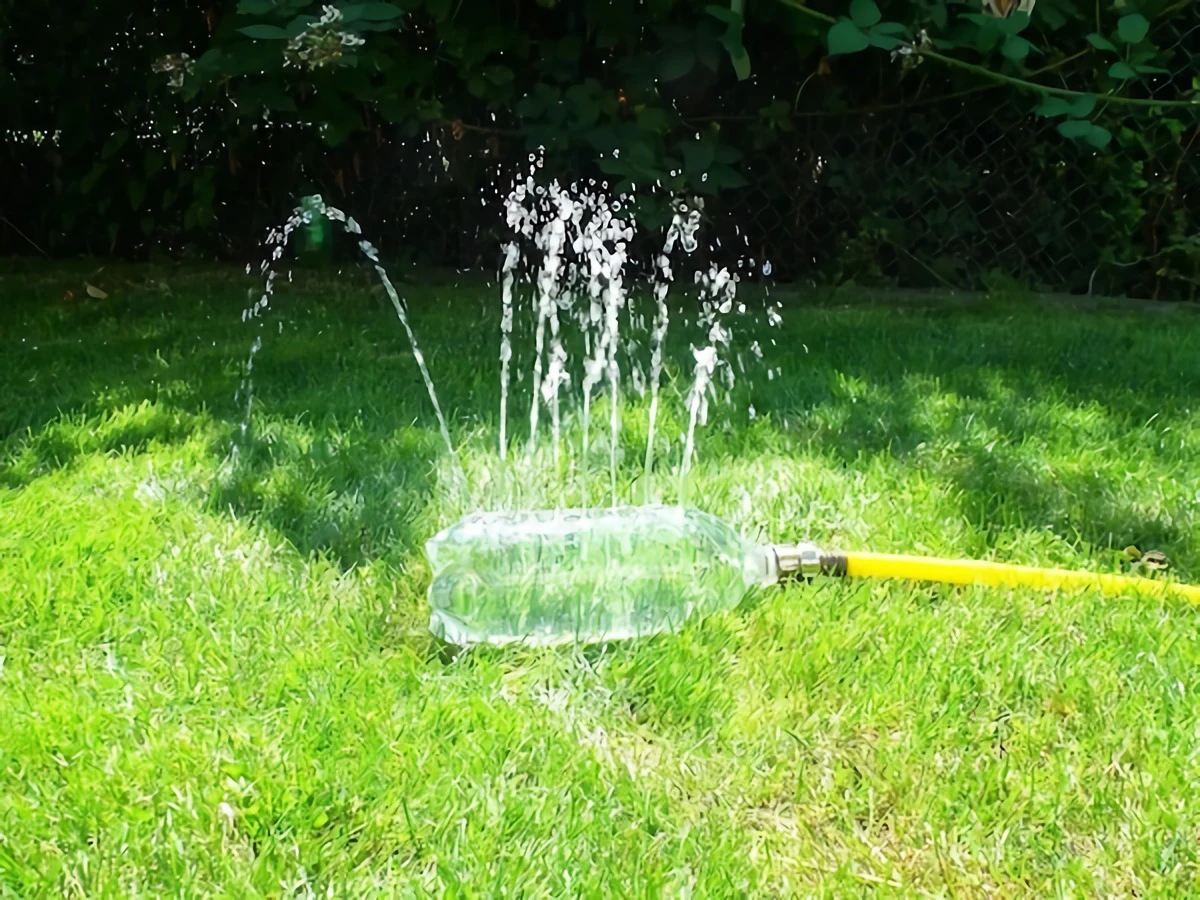
Project 1: The 10-Minute Garden Sprinkler (Beginner)
This is a perfect first project. It’s fast, easy, and works surprisingly well for giving your garden a gentle soak. A great use for a 2-liter soda bottle.
Time: About 10 minutes
Materials: A 2-liter PETE bottle, a drill with a tiny bit (like 1/16″), and your garden hose.
Simply drill about 15-20 small holes on one side of the bottle. Don’t go all the way around, or you’ll just be watering the ground beneath it. The threads on most soda bottles match a standard garden hose perfectly. Screw it on, turn the water on—but not full blast!—and you’ve got a sprinkler. Just remember, it’s PETE, so it’ll probably only last a season in the sun. But hey, it was free!
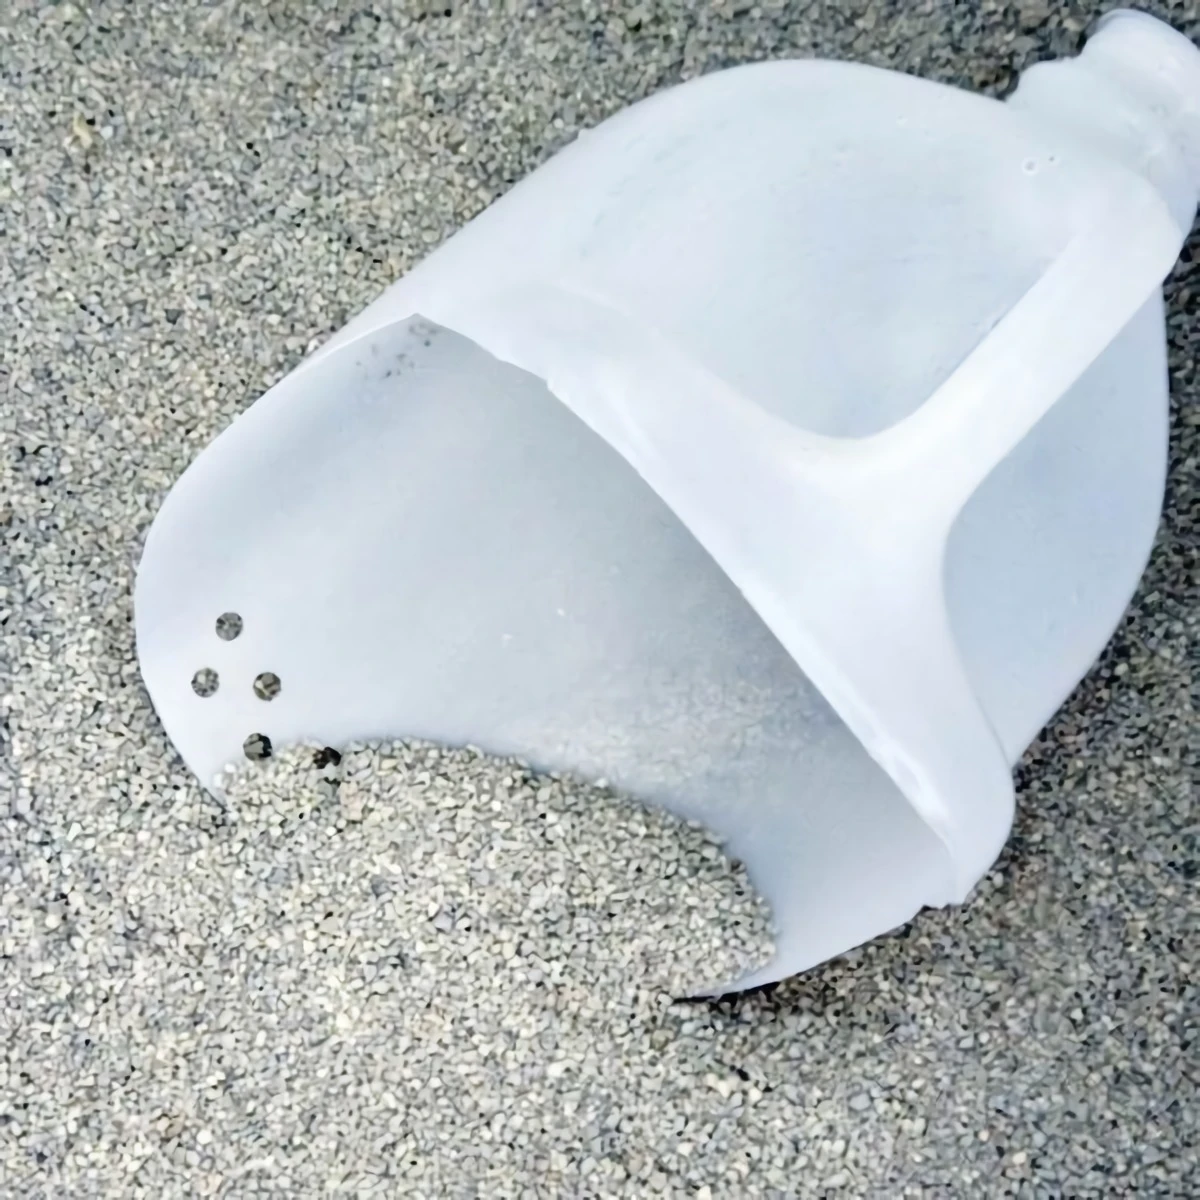
Project 2: The Indestructible HDPE Scoop (Intermediate)
Every gardener or pet owner needs a good scoop. This one, made from an old laundry detergent jug, will probably outlive any cheap one you’d buy at the store. I have some that are years old and still going strong.
Time: 20-30 minutes (most of that is sanding!)
Materials: An HDPE jug with a handle, utility knife, marker, and sandpaper.
The jug’s built-in handle becomes your scoop’s handle. Use your marker to draw a nice, swooping cut line from the base of the handle down toward the bottom of the jug. Carefully cut along the line, using multiple passes. Now for the most important part: finishing. The cut edge will be ragged. Use your medium-grit sandpaper to smooth it down completely, then follow up with the fine-grit paper to make it silky. A well-sanded edge isn’t just for looks; it makes the tool stronger and safer to use.
Project 3: The ‘Set-It-and-Forget-It’ Drip Irrigator
This little system has saved my potted plants more times than I can count when I’ve had to travel. It delivers water slowly and directly to the roots, which is way more efficient.
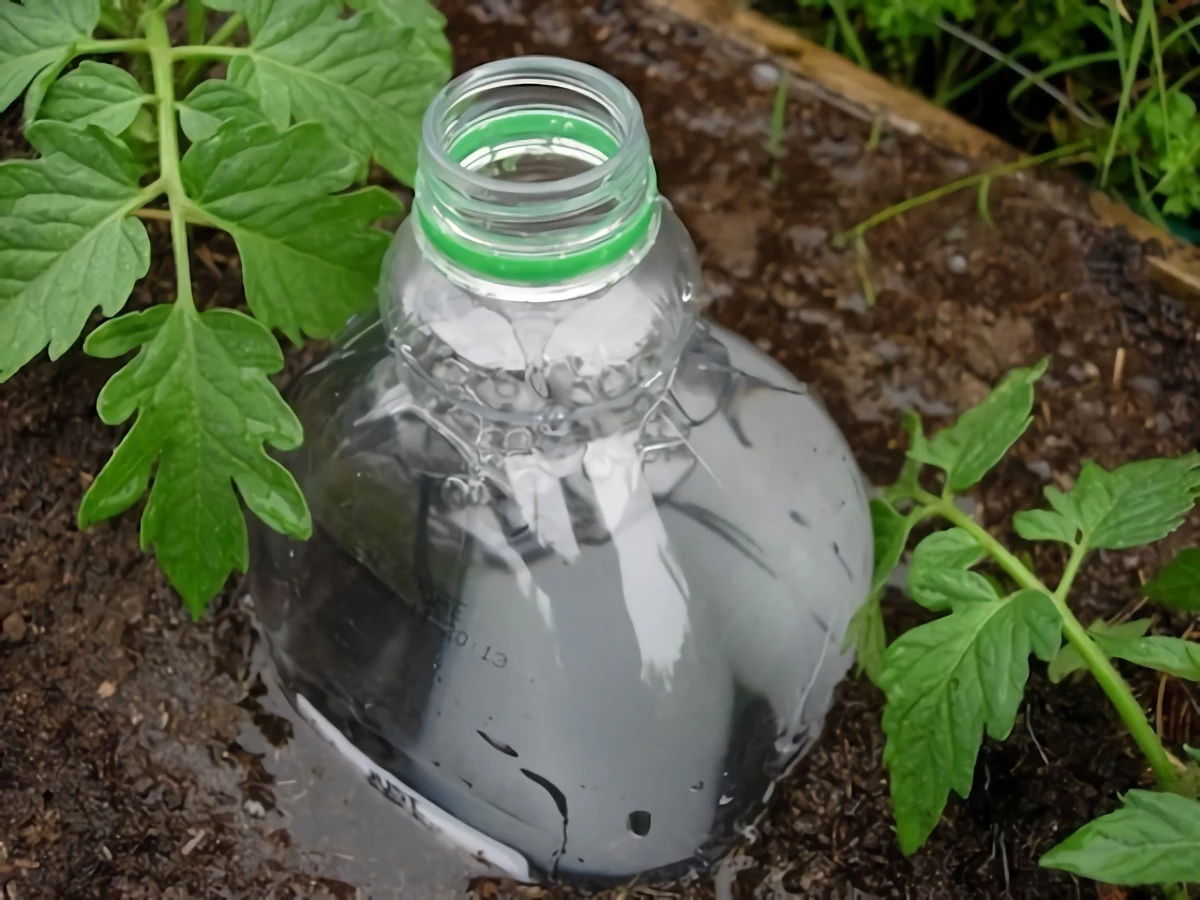
Method 1: The In-Ground Spike
This is great for garden beds. Take a 1 or 2-liter PETE bottle. Here’s a quick tip for a perfectly straight cut: wrap a large rubber band around the bottle, adjust it until it’s level, and then trace along its edge with your marker. Cut off the bottom third of the bottle using that line.
Next, poke one or two tiny holes in the bottle cap. Bury the bottle cap-down next to your plant, fill it with water, and you’re good to go. The water will drip out slowly. You can even adjust the flow by tightening or loosening the cap a bit.
Method 2: The Hanging Wick System
For hanging baskets, this works even better. Drill one small hole in a bottle cap. Thread a 6-inch strip of an old cotton t-shirt or thick yarn through the hole, leaving half in and half out. Fill the bottle with water, screw the cap on, and stick the outside end of the cotton wick into the soil of your plant. Capillary action will draw the water into the soil as needed. It’s a more reliable system that’s less likely to get clogged.

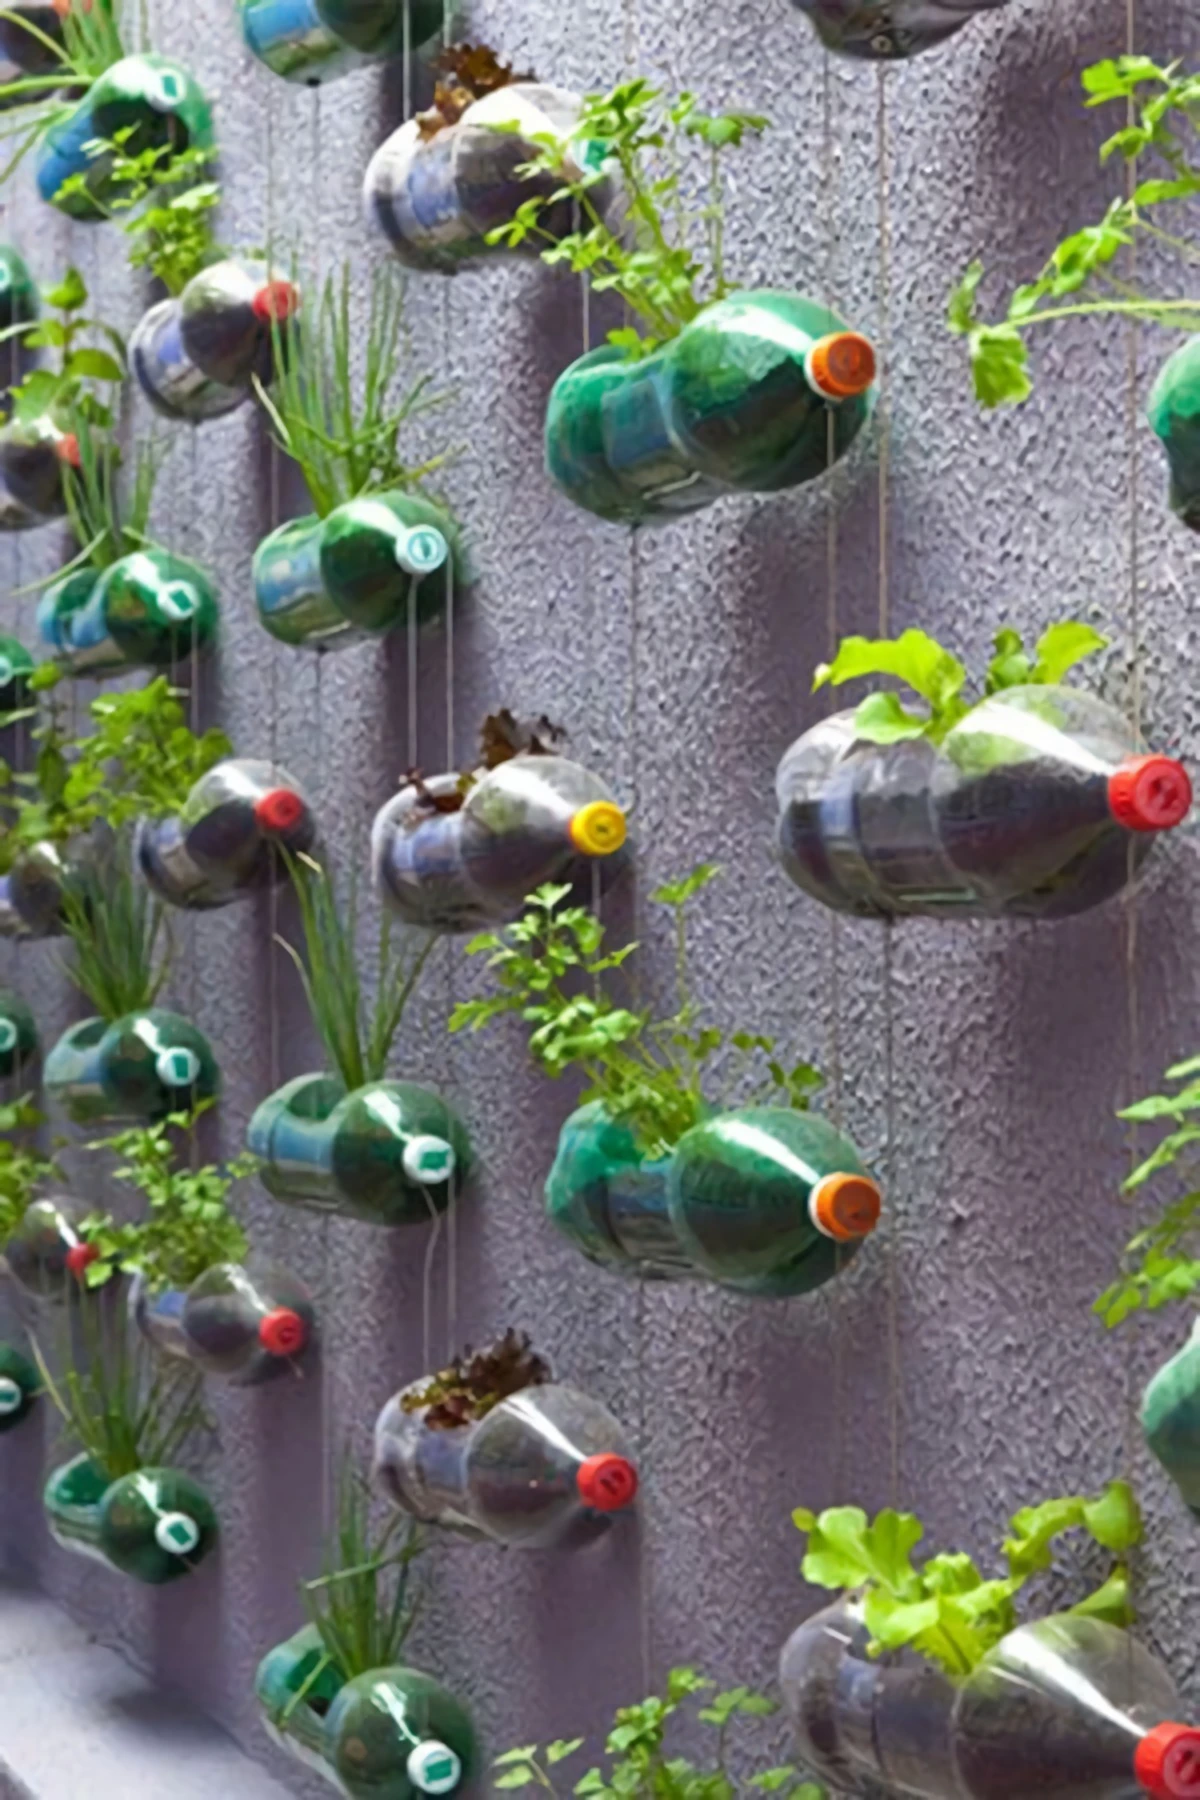
Project 4: The Modular Vertical Garden (Advanced)
This project is more involved, but the payoff is huge—a thriving garden in a tiny footprint, perfect for a balcony. My first attempt was a disaster because I didn’t plan for drainage, so learn from my mistake!
Time: 1-2 hours for assembly
Materials: 6-8 uniform 2-liter PETE bottles, knife, drill, durable rope, and washers.
The key here is planning. You’ll cut a large rectangular opening on the side of each bottle for the plant. Then, you’ll drill small drainage holes in the bottom and two larger mounting holes in both the top and bottom of each bottle. Use a paper template to make sure the mounting holes line up perfectly across all bottles.
To assemble, you’ll need a rope that can handle being wet. Don’t use natural fiber like jute; it will rot. Go for nylon or polypropylene rope from the hardware store. Thread two lengths of rope up through the bottles, using knots and washers at the very bottom to secure them. Once you hang it from a sturdy hook, you can fill the bottles with a lightweight potting mix and your plants. When you water the top bottle, the excess will cascade down to water the ones below. It’s a really efficient system!
A Final Thought… and a Challenge
Working with this stuff teaches you to be a problem-solver. You learn to see value where others see waste. You get to make something real, something tangible.
So, here’s your mission, should you choose to accept it: Find an old HDPE milk or detergent jug this week and make the scoop. It’s one of the most useful projects, it’s a great way to practice, and I promise you’ll feel ridiculously proud every time you use it. Your recycling bin is waiting.
Inspiration:
The right cut makes all the difference, but which tool is best?
A common mistake is grabbing any old pair of scissors, resulting in cracked plastic and jagged edges. For workshop-grade results, your choice of cutting tool is crucial.
The Utility Knife: Your workhorse for straight, clean lines. When scored along a metal ruler, a sharp blade (like those from Stanley or OLFA) will slice through PETE and HDPE with precision. Its weakness? Freehand curves can be tricky and dangerous without a steady hand.
Heavy-Duty Shears: For curves and complex shapes, forget kitchen scissors. A pair of paramedic-style trauma shears or even lightweight tin snips offers far better control and power, especially on tough HDPE milk jugs. They cut without crushing the plastic.
For truly pro results, use both: a utility knife for the initial straight cuts and shears for the detailed shaping.


