That Paint Can Graveyard in Your Garage? It’s a Goldmine.
Got Leftover Paint? Don’t You Dare Toss It.
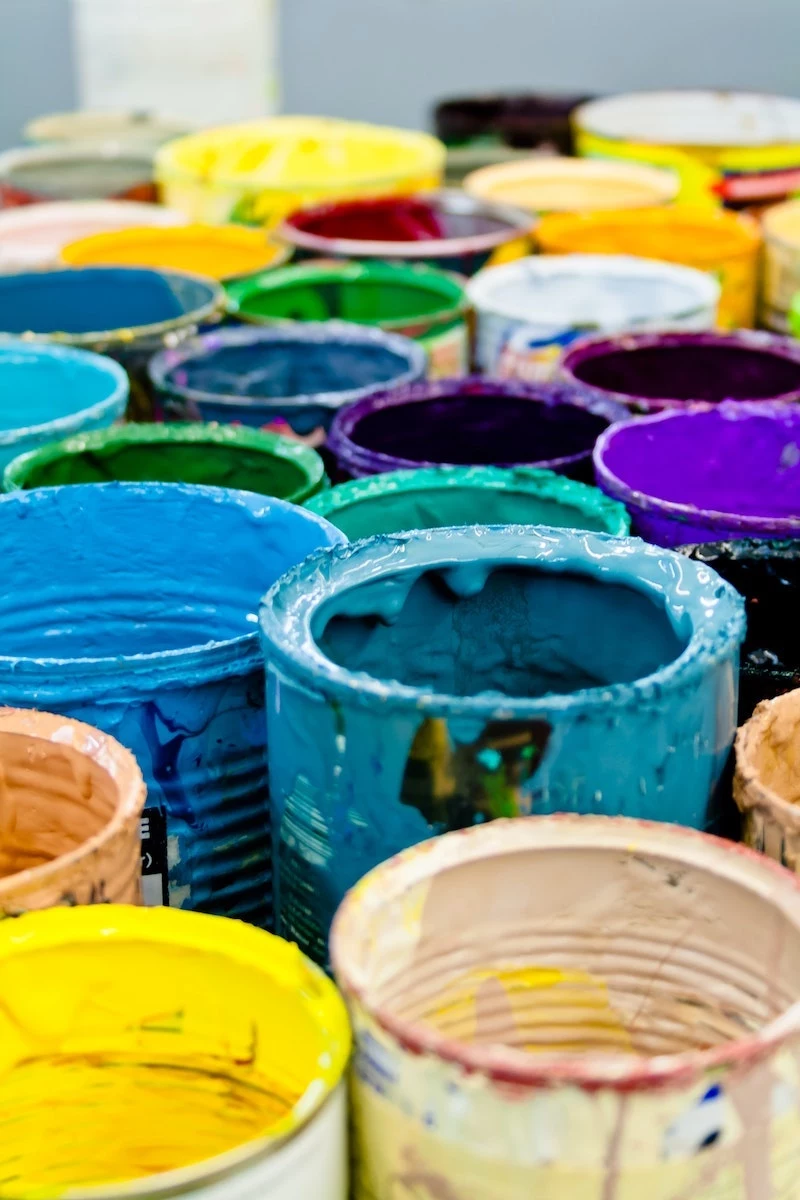
If you’ve ever painted a room, you know the drill. You have this corner in your garage or basement that I affectionately call the “paint graveyard.” It’s a growing collection of cans—some nearly full, others with just that frustrating last inch of paint clinging to the bottom. After years in this business, my own collection could probably cover a small village.
In this article
- Got Leftover Paint? Don’t You Dare Toss It.
- First Things First: Is Your Paint Even Usable?
- Your Small Project Shopping List (Under $20)
- What Can You Actually Do With That Much Paint?
- Prep is King, Even for Small Jobs
- Awesome Projects for Your Leftover Paint
- The Final Step: Smart Storage and Safe Disposal
- Inspirational Gallery
It’s a super common thing. You do the math, buy what you think you need, and somehow, you always end up with extras. Most people see this as clutter, another thing to figure out how to get rid of. But honestly? I see it as a treasure chest. That half-gallon of premium eggshell paint isn’t waste; it’s an opportunity waiting to happen. It’s your ticket to adding some serious character to your home without dropping a ton of cash or committing to a massive weekend project.
But hold on. Using old paint isn’t as simple as just grabbing a brush. To get a finish that lasts (and doesn’t look like a DIY disaster), you need to know a little bit about the paint itself. Let’s walk through how to check if your paint is still good, prep for those small but mighty projects, and turn those leftovers into something you’ll be proud to show off.
First Things First: Is Your Paint Even Usable?
Paint has a shelf life, just like the milk in your fridge. Over time, things can go wrong inside that can. Using bad paint is a one-way ticket to frustration—we’re talking peeling, cracking, or a finish that stays annoyingly tacky forever. So before you even think about starting, you have to play detective.
How to Inspect an Old Can of Paint
This is the non-negotiable first step I teach every new person on my crew. It saves so, so many headaches.
1. The Look and Smell Test
Pop open the can (use a proper paint can opener, not a screwdriver that will mangle the lid). What do you see? A thin, rubbery skin on top of an oil-based paint is usually fine; you can just peel it off and toss it. But a thick, hard, crusty layer on a latex paint can be a bad sign.
Now, take a whiff. Good paint has a distinct, chemical smell. Bad paint smells… off. If you get a whiff of sourness, like spoiled milk or a damp basement, it’s been contaminated with bacteria. Seriously, do not use it. That foul smell will stick around long after the paint is on your walls. Just close it up and set it aside for proper disposal.
2. The Stir Test
If it looks and smells okay, it’s time to stir. Grab a clean stir stick and get in there. You’re looking for a smooth, creamy consistency, kind of like a good pancake batter. If you feel gritty bits that feel like sand, or you see lumps that look like cottage cheese, the paint is a goner. This usually means it was frozen at some point, and no amount of stirring is going to bring it back to life.

Quick Troubleshooting: What if it’s just super thick?
If your latex paint just seems overly thick, like pudding, you can try to save it. Add a tiny bit of water—start with a tablespoon per quart—and stir it in thoroughly. If it thins out nicely, you might be in luck. But if it stays lumpy or sludgy, it’s time to let it go.
3. The Pro Secret: Strain Your Paint
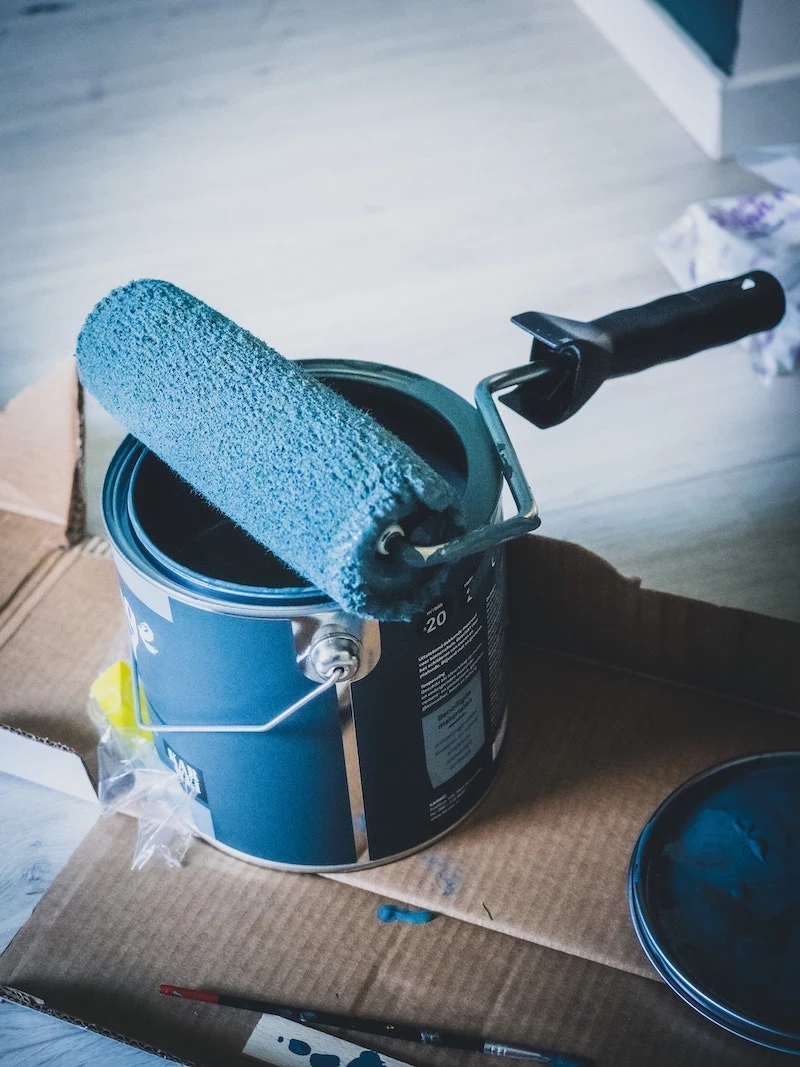
This is the one step that separates the amateurs from the pros, and it’s so easy. Even if your paint looks fine, there are probably tiny dried-up bits or debris hiding in there. These will absolutely ruin your finish, leaving you with ugly bumps and streaks. To avoid this, just pour the paint you plan to use through a cone-shaped mesh strainer. You can grab a pack of these for about $3 at any hardware or paint store. Just set the strainer over a clean bucket or paint tray and pour slowly. It’s an extra 60 seconds of work that makes a world of difference.

Your Small Project Shopping List (Under $20)
Before we get to the fun stuff, you might need a few things. Here’s a quick and cheap “pro-level prep kit” that will make any small project a success:
- Paint Strainers: An absolute must. You can get a 3-pack for around $3.
- 180-Grit Sanding Sponge: More flexible and easier to handle than paper for small jobs. Costs about $4.
- Tack Cloth: A sticky cloth that grabs every last bit of sanding dust. It’s about $3 and works way better than a damp rag.
- Good Painter’s Tape: Don’t cheap out here. A roll of FrogTape or ScotchBlue will run you about $8-$10 and is worth every penny for those crisp lines.
What Can You Actually Do With That Much Paint?
Okay, so you’re staring at a can and wondering if you have enough. Here’s a quick guide to help you figure out what’s realistic. (This isn’t an exact science, but it’s a great starting point!)
- A Little Dab (Sample Pot or less than a cup): Perfect for tiny-but-impactful projects! Think a few picture frames, a small terracotta pot, the edges of a bookshelf, or a set of drawer pulls.
- A Quart (about 32 oz): Now we’re talking. A quart can easily handle one side of an interior door, the back of a bookcase, a small accent table, or a cool geometric shape on a wall.
- A Half-Gallon (about 64 oz): With this much, you can get more ambitious. Tackle a small bathroom vanity, a standard-sized dresser, or a more substantial feature wall behind your TV.
Prep is King, Even for Small Jobs
I say this all the time: painting is 80% preparation and 20% actually putting paint on the wall. This is just as true for painting a picture frame as it is for a whole house. A great paint job on a poorly prepped surface will fail every single time.
First, you have to clean the surface. Even fingerprints leave behind oils that can prevent paint from sticking. For most things, a quick wipe-down with a degreaser is best. You can buy a TSP substitute, or honestly, for light-duty cleaning, a rag with warm water and a few drops of dish soap works fine. Just be sure to rinse it with a clean, damp cloth afterward and let it dry completely.
Next, you need to give the paint something to grab onto. If the surface is glossy or already painted, you need to “scuff sand” it. You’re not trying to strip the old finish, just dull it down. A 180-grit sanding sponge is perfect for this. Just go over the entire surface until it looks dull. Then, use your tack cloth to wipe away every speck of dust. If you paint over dust, you’re basically just gluing dirt to your project.
Awesome Projects for Your Leftover Paint
Alright, your paint is strained and your surface is prepped. Let’s do something cool.
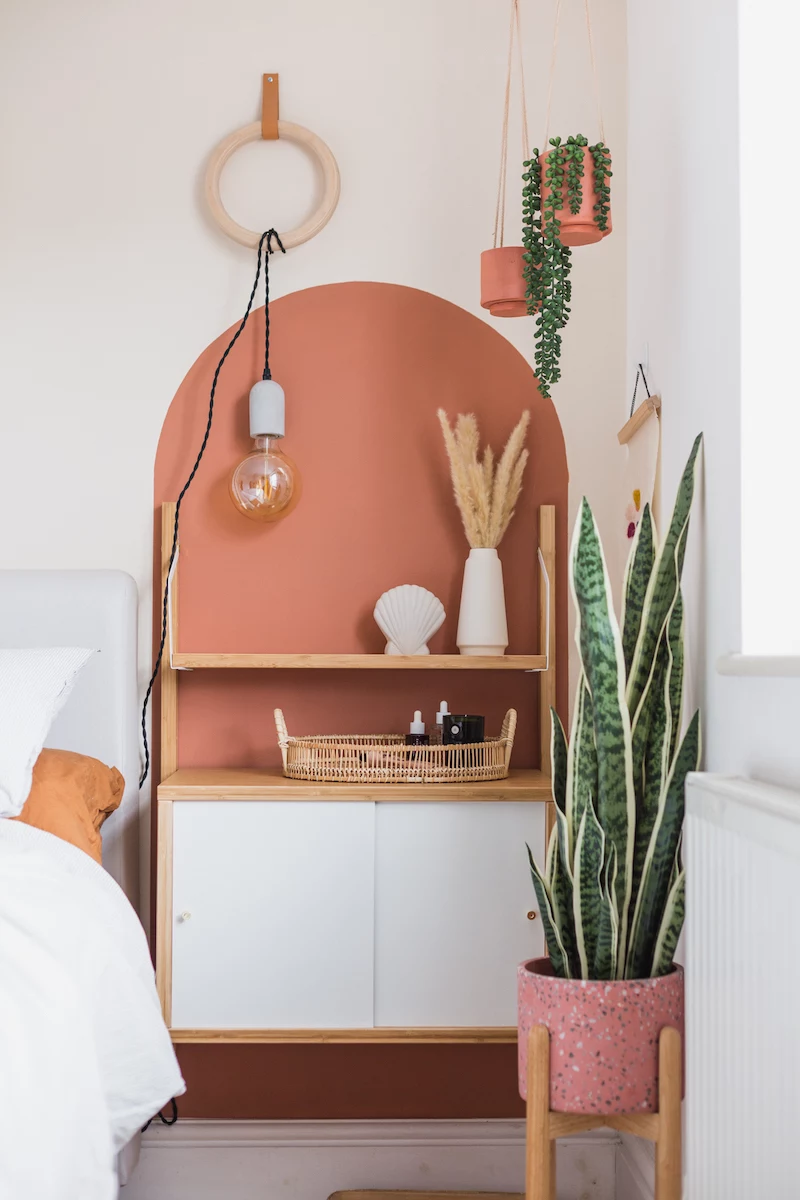
Project 1: The Geometric Accent or Feature Nook
You don’t need a whole gallon to make a statement. With just a quart, you can paint a bold arch to frame a mirror, a colorful rectangle behind your headboard, or the back wall of a boring white bookcase.
The secret to perfect, crisp lines: Use good painter’s tape and press the edge down firmly with a credit card. Then, here’s the magic trick: paint over the edge of the tape with your original wall color. Just a light coat. This seals the tape’s edge, so none of your new accent color can bleed under it. Let that seal coat dry for about 30 minutes, then go ahead and paint with your accent color. When the accent paint is dry to the touch, pull the tape off slowly at a 45-degree angle. Flawless.

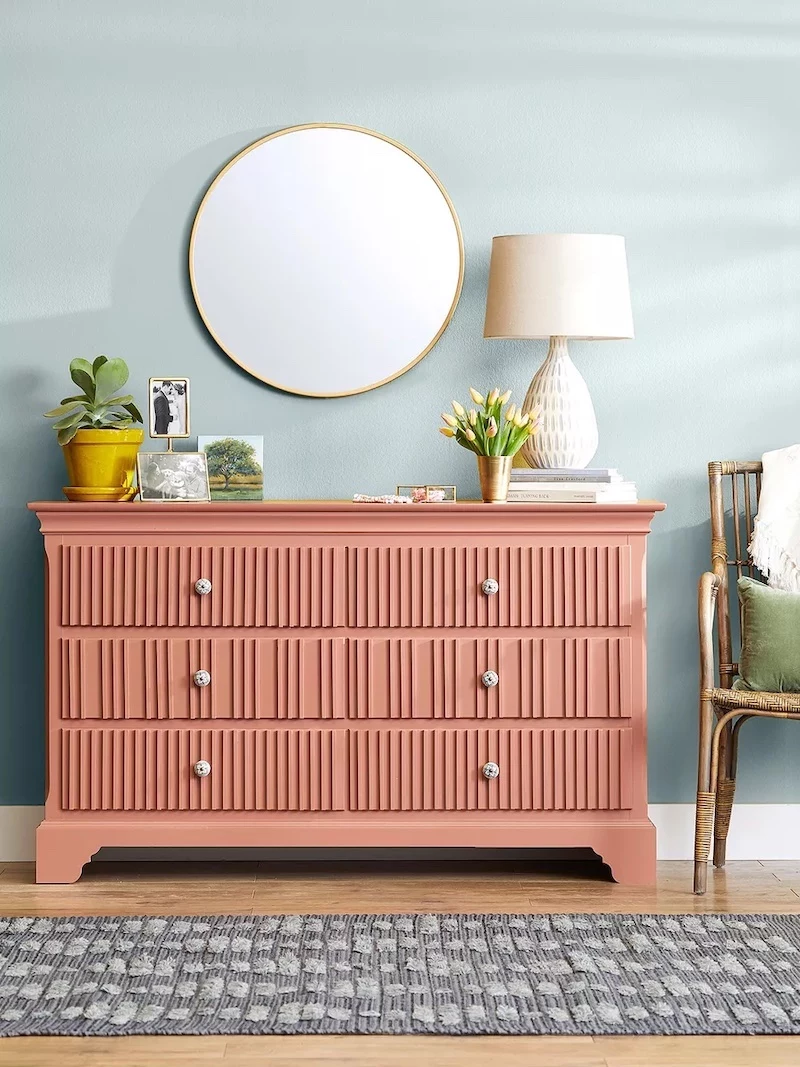
Project 2: Upcycle Old Furniture (The Right Way)
Giving an old side table or dresser a new coat of paint is a classic move. But be careful—furniture takes a lot of abuse. Standard wall paint can stay soft and scratch easily. If you have leftover trim or cabinet paint (which is usually a hard-curing enamel), that’s perfect. If you only have wall paint, you can seriously improve its durability by adding a clear topcoat of water-based polyurethane after the paint has fully cured.
To get a super smooth, brush-stroke-free finish, try a paint conditioner like Floetrol (for latex paints). It slows down the drying time, giving the paint more time to self-level. A good rule of thumb is to add about 2 ounces (a quarter cup) per quart of paint. Oh, and for big flat surfaces like a tabletop or cabinet doors, a small high-density foam roller is your best friend. It leaves a beautiful, spray-like finish.
Heads up! Dry Time vs. Cure Time. This is critical. Paint might be dry to the touch in a few hours, but it’s not cured. Curing is the chemical process where it hardens completely, and this can take anywhere from a week to a full month. I learned this the hard way years ago when I delivered a set of freshly painted cabinets to a client a bit too early. They called me back a week later to fix a bunch of dings and scuffs. Trust me, let that painted bookshelf sit for a full week before you start loading it up with heavy books.
Project 3: A Pop of Concealed Color
This is one of my favorite ways to use a bold color that you love but are too scared to put on a whole wall. Paint the inside of your coat closet, the back of your kitchen cabinets, or the sides of your dresser drawers. It’s a fun, personal surprise every time you open them up. Since these areas are low-traffic, regular wall paint works perfectly.
The Final Step: Smart Storage and Safe Disposal
When your project is done, you might still have some paint left. Storing it right means it’ll be ready for touch-ups down the road.
- Get a good seal: Clean the rim of the can completely. A pro tip is to place a small piece of plastic wrap over the opening before hammering the lid on.
- Label everything: Use a Sharpie to write the date, the color name/code, and the room you used it in right on the can. You will thank yourself later.
- Store it somewhere safe: Keep it in a cool, dry place where it won’t freeze, like a basement or an interior closet. A freezing garage will ruin latex paint for good.
And if it’s time to say goodbye? Never pour liquid paint down the drain. For small amounts of latex paint, you can just leave the lid off until it dries into a solid puck, then toss it in the regular trash. For larger amounts, mix in an equal amount of cat litter to speed up the process. Oil-based paint, however, is hazardous waste and must be taken to a proper disposal facility. A quick search for your town’s waste management website will tell you where to go.
Inspirational Gallery
Can I mix my leftover paints to create a new custom color?
Absolutely, but with one critical rule: stick to like-with-like. You can easily combine two water-based latex paints, even from different brands like Benjamin Moore and Farrow & Ball. Use a clean, separate bucket and a stirring stick, pouring the darker color into the lighter one gradually until you hit your perfect shade. However, never attempt to mix oil-based and water-based paints. They are chemically incompatible and will separate into a curdled, unusable sludge.
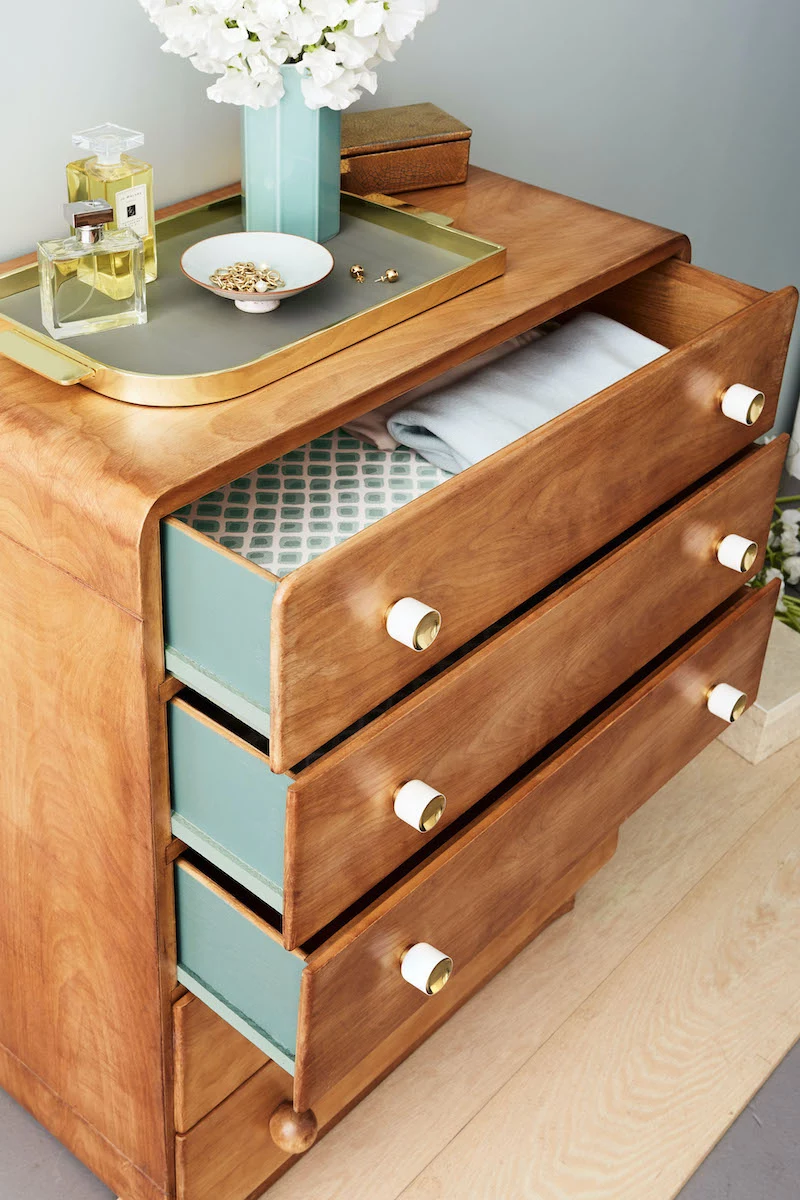
- Give a plain wooden dresser a pop of personality by painting just the sides of the drawers.
- Update old terracotta pots for your houseplants with a splash of color or a simple pattern.
- Paint the inside of a bookshelf or glass-front cabinet for a surprising, high-end look.
- Define an entryway or reading nook with a painted arch or color block on the wall.
An estimated 10 percent of the 800 million gallons of architectural paint sold in the U.S. each year goes unused.
Every time you give a tired picture frame a new coat or stencil a pattern on a doormat with that leftover quart, you’re not just saving money. You’re actively diverting usable material from the waste stream, turning potential clutter into a small but meaningful act of sustainable decorating.
For a fast, rustic texture: Mix a small amount of baking soda directly into your latex paint until it has a thick, pancake-batter consistency. This creates a slightly gritty, chalky finish that’s perfect for adding an aged, rustic vibe to small decorative objects.
For a smoother, more durable finish: Use a dedicated additive like BB Frosch Chalk Paint Powder. It blends more smoothly into the paint, providing a velvety, authentic chalk-paint feel that adheres better to slick surfaces and distresses beautifully on furniture.
The pro secret for small projects: Don’t ever skip the prep. Even for a tiny job, proper prep is the difference between a durable finish and a peeling mess. A quick wipe-down with a degreaser, followed by a light scuff-sand with 120-grit sandpaper, gives the paint a surface to grip. It’s a five-minute step that adds years to the life of your work.
Think beyond four walls and look up. Using leftover paint on a ceiling—the oft-neglected
- They add a modern, graphic touch to vintage or plain furniture.
- They visually ground a piece, making it feel more substantial.
- They require very little paint and only minimal precision.
The trick? The ‘dipped leg’ look. Simply use high-quality painter’s tape to mark a clean, level line on the legs of a stool, table, or chair—anywhere from 2 to 6 inches from the bottom—and paint everything below it. It’s one of the fastest, chicest updates you can do.
Breathe new life into a tired backsplash or dated floor tiles without a messy demolition. The key is using the right primer.
- First, thoroughly deep-clean the tiles to remove any grease or soap scum.
- Lightly scuff the tile’s glaze with sandpaper, then apply a coat of a high-adhesion primer specifically made for slick surfaces, like INSL-X Stix or Kilz Adhesion.
- Once the primer is cured, you’re ready to paint. Finish with two coats of a water-based polyurethane sealer for maximum durability.
Once latex paint freezes, it’s game over. The freezing process separates the solids from the liquids in the paint’s emulsion, and it will never recombine into a smooth, usable consistency.
What if your paint is truly unusable—sour-smelling, chunky, or rock-solid? Don’t just toss it in the bin. While fully hardened latex paint can sometimes be disposed of in household trash (check your local regulations), liquid paint is often considered hazardous waste. Seek out a responsible disposal solution like PaintCare, a non-profit that operates drop-off sites in many states, to ensure it’s handled correctly.


