Thinking Bold in the Kitchen? A Pro Painter’s No-Nonsense Guide
For what feels like a lifetime, I’ve had a brush in my hand, helping people bring their homes to life. And out of all the rooms, the kitchen is always the big one. It’s the most challenging, sure, but also the most rewarding. It’s where everything happens! So picking a color, especially a bold one, feels like a massive deal. Because, honestly, it is. You’re going to see it every single day.
In this article
So many people I chat with are secretly in love with deep, rich colors but are totally paralyzed by fear. They worry it’ll be too dark, too trendy, or that they’ll just plain get it wrong. My job isn’t just slapping paint on walls; it’s about being a guide, sharing the practical stuff you only learn after years of doing this. This isn’t about what’s hot this season. It’s about how color, light, and the paint itself work together to create something beautiful that actually lasts.
So let’s forget the trends for a minute. Let’s talk about what really matters: getting the prep right, choosing the best materials for the job, and finally, applying that bold color with total confidence. This is how the pros get it done.
First Things First: Understanding Your Tools
Before you even dream of grabbing a paint chip, you need to get to know the materials. A great paint job is part science, part art. The color is the emotional payoff at the end, but the nitty-gritty of paint and light has to come first. Skip this, and you’re setting yourself up for a headache later.
The Secret Code on the Paint Chip: LRV
Every single paint color has a Light Reflectance Value, or LRV. It’s a number from 0 (think absolute black) to 100 (pure white), and it tells you exactly how much light a color reflects. It’s probably the most important technical detail on that little paper swatch, but most people just ignore it.
Go ahead, grab a paint chip you like and look for the number on the back. Is it below 35? If so, you’ve got to be serious about your lighting plan. Here’s a quick breakdown:
- Low LRV (around 0-35): These are your gorgeous, bold colors—moody greens, deep navies, and rich charcoals. They drink up light, which can make a room feel incredibly cozy and intimate. But, in a kitchen that doesn’t get much sun, they can feel heavy. If you fall in love with a color that has an LRV of, say, 8, you’ll need great overhead lights and under-cabinet lighting to keep it from feeling like a cave.
- High LRV (around 60-100): These are the light and airy colors that bounce light all over the place. A soft buttery yellow or a pale sage green can make a tiny kitchen feel way bigger and brighter.
When a client wants a popular deep navy, my first question is always, “Tell me about your light.” Do you have big windows? Is it a north-facing room with cool, gray light, or a south-facing one with warm, bright light all day? Understanding LRV helps you predict how a color will actually live in your space, not just how it looks in the store.
Let’s Talk Sheen: Your First Line of Defense
The kitchen is a warzone for your walls and cabinets. We’re talking grease splatters, water drips, and constant wiping. The paint’s sheen (or its gloss level) is what protects it. Choosing the wrong one is a classic rookie mistake.
Matte or Flat finish looks gorgeous and velvety, and it’s fantastic for hiding small imperfections on a living room wall. But in the kitchen? Not so much. It’s porous, and a single splash of spaghetti sauce can stain it for good. I’d steer clear unless you’re using one of the new high-end “scrubbable matte” paints, which can cost a pretty penny.
Eggshell and Satin are the sweet spot. For kitchen walls, eggshell is a great choice—it has a very subtle glow and is much easier to clean than matte. For cabinets, satin is my go-to. It has a beautiful, soft luster that isn’t too shiny, but it’s durable and wipeable. The best cabinet paints on the market often come in a satin finish that dries incredibly smooth.
Semi-Gloss and Gloss are the toughest of all. They’re incredibly easy to clean, which is why they were the old-school standard for trim and doors. The downside? That high shine reflects a ton of light and highlights every single little bump, dent, and imperfection. Getting a perfect glossy finish requires a level of surface prep that, to be frank, is a real challenge for most DIYers.
Why Your Paint Color Looks Wrong at Home
Ever pick the perfect gray at the hardware store, only to have it look purple on your walls at night? That’s a phenomenon called metamerism. The color looks one way under fluorescent store lights, another in the morning sun, and totally different under your warm LED bulbs.
This is why you can never, EVER choose a color from a tiny chip. You have to test it. I always tell my clients to buy a sample pot, which is usually just $5-$10. Paint a big poster board (at least two feet by two feet) with two coats. Then, spend a day moving that board around your kitchen. Prop it up next to your backsplash, your countertops, and your floor. Look at it in the morning, at noon, and at night with the lights on. It’s the only way to know for sure if you’re going to love it.
The Pro’s Playbook for Painting Kitchen Cabinets
Okay, let’s get into the real work. Painting cabinets is one of the most demanding jobs out there because the standard is a rock-hard, perfectly smooth finish. There are no shortcuts. A professional job can easily take 40 to 60 hours, and I’d say 75% of that is just prep.
Quick tip: Before you commit to the whole kitchen, try the “One Door Challenge.” Pick one, less-visible door (like the one under the sink) and take it through the entire process from start to finish. It’s the perfect way to build confidence and iron out any kinks before you have 20 doors disassembled in your garage.
Step 1: Setup and Labeling
First, find a clean, dust-free zone to work in—a garage or basement is perfect. Lay down rosin paper to protect the floors. Then, start removing all the hardware and doors. This next part is critical: label everything! Use a piece of painter’s tape and a marker. Write “U1” (for Upper 1) on the edge of the cabinet box, and stick a matching piece of tape inside the hinge hole of that specific door. Trust me, this tiny step will save you a world of pain when it’s time to put everything back together.

Step 2: The All-Important Degreasing
Do not skip this step. I repeat: DO NOT SKIP THIS STEP. Years of airborne cooking grease and oils from your hands create a film that paint simply cannot stick to. I once had to fix a job where the paint was literally peeling off in sheets around the knobs because the homeowners didn’t degrease first.
You’ll need a strong degreasing cleaner. The old-school stuff was harsh, but today you can find excellent TSP-substitutes at any hardware store that are safer and work great. Get a bucket of warm water, mix in the cleaner, and put on some gloves. Scrub every single inch of the cabinet boxes and both sides of the doors. When you think you’re done, change the water and do it again. The surface should feel squeaky clean, not slick.
Step 3: Sanding for Grip
Sanding isn’t about stripping off the old finish. It’s about roughing up the surface just enough to give the primer something to bite into. For most factory-finished or previously painted cabinets, a light scuff-sanding with 150 or 180-grit sandpaper is all you need. Your goal is just to knock down the shine. After sanding, vacuum up all the dust with a brush attachment, then wipe everything down with a tack cloth.
Step 4: Primer, The Unsung Hero
Primer is essential. It helps the paint stick, blocks stains from bleeding through, and gives you a uniform color to work on. The type you use is crucial.
- For Wood Cabinets (especially oak or cherry): You need a stain-blocking, shellac-based primer. It’s the only thing that will permanently seal in wood tannins, which can otherwise bleed through and turn your beautiful white paint yellowish over time. It has a strong smell while it’s wet, so ventilation is key, but it dries super fast and works like magic.
- For Laminate or Thermofoil Cabinets: Heads up! If your cabinets are slick and plasticky, normal primer won’t work. The paint will scratch right off. You need a specialty high-adhesion or “bonding” primer. Look for a product specifically designed to stick to glossy, hard-to-paint surfaces.
Step 5: Applying the Color
Finally, the fun part! For a truly flawless finish on the doors, spraying is the professional standard. But for a DIY job, you can get amazing results with a brush and roller.
For the cabinet boxes and frames, use a high-quality 2.5-inch angled brush. Don’t go cheap here—a good brush (around $20) holds more paint and leaves fewer marks. For the flat panels on the doors, a 4-inch high-density foam roller works wonders. A little trick is to add a paint conditioner or extender to your paint. This slows down the drying time just a bit, allowing the paint to level out and the brush strokes to disappear.
Always plan on two topcoats. Let the first coat dry completely, then give it a very light sanding with 220-grit paper before applying the second. And be patient! High-quality cabinet enamels can take up to 30 days to fully cure and reach maximum hardness. Be gentle with them for that first month.
A Quick-Reference Prep Checklist
When you’re in the middle of the chaos, it’s easy to forget a step. Here’s a quick summary to keep you on track:
- Set up a clean, protected workspace.
- Remove all hardware.
- Label every door, drawer, and its corresponding spot on the cabinet frame.
- Degrease everything. Twice. Seriously.
- Scuff-sand all surfaces to remove the shine.
- Vacuum and wipe away all dust.
- Apply the correct primer for your cabinet type (stain-blocking for wood, bonding for laminate).
- You’re ready for paint!
Let’s Talk Colors!
Now that you know the how, let’s talk about the what. Some families of bold colors have real staying power when you do them right.
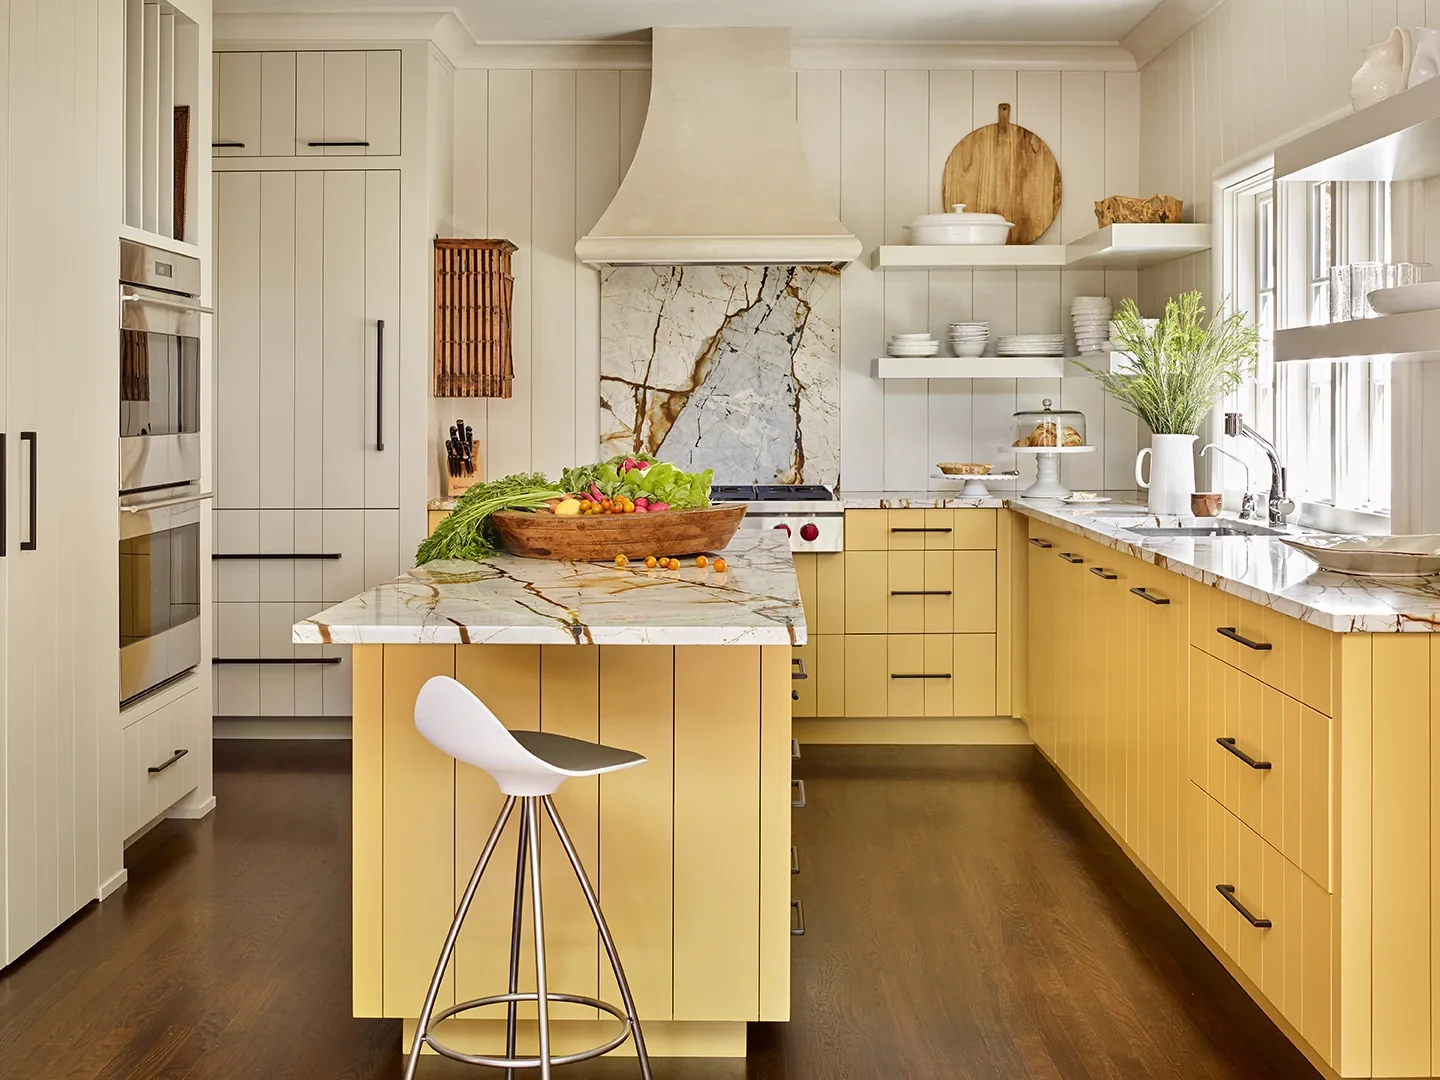
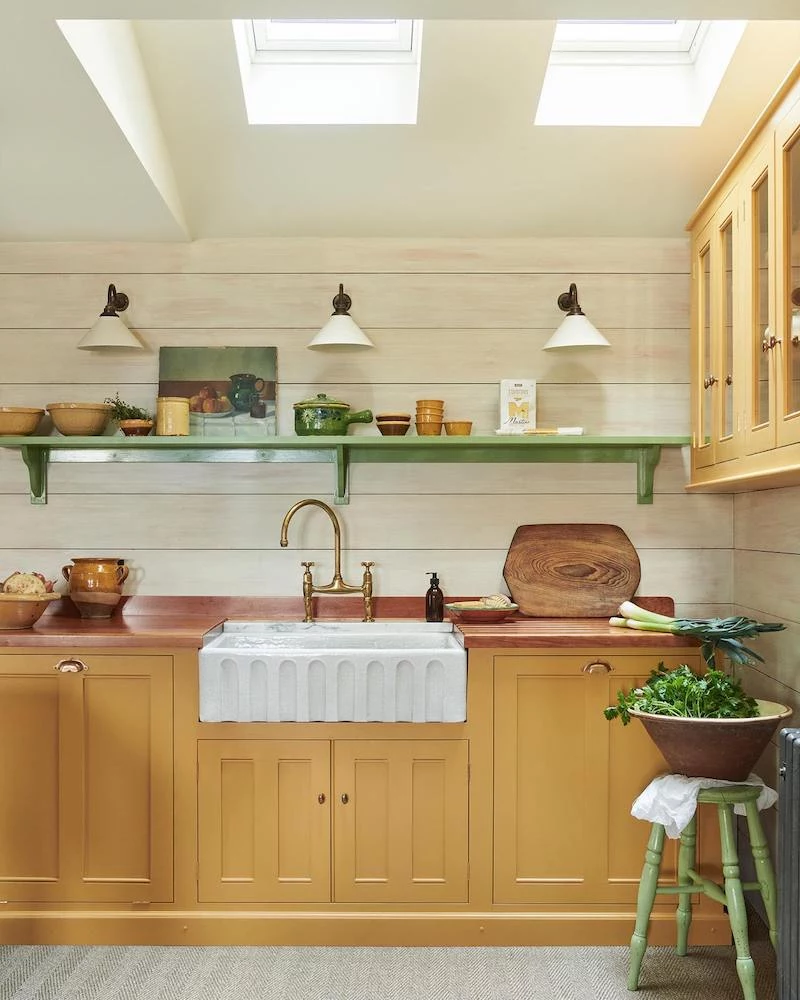
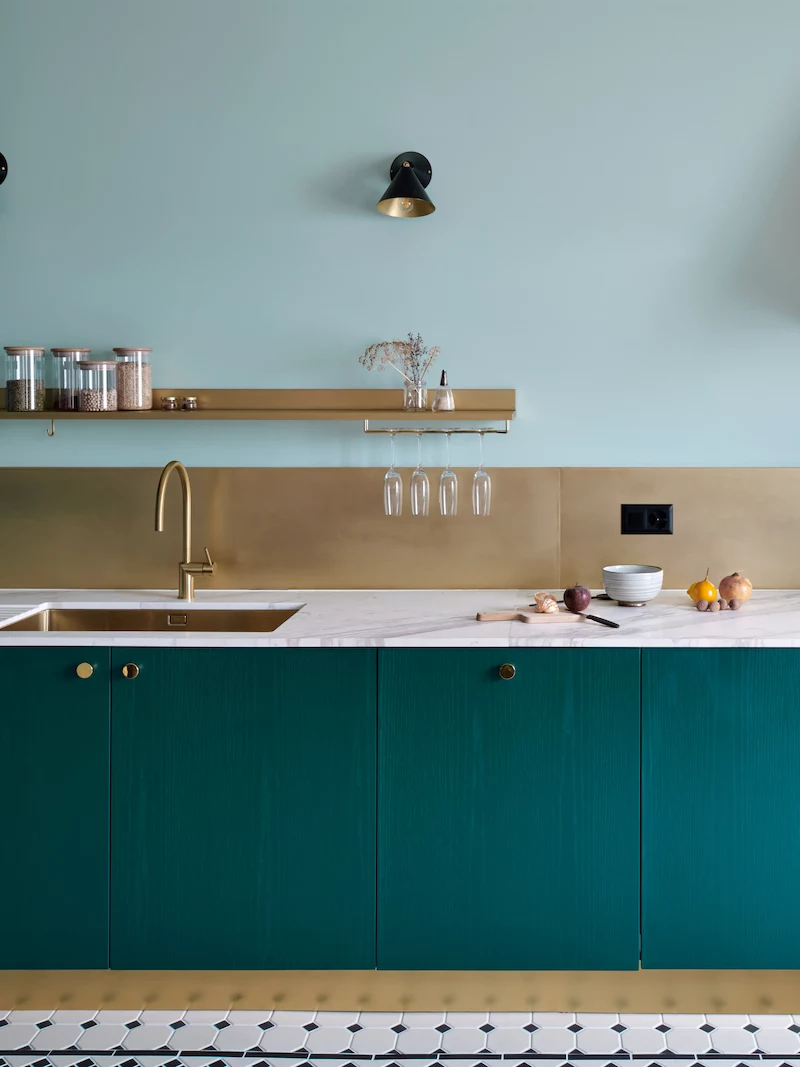
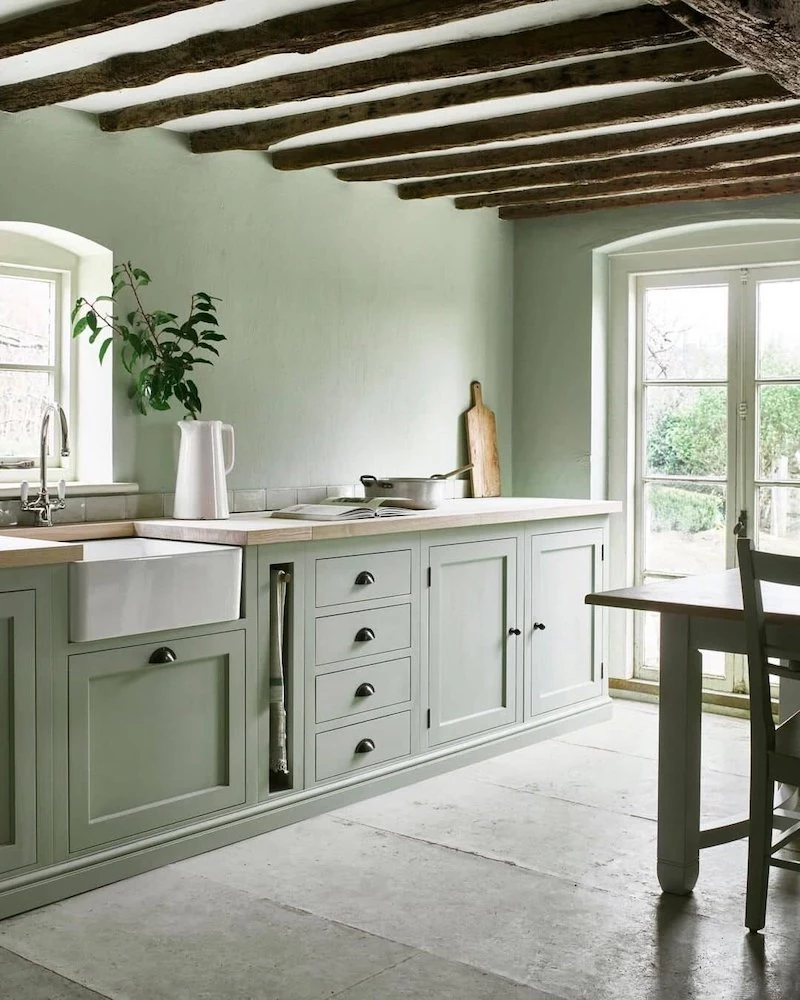
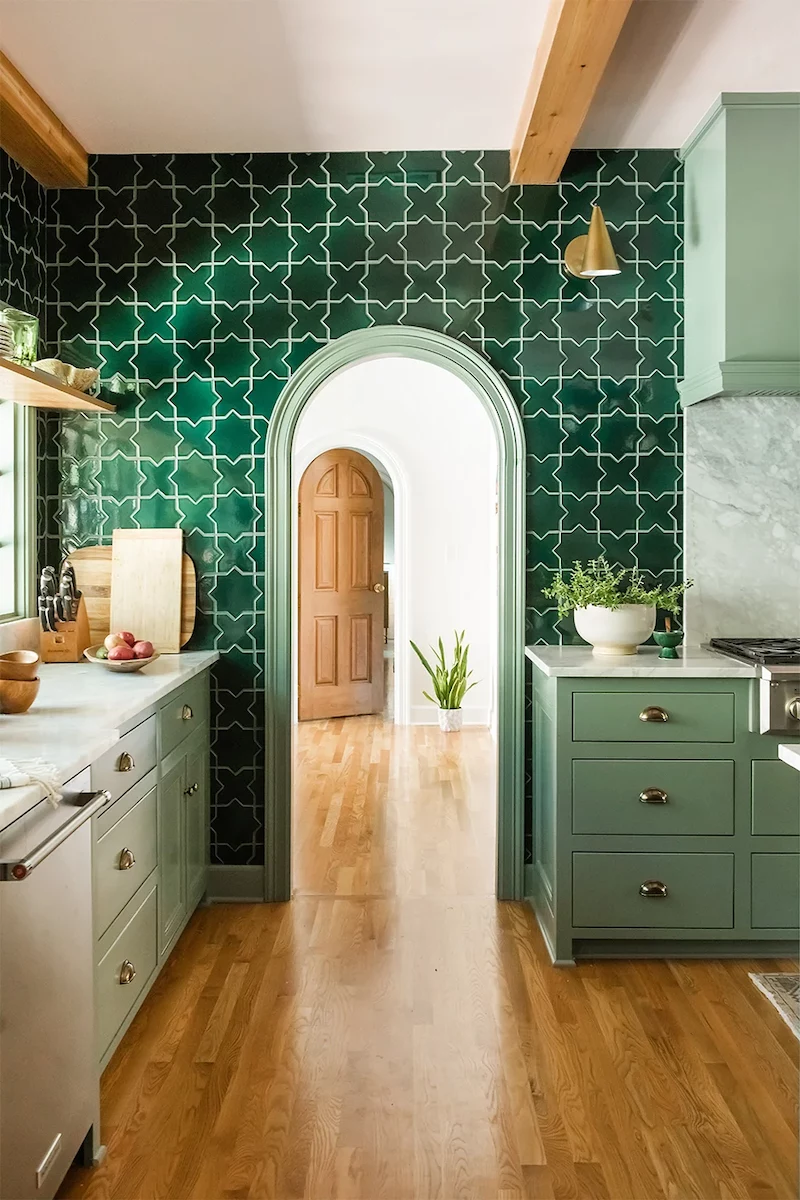
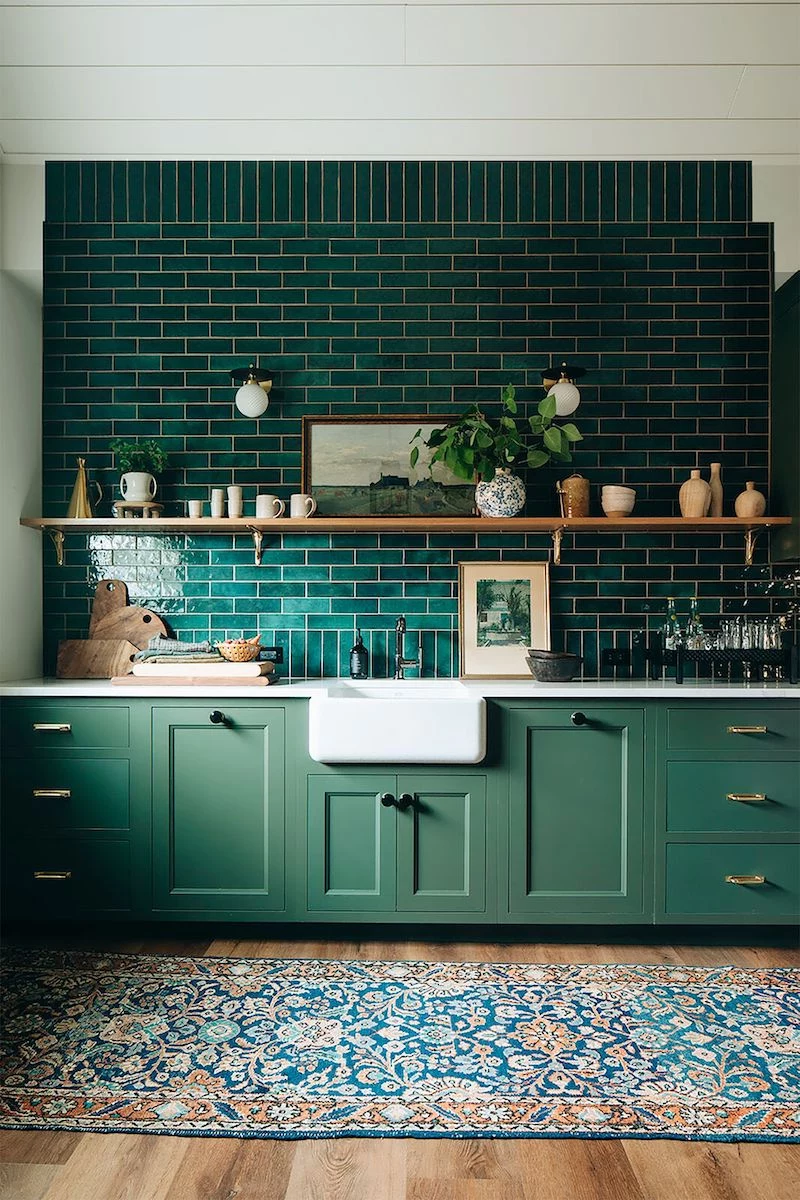
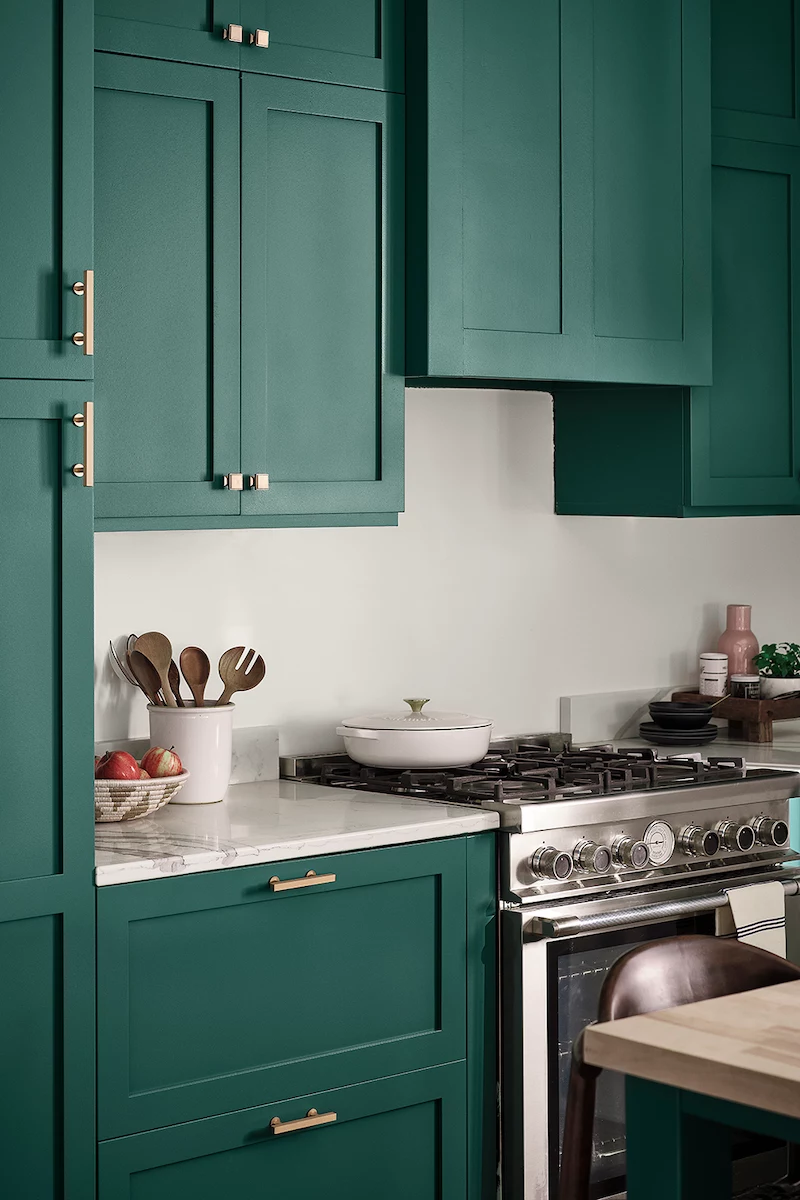
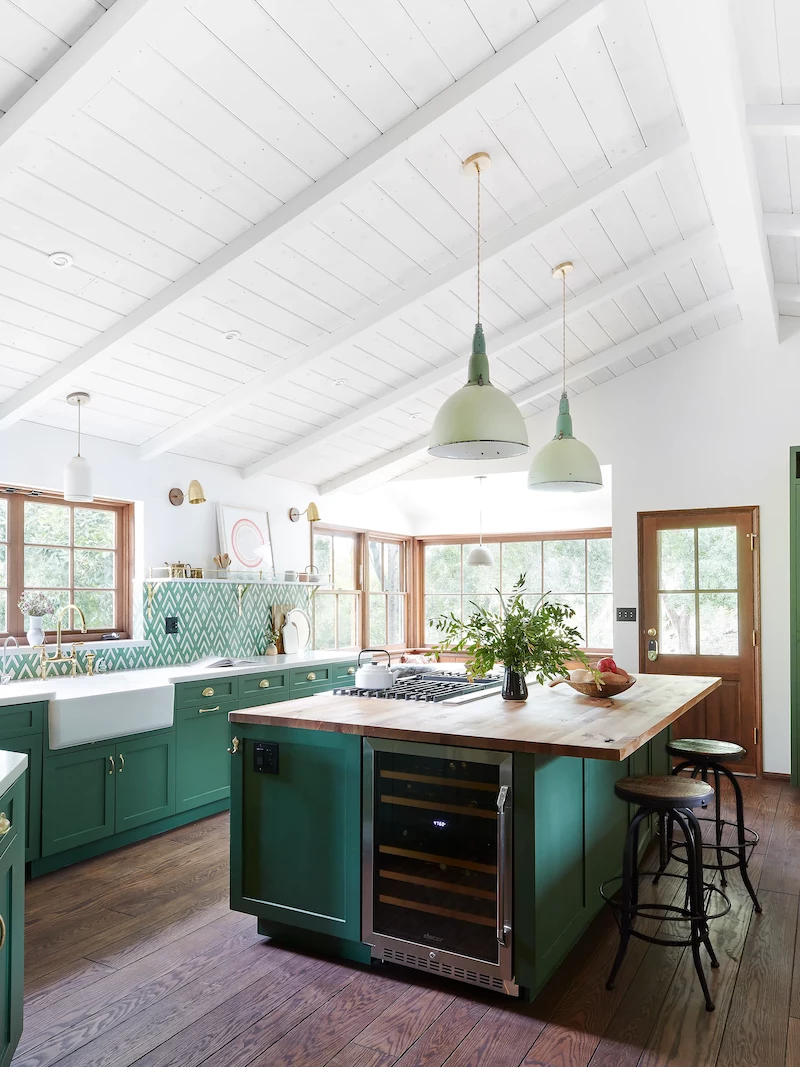
Deep, Moody Greens: Think of a green so dark it’s almost black, or a classic forest green without any blue in it. These colors are incredibly popular because they feel sophisticated and connect us to the outdoors. They look amazing on lower cabinets paired with white uppers to keep the room feeling bright. Pro tip: pair them with warm brass hardware to really make them pop.
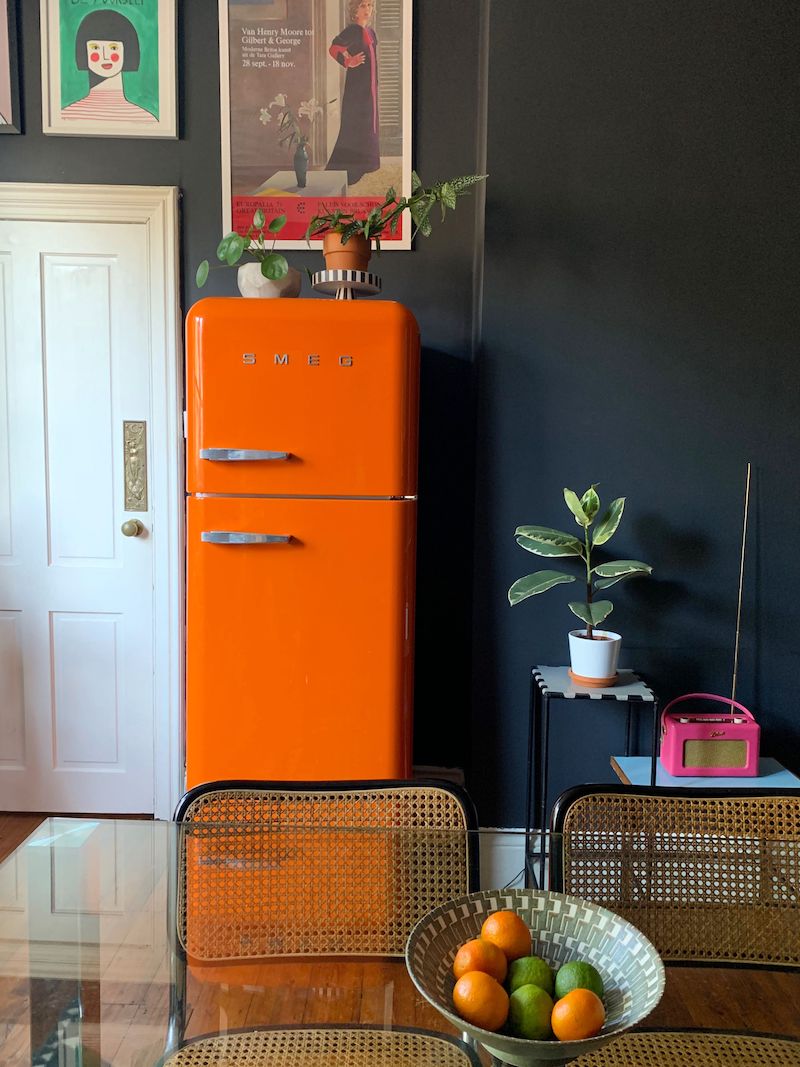
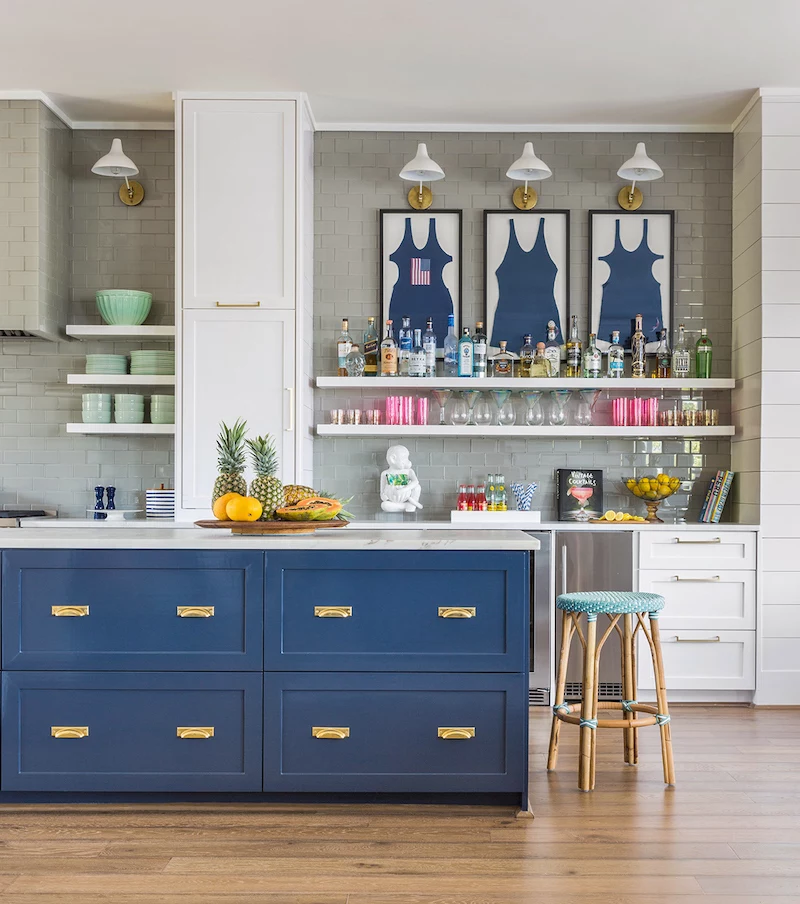
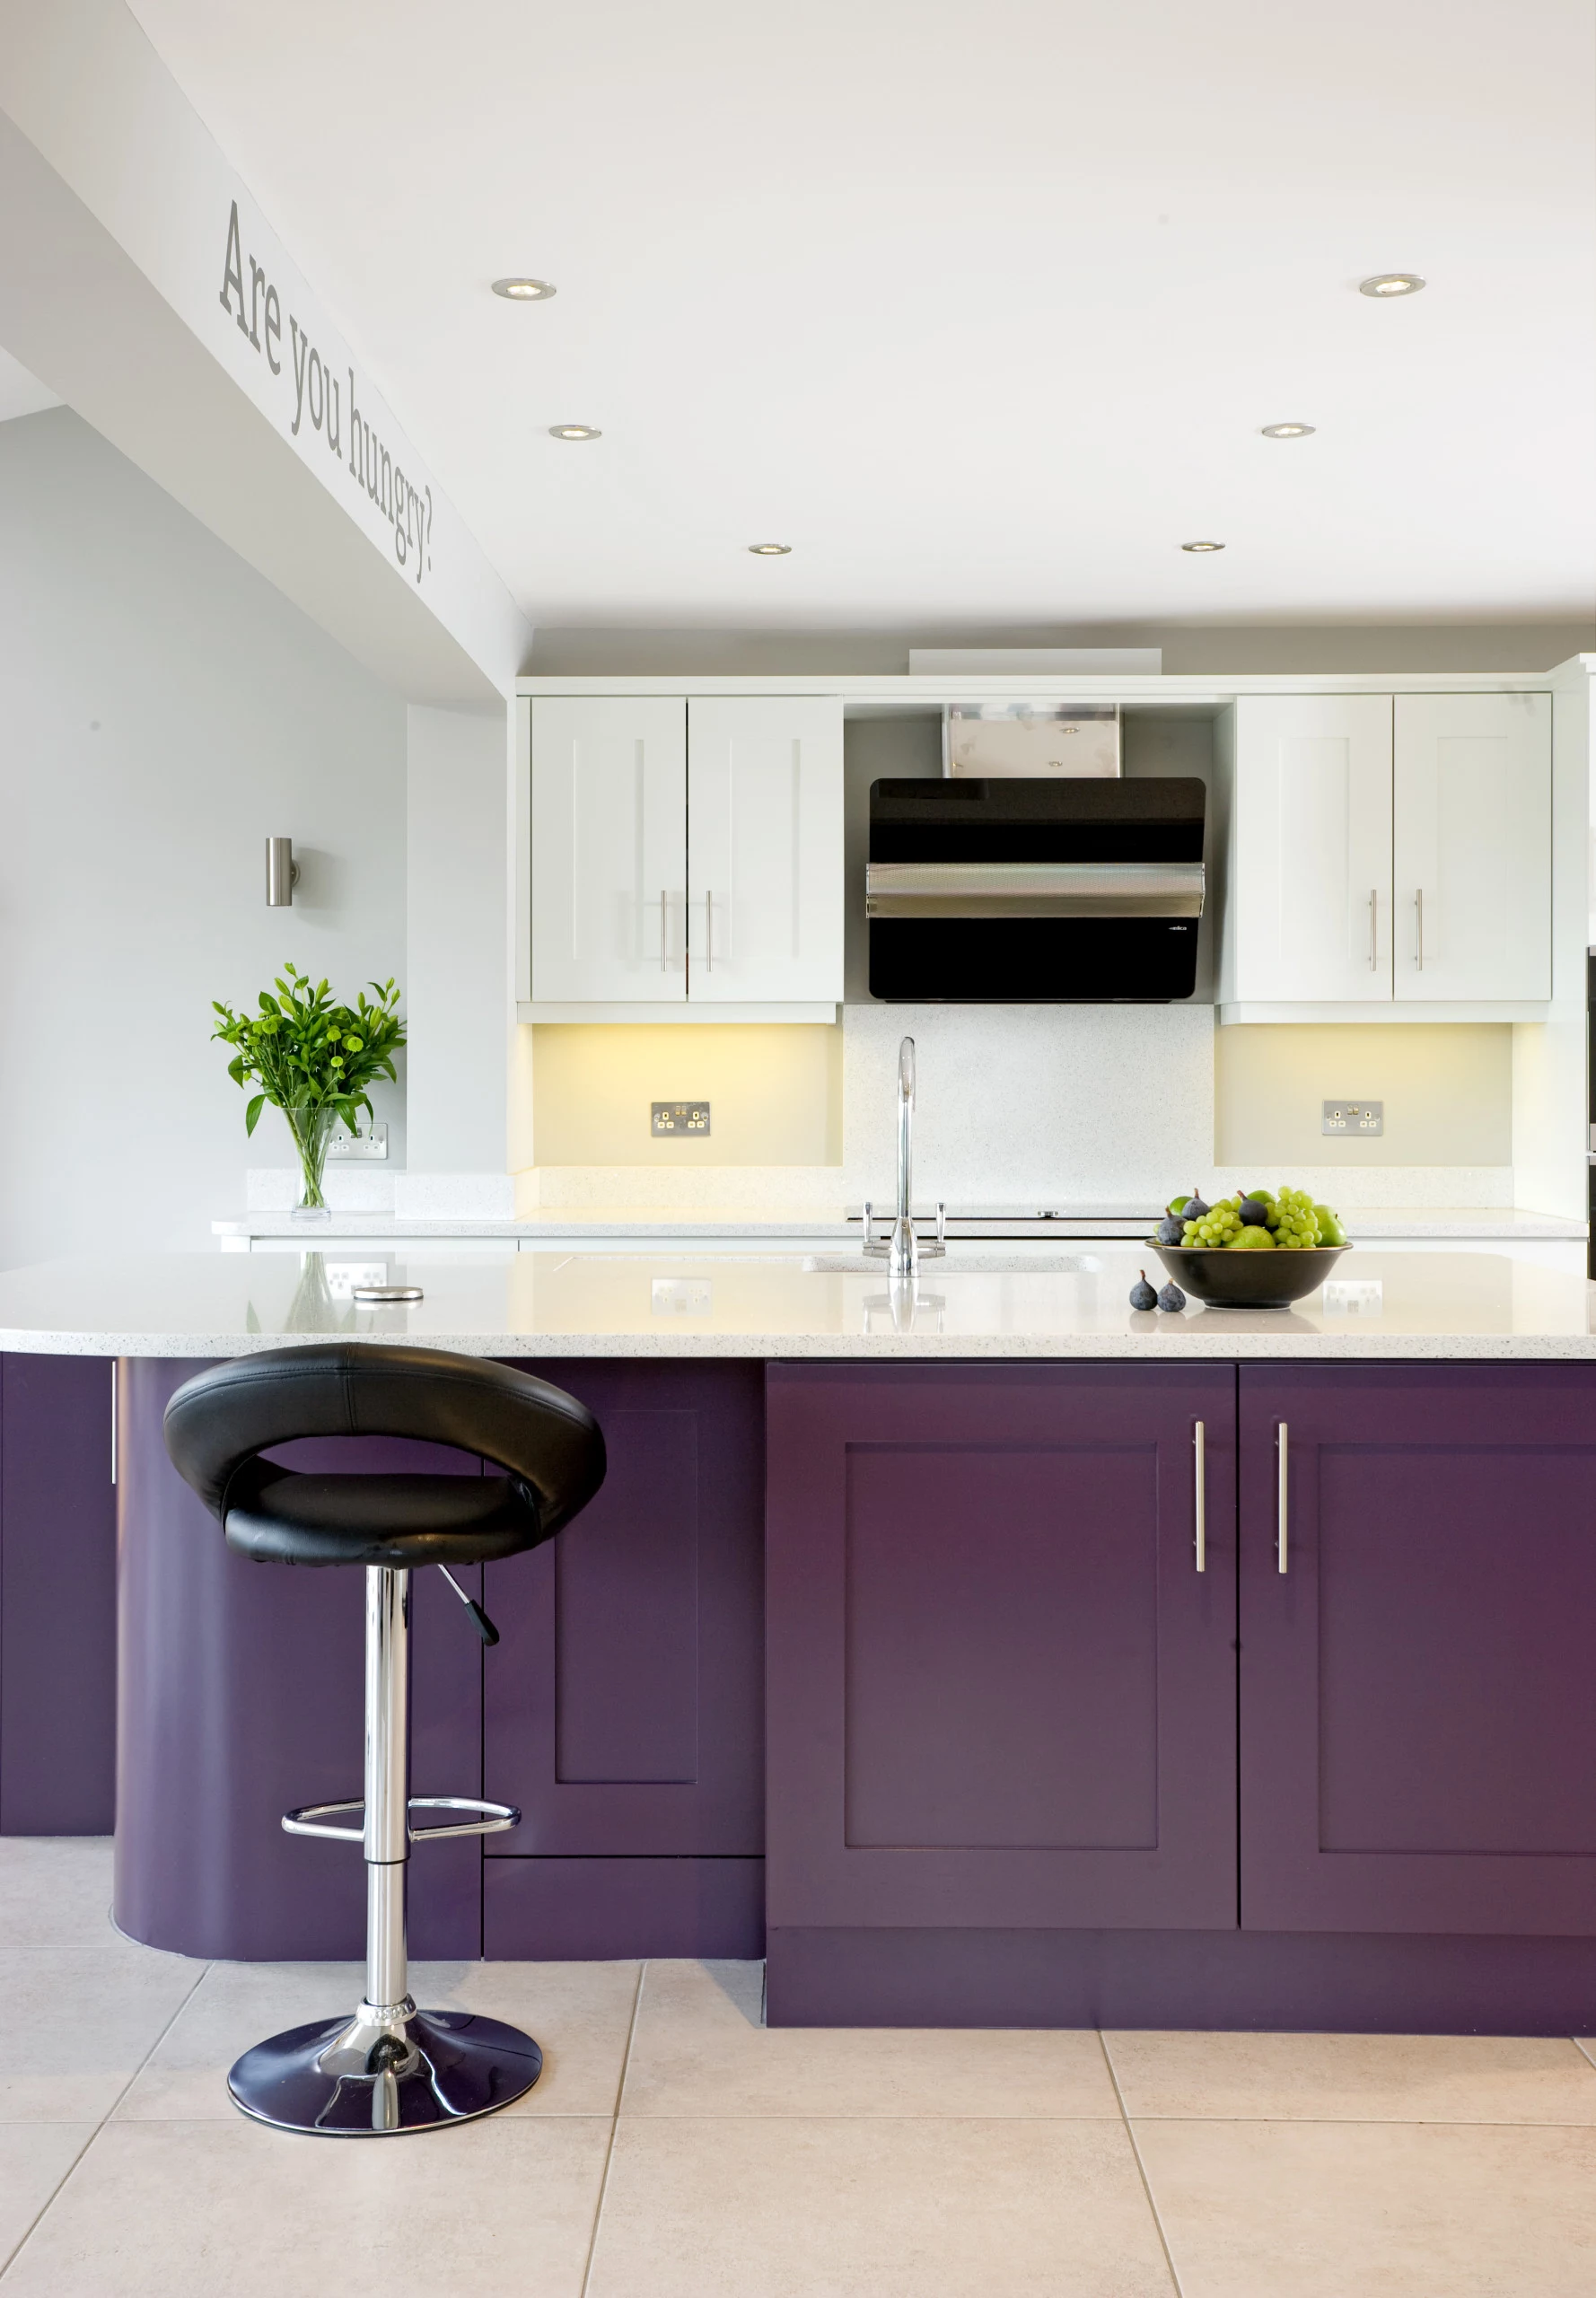
Rich, Timeless Blues: A deep navy blue is practically a neutral these days. It works with almost any countertop and metal finish. One great strategy if you’re nervous is to just paint the island. I once did an island in a rich, dark teal for a client, and it became the perfect anchor in an otherwise all-white kitchen. It’s a statement without the full commitment.
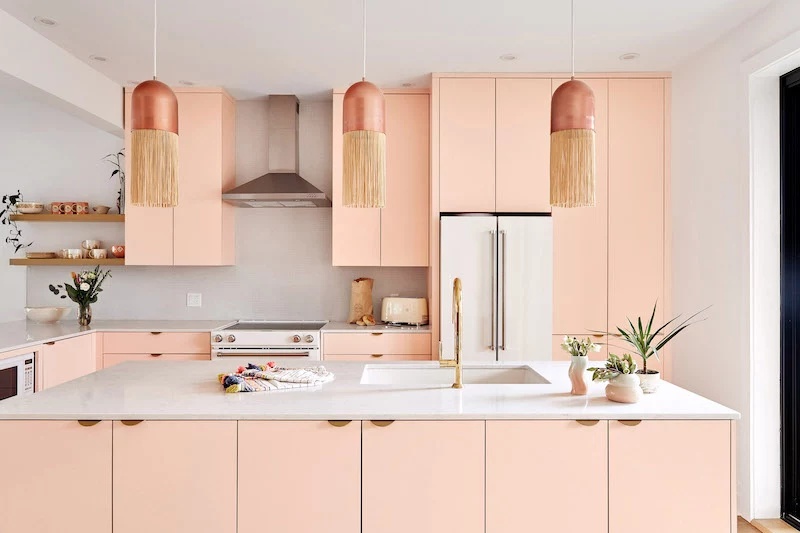
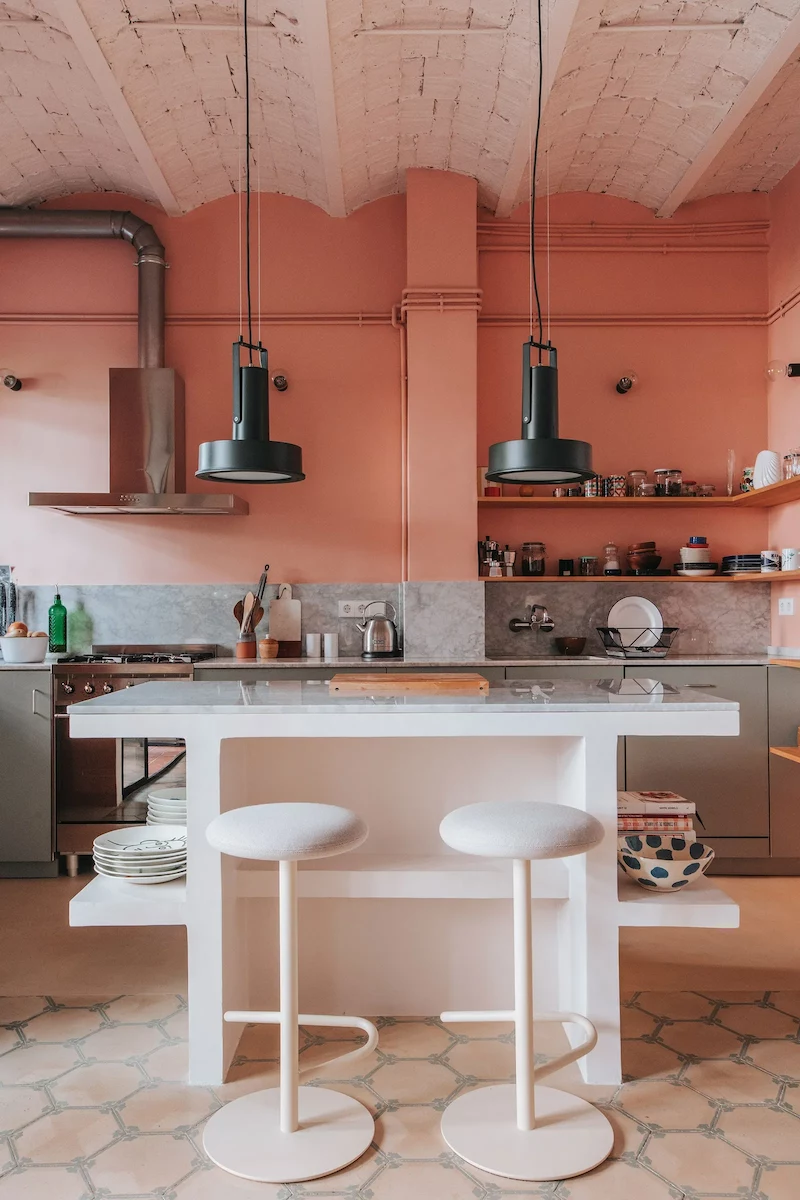
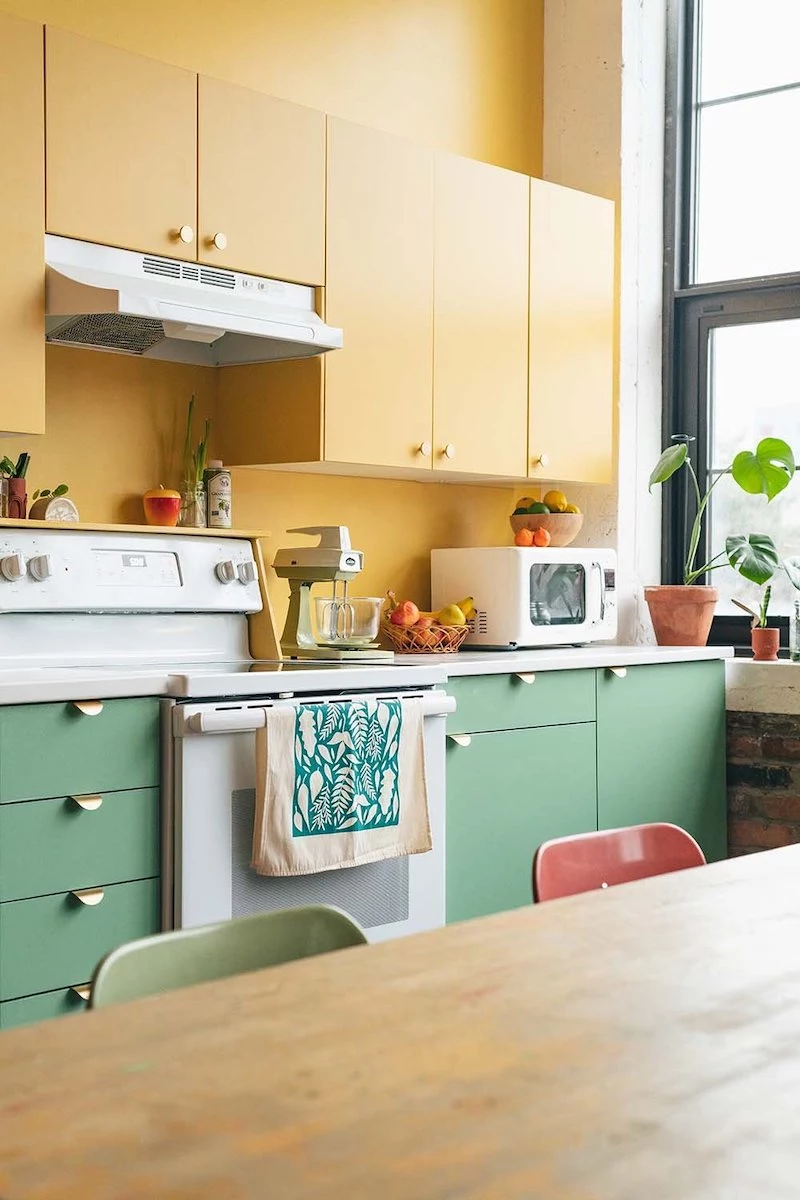
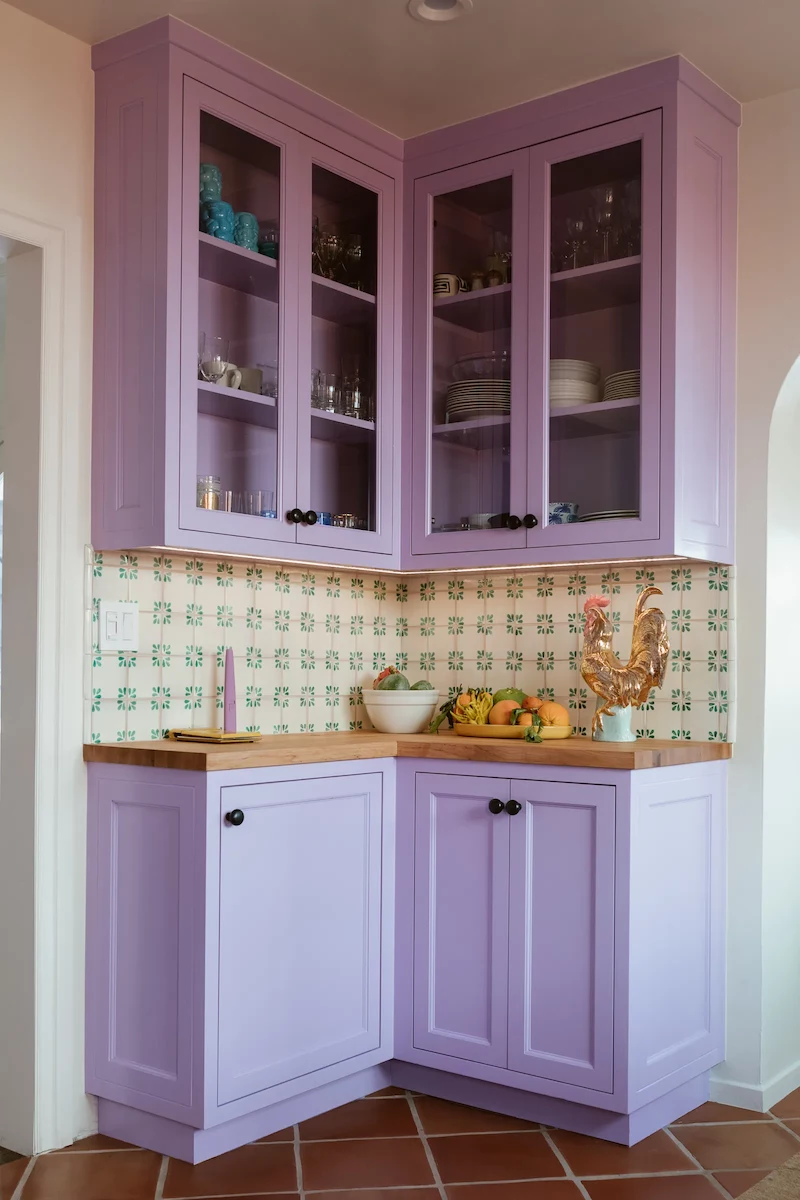
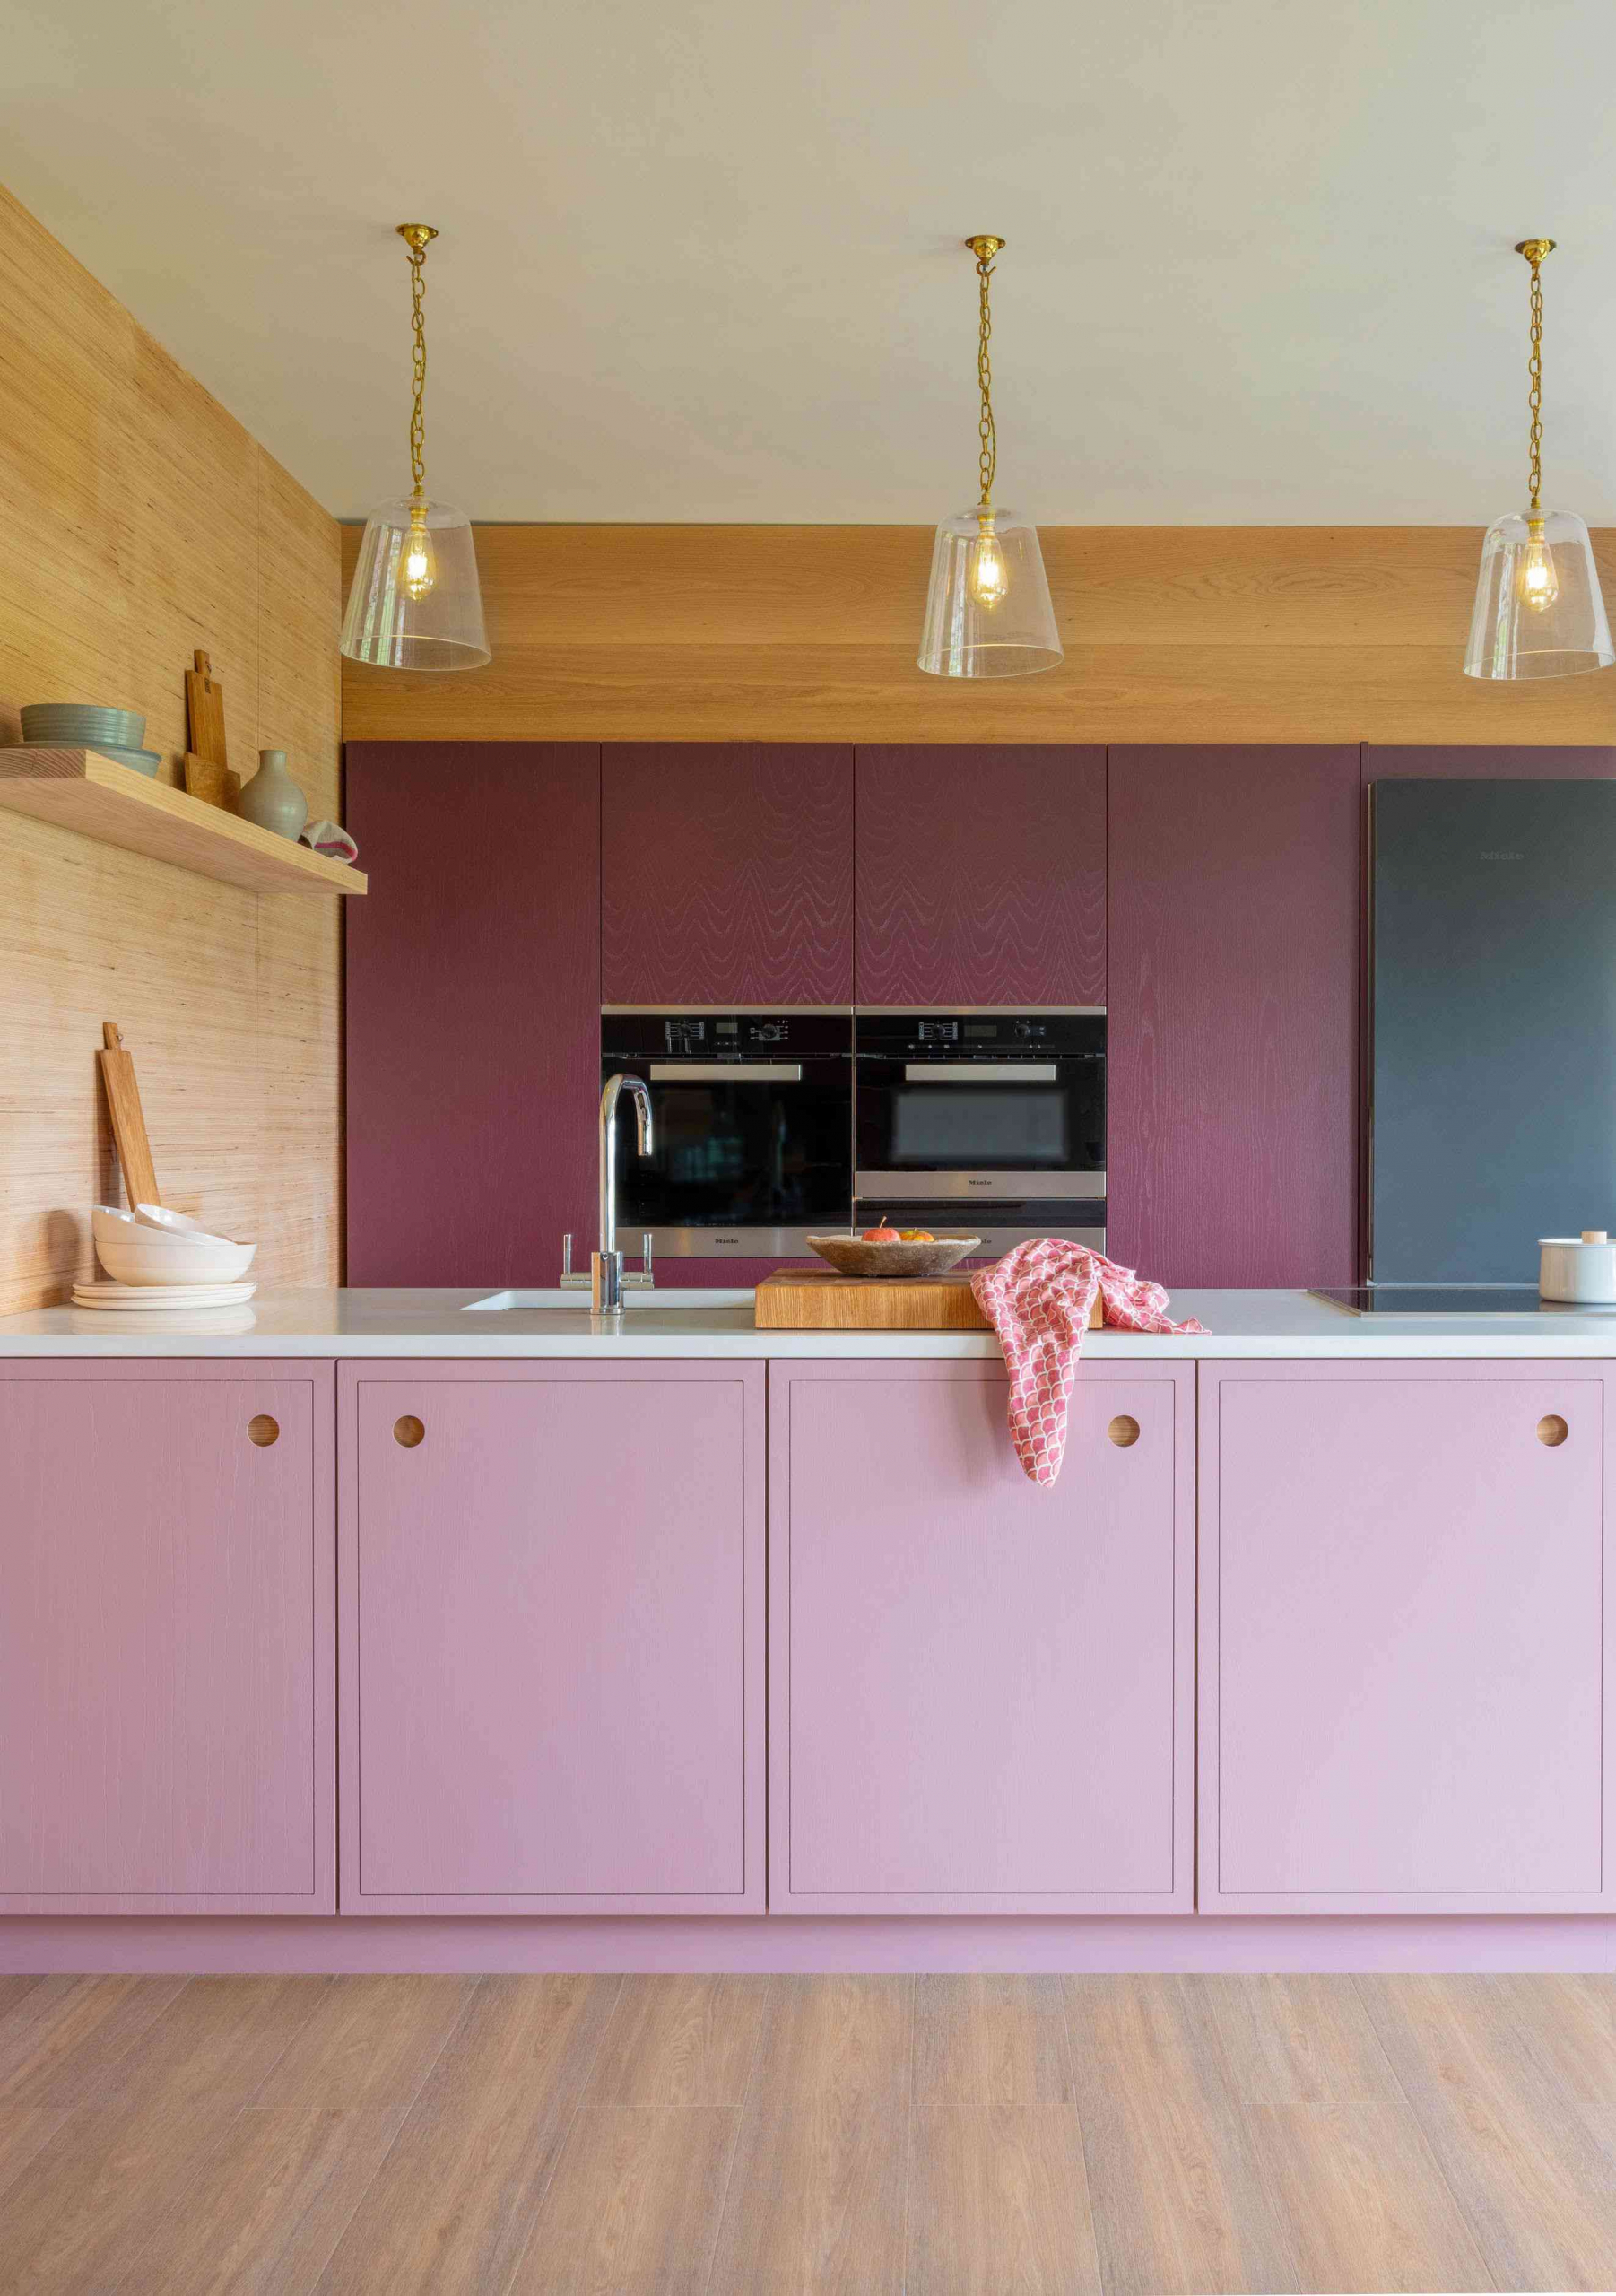
Earthy & Warm Tones: A deep, sun-baked terracotta or rust can make a kitchen feel unbelievably warm and inviting. Another modern option is a muted, dusty pink. The key is to find one with a lot of brown or gray in it, so it feels sophisticated, not childish. These colors are fantastic for warming up a room that gets cool, indirect light.
The Reality Check: Budgets, Timelines, and Troubleshooting
How Much Time and Money Are We Talking?
Be honest with yourself. This is not a weekend project. For a medium-sized kitchen, you should block out at least a full week of your life to do this right, factoring in all the prep and drying time.
As for cost, hiring a pro can run you anywhere from $4,000 to $8,000. It sounds like a lot, but you’re paying for 50+ hours of skilled labor and a guaranteed, durable finish. If you DIY, your main cost is materials. For a top-notch job, expect to spend around $250 to $400. That breaks down roughly to:
- High-quality cabinet paint: $70-$90 per gallon
- High-quality primer: $50-$70 per gallon
- Good brushes, rollers, and trays: $40-$60
- Sandpaper, tape, cleaner, and drop cloths: $50-$80
When you compare that to the cost of brand-new cabinets, it’s an incredible value.
Common Problems & How to Fix Them
- My paint is chipping! This is almost always a prep failure. Either it wasn’t cleaned well enough, or it wasn’t sanded. The only fix is the painful one: strip it, clean it, and start over.
- I can still see the wood grain. If you have oak cabinets, this is normal. Some people like the texture. If you want a perfectly smooth, grain-free look, you have to use a grain filler before you prime, which is a very labor-intensive extra step.
- Help, I have a drip! Don’t touch it while it’s wet! Let it dry completely for at least 24 hours. Then, carefully slice the hardened drip off with a fresh razor blade held flat against the surface. Lightly sand the spot smooth with fine-grit sandpaper, wipe away the dust, and touch it up with a tiny bit of paint.
A Quick Word on Safety
This is non-negotiable. When you’re using primers and paints, especially the strong-smelling ones, you need good ventilation. Open the windows, set up a box fan. And please, wear a proper respirator rated for organic vapors, not just a flimsy dust mask.
Heads up! If your house was built before 1978, there’s a chance your cabinets have lead-based paint on them. You can grab a lead test kit from any hardware store for about $10. If it tests positive, STOP. Do not sand or scrape anything. That work needs to be handled by a certified professional.
So, should you do it yourself? If you have the time, the space, and the patience to follow every step without cutting corners, absolutely. But if you’re hesitating, there is zero shame in hiring a pro who specializes in this. A great painter will give you a finish that makes your bold kitchen dreams come true, beautifully and durably.
Inspirational Gallery
Satin Finish: Your best friend for kitchen walls. It offers a subtle, low-reflection glow that’s much easier to clean than a flat or matte finish, but it’s more forgiving of wall imperfections than a high-gloss. A quality acrylic like Benjamin Moore’s Regal Select in Eggshell or Satin is perfect for this.
Semi-Gloss Finish: Reserve this for cabinets and trim. The higher sheen creates a tough, scrubbable surface that can withstand fingerprints, grease, and constant cleaning, which is essential for high-touch areas.
Ultimately, using both—satin on walls, semi-gloss on trim and cabinets—gives you the ideal mix of practicality and aesthetics for a bold kitchen.
Afraid to commit a deep navy or forest green to all four walls?
Look up. Painting the ceiling—the often-forgotten “fifth wall”—is a pro-level move to introduce drama without overwhelming the space. In a kitchen with high ceilings or plenty of natural light, a dark ceiling like a rich charcoal can create an incredibly cozy, canopy-like effect. It feels intentional and sophisticated, drawing the eye upward and making the wall color (even if it’s a simple white) pop with contrast.
Nearly 80% of paint failures are due to improper surface preparation.
In a kitchen, this usually means one thing: grease. An invisible film of cooking oil builds up on walls and cabinets, and paint simply won’t stick to it. Before you even open a can of primer, wipe every surface down with a TSP (trisodium phosphate) substitute or a good degreasing cleaner. This non-negotiable step is the single biggest secret to a lasting, professional-looking finish.
- A perfectly smooth, uniform finish.
- Guaranteed adhesion, even in steamy conditions.
- Your chosen bold color will look richer and truer.
The key? Using the right primer. Don’t just grab any old can. For kitchen cabinets, especially if they’re laminate or glossy, you need a high-adhesion bonding primer like INSL-X Stix or Zinsser B-I-N. This isn’t just a base coat; it’s a powerful adhesive that creates a fail-proof foundation for your topcoat.
When you go bold, you create an instant focal point. To make it work, you need to balance that intensity with texture and light. Think about pairing a deep green wall, like Farrow & Ball’s ‘Studio Green’, with:
- Warm metallics: Unlacquered brass or copper hardware will glow against the dark background.
- Natural wood: Open oak shelving or a butcher block countertop adds organic warmth and prevents the space from feeling too cold.
- Crisp whites: Use a clean white for countertops or a backsplash to bounce light around the room and provide sharp, clean contrast.


