The Tiler’s Tell-All: What You Actually Need to Know Before Choosing Tile
I’ve probably spent a good twenty years on my knees setting tile. It’s a craft that seeps into your bones, and honestly, I wouldn’t have it any other way. I started out like everyone else, the low man on the totem pole, hauling heavy buckets and learning the hard way how to make a clean cut. Now I run my own crew, and the biggest lesson I drill into my apprentices is this: you have to understand the tile itself.
In this article
It’s not just a pretty square you glue to the wall. It’s a man-made piece of stone, with its own story, its own strengths, and its own hidden weaknesses. So many people get hung up on the color or the pattern, but the real magic is in the material. Knowing how it’s made—from a pile of dust to a rock-hard surface—is what separates a floor that lasts forever from one that fails in a few years. This is the stuff that matters.
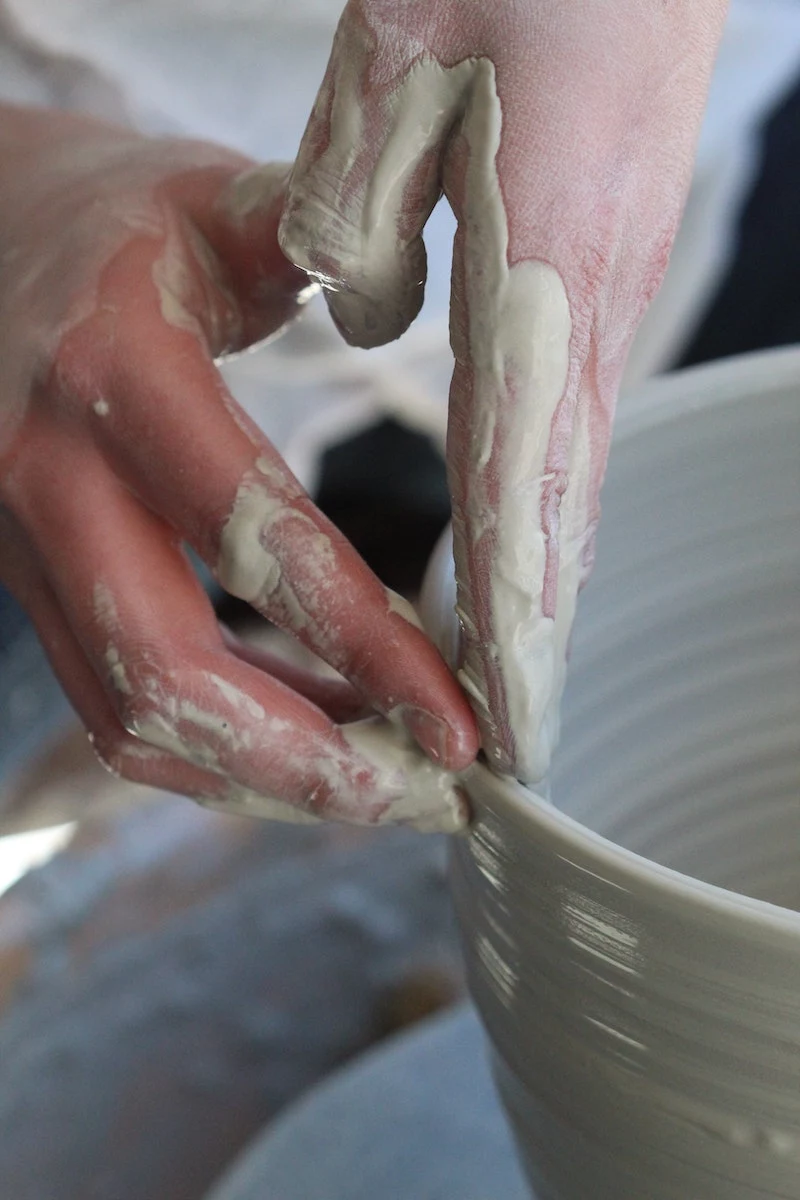
What Is Tile, Anyway? From Mud to Magic
Every single tile, whether it costs a dollar or fifty dollars a square foot, starts its life as a very specific recipe of natural stuff. It’s not just random clay from a pit; the process is surprisingly scientific. Getting the mix right is everything.
The Core Ingredients
Think of it like baking a high-performance cake. The main ingredients are clays, feldspar, and silica sand. The experts use a special blend of clays for plasticity, which is just a fancy word for being able to shape it without it cracking. Feldspar is the magic glue; when it gets super hot in the kiln, it melts and binds everything into a solid mass. And silica? That’s the skeleton, giving the tile its structural backbone and keeping it from shrinking weirdly.
These materials are ground into a powder so fine it feels like flour. The consistency here is critical. I once dealt with a bad batch for a big restaurant kitchen floor. A few boxes were just a shade off in color. The supplier told us it was a tiny variation in the raw ingredient mix at the factory. It’s wild how a small change before firing can have such a visible result.
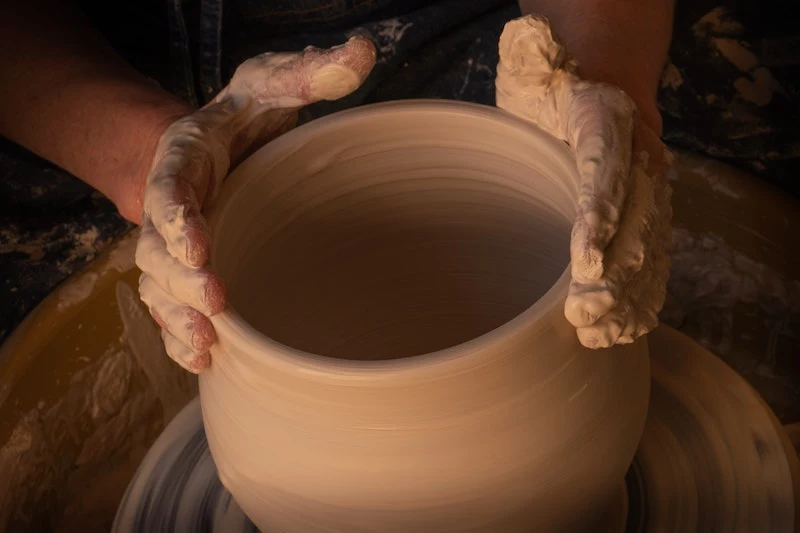
From Powder to a Solid Tile
Getting from that powder to the tile you hold in your hand is a journey. First, that powder is dumped into enormous hydraulic presses that squeeze it with thousands of pounds of pressure. This is what makes the tile dense and strong. More pressure equals a tougher tile that won’t soak up as much water.
These freshly pressed tiles, called “green tiles,” are then moved into controlled dryers to slowly remove moisture. If they dry too fast, they can warp. Quick tip: If you’re picking out tile, especially large ones, lay a straightedge across the surface. A noticeable bow or hump in the middle is a sign of poor manufacturing and will make your installer’s life a nightmare (and your floor look terrible).
Next up, for most tiles, is the glaze. This is a liquid coating that gives the tile its color, pattern, and finish—whether it’s glossy, matte, or textured. More importantly, it’s the shield that makes the surface waterproof and a breeze to clean. Some rustic tiles, like terracotta, skip this step, so their color comes directly from the clay they’re made of.
And then comes the trial by fire. The tiles take a long, slow trip through a kiln that’s hotter than you can imagine, often over 2,000°F. This intense heat does two crucial things: it fuses all the particles together into a hard, glass-like body (a process called vitrification) and melts the glaze, bonding it permanently to the tile. The slow cooling process afterward is just as important to prevent cracking. This whole ordeal is what turns a fragile-pressed powder into a durable building material.
Choosing Your Fighter: Ceramic vs. Porcelain
Okay, let’s clear this up. People use “ceramic” and “porcelain” like they’re the same thing, but for a pro, they are worlds apart. The difference boils down to one simple thing: how much water they absorb. This affects where you can use it, how long it will last, and even what tools are needed to cut it.
- Ceramic Tile: This is your general-purpose tile. It’s usually made from red or white clay and fired at a lower temperature. This makes it a bit softer, more porous, and easier to cut. It’s perfectly fine for most residential walls, backsplashes, and floors in low-traffic areas like bathrooms. Cost-wise, you can find decent ceramic tile for anywhere between $1 to $5 per square foot, making it a great budget-friendly option.
- Porcelain Tile: To earn the name “porcelain,” a tile has to meet a strict industry standard for water absorption (less than 0.5%). It’s made with finer clays and fired at much higher temperatures. The result is an incredibly dense, hard tile that’s a beast against moisture, stains, and frost.
I learned this lesson the hard way… by fixing someone else’s mistake. A homeowner installed a beautiful ceramic tile patio themselves, and it looked great for about six months. After one tough winter, the tiles were flaking and falling apart. Water had soaked in, frozen, expanded, and destroyed them. It was a costly mess that using porcelain would have completely avoided. By the way, good porcelain usually starts around $3 to $4 per square foot and can easily climb to $10 or more. That extra cash buys you peace of mind, especially for floors and outdoor spaces.
What the Heck is a PEI Rating?
When you’re looking at floor tile, you might see a “PEI rating” on the box. Pay attention to this! It’s a scale that tells you how well the glaze stands up to foot traffic. Putting a low-rated tile in a high-traffic area is a recipe for disaster.
- PEI 1-2: Think walls or bathroom floors where you’re only wearing slippers. The glaze is soft.
- PEI 3: This is your go-to for any residential floor—kitchens, hallways, you name it.
- PEI 4: Tough enough for homes and light commercial use, like a small office.
- PEI 5: The heavyweight champion. This is for grocery stores, airports, and other high-traffic commercial spaces.
Glazed vs. Through-Body Porcelain
Heads up! Even within the world of porcelain, there’s another choice to make. Most porcelain has a glaze on top, meaning the color is just a surface layer. If you chip it, you’ll see a different color underneath. For most homes, this is totally fine.
But for a demanding spot, like a restaurant kitchen or a busy entryway, I always recommend through-body porcelain. The color pigment is mixed all the way through the tile itself. If it gets a deep chip, the color underneath is the same, making damage way less noticeable. It’s more expensive, for sure, but it’s an investment in durability.
Doing It Right: The 90% Prep-Work Rule
You can buy the most expensive tile in the world, but a shoddy installation will ruin it. A professional job is almost all about the prep work. We spend most of our time getting the surface ready; laying the tile is the final, easy part.
Your tile is only as good as the foundation it sits on, which must be perfectly flat, stable, clean, and dry. For most tile, we can’t have a dip or hump bigger than 1/4 inch over a 10-foot span. For large tiles, that gets cut down to just 1/8 inch. Any bounce in the floor is a dealbreaker; it will crack the grout and tile over time. We often add a layer of cement backer board or an uncoupling membrane (you’ve probably seen those orange dimpled sheets at Home Depot) to create a stable, isolated surface.
The Right Tools for the Job
Using the right stuff isn’t about being fancy; it’s about getting results. The adhesive we use, called thin-set mortar, isn’t just glue—it’s a cement-based product that creates a powerful bond. For a solid recommendation, look for trusted brands like Mapei or Laticrete at tile shops or hardware stores. They make different formulas for different needs, like a non-slump mortar specifically for large, heavy tiles.
The trowel you use is also critical. The size of the notches determines how much mortar goes on the floor. For a big 24×24 inch floor tile, I’m using a 1/2-inch notched trowel and also “back-buttering”—spreading a thin, flat layer on the back of the tile itself. The goal is to get near-perfect mortar coverage, which prevents hollow spots and future cracks.
Setting, Grouting, and a Lesson Learned
I never, ever start setting tile from a corner. I find the center of the room and snap chalk lines to create a balanced layout. The last thing you want is to end up with tiny, awkward slivers of tile along a prominent wall.
When it’s time to grout, the choice is usually between sanded (for joints 1/8″ or wider) and unsanded (for smaller joints or scratchable tile). Here’s a story for you: I’ll never forget one of my first big solo jobs. It was a hot, dry day, and I mixed my grout with a little too much water to try and keep it workable. Big mistake. The excess water weakened the grout and pulled some of the pigment out as it dried, leaving me with blotchy, inconsistent color. It was a painful lesson in following the directions on the bag to the letter. A little extra water can ruin the whole batch.
A Quick Reality Check: Safety, Time, and Money
Let’s get serious for a second. Tiling has some real hazards. The number one danger is silica dust. Cutting tile and cement board creates a fine dust that’s incredibly harmful to your lungs over time. We always use a wet saw to eliminate dust, wear N95 respirators, and use HEPA-filtered vacuums. There’s no excuse for working in a cloud of dust.
When it comes to cost, remember that labor is often the biggest part of the bill. Hiring a good, experienced pro can range anywhere from $10 to $25+ per square foot for installation, depending on where you live and how complex the job is. That’s why a custom shower is a major investment. A cheap tile job is almost always the most expensive one in the long run because it will eventually fail and have to be torn out and redone.
When to DIY and When to Call a Pro
I love seeing people get into DIY! A simple kitchen backsplash is a fantastic first project to learn the ropes. If you’re going to try it, here’s a basic shopping list to get you started:
- Your tile (buy at least 10% extra for cuts and mistakes!)
- A small bag of thin-set mortar
- A small notched trowel
- Unsanded grout (for typical backsplash gaps)
- A rubber grout float
- A good sponge and two buckets (one for rinsing, one for clean water)
However, there are a few jobs I’d strongly advise leaving to the pros. Full shower construction is at the top of the list; the waterproofing is too critical. Any project involving a bouncy or sloped subfloor also needs an expert. And if you’re working with expensive large-format tiles or natural stone, the cost of a single mistake can be more than the labor to have it done right.
If you do hire someone, ask if they are a Certified Tile Installer. It’s a hands-on certification program that proves they know the industry’s best practices. You can usually find a list of local certified pros by searching online for the “Ceramic Tile Education Foundation” website. It’s a great way to filter out the hacks and find a true craftsperson.
At the end of the day, tile is so much more than a floor covering. It’s a craft that blends art and science. When you respect the material and the process, you can create something beautiful and tough enough to truly stand the test of time.
Inspirational Gallery
Porcelain Tile: Fired at a higher temperature and made from a denser clay, it’s a beast. It absorbs less than 0.5% water, making it frost-proof and ideal for bathrooms, kitchens, and even outdoor patios.
Ceramic Tile: Softer and more porous, it’s easier to cut and generally more budget-friendly. It’s a great choice for walls or low-traffic areas but can be prone to chipping in the wrong spot.
For a floor that has to endure kids, pets, or heavy foot traffic, porcelain is almost always the smarter long-term investment.
A tile’s PEI rating indicates its hardness and durability, ranging from 1 (no foot traffic) to 5 (heavy commercial use).
Don’t just fall for a pretty face. Before you commit to a floor tile, check its PEI rating. A gorgeous PEI 2 tile might be perfect for a guest bathroom wall, but it will scratch and wear terribly in a busy entryway. For most residential floors, look for a PEI rating of 3 or 4 to ensure it holds up to daily life.
The Grout Game-Changer: The color of your grout does more than just fill gaps; it defines the entire look. A contrasting grout (like dark grey with white subway tile) creates a bold, graphic pattern, highlighting the shape of each tile. A matching grout color creates a seamless, monolithic surface, making the space feel larger and more serene. Don’t treat it as an afterthought!
Ever wondered if you can put a rug over a heated tile floor?
Yes, you can, but choose wisely. A thick, rubber-backed rug will act as an insulator, trapping heat and potentially damaging both the flooring system and the rug itself over time. Opt for thinner, breathable rugs made from natural fibers like wool or cotton. Many manufacturers of underfloor heating systems, like Schluter-DITRA-HEAT, provide guidelines on the maximum thermal resistance (Tog value) for floor coverings.
- Reduces the stress of mis-cuts or breakages during installation.
- Ensures you have replacements for future repairs that match the original batch.
- Accounts for complex layouts like herringbone or diagonal patterns that require more cuts.
The golden rule? Always buy 10-15% more tile than your square footage measurement requires. This is the non-negotiable
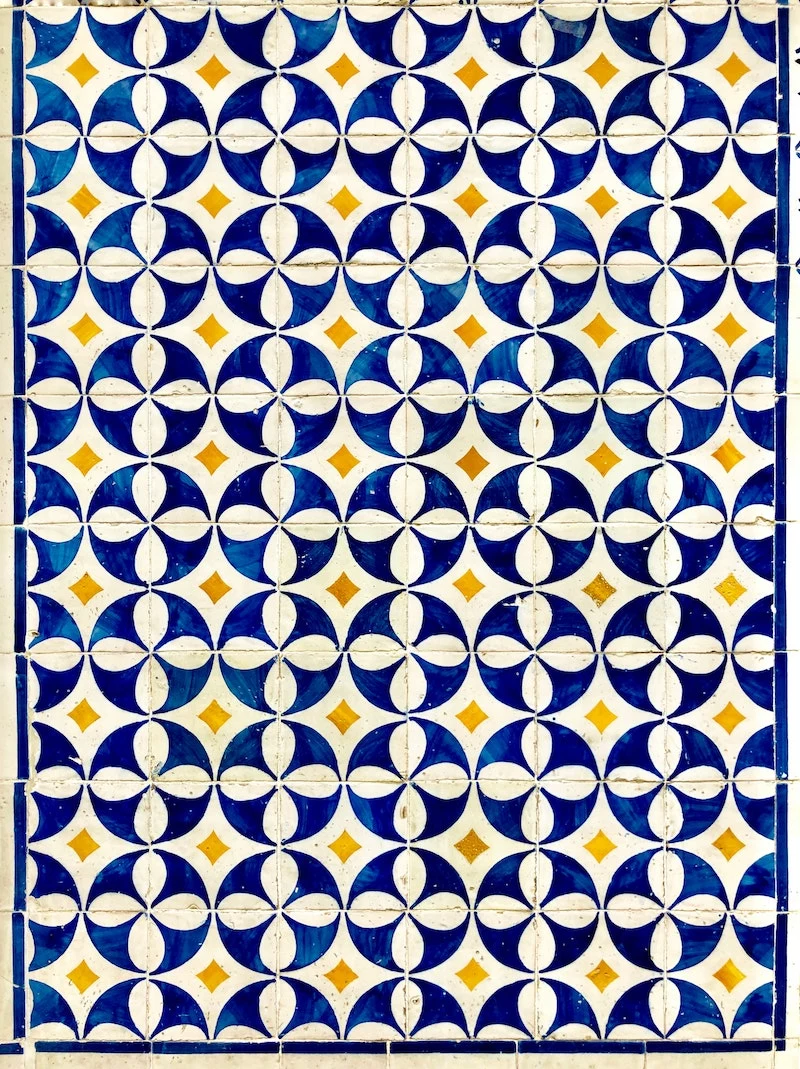
There’s a reason Zellige tiles are having such a moment. Handcrafted in Morocco for centuries, each tile is unique, with subtle variations in color, texture, and glaze. This
Choosing a tile’s finish is about balancing aesthetics with daily life. Which is right for your space?
- Glossy Finish: Bounces light around, making spaces feel brighter and larger. It’s incredibly easy to wipe clean, making it a star for kitchen backsplashes. The downside? It shows water spots and can be very slippery when wet.
- Matte Finish: Offers a more modern, organic feel. It’s much better at hiding dirt and provides more traction underfoot, making it a safer choice for bathroom floors.
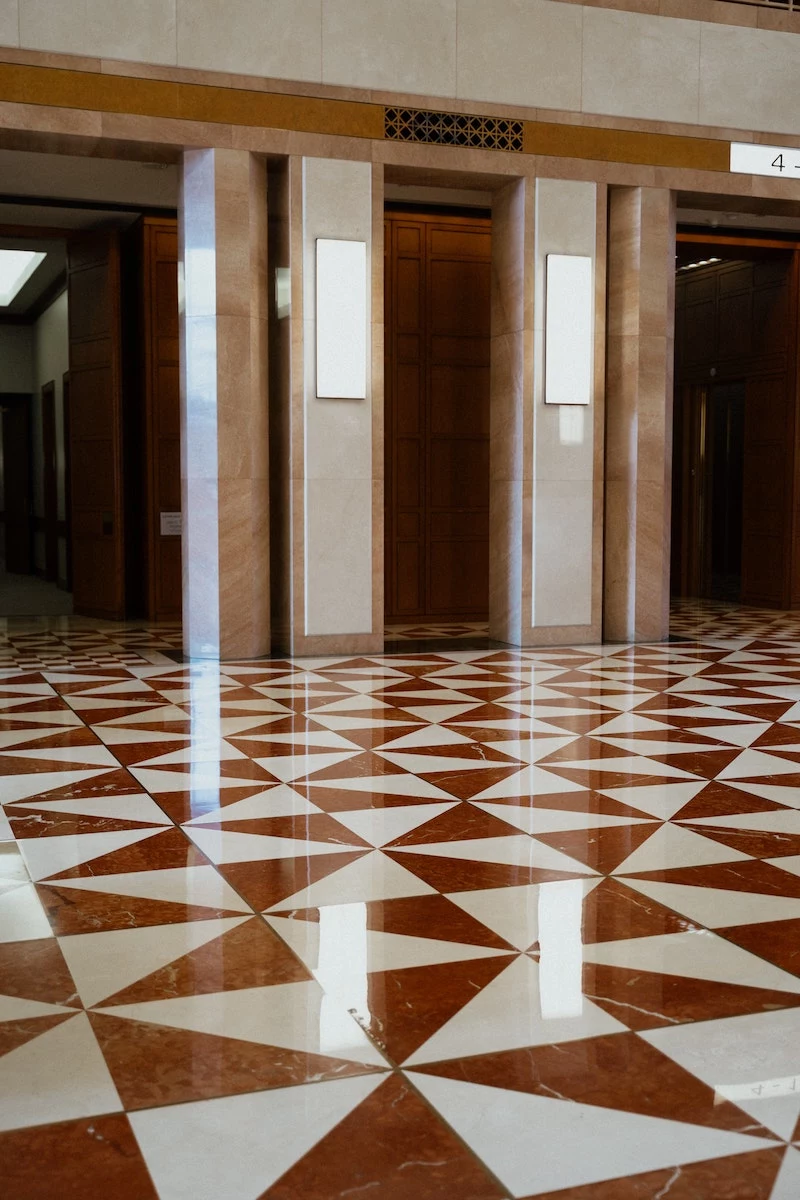
Did you know that large-format tiles (anything over 15 inches on one side) can actually make a small room feel bigger?
It sounds counterintuitive, but fewer grout lines create a less
The most beautiful, expensive tile in the world will fail if it’s stuck to the wall with the wrong adhesive. A common DIY mistake is using pre-mixed


