Your Sanity-Saving Guide to Finding and Eliminating Bed Bugs for Good
I’ve been working in pest management for a long, long time. But my most important lesson about bed bugs didn’t come from a textbook. It happened in a small, tidy apartment. The woman who lived there was convinced she was going crazy. She felt bites, but her doctor found nothing. Her family thought she was imagining it. After an hour of searching her spotless home, I was about to give up, too. But something told me to check one last place: the back of an ornate, carved wooden headboard. Tucked deep inside the carvings, I found them. Dozens.
In this article
The look of pure relief on her face when I showed her the proof… well, it stuck with me. It taught me this job isn’t just about pests; it’s about giving people back their peace of mind.
And let’s be clear: bed bugs are a unique kind of challenge. They are not a sign that your home is dirty. They’re just incredibly successful hitchhikers that happen to feed on us. Their comeback in recent decades is a huge deal because the old-school chemicals are gone, and these new bugs are resistant to a lot of what’s on the market now. That means we have to be smarter and more thorough than ever. This guide is basically everything I’ve learned from being in the trenches. I’m going to walk you through the exact process I use, from finding them to getting rid of them for good.

First, Understand Your Enemy
You can’t win a fight if you don’t know who you’re up against. This is the core idea behind what the pros call Integrated Pest Management (IPM). It’s not about just spraying wildly; it’s about using the pest’s own biology against it.
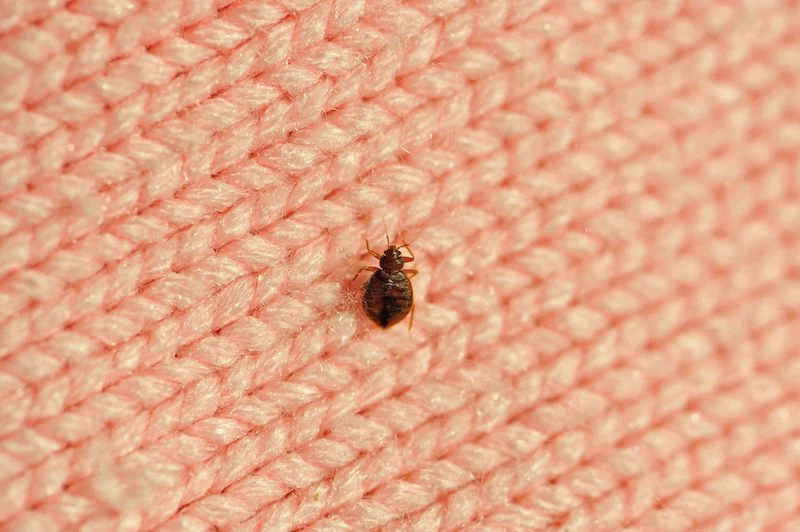
Can You Spot Them? A Quick ID Guide
Honestly, one of the most common and costly mistakes I see is misidentification. People will spend a fortune on flea bombs when they actually have bed bugs. Here’s what to look for, and you’ll need a good flashlight.
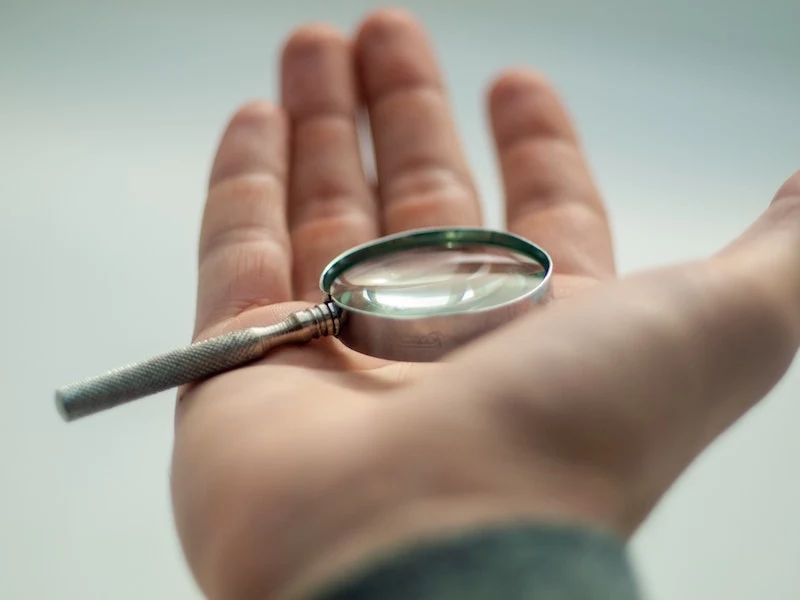
- The Eggs: Think tiny, tiny grains of rice, about the size of a pinhead. They’re pearly-white and glued onto surfaces in hidden spots. A magnifying glass can be a huge help here.
- The Nymphs (Babies): When they first hatch, they’re almost transparent and incredibly small. To grow, they have to eat. After they feed, you can actually see the red blood inside their little bodies. They’ll go through this five times before becoming adults.
- The Adults: An adult that hasn’t eaten is flat, brown, and about the size of an apple seed. But after a meal, it gets bigger, longer, and turns a deep reddish-brown. Oh, and good to know: they can’t fly or jump. They’re strictly crawlers.
Why They Act the Way They Do
Bed bugs are pretty predictable. They’re drawn to the carbon dioxide we breathe out, our body heat, and certain chemicals on our skin. It’s why they almost always hang out where we sleep or rest. They’re creatures of habit.
Their resilience is what makes them a nightmare. An adult can live for months without a meal. In a cooler room, maybe even over a year. So, just leaving your apartment empty for a few months won’t work. And they reproduce fast. A single pregnant female can lay hundreds of eggs in her lifetime, turning one little hitchhiker into a full-blown infestation in under six months.
The Telltale Signs a Pro Looks For
We rarely find a live bug right away. We look for the clues they leave behind, which tell us where they are and how bad the problem is.
- Fecal Spots: This is basically digested blood. It looks like someone took a black marker and made tiny dots, often along mattress seams. Quick tip: If you wet a Q-tip and touch one of these spots, it will smear a reddish-brown. Regular lint or dirt won’t do that.
- Shed Skins: As the nymphs grow, they leave behind their old, translucent exoskeletons. Finding a collection of these hollow, bug-shaped shells is a dead giveaway that you have an active, growing population.
- A Weird Smell: In a really heavy infestation, you’ll notice a distinct odor. To me, it’s a musty, almost sickly-sweet smell, kind of like old raspberries or coriander. Once you smell it, you’ll never forget it.

How to Inspect Like a Professional
You can’t treat what you can’t find. This is where most DIY attempts fail—people just aren’t thorough enough. You have to be systematic. We start at the bed and work our way out.
Your Basic Inspection Toolkit
You don’t need a lot of fancy gear. My kit is simple and affordable.
- A good LED flashlight. Seriously, the brighter, the better.
- An old credit card or a thin plastic putty knife. Perfect for sliding into tight crevices to see what pops out.
- A magnifying glass. Helps you be sure if that speck is an egg or just debris.
- Clear tape or a small vial. For collecting a sample if you need an expert to confirm it for you.
The Search Pattern: Start at Ground Zero
The bed is ground zero. In most cases, almost all the bugs will be on or within a few feet of it. I once cleared an entire apartment, but a few weeks later they were back. Turns out, the client’s elderly mother spent most of her day in a specific recliner in the corner, and I had focused too much on just the bed. It taught me to think about where people rest, not just where they sleep.
Here’s the methodical approach:
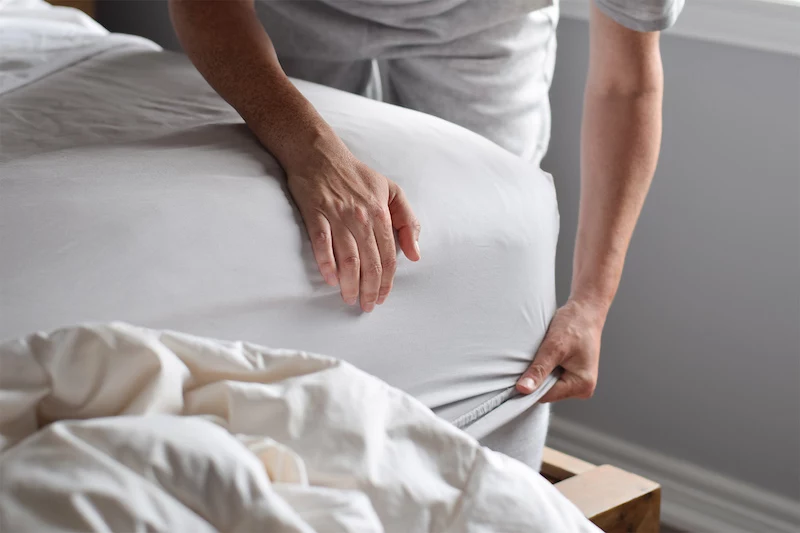
- The Mattress: Slowly lift and check every single seam, tuft, tag, and especially the piping around the edges. This is prime real estate for them.
- The Box Spring: This is the #1 hiding spot. Flip it over and, this is critical, remove the bottom fabric cover. The wooden frame inside is full of dark, protected spaces. This is often where the main nest is.
- The Bed Frame & Headboard: Check every crack, joint, and screw hole. If the headboard is mounted on the wall, take it off. That gap behind it is a five-star hotel for bed bugs.
- The 8-Foot Zone: Once the bed area is clear, expand your search. Empty nightstands and check them inside and out. Look at lamps, clocks, picture frames, and even the edge of the carpet where it meets the wall.
- Chairs and Couches: Any upholstered furniture where people lounge gets the same intense inspection as the bed. Check all the cushions, seams, and the frame underneath.
This isn’t a quick job. A proper inspection of just one room can easily take an hour. But that time is what sets you up for a successful treatment.

So, What Are Your Treatment Options?
Once you know you have them, you’re at a crossroads: DIY or call a professional. I’m going to give you the straight scoop on both, based on what I’ve seen work—and what I’ve seen fail miserably.
A Realistic Look at DIY (And a Shopping List)
Let’s be honest, DIY can work, but only if you catch the infestation super early and it’s contained to one small area, like a single piece of furniture. It takes a ton of work and a combination of methods. It is NOT a one-and-done solution.
Here’s a basic shopping list for your DIY battle kit:
- High-Quality Mattress Encasements: Its purpose is to trap any bugs on your mattress/box spring so they starve, and prevent new ones from getting in. Expect to pay between $40 and $80 for a good one. Don’t cheap out here.
- Interceptor Traps: These are little plastic dishes that go under your bed legs to catch bugs trying to climb up. They’re an amazing early-warning system. A set will run you about $15 to $25.
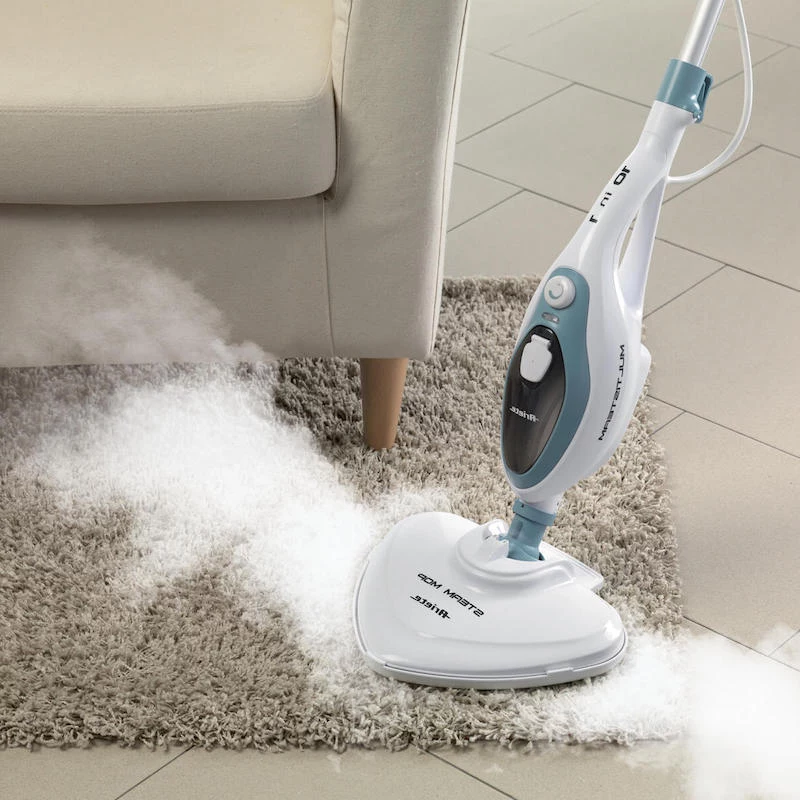
- A Dry Vapor Steamer: Heat is your best friend. A good steamer that produces high-temperature, low-pressure steam can kill bugs and eggs on contact. I’m not talking about a clothes steamer; those are too wet and can blow bugs around. A real dry vapor steamer is an investment, usually $150 or more, but it’s effective for treating furniture cracks.
- Pest-Control Grade Diatomaceous Earth (DE): This fine powder works by drying bugs out. It’s for cracks and voids, not for sprinkling all over your carpet. A bag costs around $20 at a hardware store or online.
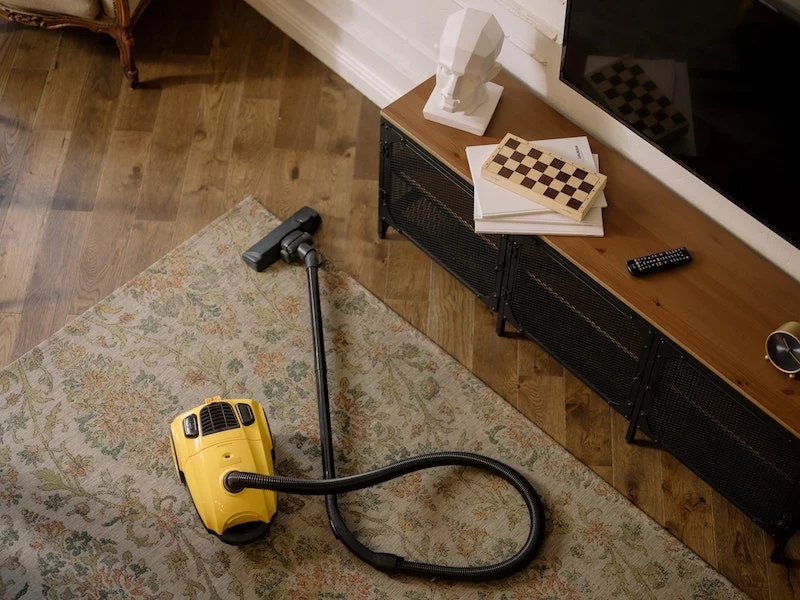
The DIY process involves relentless vacuuming (and immediately disposing of the bag/contents), laundering everything possible on high heat, and using tools like steam and encasements. It is a slow, grueling process that can take months.
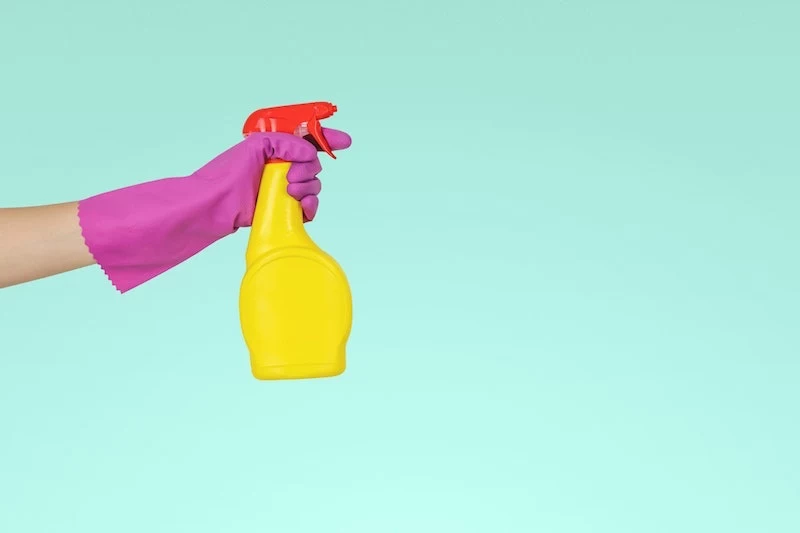
Heads up! I strongly advise against using over-the-counter “bug bombs” or foggers. They are a fire hazard, and worse, they don’t penetrate the cracks where bugs hide. The irritating vapor just makes them scatter deeper into your walls, spreading the problem and making it a hundred times harder to treat.
What to Do in the First 24 Hours
If you’re feeling panicked and need to take control, here are four things you can do right now:
- Pull your bed and other furniture about six inches away from every wall.
- Place interceptor traps under all the legs of your bed frame.
- Start washing and drying all your bedding, pillows, and any clothes on the floor on the highest heat setting possible. Bag the clean items in sealed plastic bags.
- Call a few local, reputable pest control companies to schedule an inspection. Even if you plan to try DIY, getting a pro’s opinion is invaluable.
When You Absolutely Should Call a Professional
My honest advice? If the bugs are in more than one room, or if you’ve tried DIY for a few weeks with no clear results, it’s time to call a pro. I’ve seen people waste hundreds of dollars and months of their lives on products that don’t work, all while the infestation gets worse and the anxiety skyrockets. The cost of a professional treatment is an investment in a real solution and your own sanity.
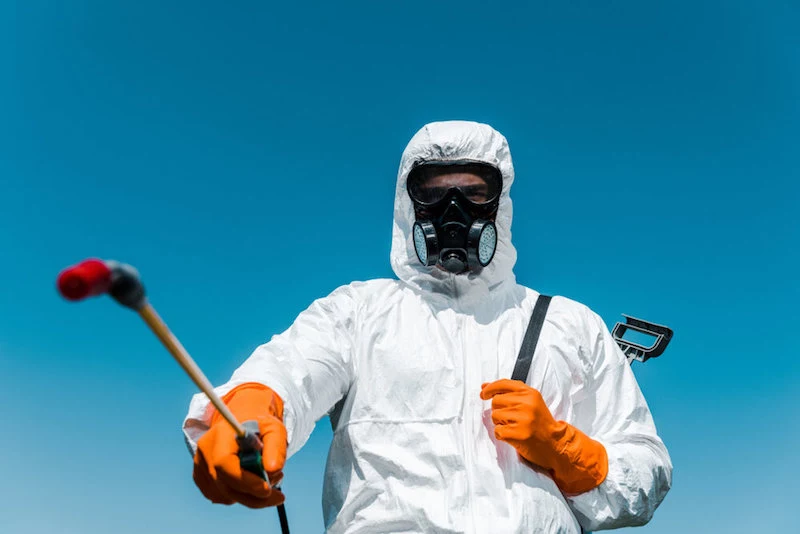
Professional Treatments: What to Expect
When you hire a pro, you’re paying for their expertise, better tools, and access to materials you can’t buy at the store. We usually compare two main approaches: targeted chemical treatments and whole-room heat treatments.
The Chemical Approach (Precise and Methodical)
A professional chemical treatment is nothing like a DIY spray-and-pray. It’s a multi-faceted process that unfolds over several weeks.
- How it works: We use a mix of different products. Some are contact killers for cracks and crevices, some are residual products that last for weeks, and some are Insect Growth Regulators (IGRs) that stop baby bugs from growing into adults. It’s a strategy designed to break their life cycle.
- Cost: For a typical apartment or small home, you can expect to pay anywhere from $500 to $1,500. This price often includes 1-2 follow-up visits.
- Timeframe: This is not a one-day fix. The full process usually takes 4 to 6 weeks to ensure all the egg cycles have been eliminated.
- Prep Work: This is a big one. You’ll need to do a lot of prep before the technician arrives. This usually includes laundering all fabrics, bagging them up, emptying closets and drawers, and pulling furniture away from the walls. They will give you a detailed checklist—follow it to the letter for the best results.

The Heat Treatment Approach (Fast and Intense)
This is the nuclear option, in a good way. It’s completely non-chemical and incredibly effective.
- How it works: We bring in massive heaters and fans to bake the entire room or home to about 135°F (around 57°C). We hold that temperature for several hours to make sure the heat penetrates everything—inside walls, deep in furniture—killing all life stages, including eggs.
- Cost: This is the more expensive option, typically ranging from $2,000 to $6,000+ depending on the size of your home. The price reflects the specialized equipment and labor involved.
- Timeframe: It’s a one-and-done deal. The whole process is usually completed in a single day.
- Prep Work: The prep is different but just as critical. You have to remove anything that can melt or be damaged by high heat: candles, vinyl records, aerosol cans, some plastics, musical instruments, and even oil paintings. Again, you’ll get a very specific list. Don’t ignore it.

Special Cases: Apartments and Travel
If you live in an apartment, you have to tell your building manager. I know it’s a tough conversation, but bed bugs easily travel between units through walls and shared plumbing. Treating just your unit is like trying to empty the ocean with a bucket. A good treatment plan requires inspecting and, if necessary, treating the units next to, above, and below yours.
By the way, if you need to have that talk, just be calm and factual. Something like, “Hi, I’ve found evidence that I believe points to bed bugs in my unit. To prevent a building-wide issue, pest control experts recommend that the adjacent units be inspected as well.”
As for travel, hotels are a major hub. Before I even bring my luggage into a hotel room, I do a quick five-minute check of the headboard and mattress seams. I always use the luggage rack and keep my suitcase off the floor and away from the bed. When I get home, all clothes go straight into the dryer on high heat for 45 minutes before they even enter my bedroom.
Life After Bed Bugs: How to Keep Them Gone
Getting rid of them is only half the job. Keeping them away is the other.
- Reduce Clutter: Clutter is a bed bug’s best friend. Keeping things tidy, especially around your bed, gives them fewer places to hide.
- Use Interceptor Traps: Keep those traps under your bed legs long-term. Checking them weekly is the best early-detection system you can have.
- Seal Up Cracks: A simple tube of caulk can be a powerful tool. Seal cracks along baseboards and around pipe penetrations to eliminate hiding spots.
- Be Wary of Used Stuff: Be incredibly careful with second-hand furniture. I would personally never bring a used mattress or couch into my home. It’s just not worth the risk.
Look, dealing with bed bugs is one of the most stressful things a person can go through. It messes with your sleep and your sanity. But remember, this is a solvable problem. Don’t panic and douse your home in chemicals. If you feel overwhelmed, the smartest and safest thing you can do is call a licensed professional. They can give you a real solution and, most importantly, give you your home back.

Inspirational Gallery
A single pregnant female bed bug can cause an infestation of over 5,000 bed bugs in just six months under ideal conditions.
This isn’t just a scary statistic; it’s a call for speed and diligence. Spotting one bug and deciding to “wait and see” is often the costliest mistake. The moment you have a confirmed sighting, the clock is ticking. A swift, comprehensive response is the only way to prevent a minor issue from escalating into a full-blown, difficult-to-treat infestation that takes over your home and your life.

I’m about to travel. How can I avoid bringing these unwelcome souvenirs home with me?
Prevention is your best defense. Before settling into your hotel room, do a quick inspection. Pull back the sheets and check the mattress seams, especially at the head of the bed. Look behind the headboard and in the drawers of the bedside table with your phone’s flashlight. Always use the luggage rack and keep your suitcase zipped shut. Upon returning home, unpack in your garage or on a hard floor—never on your bed. Immediately wash all your clothes (even the unworn ones) in hot water and dry on the highest heat setting for at least 30 minutes.

Heat vs. Steam: Which is the better weapon?
Professional Heat Treatment: This involves heating the entire room or home to about 135°F (57°C) for several hours. It’s incredibly effective, killing bugs and eggs everywhere, even inside walls and electronics. However, it’s a job strictly for professionals with specialized equipment and can be costly.
Targeted Steaming: A high-quality dry vapor steamer (like a Vapamore or Dupray model) is a powerful DIY-friendly tool. It delivers lethal temperatures directly into mattress tufts, furniture joints, and baseboards. It’s excellent for treating specific items but won’t penetrate as deeply as a whole-room heat treatment. Steam is a crucial part of an integrated approach, but rarely a standalone solution for a widespread problem.
- They don’t transmit diseases.
- They are not a sign of a dirty home.
- They can be eliminated completely with the right strategy.
The secret to maintaining your sanity?
Focus on these facts. The psychological toll of a bed bug infestation is often worse than the physical bites. It’s easy to fall into a spiral of anxiety and shame. Remind yourself that this is a solvable problem, not a personal failing. It’s a battle against a very successful pest, and with patience and thoroughness, it’s a battle you can win.


