How to Actually Grow an Avocado Tree at Home (From Pit to Plant)
I’ve spent more time with my hands in the dirt than I can count, from running big commercial greenhouses to just helping folks in community gardens. And you know what question comes up more than any other? How to grow an avocado tree from a grocery store pit. It’s an awesome project, and it’s a great way to feel connected to your food while getting a gorgeous, leafy plant for your home.
In this article
But a lot of the quick guides online miss the details—the little things that make the difference between a sprouted pit that withers away and a happy little tree that thrives for years.
So let’s get one thing straight right away: the tree you grow from a pit is almost certainly not going to give you avocados. The fruit you buy at the store comes from special grafted trees, which is a whole other level of gardening. This project is purely for the joy of it. It’s for the satisfaction of watching life spring from a seed. If you’re cool with that, you’re ready to go.
Oh, and a quick but super important heads-up for pet owners: Avocado leaves, pits, and stems are mildly toxic to cats and dogs. It’s a good idea to keep your new plant project in a spot where your furry friends can’t get to it.
In a Hurry? The 60-Second Guide
No time to read all the details? Here’s the lightning-fast version:
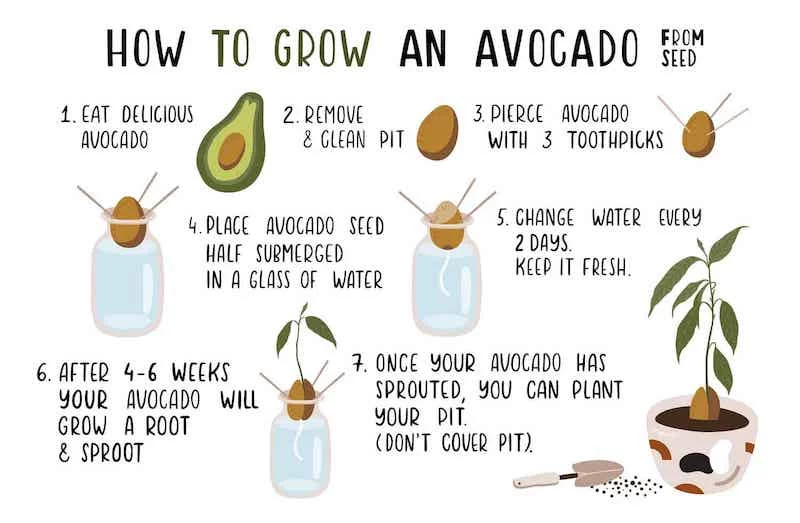
- Clean your avocado pit and suspend the bottom half in a glass of water with toothpicks.
- Place it in a warm, bright spot and change the water every 2-3 days.
- Wait 2-8 weeks for a root to sprout from the bottom and a stem from the top.
- Once the root is 3 inches long and a stem has leaves, plant it in a 6-inch pot with drainage, using cactus/succulent soil. Leave the top half of the pit exposed.
- Water when the top two inches of soil are dry, and give it lots of indirect sunlight. Done!
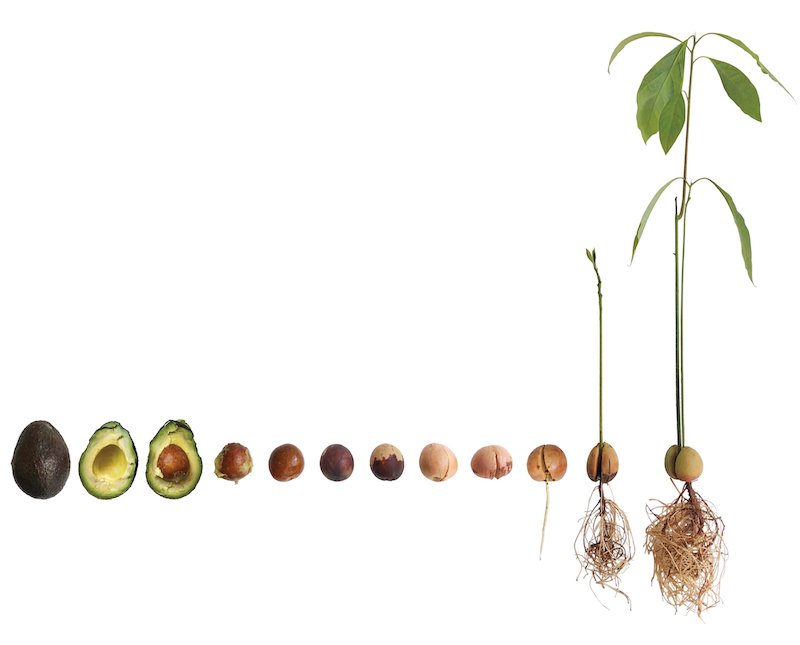
First Things First: Picking and Prepping Your Pit
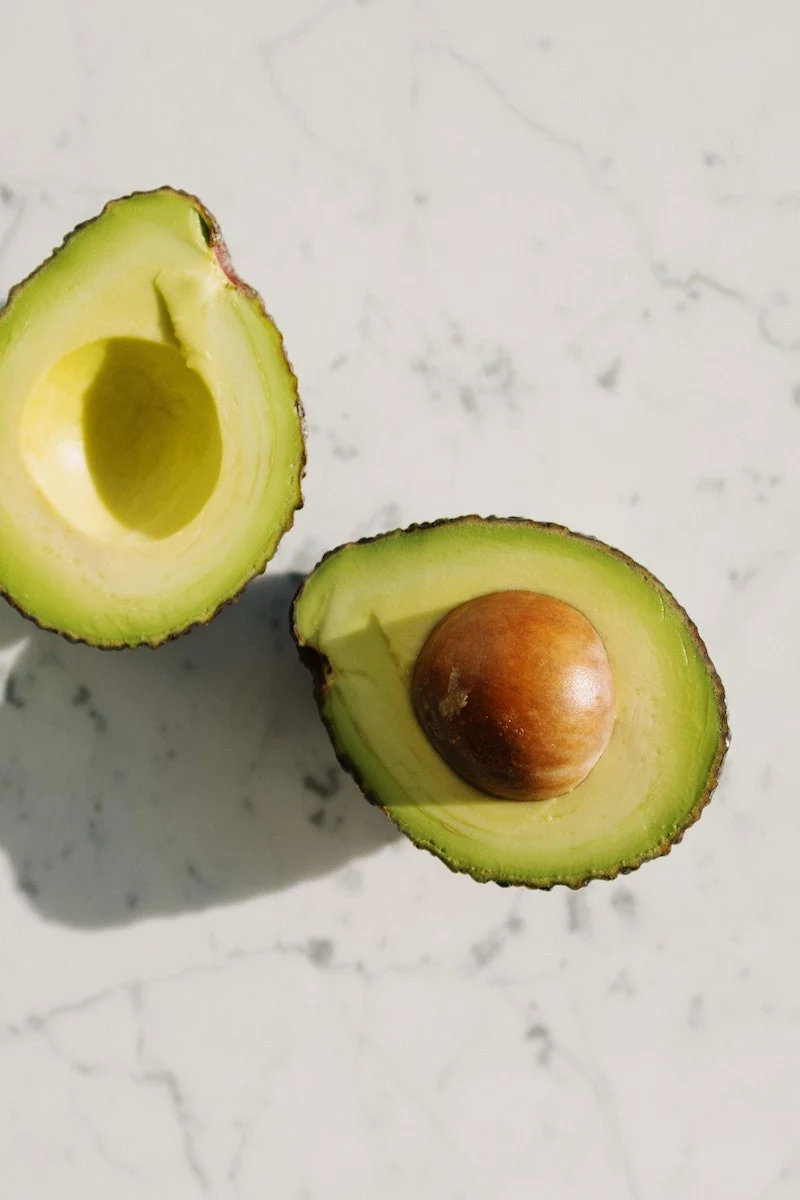
Your journey starts the moment you cut open that avocado. Try your best to slice around the pit, not into it. A big gash can damage the little embryo inside or just invite rot later on. Once you’ve got the pit, give it a good, gentle cleaning under some lukewarm water. Use your fingers or a soft brush to get all the green fruit bits off—any flesh left behind is a magnet for mold.
Don’t use soap, just water. Pat it dry.
Now you have a choice: to peel or not to peel that thin, papery brown skin. Some people swear by peeling it to speed things up. And yeah, it can help water get in faster. But honestly, for a beginner, I’d leave it on. That skin is the pit’s natural armor against fungus and bacteria. It’s a nice little safety net, especially if you forget to change the water once or twice.
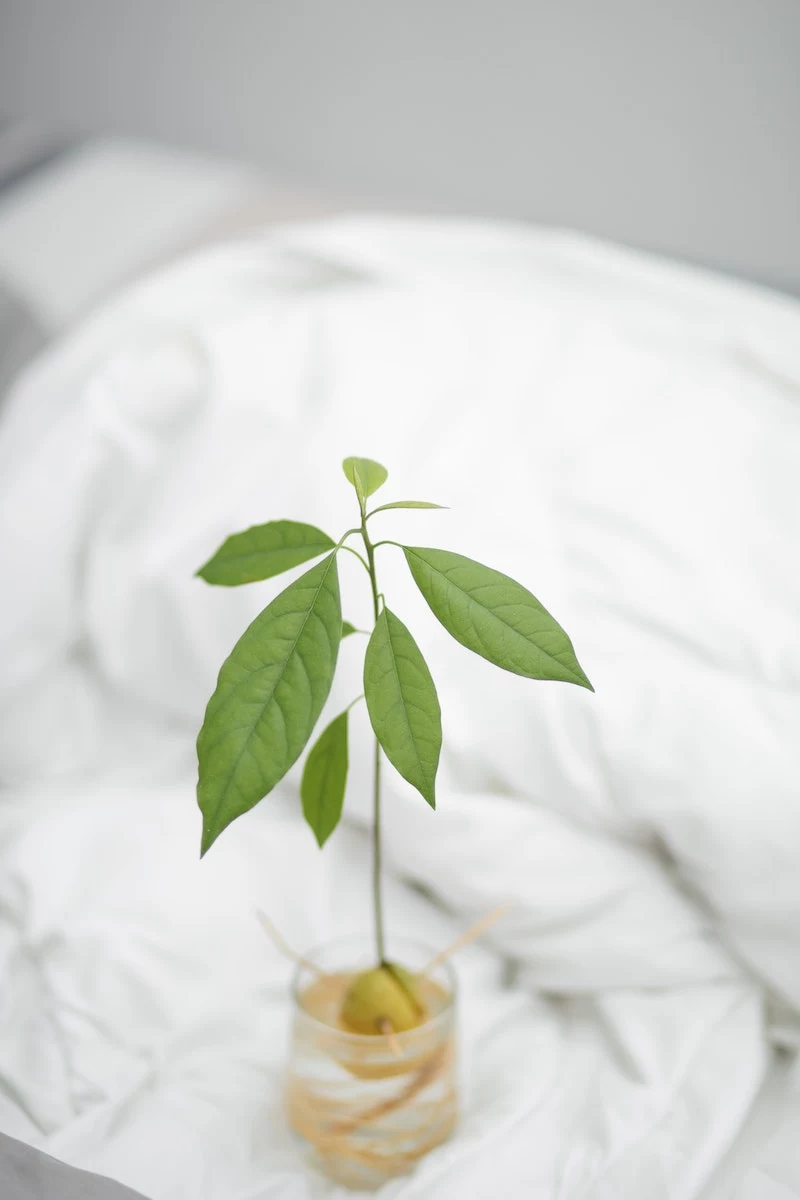
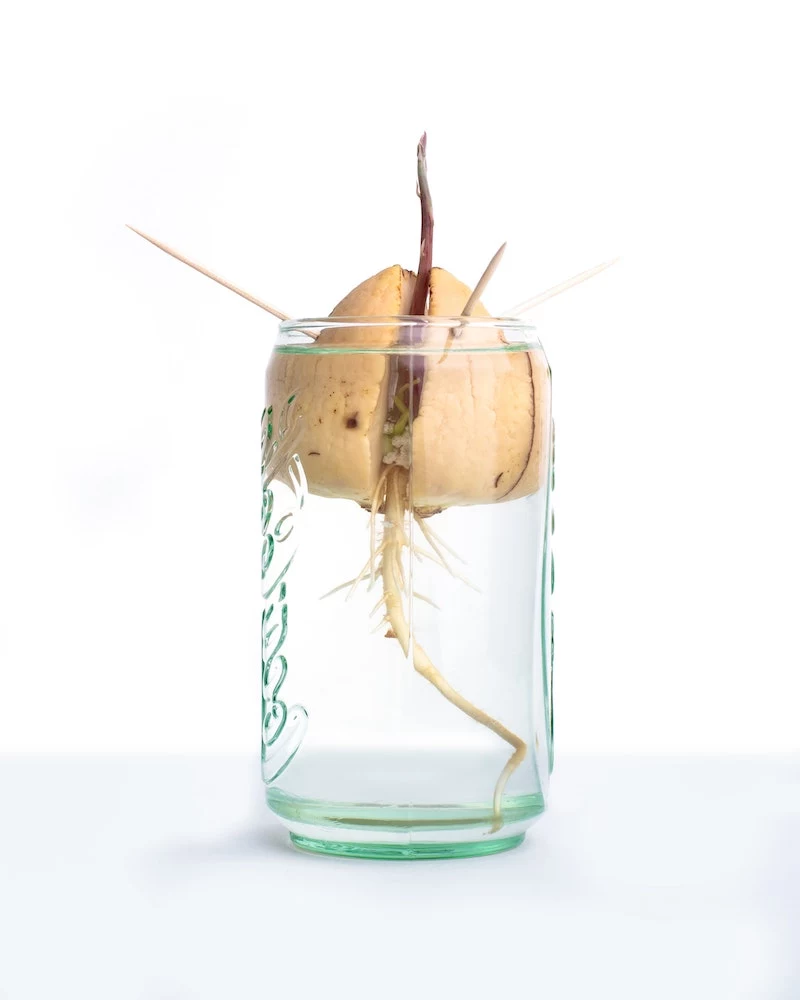
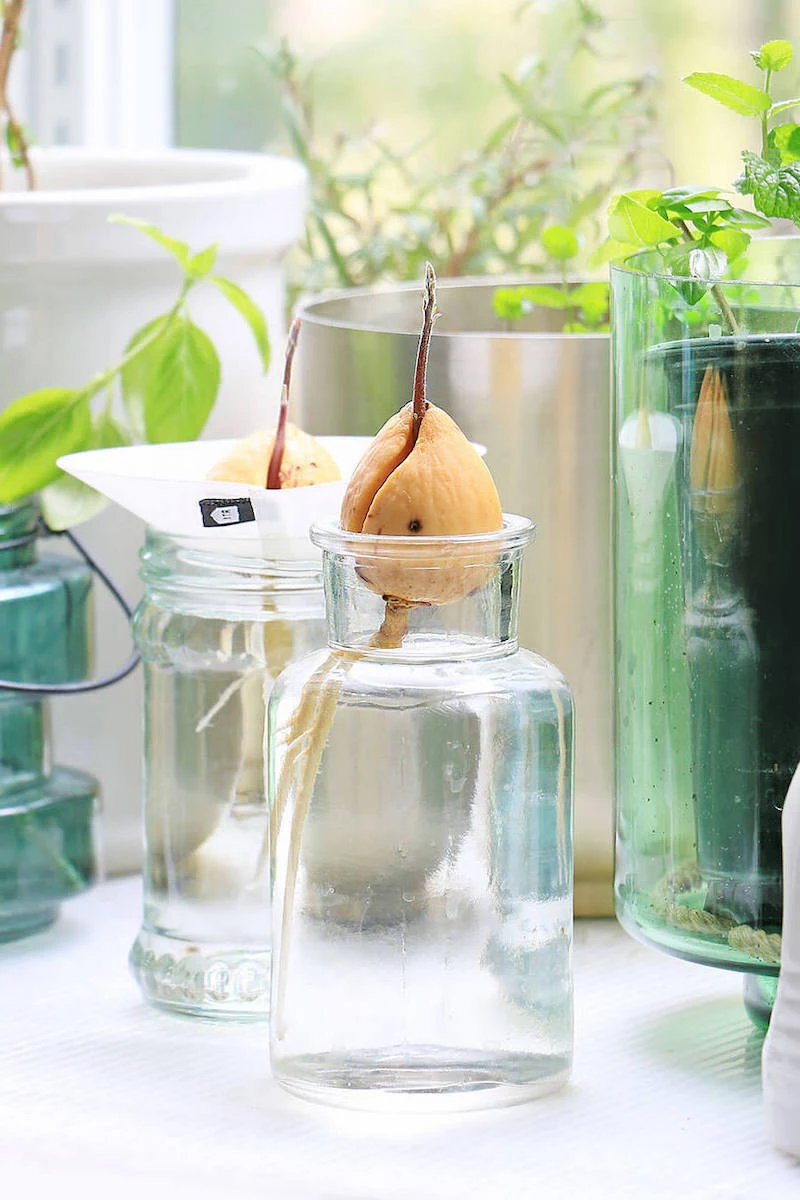
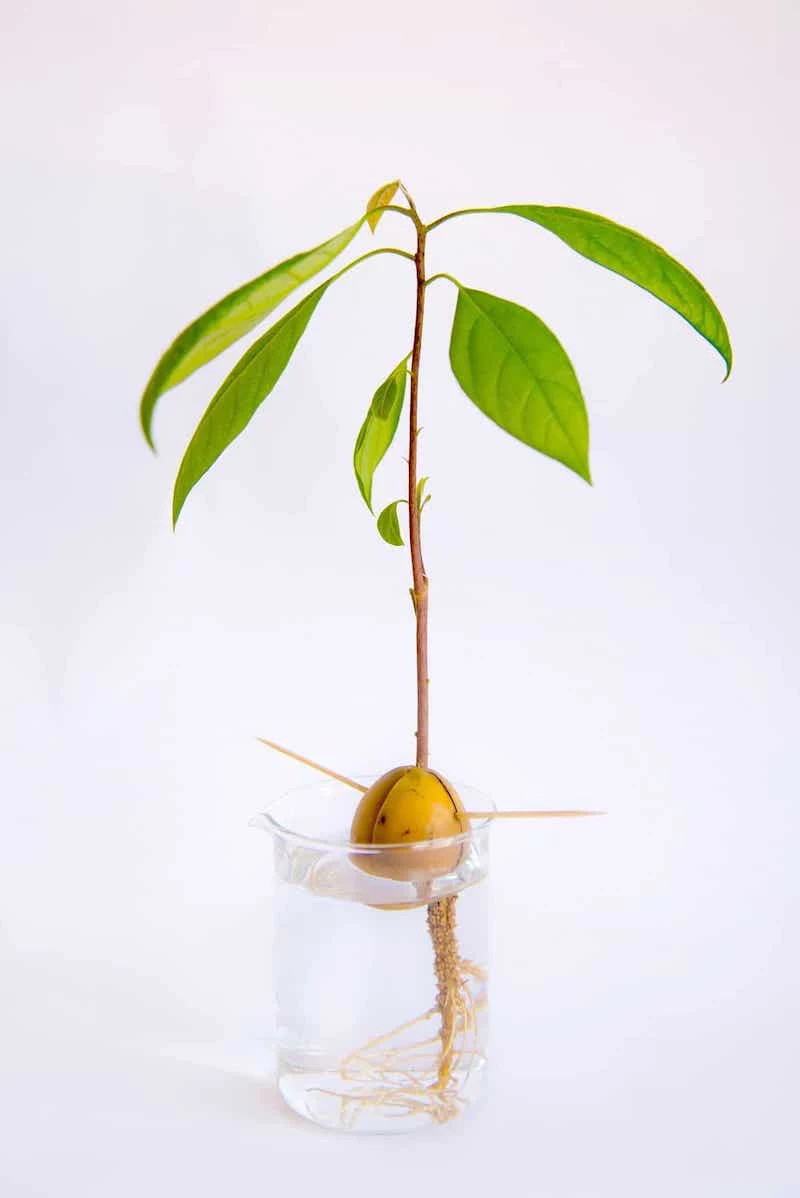
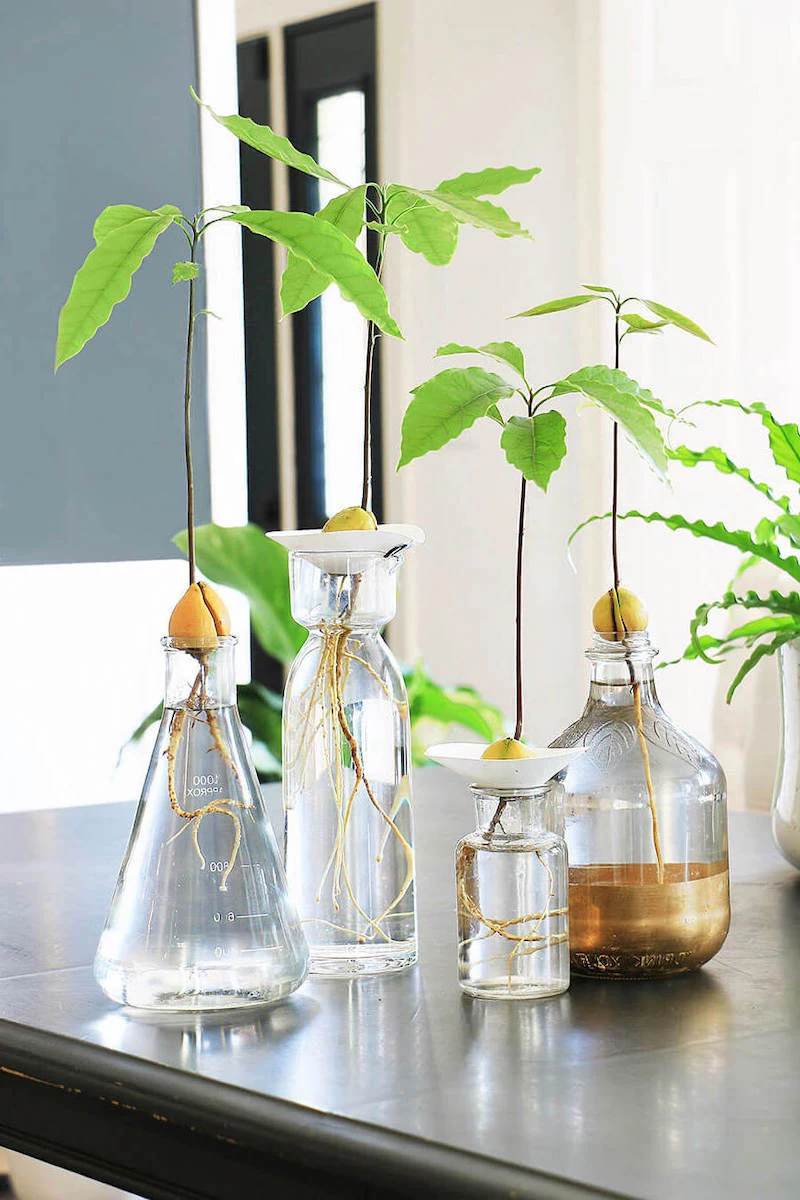
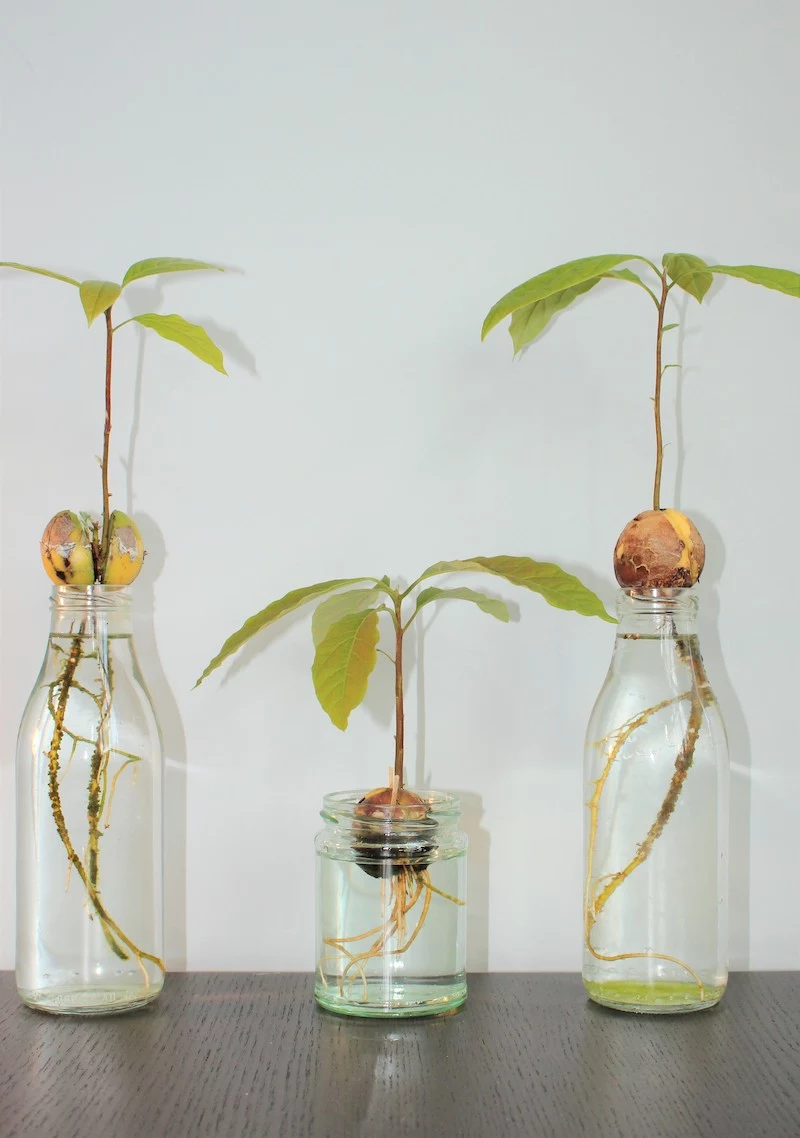
Method 1: The Classic Water Glass Method
This is the one everyone’s seen online, and it’s popular for a reason—you get to watch the whole miracle unfold. It’s especially great if you’re doing this with kids.
You’ll need a clean glass jar, three or four toothpicks, and your pit. For water, filtered or even bottled is best. Tap water often has chlorine that can slow things down. A simple trick? Just let a jar of tap water sit out overnight; most of the chlorine will evaporate.
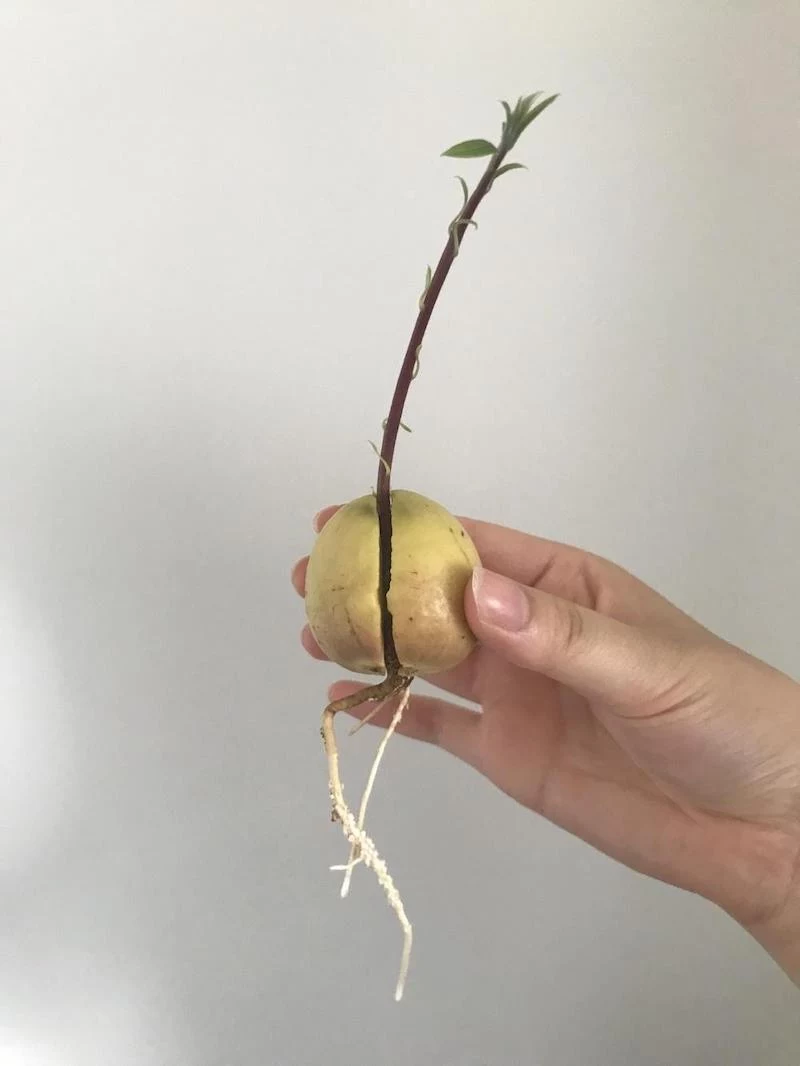
First, figure out which end is up. The pit has a slightly pointed top (where the stem will grow) and a flatter, wider bottom (where the root comes out). You want the bottom end in the water.
Carefully poke three toothpicks into the sides of the pit, angled slightly up. They only need to go in about a quarter of an inch—just enough to be sturdy. This little cradle will let you suspend the pit on the rim of your glass. Fill the glass with water until the bottom third of the pit is submerged. The top half needs to stay dry to prevent rot.
Find a warm spot with bright, indirect light, like an east-facing windowsill, and you’re set.
Here’s the part people mess up: You have to change the water every couple of days. This isn’t just to keep it fresh; it prevents mold and bacteria from taking over. You might see a slimy film on the pit or the root—that’s normal biofilm. Just give it a gentle rinse under the tap. A healthy root should be firm and creamy white. If it starts turning brown and mushy, that’s root rot, and it’s bad news.
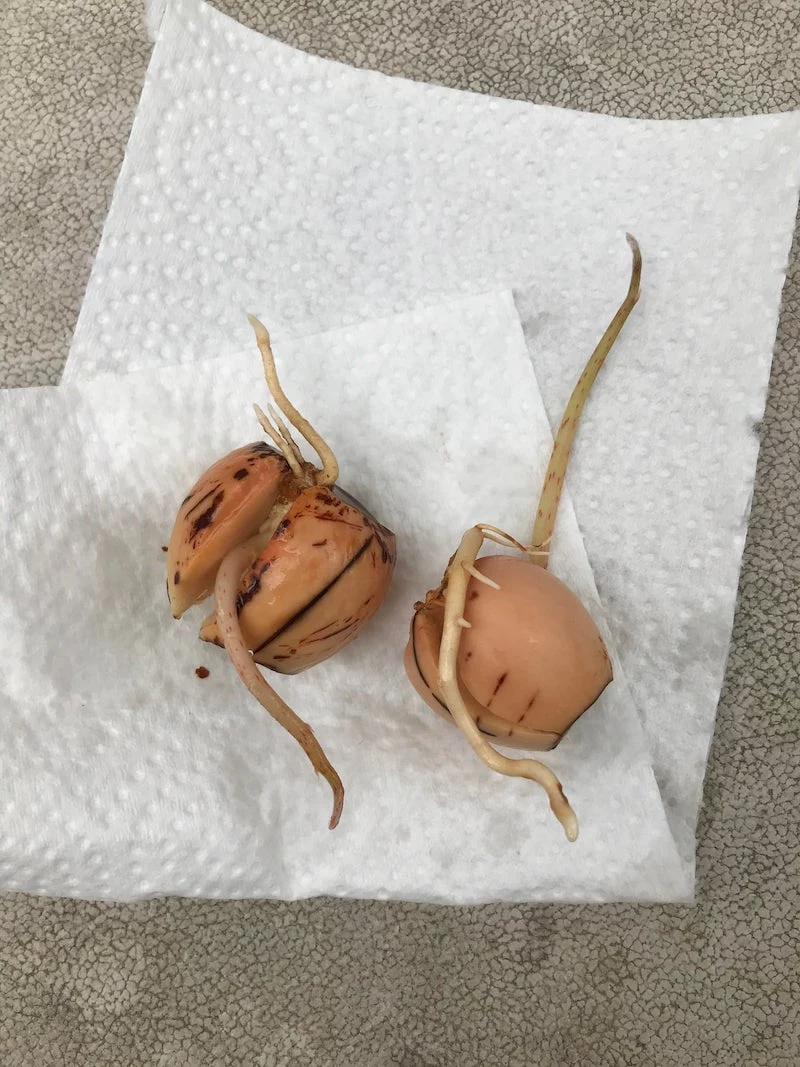
Now, be patient. It can take anywhere from two to eight weeks to see a crack, then a root. Don’t let that root dry out, ever. That can kill the project instantly.
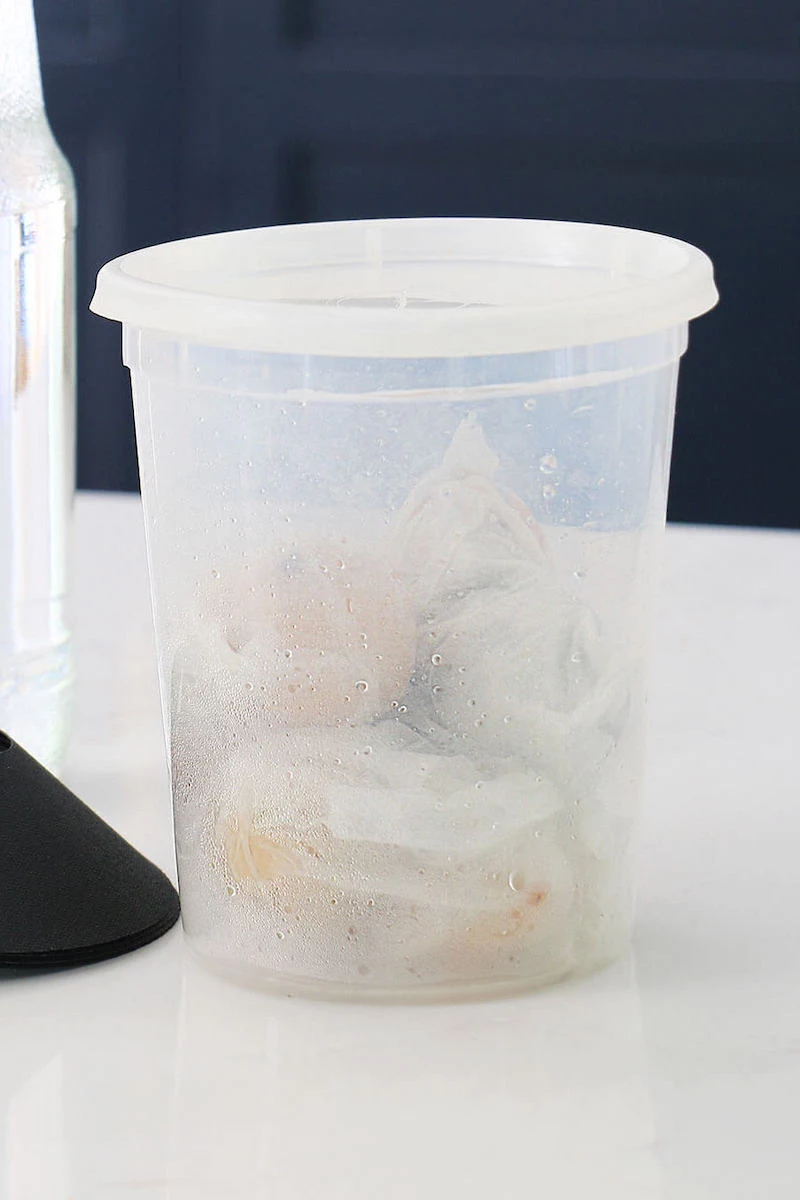
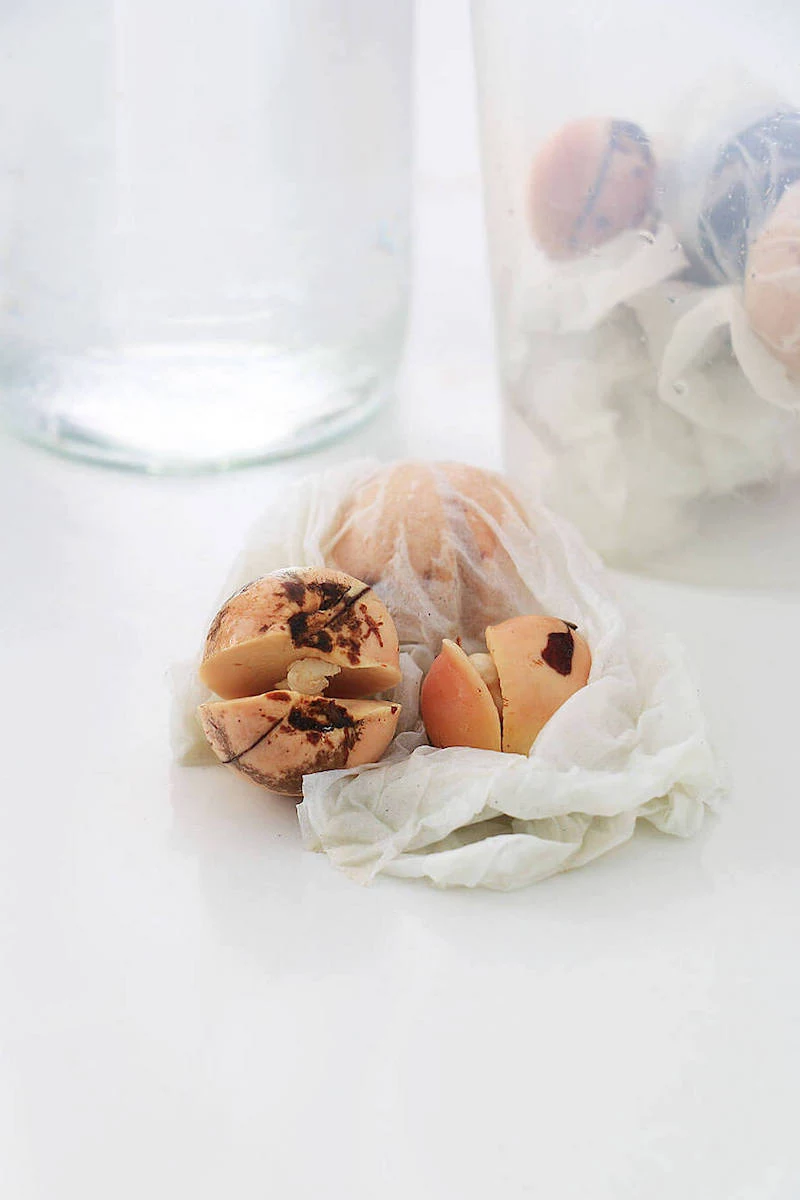
Method 2: The Faster Moist Towel Method
This method is less scenic, but in my experience, it’s a bit faster and more reliable. It’s closer to how the pros start seeds in a nursery.
Just dampen a paper towel—it should feel like a wrung-out sponge, not sopping wet. Wrap your pit snugly in the towel, pop it into a zip-top bag, and seal it. Store the bag somewhere warm and dark, like on top of your fridge or in a kitchen cabinet.
Check on it once a week to let in fresh air and make sure the towel is still damp. You should see a root pop out in two to six weeks. Once that root is about an inch long, you can either move it to a glass of water or plant it straight into soil.
Which Method is Right for You?
So, which way should you go? Honestly, it just depends on your personality. The water glass method is a fantastic visual journey, perfect for seeing every stage of growth. It’s a slow-burn science experiment on your windowsill. The moist towel method, on the other hand, is for people who want results a little quicker and more reliably. It’s less about the show and more about getting a viable seedling ready for soil.

Moving to Soil: The Most Important Step
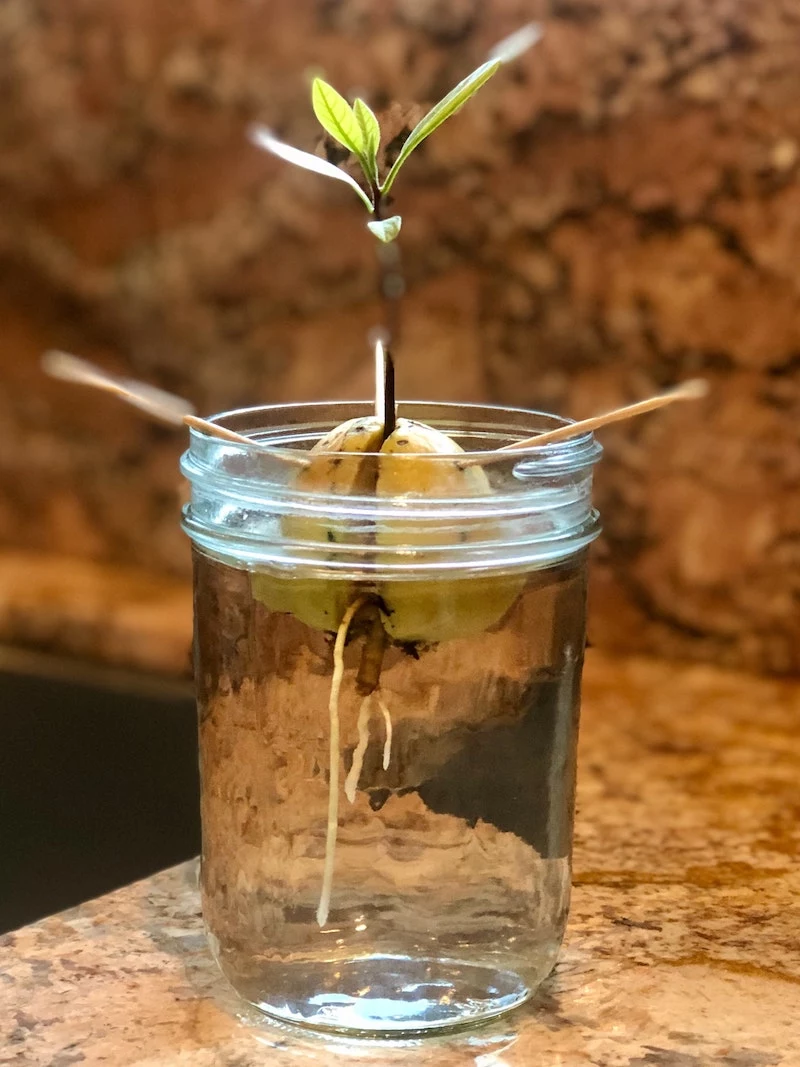
Sooner or later, your little sprout needs a real home with nutrients. I recommend waiting until the main taproot is at least three inches long and the stem has pushed out its first real set of leaves. This gives it enough strength to handle the shock of moving.
Your Shopping List & Budget
Good news—this is a very budget-friendly hobby. Your pit is free with a side of guacamole, and the rest is pretty cheap. Here’s what you’ll need:
- A Pot (with drainage!): A 6 to 8-inch terracotta pot is perfect. It’s porous, so it helps prevent the soil from getting waterlogged. You can find one for about $5-$10 at any home improvement store or garden center.
- The Right Soil: Do NOT use dirt from your backyard. It’s too dense. You need a light, airy mix. A bag of cactus and succulent soil is a great choice and costs around $8-$12.
- Something for Aeration (Optional but recommended): A small bag of perlite or pumice costs about $5. Mixing a few handfuls into your cactus soil makes it even better.
Total investment? You’re looking at around $20-$25 for a setup that will last your plant for at least a year.
How to Plant Your Seedling
I like to make my own soil mix, and it’s simple: about half potting mix, a big handful of perlite for airflow, and another good portion of cactus mix. Why the cactus mix? Because avocados absolutely HATE having ‘wet feet,’ and that sandy mix helps water drain away super fast, keeping the roots from getting rotten and gross.
Fill your pot, make a hole for the root, and gently place your seedling inside. Now, this is key: only bury the bottom half of the pit. Leave the top half sticking out of the soil. If you bury the whole thing, the base of the new stem can easily rot.
Water it well until you see it run out the bottom drainage hole, let it drain completely, and you’re done!
Keeping Your Little Tree Happy
Okay, your avocado is potted. Now what?
- Light: It needs tons of bright, indirect sunlight. A spot near a window that gets morning sun is perfect. Direct, harsh afternoon sun can scorch the leaves and leave brown, crispy spots. If your place is dark, a simple LED grow light bulb in a regular lamp can be a lifesaver.
- Water: This is the #1 killer of indoor avocados. Don’t water on a schedule. Stick your finger two inches into the soil. If it feels dry, it’s time to water. If it’s even a little damp, wait.
- Humidity: Your house is probably drier than a tropical forest. Brown, crispy leaf tips are a dead giveaway. You can mist the leaves, group it with other plants, or place it on a tray of pebbles with water to boost the humidity around it.
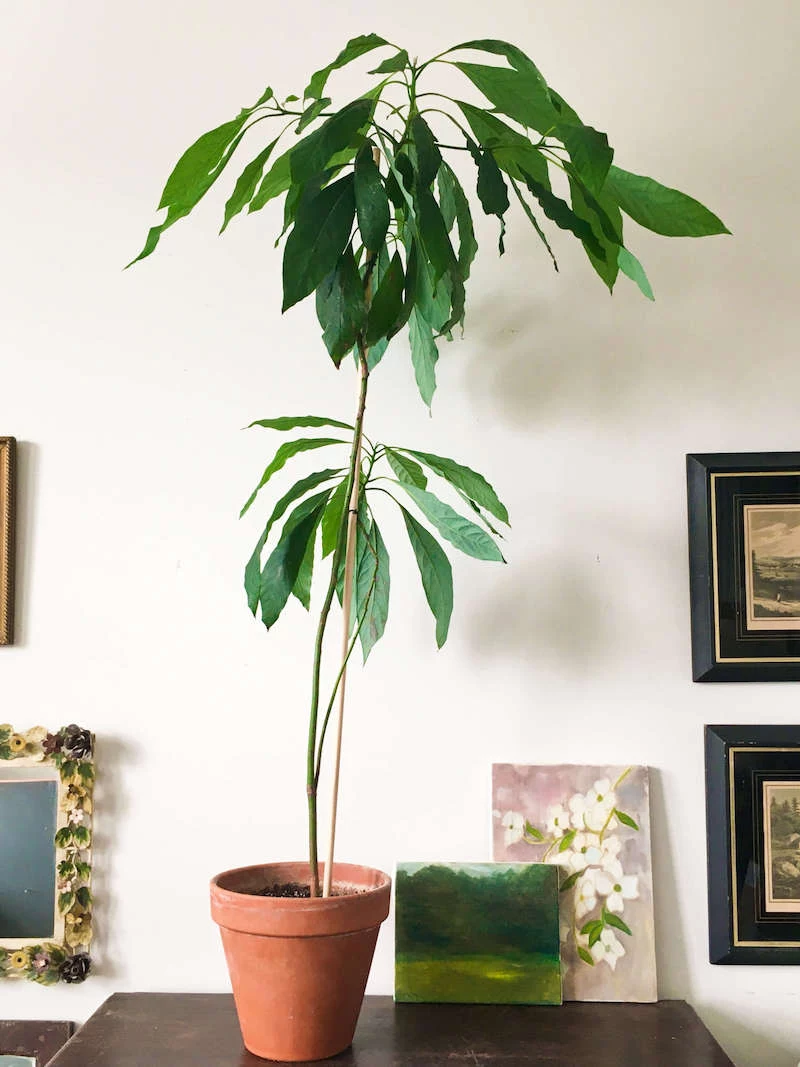
- Pruning for a Fuller Plant: It feels scary, I know! But if you don’t prune, you’ll end up with a tall, sad-looking stick. Once your plant is about a foot tall, use clean scissors to snip it back to about six inches. Trust me. This forces it to sprout new branches from the side, making it look full and lush like a real tree.
- Food: Once it has a few sets of leaves, you can start feeding it. Use a standard liquid houseplant fertilizer, but dilute it to half-strength. Feed it about once a month during spring and summer, then take a break in the fall and winter.
What to Do When Things Go Wrong
Even the best of us run into trouble. Here are a few common issues:
- My pit isn’t sprouting! If it’s been over 8 weeks (or 12 for a stubborn one) and you see no cracks, no roots, and no mold… it’s probably a dud. It happens! Time to make more guacamole and try again.
- Yellowing, dropping leaves? You’re almost definitely overwatering. Let that soil dry out completely before you water again.
- Tiny webs under the leaves? Ugh, spider mites. The easiest way to deal with them is to spray the plant down with a mix of water and a few drops of dish soap. For tougher cases, neem oil is a great organic solution you can find at any garden store.
Growing an avocado plant this way is a long game. It teaches you patience and how to listen to what a plant needs. You’re growing it for the beautiful green foliage and the simple, deep satisfaction of nurturing something from a humble pit into a living part of your home. Enjoy the process!
Inspirational Gallery
Choosing the right container is about more than just size. While a simple 6-inch pot works, consider the aesthetic. A raw, unglazed terracotta pot breathes well and offers a rustic contrast to the glossy green leaves. For a more modern look, a sleek, white ceramic planter from a brand like Crate & Barrel or West Elm can elevate your little tree into a true decorative object. Just ensure whatever you choose has a drainage hole—style should never sacrifice plant health.
- They love the morning sun but can get scorched by intense afternoon rays. An east-facing window is often the sweet spot.
- They get thirsty, but their roots hate sitting in water, which leads to root rot.
- Yellowing leaves can signal overwatering, while brown, crispy tips often mean the air is too dry.
The soil dilemma: Your young avocado tree needs excellent drainage above all else. A standard potting mix holds too much moisture on its own.
The quick fix: A pre-made cactus and succulent mix, like the one from Miracle-Gro or Espoma, is perfect. It contains sand or perlite that allows water to flow through freely, preventing the dreaded root rot that can quickly kill your plant.
This is the simplest way to give your pit the best start once it moves from water to soil.
The word “avocado” is a Spanish adaptation of the Nahuatl word “āhuacatl.”
When you nurture your little pit, you’re connecting with a plant that has been cultivated in Central and South America for thousands of years. Your windowsill project is part of a long and rich history!
Why is my avocado stem so long and skinny with only a few leaves at the top?
This ‘leggy’ growth is a classic sign your plant is stretching desperately for more light. While you can’t always provide professional greenhouse conditions, you can encourage a bushier, stronger plant. Once your seedling is about 12 inches tall, don’t be afraid to snip the top set of leaves off. This ‘pinching’ forces the plant to send out new branches from the side, creating a much fuller shape over time.
- A strong, thick trunk that can support more leaves.
- A lush, bushy appearance instead of a single, spindly stem.
- A healthier plant that’s less likely to bend or break.
The secret? A brave cut. Pruning your young avocado tree back by about half its height when it reaches a foot tall signals it to branch out. It feels scary, but it’s the key to a beautiful form.
Studies show that interacting with indoor plants can reduce psychological and physiological stress.
Beyond the simple satisfaction of seeing it grow, the daily ritual of checking the water, watching for roots, and tending to your avocado plant can be a genuinely meditative practice. It’s a small, green moment of mindfulness in your day.
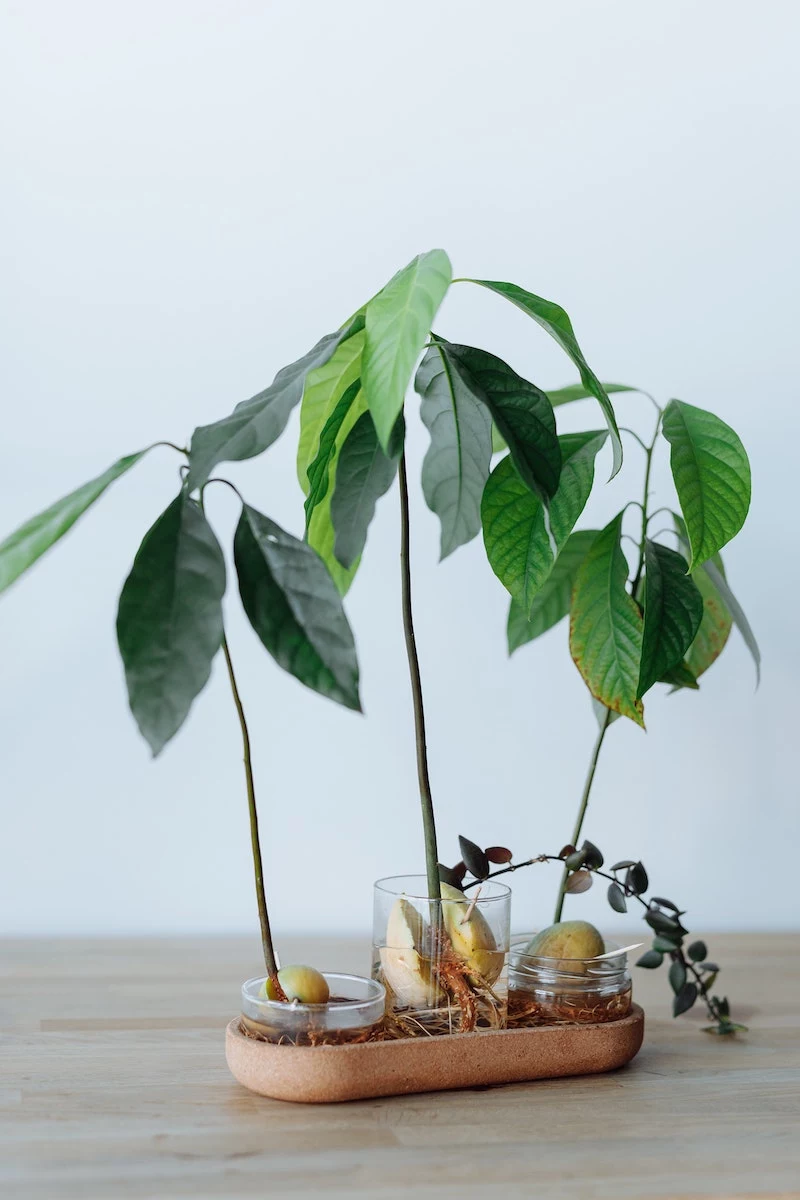
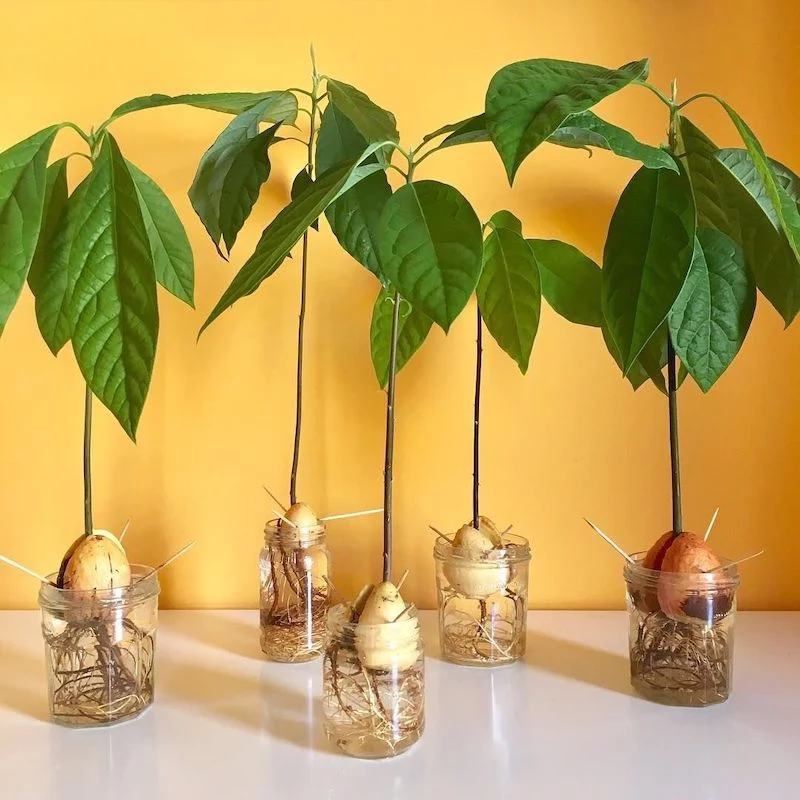
To get a fuller, more impressive display faster, try sprouting three pits at the same time.
- Once they have all rooted and grown stems, plant them together in a single larger pot (around 10-12 inches).
- Arrange them in a tight triangle, which allows their foliage to merge as they grow.
This method creates a dense, grove-like effect that beautifully compensates for the naturally sparse look of a single young avocado plant.
Water Method: Suspending the pit with toothpicks is visually rewarding. You get to see the first root emerge and the stem split open. It’s a fantastic science experiment on your windowsill.
Paper Towel Method: Wrapping the pit in a damp paper towel and placing it in a sealed bag in a dark place is often faster. It creates a humid micro-environment that encourages quicker sprouting, though you miss out on watching the daily progress.


