The Real Guide to Learning Snowboarding (Without All the Falling)
That First Day on a Board? We’ve All Been There.
I’ll never forget my first day trying to snowboard. I was working as a liftie, thought I was cool, and figured I could just teach myself. Big mistake. The rental shop hooked me up with a board that felt like a 2×4, and my skier friends were gone in a flash. I then spent the next couple of hours intimately acquainted with the snow—falling on my wrists, my knees, and especially my tailbone. Ouch.
In this article
- That First Day on a Board? We’ve All Been There.
- How Does a Snowboard Even Turn? (It’s Not Magic)
- What to Expect on Your First Day (And How Much It’ll Cost)
- The First-Timer’s Checklist: Gear Up for Success
- How to Not Fall (As Much)
- Your First Lesson: From Sideslip to Falling Leaf
- The Chairlift: Your Ride to the Top
- The Big Moment: Linking Your First Turns
- Taking Care of Your Board
- Inspirational Gallery
Every single time I managed to stand up, the board would just shoot out from under me. I was cold, annoyed, and so close to calling it a day. Then, an older instructor slid over and dropped a piece of advice that changed everything: “You’re fighting it. Let the board do the work.” He showed me how to just balance on my heel edge, and suddenly, it clicked.
I share this because that’s where everyone starts: feeling a bit clumsy and wondering if they’ll ever get it. Snowboarding isn’t natural at first. It has its own feel, its own rhythm. But once you build the right foundation, that struggle turns into one of the best feelings in the world. This guide is built on countless hours on snow, and we’re going to dig into the ‘why’ behind the techniques so you can build a solid base and actually enjoy the process.
How Does a Snowboard Even Turn? (It’s Not Magic)
Understanding what your board is designed to do is the key. You’re not supposed to force it to turn; you’re supposed to let it turn. It sounds weird, but stick with me.
Sidecut: The Engine of Your Turns
If you look at a snowboard from above, you’ll see it’s curved. It’s wider at the ends and narrower in the middle. That curve is called the sidecut, and it’s your best friend. When you tilt your board and put it on its edge, that curve is what presses into the snow. As you glide forward, the board naturally wants to follow that arc, creating a perfect turn for you. So many beginners try to kick their back foot out to turn, which just leads to skidding and falling. The real goal? Trust the edge.
Board Profiles: Rocker vs. Camber
The shape of your board when you lay it flat also makes a huge difference in how it feels. There are three main flavors you should know about.
- Traditional Camber: This is the classic profile. The board arches up in the middle, so when you stand on it, your weight presses the edges into the snow. This gives you amazing grip on firm or icy snow and a really “poppy,” responsive feel. Honestly, it requires more precise control, which can be tough when you’re just starting out.
- Rocker (aka Reverse Camber): This profile looks more like a banana. The middle of the board is flat or touches the snow, while the tip and tail curve up. This makes starting a turn incredibly easy because the edges are less likely to catch. It’s also fantastic for floating in deep powder. The trade-off is that it can feel a bit “loose” on icy days. For a first-timer, a rocker board is super forgiving.
- Hybrid Profiles: This is what most modern boards are, and it’s likely what you’ll get at a rental shop. These boards combine the best of both worlds—often with camber under your feet for grip, and rocker at the tip and tail for easy turning and float. It’s the perfect middle ground that gives you stability without being too punishing.
Good to know: When you’re at the rental counter, just tell them you’re a beginner and ask for a forgiving board, probably one with a rocker or hybrid profile. It’ll make a world of difference.
What to Expect on Your First Day (And How Much It’ll Cost)
Alright, let’s talk about the practical stuff. A day on the mountain is an investment, so it’s good to know what you’re getting into. Prices can vary a lot depending on the resort, but here’s a general idea to help you budget.
- Lift Ticket: This is your pass to get on the chairlifts. Expect to pay anywhere from $80 to over $200 for a single day at a major resort, especially on a weekend. Quick tip: Look for beginner-area-only tickets, which are much cheaper!
- Rental Package: This usually includes your board, boots, and a helmet. Plan for about $50 to $80 for the day. Always get the helmet.
- The Lesson: I cannot stress this enough: get a lesson. A 2-hour group lesson might cost between $100 and $250, but it will advance your skills faster than a whole week of struggling on your own. It’s the best money you’ll spend.
Pro tip: Always try to book your lift tickets, rentals, and lessons online a few days in advance. You can often save a good chunk of change compared to walk-up prices.
The First-Timer’s Checklist: Gear Up for Success
Your gear is more than just the board. Being warm and dry is non-negotiable for having a good time. Here’s a quick rundown of what you actually need to wear.
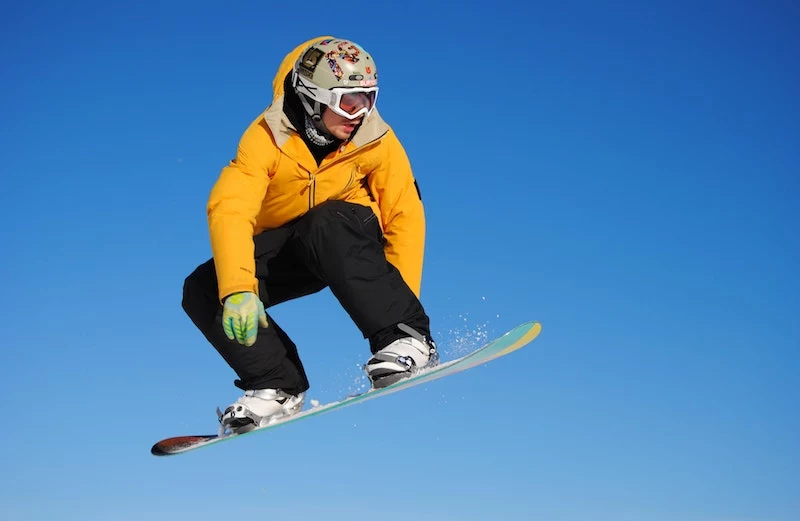
The Non-Negotiable Clothing: – Waterproof Jacket and Pants: This is essential. You’re going to be sitting in the snow a lot. Jeans or sweatpants will get soaked and cold in minutes, ruining your day. Seriously, no jeans. – Layers, Layers, Layers: Don’t wear one giant, bulky coat. It’s better to wear a base layer (like thermal underwear made of wool or a synthetic material), a mid-layer (like a fleece), and then your waterproof shell. – Wool or Synthetic Socks: Do NOT wear cotton socks. They absorb sweat, get wet, and your feet will freeze. A good pair of ski or snowboard socks is worth every penny. – Waterproof Gloves or Mittens: Your hands will be in the snow a lot. Mittens are generally warmer than gloves. – Goggles: Way better than sunglasses. They protect your eyes from wind, snow, and intense sun glare reflecting off the snow. A lens with a high VLT (Visible Light Transmission) is for cloudy days, while a low VLT is for bright sun.
The Safety Stuff: – Helmet: Wear one. Always. Modern helmets are lightweight, warm, and have saved countless lives. Look for one with MIPS technology if you can. – Wrist Guards: When you’re learning, you fall backward and instinctively put your hands out. That’s how wrists get broken. Wrist guards, worn under your gloves, are a fantastic idea for your first season.
How to Not Fall (As Much)
You’re going to fall. It’s a rite of passage. But there’s a right way and a wrong way to do it. The pros learn how to fall to minimize impact.
Quick tip: Try to fall uphill, toward the slope. If you feel yourself losing balance, instead of sticking your arms straight out (a recipe for a broken wrist), make fists to protect your fingers and try to absorb the impact along your forearms and butt. Think of it like a controlled tuck and roll, not a splat.
Your First Lesson: From Sideslip to Falling Leaf
A good instructor will get you comfortable with the basics in a structured way. You won’t be linking turns in the first hour, and that’s okay! It starts with the fundamentals.
First, you’ll figure out your stance. Most beginners use a “duck” stance, with the front foot angled forward a bit (+15 degrees) and the back foot angled slightly backward (-6 degrees). The key is to keep your knees and ankles bent! This is your suspension. A straight-legged rider is a falling rider.
Then you’ll learn to sideslip. This is just controlling your speed by using your heel edge and then your toe edge. Pushing your heels down digs the edge in and slows you down; easing up lets you slide faster. Once you master that, you’ll learn the “falling leaf,” which is just traversing back and forth across the hill on one edge. It’s the building block for your first real turns—the C-turn—where you point the board downhill for a moment and then use your edge to steer back across the slope and stop.
The Chairlift: Your Ride to the Top
Honestly, the chairlift can be one of the most intimidating parts for a beginner. Here’s how to handle it without panic.
Getting On: As you get to the front of the line, shuffle forward with your back foot out of its binding. Use that free foot to skate on the snow like you’re on a scooter. When the chair comes up behind you, just glance back, aim your butt for the seat, and sit down. That’s it! Rest the board on the footrest if there is one.
Getting Off: As you approach the top, lift the safety bar and point your board straight ahead. Keep the tip up slightly. The moment your board touches the ramp, stand up smoothly and let your momentum glide you forward. Don’t try to turn or stop right away. Just glide straight for about 10-15 feet, then move over to the side and out of the way of the people behind you.
The Big Moment: Linking Your First Turns
Okay, you can stop on both edges. Now it’s time to connect them. This is where you really start snowboarding. An S-turn is just a smooth transition from your heel edge to your toe edge, and back again.
The magic happens in your ankles and feet. As you’re crossing the hill on your heel edge, you start the turn by easing the pressure off your heels. Feel your weight shift from the edge to the flat, centered part of your board. For a split second, you’ll be on that “flat base,” pointing straight downhill and accelerating. Don’t panic! Look where you want to go—not at your feet.
As the board points downhill, you start rolling onto your new edge. To go to your toe side, you’ll start pressing your shins into the front of your boots and applying pressure with your toes. Your whole body moves over the toe edge, and the board will steer you beautifully back across the hill. Then you just repeat the process to go back to your heels. Smooth and steady wins the race.
Taking Care of Your Board
A little love goes a long way. A well-maintained board is faster, turns easier, and is just more fun to ride. The two big things are wax and edges.
The base of your board needs wax to glide smoothly. A dry, chalky-looking base will feel slow and sticky. You should get your board waxed every 3-5 days of riding. You can learn to do it yourself, or just take it to any ski and board shop. A professional hot wax is usually only about $20-$30 and is totally worth it.
Your metal edges are what give you grip. After a while, they can get dull or burred. A full tune-up at a shop, which includes sharpening your edges, might cost around $50-$70 and is a great idea to do once or twice a season, especially if you ride in icy conditions.
And that’s it! Snowboarding is a journey. You’ll have frustrating moments, but you’ll also have amazing ones. Be patient, embrace the learning process, and before you know it, you’ll be the one gliding down the mountain with a huge smile on your face, hearing nothing but the sound of your edge carving through the snow.
Inspirational Gallery
The single most overlooked piece of gear? Your socks. Don’t just grab any old cotton pair. Invest in a thin, moisture-wicking ski or snowboard sock made from merino wool or a synthetic blend. They prevent blisters, keep your feet warmer by staying dry, and provide a much better connection between your foot and the boot, which is crucial for board control.
A snowboard helmet can reduce the risk of a significant head injury by over 50%.
It’s a no-brainer. Modern helmets from brands like Smith or Anon are lightweight, comfortable, and well-ventilated. Beyond the obvious safety benefit, wearing one gives you a huge confidence boost, allowing you to focus on learning without the fear of a bad fall holding you back.
Beyond just standing, your first real goal is mastering the “falling leaf.” This is where you stay on one edge (either your heels or your toes) and gently glide back and forth across a mellow slope. You aren’t turning yet, just getting a feel for how the edge grips the snow and controls your speed. It’s the absolute foundation for linking turns later on.
Do I really need a lesson? My friends can teach me.
While learning with friends is fun, a certified instructor is a game-changer. They are trained to spot bad habits before they form and can explain the body mechanics in a way that just clicks. A single two-hour lesson can often save you two full days of frustration and falling, making it the best investment you can make in your snowboarding journey.
- You’ll spend less time on the ground and more time riding.
- You build confidence to try slightly steeper terrain sooner.
- You protect your wrists and tailbone from repetitive impacts.
The secret? Learning to fall correctly. Instead of sticking your hands out straight (a recipe for a broken wrist), try to absorb the impact with your forearms and butt. Tuck your chin to your chest and aim to roll like a log. It feels unnatural at first, but it quickly becomes second nature.
“The journey is the reward.” – A motto often attributed to the Burton Snowboards philosophy.
Strap-in Bindings: The classic design. Two straps go over your boot, offering a highly adjustable and secure fit. They are reliable and compatible with any snowboard boot.
Step-On/Step-In Systems: A newer innovation, popularized by Burton’s Step On® line. You simply step onto the binding for a quick, click-in connection without sitting down. They offer incredible convenience, especially for getting off the lift.
For beginners, the convenience of Step-On can reduce initial frustration, though traditional straps remain the versatile, budget-friendly standard.
That rental board you’re using needs love too! A fresh coat of wax isn’t just for pros. It makes the base of your board glide more smoothly over the snow, which has two huge benefits for a learner:
- It makes it easier to start sliding on very flat terrain.
- It provides a more predictable and consistent feel, helping you focus on your balance.
Your goggle choice drastically affects your vision on the mountain. The key is understanding VLT (Visible Light Transmission). A low VLT lens (10-25%), like a dark mirror or smoke lens, is perfect for bright, sunny days. A high VLT lens (60-90%), often yellow, rose, or clear, is for cloudy days or night riding, as it lets in more light and enhances contrast. Many brands, like Oakley with its Prizm™ lenses, offer all-condition options that work well in mixed light.


