Your Patio Isn’t Just for Summer: How to Actually Use It This Winter
It happens every single year, doesn’t it? We pour our hearts (and wallets) into creating these beautiful patios. We live on them from May to September. And then, the first real cold snap hits, and boom—the doors are shut, the furniture gets covered, and a whole chunk of our home goes into hibernation until spring. I’ve seen this play out for years in outdoor design, and my mission is to stop the madness. A winter patio shouldn’t just be tolerable; it should be a place you’re genuinely drawn to, even on a frosty morning.
In this article
So, how do we pull this off? Honestly, it’s not about buying one magic item. A fire pit alone won’t cut it. It’s about building a cozy little ecosystem of warmth, shelter, light, and comfort. When all those pieces work together, you’ll find yourself sipping coffee outside in November or sharing a bottle of wine under the stars in February. Let’s walk through how the pros do it, covering the gear, the science, and the safety tricks that turn a chilly slab of concrete into your favorite winter room.
First Things First: Furniture That Can Handle the Cold
Your furniture is the heart of your outdoor space, but it’s also where most people make their first big mistake. It’s so easy to get seduced by something that looks great in a sunny showroom, only to watch it crack, rust, or fall apart after a couple of harsh winters. True all-weather furniture is an investment, plain and simple. It costs more upfront because it’s engineered to fight off moisture, wild temperature swings, and UV rays. Buying cheap often means buying again… and again.
Let’s Talk Materials (and What They’ll Cost You)
Making the right choice comes down to knowing what you’re buying. Each of these materials has its own personality and needs.
The Gold Standard: Grade-A Teak
This is the classic, top-tier choice for outdoor wood. Why? Teak is packed with natural oils that make it incredibly resistant to water and rot. It’s the real deal. But, heads up: you need to look for “Grade-A” teak, which comes from the dense heart of the tree. Cheaper grades just don’t have the same oil content and won’t last nearly as long.
- The Look & Feel: Brand new, teak has a gorgeous honey-brown color. If you leave it alone, it will naturally age into a distinguished, silvery-gray patina. This is just a cosmetic change and doesn’t hurt the wood. Some people panic when they see this, but most end up loving the weathered, coastal vibe.
- Maintenance & Cost: To keep that honey color, you’ll need to clean it and apply a teak sealer once a year. A good quality sealer will run you about $40-$60 a bottle. If you let it go gray, just give it a gentle scrub with soapy water annually to keep mildew away. A single, high-quality teak dining chair can range from $300 to over $800, so it’s a serious investment. Quick tip: NEVER pressure wash teak. You’ll strip out those precious oils and wreck the wood grain.
The Modern Workhorse: Powder-Coated Aluminum
Aluminum is awesome because it’s strong, lightweight, and absolutely will not rust. It’s perfect for a clean, modern aesthetic. The key here is the finish. You want powder-coating, where a polymer powder is baked onto the metal. It’s way tougher than regular paint. When I’m inspecting a piece, I always check the welds—smooth, clean joints are a sign of quality.
- The Catch: While it won’t rust, a deep scratch in the powder-coating can expose the metal, which will then oxidize (turn chalky). In coastal areas with salty air, this can happen faster. Touch-up pens are your friend here.
- Maintenance & Cost: Maintenance is a breeze—just soap and water. Because it’s light, you have to plan for high winds. Look for heavier frames or have a plan to secure it. I’ve seen too many aluminum chairs take flight in a storm. Bungee cords to a railing or specialized furniture weights work well. Expect to pay between $150 and $500 for a quality chair.
The Heavy-Duty Classic: Wrought Iron
For that traditional, substantial look, nothing beats wrought iron. It’s incredibly heavy and stable—this stuff is NOT blowing away. Its one and only enemy is rust. Good modern pieces are treated with protective layers, but cheap ones will show rust spots at the joints within a season. This is one area where you really get what you pay for.
- Maintenance & Cost: Give it a once-over each year. If you find a chip, just lightly sand the spot and dab on some matching touch-up paint. A five-minute fix can prevent a total rust-out. Wrought iron chairs typically fall in the $200 to $600 range.
The No-Fuss Champ: HDPE Lumber
High-density polyethylene (HDPE) is a synthetic wood made from recycled plastics (think milk jugs). You’ve probably seen brands that specialize in this, and for good reason. It’s heavy, incredibly durable, and the color is mixed all the way through the material, so scratches are hard to see. It’s a beast that can handle freezing and thawing without a single complaint.
- Maintenance & Cost: There is basically zero maintenance besides hosing it down. I once helped a client in a heavy snow area who was sick of dragging furniture into storage. We swapped their old set for HDPE. Now they just brush the snow off and sit down. That peace of mind is huge. A good Adirondack-style chair in HDPE will set you back about $200 to $450.
Oh, and by the way, furniture covers are not optional. A common mistake is buying cheap, non-breathable vinyl covers. They trap moisture and create a mildew nightmare. Spend a little extra ($50-$100) on a quality, breathable cover with vents. And always, always bring your cushions inside. No cushion is truly “all-weather,” and a frozen, moldy cushion is a sad, sad sight.
Turning Up the Heat: Fire Pits vs. Heaters
Okay, let’s get to the main event: warmth. Without a heat source, you’re just a person sitting in the cold. Your two main options are fire pits and outdoor heaters, and they work very differently.
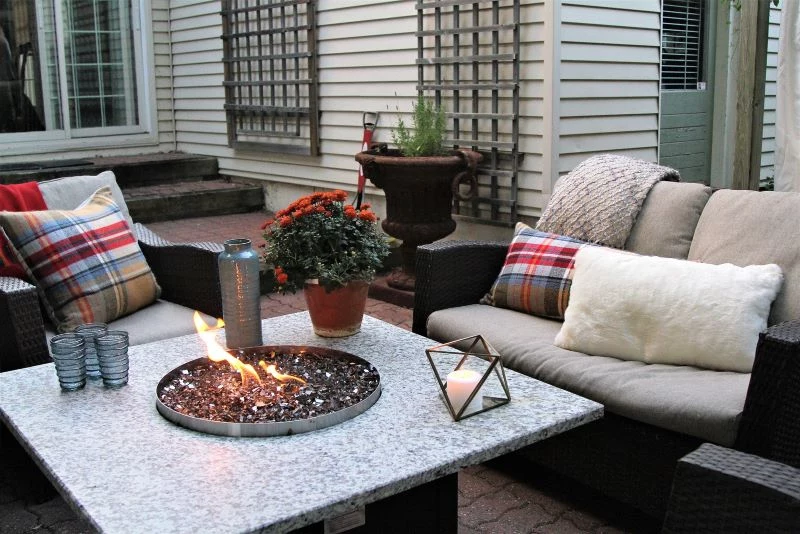
A fire pit—wood or gas—is all about radiant heat. It sends out infrared waves that warm up solid objects directly (that means you, your chair, and your drink). It’s super effective because it’s not wasting energy trying to heat the air, which just blows away. That’s why a campfire feels so good even on a frigid night.
Outdoor heaters, on the other hand, can be either radiant (like electric infrared models) or convection-based (like most propane models). Convection heats the air around you. In an open space, this is way less efficient because all that toasty air immediately escapes. That’s why I almost always lean toward radiant heat sources.
The Vibe of a Fire Pit
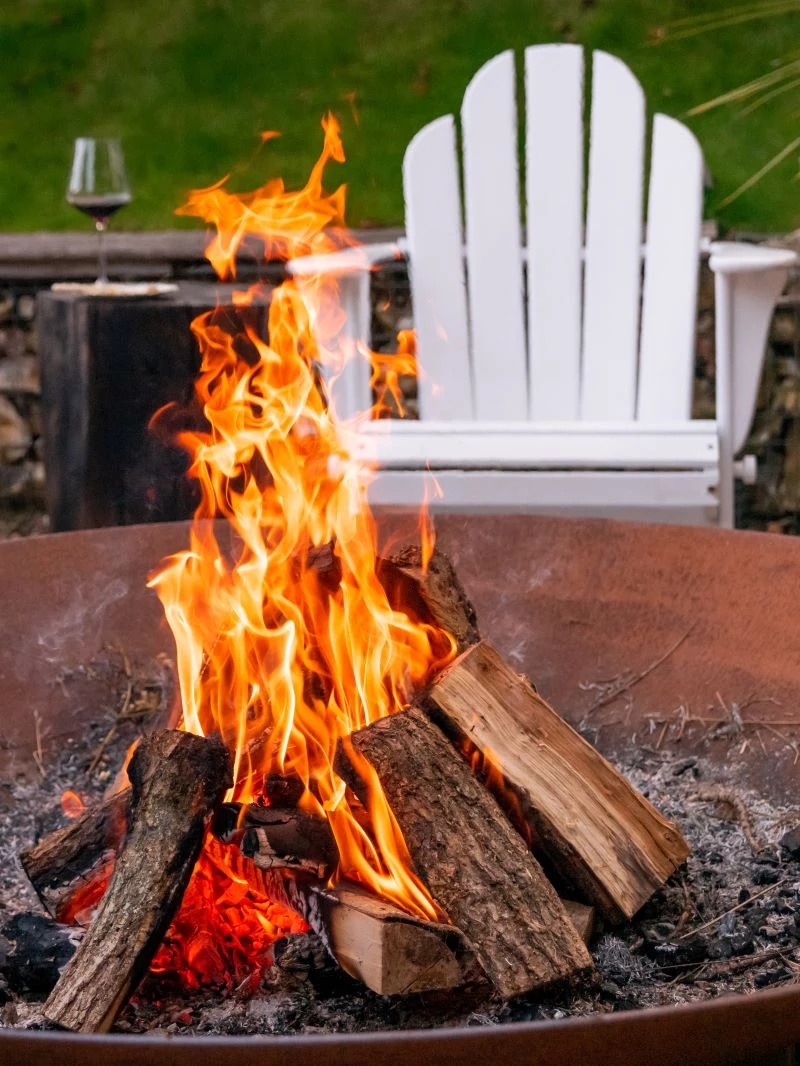
A fire pit is more than just a heater; it’s an experience. It’s a focal point, a gathering spot, and the crackle and glow are just plain comforting. But it also comes with the most responsibility.
- Safety & Placement: This part is non-negotiable. Check your local fire codes first, but a good rule of thumb is to place the pit at least 10-15 feet from your house or any railings, and 20-25 feet away from low-hanging branches or the neighbor’s fence. I once visited a potential client who had scorch marks up their vinyl siding because their fire pit was too close. A very costly and dangerous lesson.
- Wood vs. Gas: Wood is classic, but it’s messy and the smoke can be a pain. Plus, many towns now restrict wood-burning fires. Gas (propane or natural gas) is clean, instant, and smoke-free. A propane fire pit table can cost anywhere from $250 to over $1,500. Running a natural gas line is a job for a licensed pro and can cost $500-$2,000 depending on the distance.
- A Critical Warning: Always have a fire extinguisher, a bucket of water, or a hose nearby. And never, ever leave a fire unattended. I learned a hard lesson early in my career about radiant heat when I placed a fire pit a little too close to a client’s prize boxwoods. They were… not happy. Heat radiates farther than you think!
The Convenience of Heaters
If a fire pit feels like too much work, heaters are a fantastic, targeted solution.
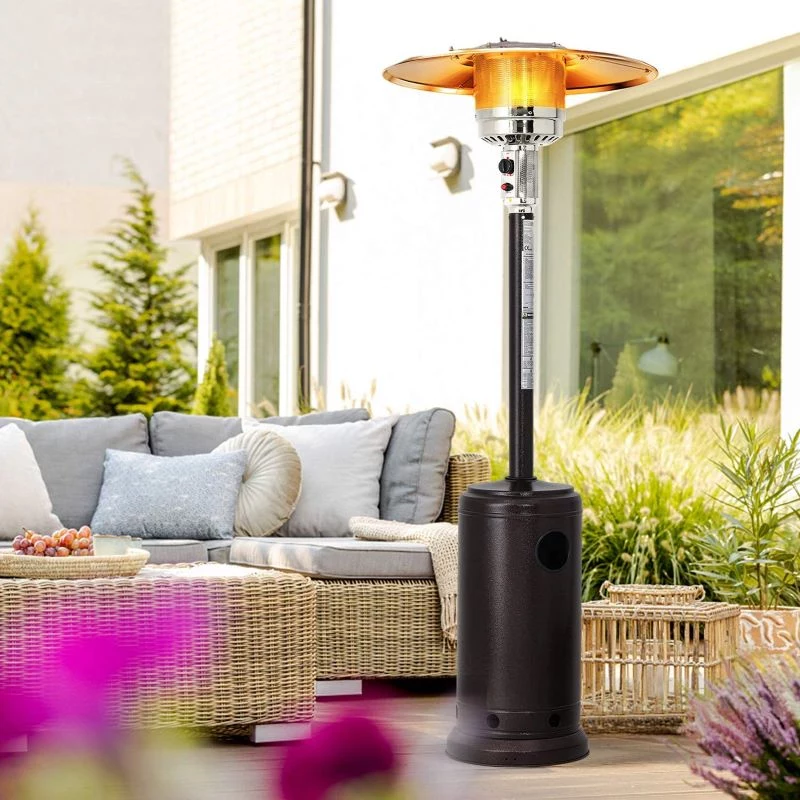
- Propane Heaters: Those tall “mushroom” heaters you see at restaurants are great. They kick out a ton of heat. A decent one costs about $150-$300. The downside is swapping out the 20 lb propane tanks (about $20 a refill) and they can be top-heavy.
- Electric Infrared Heaters: These are my favorite for many situations, especially smaller spaces. They’re silent, efficient, and you can mount them on a wall or ceiling to save floor space. A good 1500-watt wall-mounted unit starts around $150. You’ll need a proper weatherproof GFCI outlet, which is a job for an electrician.
Creating Shelter (Because Heat Hates Wind)
Heat is useless if a freezing wind is whipping it away. Creating a windbreak is the next crucial layer. For a big patio, this could mean a pergola with retractable screens or even a solid-roofed structure—major projects that require permits and pros. But for most of us, and especially for small balconies or city patios, the solution can be much simpler.
Think about adding a decorative privacy screen or a row of tall, slender planters with evergreen plants like arborvitae or boxwood. Even a heavy outdoor curtain hung on one side can make a massive difference in cutting the wind and trapping that precious radiant heat. It’s all about creating a cozy microclimate.
The Final Touch: Magical Winter Lighting
It gets dark so early in the winter. The right lighting can single-handedly transform your patio from a dark void into an inviting escape. The biggest mistake is using a single, harsh floodlight from the house. It’s jarring and creates creepy shadows.
Instead, think in layers. Here’s a simple recipe:
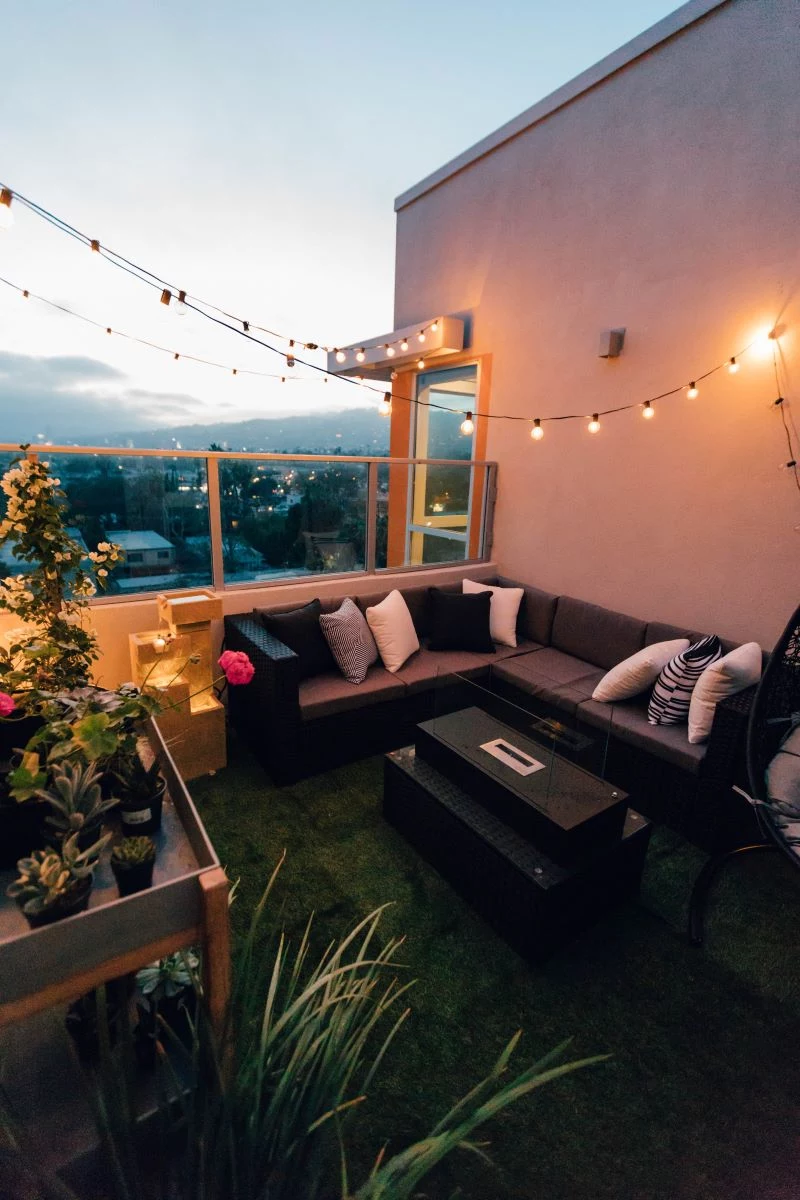
1. Ambient Light: This is your base layer of glow. Commercial-grade outdoor string lights are perfect for this. They cast a warm, welcoming light over the whole area. A good 50-foot strand costs about $30-$50.
2. Task Light: This is focused light for a specific purpose. Maybe it’s a small outdoor lamp on a side table for reading, or a discreet downlight over your dining area.
3. Accent Light: This is the fun part! Use a small, low-voltage spotlight ($25) to aim up at a cool tree, a stone wall, or an interesting plant. It adds depth and drama.
Pro tip: When buying bulbs or fixtures, look for a “warm white” color temperature, usually around 2700K. It’s the cozy, yellowish light that mimics candlelight, not the harsh, blue-white light of a hospital.
Your Weekend Project: A Cozy Corner for Under $250
Feeling overwhelmed? Don’t be. You can make a huge impact with a small budget and a free afternoon. Here’s a simple starter kit:
- One Set of Outdoor String Lights: Get a heavy-duty, commercial-grade set. They’re built to last. (~$40)
- A Small Tabletop Propane Fire Pit: These are brilliant for small spaces. They sit right on your table and connect to a small 1 lb propane canister, giving you a lovely bit of warmth and ambiance. (~$80)
- Two Really Good Outdoor Blankets: Think chunky wool or a plush fleece that you can keep in a basket by the door. (~$60 for two)
- Two Weather-Resistant Pillows: For a pop of color and comfort. (~$50 for two)
Total: ~$230
For a small investment, you’ve just created a dedicated cozy zone. String the lights, fire up the mini-pit, grab the blankets, and you’re ready to go. It’s a simple change that completely redefines how you see your outdoor space when the temperature drops.
Inspirational Gallery
- Create pockets of light instead of one harsh floodlight. Use weather-rated string lights, like those from Brightech, to define the seating area.
- Add solar-powered pathway lights to guide the way from the door, ensuring safety and ambiance.
- Place a single, dramatic uplight behind a sculptural plant or tree to create beautiful winter shadows.
The right heat source changes everything. A wood-burning fire pit offers crackling sound and a rustic focal point, but requires attention. For effortless warmth, consider an infrared heater like those from Infratech; they heat objects (including you!), not the air, making them incredibly effective even on a breezy evening. Propane heaters offer portability but are less efficient in the wind.
According to studies on environmental psychology, exposure to natural daylight in winter is crucial for regulating circadian rhythms and can help combat the effects of Seasonal Affective Disorder (SAD).
Your patio can be more than just a space; it can be a wellness tool. Just 20 minutes outside with a warm drink, even on a cloudy day, can significantly boost your mood and energy levels. Think of it as your personal light therapy box, but with better scenery.
What about plants? Is my patio doomed to be barren all winter?
Not at all! The key is to shift focus from flowers to structure and texture. Evergreen topiaries in pots, like Boxwood or Cypress, provide year-round green. Ornamental grasses such as ‘Karl Foerster’ feather reed grass look stunning when dusted with frost. For a pop of color, nothing beats the vibrant red berries of a Winterberry holly in a large planter.
Don’t underestimate the power of textiles. While your indoor wool throws are cozy, they aren’t meant for damp winter air. Invest in a few high-quality outdoor-specific blankets. Look for options with a waterproof backing on one side and a soft fleece or flannel on the other. They provide serious warmth while protecting you from a chilly, damp chair.
- It adds an instant layer of visual warmth and softness to hard surfaces like stone or concrete.
- It provides a crucial thermal break, making the ground feel significantly less cold underfoot.
- It defines a ‘room,’ making the outdoor space feel intentional and cozy.
The secret? A quality outdoor rug. Choose one made from 100% polypropylene, which is stain-resistant, won’t grow mildew, and can be simply hosed off and left to dry. Brands like Ruggable even offer two-part systems where the top layer can be machine washed.
Mistake to Avoid: Forgetting the sensory details. A visually beautiful patio can still feel stark and cold. Engage the other senses. Hang a set of deep-toned bamboo wind chimes from Woodstock Chimes for a softer sound than metal. On a calm day, use a portable speaker like the Sonos Roam to play a low-volume ambient playlist. Scent is also key; a bundle of eucalyptus or pine branches placed in a vase on the table will release a crisp, clean fragrance.
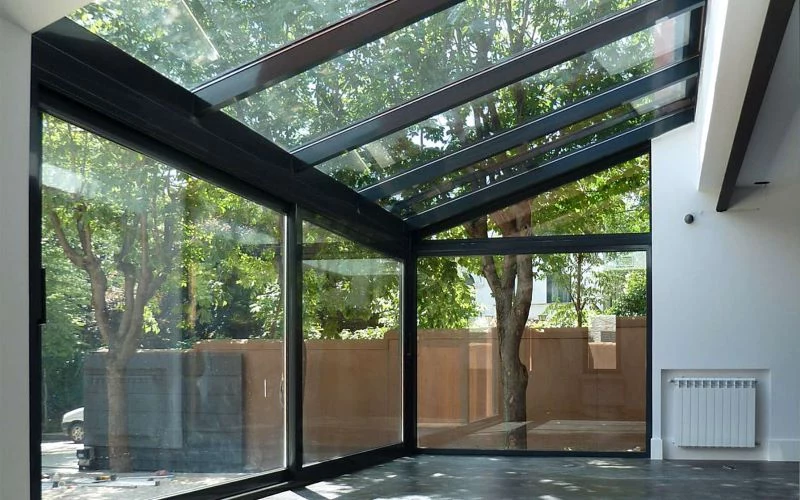
A single pane of glass loses almost 10 times as much heat as an insulated wall of the same size.
While you might not be insulating your patio walls, this principle highlights the importance of shelter. Even a simple glass windbreak or a clear vinyl panel on a pergola can dramatically reduce wind chill and trap radiant heat from the sun or your heater, making the space feel degrees warmer without sacrificing your view or precious winter light.
Channel an ‘après-ski’ vibe by setting up a dedicated hot beverage station. A small, sturdy bar cart can hold an electric kettle, a thermal carafe of pre-made mulled cider or hot chocolate, and a collection of insulated mugs from a brand like YETI or Hydro Flask. Add a small bowl of marshmallows or cinnamon sticks, and you’ve created a destination that makes braving the cold feel like a luxurious treat.


