The Real Deal on Cleaning Stainless Steel (And What NOT to Do)
Let’s Be Honest About Stainless Steel
I’ve spent a huge chunk of my life working with stainless steel—bending it, welding it, and polishing it until it shines. So I know its secrets, its strengths, and yeah, its weaknesses. The first thing I always tell people is that stainless steel is an honest material. It doesn’t hide much. It shows every smudge and fingerprint, but it also develops a beautiful character over time.
In this article
- Let’s Be Honest About Stainless Steel
- So, What Makes Stainless Steel… Stainless?
- The Pro’s Daily Cleaning Method (It’s Almost Too Easy)
- My Go-To Shopping List for Stainless Steel Care
- How to Tackle Heavier Grease and Grime
- The Truth About Polishing and Oily Shine
- Advanced Care: What to Do About Scratches
- A Pro’s Warning List: Never Use These on Stainless Steel
- Your Kitchen’s Story Is Written in Steel
- Inspirational Gallery
So many people love the sleek, professional look but are terrified of the upkeep. They picture chefs in gleaming kitchens and assume it takes an army and a ton of harsh chemicals to keep it looking good. That’s a total myth.
The truth? Stainless steel is one of the most durable and hygienic surfaces you can own. The pros choose it because it can take a beating from heat, pans, and intense daily cleaning. The secret isn’t about scrubbing endlessly; it’s about understanding the material and using the right—and surprisingly simple—techniques. Let’s walk through how to care for your kitchen surfaces with total confidence, covering everything from the daily wipe-down to fixing those dreaded scratches.

So, What Makes Stainless Steel… Stainless?
Before you clean anything, it helps to know what you’re dealing with. The name “stainless” steel is a little misleading because, under the wrong circumstances, it absolutely can stain or even rust. Its real superpower comes from one key ingredient: chromium.
When the chromium in the steel meets the oxygen in your kitchen, it creates an invisible, super-thin protective shield called a passive layer. This layer is what stops the iron in the steel from rusting. And here’s the cool part: it’s self-healing. If you get a light scuff, the chromium oxide layer reforms almost instantly, as long as air can get to it. This is why it’s a champ in busy kitchens.
But this shield isn’t invincible. Its two biggest enemies are deep scratches and harsh chemicals, especially chlorides (think bleach). Using the wrong cleaner can strip away that protective layer, leaving the steel vulnerable. So, you’re not just cleaning—you’re preserving its armor.
Steel Grades and Finding the Grain
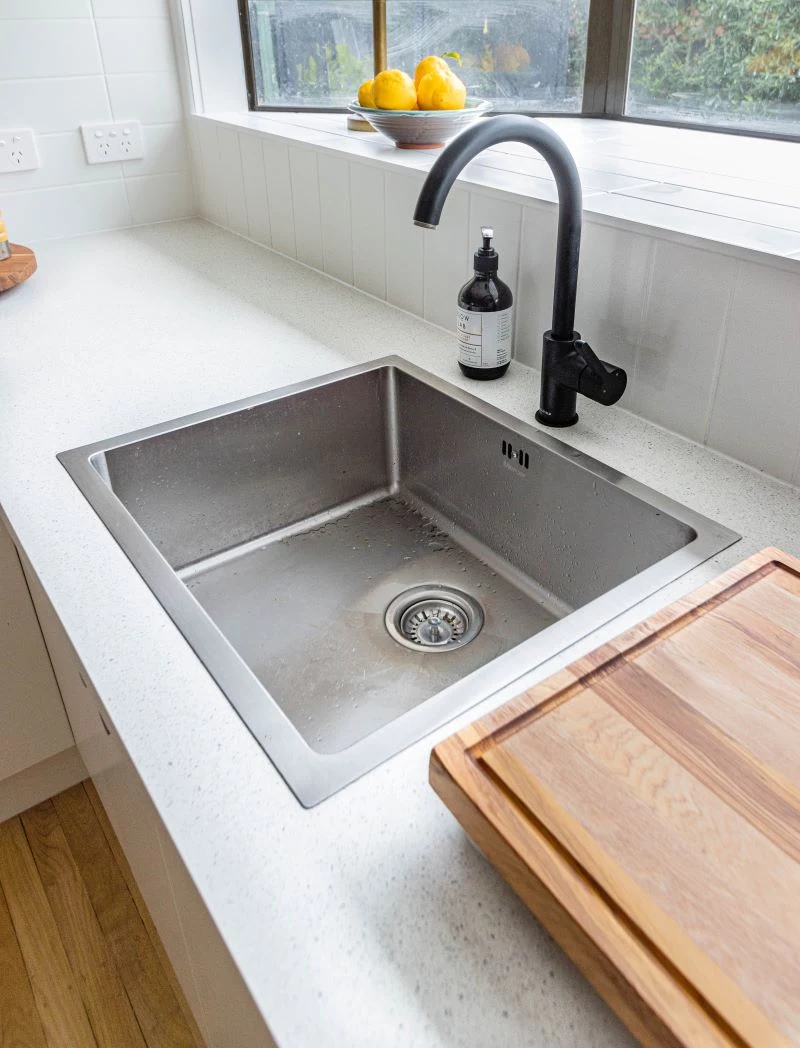
Not all stainless is created equal. The two you’ll see most often in kitchens are Type 304 and Type 430. Type 304 is the industry workhorse for sinks and countertops because it has more nickel and chromium, making it tougher against corrosion. Type 430 is a bit more budget-friendly and is often used for appliance panels.
Quick tip: Not sure which one you have? Grab a fridge magnet. If it sticks firmly, you probably have the 430 grade. If it doesn’t stick at all or just barely hangs on, you’ve got the higher-end 304. Good to know, right?
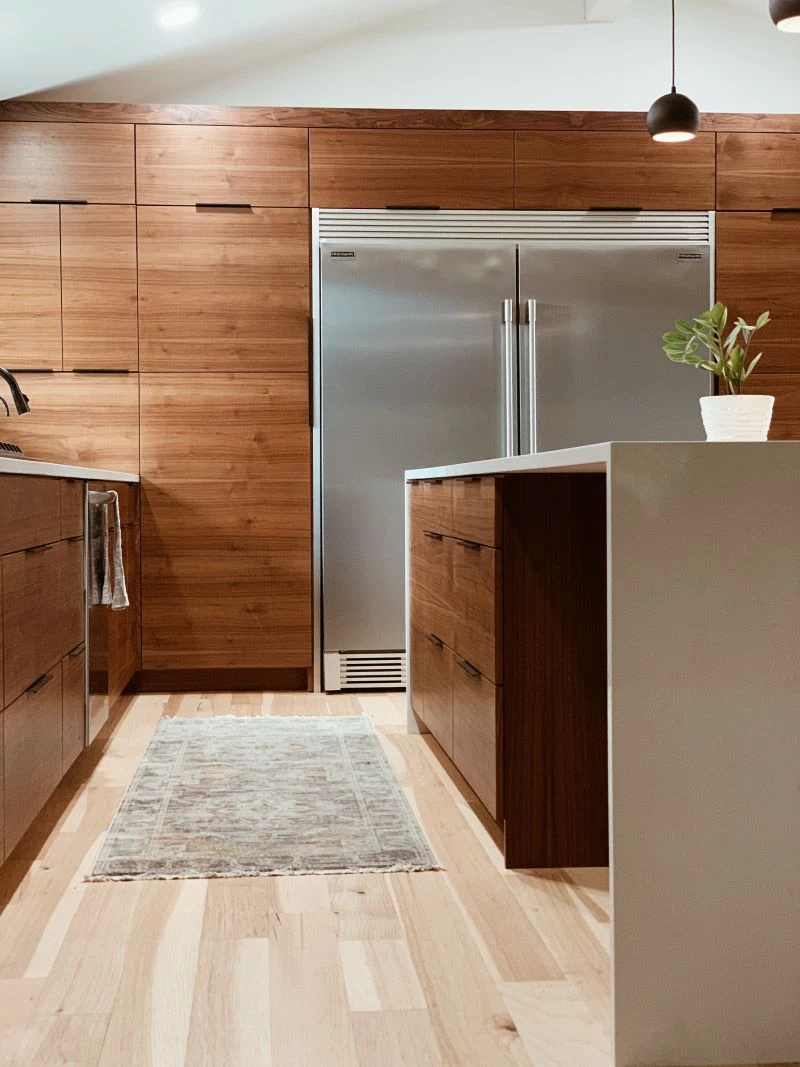
Even more important than the grade is the finish. Most appliances have a brushed finish, which means it has a very fine, linear pattern. This is the “grain.” Just like with wood, cleaning with the grain is the golden rule. Wiping against it can push grime into those tiny lines and even create micro-scratches that dull the surface.
But how do you find the grain? It can be tricky. Stand back and tilt your head while looking at the surface in good light—you should be able to see faint, parallel lines. If you’re still not sure, run your fingertip lightly across the surface; sometimes you can feel the direction. As a general rule, most appliance panels have a vertical grain (up and down), and most sinks have a horizontal one (side to side). When in doubt, pick a direction and stick with it!
The Pro’s Daily Cleaning Method (It’s Almost Too Easy)
After finishing a custom countertop, we need it to look absolutely perfect. And we don’t use any fancy, expensive sprays. The best method for daily cleaning is also the simplest and cheapest, and it’s perfect for fingerprints, water spots, and light smudges.
My philosophy is to always start with the gentlest method first. All you need is warm water and two good microfiber cloths.

The Two-Cloth Technique
Step 1: The Damp Wipe. Get one microfiber cloth damp with warm water. Not sopping wet, just damp enough to clean without flooding the surface. The warmth helps break down oils from fingerprints way better than cold water. Wiping with the grain, use long, even strokes to clean the surface.
Step 2: The Dry Buff. Immediately grab your second, completely dry microfiber cloth and buff the surface dry, again, moving with the grain. This step is critical! If you let water air-dry, you’ll get those annoying spots, which are just mineral deposits. Buffing it dry removes the water and the minerals, leaving a perfect, streak-free shine. The whole process for a big fridge door takes maybe 30 seconds.
Seriously, try this now. Go to your fridge with a damp cloth and a dry one. Find the grain and give it a wipe. See? Looks brand new.
My Go-To Shopping List for Stainless Steel Care
You don’t need a whole cabinet of products. Honestly, this is all you’ll ever really need to keep your stainless looking great.

- A good pack of microfiber cloths: This is your most important tool. Don’t use cotton towels—they leave lint. A quality pack will run you between $15 and $25 on Amazon or at Target and will last for ages.
- Simple, pH-neutral dish soap: A bottle of original blue Dawn is perfect. It’s gentle and cuts grease like nothing else. Costs about $3.
- Bar Keepers Friend (the powder): For tough stains or light scuffs, this stuff is magic. It uses oxalic acid, not harsh grit. A canister is about $5 and will last you a year. Make sure you get the powder, not the pre-mixed liquid.
- Optional Polish: If you love that extra-slick, fingerprint-resistant feel, a dedicated polish is the way to go. I’ve had good results with brands like Weiman or Cerama Bryte, which you can find for around $8-$12 at most hardware or grocery stores.
How to Tackle Heavier Grease and Grime
Okay, sometimes water alone won’t cut it, especially after frying bacon. For greasy messes, just add a tiny bit of help.
Put a single drop of mild dish soap (like Dawn) on your damp microfiber cloth. Too much soap is a classic mistake; it leaves a sticky film that actually attracts more dust. Wipe down the greasy areas, always following the grain. For stuck-on food, you might need a little gentle pressure.
Now for the crucial part: rinsing. Get a fresh cloth, dampen it with plain warm water, and wipe the whole area again to remove every trace of soap. Then, follow up with your dry cloth to buff it dry. If you skip the rinse, you’ll be left with a dull, streaky mess.
A Quick Word on Vinegar and Baking Soda
People love recommending vinegar and baking soda for everything. For stainless, I offer a strong word of caution. Vinegar is an acid, and while it’s great for dissolving hard water scale around a faucet, frequent use can dull and etch the steel’s surface over time. If you absolutely must use it, dilute it (at least 3 parts water to 1 part vinegar), spray it on, let it sit for less than a minute, then rinse thoroughly and dry completely.
Baking soda is a mild abrasive. Yes, a paste can work on tough spots, but because it’s abrasive, you risk scratching the finish. If you try it, you MUST rub only with the grain, use very light pressure, and test it in a hidden spot first. To be frank, Bar Keepers Friend is a much safer and more effective option.
The Truth About Polishing and Oily Shine
Please, I’m begging you, do not use olive oil, baby oil, or any other kind of cooking oil to polish your stainless steel. I’ve seen the aftermath of this popular internet “hack” too many times.
Yes, it will look amazing for about five minutes. But the oil never dries. It just sits there, turning into a sticky magnet for every speck of dust, lint, and pet hair in your home. Food-based oils can also go rancid, leaving behind a gummy, stinky residue that’s a nightmare to clean off. You’ll end up in a vicious cycle of using harsh degreasers to remove the oil you used for cleaning.
If you want that polished look, use a product made for it, like Weiman. These are typically silicone-based and create a dry, non-sticky barrier that resists fingerprints. Use it sparingly—a little goes a long way. Apply a small amount to your cloth (never directly to the steel) and buff it in, following the grain.
Advanced Care: What to Do About Scratches
It’s going to happen. A dropped pan, a dragged ceramic bowl—scratches are a part of life. The good news is, many are fixable. But this is where you need to be really honest about your DIY skills.
Fixing Light Scuffs and Stains
For fine scuffs or faint rust-like spots (which are usually just tiny iron particles on the surface), a non-abrasive powdered cleaner like Bar Keepers Friend is your best bet. Make a paste with a little water, apply it with a soft cloth, and rub gently and only in the direction of the grain. Never, ever rub in circles—you’ll create a swirl mark that’s way worse than the original scuff. Rinse completely, dry, and check your work.
Dealing with Deeper Scratches
Here’s my rule of thumb: the fingernail test. If you can run your fingernail across a scratch and it noticeably catches, you cannot fix it with a simple cleaner. Period. Removing a deep scratch means re-graining the steel with abrasive pads, and it’s a delicate, advanced skill.
You can buy DIY scratch removal kits, but one wrong move can leave a massive, ugly patch on your expensive appliance. For a deep scratch on a prominent spot, I strongly recommend calling a professional metal refinisher. A service call might cost between $150 and $400, which sounds like a lot, but it’s far cheaper than replacing a $1,500 refrigerator door you ruined trying to save a few bucks.
A Pro’s Warning List: Never Use These on Stainless Steel
I’ve seen beautiful, expensive kitchens damaged by well-meaning people using the wrong stuff. Please, burn this list into your memory. The damage is often permanent.
- Chlorine Bleach: This is public enemy #1. It destroys the protective layer and causes pitting and rust. Check your cleaning wipes, too—many contain chlorides.
- Abrasive Powders or Steel Wool: Using things like Comet or regular steel wool is like taking sandpaper to your countertop. You will permanently scratch the finish.
- Oven Cleaner: This stuff is incredibly caustic. I once had a client who accidentally oversprayed oven cleaner onto their brand-new fridge. It left a permanent dark stain that looked like a shadow. We couldn’t fix it; they had to live with it. A 5-second mistake on a $3,000 appliance. Always cover your stainless when cleaning the oven.
- Scrubbing Against the Grain: I know I keep saying it, but it’s that important. Wiping against the grain, especially with anything even mildly abrasive, will ruin the finish. Always, always go with the flow.
Your Kitchen’s Story Is Written in Steel
Think of your stainless steel kitchen as an investment in longevity. With the right, simple care, it will look fantastic for decades. It will slowly develop a subtle patina—a history of all the meals and memories made around it. So don’t be afraid of it. Embrace its honesty and its incredible utility, and you’ll have a kitchen that works as hard as you do and looks great doing it.
Inspirational Gallery
According to the Hospitality Institute of Technology and Management, stainless steel’s non-porous surface harbors significantly fewer bacteria and germs than common materials like plastic or even wood.
This is why it’s the undisputed champion in professional kitchens. Its surface gives germs nowhere to hide, and a simple cleaning doesn’t just make it look good—it makes it hygienically safe. You’re not just wiping a counter; you’re resetting it to a pristine state.
Fingerprint-Resistant Finish: A special coating that significantly reduces the appearance of smudges and oils. Often has a slightly darker, satin-like appearance. Found on newer appliances from brands like LG and Whirlpool.
Traditional Brushed Finish: The classic look with a visible grain. It shows fingerprints more readily but offers a bright, professional aesthetic that can be easily polished to a high shine.
The choice depends on your tolerance for daily smudges versus your love for that classic, gleaming look.
Those stubborn, chalky white spots around your sink and dishwasher?
That’s likely limescale from hard water. Don’t scrub! You’ll just scratch the surface. Instead, soak a microfiber cloth in plain white vinegar and lay it over the affected area for 10-15 minutes. The acid will gently dissolve the mineral deposits. Remove the cloth, wipe with the grain using a damp cloth, and buff dry for a perfect finish.
Go beyond a simple wipe-down and give your appliances a true polish. The secret isn’t an expensive, single-use product. After cleaning, apply a few drops of a neutral oil—like mineral oil or even olive oil—to a clean, dry microfiber cloth. Buff it into the surface, always moving with the grain. This fills in microscopic imperfections, repels water, and creates a deep, streak-free luster that lasts for days.
- Removes tough, baked-on grease without harsh scrubbing.
- Restores the original shine by gently lifting away oxidation.
- Polishes away minor scuffs and water spots.
The secret? A non-abrasive, oxalic acid-based powder or cream cleanser. A small amount of Bar Keepers Friend applied with a soft sponge can work miracles on stainless steel sinks and cookware that you thought were past their prime.
A critical warning: Never use steel wool or highly abrasive scouring pads to clean stainless steel. It seems intuitive, but you are literally scratching fine metal lines into the surface. These scratches not only ruin the finish but also trap dirt and break down the protective passive layer, making the area more susceptible to rust in the long run.
The feel of a kitchen anchored by stainless steel is one of cool, calm capability. It reflects the light, making the space feel brighter and larger. There’s a satisfying solidity to it—a smooth, cool surface under your fingertips that speaks of durability and cleanliness. It’s the confidence of knowing your workspace can handle anything you throw at it and clean up beautifully afterward.
Over 85% of all steel products are recycled at the end of their life, making it the world’s most recycled material.
Choosing stainless steel appliances isn’t just a design choice; it’s a sustainable one. Unlike many other materials, steel retains its core properties through endless recycling cycles. Your decades-old refrigerator or sink won’t end up in a landfill forever—it will be reborn as part of a new car, a building, or even another kitchen appliance.
Forget the specialized sprays for a moment and look in your pantry. A few surprisingly effective cleaners are likely already there.
- Club Soda: The carbonation helps lift dirt and smudges. Spray it on, wipe with the grain, and dry.
- White Vinegar & Water: A 50/50 solution in a spray bottle cuts through grease effectively.
- Dish Soap: A drop of mild dish soap (like Dawn) in warm water is the perfect solution for daily cleaning.
Black stainless steel is a striking trend, but it’s not the same as the classic material. It’s actually a polymer-based or oxide coating applied over standard stainless steel. This means you must treat it more gently. Avoid any abrasive cleaners or cloths, as you can scratch or delaminate the black coating itself, revealing the shiny steel underneath. Always check the manufacturer’s specific cleaning recommendations.


