Building an Outdoor Farmhouse Table That Won’t Actually Rot
I’ll never forget the first outdoor table I built. It was a beauty—made from heavy, gorgeous pine, with joints so perfect I spent a week on them. I slathered it in a thick, glossy varnish that looked like glass in the sun. I was so proud. And then, reality hit. After just one season, the wood swelled up, cracking the finish. Water seeped into those “perfect” joints, and by the second year, rot was creeping up the legs. It was a tough lesson in humility.
In this article
An outdoor table isn’t just a piece of furniture; it’s a warrior. It has to battle scorching sun, pouring rain, and constant humidity shifts every single day. The classic farmhouse style, with its straightforward strength, is a fantastic choice for a backyard or garden. But here’s the secret: its survival has almost nothing to do with trends and everything to do with the right materials and smart construction. It’s about building something that’s designed to last in the wild.
So, this guide is everything I learned the hard way, through years of professional work. We’ll get into the wood, the joints, and the finishes that actually hold up. More importantly, we’ll talk about what fails and why. Whether you’re planning to build one yourself or just want to buy one that won’t become firewood in two years, this is the knowledge you need.
First Things First: What Are You Getting Into?
Before you even look at a piece of lumber, let’s be realistic about the project. This isn’t a simple afternoon assembly job.
Time Commitment: For a beginner who is learning as they go, plan for this to be a multi-weekend project. Maybe 20-30 hours all in, including finishing. If you’re a seasoned woodworker with all the tools, you could probably knock out the build in a solid weekend, with finishing taking a few more days.
The Right Tools for the Job: You don’t need a pro-level workshop, but you do need some basics.
- Bare Essentials: A good circular saw with a straight-edge guide, a power drill, a tape measure, a speed square, and some quality clamps. You can build a very respectable table with just these.
- Nice-to-Haves: A miter saw makes crosscuts a breeze, and a table saw offers incredible precision for ripping boards. A pocket hole jig can be useful for aprons (more on that later), and a router is fantastic for softening edges.
What Size Are We Talking? A great starting point for a table that comfortably seats 6 to 8 people is somewhere around 72 to 84 inches long and about 36 to 40 inches wide. This gives everyone enough elbow room without being monstrously huge.
Your Real Opponents: Water and Sun
Okay, let’s talk about the forces trying to destroy your beautiful table. The main villain is water. Wood is basically a bundle of tiny straws that suck up moisture from the air when it’s humid and release it when it’s dry. This swelling and shrinking is the most powerful force you’ll deal with. You can’t stop it, so you have to build in a way that allows for it.
Imagine a solid tabletop made of boards screwed tightly together. When it gets humid, each board tries to expand sideways. The force is immense—it can easily bend steel screws or crack the wood itself. This is precisely why you see gaps between the boards on any well-made outdoor table. A 1/4-inch (about 6mm) gap is a good standard. It’s not a design flaw; it’s essential engineering that lets water drain and gives each board room to breathe.
The sun is the second challenge. UV rays break down the surface fibers of wood, turning it that familiar silvery-gray. But they also absolutely destroy most finishes. That crystal-clear varnish that looks amazing indoors might only last a single season outside before it yellows, cracks, and starts peeling off, letting water in. Game over.
Choosing Your Wood: The Most Important Decision
Your choice of wood is the number one factor in how long your table will last. Some woods are naturally packed with oils and dense fibers that fight off rot and bugs. Others will turn to mush in no time. Cost is always a factor, but trust me, choosing cheap, unsuitable wood is a false economy. You’ll just be building it all over again.
Top-Tier Woods: The Investment Pieces
These are the champions of the outdoors. They cost more upfront, but they have the best natural defenses. Think of this as the “buy it for life” category.
- Teak: This is the gold standard for a reason. It’s a tropical hardwood loaded with natural oils that make it incredibly resistant to water and insects. It’s dense, strong, and can last for decades. Left alone, it weathers to a beautiful, elegant silver-gray. The downside? The price. You’re looking at $25 to $40+ per board foot. If you go this route, please look for sustainably sourced options.
- Iroko (African Teak): A fantastic and slightly more affordable alternative to teak, often running $15 to $25 per board foot. It has great rot resistance and stability. It starts as a yellow-brown and deepens to a rich, dark brown. Heads up! Iroko dust can be a serious irritant. A good dust mask is non-negotiable when cutting or sanding it. I learned that the hard way.
- White Oak: A phenomenal domestic hardwood for outdoor use. Unlike its cousin, Red Oak, White Oak has closed cell structures that block water—it’s the same reason it’s used for whiskey barrels. It’s heavy, strong, and beautiful. Expect to pay around $10 to $18 per board foot. One critical rule: NEVER use Red Oak outside. Its open pores will suck up water like a sponge and rot from the inside out.
- Western Red Cedar: Lightweight, smells amazing, and is naturally resistant to rot. It’s a softwood, so it’s easy to work with but also dents and scratches easily, which can add to a rustic charm. It’s a great choice for that classic farmhouse look and costs about $8 to $15 per board foot.
Good Woods That Need a Great Finish
These can work really well, but their lifespan is tied directly to how well you protect them with a finish. Their natural defenses aren’t quite as high.
- Cypress: Another softwood with good natural decay resistance, especially common in the southern U.S. It’s fairly stable and creamy-colored but, like cedar, it’s soft. A solid mid-range choice, usually $7 to $12 per board foot.
- Accoya: This is a fascinating modern material. It’s a modified wood (usually pine) that’s been treated in a way that changes its molecular structure, making it unable to absorb water. It’s incredibly stable and often comes with a 50-year warranty against rot. It’s pricey—often more than teak—but its performance is unreal, and it holds paint better than almost anything.
- Pressure-Treated (PT) Pine: This is your budget-friendly workhorse, typically $2 to $5 per board foot. The wood is infused with chemicals to stop rot. The catch? It’s usually sold soaking wet and will shrink, twist, and crack as it dries. Quick tip: Buy your PT lumber in the spring, stack it in your garage with small sticks (a process called ‘stickering’) between each layer, and let it dry out for a couple of months. It’ll be much more stable to work with by summer. Oh, and you MUST use stainless steel or hot-dipped galvanized fasteners. Standard screws will corrode and fail in a year or two.
How You Build It Matters
The strongest, longest-lasting joints are often the most traditional ones. They’re designed for strength and to handle that inevitable wood movement.
For joining the legs to the aprons (the frame under the top), nothing beats a mortise and tenon joint. It provides massive glue surface area and mechanical strength. Lap joints and bridle joints are also solid choices. What should you avoid? For primary structural joints, I strongly advise against pocket holes. They’re great for indoor cabinets, but outdoors they create a little pocket that can trap water, and they rely entirely on the screw’s strength. As the wood moves, those screws can loosen and fail.
Pro-Tip on Breadboard Ends: Those perpendicular boards on the ends of some farmhouse tabletops look amazing, but they are a nightmare outdoors if done wrong. Why? Because the main tabletop wants to expand and shrink side-to-side, but the breadboard end won’t let it. The solution? Don’t glue the whole thing. The center can be glued, but the outer connections should be done with screws in elongated holes or with a floating tenon system that allows the main top to move freely inside the end cap.
And for hardware and glue? Non-negotiable: use stainless steel or hot-dipped galvanized screws and bolts. For glue, a waterproof PVA like Titebond III is a good standard. For the absolute best, bomb-proof bond, use a marine-grade epoxy.
The Final Step: A Finish That Actually Protects
Remember how water and sun are the enemies? Your finish is your shield. First, design for drainage. Beyond the gaps in the top, make sure you round over all sharp edges with a router or sandpaper. A finish has a hard time sticking to a sharp 90-degree edge; it creates a thin, weak point that fails first. A slightly rounded edge holds finish much better and helps water run off instead of sitting.
Now for the finish itself. You have two main camps:
- Film Finishes (Varnish, Polyurethane): These create a plastic-like film on the surface. They offer great protection at first, but they are brittle. When the wood moves, they crack. Once breached, they trap water underneath, causing peeling and rot. I generally avoid them for outdoor tables.
- Penetrating Oils (Tung Oil, Teak Oil): These soak into the wood, nourishing it from within and repelling water. They don’t form a film, so they can’t crack or peel. The trade-off is that you need to reapply them more often, usually once a year.
My Simple 3-Step Finishing Process: 1. Sand everything smoothly, up to about 180-grit. 2. Apply a liberal coat of a quality penetrating outdoor oil. Let it soak in for 15-20 minutes. 3. Wipe off ALL the excess. Seriously, wipe it until it feels dry. If you leave oil on the surface, it gets sticky. Let it cure for a day and repeat with a second coat.
This method is forgiving, easy to maintain, and in my opinion, it lets the wood look and feel like actual wood.
Quick Win for Your Old Table: Got a wobbly table outside right now? Go give it a 15-minute tune-up. Tighten all the bolts and check the screws. If any are rusted, replace them with stainless steel ones of the same size. A little bit of maintenance can add years to its life.
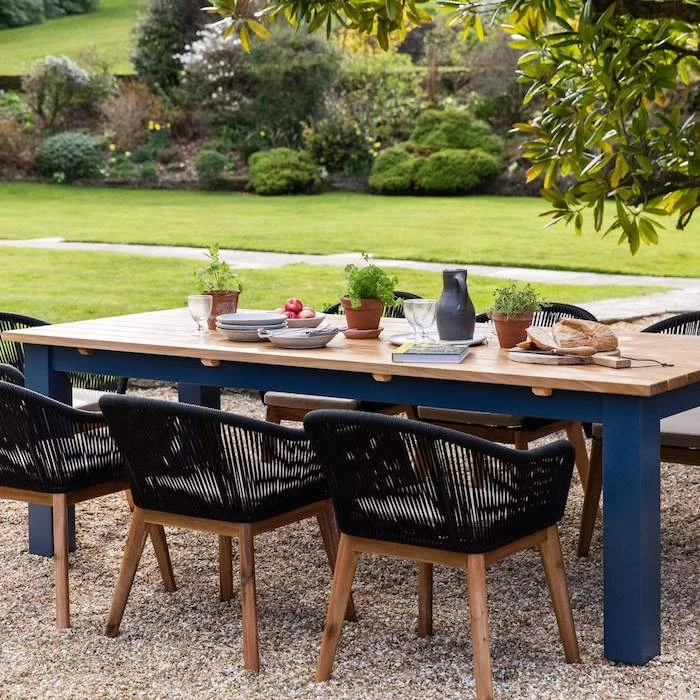
Inspirational Gallery
Teak: The gold standard. Naturally rich in oils, it’s incredibly resistant to rot and insects. It weathers to a beautiful silver-grey. The downside? Its high cost reflects its premium quality.
Western Red Cedar: A fantastic, more affordable alternative. It contains natural tannins that resist decay and bugs. It’s much lighter than teak, making the table easier to move, but it’s also softer and can dent more easily. Both are excellent choices for a long-lasting outdoor table.
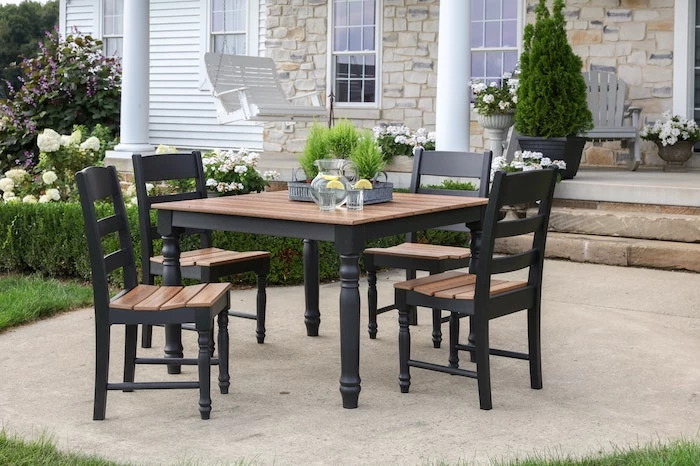
Not all screws are created equal for outdoor use. Galvanized screws will eventually react with the tannins in woods like cedar, leaving black stains and failing over time.
The ultimate enemy of your table legs: end grain. The cut ends of wood act like a bundle of straws, wicking moisture up from a damp patio or lawn. Even with the best wood, this is where rot begins. The non-negotiable solution is to seal the end grain of the legs with multiple coats of a penetrating epoxy like Smith’s Clear Penetrating Epoxy Sealer before applying your final finish. It creates an impermeable plastic barrier inside the wood fibers.
Your table’s annual check-up is simple but crucial for its longevity. A quick spring ritual can prevent major issues down the line.
- Gently scrub the surface with a soft bristle brush and a mild, pH-neutral wood cleaner.
- Check all joints and hardware. Tighten any loose bolts or screws.
- Lightly sand any rough spots or areas where the finish is wearing thin.
- Reapply a single, thin coat of your original finish, such as a penetrating oil like Penofin or Messmer’s UV Plus, to refresh its water repellency and UV protection.
How do I get that beautiful, silvery-grey patina on my table without it looking like neglected rot?
The key is controlled aging. That desirable patina is the result of surface wood fibers reacting to UV light. To achieve it gracefully, start with a rot-resistant wood like cedar or ipe. Instead of a heavy varnish, use a high-quality penetrating oil finish with a clear or silver-hued tint. This protects the wood from water deep within while allowing the surface to slowly and evenly grey over. Clean it annually to prevent mildew from turning the silver into a grimy black.
The ancient Japanese technique of Shou Sugi Ban involves charring the surface of wood to make it weatherproof.
This isn’t just a design trend; it’s a centuries-old preservation method. The charring process creates a layer of carbon that is remarkably resistant to rot, insects, and even fire. While a fully charred farmhouse table is a bold statement, you can apply a light char with a roofer’s torch to cedar planks before assembly and sealing. It brings out the wood grain beautifully and adds a powerful layer of natural protection.
An outdoor table is more than wood and screws; it’s a silent witness to life. It will host impromptu Tuesday night dinners, birthday cakes with melting frosting, and late-night conversations under the stars. It will bear the marks of spilled wine and children’s art projects. These aren’t imperfections; they are the patina of a life well-lived outdoors, a story etched into its grain season after season.
- It won’t crack or peel like varnish.
- It nourishes the wood from within, preventing it from drying out.
- Touch-ups are as simple as wiping on a new coat—no stripping required.
The secret? A quality penetrating oil finish. Unlike film finishes that sit on the surface, oils soak into the wood fibers, becoming part of the wood itself. This allows the wood to breathe and move with changes in humidity, which is the key to preventing cracks and water intrusion.
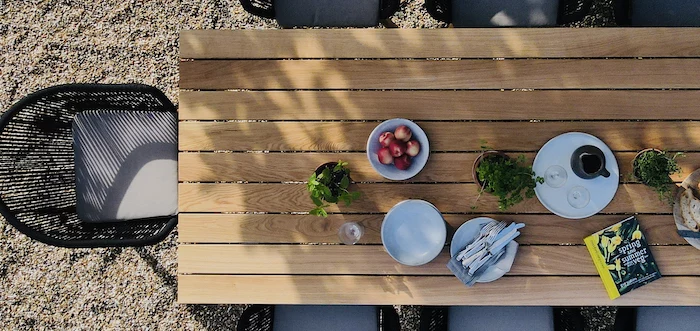
Elevate your farmhouse table from a simple surface to a functional centerpiece by incorporating a built-in trough. This is easier than it sounds and adds incredible utility for gatherings.
- For Drinks: Build it with a slight slope and a small drain hole, then line it with a custom-fit galvanized metal insert to create the perfect ice bucket for chilling bottles.
- For Ambiance: Skip the liner and use it as a planter for a row of hardy succulents or herbs. It creates a living table runner that’s always beautiful.


