My Method for a Magazine-Worthy Christmas Tree (It’s Easier Than You Think)
I’ve decorated hundreds of Christmas trees over the years, from towering giants in hotel lobbies to cozy ones in family living rooms. And I’ll let you in on a little secret: a breathtaking tree has almost nothing to do with how much money you spend. It’s all about the method.
In this article
- The Foundation: Picking and Prepping Your Tree
- The Science of Light: Creating That Inner Glow
- Adding Dimension with Ribbon and Garland
- The Main Event: Hanging Ornaments with a Strategy
- Get Creative: Themes and DIY Touches
- The Finishing Touches
- The After-Party: Storing It All Like a Pro
- Inspirational Gallery
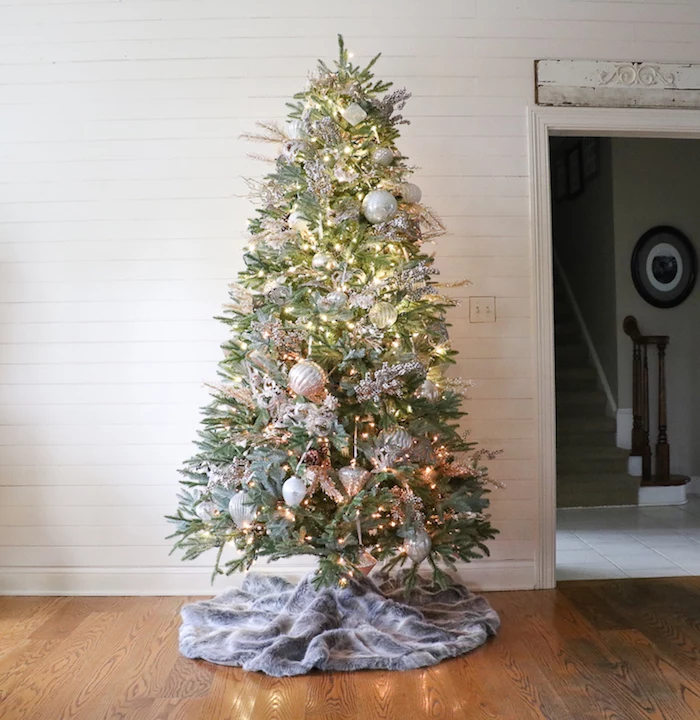
The biggest mistake I see people make is just… hanging ornaments on the outside branches. A truly stunning tree has depth. It has layers. It literally glows from the inside out. This isn’t about chasing some fleeting trend; these are the foundational techniques that create that ‘wow’ factor every single time.
So, let’s walk through the whole process. We’re going to cover everything from picking the right tree to the final, crucial step of standing back and making those last little tweaks. Think of it as building your masterpiece, one layer at a time.
The Foundation: Picking and Prepping Your Tree
Everything starts here. You can’t build a beautiful display on a weak or poorly prepared tree. This first choice, whether you go for a real tree or an artificial one, sets the stage for everything else.
For Live Trees: Freshness is Everything
When I’m picking out a live tree, I’m not just looking for a nice shape. I’m checking its health, because a dry tree is a serious fire hazard and won’t hold up your decorations. Here’s my field test:
- The Needle Test: Gently slide a branch through your closed hand. If more than a few needles come off, it’s a pass. Keep looking.
- The Drop Test: Lift the tree a couple of inches off the ground and drop it on its stump. It’s normal for some brown, dead needles from the interior to fall, but if you see a shower of green, that tree is already on its way out.
By the way, the type of tree matters. For big, heavy ornaments, I love a Fraser or Noble Fir. Their branches are strong and angle up a bit. A Douglas Fir is beautiful and smells amazing, but the branches are softer, so they’re better for lighter ornaments and lots of ribbon.
Once you get it home, the clock is ticking. You need to make a fresh, one-inch cut off the bottom of the trunk to help it drink water. Then, get it into a sturdy stand with a big water reservoir—and I mean big. Look for a heavy metal stand with a wide base and eye-bolts that screw directly into the trunk; those cheap plastic ones just aren’t worth the risk. A good one might cost you $50-$80, but it will last forever. Make sure the reservoir holds at least 1.5 gallons, because a tree can guzzle a whole gallon in the first 24 hours. Check the water level every single day. Honestly, this is the most important safety rule for a live tree.
For Artificial Trees: The Art of the Fluff
A good artificial tree is an investment. You’ll see terms like “tip count” (more is better) and needle types. Look for trees with PE needles mixed in with the standard PVC ones—they’re molded to look like real branches and make a huge difference in realism. A quality 7.5-foot tree can run you anywhere from $300 to over $700, but it’s something you’ll use for years.
Now for the most tedious, but most transformative, step: fluffing. Don’t rush this. I budget a solid hour for a 7.5-foot tree. Start at the bottom and work your way up, section by section. On each main branch, you have to separate every single little tip. Point them in all different directions—up, down, and to the sides. The goal is to hide the center pole and create a dense, full canvas. A properly fluffed tree looks a foot wider and a hundred times more expensive than one just pulled from the box.
A Quick Word on Pre-Lit Trees
Let’s be real, a lot of us have pre-lit trees for the convenience. They’re great… until a whole section goes dark. Before you panic, find the plug for that section and look for a tiny, slide-out compartment. That’s where the fuse is! Most light sets come with a couple of spares taped to the cord. Swapping that little guy out fixes the problem 90% of the time. If that doesn’t work, you can buy a light tester tool at a hardware store for about $25 that can help you find the one bad bulb causing the outage. And if all else fails? Don’t despair. Just grab a new strand of lights and weave it into the dead section. No one will ever know.
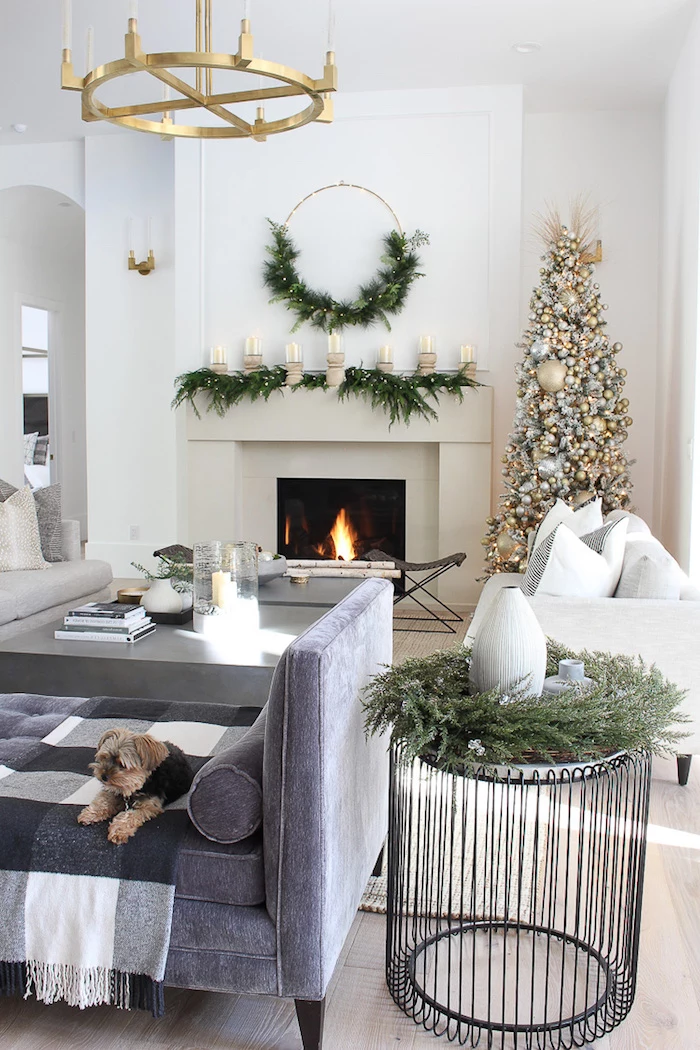
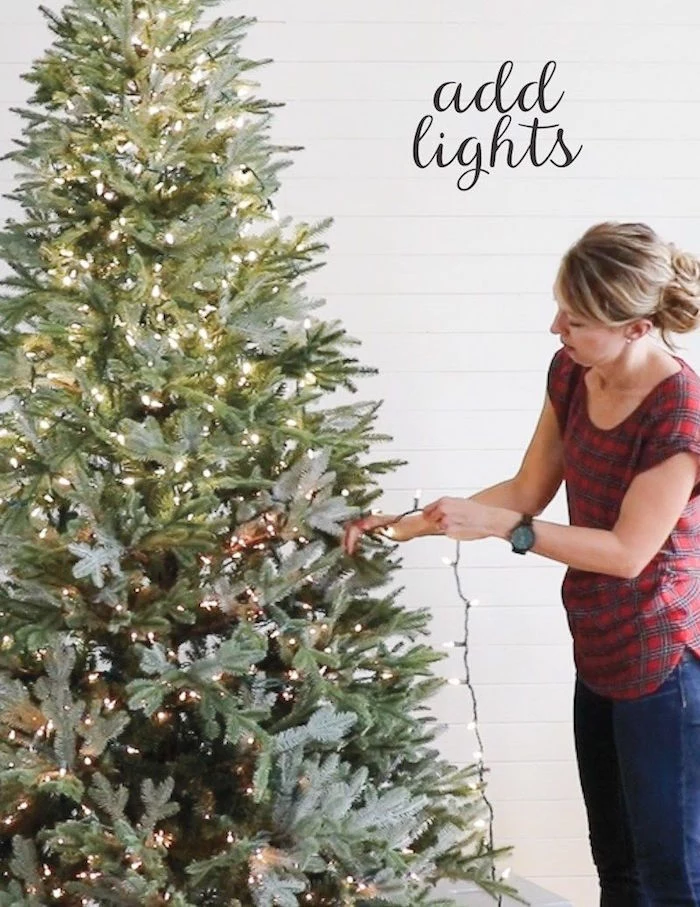
The Science of Light: Creating That Inner Glow
Lights are the soul of the tree. This is where we create that magical depth. Amateurs wrap lights around the outside. Pros light the tree from the inside out.
As a rule of thumb, you want a minimum of 100 lights per vertical foot of tree. So for a 7.5-foot tree, that’s at least 750 lights. To be frank, I usually aim for 150-200 per foot for that really brilliant, commercial look. Don’t be shy here; more is more.
Before you start, plug in every single strand to make sure they all work. It’s absolutely heartbreaking to finish wrapping a section only to discover it’s dead.
Here’s the pro technique: Start at the bottom, near the trunk. Take your strand of lights and weave it from the trunk out to the tip of a branch, and then weave it back toward the trunk. Then move to the next branch. This places lights deep inside the tree and out toward the tips. The inner lights create that gorgeous glow, while the outer lights provide the sparkle. It takes a little more time, but the effect is so worth it.
Heads up on safety! Only use lights that are UL-listed. And don’t overload your circuits. The classic rule is to connect no more than three strands of old-school incandescent lights. With modern LEDs, it’s a different story; you can often connect 20, 30, or even more strands together safely. Just check the box to be sure. A surge protector is always a good idea.
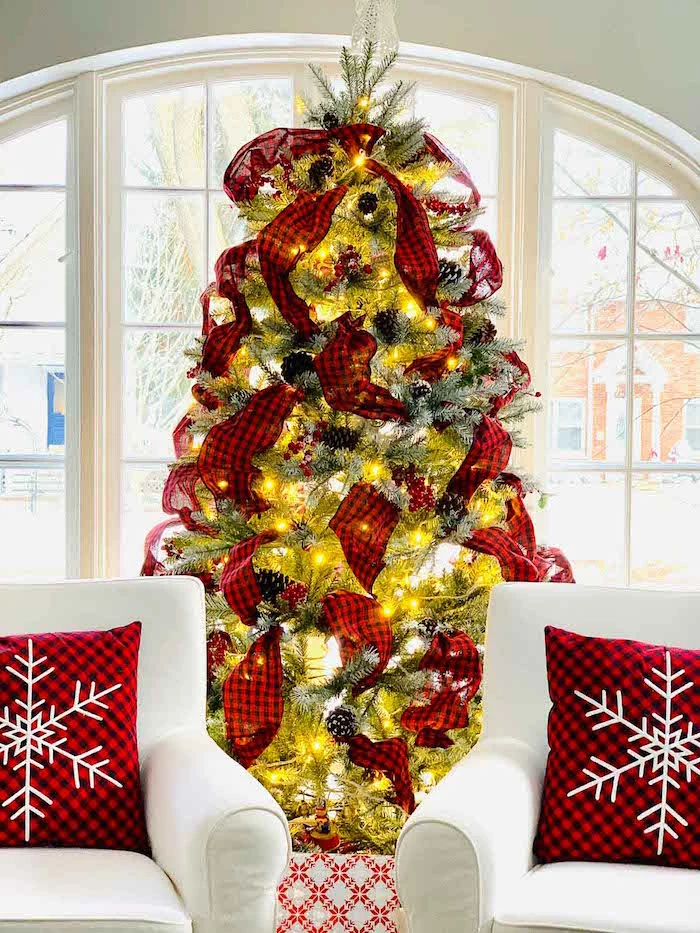
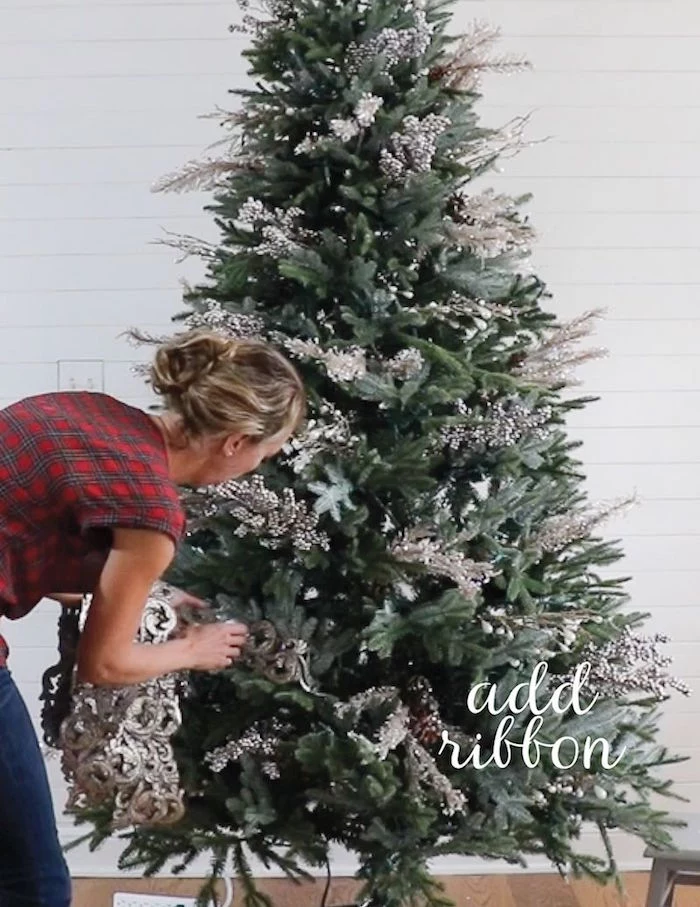
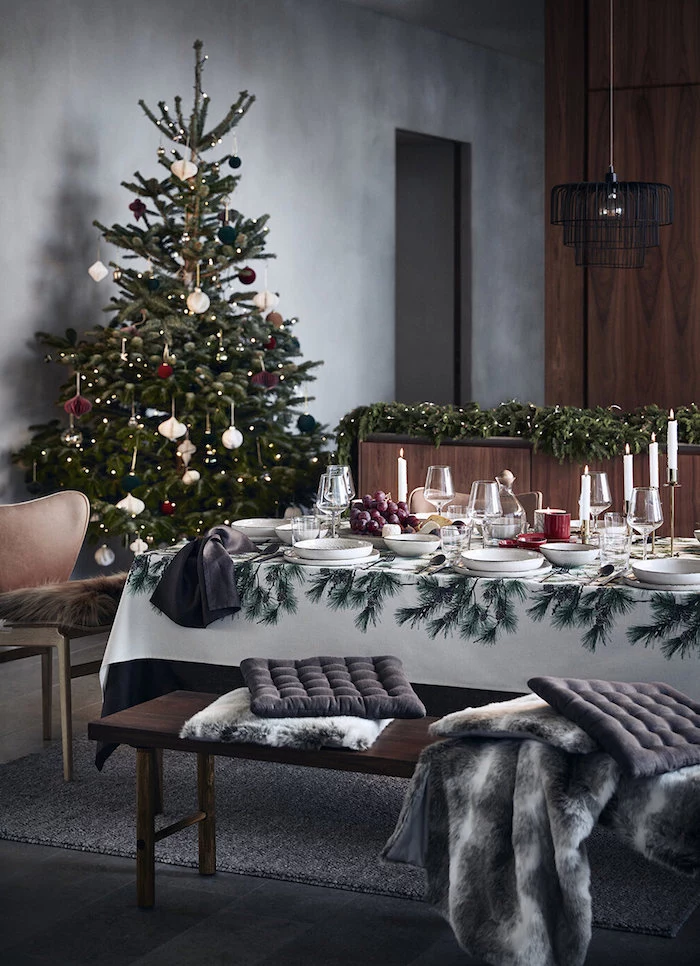
Adding Dimension with Ribbon and Garland
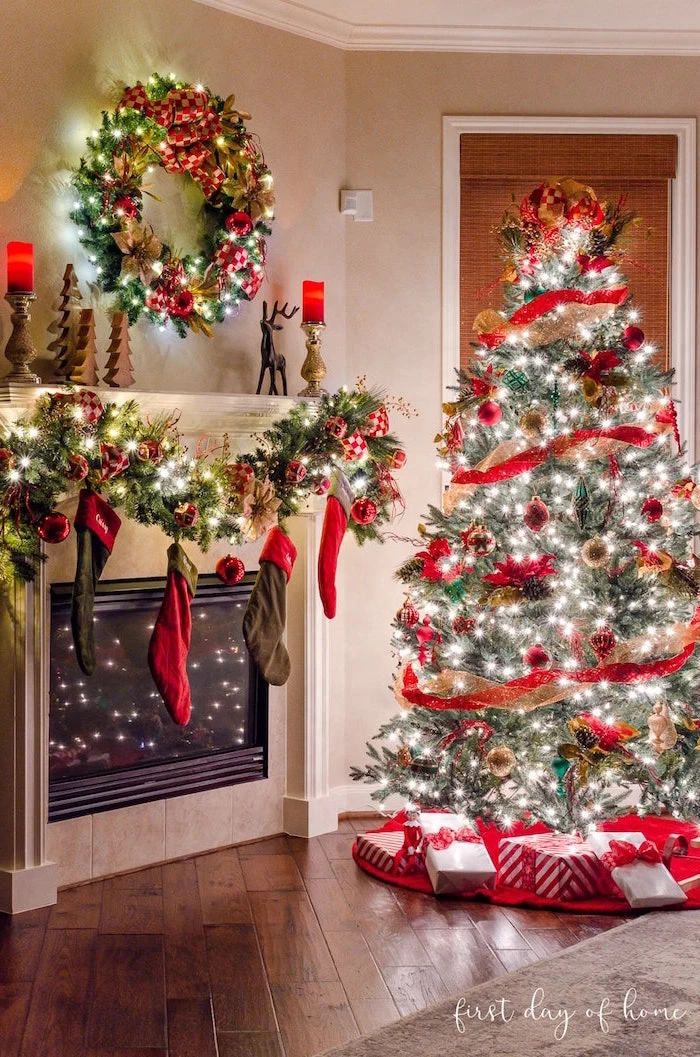
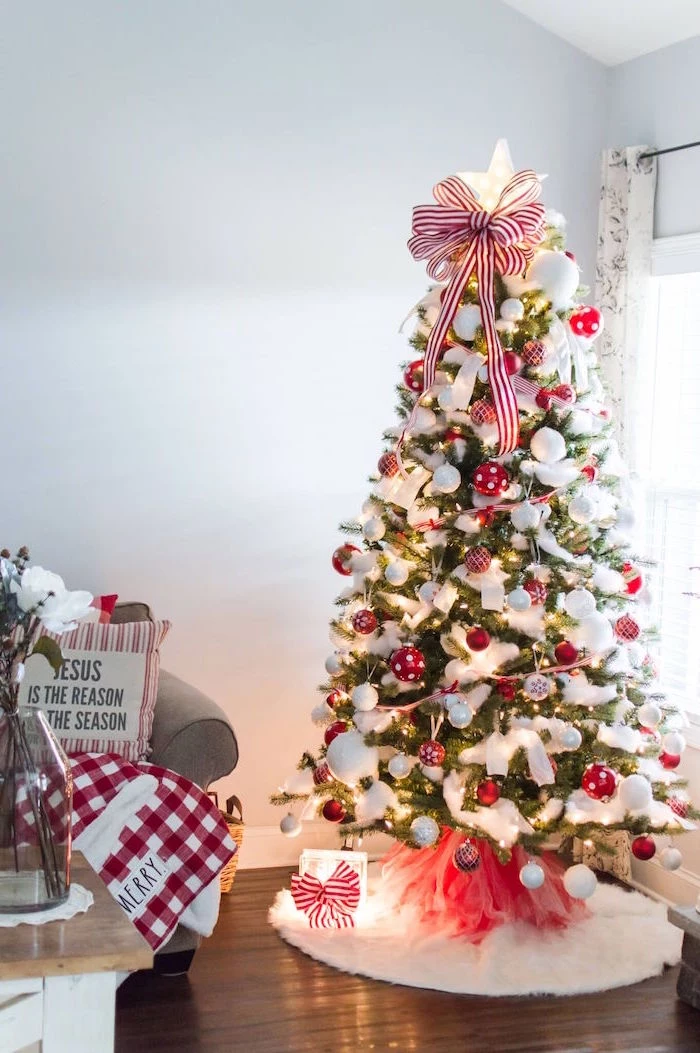
Once the lights are on, the tree should already look pretty magical. Now we add texture. The secret here is wired ribbon. I’ll never forget the year I tried using cheap, non-wired ribbon on a client’s tree to save a few bucks. It looked like a sad, droopy mess by morning. Trust me, the wire is everything! I typically use 2.5-inch or 4-inch wide ribbon. For a lush look on a 7.5-foot tree, you’ll want around 30 to 50 yards. You can find good quality rolls at craft stores for about $8 to $15 each.

There are a few ways to apply it:
- The Waterfall: This is my favorite for a dramatic look. Cut 4- to 5-foot strips of ribbon. Starting near the top, tuck one end deep into the branches and secure it by wrapping a branch tip around it. Let the ribbon cascade down, tucking it in every 12 inches or so to create a soft billow. Repeat this all around the tree.
- The Weave: Start at the top and gently weave the ribbon horizontally around the tree. The key is to keep it loose, creating generous poofs as you go. Don’t pull it tight—that makes the tree look stiff.
- The Bow Method: For a more traditional or rustic vibe, make a bunch of simple bows and attach them with floral wire. Place them strategically to fill in gaps, almost like they’re large ornaments.
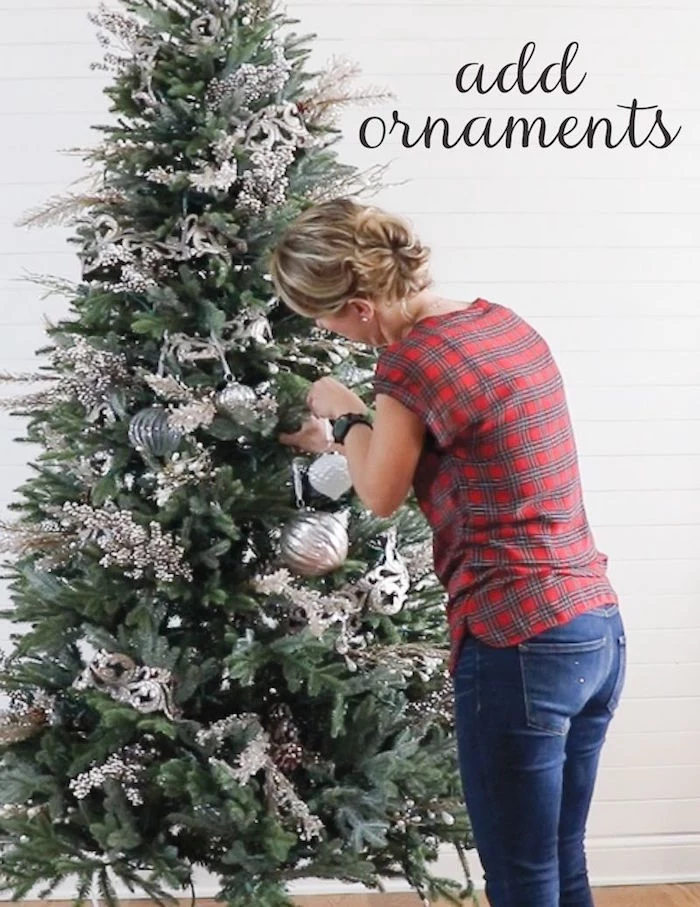
The Main Event: Hanging Ornaments with a Strategy
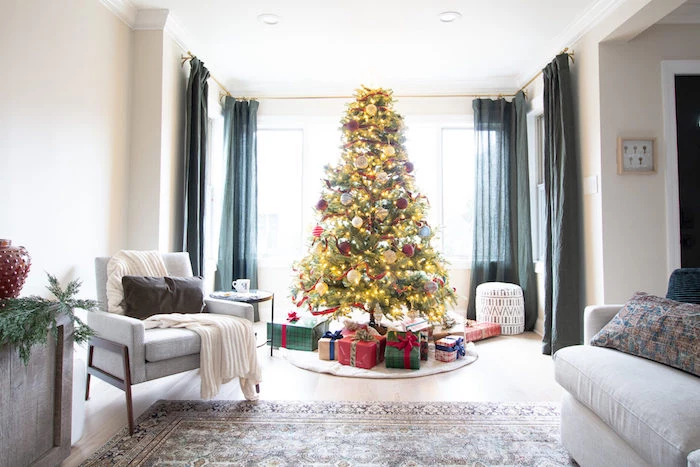
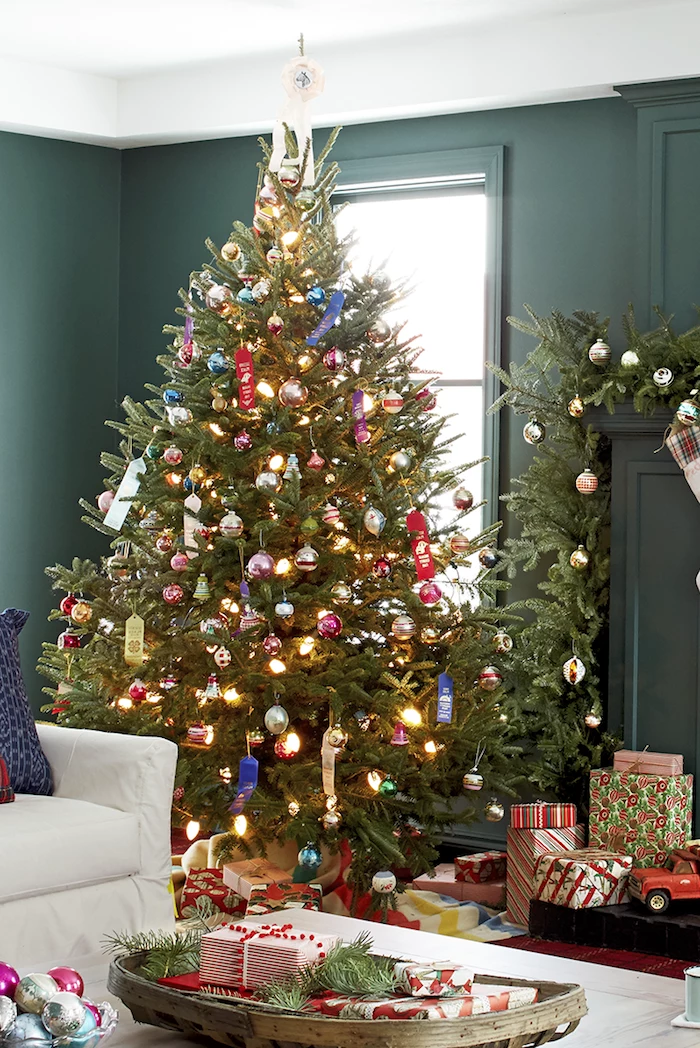
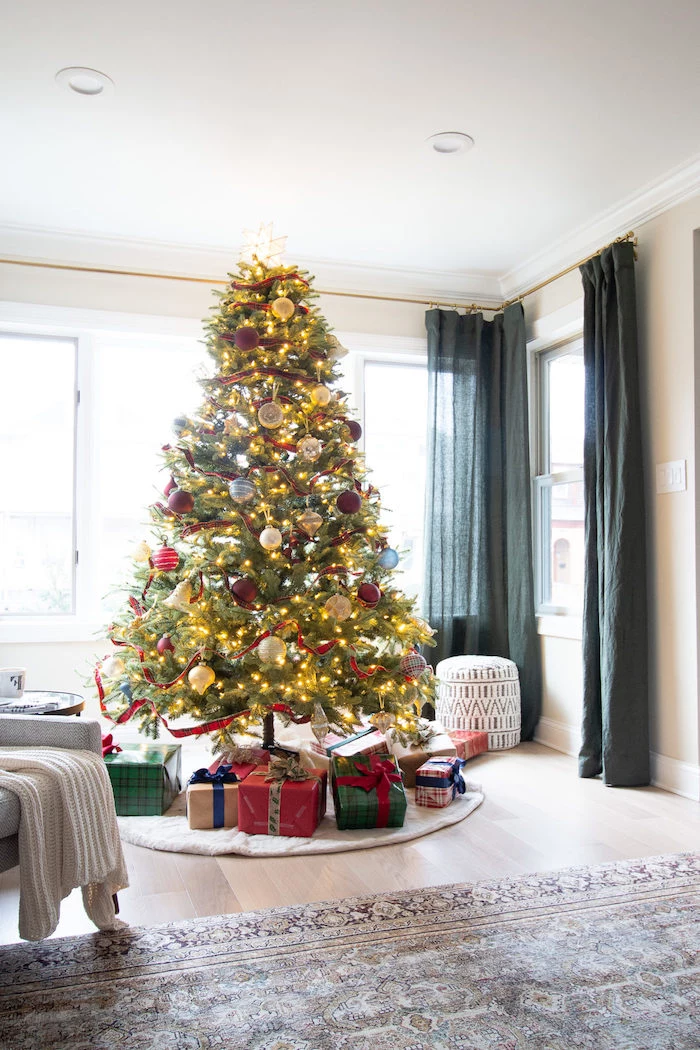
Okay, now for the fun part. But there’s a strategy here, too. One of the biggest secrets to a full, expensive-looking tree is using ‘filler ornaments.’ These are just simple, inexpensive balls in your main colors. Their job isn’t to be seen, but to fill space and reflect light from deep inside the tree. I usually buy 4 to 6 dozen of these in bulk. Before you hang a single fancy ornament, hang these fillers deep inside the tree, close to the trunk.
Once the fillers are in, you can hang your main ornaments in layers:
- Largest Ornaments First: Distribute your biggest, heaviest ornaments evenly around the tree. This helps establish the visual weight and balance.
- Standard Ornaments Next: Fill in the gaps with your regular-sized decorative ornaments. Make sure to hang some on the outer tips and others further back to continue building that depth.
- “Showstoppers” Last: Your most special, delicate, or sentimental ornaments go on last. Place them in prime real estate, at eye-level, where they can really be appreciated.
Every so often, step back across the room. Squint your eyes. Are there any weird gaps? Are all the red ornaments clumped together? Adjust as you go.
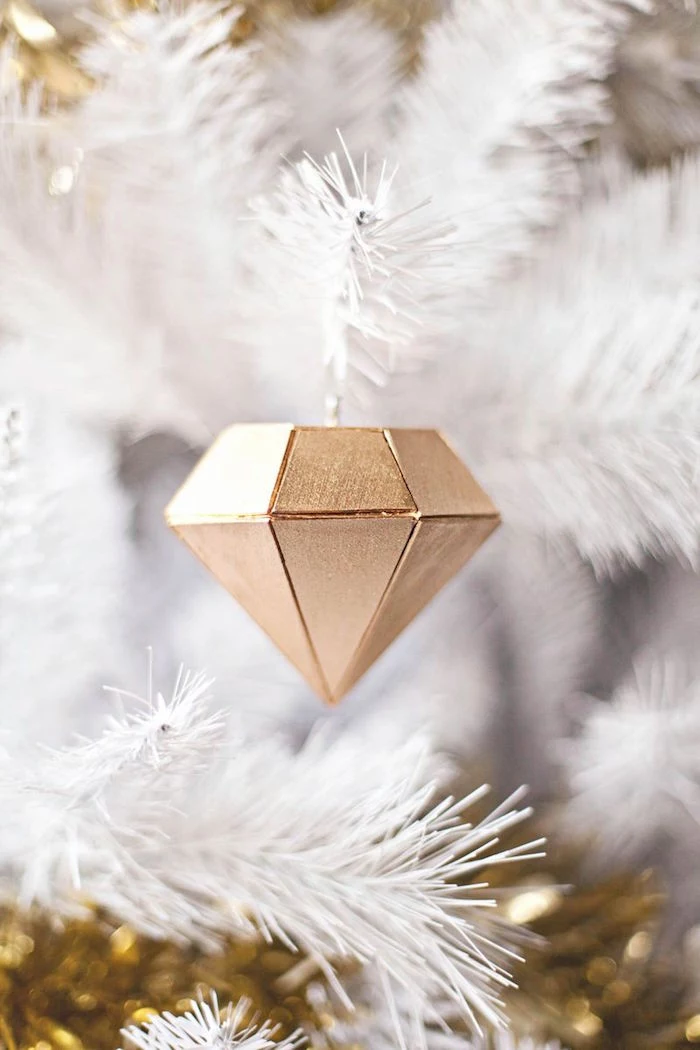
Get Creative: Themes and DIY Touches
While the techniques are universal, the style is all you. A woodland theme with pinecones and burlap is beautiful. A coastal theme with blues, greens, and starfish can be stunning. Or a simple, clean Scandinavian look with natural wood and straw ornaments. It’s all about creating a vibe that feels authentic to you.
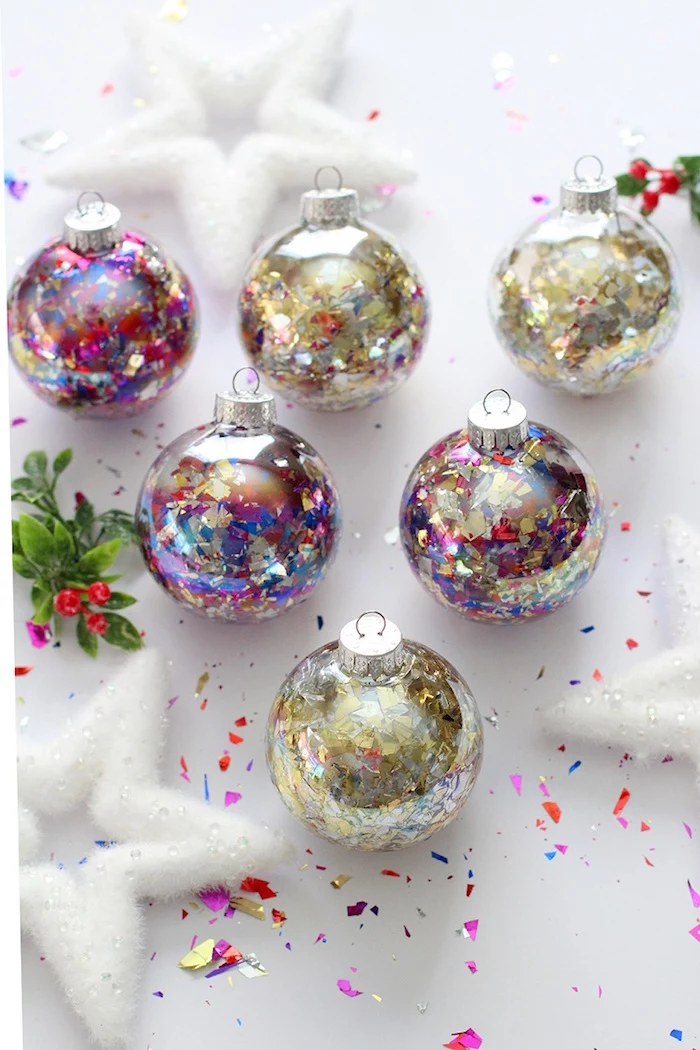
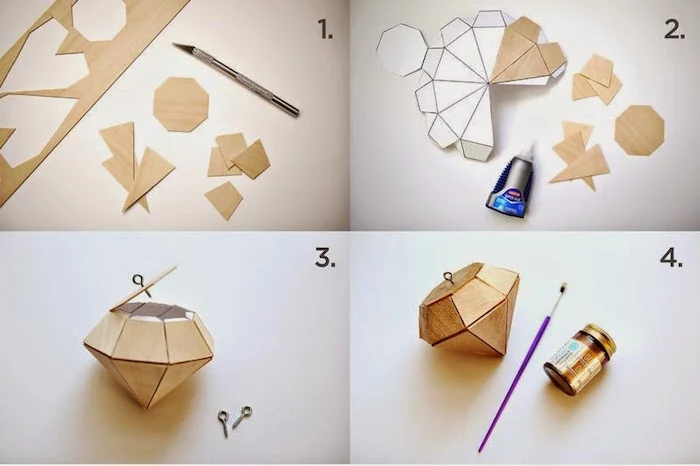
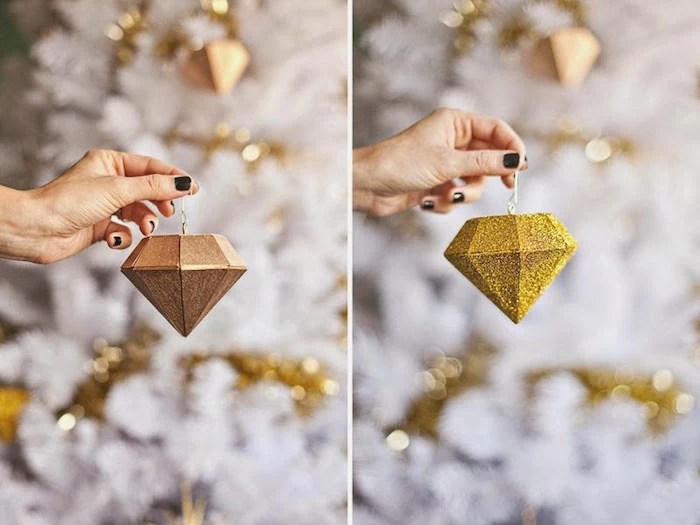
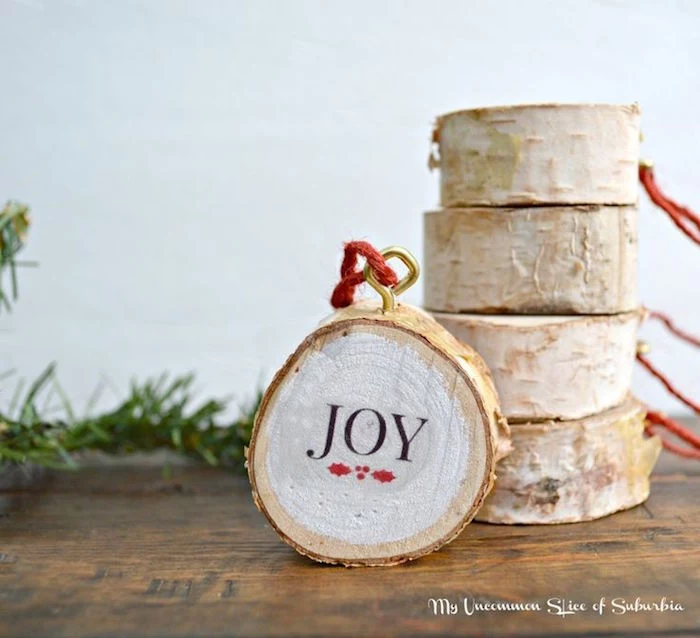
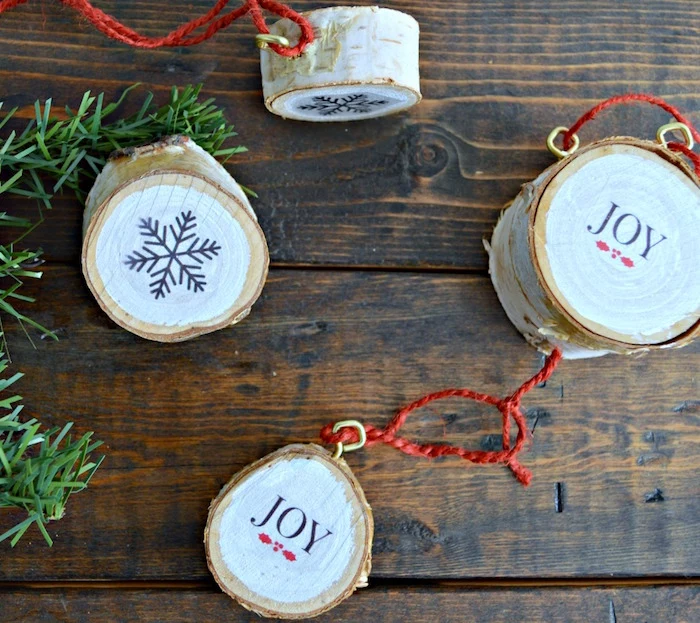
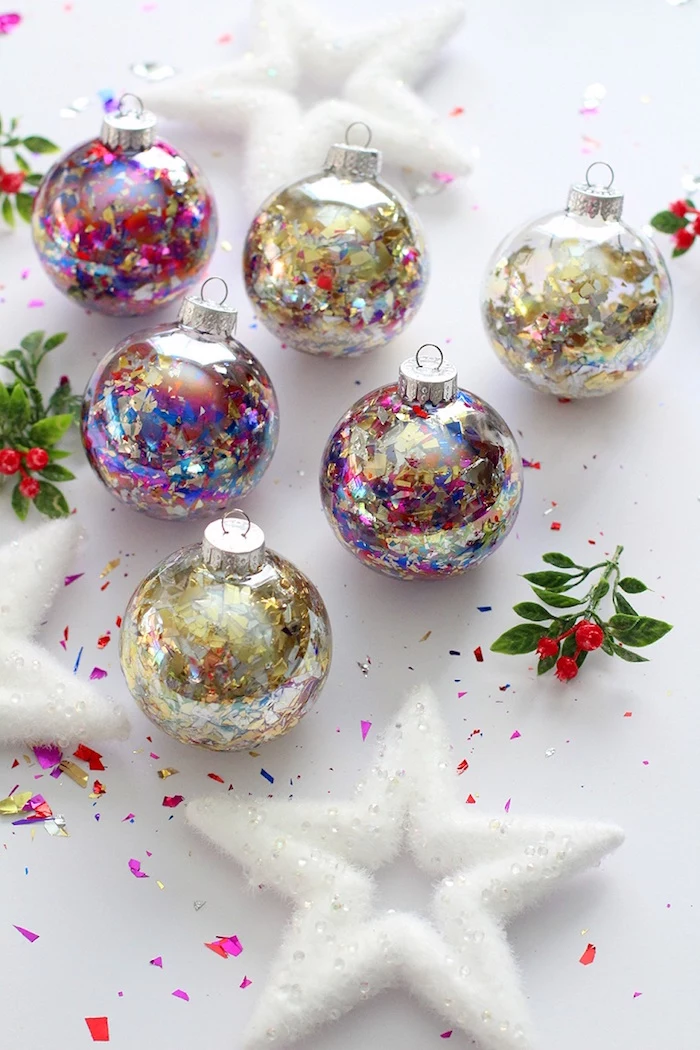
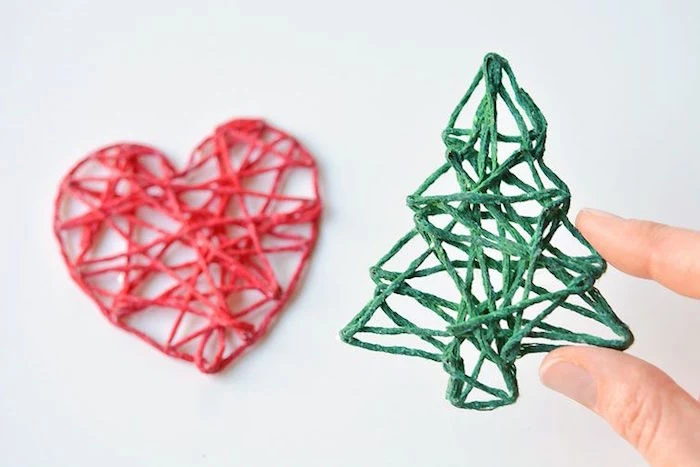
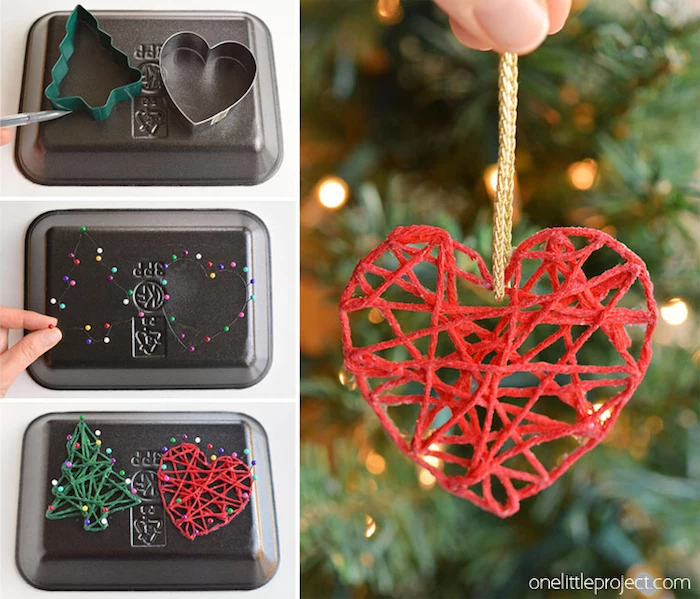
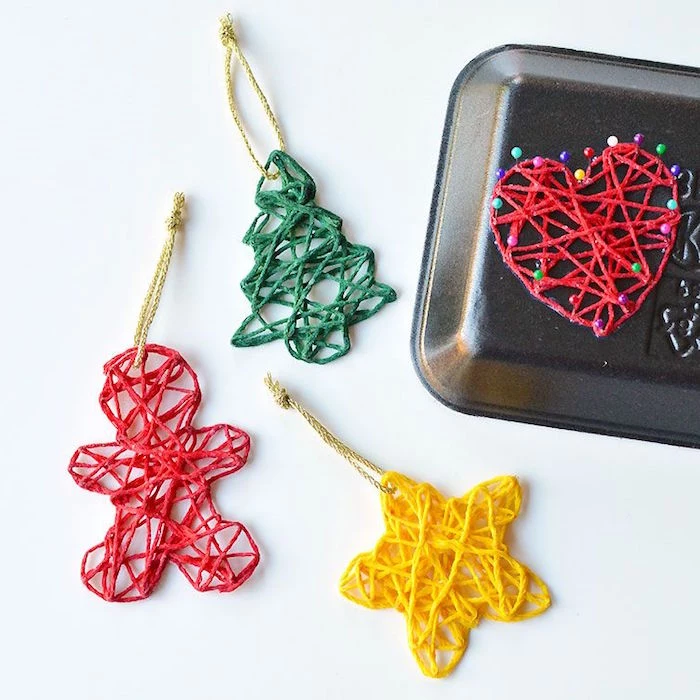
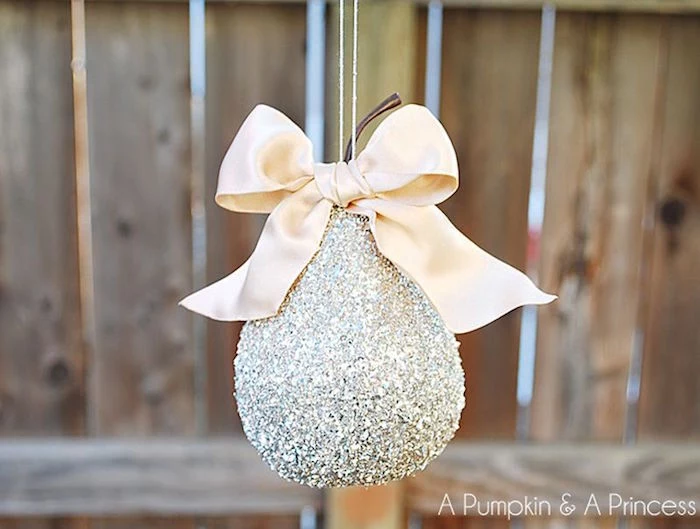
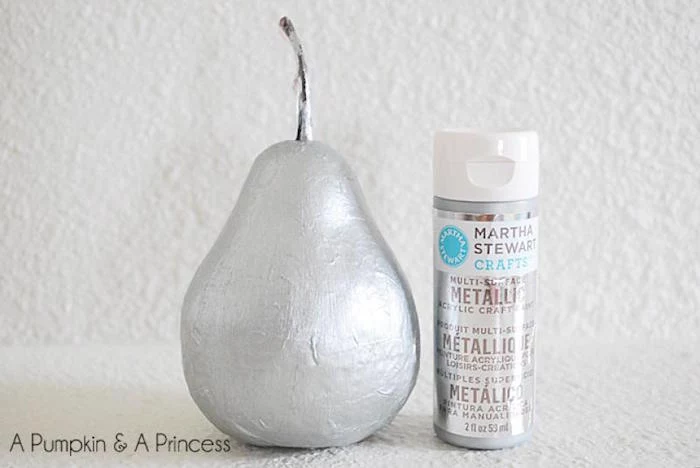
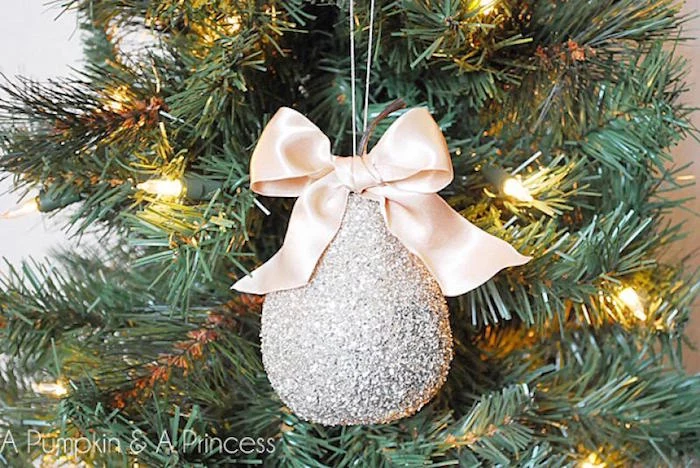
Making a few of your own ornaments is a great way to add a personal touch. Here’s a pro tip for a popular project:
For those glitter-filled glass ornaments, don’t use water-based glue—it gets splotchy. The trick is to use a liquid floor finish or a thin, clear sealant like Polycrylic (you can find it in the wood stain aisle at Home Depot or Lowe’s). Pour a little into a clear glass ornament, swirl to coat the inside, pour out the excess, and then immediately add your glitter. Shake it up, and you’ll get a perfect, durable coat of sparkle every time.
The Finishing Touches
We’re almost there! Let’s talk about the final details that pull it all together.
A heavy topper can be a pain to secure on a flimsy top branch. Here’s my go-to hack: get a simple 1/2-inch wooden dowel from any hardware store. Use a couple of green zip ties to lash the dowel vertically to the top two feet of the tree’s main trunk, letting it stick out a few inches above the top. Now you have a super sturdy post to slide any topper onto. It will be perfectly straight and secure.

For the base, you can go with a traditional skirt or a tree collar—those solid rings of metal or wicker. Collars give a cleaner look and are fantastic if you have pets or a robot vacuum that might mess up a cloth skirt.
Finally, before you call it done, do the professional’s final review. Turn off all the other lights in the room. Walk around the tree slowly. Stand way back. Look for any crooked ornaments or ribbon that needs a little fluffing. This final check is what makes it perfect.
The After-Party: Storing It All Like a Pro
Oh yeah, don’t forget the takedown plan! This will save you so much grief next year. Don’t just throw everything in a box.
- For Lights: Never ball them up. I wrap my strands tightly around a square of sturdy cardboard or a dedicated light storage reel. No more tangled mess.
- For Ribbon: Carefully roll your good wired ribbon back onto its original spool or a spare paper towel tube. This keeps it from getting crushed and creased.
- For Ornaments: Invest in sturdy plastic bins with cardboard dividers. I wrap my most precious ornaments in a bit of tissue paper before putting them away.
And that’s the whole process! It might seem like a lot, but by building your tree in these layers—foundation, lights, ribbon, and ornaments—you create something truly special that will bring so much warmth and beauty into your home.
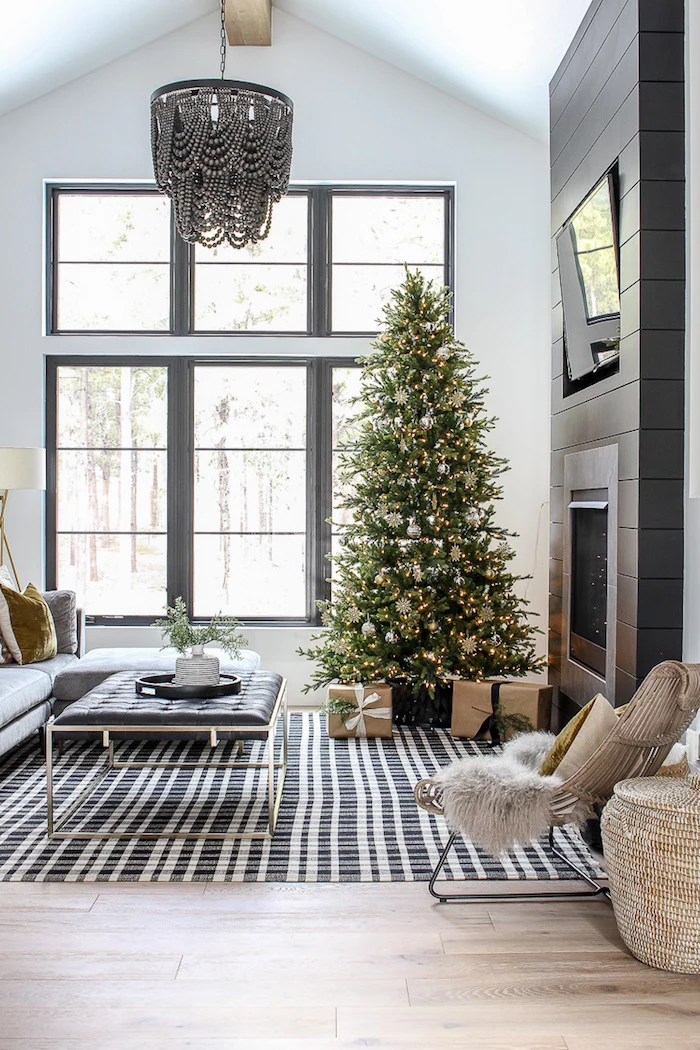
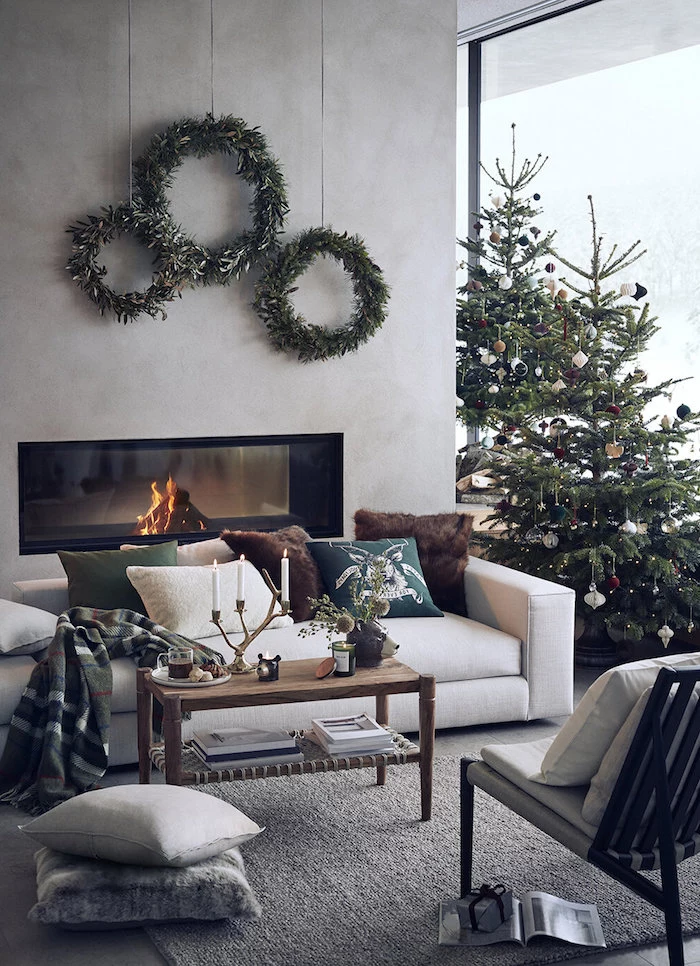
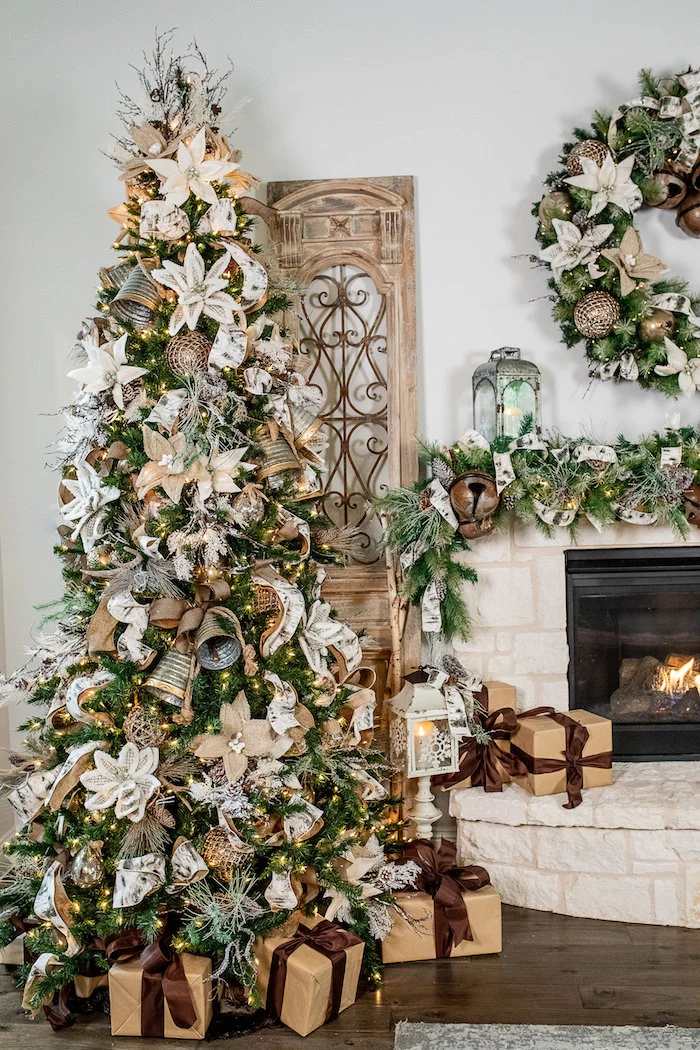
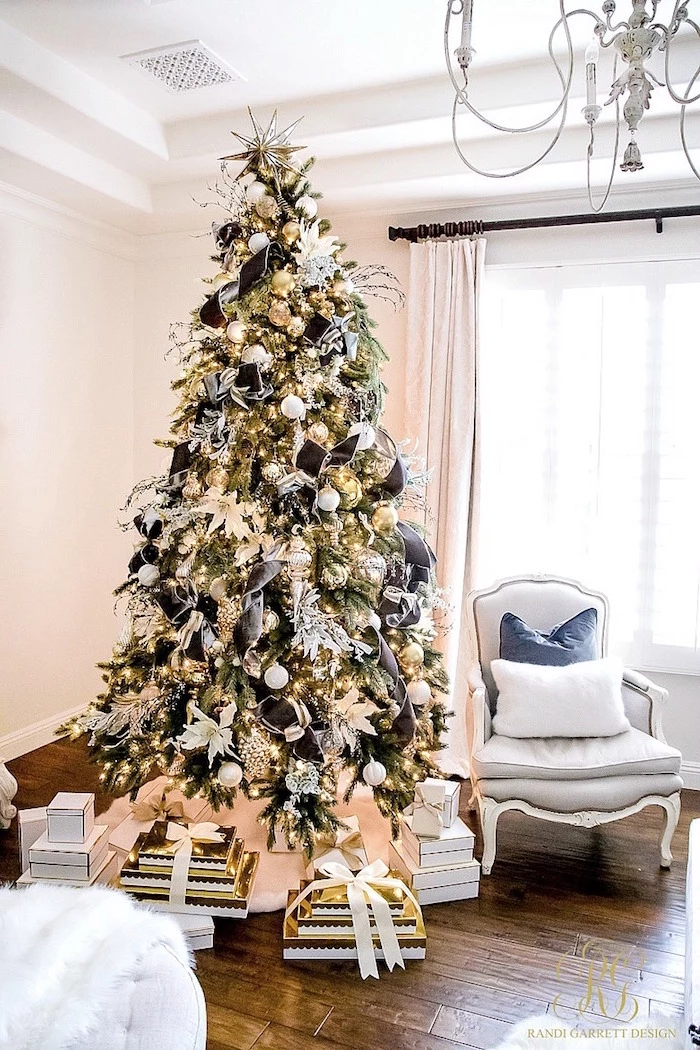
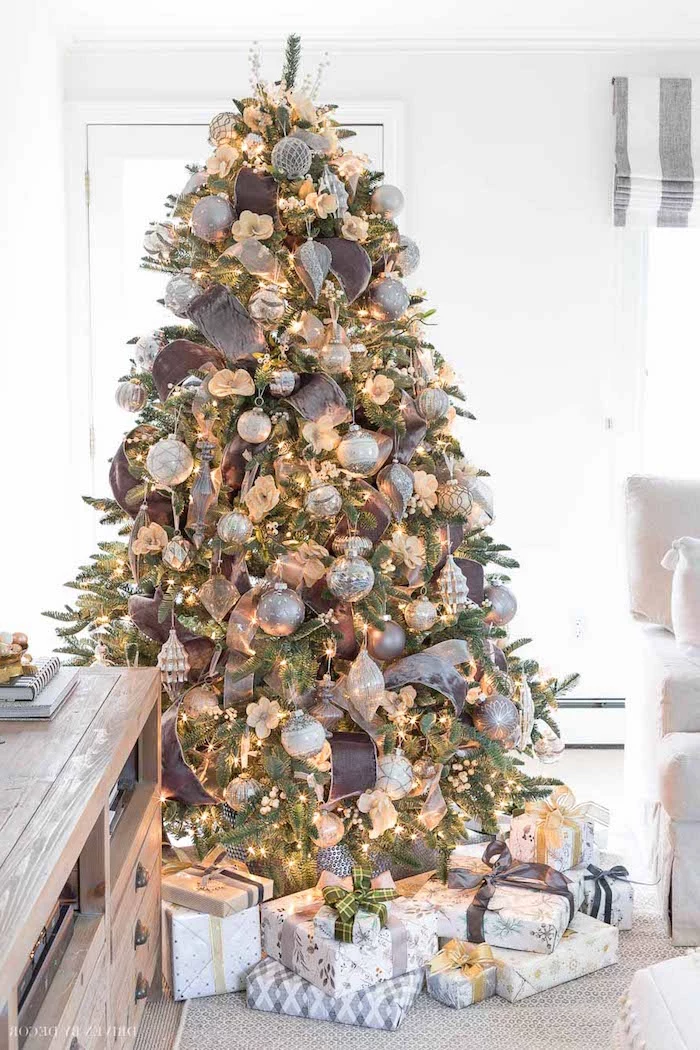
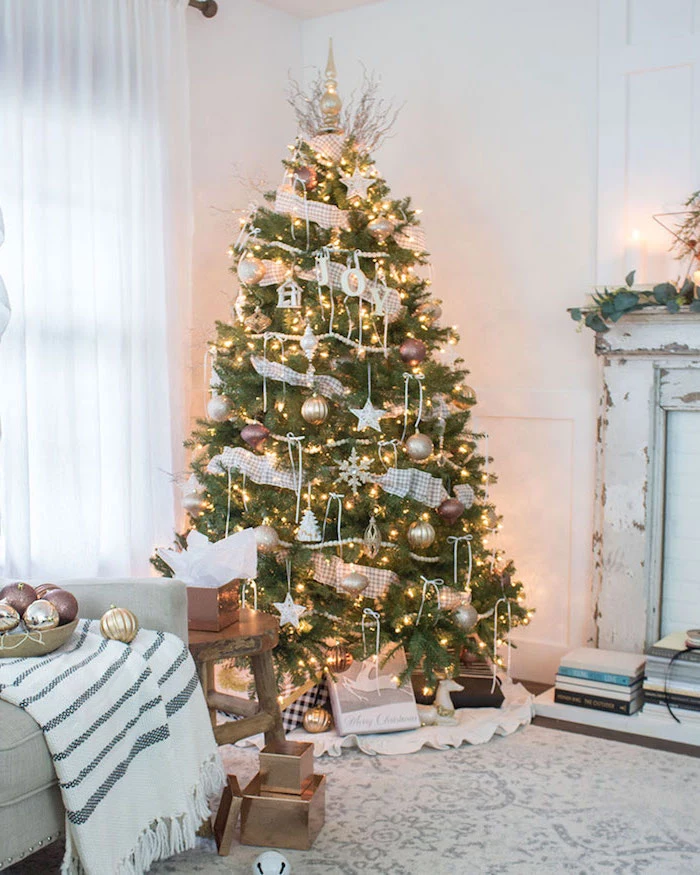
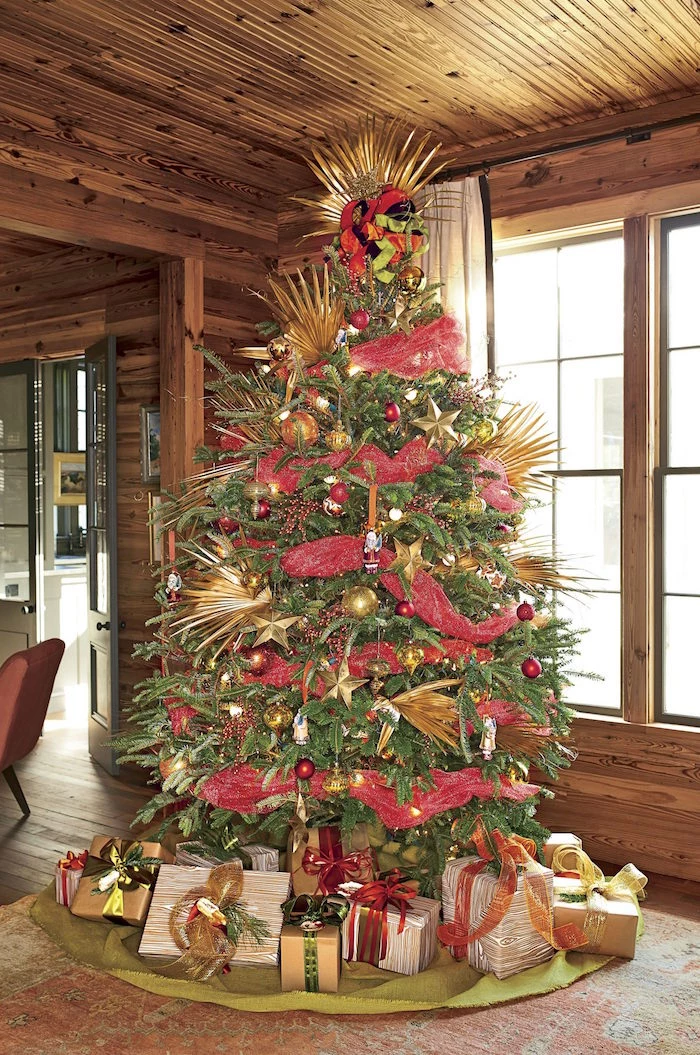
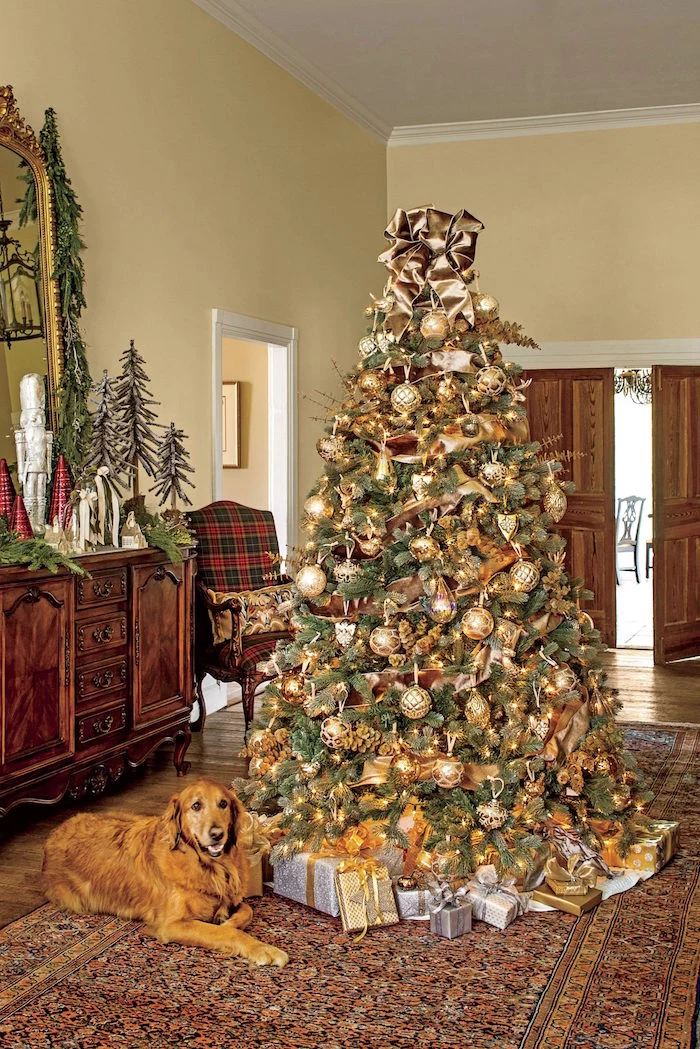
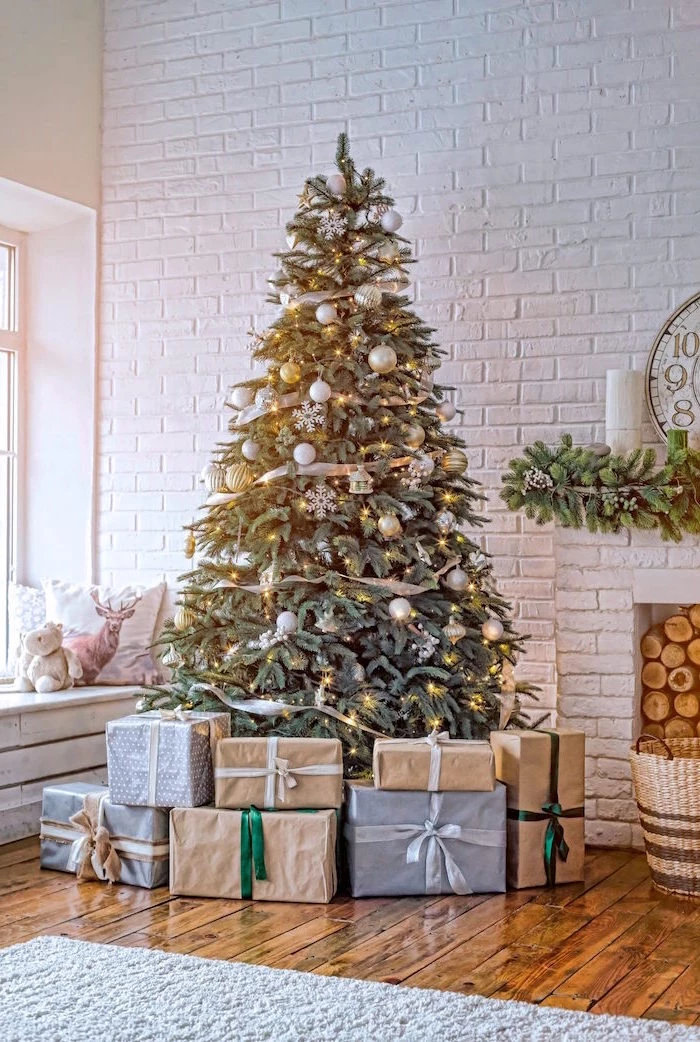
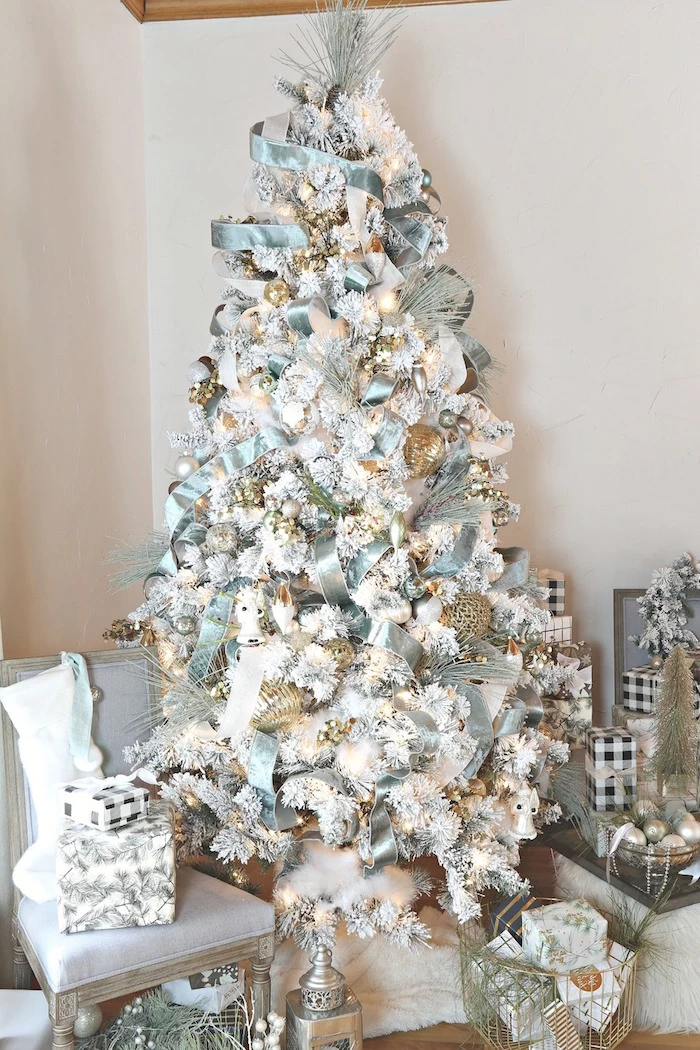
Inspirational Gallery
When lighting your tree, don’t just wrap the strands around the outside. For a truly professional glow, weave the lights in and out of the branches, starting near the trunk and working your way to the tips. This creates layers of light and an incredible sense of depth before a single ornament is hung.
- Create a mesmerizing sparkle by mixing different types of lights.
- Combine standard steady lights with strands of slow-twinkling or gently fading lights.
The secret? The subtle motion from the twinkling lights makes the entire tree feel alive and dynamic.
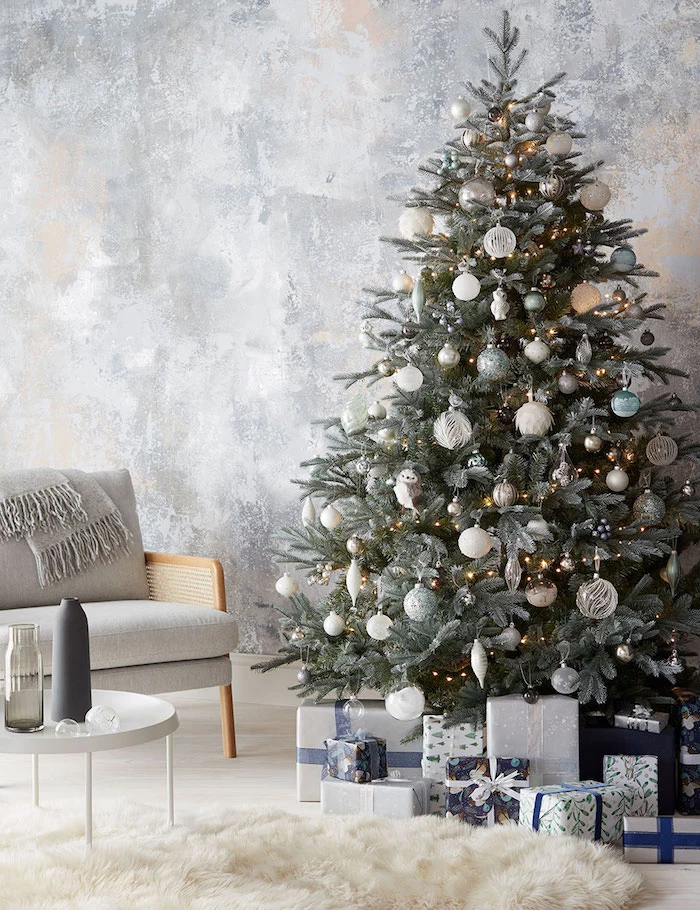
What’s the secret to a high-end, cohesive look?
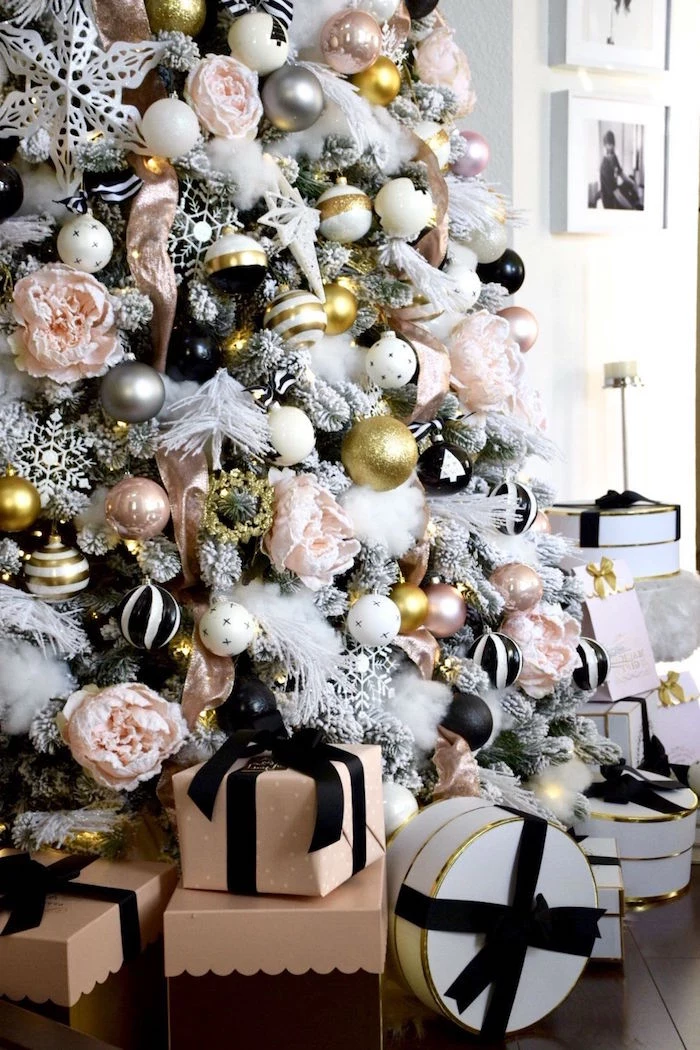
It’s a disciplined color palette. Instead of using every color, choose two or three and repeat them in different textures—shiny, matte, glittered, and natural. A palette of deep navy, champagne gold, and cream, for instance, feels both classic and incredibly current. Think Farrow & Ball’s ‘Hague Blue’ as your anchor.
The first Christmas tree lit with electric lights was showcased in 1882 by Edward Johnson, a colleague of Thomas Edison. It had 80 hand-blown red, white, and blue light bulbs.
Wired Ribbon: Offers structure, allowing you to create dramatic loops and bows that hold their shape perfectly. Ideal for cascading ribbon down the tree or for large, statement bows.
Unwired Ribbon: Drapes more naturally and softly. Best for a relaxed, less formal look, like loosely weaving through branches or tying simple bows on individual ornaments.
For the ‘magazine’ look, wired ribbon is almost always the professional’s choice.
Embrace the simplicity and warmth of Scandinavian design for a serene holiday atmosphere. It’s less about quantity and more about meaningful, natural elements.
- Stick to a light, neutral palette: white, wood tones, and a touch of black or deep green.
- Use simple, handmade-style ornaments: straw stars, felted animals, and plain white ceramic baubles.
- Incorporate natural textures like wood bead garlands and linen ribbon.
Don’t forget the scent! A beautiful tree should engage all the senses. Tuck a few cinnamon sticks deep into the branches, or hang dried orange slices with cloves. These natural elements are invisible but create a welcoming, festive aroma the moment you walk into the room, especially effective for artificial trees.
A study by the American Christmas Tree Association found that an artificial tree needs to be used for at least 5 to 9 years to be more environmentally friendly than buying a real tree annually.
This means investing in a high-quality artificial tree, like those from Balsam Hill or Frontgate, is a more sustainable choice in the long run. Proper storage is key to reaching that 9-year mark and beyond.
- Your most treasured glass ornaments are protected from scratches and breakage.
- Finding your favorites next year is quick and easy.
- You prevent the heartbreak of discovering a shattered heirloom.
The secret? Storing each delicate ornament in its original box or a specially designed archival ornament storage case with acid-free dividers.
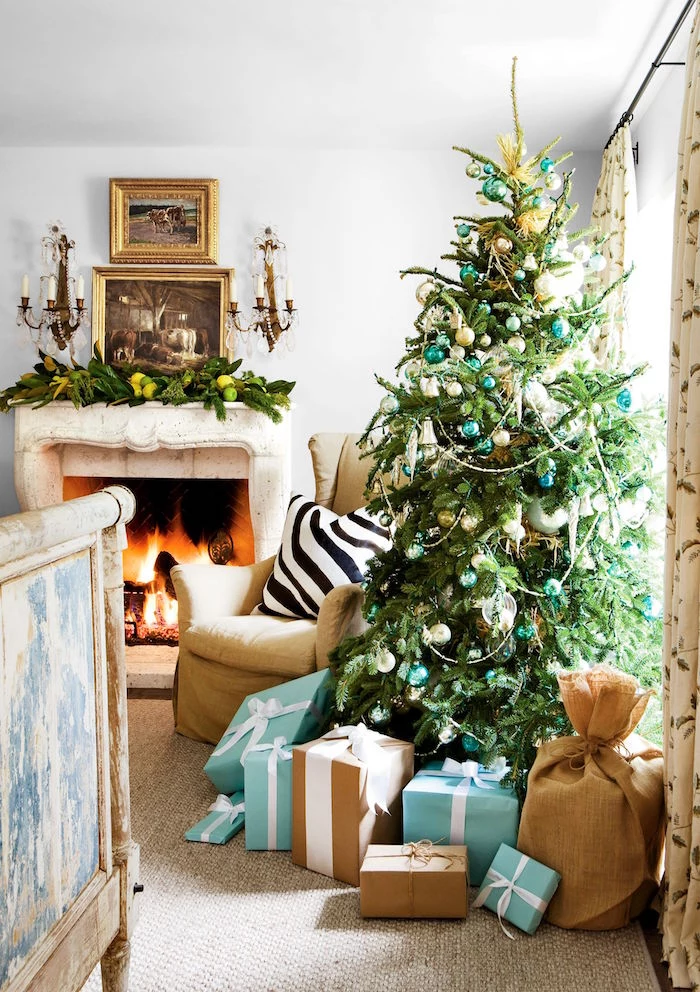
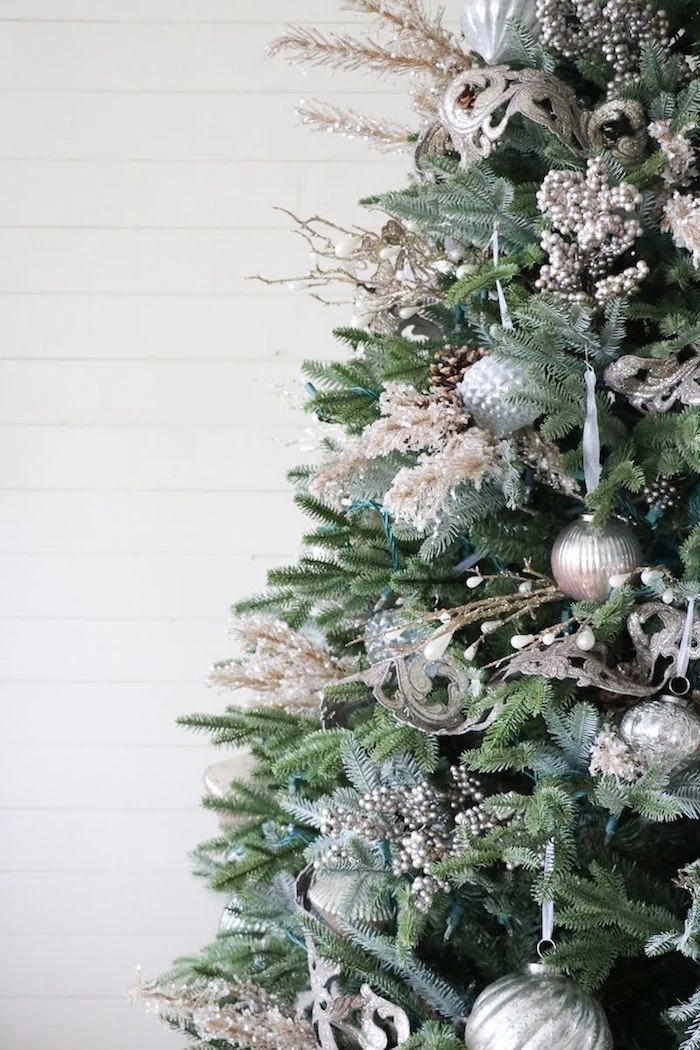
A common mistake: The ‘donut hole’ effect. Many people decorate only the outer 6 inches of their tree, leaving a dark, empty void around the trunk. A truly luxe tree has decorations nestled deep inside. Place shiny, reflective ornaments on inner branches to bounce light from the inside out, creating that essential glow.
For a rustic, high-impact look, incorporate oversized pinecones. Don’t just hang them from the tips; wedge them securely into the tree where larger branches meet. This adds a wonderful, woodsy texture and fills visual gaps in a way small ornaments can’t. For extra glam, lightly tip the edges with gold or silver craft paint.

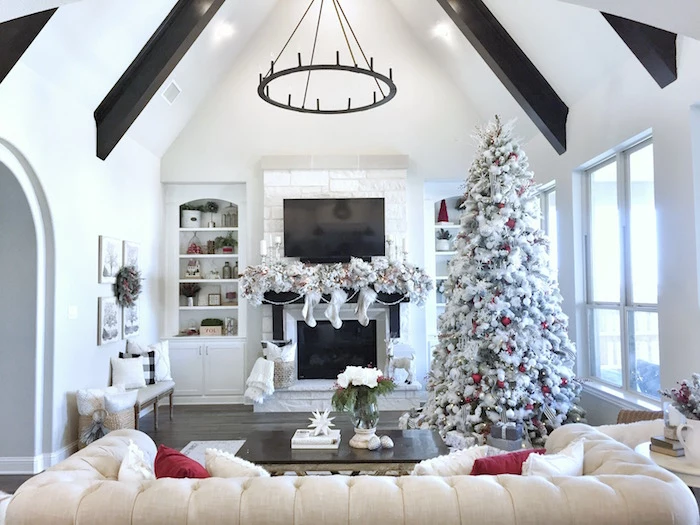
Is a flocked tree hard to decorate?
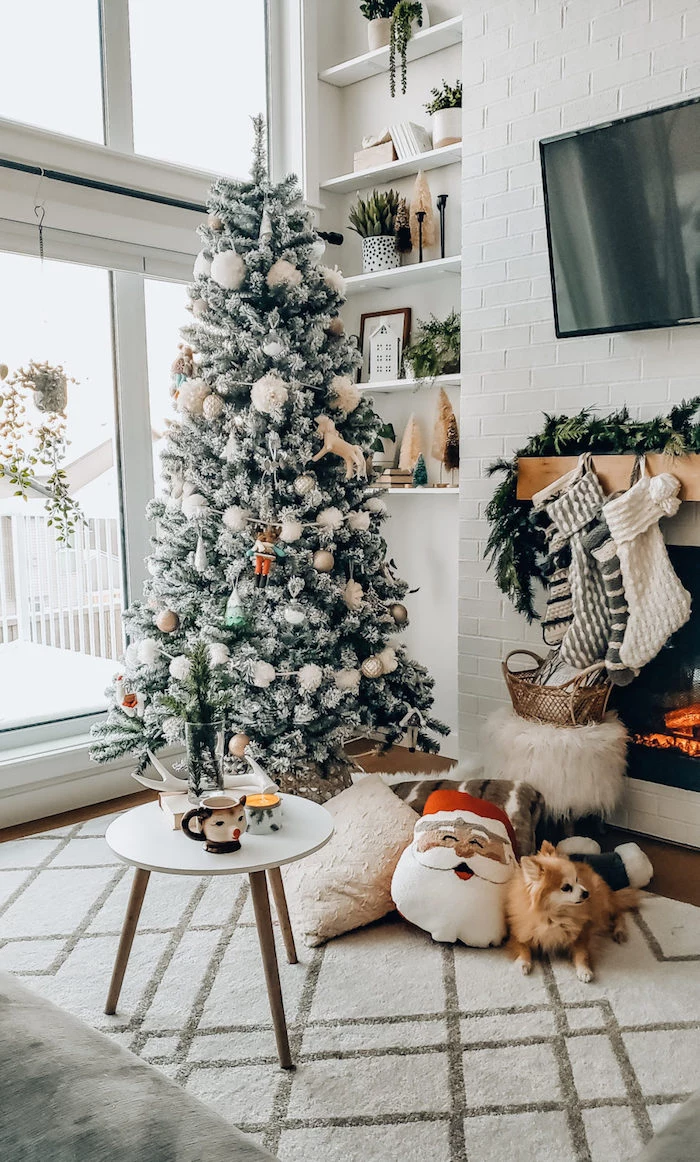
Not at all, but it requires a different approach! The ‘snow’ provides a beautiful, soft backdrop, so you can often use fewer ornaments. Rich, saturated colors like emerald green, deep burgundy, or sapphire blue create a stunning contrast. Metallic ornaments also pop beautifully against the white flocking.
Create a stunning tree topper that’s more than just a star or an angel. For a dramatic, custom look, gather a bundle of interesting elements and wire them together at the top:
- Try combining glittery branches, faux berry picks, and long pheasant feathers.
- Use a wide, wired ribbon to tie the bundle together and create cascading tails down the sides of the tree.
- Ensure it’s proportional to your tree – go big for a tall tree!
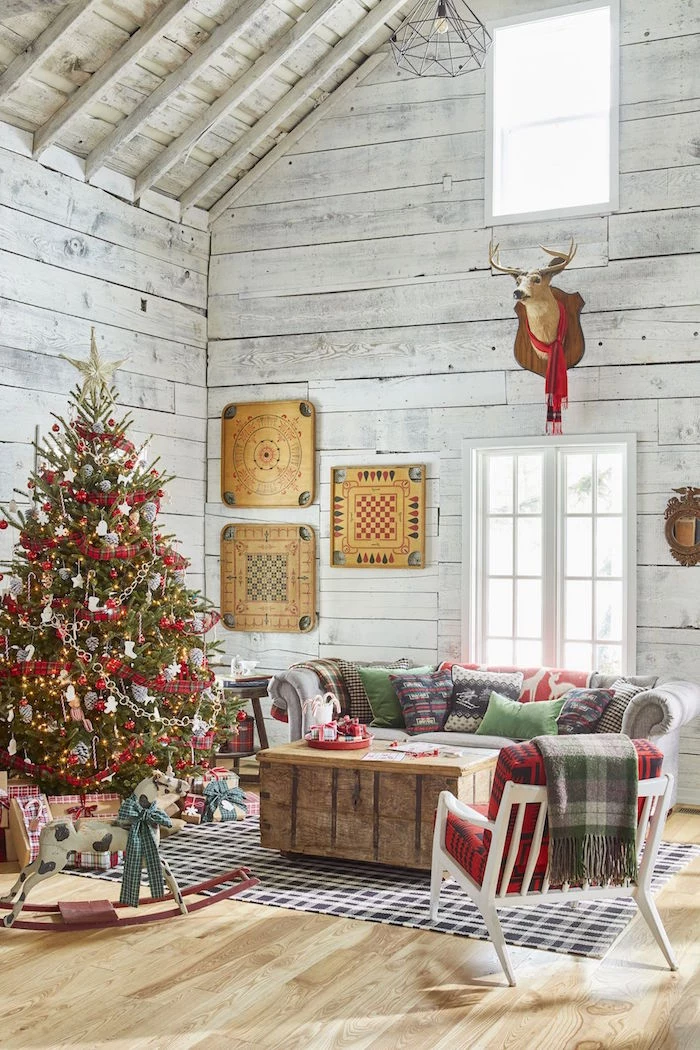
Theme It Up! A themed tree can be a joyful expression of your family’s personality. Don’t be afraid to go beyond traditional decor. Consider a ‘Coastal Christmas’ with starfish and seashell ornaments, a ‘Woodland Wonderland’ with foxes and mushrooms, or even a ‘Harry Potter’ tree with golden snitches and house-colored scarves as a garland.
LED Lights: Energy-efficient, cool to the touch (safer for live trees), and long-lasting. Look for ‘warm white’ options to mimic the classic glow of older bulbs.
Incandescent Lights: Offer that traditional, warm, nostalgic glow. They get hot, however, and use significantly more energy.
For longevity and safety, modern LEDs from brands like GE are the superior choice, and their color temperature technology has improved immensely.
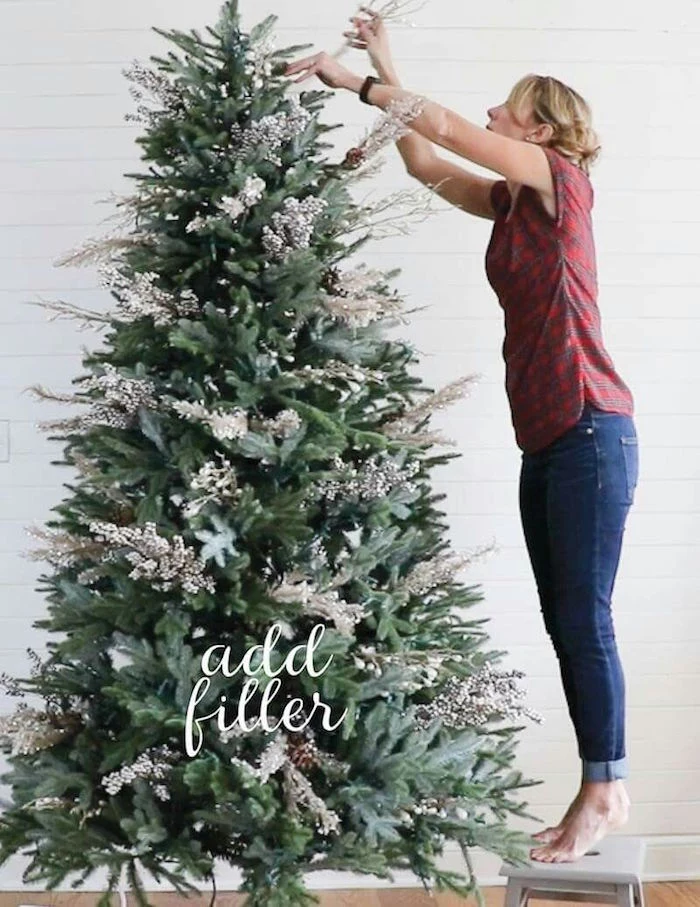
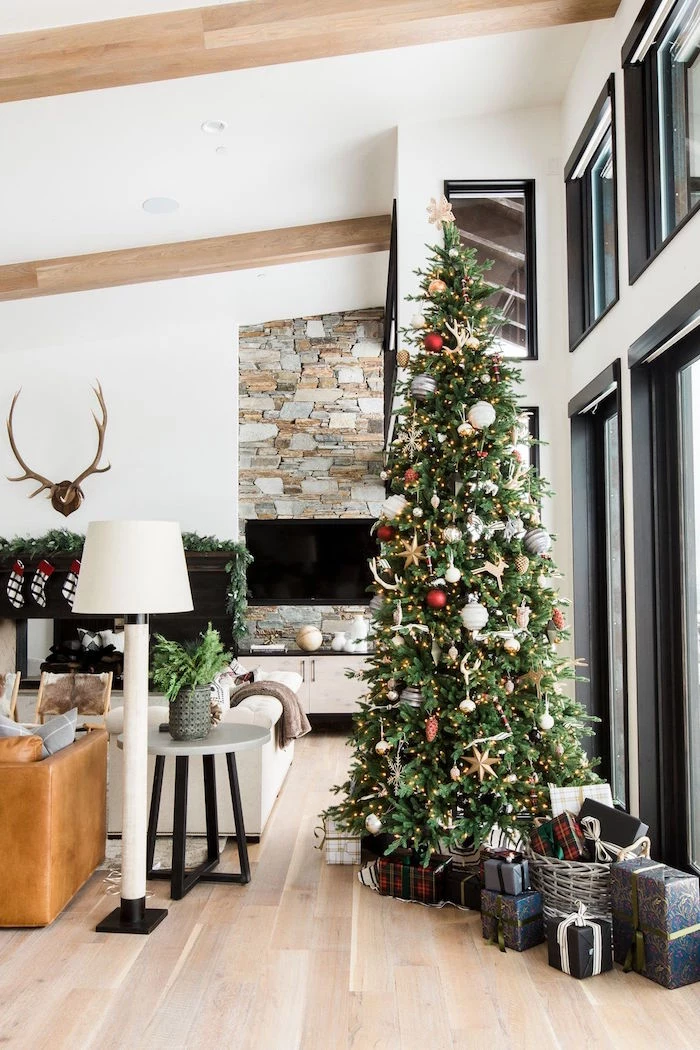
Go beyond the bauble. To add visual interest and a designer touch, incorporate ‘picks’ and ‘sprays’. These are decorative stems of faux leaves, berries, or glittered twigs available at craft stores like Michaels or Hobby Lobby. Simply tuck them into the branches to fill gaps, add a new texture, and extend the shape of your tree.
- Achieve a full, lush look for less money.
- Create dramatic visual impact.
- Fill gaps in a sparse tree.
The secret? Using a few oversized ornaments. A handful of baubles 6-8 inches in diameter, placed deep within the tree’s core, makes the entire arrangement feel more substantial and luxurious.
My live tree is drinking a gallon of water a day. Is this normal?
Yes, absolutely! Especially in the first few days. A fresh tree in a warm home can be extremely thirsty. This is a great sign that your tree is healthy and well-hydrated, which keeps it greener and more fire-resistant. Keep the stand topped up daily; never let the water level drop below the base of the trunk.
Once made of real silver, tinsel was invented in Nuremberg, Germany, around 1610. The silver would tarnish, and it was eventually replaced by other shiny metals.
Today’s mylar tinsel can still add a magical, retro shimmer, but use it sparingly. A light touch evokes a vintage feel; too much can quickly overwhelm your other ornaments.
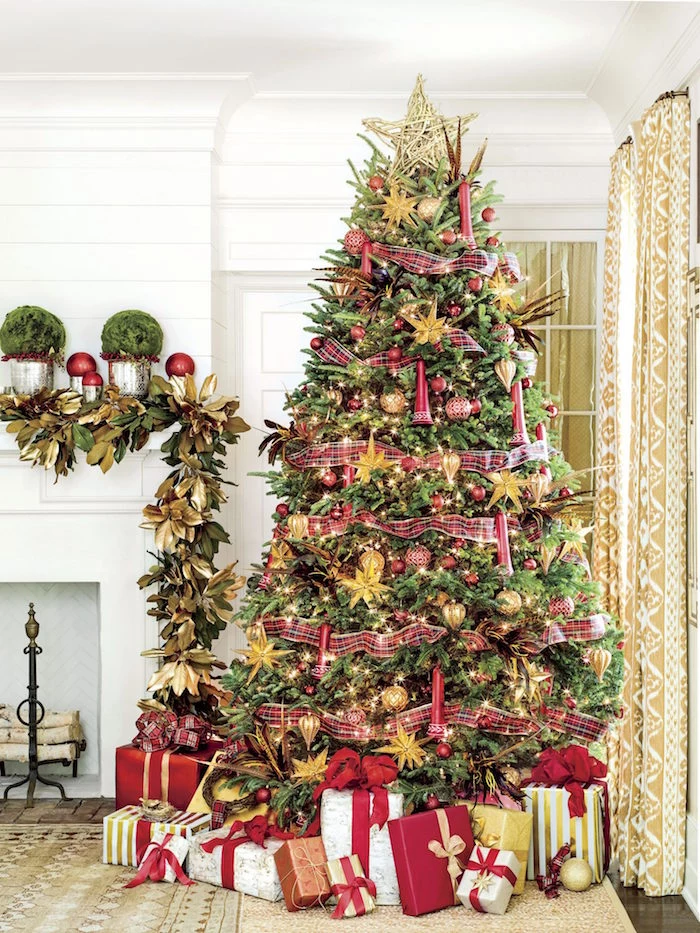
For a touch of Victorian opulence, think more is more. This style is about richness, sentimentality, and abundance.
- Use a dark, moody color scheme: deep reds, forest greens, and lots of gold.
- Layer on multiple types of garlands, from beads to thick velvet ribbons.
- Choose intricate, detailed ornaments. Look for brands like Christopher Radko, known for their elaborate, European-style glass pieces.
Important detail: Upgrade your ornament hooks. The flimsy metal hooks that come with most ornament boxes are frustrating and unreliable. Invest in a set of more decorative ‘S’ hooks or sturdy green pro-grade hooks. They not only look better but also secure your precious ornaments more safely to the branches, preventing accidental falls.
Want to create high-impact decor on a tight budget? Focus on volume and texture.
- Buy bolts of inexpensive, wide tulle or burlap from a fabric store to use as a massive garland.
- Forage for pinecones and spray paint them in your chosen metallic color.
- Make simple salt dough ornaments with cookie cutters – a perfect activity for kids.
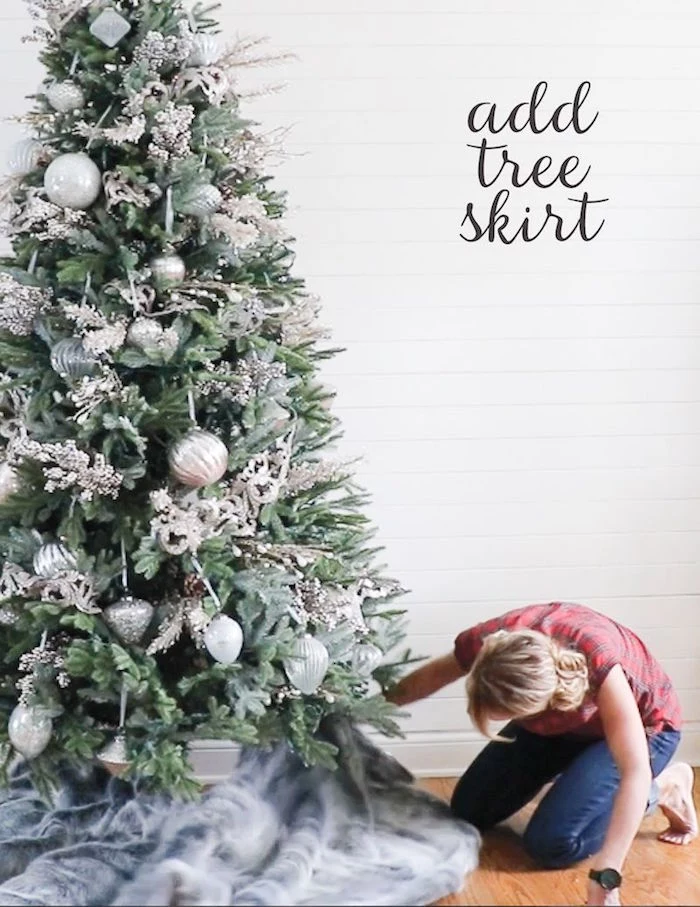
Tree Skirt vs. Tree Collar:
A soft fabric tree skirt creates a classic, traditional foundation and is perfect for piling presents on. For a more modern, clean, and contained look, consider a tree collar. Made of metal, wicker, or wood, it’s a structured base that hides the stand without the fuss of arranging fabric.
- An incredible, full look that cascades down the tree.
- Perfectly shaped bows that don’t sag or droop.
- A professional finish that’s easy to adjust.
The secret? Always choose wired ribbon. The hidden wire in the edges is the single most important factor for creating structured, beautiful ribbon decorations that look like they’re straight from a catalog.


