Your Pressure Cooker Isn’t Scary: A Pro’s Guide to Actually Using It
I spent the first part of my career in kitchens filled with screaming stovetop pressure cookers. We called them ‘jiggle tops,’ and they honestly sounded like a freight train about to fly off the rails. They were loud, a little intimidating, and you had to keep a close eye on them. But man, were they our secret weapon for turning tough, cheap cuts of meat into melt-in-your-mouth magic in under an hour.
In this article
So when the first quiet, automated electric multi-cookers showed up, I was pretty skeptical. They just seemed… too easy. After years of putting them through their paces, though, I’m a total convert. These things are remarkable tools, and not just for convenience. Once you really get what’s happening inside that pot, you can create food that’s just as good, and sometimes even better, than with traditional methods.
This isn’t just a list of recipes. Think of it as the core playbook I’ve developed over the years. My goal is to get you past just following steps and into a place where you’re cooking with confidence, using that machine as a powerful and deliberate tool.

First Things First: What Size Pot Do You Even Need?
Before we dive in, let’s tackle the first big question: size. The 6-quart is the standard and it’s perfect for most families, easily handling a whole chicken or a batch of stew for 4-6 people. If you have a big family or love batch cooking, the 8-quart is your best friend. But don’t overlook the little guy! If you’re cooking for one or two, a 3-quart model is fantastic—it comes to pressure faster and is way easier to store.
The Real Magic: Why It Works So Fast
To really master this thing, you need to understand the simple physics going on inside. At sea level, water boils at 212°F (100°C), and no matter how high you crank the heat, it won’t get hotter than that in an open pot. A pressure cooker changes the game by trapping all the steam, which jacks up the atmospheric pressure inside.
At a typical high-pressure setting, the boiling point of water gets pushed all the way up to around 240-250°F (115-121°C). That superheated, steamy environment is the secret sauce. Those extra 30 degrees do two amazing things:
- It Obliterates Toughness: Tough cuts of meat, like a chuck roast, are full of connective tissue called collagen. It usually takes hours of low-and-slow simmering to melt that collagen into gelatin (which is what makes meat feel rich and juicy). At 250°F, that process happens on hyper-speed, making meat incredibly tender, fast.
- It Creates Deep Flavor: That higher temperature also kicks the flavor-making reactions, like caramelization, into overdrive, even in a wet environment. You won’t get a dry sear, but you’ll get a depth of flavor in your sauces and broths that you just can’t get from regular boiling.
Heads up! This brings us to the number one rule that trips people up. To create all that steam and pressure, the pot needs liquid. Most electric models require at least 1 to 1.5 cups of a thin liquid (like broth, water, or wine) to even start the process. Without it, you’ll almost certainly get the dreaded “Burn” error.

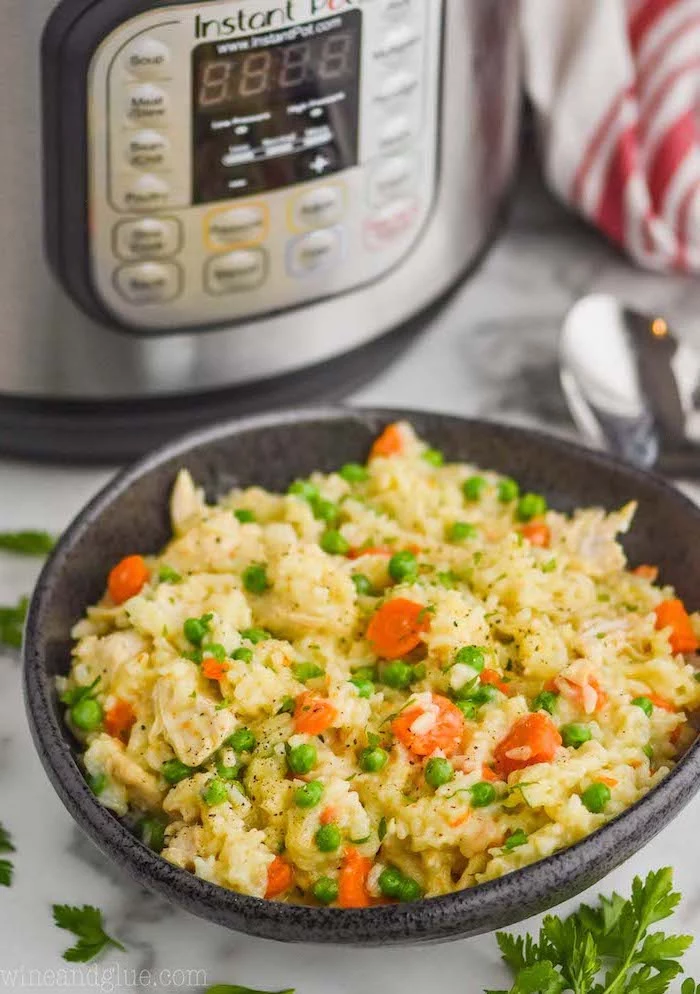
The Pro’s Workflow: Master These Two Functions
Your cooker might have a dozen buttons, but honestly, you only need to master a couple. The pros think of it as a simple workflow: build flavor, pressure cook, then finish the dish.
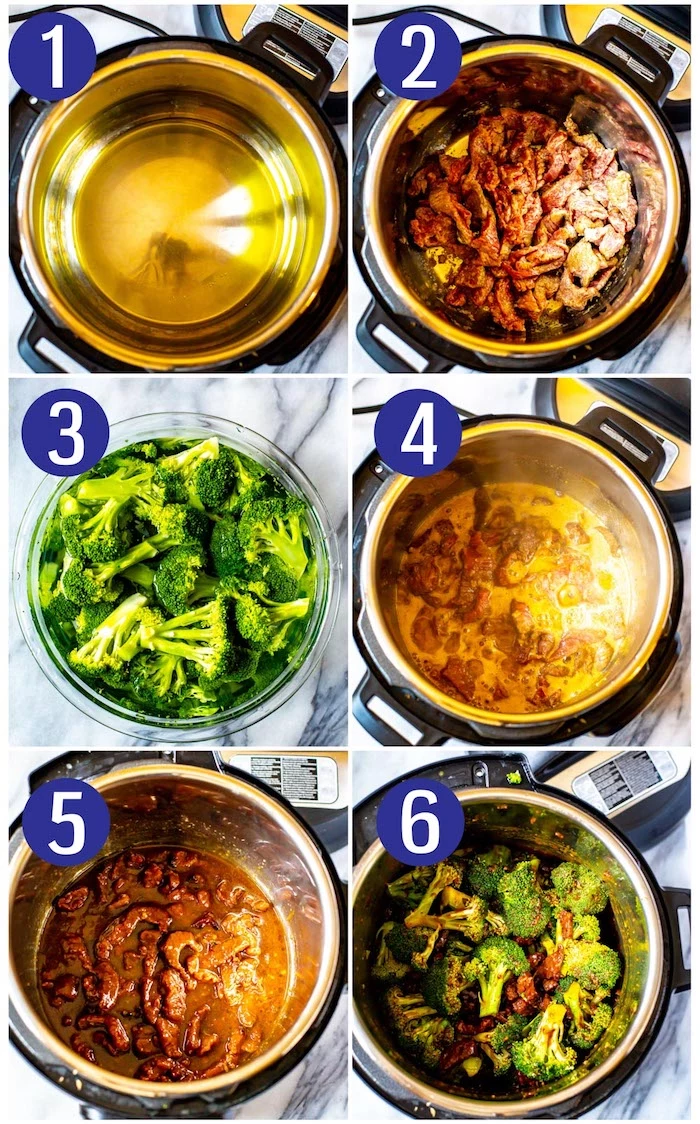
1. The Sauté Function: Your Flavor Foundation
I can’t stress this enough: do not skip this step. The Sauté function turns your machine into a little pot on the stove, and it’s where you build the deep, savory base of your dish by browning meats and veggies. Those little browned bits that get stuck to the bottom of the pot? In professional kitchens, we call that the “fond,” and it’s pure flavor gold.
Quick tips for a perfect sauté:
- Get it HOT: Always wait for the pot to get fully hot before adding your oil. Most models have a display that will say “Hot” when it’s ready. Tossing food into a cold pot leads to steaming and sticking.
- Don’t Crowd the Pan: This is a universal kitchen law. If you pack meat in shoulder-to-shoulder, it just steams and turns a sad, gray color. Work in batches to get a beautiful brown crust. It takes a few extra minutes but the flavor payoff is huge.
- Deglaze, Deglaze, Deglaze: After browning, you’ll see that brown crust on the bottom. Pour in a splash of liquid—broth, wine, whatever—and use a wooden spoon to scrape it all up. This mixes that amazing flavor into your sauce AND is the best way to prevent a “Burn” notice later.

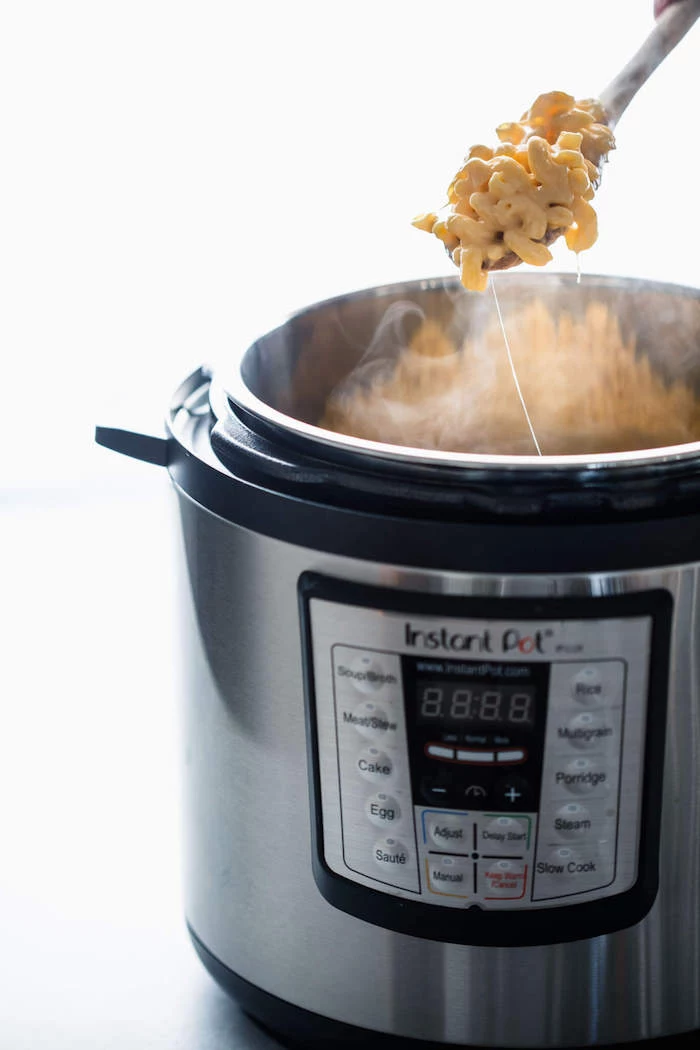
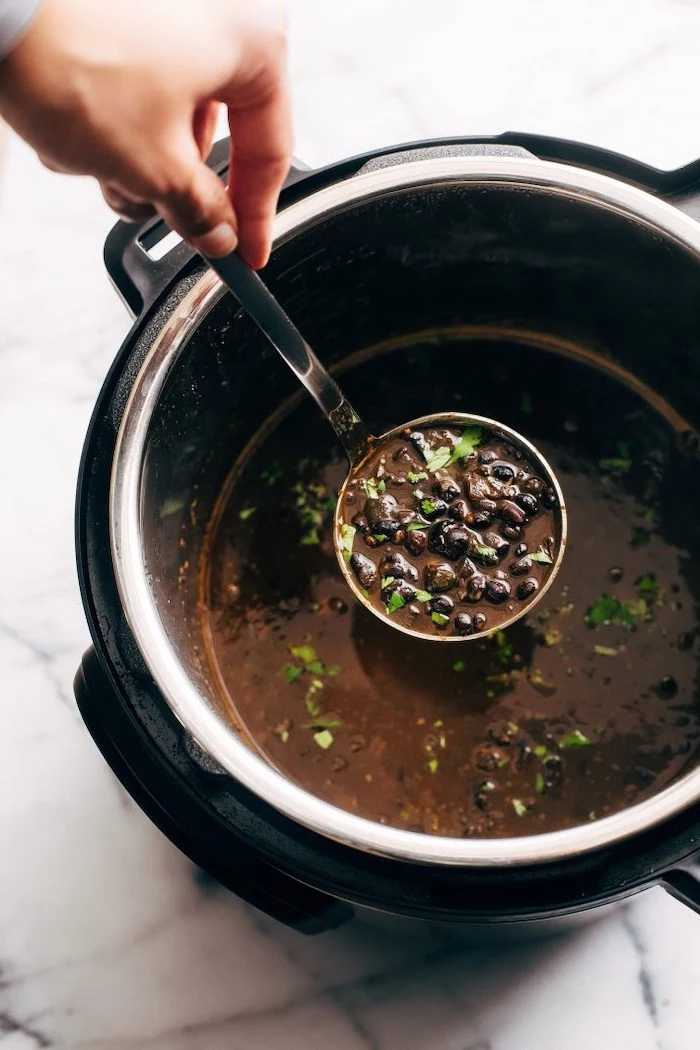
2. The Pressure Release: The Most Important Decision You’ll Make
Once the timer beeps, you have to let the pressure out. How you do this can make or break your meal.
Natural Pressure Release (NPR): This just means you do nothing. You turn off the cooker (or at least the “Keep Warm” function) and let it sit. The pressure slowly drops on its own, which can take anywhere from 10 to 30 minutes. You’ll know it’s done when the little float valve drops. (By the way, that’s the little silver or red pin next to the big steam valve—when it’s down and flush with the lid, you’re good to open it.)
Use NPR for: Roasts, stews, beans, lentils, and broths. For meats, the gradual release lets the fibers relax and reabsorb all the juices. For foamy things like beans or brothy soups, a quick release can cause a volcano of hot liquid to spew out of the steam valve. Trust me, you don’t want to clean bean juice off your ceiling.
Quick Pressure Release (QPR): This is when you manually turn the steam valve to “Venting” to let all the steam out at once. It stops the cooking process almost immediately.
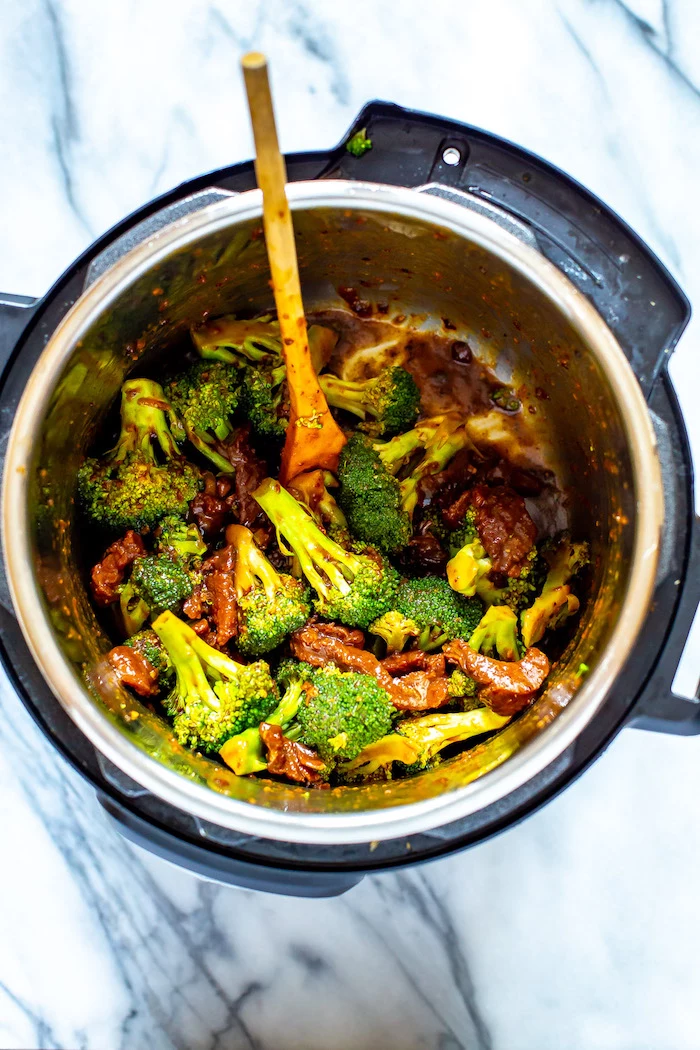
Use QPR for: Delicate vegetables like broccoli or asparagus, seafood, and pasta. Anything that would turn to mush with a few extra minutes of cooking needs a QPR.
A serious safety warning: That steam is incredibly hot and can give you a nasty burn. I have a small scar on my forearm that’s a permanent reminder to always use a long-handled spoon to turn the valve and keep my hand and face far away. Respect the steam!
Let’s Cook: Real-World Examples
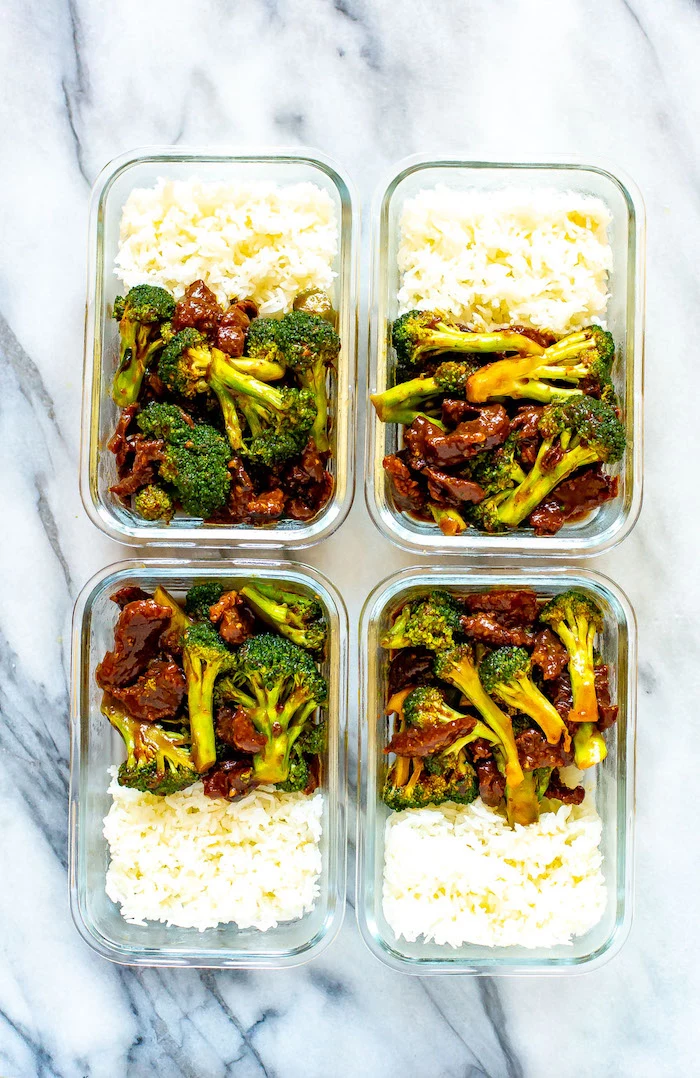
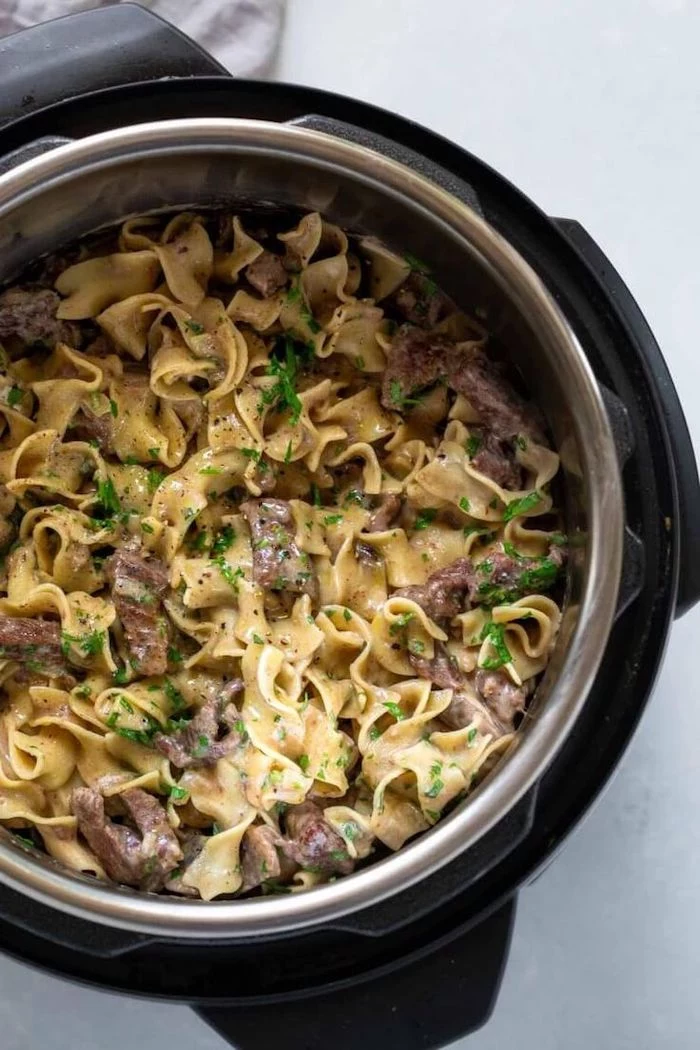
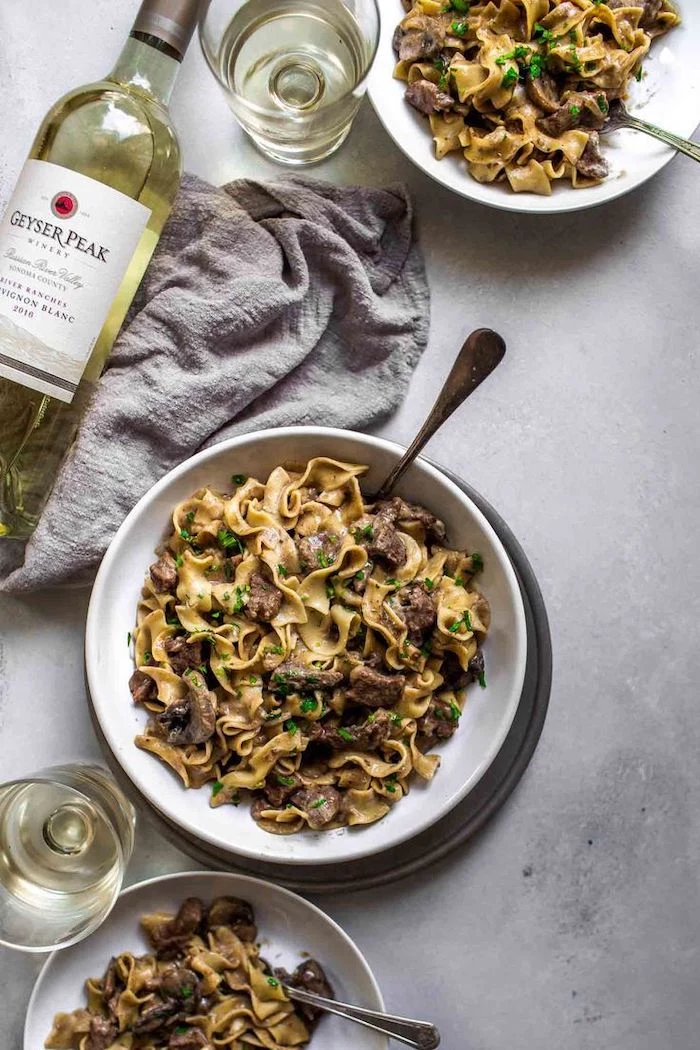
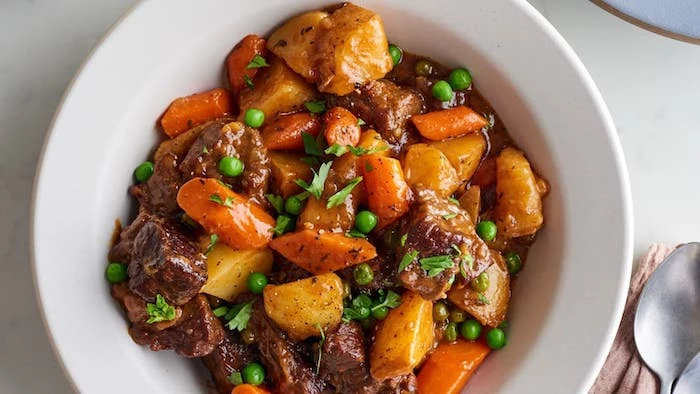
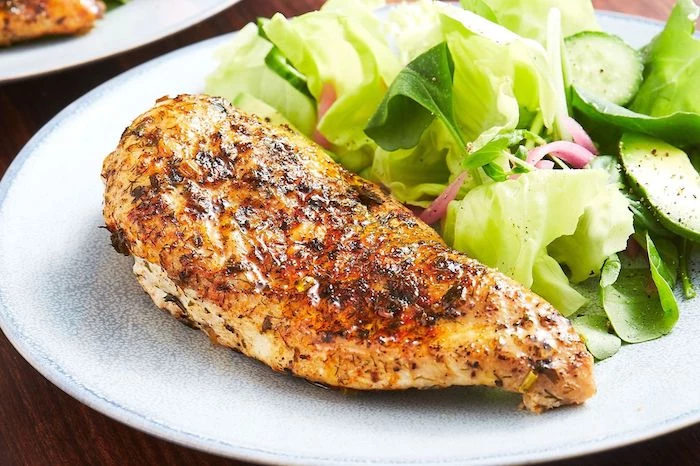
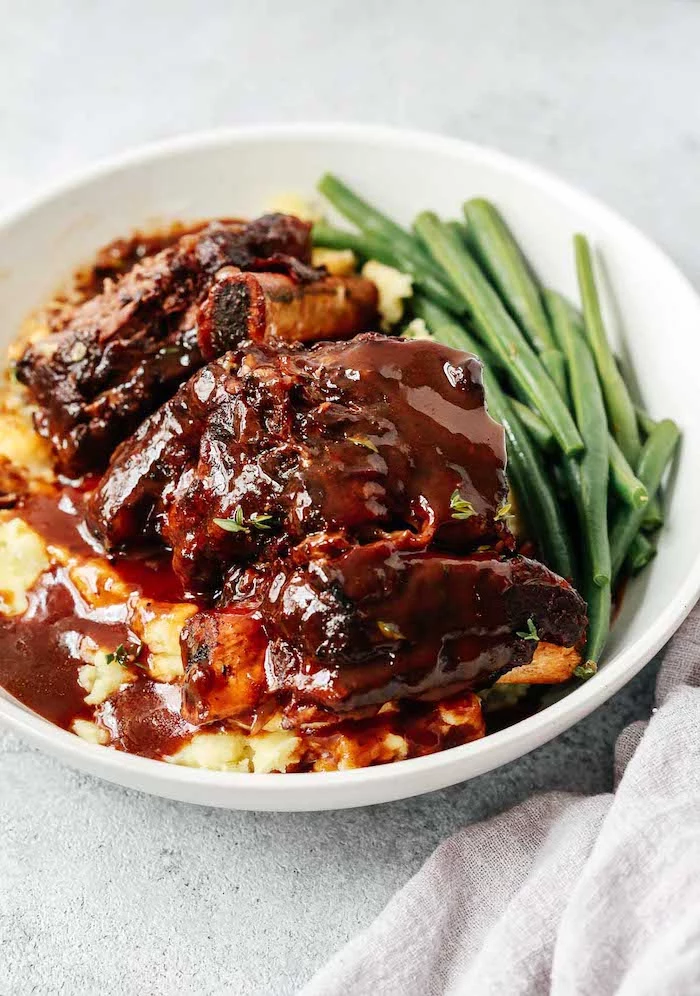
Case Study: Classic Beef Stew
This is the benchmark dish. If you can nail this, you can cook anything. All in, expect this to take about 1 hour and 45 minutes, with only about 30 minutes of that being active work.
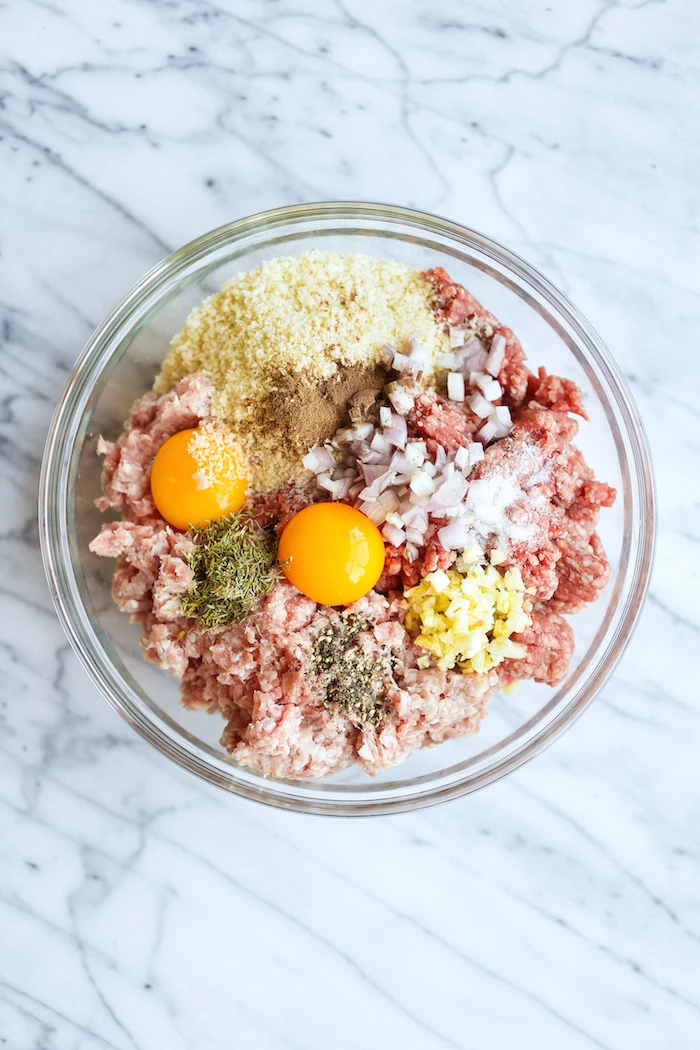
- The Meat: Grab a 2-3 lb beef chuck roast and cube it yourself. Don’t buy that pre-cut “stew meat.” It’s usually lean scraps that dry out. Chuck has the perfect fat and collagen. Yes, it might cost you an extra $5, but the tender, juicy result is more than worth it.
- The Method: Start by browning the beef really well in batches using the Sauté function. Set it aside. Sauté your onions, carrots, and celery, then add some garlic and tomato paste. Deglaze the pot with a cup of red wine or dark beer, scraping up all the fond. Turn off the heat, add the beef back in with 2 cups of beef broth and seasonings. The liquid should NOT cover the meat—too much liquid is the #1 cause of watery stew.
- The Cook: Lock the lid and cook on High Pressure for 35 minutes. When it’s done, let the pressure release naturally for at least 15 minutes (a full natural release is even better). Open it up, toss in some halved potatoes, and cook for another 4-5 minutes on High, followed by a Quick Release. Thicken the sauce at the end with a cornstarch slurry on the Sauté setting if needed.
First-Timer’s Win: The 5-5-5 Hard-Boiled Egg Trick
Need a quick confidence boost? This method is foolproof and a great way to see how versatile the machine is. Just pour one cup of water in the pot, place a trivet or steamer basket inside, and arrange your eggs on it. Lock the lid and cook on High Pressure for 5 minutes. Let the pressure release naturally for 5 minutes, then do a quick release for any remaining pressure. Immediately transfer the eggs to an ice bath for 5 minutes. They’ll be perfectly cooked and peel like a dream.
Leveling Up: Pro Tips for Everyday Use
Once you’re comfortable, you can start getting creative.
Converting Your Favorite Recipes: Have a beloved slow cooker recipe? The conversion is easier than you think. A good starting point is to reduce the liquid by about a third (remember, the pressure cooker traps moisture) and cut the cook time by about two-thirds. It’s not exact, but it’ll get you in the ballpark, and you can always add more time if needed.
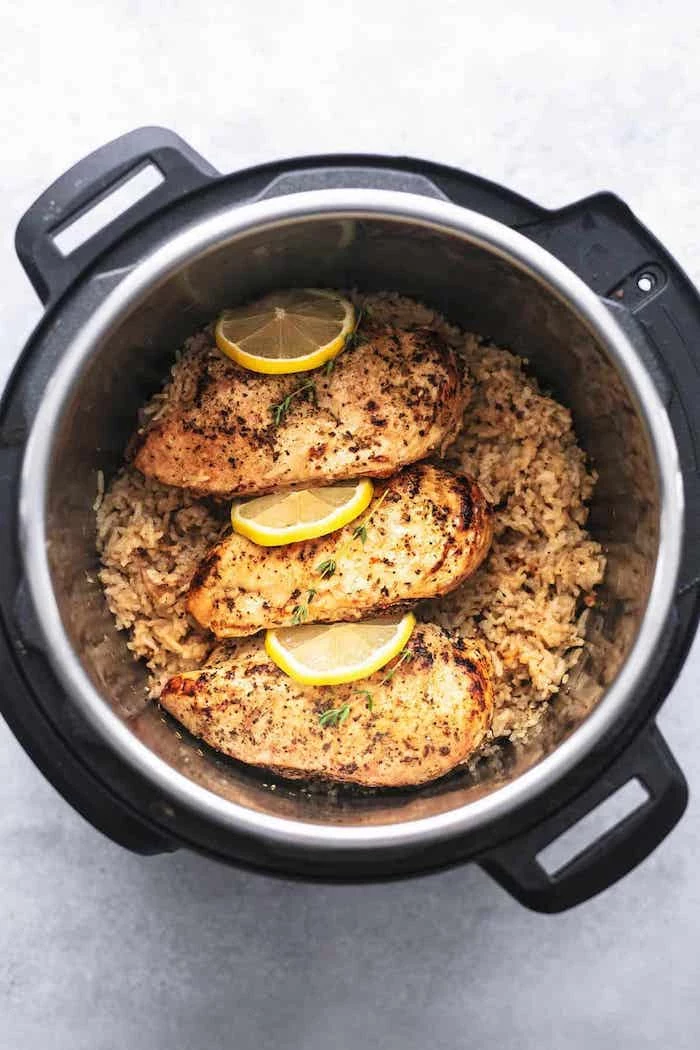
The “Pot-in-Pot” (PIP) Method: This is a game-changer. It’s how you make delicate things like cheesecake or custards, and it lets you cook two things at once. It’s super simple:
- Pour 1-1.5 cups of water in the main pot.
- Place the metal trivet that came with your cooker inside.
- Put your food (like rice in a small bowl, or cheesecake batter in a 7-inch springform pan) on top of the trivet.
- Lock the lid and cook! The food cooks with gentle steam, not direct heat.
Quick Troubleshooting & Maintenance
Things will go wrong sometimes. It’s okay! Here’s how to fix the most common issues:
- “My stew is watery!” You probably used too much liquid. No big deal. Just hit the Sauté button and let it simmer with the lid off to reduce and thicken the sauce.
- “My meat is tough!” It just needed more time under pressure to break down. Seal the pot back up and cook on High for another 10-15 minutes. It will fix it.
- “I got the ‘Burn’ notice!” This usually means you didn’t deglaze well enough, or you have thick sauce or starches at the very bottom. Next time, make sure you scrape the bottom clean and layer ingredients, putting thin liquid in first.
Oh, and a final pro tip on maintenance. The silicone sealing ring in the lid loves to absorb odors. To prevent your cheesecake from tasting faintly of last night’s curry, it’s a great idea to have two rings: one for savory foods and one for sweets. You can find them on Amazon or at other online retailers for about $10-$15. It’s a simple fix that makes a huge difference.

To be frank, a pressure cooker can’t do everything. It won’t give you a crispy chicken skin or a crusty loaf of bread—your oven is still the king for that. But knowing when to use it, and what its superpowers are, is the mark of a truly great home cook.
Inspirational Gallery


A study published in the Journal of Food Science found that pressure-cooked broccoli retains up to 90% of its vitamin C, compared to just 40% when steamed or boiled.
This isn’t just about speed; it’s about nutrition. The sealed environment and reduced cooking time mean more vitamins and minerals stay in your food instead of leaching into water or being destroyed by prolonged heat.

Natural Release: The pressure dissipates on its own (10-30 mins). Ideal for meats, broths, and beans, as it allows fibers to relax and reabsorb moisture, resulting in more tender food.
Quick Release: You manually turn the valve to vent steam instantly. Use this for quick-cooking items like vegetables or seafood to prevent them from turning to mush.

That little silicone ring inside the lid is the unsung hero of your pressure cooker. But it’s porous and loves to hold onto strong smells. Pro tip: Keep two rings on hand. Use one for savory dishes like curries and stews, and a separate one for sweets like cheesecakes or steamed puddings. It’s a small investment that prevents your cheesecake from tasting faintly of last night’s chili.
The dreaded ‘Burn’ or ‘Ovht’ message is rarely a fault with your machine. It’s a cry for help! It usually means there isn’t enough thin liquid to create steam, or that thick sauces or starches have stuck to the bottom of the pot. The fix? Ensure you have at least 1 cup of water, broth, or other thin liquid, and always scrape the bottom of the pot after sautéing.
Unlock a new level of flavor by ‘blooming’ your spices. After sautéing onions and garlic, add your dry spices like cumin, coriander, or paprika and cook for another 30 seconds until fragrant before adding your liquid. This toasting process deepens their flavor and infuses the entire dish.
Why is my food sometimes bland or watery?
A pressure cooker traps every bit of moisture, so liquids don’t reduce as they would in a regular pot. The secret is to either start with less liquid (often half of what a traditional recipe calls for) or use the ‘Sauté’ function *after* pressure cooking. Let the sauce simmer and bubble with the lid off for a few minutes to thicken it to perfection.
- Flawless, peel-able hard-boiled eggs.
- Perfectly steamed, individual cheesecakes.
- Reheating leftovers without them drying out.
The secret is Pot-in-Pot (PIP) cooking. By placing food in a separate, oven-safe container on a trivet inside the main pot with water below, you can cook with gentle, surrounding steam instead of direct, intense heat.

Ready to move beyond the included trivet? These accessories will make your pressure cooker a true workhorse:
- A Silicone Steamer Basket: More flexible and easier to clean than metal ones, perfect for vegetables and dumplings. Brands like OXO Tot make excellent ones.
- Stackable Pans: Cook two different things at once (like rice on the bottom and chicken on top) with stackable insert pans.
- A 7-inch Springform Pan: The key to making incredible pressure-cooker cheesecakes.
According to the US Department of Energy, a pressure cooker can use up to 70% less energy than a conventional oven for the same dish.
By cooking faster and containing the heat, your electric multi-cooker isn’t just a time-saver; it’s an energy-saver. Over the course of a year, regularly using it for roasts, stews, and grains can make a noticeable difference on your electricity bill.
Don’t add thickeners before cooking. Ingredients like cornstarch, flour, or arrowroot will clump under pressure and almost guarantee a ‘Burn’ warning as they settle on the bottom. Always mix them with a little cold water to make a slurry and stir it in using the ‘Sauté’ function after the pressure cooking cycle is complete.
Can I really cook meat from frozen?
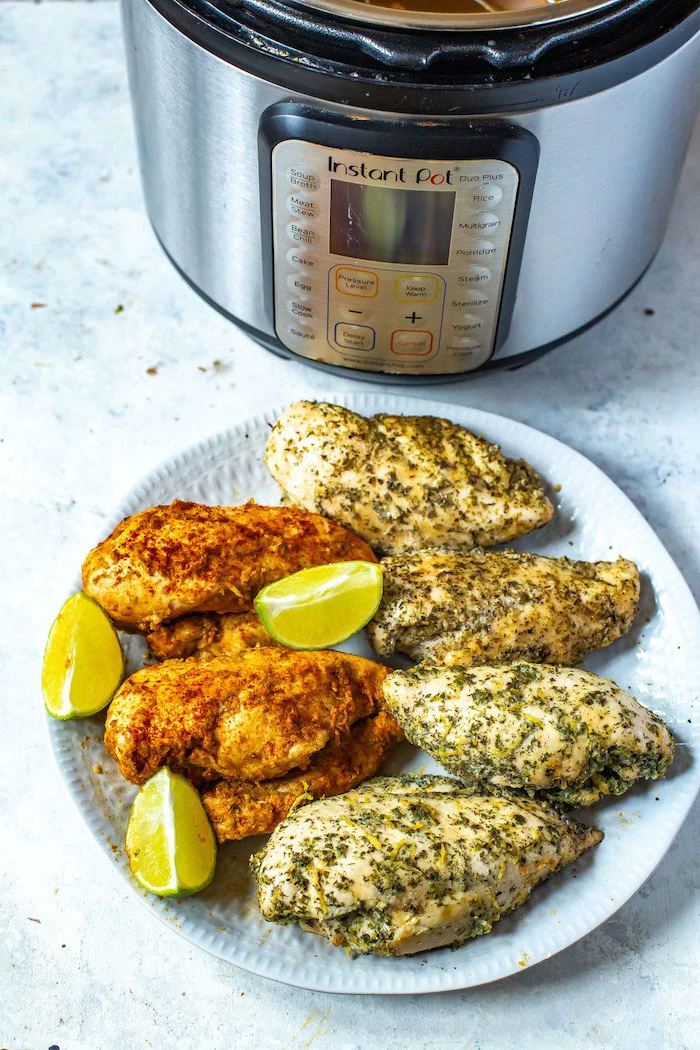
Absolutely! It’s one of the machine’s superpowers. For a solid block of frozen ground meat or a frozen chicken breast, simply add about 50% more cooking time than the recipe calls for with thawed meat. It won’t have the deep flavor from searing, but for shredded chicken tacos or a quick bolognese, it’s a lifesaver on busy weeknights.
The pressure cooker is a cornerstone of global cuisine. In India, it’s essential for making dal and legumes creamy in minutes. In Vietnam, it transforms the hours-long process of making rich Pho broth into a weeknight possibility. Exploring these recipes is a great way to understand the true power of your machine.
Stainless Steel Inner Pot: The standard for most models like the Instant Pot. It’s durable, dishwasher-safe, and perfect for getting a deep, flavorful sear on meats. Its main drawback is that starchy foods like rice can sometimes stick.
Ceramic Non-Stick Inner Pot: An optional accessory that’s fantastic for rice, risotto, and anything that tends to stick. It makes cleanup a breeze but requires more care (no metal utensils!) and isn’t as good for searing.
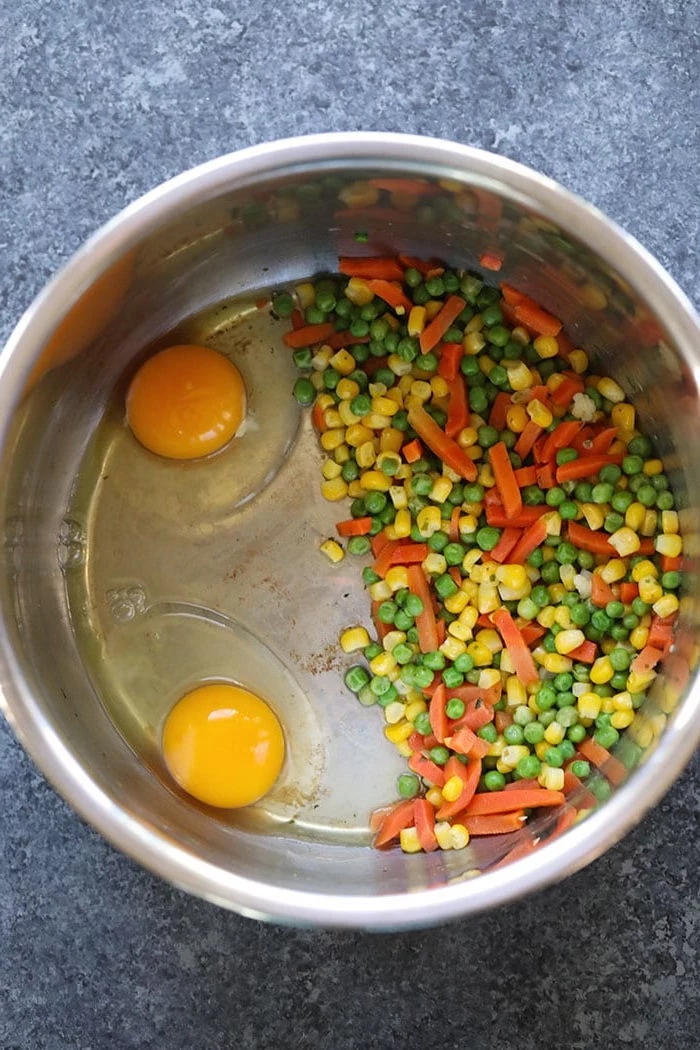
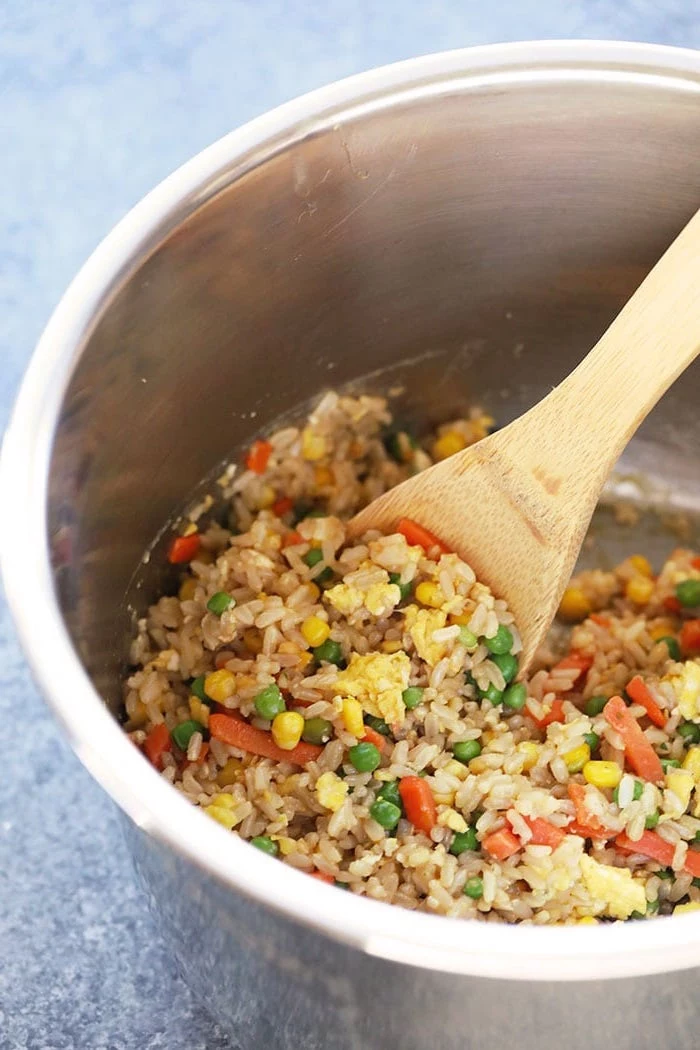
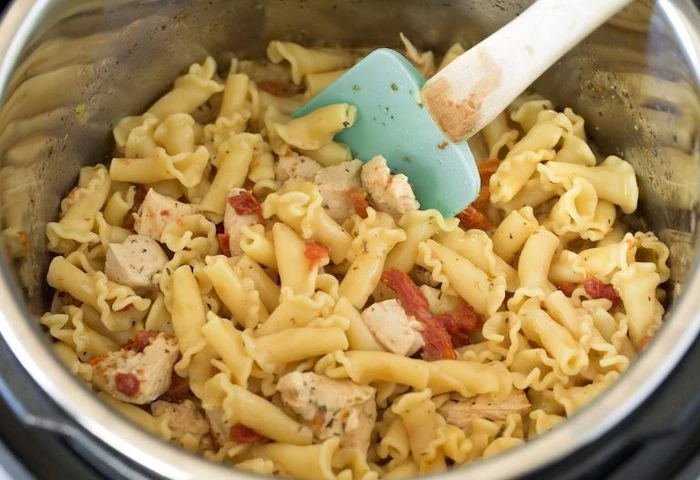
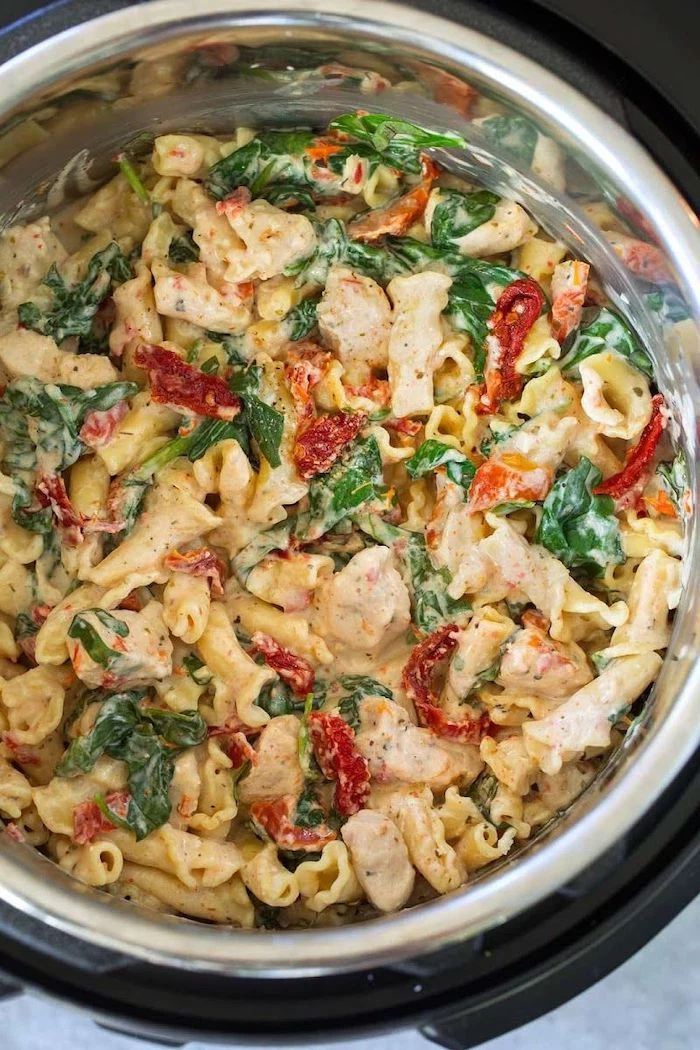
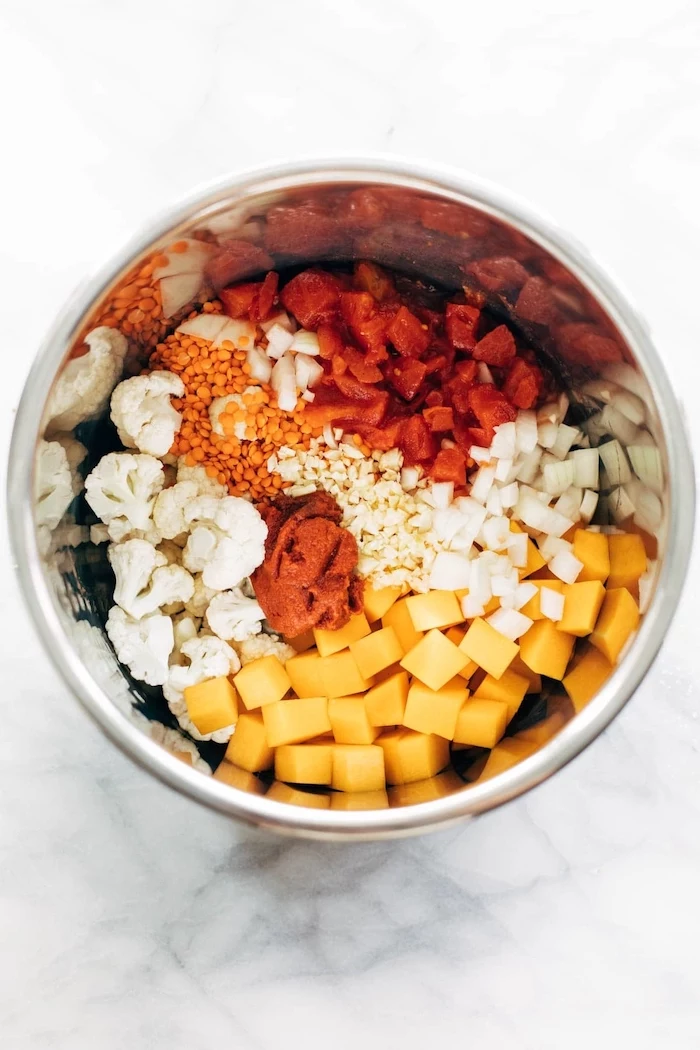
Layering your ingredients is a pro technique to prevent sticking and burning. Follow this order for one-pot pasta or grain dishes:
- Bottom: Aromatic vegetables (onions, garlic) and proteins (chicken, beef).
- Middle: Liquids like broth or water.
- Top: Starches like pasta or rice (do not stir!), and delicate vegetables.
The ‘steam digester,’ the precursor to the pressure cooker, was invented by French physicist Denis Papin in 1679.
To keep your pressure cooker in top shape, give the lid a quick deep-clean once a month. Gently pull off the silicone ring and the small, metal anti-block shield on the underside. Wash them in warm, soapy water and make sure the steam release valve and float valve are clear of any food debris before reassembling.
Sauté first, always. The secret to deep, complex flavor that rivals slow-cooking isn’t just the pressure; it’s the Maillard reaction. Using the ‘Sauté’ function to brown your meat and caramelize your onions before adding liquid builds a foundation of flavor that pressure alone can’t replicate. Never skip this step!
- Save vegetable peels, onion skins, and herb stems in a bag in your freezer.
- Collect leftover bones from a roast chicken.
When the bag is full, you have a free meal. Add it all to your pressure cooker, cover with water, and cook on high pressure for 60-90 minutes. The result is a rich, nutrient-dense stock for soups and sauces, made from ingredients you would have thrown away.

I see recipes calling for a ‘foil sling’. What is that?
It’s a simple, brilliant DIY tool. Tear off a long sheet of heavy-duty aluminum foil and fold it into a sturdy strip about 2-3 inches wide. Place it under your pot-in-pot dish (like a cheesecake pan) before lowering it into the cooker, leaving the ‘handles’ sticking up. It makes lifting hot, heavy dishes out of the pot effortless and safe.
The latest generation of multi-cookers, like the Instant Pot Pro Crisp or Ninja Foodi, are more than just pressure cookers. They come with a second, specialized lid that turns the appliance into a powerful air fryer. This allows you to pressure cook a whole chicken to be juicy and tender, then switch lids to crisp the skin to golden-brown perfection, all in the same pot.

Don’t be afraid of the sounds! The gentle ticking as it comes to pressure, the quiet hum during cooking, and the powerful hiss of a quick release are all normal. Think of them as the machine communicating with you. Once you learn what each sound means, the process becomes much less intimidating and a lot more satisfying.
Never fill your pressure cooker more than two-thirds full for most foods. For foods that expand or foam, like beans, grains, and applesauce, never fill it more than halfway.
This is the most critical safety rule. The empty space, or ‘headspace,’ is essential for steam to build up properly. Overfilling can block the pressure valves and lead to messy, dangerous sprays of hot food.
Your pressure cooker can also proof bread dough beautifully. Rub the inner pot with a little oil, place your dough inside, and select the ‘Yogurt’ setting on the ‘Less’ or ‘Low’ function. Cover with a glass lid or plate (don’t seal for pressure!). It creates a consistently warm, draft-free environment that can cut your first proofing time in half.
When adapting a conventional slow-cooker or stovetop recipe, the golden rule is to reduce the liquid. Since the pot is sealed, there’s virtually no evaporation. A good starting point is to cut the amount of broth, water, or wine by about one-third. You can always add more later if needed, but you can’t easily take it away.
The 5-5-5 Method: It’s the foolproof way to get perfect hard-boiled eggs that peel like a dream.
- Cook on high pressure for 5 minutes.
- Let the pressure release naturally for 5 minutes, then quick release the rest.
- Immediately transfer the eggs to an ice bath for 5 minutes.


