Stop Pinning, Start Planning: The No-Nonsense Guide to a Kitchen That Actually Works
I’ve been designing and building kitchens for a long, long time. I’ve seen some wild trends come and go (avocado green everything, anyone?). But here’s the thing: the core principles of a fantastic kitchen are absolutely timeless. So many people start their journey on Pinterest, falling in love with a cabinet color or a funky light fixture. And honestly, that’s a huge mistake.
In this article
- First Things First: How Do You Actually Use Your Kitchen?
- What’s Your Shape? Finding the Right Kitchen Layout
- Let’s Talk Money and Time (The Stuff No One Tells You)
- Choosing Your Core Materials: Cabinets & Countertops
- The Unseen Heroes: Wiring, Plumbing & Airflow
- DIY vs. Hiring a Pro: A Reality Check
- Inspirational Gallery
A beautiful kitchen that’s a nightmare to cook in is just a pretty room you’ll eventually resent. The real secret? Plan for function first. Think of your kitchen as a workshop for your daily life. It needs a smart layout, materials that can take a beating, and systems that are safe and reliable. When you nail those things, the style part falls into place beautifully.
So, let’s skip the marketing fluff and get right into the practical stuff that leads to a kitchen you’ll love using every single day.
First Things First: How Do You Actually Use Your Kitchen?
Before you even think about materials, you need to understand your workflow. For ages, designers swore by the “Kitchen Work Triangle,” which connects the fridge, sink, and stove. The idea was to keep the path between these three spots clear and compact, and it’s a simple concept that still holds up.
Industry guidelines suggest that each side of this triangle should be between 4 and 9 feet long, with the total path being no more than 26 feet. Too small, and you feel boxed in. Too big, and you’re running a marathon just to make dinner. I once had to fix a kitchen where the fridge was a full 15 feet from the sink—the homeowners didn’t realize how infuriating it was until they moved in. That’s a costly “oops.”
Try this right now: Stand in your current kitchen. Pretend you’re making a simple salad. Walk from the fridge (to get the lettuce), to the sink (to wash it), and then to a counter (to chop it). How many steps did that take? Did you have to squeeze past a table or bump into anything? That’s your workflow in action.
Moving Beyond the Triangle to “Work Zones”
Today’s kitchens are often bigger and do more than just cooking, so the pros now think in terms of “Work Zones.” It’s a more flexible approach that just makes sense.
- Prep Zone: This is mission control for chopping, mixing, and assembling. You need a good stretch of counter space here, ideally between the sink and the cooktop. I always push for at least 36 inches of clear counter.
- Cooking Zone: This is your stove, oven, and microwave. A crucial safety tip: you need landing space on both sides of your cooktop. 12 inches is the absolute minimum, but 15 inches is way better for setting down hot pans without a panic.
- Cleaning Zone: This area is all about the sink and dishwasher. Quick tip: Place the dishwasher right next to the sink. And think about which hand you use most. If you’re right-handed, putting the dishwasher to the left of the sink often feels more natural—you can scrape plates with your right hand and load with your left.
- Storage Zones: It’s smart to split this up. Keep your pantry and fridge (consumables) near the entrance of the kitchen so you can drop off groceries without a long trek. Then, place your everyday dishes and silverware (non-consumables) near the dishwasher to make unloading a breeze.
Thinking in zones keeps traffic flowing smoothly, even when you have multiple people in the space.
What’s Your Shape? Finding the Right Kitchen Layout
The shape of your room is pretty much the boss when it comes to layout. But no matter the shape, the most important rule is about clearance. You need at least 36 inches for a simple walkway. For a working aisle—where you’ll be opening oven doors and cabinet drawers—you need 42 inches for one person. If two people might be working back-to-back, you need a comfortable 48 inches.
The Most Common Kitchen Layouts
- The Galley: Two parallel walls of counters. Super efficient for one cook, but it can become a traffic jam if it’s a main hallway.
- The L-Shape: Uses two connected walls, which naturally opens the kitchen up to another room. It’s great for socializing while you cook. The only tricky part is that deep corner cabinet; a good pull-out shelf or a Lazy Susan is a must.
- The U-Shape: This gives you the most counter space and storage, wrapping around you on three sides. It’s a functional dream but needs a wider room (ideally 10 to 16 feet across) to avoid feeling cramped.
- The One-Wall: Perfect for studios and small lofts, everything is lined up on one wall. To make it work, you have to be clever with the order. I usually recommend putting the sink in the middle, flanked by the fridge and cooktop.
- The Island: Adding an island is wildly popular, and for good reason—it adds prep space, storage, and seating. But they need room to breathe. Don’t be tempted to cram one in if you don’t have the space.
Heads Up! 3 Mistakes That Will Make You Hate Your Island
An island should be a helper, not a hurdle. Avoid these common blunders:
- Skimpy Aisles: People forget the 42-to-48-inch rule. They put in a huge island and suddenly can’t fully open the oven or dishwasher if someone is standing there. It’s a daily frustration.
- The Wrong Size: An island that’s too big makes the room feel choked and difficult to navigate. One that’s too small just looks awkward and doesn’t offer enough utility to be worth the space it occupies.
- Bad Placement: A poorly placed island can completely block the natural flow between your sink, stove, and fridge. It becomes a massive obstacle you have to walk around a dozen times a day.
Let’s Talk Money and Time (The Stuff No One Tells You)
A kitchen remodel is a huge undertaking, and the two biggest questions are always “How much?” and “How long?” Let’s get real about it.
A Rough Guide to Splitting Your Kitchen Budget
Every project is different, but costs generally break down like this. Use it as a starting point:
- Cabinets & Hardware: This is your biggest expense, typically eating up 35-40% of the total budget.
- Labor & Installation: Don’t underestimate this! It’s usually around 20%.
- Appliances: Plan for about 15% here. A crucial decision here is freestanding vs. built-in. A slide-in range, for example, gives a more seamless look but requires a specific countertop cutout, while a counter-depth fridge costs more but sits flush with your cabinets, saving precious floor space.
- Countertops: These will run you about 10-15% of the total.
- Everything Else: This 10-15% bucket includes flooring, backsplash, lighting, plumbing, and electrical work.
And the most important part: Always have a 10-15% contingency fund. Trust me, there will be surprises. You might open a wall and find unexpected plumbing or electrical issues. This fund is what keeps a small problem from becoming a budget-breaking disaster.
How Long Will This Actually Take?
A full kitchen gut and remodel isn’t a weekend project. For a standard kitchen, a professional crew’s timeline might look something like this:
- Week 1: Demolition and tear-out. Bye-bye, old kitchen!
- Week 2-3: Rough-in work. This is when the plumbers and electricians move pipes and wires. This is followed by wall repair, priming, and painting.
- Week 4: Cabinet installation.
- Week 5: Countertop templating, followed by a 1-2 week wait for fabrication. This is a great time to get the flooring done.
- Week 6-7: Countertop installation, followed by backsplash tiling, appliance installation, and hookups.
- Week 8: The final stretch! Lighting fixtures, cabinet hardware, and final paint touch-ups.
So, you’re looking at a minimum of 6-8 weeks where your kitchen is mostly out of commission. Plan accordingly!
Choosing Your Core Materials: Cabinets & Countertops
This is where you make decisions you’ll live with for a long time. My advice? Invest in quality for these core components. You can always repaint a wall, but replacing countertops is a major ordeal.
A Pro’s Take on Cabinets
Cabinets are the furniture of your kitchen. The box construction is actually more important than the door style.
- The Box Matters: Your main options are particleboard, MDF, and plywood. To be frank, I avoid particleboard. It’s cheap, but it swells and crumbles the second it gets wet—a huge risk under a sink. MDF is better and paints up nicely, but it’s heavy and still vulnerable to water. My strong preference is always furniture-grade plywood. It’s stronger, lighter than MDF, and handles moisture much better. It might add 10-15% to your cabinet cost, but it’s an investment in longevity.
- Framed vs. Frameless: Framed cabinets are the traditional American style, with a solid wood frame on the front that adds rigidity. Frameless, or “European-style,” cabinets offer a sleek, modern look with slightly more interior space since the doors attach directly to the box. Both are great if they’re well-built, but frameless cabinets must be made from a stable material like plywood since they lack that extra face frame support.
- Doors & Drawers: Look for signs of quality like solid wood drawer boxes with dovetail joinery. And by the way, soft-close hinges and slides aren’t a luxury anymore. They’re a standard feature that prevents slamming and saves wear and tear on your investment.
Your Countertop: The Hardest Working Surface
There’s no single “best” countertop—it’s about what fits your life and budget.
- Quartz: This is my top pick for most families. It’s an engineered product that’s non-porous, so it won’t stain from coffee or wine and never needs sealing. It’s incredibly durable and comes in countless styles. You just have to be careful with extreme heat, so always use a trivet for hot pans. Expect to pay between $70 and $200 per square foot, installed.
- Granite: This natural stone is a workhorse. It’s super durable and heat-resistant. The main drawback is that it’s porous and needs to be sealed about once a year to prevent stains. Forget to seal it, and that olive oil spill could become a permanent dark spot. It typically runs from $60 to $150 per square foot.
- Marble: Oh, marble is gorgeous, but it’s a diva. It’s soft and porous, meaning it will scratch and etch from things as simple as a lemon slice. I only recommend it for people who are ready to embrace an aged, well-worn look.
- Butcher Block (Wood): Wood adds incredible warmth and is great for prep areas. But it’s a lifestyle choice. It needs regular oiling to prevent cracking and can be damaged by water and heat. It’s beautiful but requires commitment.
- Laminate: Don’t picture your grandma’s old laminate. Modern versions look fantastic and are the most budget-friendly choice, usually around $30 to $70 per square foot. It’s easy to clean but can be scratched or scorched, and damage is usually permanent.
The Unseen Heroes: Wiring, Plumbing & Airflow
What’s behind the walls is just as important as what you see. This is where you don’t cut corners, and for most people, this is NOT a DIY job.
Kitchen Electrical Done Right
You can never have too many outlets. Building codes require them for a reason—to keep you safe.
- Outlets & Safety: You’ll need outlets spaced so that no point along the counter is more than 24 inches away from one. Any outlet near a sink must have GFCI protection, which cuts the power instantly to prevent shocks.
- Dedicated Circuits: Major appliances like the fridge, dishwasher, and microwave each need their own circuit. This is what prevents the breaker from tripping every time you try to make toast and coffee at the same time.
- Lighting Layers: Good lighting is everything. You need ambient (overall) light from ceiling fixtures, task lighting for your work surfaces (under-cabinet LEDs are the best for this), and accent lighting like pendants to add style.
Pro Tip: Put ALL of your lights on dimmer switches. It’s a cheap upgrade—about $20 a switch at any home improvement store—and it’s the single best way to control the mood, from bright-as-an-operating-room for cleaning to a soft glow for a late-night snack.
Plumbing and Ventilation
Getting water in and out and handling cooking fumes is critical.
- Plumbing Basics: Your sink needs a P-trap (the U-shaped pipe) to block sewer gas, and the drain lines need proper venting to work efficiently. Insist on separate shut-off valves for the sink and dishwasher to make future repairs much easier.
- Good Ventilation: A range hood is a health item, not a luxury. It pulls grease, smoke, and moisture out of your air. A ducted hood that vents outside is ALWAYS better than a recirculating one that just filters the air and blows it back into the room. A decent ducted hood will start around $300 and go up from there, but it’s worth every penny.
DIY vs. Hiring a Pro: A Reality Check
It’s tempting to save money by doing it yourself, but a kitchen remodel is a complex beast.
Good Projects for a Confident DIYer
- Demolition: Tearing out old stuff is satisfying work. Just be sure to shut off the power and water first!
- Painting: A fresh coat of paint can work wonders and is very DIY-friendly.
- Installing Cabinet Hardware: Knobs and pulls are an easy final touch. Use a template for perfect alignment.
- A Simple Backsplash: If you’re patient, tiling can be a manageable weekend project.
Jobs Best Left to the Professionals
- Electrical and Plumbing: For safety and code compliance, this is non-negotiable. Hire licensed pros.
- Cabinet Installation: This is way harder than it looks. Walls and floors are never perfectly level. A pro knows how to shim and scribe cabinets so they are perfectly aligned. I once had a client who insisted on installing their own cabinets. When we came to measure for the countertops, they were so uneven that we had to take them all down and reinstall them correctly. We had to charge them for 8 hours of labor, which cost an extra $800. It wiped out their “DIY savings” and then some.
- Countertop Fabrication: Heavy materials like quartz and granite can easily crack if mishandled. The price always includes professional templating and installation. Let them do it.
- Removing Walls: Never, ever remove a wall without consulting a structural engineer. What looks like a simple partition could be holding up your second floor.
A successful kitchen project comes down to an honest assessment of your skills, budget, and timeline. A good plan, built on a solid understanding of how a kitchen actually functions, is your most valuable tool. Take your time, and build a space that will serve you and your family for years to come.
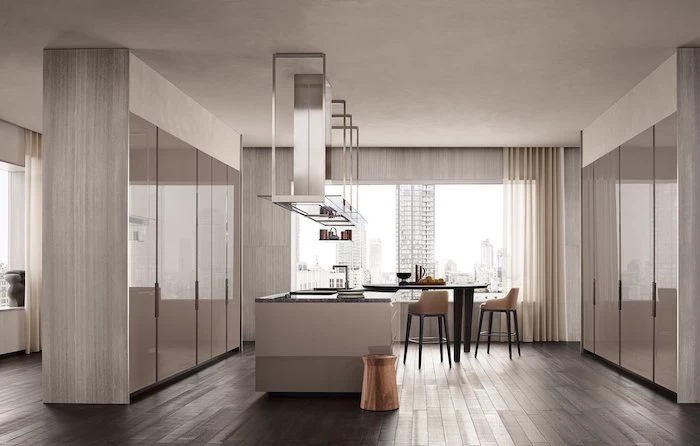
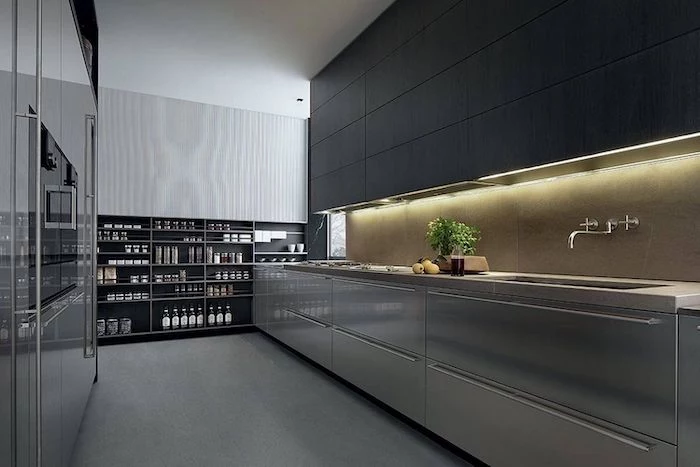
Inspirational Gallery
Quartz Countertops: An engineered stone made from quartz crystals, resins, and pigments. It’s non-porous, meaning it resists staining from wine, coffee, or oil without needing to be sealed. Brands like Caesarstone or Silestone offer immense color consistency.
Granite Countertops: A natural stone, so each slab is unique. It’s highly durable but is porous and requires periodic sealing (typically yearly) to prevent stains and bacteria growth. It generally handles heat better than quartz.
For a truly no-fuss, low-maintenance kitchen as discussed, quartz often has the edge.
The National Kitchen & Bath Association (NKBA) recommends at least 36 inches of continuous countertop space for food preparation.
This isn’t just about having one big island. Think about creating several functional prep zones. An ideal setup includes a primary space near the sink and a smaller one next to the stove for last-minute chopping or plating. Spreading out your prep areas prevents kitchen traffic jams when more than one person is cooking.
One of the most common design regrets is forgetting dedicated ‘landing zones’. This is a critical oversight: You need at least 15 inches of clear counter space next to your oven and refrigerator. It’s a matter of safety and convenience—a place to set down a hot casserole dish instantly or to unload grocery bags without a long trek across the room.
- Eliminates the jarring sound of slamming cabinets.
- Keeps contents from shifting and clattering.
- Adds a touch of quiet luxury to daily tasks.
The secret? It’s not about the cabinets themselves, but the hardware. Investing in high-quality soft-close hinges and drawer slides from specialists like Blum or Grass is a relatively small upgrade that dramatically improves the daily experience of using your kitchen.
What exactly is a workstation sink?
Imagine your sink area transforming into a multi-functional prep station. That’s the idea behind workstation sinks, like those from Ruvati or Kraus. They feature a built-in ledge that supports custom-fit accessories: a sliding cutting board, a colander, or a roll-up drying rack. This consolidates chopping, rinsing, and straining into one compact, efficient zone, freeing up valuable counter space elsewhere.
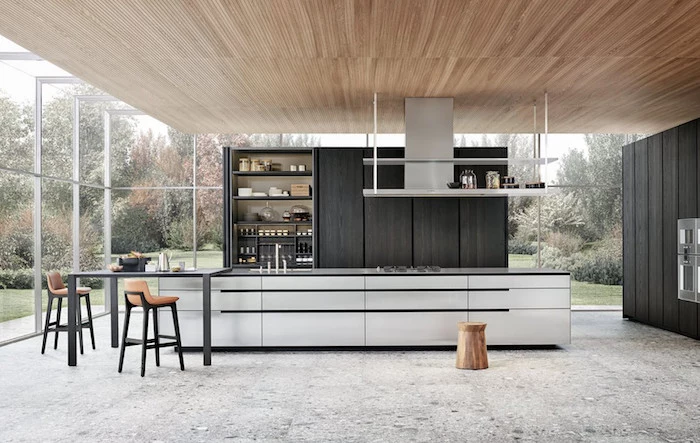
Beyond the work triangle, think in ‘zones’. A well-planned kitchen isn’t just three points, but a series of dedicated areas.
- The Prep Zone: Ample counter space with easy access to the sink, trash, and knives.
- The Cooking Zone: The stove, oven, and microwave, with nearby storage for pots, pans, and spices.
- The Cleaning Zone: The sink and dishwasher, logically placed next to each other for easy loading.
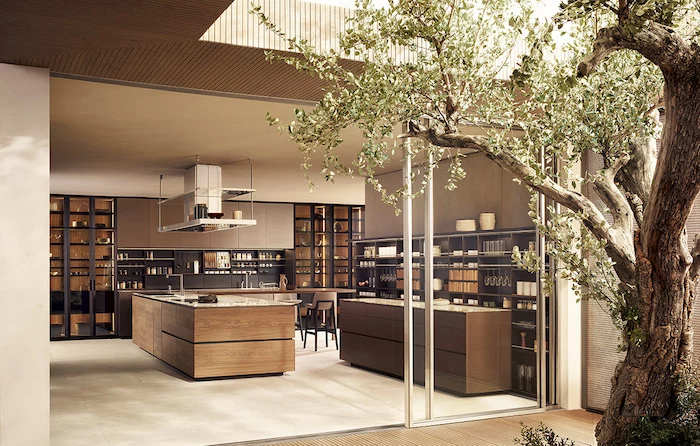
According to the EPA, indoor air can be two to five times more polluted than outdoor air, often due to materials used in our homes.
When selecting cabinets, flooring, and paint, look for products with low or no Volatile Organic Compounds (VOCs). Brands like Sherwin-Williams (Harmony line) or Benjamin Moore (Aura line) offer zero-VOC paints, contributing to a healthier environment in the room where your food is prepared.
Think of cabinet pulls as the jewelry of your kitchen, but prioritize function. That ornate, wrought-iron knob might look great on Pinterest, but it will snag your clothes and be a nightmare to clean after you’ve handled raw chicken. Simple bar or C-shaped pulls are far more practical—easy to grab with messy hands and quick to wipe down.
Where to save and where to splurge? Focus your budget on the things you touch every day. Invest in a high-quality faucet (like a Delta or Moen with a durable finish), smooth-gliding drawer hardware, and resilient countertops. You can save on elements that are easier and cheaper to update later, such as a tile backsplash, wall paint, or even light fixtures.
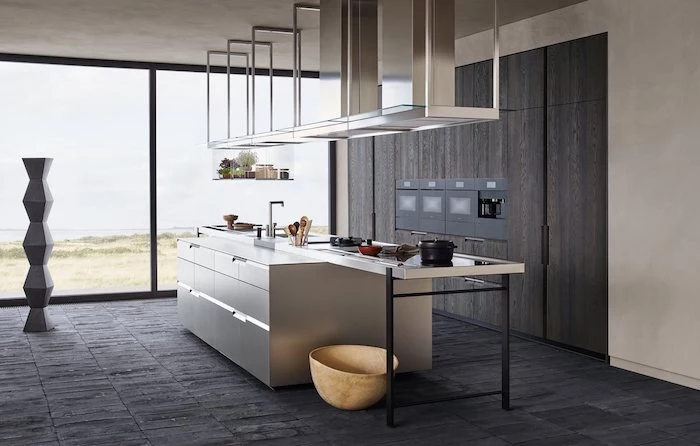
- Task lighting directly over prep areas (under-cabinet LED strips are perfect).
- Ambient lighting for overall illumination (recessed lights or a central fixture).
- Accent lighting to highlight features (pendant lights over an island).
A layered lighting plan is non-negotiable. One single, harsh overhead light creates shadows and makes chopping feel like performing surgery in the dark. Good lighting makes a kitchen safer, more functional, and feel more inviting.


