Thinking About a Double Cartilage Piercing? Read This First.
Over the years, I’ve seen piercing trends come and go. But one thing that never fades is our desire to make our look our own. A well-placed piercing isn’t just a piece of jewelry; it’s a little piece of you. And lately, the double cartilage piercing has been getting a lot of love.
In this article
Honestly, its popularity has less to do with what’s trendy and everything to do with proper planning, smart choices, and good aftercare. In my studio, I don’t just poke holes. I make sure my clients walk out knowing exactly what they’re getting into—from the anatomy of their own ear to what to expect during the long haul of healing. A happy client is an informed one.
So, let’s talk about what a double cartilage piercing really involves. This is the same chat I have every day, and it’s about making a safe, beautiful choice that you’ll love for years to come.
First Things First: Why Cartilage is Different
Before we even think about where to put the jewelry, we have to talk about what we’re piercing through. Your earlobe is soft, fleshy, and has great blood flow, which is why it heals up so fast. Cartilage is a whole different ball game.
It’s that firm, flexible tissue that gives your ear its unique shape. The most important thing to know? Cartilage has no direct blood supply. It gets all its nutrients from the fluid around it. That one simple fact is why cartilage piercings are famous for their long healing times. They just don’t have the biological fast lane to repair tissue quickly.
A new piercing is basically a controlled wound. The goal is for your body to form a smooth skin tunnel (called a fistula) through it. With cartilage, this process is slow and can be a bit fussy. Patience isn’t just a virtue here; it’s a requirement.
Needle vs. Gun: This Isn’t a Debate
Let’s be crystal clear about one thing: a true professional will only ever use a hollow, single-use piercing needle. This isn’t just a sharp pin. The needle is specifically designed to part the tissue cleanly, removing a teeny-tiny piece of cartilage to create a perfect channel for your jewelry. Think of it like a precise surgical tool, because that’s what it is.
A piercing gun, on the other hand, uses blunt force. It literally rams a dull stud through your ear, shattering the cartilage and causing a ton of trauma to the area. I’ve seen the aftermath—nasty scarring, healing complications, and a much higher risk of infection. Plus, those plastic guns can’t be properly sterilized in an autoclave (a machine that uses pressurized steam to kill germs), which is a huge red flag.
Heads up: If a place wants to use a gun on your cartilage, walk out. Seriously.

Finding the Perfect Spot for Your Double Piercing
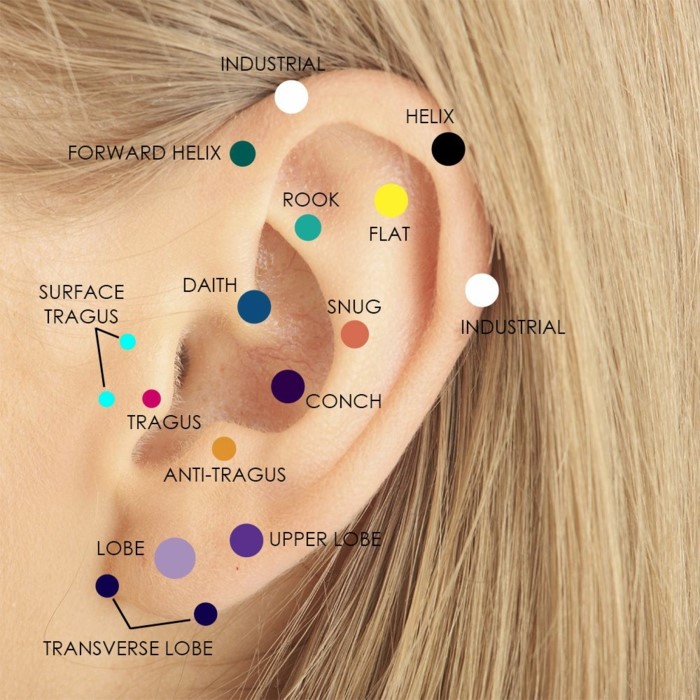
Your ear has its own unique landscape of folds, ridges, and curves. We can’t just pick a spot randomly. For a double piercing, we’re usually looking at a few key zones:
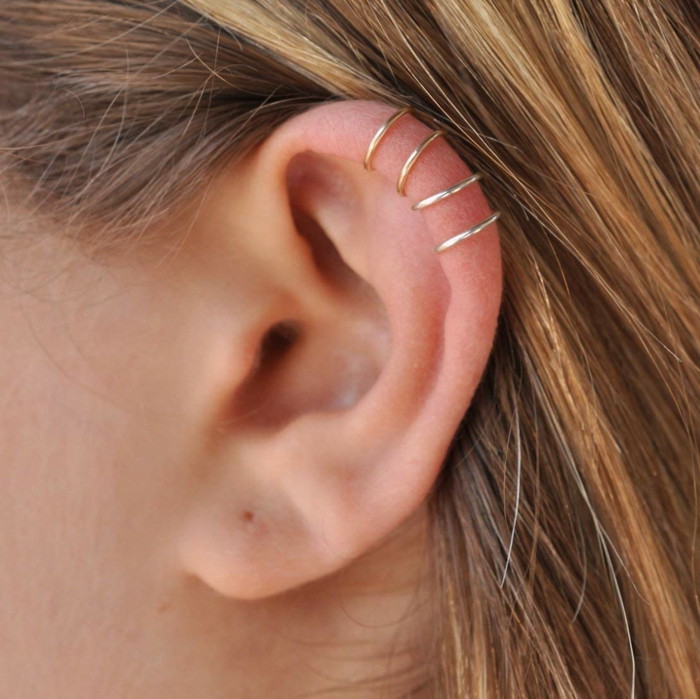
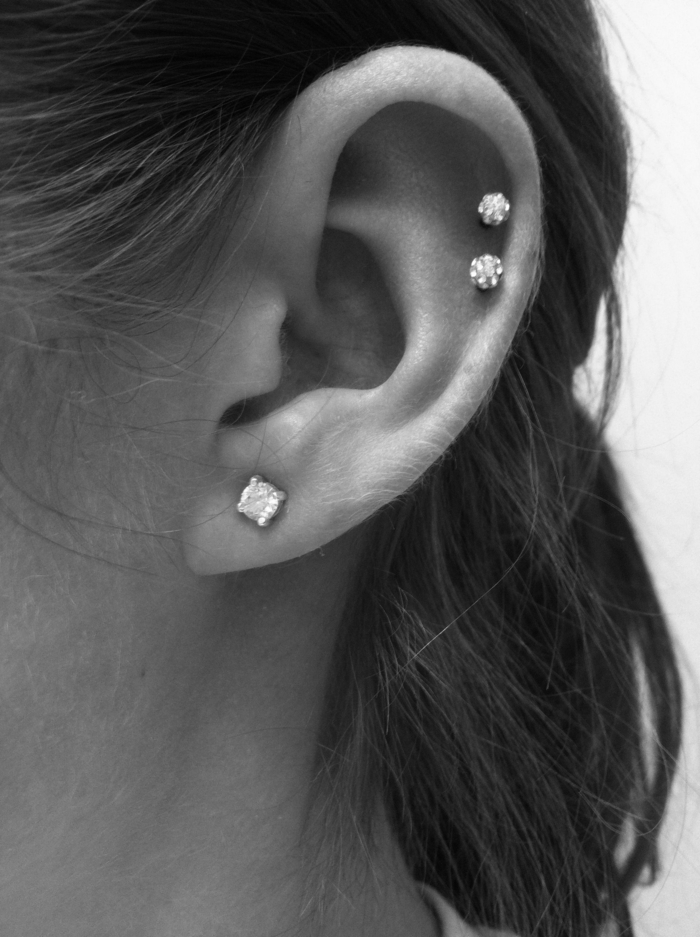
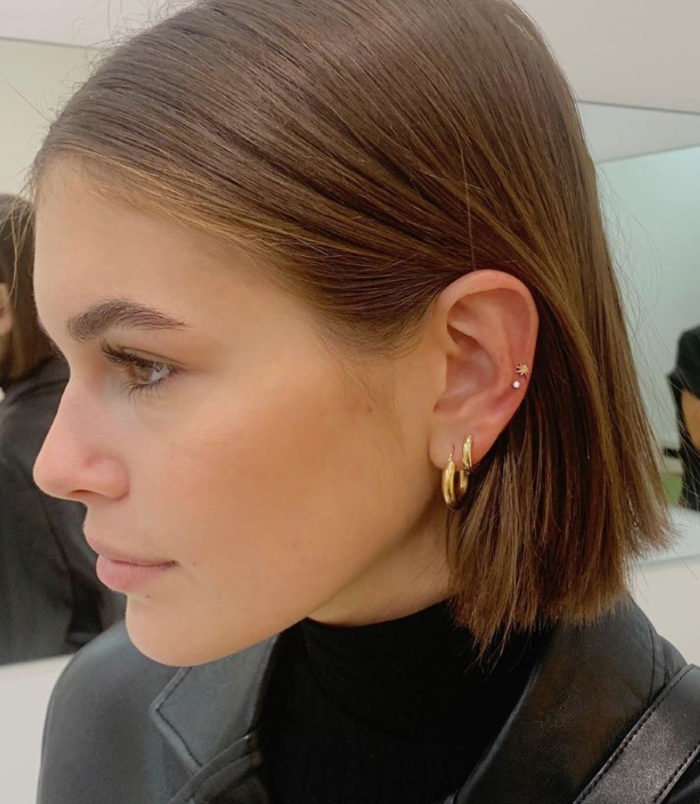
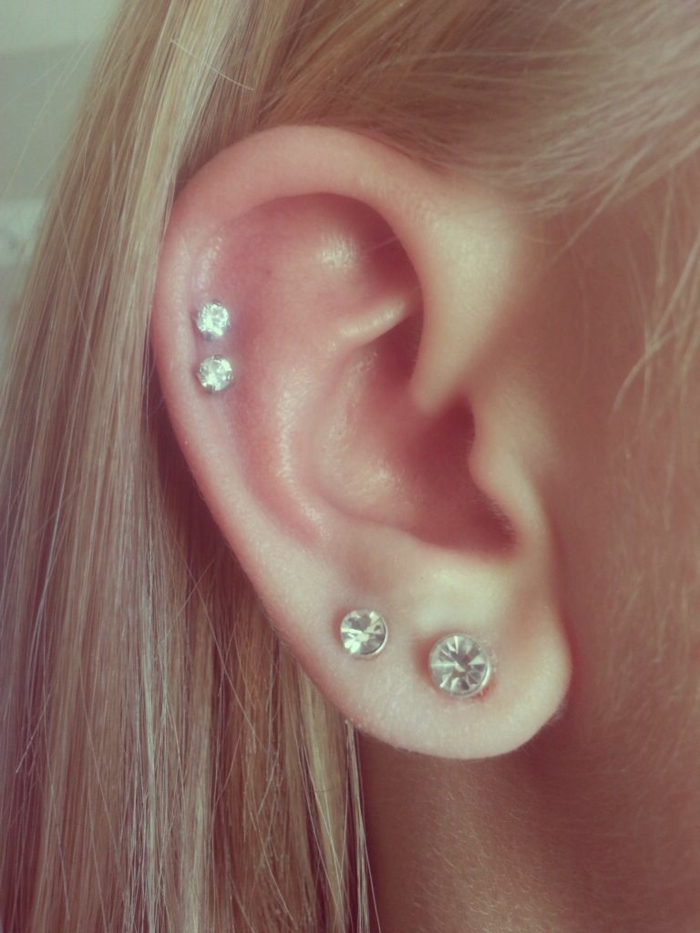
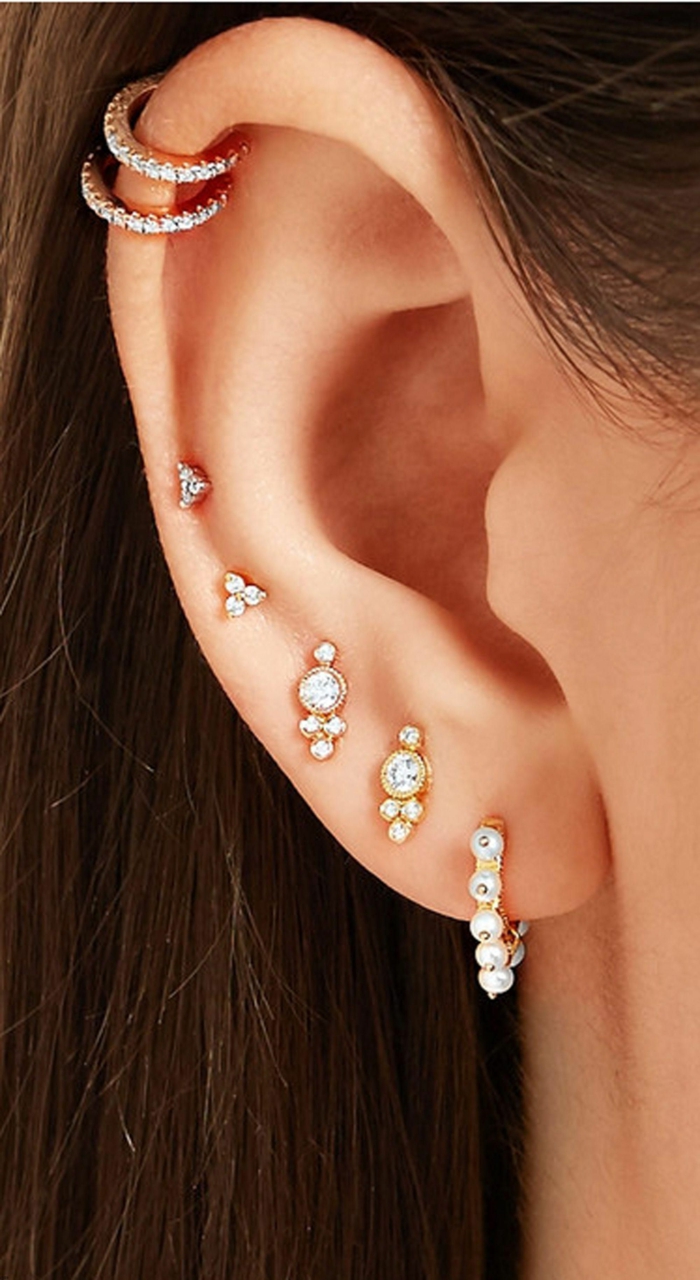
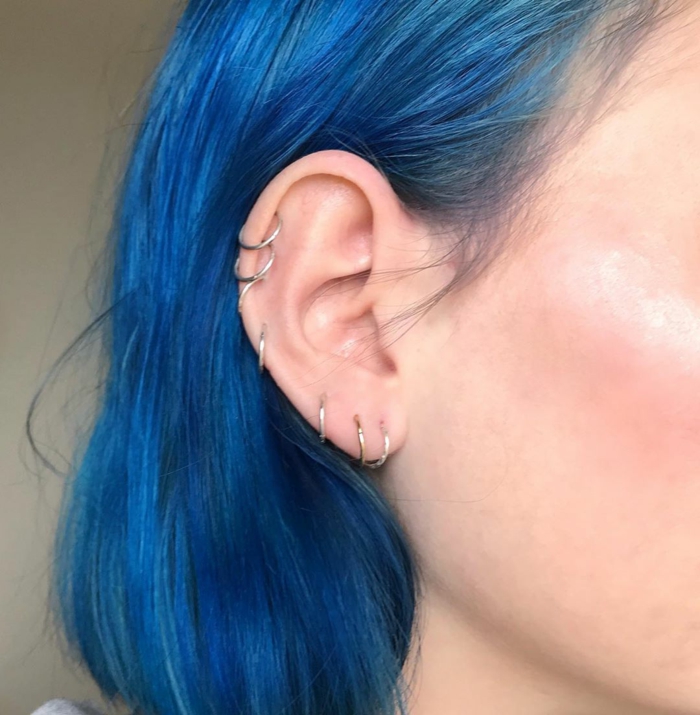
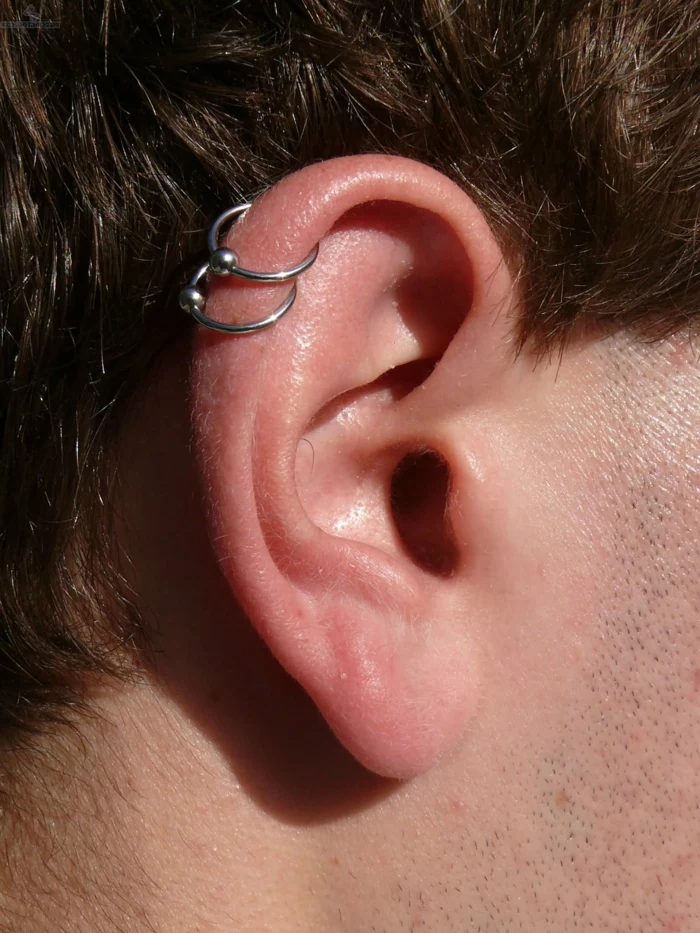
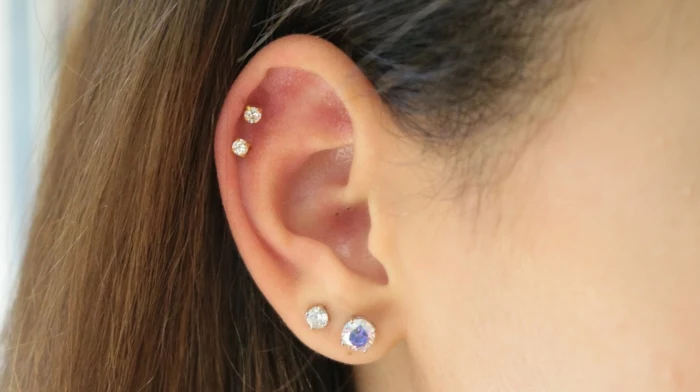
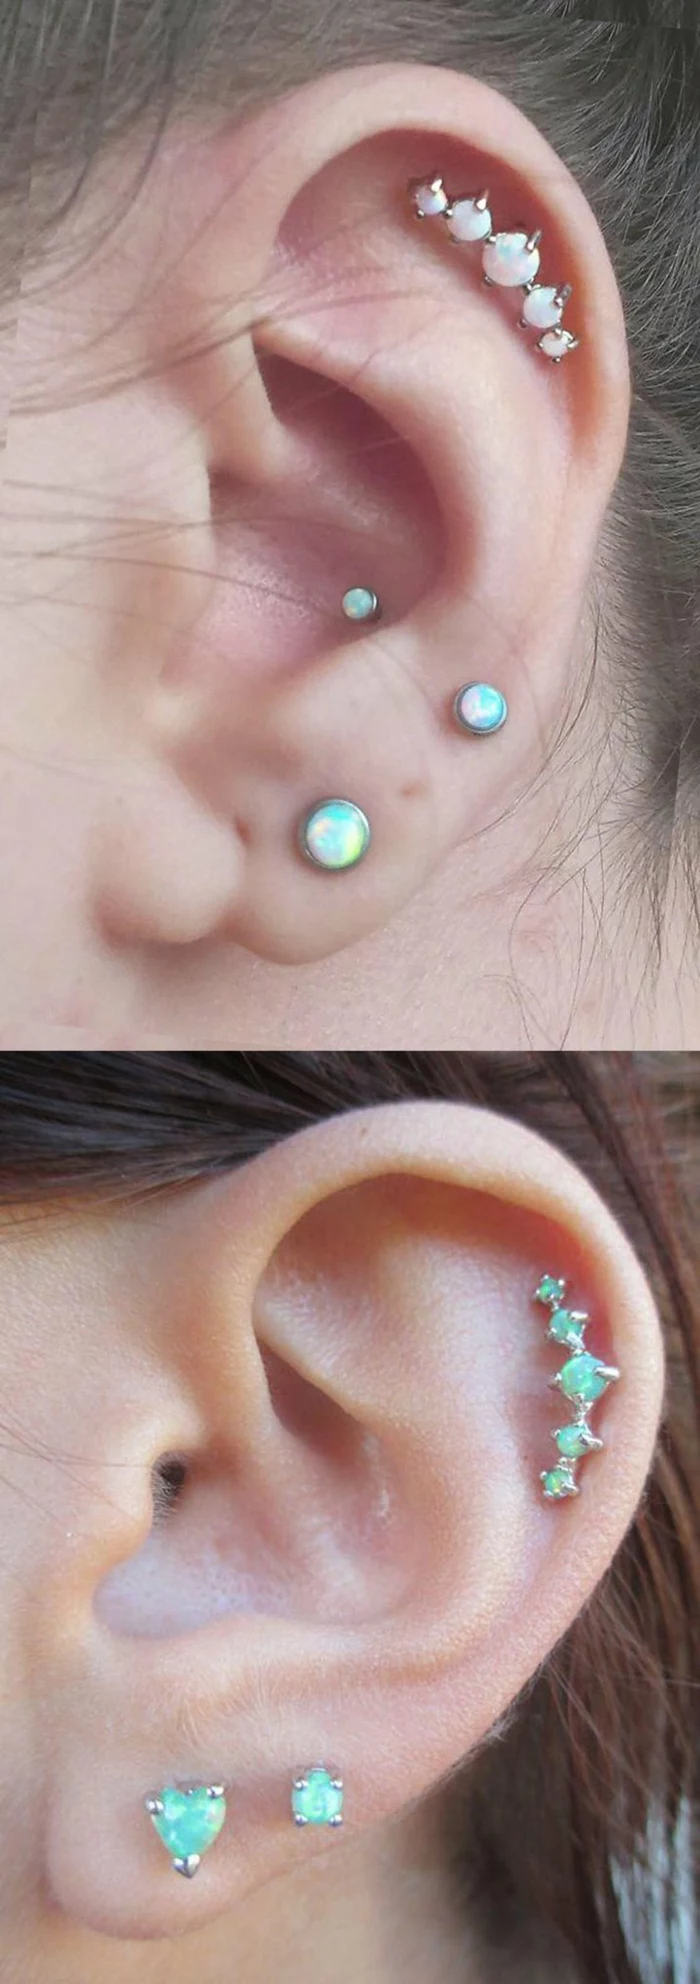
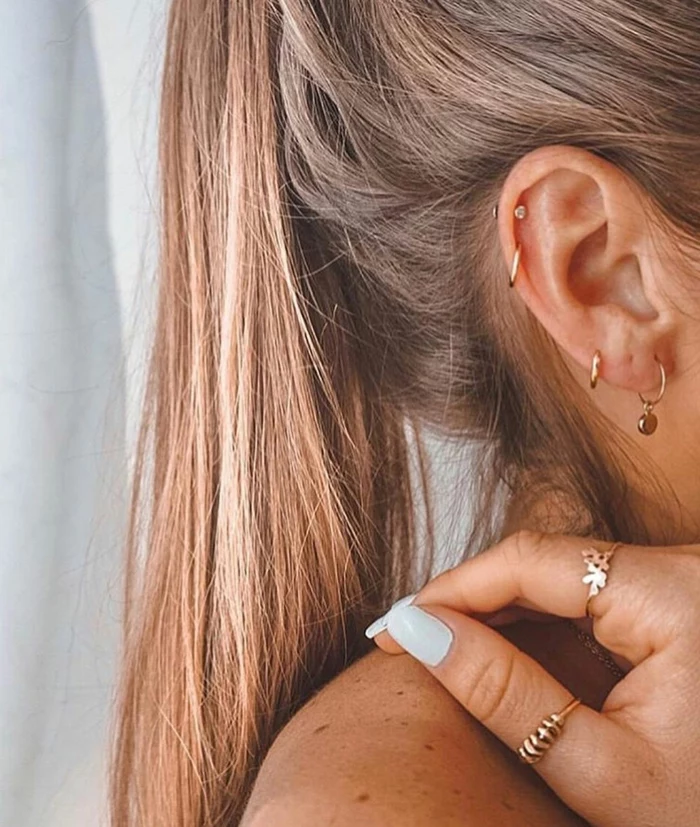
- The Helix: This is the classic spot on the outer rim of your ear. It’s perfect for a double piercing, but spacing is everything. We usually aim for about 6-8mm apart. Too close, and the jewelry backs can collide and cause irritation. Too far, and you lose that cool, intentional “double” look.
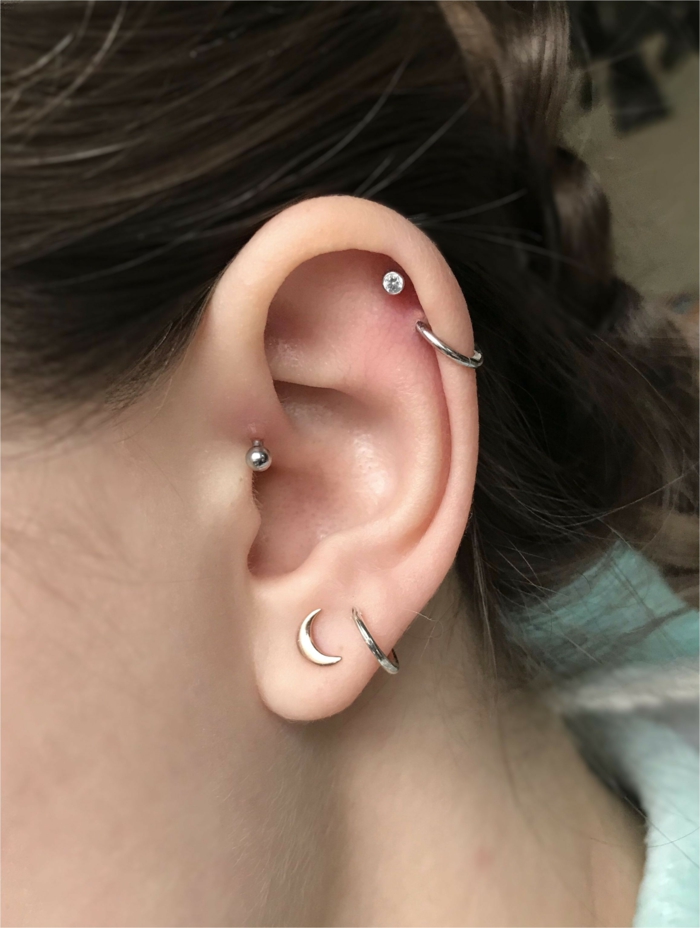
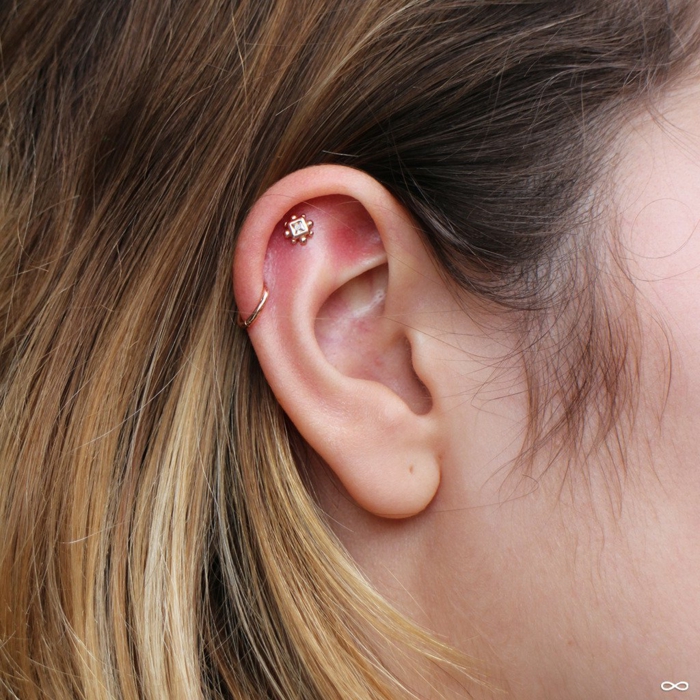
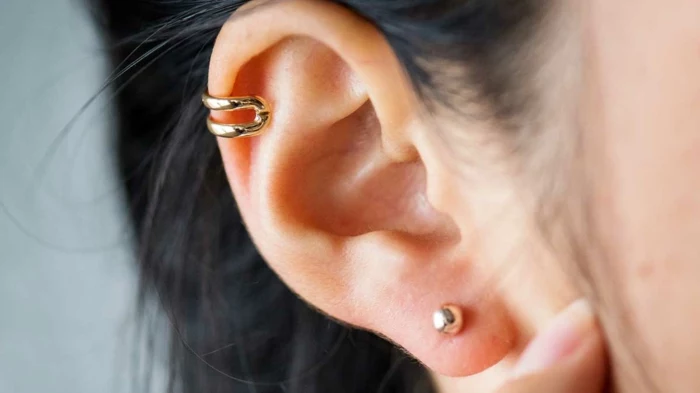
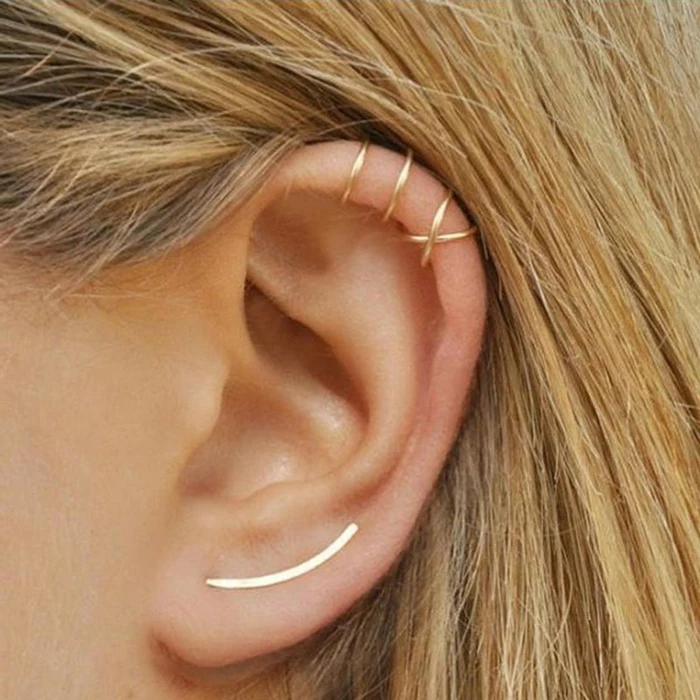
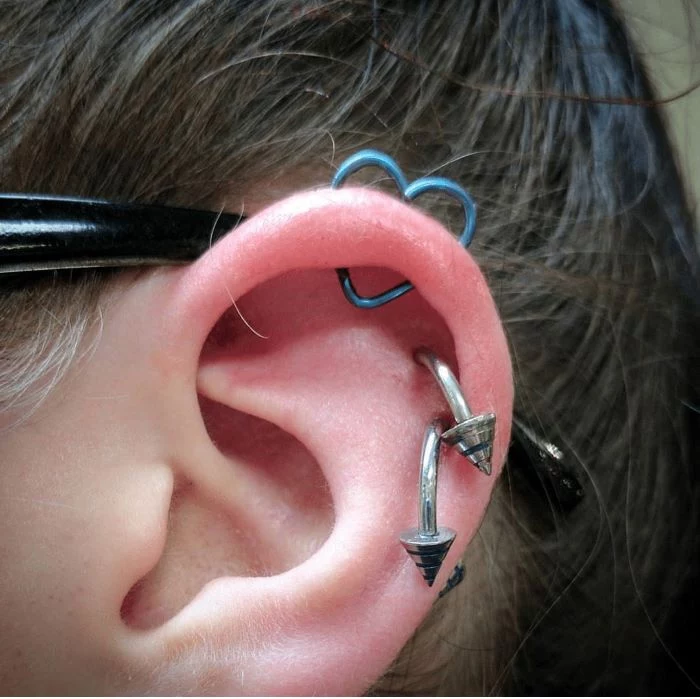
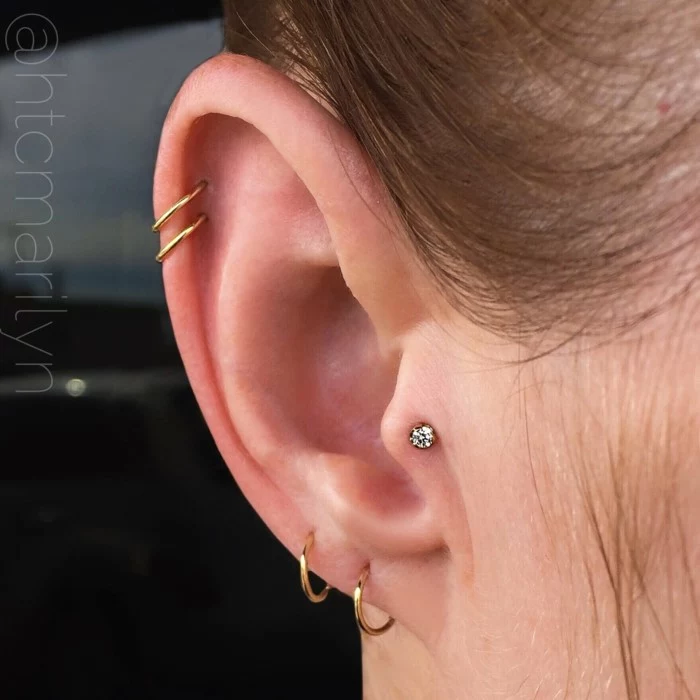
- The Forward Helix: This is the front part of that rim, right above the little flap that covers your ear canal. A double or even triple forward helix looks amazing, but it’s totally dependent on your anatomy. You need a well-defined ridge to support the jewelry properly.
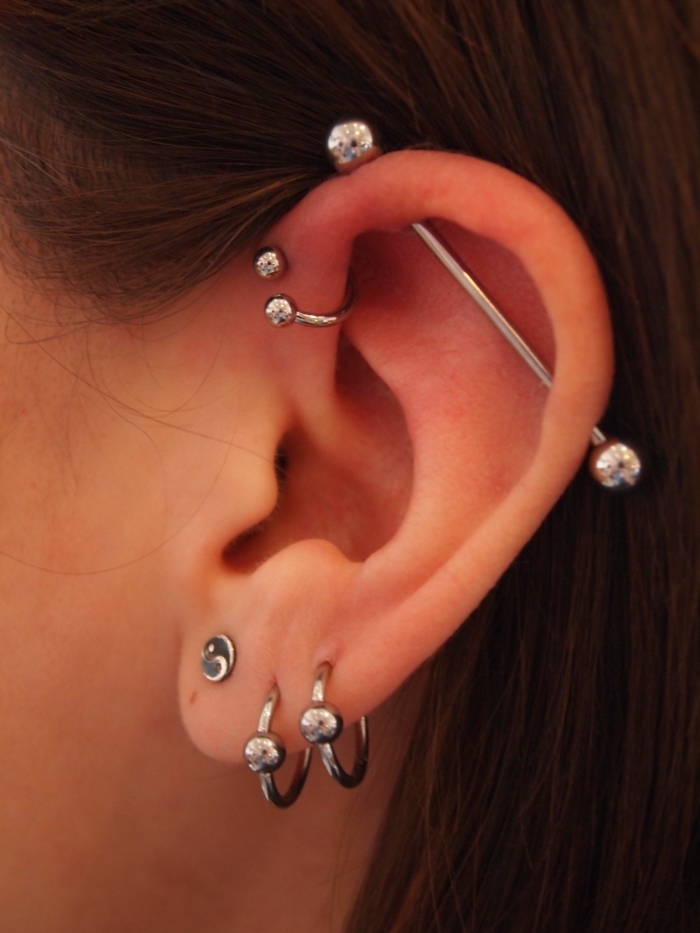
- The Conch: This is the large inner cup of your ear. A double piercing here is a bold statement, but we have to be practical. We’ll need to talk about whether you use earbuds or over-ear headphones, as that will definitely influence placement.
When you come in for a consultation, the first thing I do is look at your ear and talk about your lifestyle. Do you wear glasses? Are you a side-sleeper? Answering these questions helps us find a spot that not only looks great but also has the best possible chance to heal without a hitch.
In the Studio: What to Expect
A professional piercing experience should feel calm, clean, and collaborative. Here’s what it looks like.
Budgeting for Quality
Before we even mark the spot, let’s talk money, because this is an investment in your body. Prices vary by location, but here’s a realistic breakdown of what to expect:
- Piercing Service Fee: Usually runs between $35 and $60 per piercing. So for a double, you’ll be paying that fee twice.
- Initial Jewelry: This is crucial. You need high-quality, implant-grade titanium or solid 14k/18k gold. Expect to pay $40 to $80+ per stud. Yes, it’s more than costume jewelry, but it’s non-reactive and essential for healing.
- Aftercare Spray: A can of sterile saline spray will set you back about $12 to $20.
All in, you’re likely looking at a starting cost of $150 to $250+ for a quality double cartilage piercing. Don’t cheap out here—you’ll pay for it later in complications.

The Process
First, we talk and I mark the potential spots on your ear with a sterile pen. You get the final say, and we won’t move forward until you’re 100% happy with the placement. Next, everything is sterilized. I’ll open the single-use needle and jewelry from their sterile pouches right in front of you.
When it’s time, I’ll ask you to take a deep breath in and breathe out slowly. On the exhale, I’ll perform the piercing in one quick, smooth motion. You’ll feel a sharp pinch and some pressure. Then, I’ll guide the jewelry in gently. The whole thing is over in seconds.
The Long Haul: Healing and Aftercare
Okay, this is the most important part. Cartilage piercings take a long time to fully heal—we’re talking 6 to 12 months, sometimes longer. The outside might look fine after a few months, but the fistula inside is still developing.

Your Daily Routine
Aftercare is simple, but you have to be consistent.
- Clean it twice a day. Use only a sterile saline wound wash spray. You can find this at most pharmacies or get it from your piercer. Just spray the front and back of the piercing, let it sit for a minute, and then gently pat the area dry with a clean paper towel.
- Don’t touch it! The golden rule is LITHA—Leave It The Heck Alone. Don’t twist, turn, or pick at your jewelry. Your hands are covered in bacteria.
- Be careful when sleeping. Try not to sleep on your new piercings. A travel pillow with a hole in the middle can be a total lifesaver. Just put your ear in the hole!
Common Healing Mistakes to Avoid
- Using harsh chemicals: Ditch the alcohol, hydrogen peroxide, and antibacterial soaps. They are way too harsh and will only irritate your piercing.
- Changing the jewelry too soon: You must wait until the piercing is fully healed. I once had a client who swapped her new double helix studs for hoops after just a month. She came back with massive irritation bumps that took ages to calm down. That’s why I’m so strict about this now.
- Going swimming: Avoid submerging your new piercings in pools, hot tubs, lakes, or oceans for at least the first couple of months. They are full of bacteria.

Troubleshooting: That Annoying Little Bump
Sooner or later, many people get the dreaded “piercing bump.” First off, don’t panic. It’s almost always just an irritation bump, not a true keloid or an infection. It’s your body’s way of saying, “Hey, something is bothering me!”
Usually, the cause is one of three things: physical trauma (sleeping on it, snagging it), moisture, or low-quality jewelry. The fix? Go back to basics with your aftercare, be extra careful not to sleep on it, and if it doesn’t calm down in a week or two, go see your piercer. We can help troubleshoot the problem.
A Final Word on Jewelry
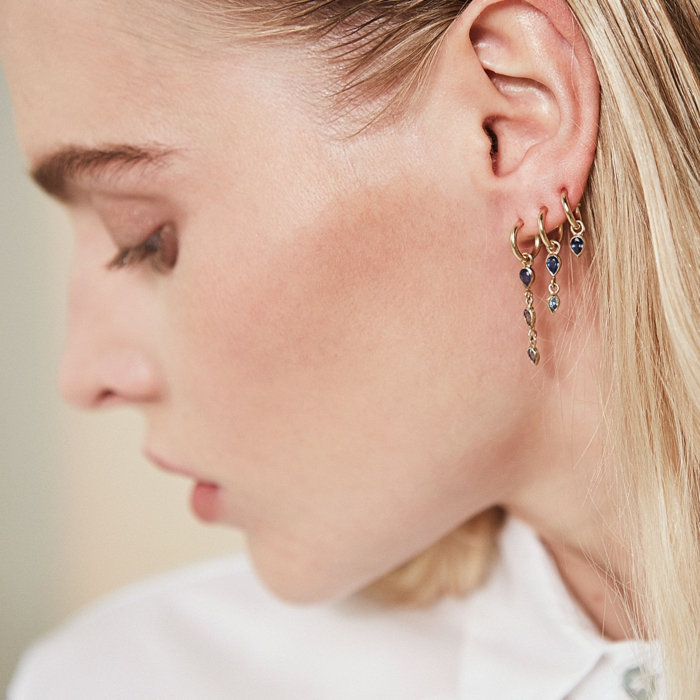
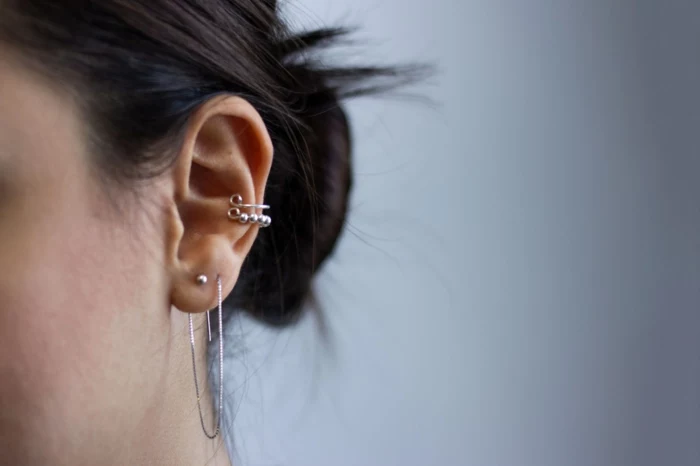
For initial healing, the best choice is a flat-back labret stud made from implant-grade titanium. The flat back sits flush against your skin, reducing the chances of snagging. Hoops are fun, but they move around way too much, causing constant irritation in a fresh piercing. Butterfly-back earrings are a definite no—they trap bacteria and are often made of mystery metal.

Save the hoops and dangly gems for later. Start smart with a stud, be patient, and your double cartilage piercing will be a beautiful part of your look for a lifetime.
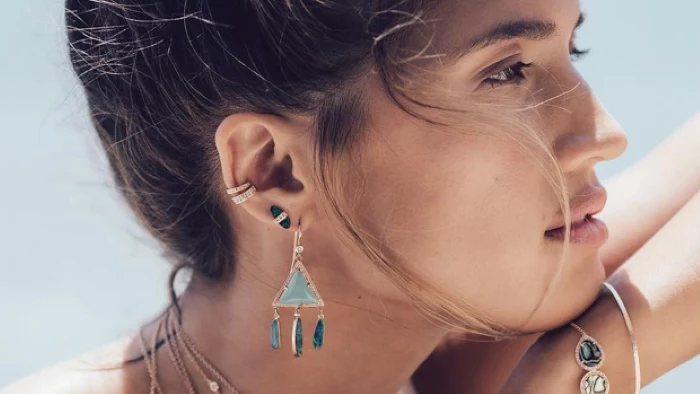
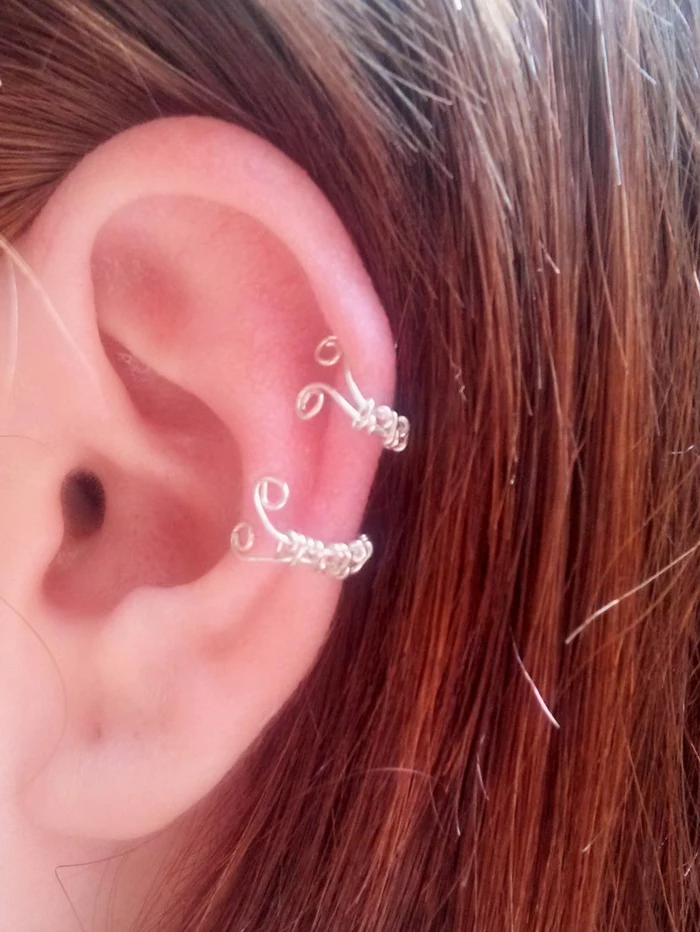
Inspirational Gallery
- Spray twice daily with a sterile saline solution, like NeilMed Piercing Aftercare.
- Gently pat dry with non-woven gauze; towels harbor bacteria.
- Avoid sleeping on the new piercings—a travel pillow can be a lifesaver.
- Do not twist, turn, or touch the jewelry.
The goal? Let your body do its work with minimal interference.

Implant-Grade Titanium (ASTM F-136): The gold standard for initial piercings. It’s nickel-free, lightweight, and highly biocompatible, minimizing the risk of allergic reactions. Ideal for sensitive skin.
14k or 18k Solid Gold: A beautiful, body-safe option, but ensure it’s nickel-free and solid, not plated. Gold-plated jewelry can flake, exposing underlying alloys and causing irritation.
For healing, titanium often has the edge, but high-quality gold is perfect once you’re fully healed.
The Association of Professional Piercers (APP) specifies that initial jewelry for healing piercings must be made from materials like implant-grade titanium, 14-18k gold, or niobium. Notice what’s not on that list? ‘Surgical steel.’

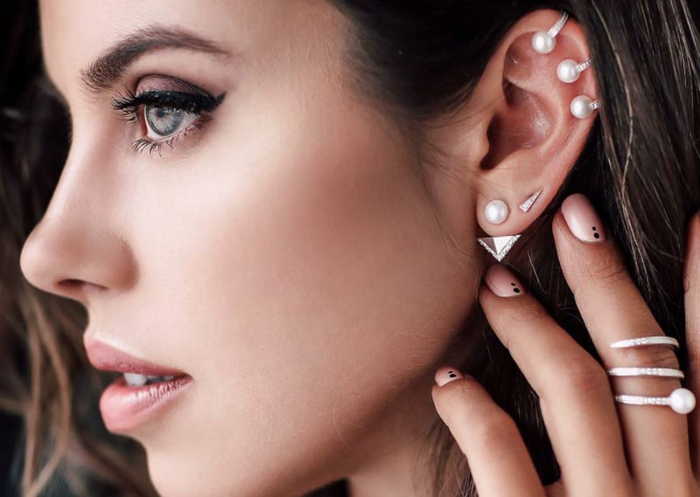
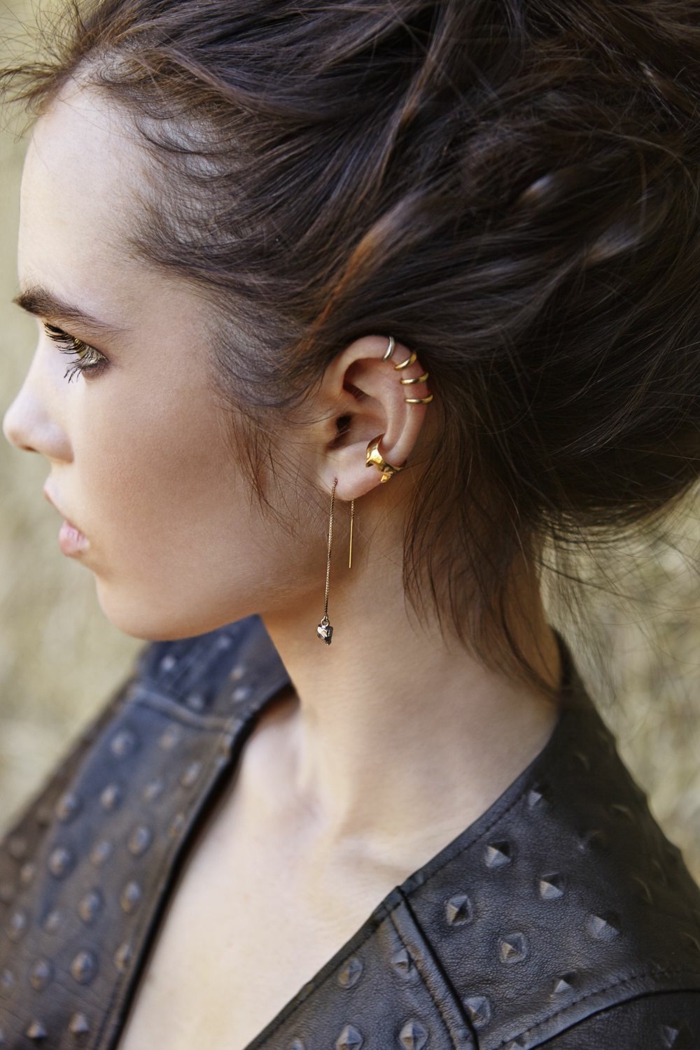
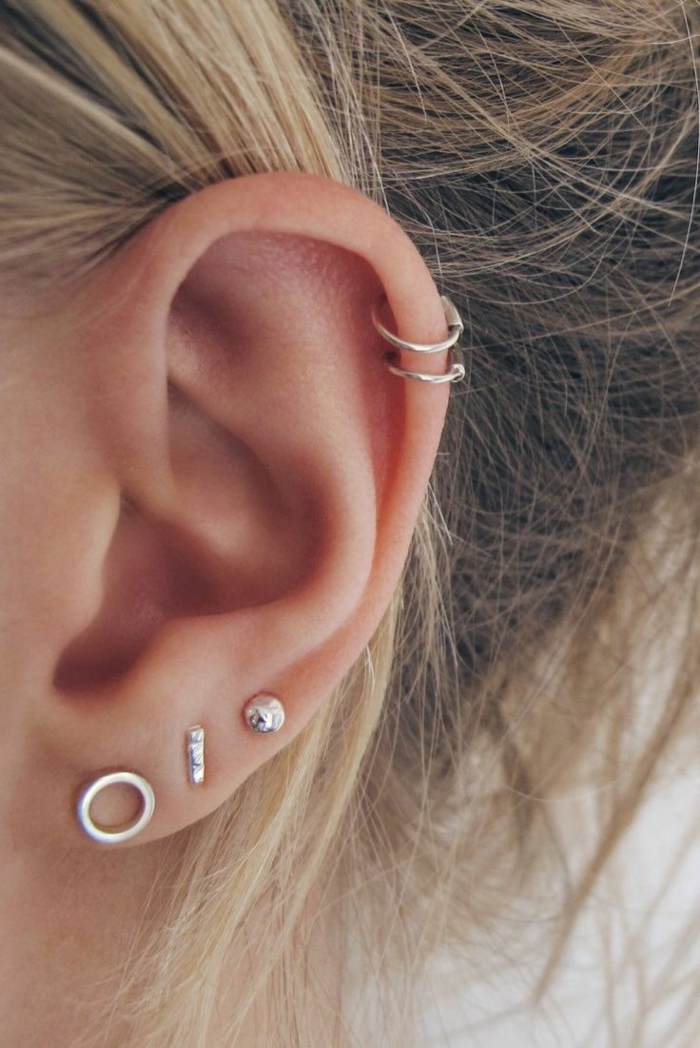
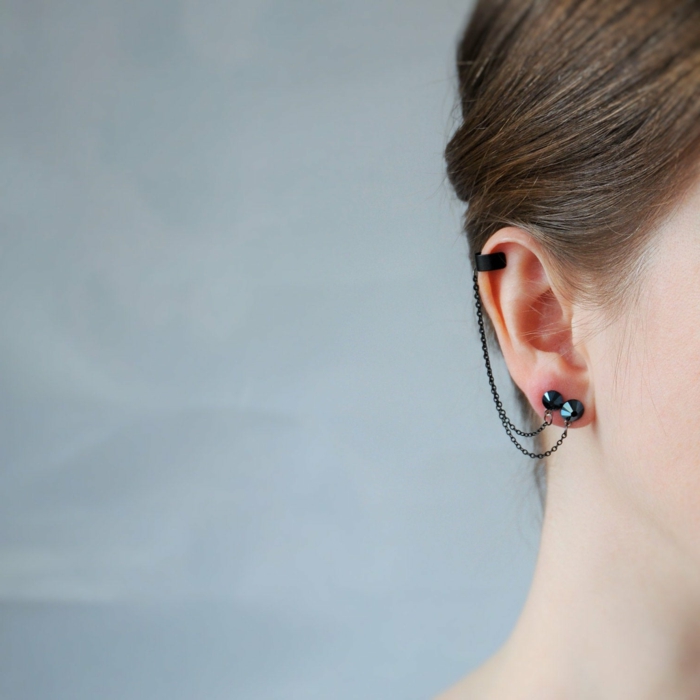
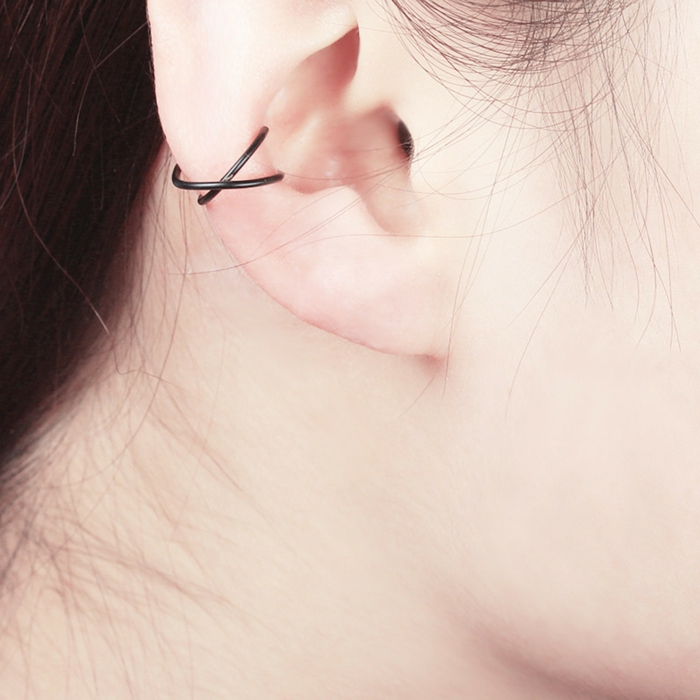
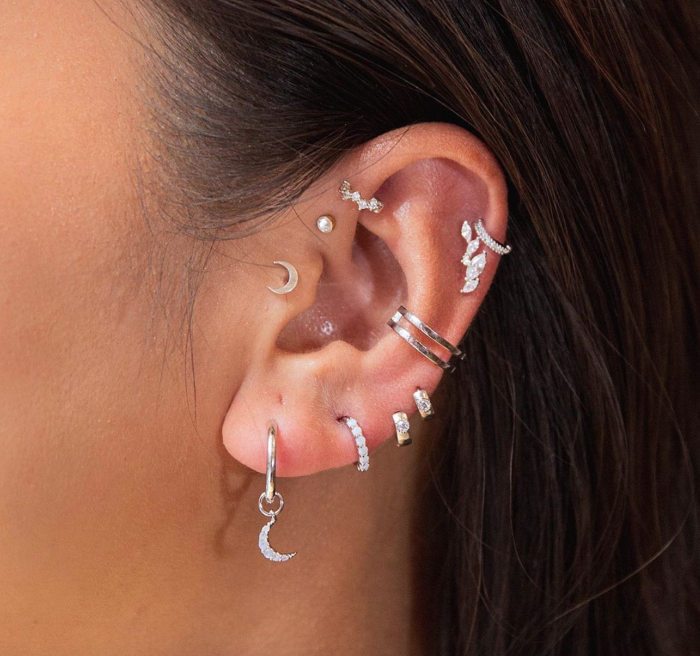
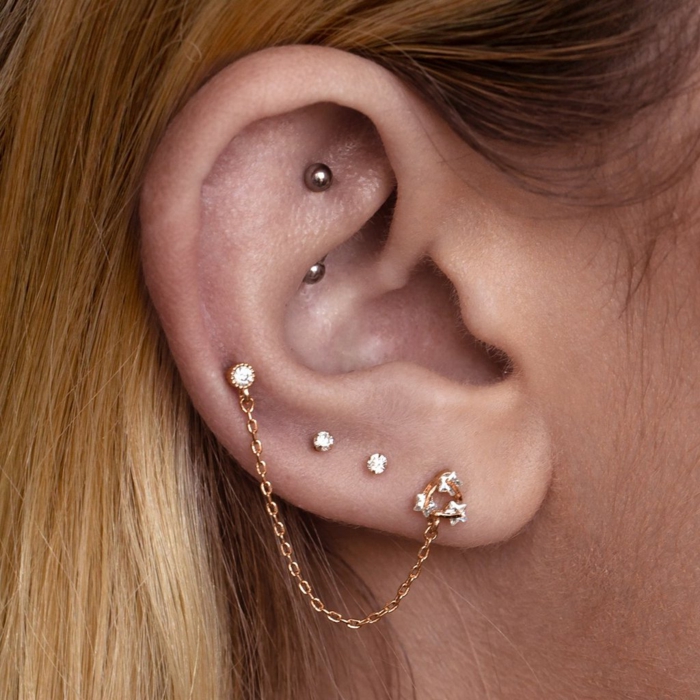
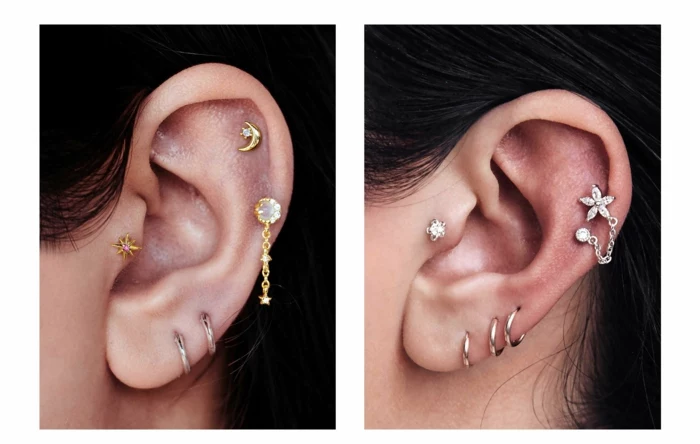
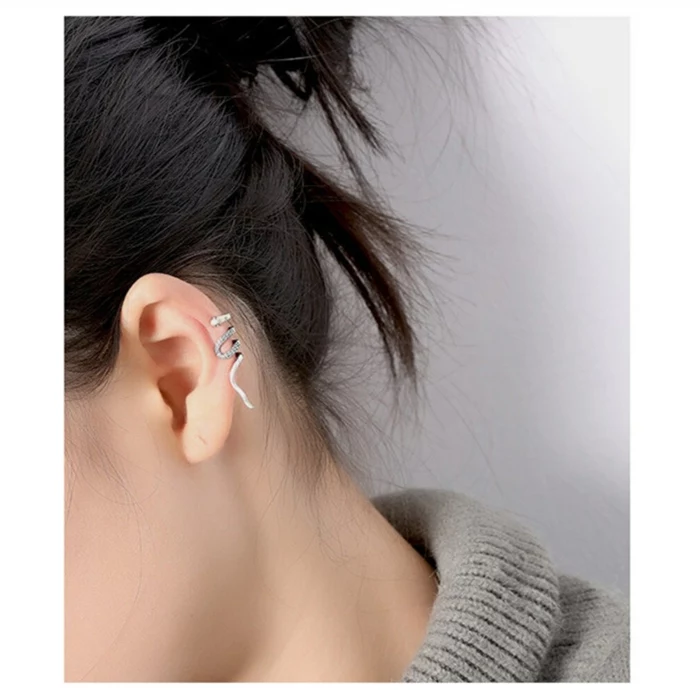
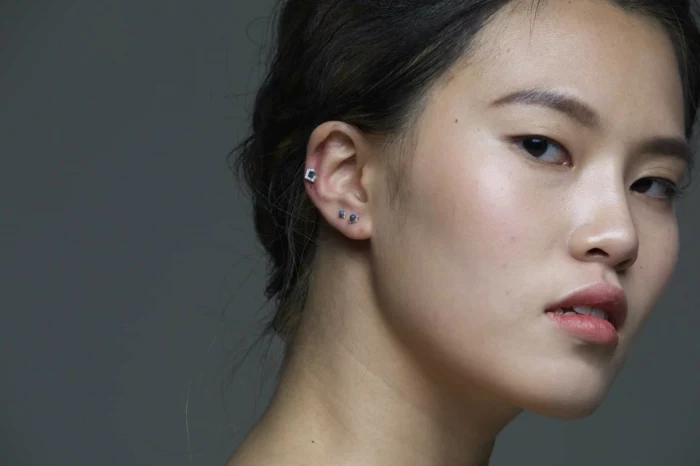
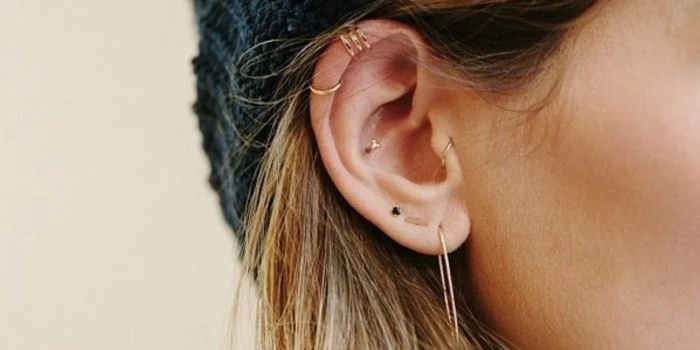
The ‘curated ear’ is more than just a collection of piercings; it’s a personalized art form. Think of your ear as a canvas. A double cartilage piercing can be the foundational element—two perfectly spaced studs in the helix, for example—that you build around over time, adding a conch ring or a delicate tragus stud later. The key is to consider flow, balance, and your unique anatomy.


Is getting two piercings at once more painful than getting one?
The pain of the second piercing is often described as more intense than the first. Your body is already reacting to the initial trauma, and adrenaline may be wearing off. However, the discomfort is very brief. The real advantage of getting them together is that they will heal on the same timeline, meaning you only have one healing period to manage.
Don’t get fooled by ‘surgical steel’. While it sounds medical-grade, it’s often an undefined mix of alloys containing nickel, a common irritant for fresh piercings. Reputable piercers rarely use it for initial healing. Always ask for implant-grade titanium (ASTM F-136) to ensure a smooth start.

- A small, hard bump appears next to the piercing site.
- It might be reddish and occasionally secrete clear fluid.
- It doesn’t typically hurt like an infection does.
This is likely an irritation bump, not an infection. It’s your body’s response to friction, pressure, or improper aftercare. The solution is to identify and remove the irritant—stop sleeping on it, ensure your jewelry is correctly sized, and stick to simple saline cleaning.
A cartilage piercing can take anywhere from 6 to 12 months—or even longer—to fully heal.
This long timeline is why patience is non-negotiable. The external look can be deceiving; it might seem healed after a few months, but the internal fistula (the skin tube) is still very fragile. Changing jewelry too soon or neglecting aftercare can set your healing back to square one.
A few weeks into healing, you might notice your piercing post seems too long. This isn’t your imagination! Your piercer initially used a longer bar to accommodate swelling. Returning for a ‘downsize’—swapping the long post for a snugger one—is a crucial step. It prevents the jewelry from snagging and moving excessively, which is a primary cause of irritation bumps and healing delays.
- They sit flush against the back of your ear, reducing snags on hair and clothing.
- They prevent the dreaded ‘angle shift’ that can happen with hoops during healing.
- They are incredibly comfortable for long-term wear, especially for sleeping once healed.
The secret is the flat-back labret stud. This is the preferred style used by high-end studios like Maria Tash and BVLA for a reason: they promote better, faster healing for cartilage piercings.

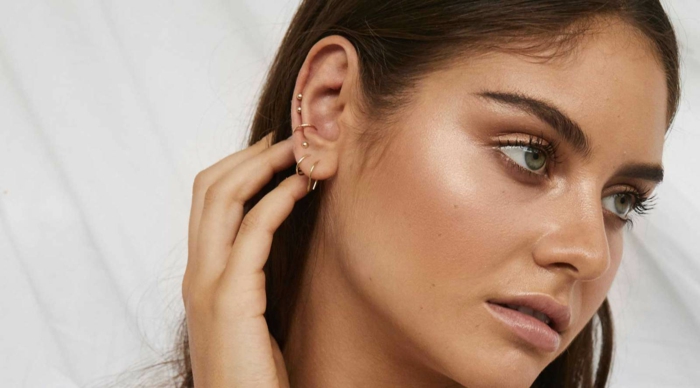
The perfect spot for your double piercing depends entirely on your ear’s unique landscape. Do you have a prominent, flat helix perfect for a ‘stacked’ look? Or a curved rim that would beautifully frame two tiny hoops? A great piercer won’t just pierce you; they’ll act as a stylist, analyzing your anatomy to suggest a placement that will be both safe and aesthetically stunning.
When can I finally swap my boring starter studs for that cute hoop?
Patience, patience! You should not change your jewelry for aesthetic reasons until the piercings are 100% healed, which means a minimum of 6-9 months, but more realistically closer to a year for many people. Changing it too early can damage the delicate healing tissue, introduce bacteria, and lead to significant setbacks. Wait for your piercer’s green light.


- Sterile saline wound wash (NeilMed is a piercer favorite).
- A travel-sized pillow (to keep pressure off the ear while sleeping).
- Clean, non-woven gauze for drying.
- Patience!


Forget DIY salt soaks. Mixing your own salt water is a recipe for disaster, as the ratio is impossible to get right. Too much salt is caustic and drying, while too little is ineffective. A sterile saline spray from a can is perfectly isotonic, meaning it matches your body’s salinity, and its sterile nature prevents introducing any new bacteria to the wound site.
Initial Piercing: Studs vs. Hoops
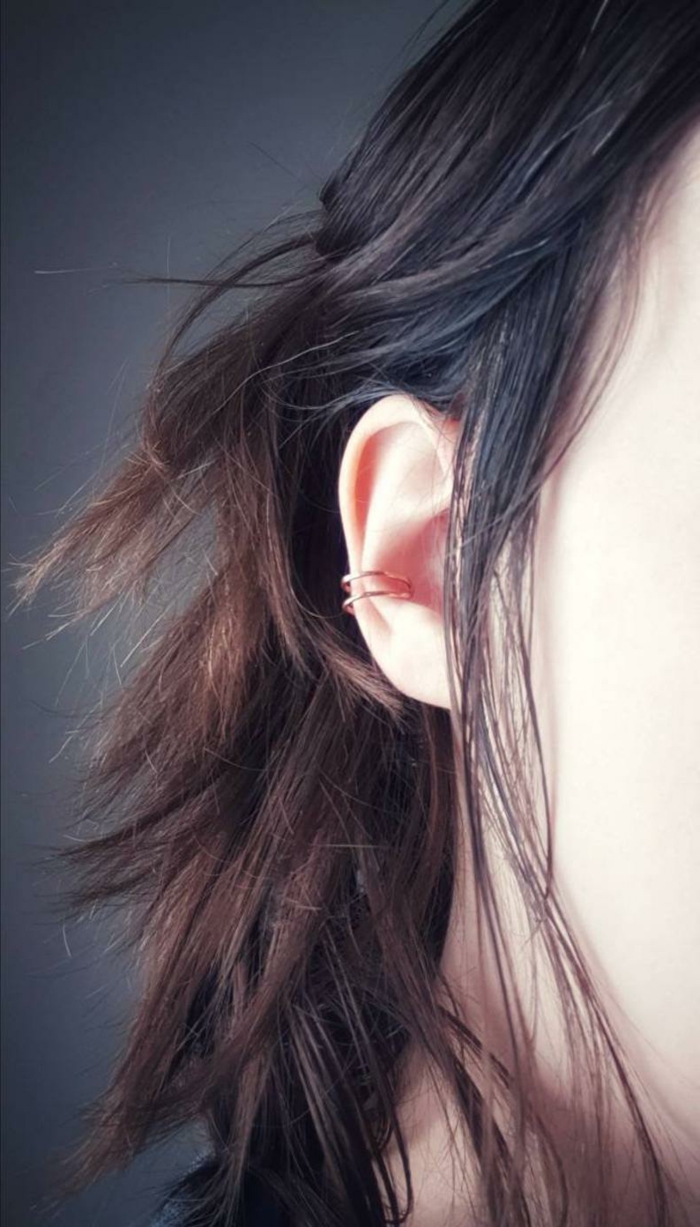
While hoops look great, they are not ideal for a fresh cartilage piercing. Their curvature and movement can put constant pressure on the healing channel, leading to irritation, bumps, and migration. A flat-back labret stud provides stability, allowing the fistula to heal in a straight, undisturbed line. Save the hoops for when you’re fully healed.


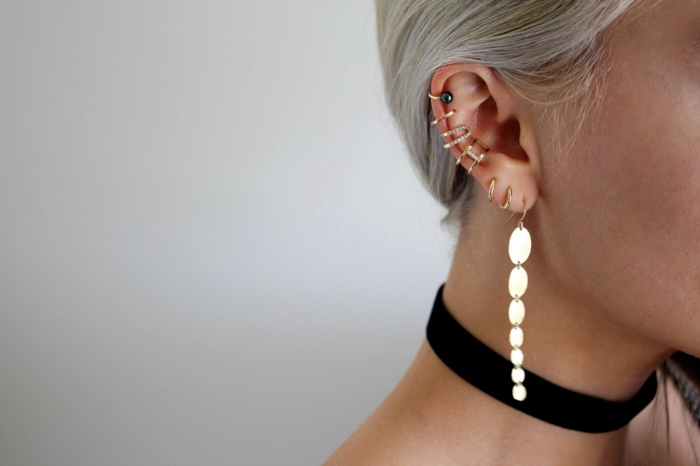
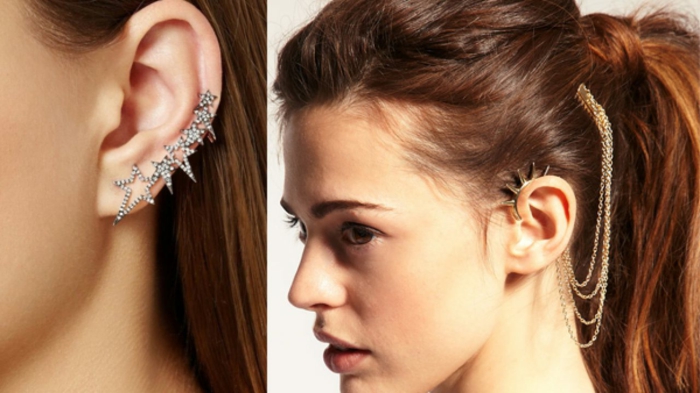
Gone are the days of sticking to just one metal tone. A well-curated ear plays with contrasts. Imagine your double helix with a yellow gold stud in one hole and a white gold in the other, linked by a delicate rose gold chain. The key is intentionality. Brands like Anatometal, BVLA, and Pupil Hall offer their pieces in various gold tones, making it easy to create a cohesive, mixed-metal look.

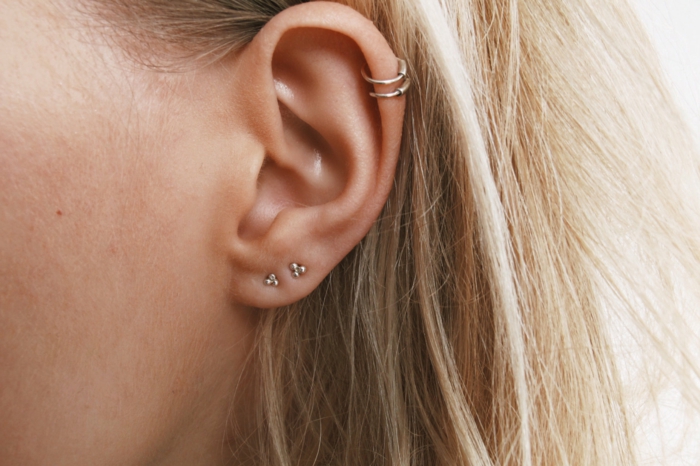
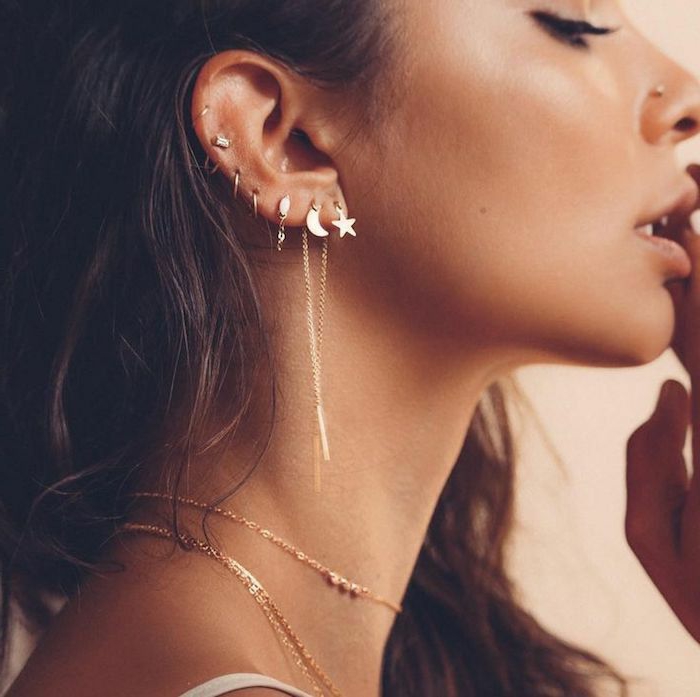
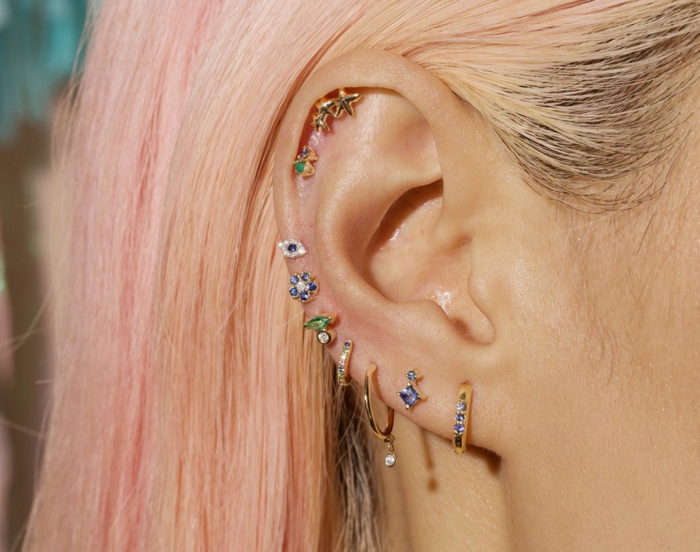
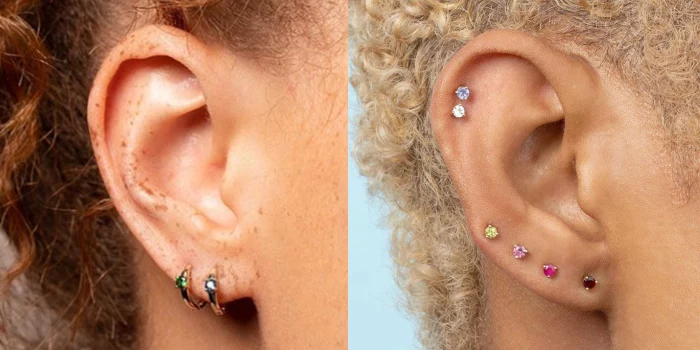
The constellation piercing trend is perfect for a double placement. Instead of a symmetrical pair, the piercings are placed asymmetrically to mimic a star constellation.
- Two tiny studs placed close together, with a third added later to form a triangle.
- A larger gem ‘star’ with a smaller one orbiting nearby.
It’s a delicate and highly personalized approach to ear styling.
In ancient Rome, earrings weren’t just for women. Soldiers wore them in their cartilage as a sign of wealth and to denote rank. It was a symbol of strength and status.

Can I wear my AirPods or over-ear headphones?
For the first few months, it’s best to avoid anything that puts pressure on or introduces bacteria to your new piercings. Earbuds can be especially problematic, as they can trap moisture and harbor germs. Over-ear headphones are generally a safer bet, but make sure they sit completely around your ear and don’t rest on the helix itself. When in doubt, give your piercings a break.


- Healing: Clear or yellowish fluid (‘crusties’), mild redness and swelling that subsides, occasional itching.
- Infection: Thick, green, or dark pus; severe or worsening pain, redness, and swelling; skin that’s hot to the touch; fever.
Crusties are a normal part of healing—it’s just dried lymph fluid. An infection is a serious medical issue. If you suspect an infection, see a doctor immediately and do not remove the jewelry.
You don’t just pay for two holes; you’re investing in expertise. A great piercer is a skilled technician, a stylist, and a hygiene expert all in one. Look for a studio that is a member of the APP, showcases a strong portfolio of healed work (not just fresh piercings), and uses high-quality, implant-grade jewelry from trusted brands. Your safety is worth the investment.
- They don’t have a clunky butterfly back that collects bacteria and pokes you.
- The decorative top simply pushes into a hollow post for a secure fit.
- Changing the top is effortless once healed, without removing the post from your ear.
The answer? Threadless jewelry. This ‘push-pin’ style is a game-changer for comfort and convenience, and it’s the standard at most high-quality piercing studios.
Irritation Bump: A localized, non-painful bump caused by friction, pressure, or moisture. It’s an overgrowth of scar tissue and usually resolves once the source of irritation is removed.
Keloid: A type of aggressive, raised scar that grows well beyond the original wound boundaries. They are a genetic condition and are relatively rare. If you have a personal or family history of keloids, discuss the risks with your piercer and doctor.
Most people who think they have a keloid actually have a treatable irritation bump.
The journey of a cartilage piercing is one of stages. The first month is about managing swelling and tenderness. Months two through six are the ‘deceptive’ phase, where it looks good on the outside but is incredibly fragile inside. This is when most people get lazy with aftercare and run into trouble. From six months to a year is the ‘toughening up’ phase, where the fistula matures. Only after this full cycle can you consider it truly healed and durable.


