Your Fairy Garden Keeps Dying? Here’s How to Build One That Actually Lasts
I’ve spent years with my hands in the dirt, doing everything from huge landscape jobs to these tiny, detailed miniature gardens. And I can tell you right now: the secret to a magical fairy garden that thrives isn’t about whimsy. It’s about good old-fashioned gardening know-how.
In this article
So many people get excited, buy a bunch of cute stuff from the craft store, and a few months later, it’s a sad little graveyard of dead plants and moldy houses. Why? Because most guides focus on the ‘craft’ and completely forget the ‘garden’ part. We’re not going to do that here.
My goal is to walk you through building a tiny, sustainable world that will bring you joy for years, not just a few weeks. It takes a little more thought up front, but trust me, it’s worth it. Let’s build something that actually lives.
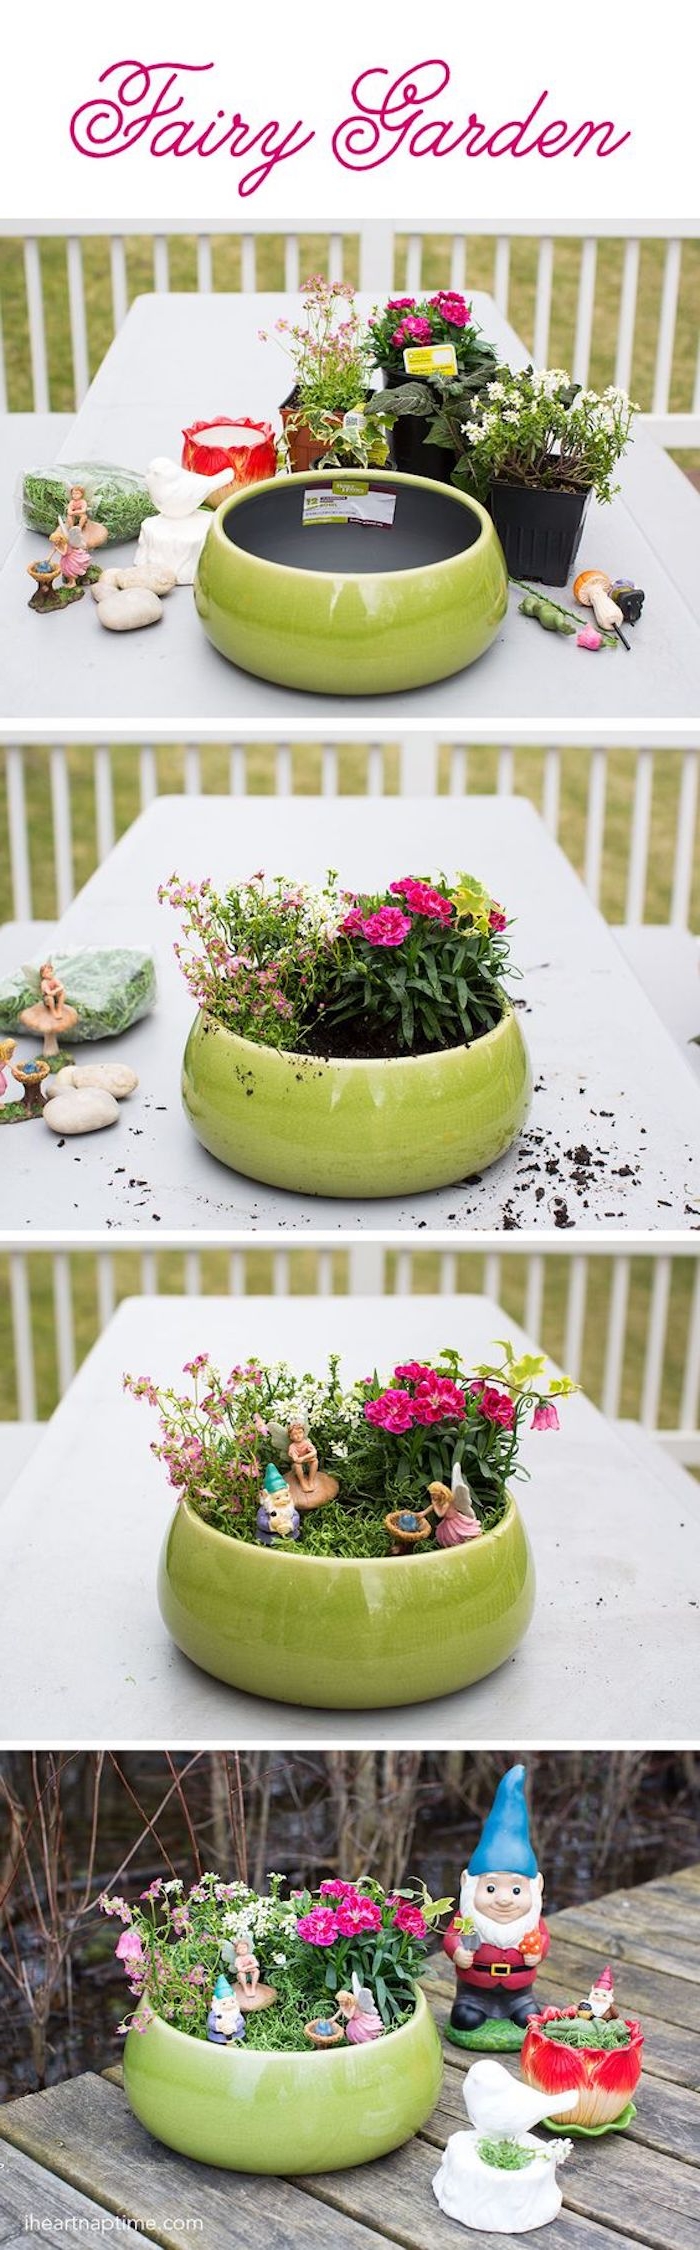
Your First Garden in Under an Hour
Feeling intimidated? Don’t be. You can get your feet wet with this hobby in less than an hour for about $20. Seriously.
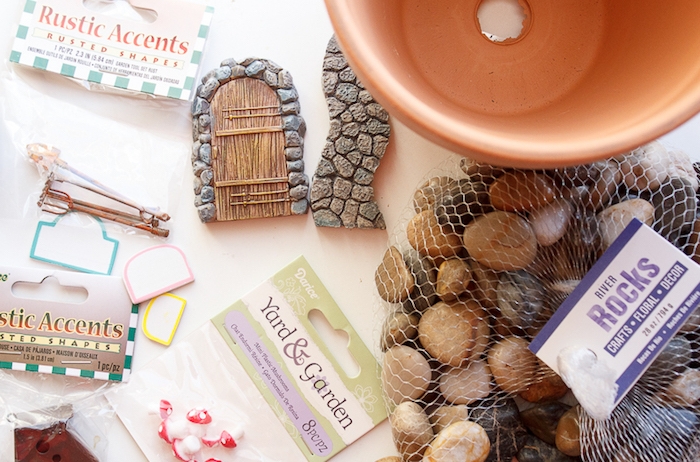
Here’s a super simple shopping list for your first project:
- One 6-inch terracotta pot with a drainage hole (about $5)
- One cool-looking succulent, like a Hens and Chicks variety (around $5-$7)
- A small bag of cactus/succulent potting mix ($5-$8)
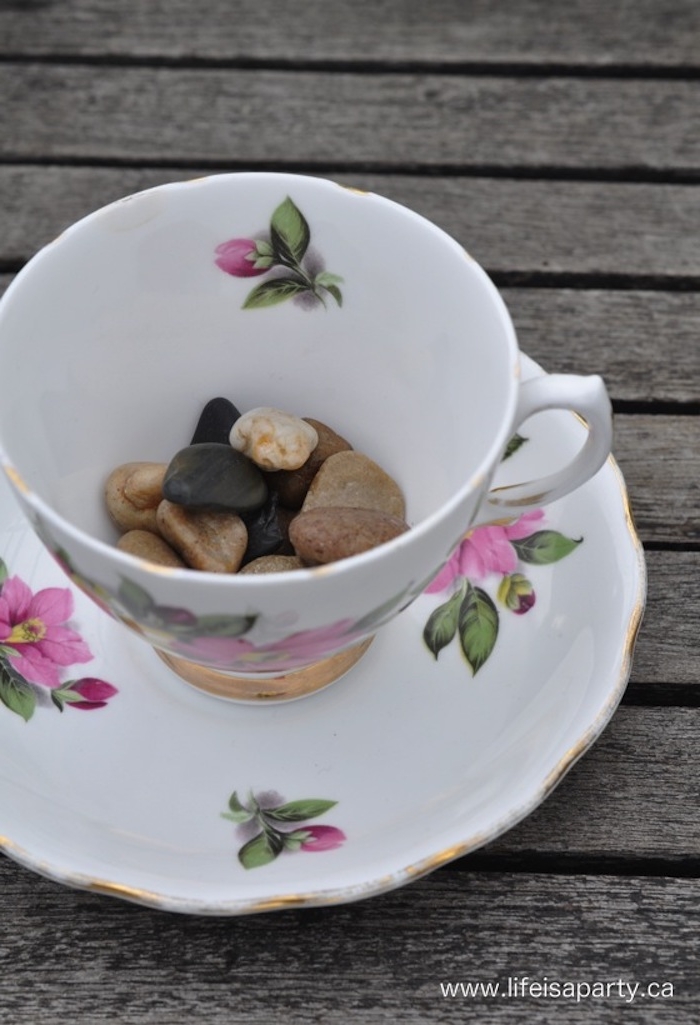
- A little bag of polished pebbles or sea glass from a craft store ($3-$5)
Just plant the succulent in the pot, arrange the pebbles to look like a tiny path, and boom. You’re officially a fairy gardener. See? Easy.
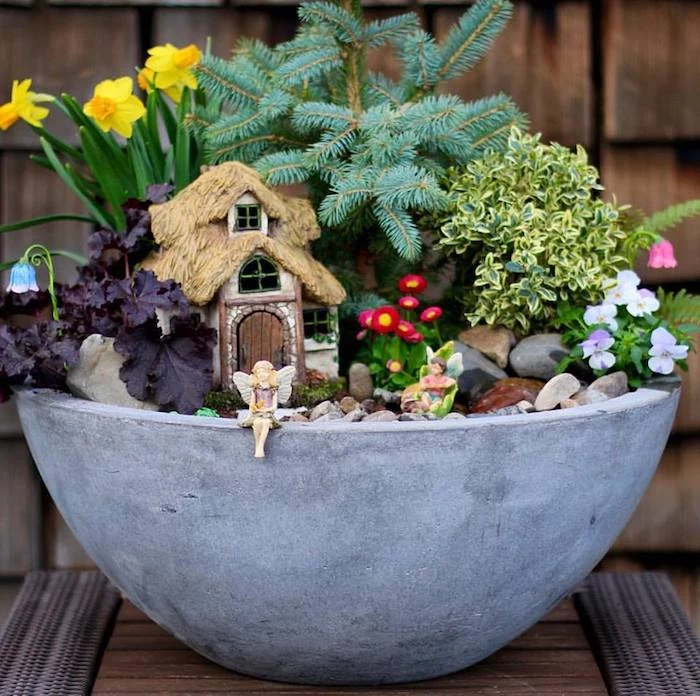
The Foundation: It All Starts with the Pot
The number one killer of these gardens is a bad foundation. Your container choice and where you put it honestly accounts for more than half of your success. And it all boils down to one thing: water.
Plants need to drink, but they also need to breathe. When water sits at the bottom of a pot with no way out, it drowns the roots. This is called root rot, and it’s a one-way ticket to a dead plant. That’s why every single container you use for a living garden must have a drainage hole. No exceptions.
By the way, that old trick about adding a layer of gravel to the bottom of a pot without a hole? It’s a complete myth. In fact, it makes things worse by creating a swampy little water table right where the roots are. A drainage hole is the only real answer.
Choosing Your Container Material
The pot’s material really does matter, as it changes how it handles heat and water. Think about your local climate before you buy.
- Terracotta (Unglazed Clay): I love these because they’re porous and let the soil breathe, which is perfect for succulents and other plants that hate soggy roots. They’re also cheap—you can find them for $5 to $15 at any garden center. Heads up, though: in a hot, dry climate, they can dry out too fast. And in a place with freezing winters, they can absorb water, freeze, and crack. I learned that one the hard way.
- Glazed Ceramic: These hold moisture much longer, making them a great choice for things like ferns and mosses that prefer to stay damp. They look gorgeous and are more frost-resistant. The downside? They can get scorching hot in direct sun, potentially cooking the roots inside. Expect to pay a bit more, maybe $20 to $60 depending on size and detail.
- Wood: A wooden planter box or half-barrel has a wonderful, natural look and insulates roots from heat and cold. Just make sure it’s a rot-resistant wood like cedar. Avoid pressure-treated wood, as the chemicals can be iffy for plants. And yes, you’ll need to drill your own drainage holes.
- Recycled Objects: This is where you can get really creative! Old wheelbarrows, metal washtubs, even sturdy drawers can be amazing. The key is adapting them for plants. You’ll need to drill several half-inch drainage holes across the bottom. For metal, you’ll want a special drill bit and some cutting oil to make the job easier.
The Guts of the Garden: Getting the Soil Right
Please, whatever you do, don’t just scoop soil out of your yard. It’s way too dense for a container, is probably full of weed seeds and pests, and will compact into a solid brick. You need a light, airy potting mix that lets roots breathe.
My Go-To Soil Recipes
Sure, you can buy a general-purpose bag of potting mix, but for the best results, I always blend my own. It gives me way more control and, honestly, it saves money in the long run. These two recipes are my workhorses. (Each recipe makes enough to fill about one 12-inch round pot).
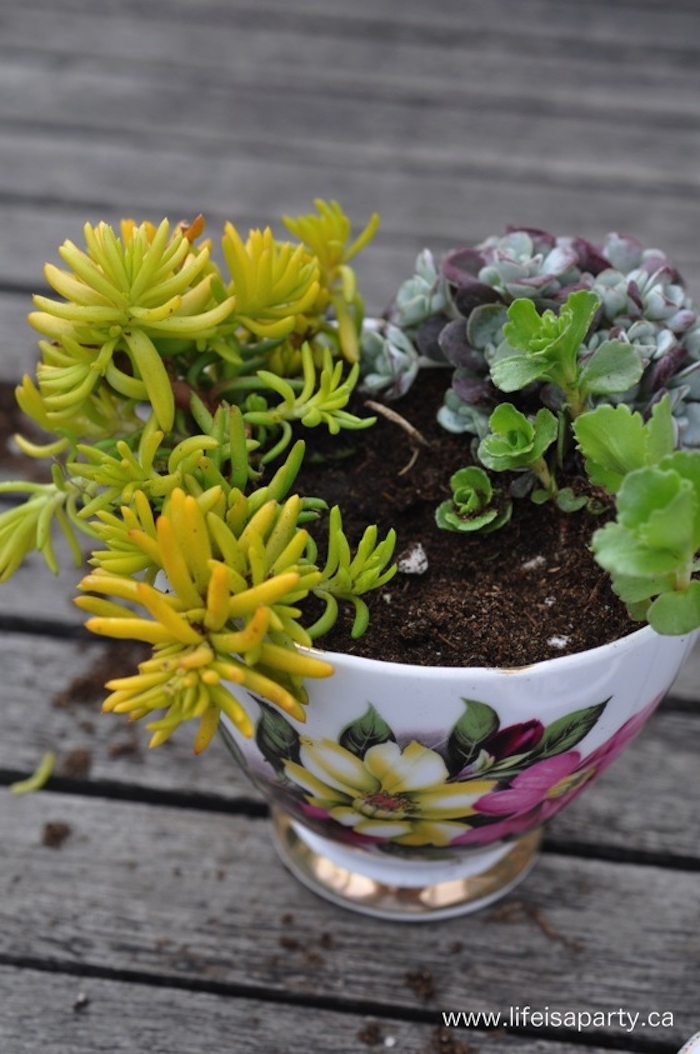
For Sunny, Succulent Gardens: Succulents need soil that dries out fast. Think gritty and sandy.
- 2 parts standard potting mix
- 1 part coarse horticultural sand (not play sand, it’s too fine)
- 1 part perlite or pumice (those little white crunchy bits)
For Shady, Woodland Gardens: For things like moss and ferns, you want a mix that holds moisture without getting boggy.
- 2 parts standard potting mix
- 1 part peat moss or coco coir (for moisture retention)
- 1 part fine pine bark or compost (for nutrients)
A Lesser-Known Trick: I often toss a small handful of horticultural charcoal into my mixes. It’s an old-school trick that helps absorb impurities and keeps the soil from getting funky and sour over time. You can find it online or at specialty garden shops.
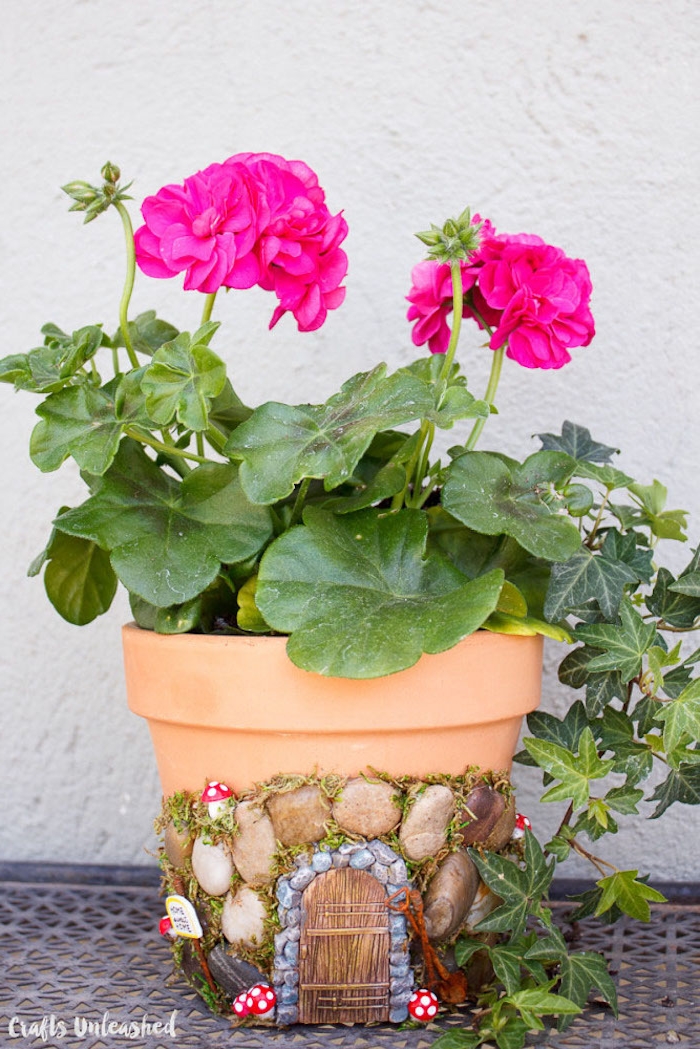
The Living Decor: Choosing the Right Plants
This is the fun part, but it’s also where a critical mistake happens. People buy plants based on looks alone. You can’t put a sun-loving cactus and a shade-loving fern in the same pot. One of them will always be miserable. Group plants with the same light and water needs!
Look for plant tags that say ‘dwarf’ or ‘miniature.’ You want things that are naturally small or grow slowly. Most of these little gems will cost between $4 and $7 at a good nursery.
Great choices for sunny, dry spots:
- Hens and Chicks (Sempervivum): These form beautiful, tight little rosettes and are incredibly tough.
- Creeping Sedum: There are so many varieties that look like miniature groundcover. They are perfect for spilling over the edge of a pot.
- Elfin Thyme: This stuff is amazing. It’s a super-tiny, walkable herb that forms a dense green carpet and even has tiny pink flowers. It’s the perfect fairy lawn.
Great choices for shady, moist spots:
- Baby’s Tears: A lush, vibrant green carpet, but it needs to stay consistently moist to look good.
- Irish or Scotch Moss: This isn’t a true moss, but it forms a soft, squishy, bright green mat that looks fantastic.
- True Mosses: You can buy sheets of moss from floral suppliers. Just be a good human and never harvest it from parks or protected forests.
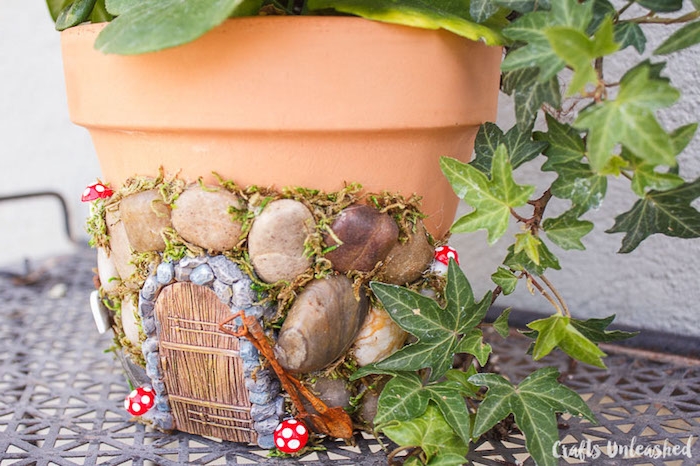
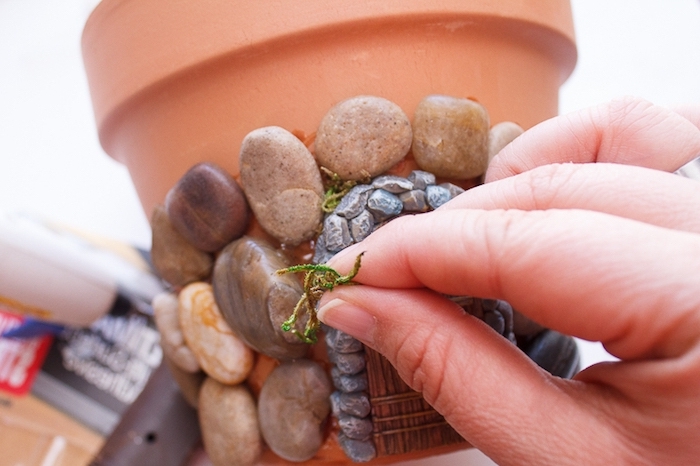
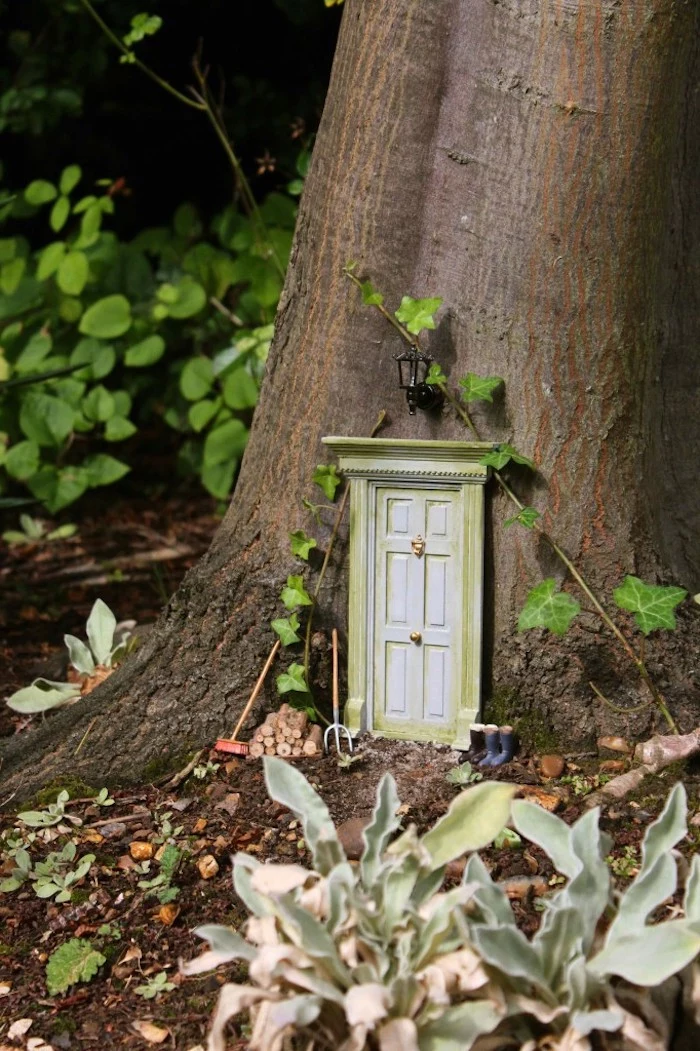
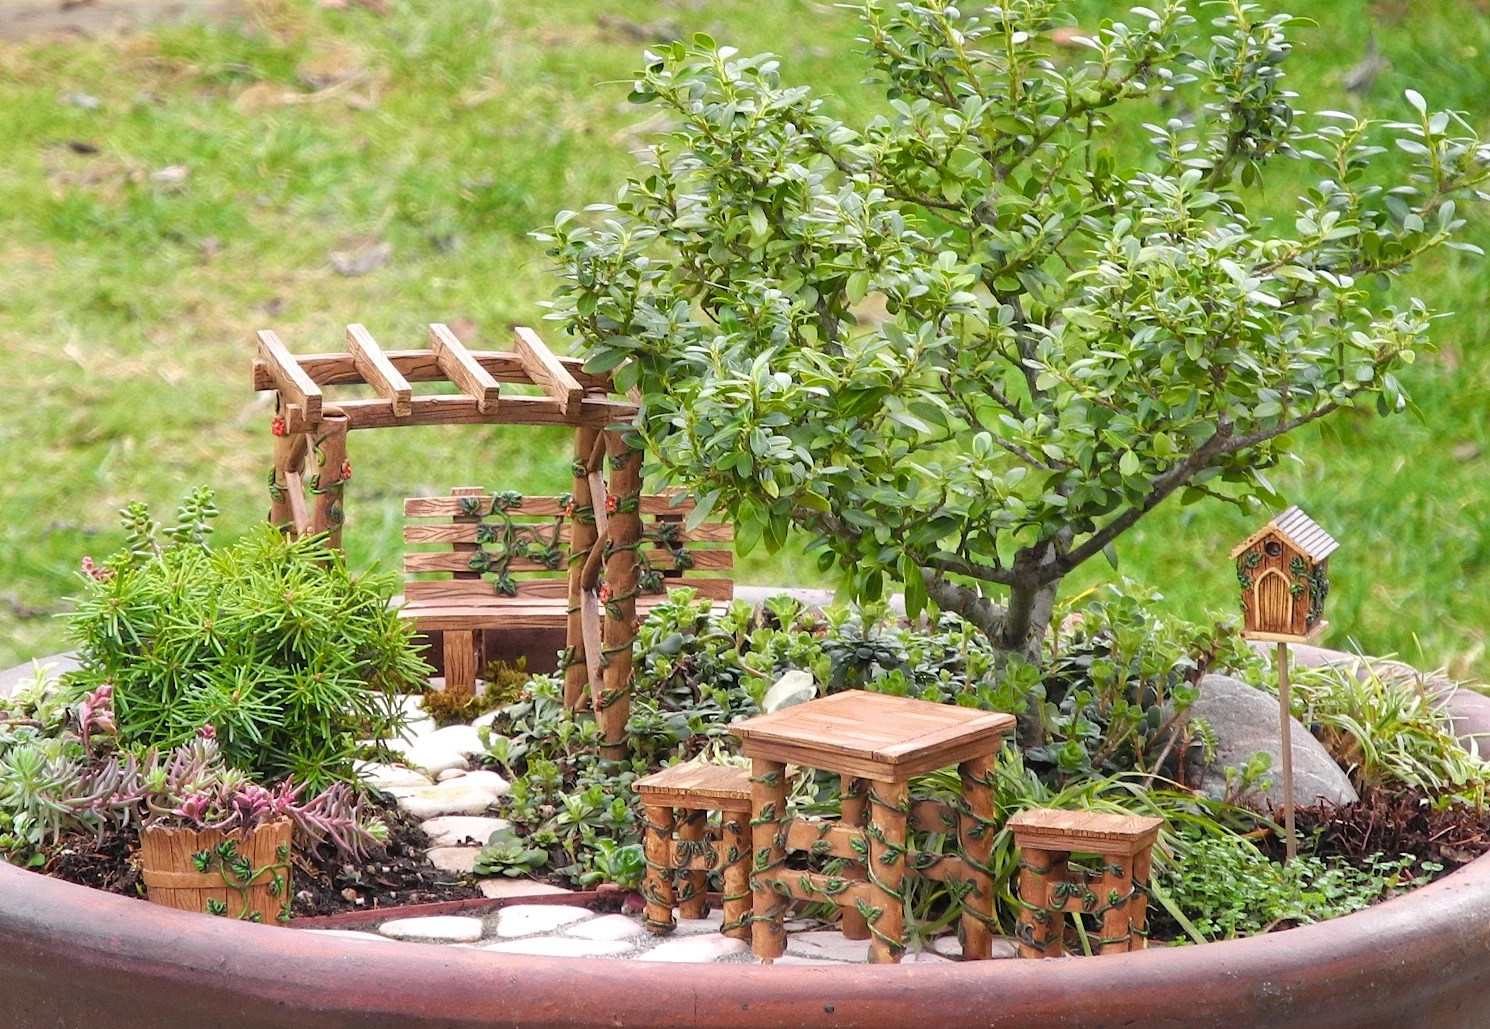
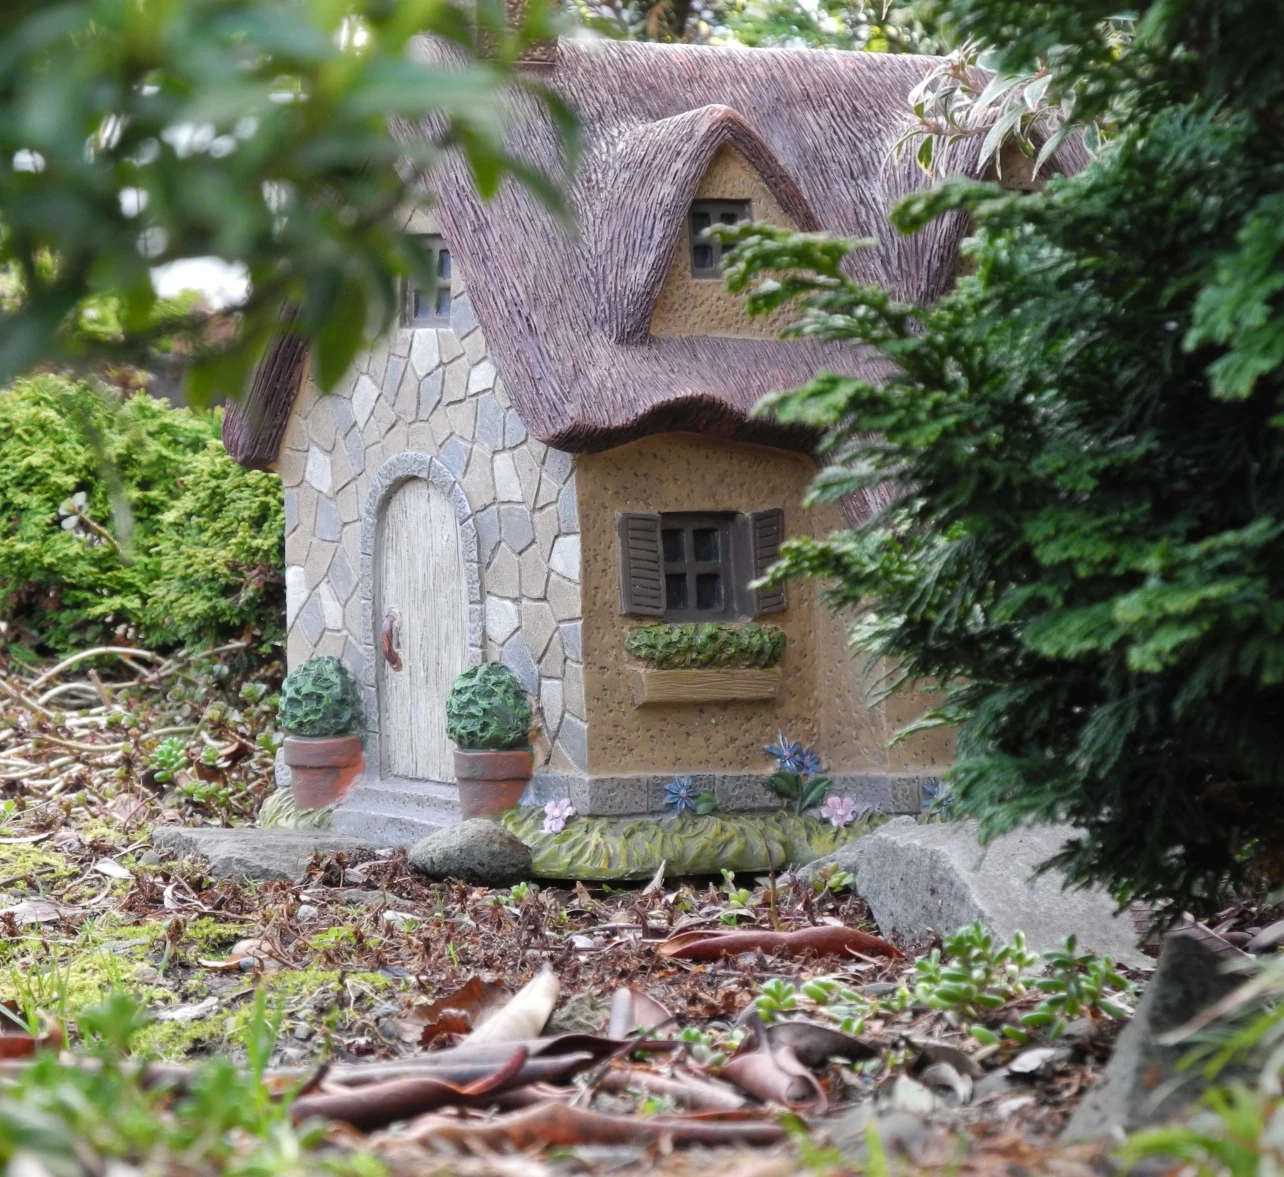
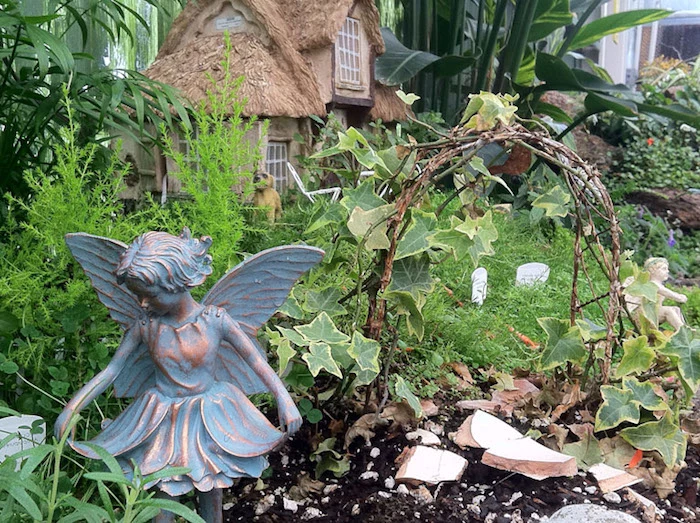
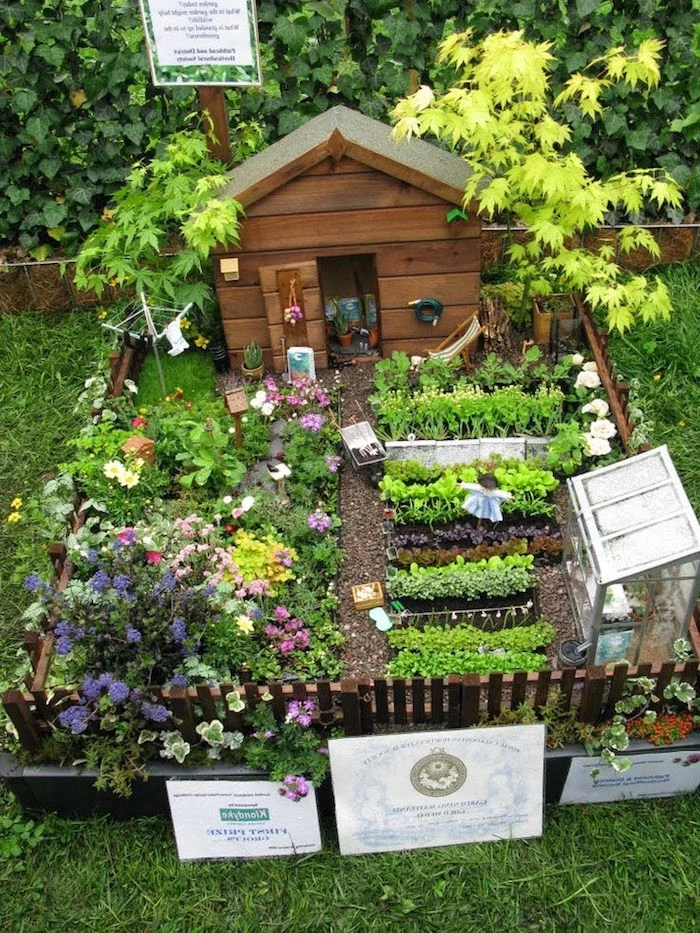
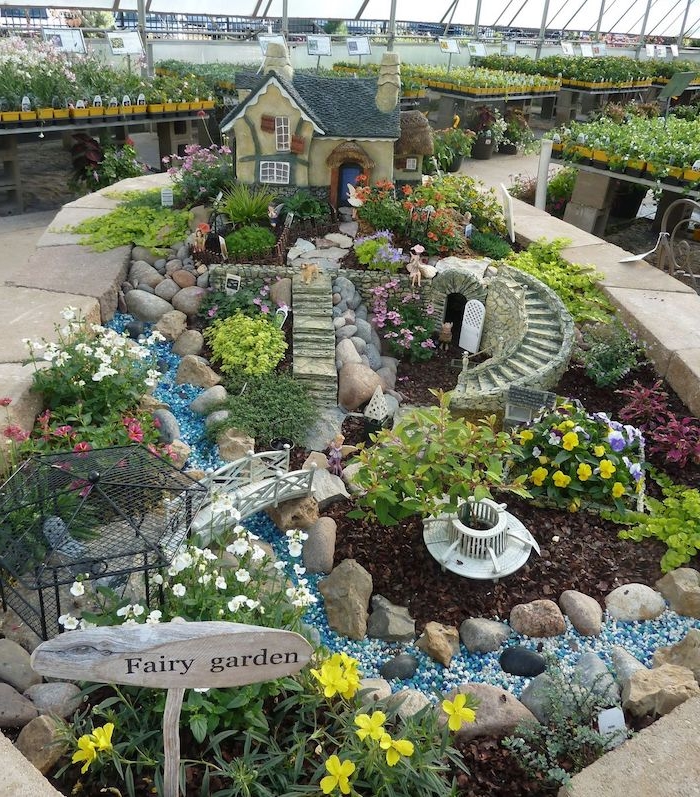
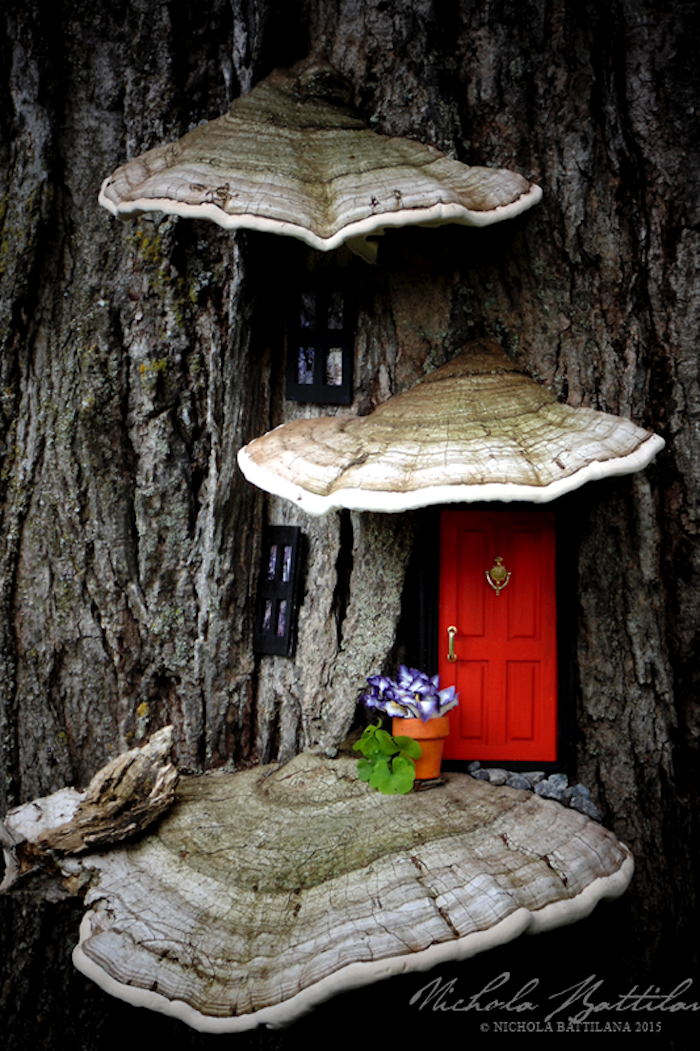
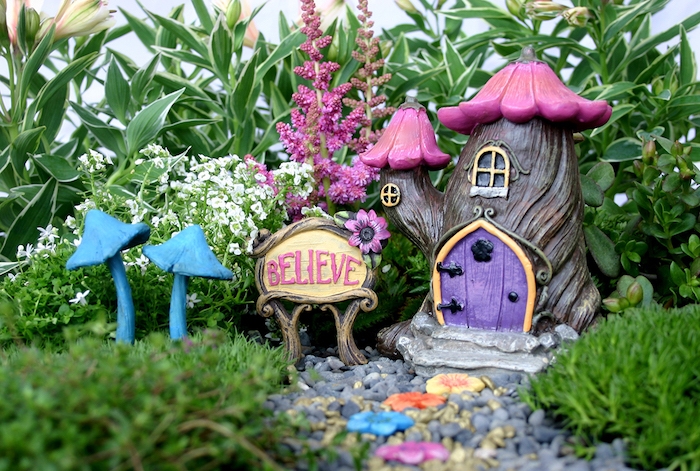
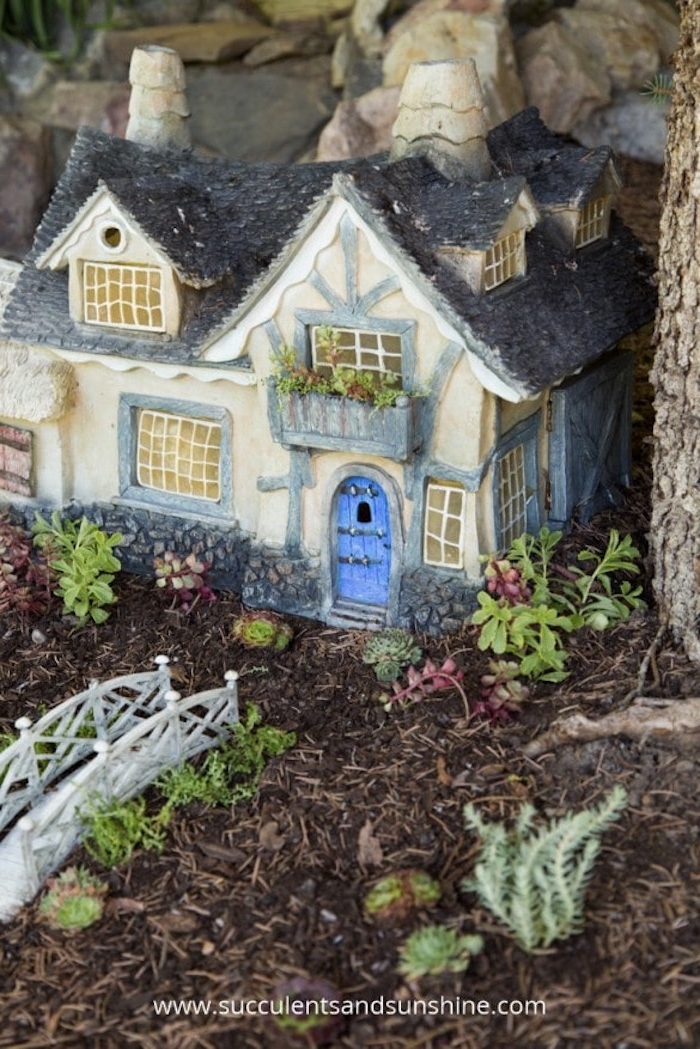
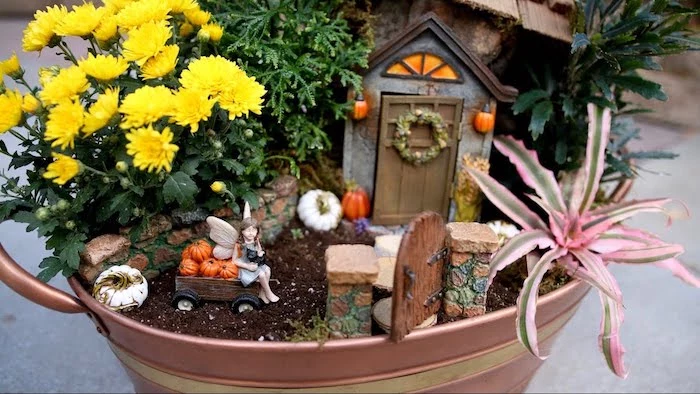
The Fun Stuff: Houses, Paths, and Furniture
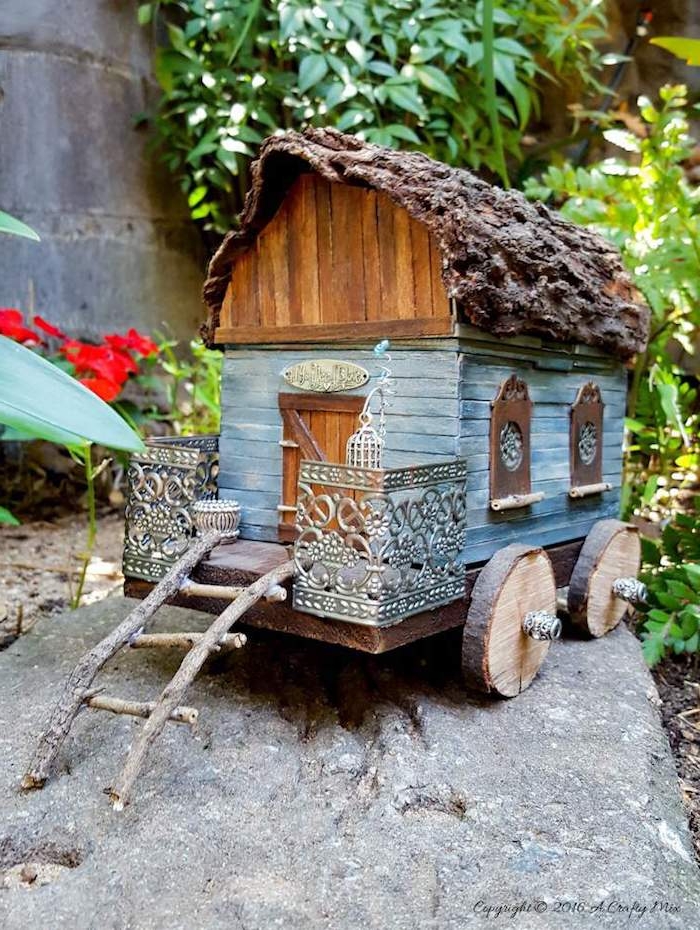
The little structures are what really sell the fantasy, but durability is everything. I once made a fairy house for a client with craft wood and a hot glue gun. It completely fell apart after one summer. It was embarrassing, but it was a valuable lesson: use weatherproof materials!
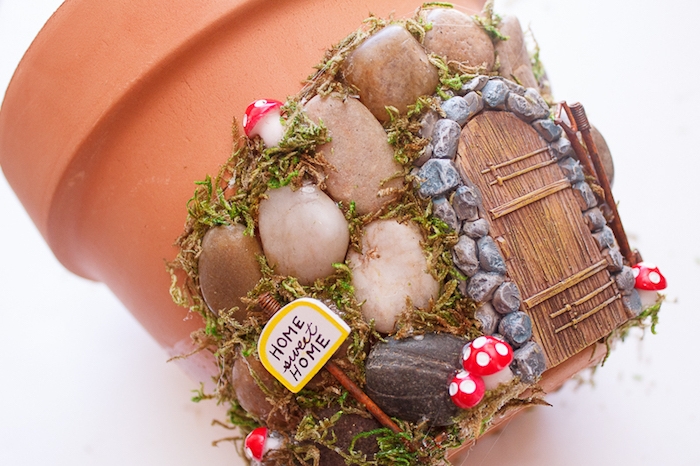
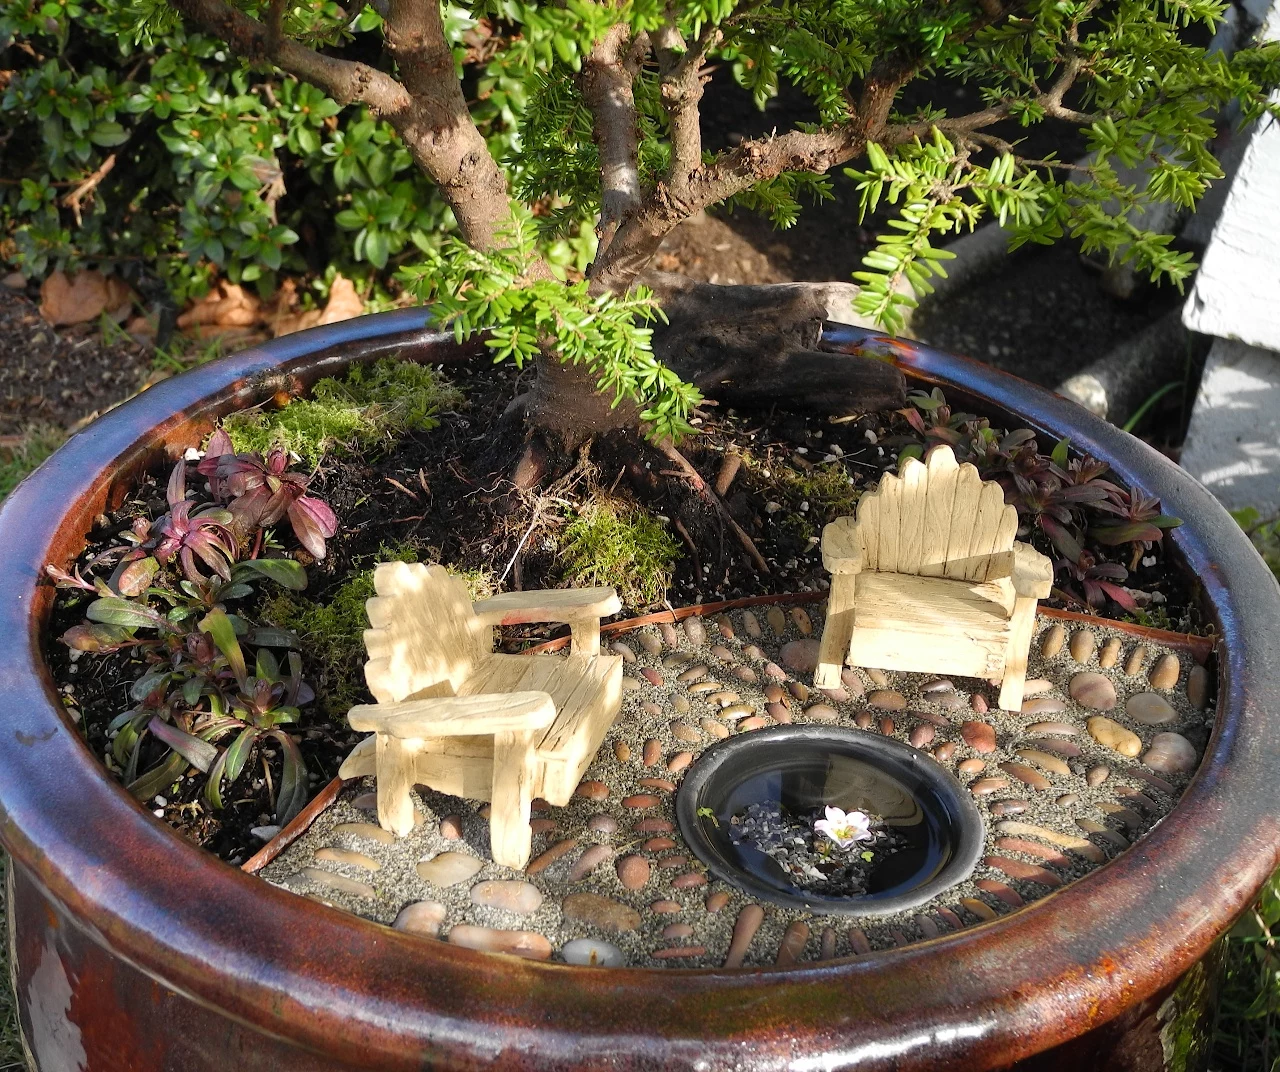
- Houses & Furniture: Your best bet is to buy resin-cast items made specifically for outdoor garden use. They’re UV- and water-resistant. If you’re crafty, you can make your own incredible things from polymer clay (like Sculpey or Fimo, found at any craft store), which turns into durable plastic when you bake it.
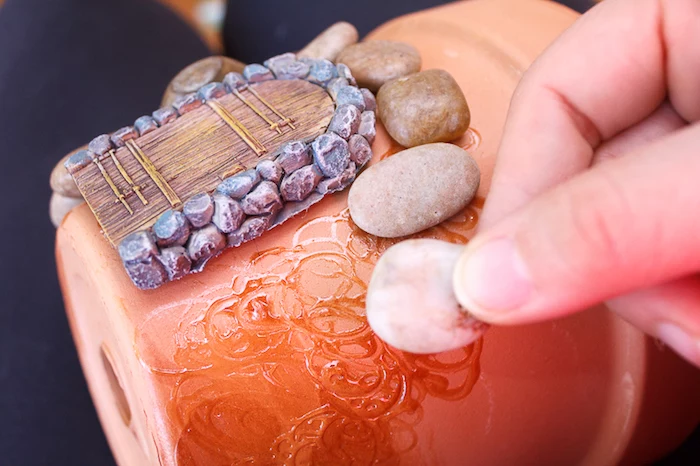
- The Right Glue: Step away from the hot glue gun. For outdoor projects, it will fail. I only use a 2-part marine epoxy like J-B Weld (about $7 at a hardware store) or a flexible, waterproof construction adhesive like E6000. Quick safety tip: These glues have strong fumes, so always use them in a well-ventilated space (outdoors is best) and wear gloves.
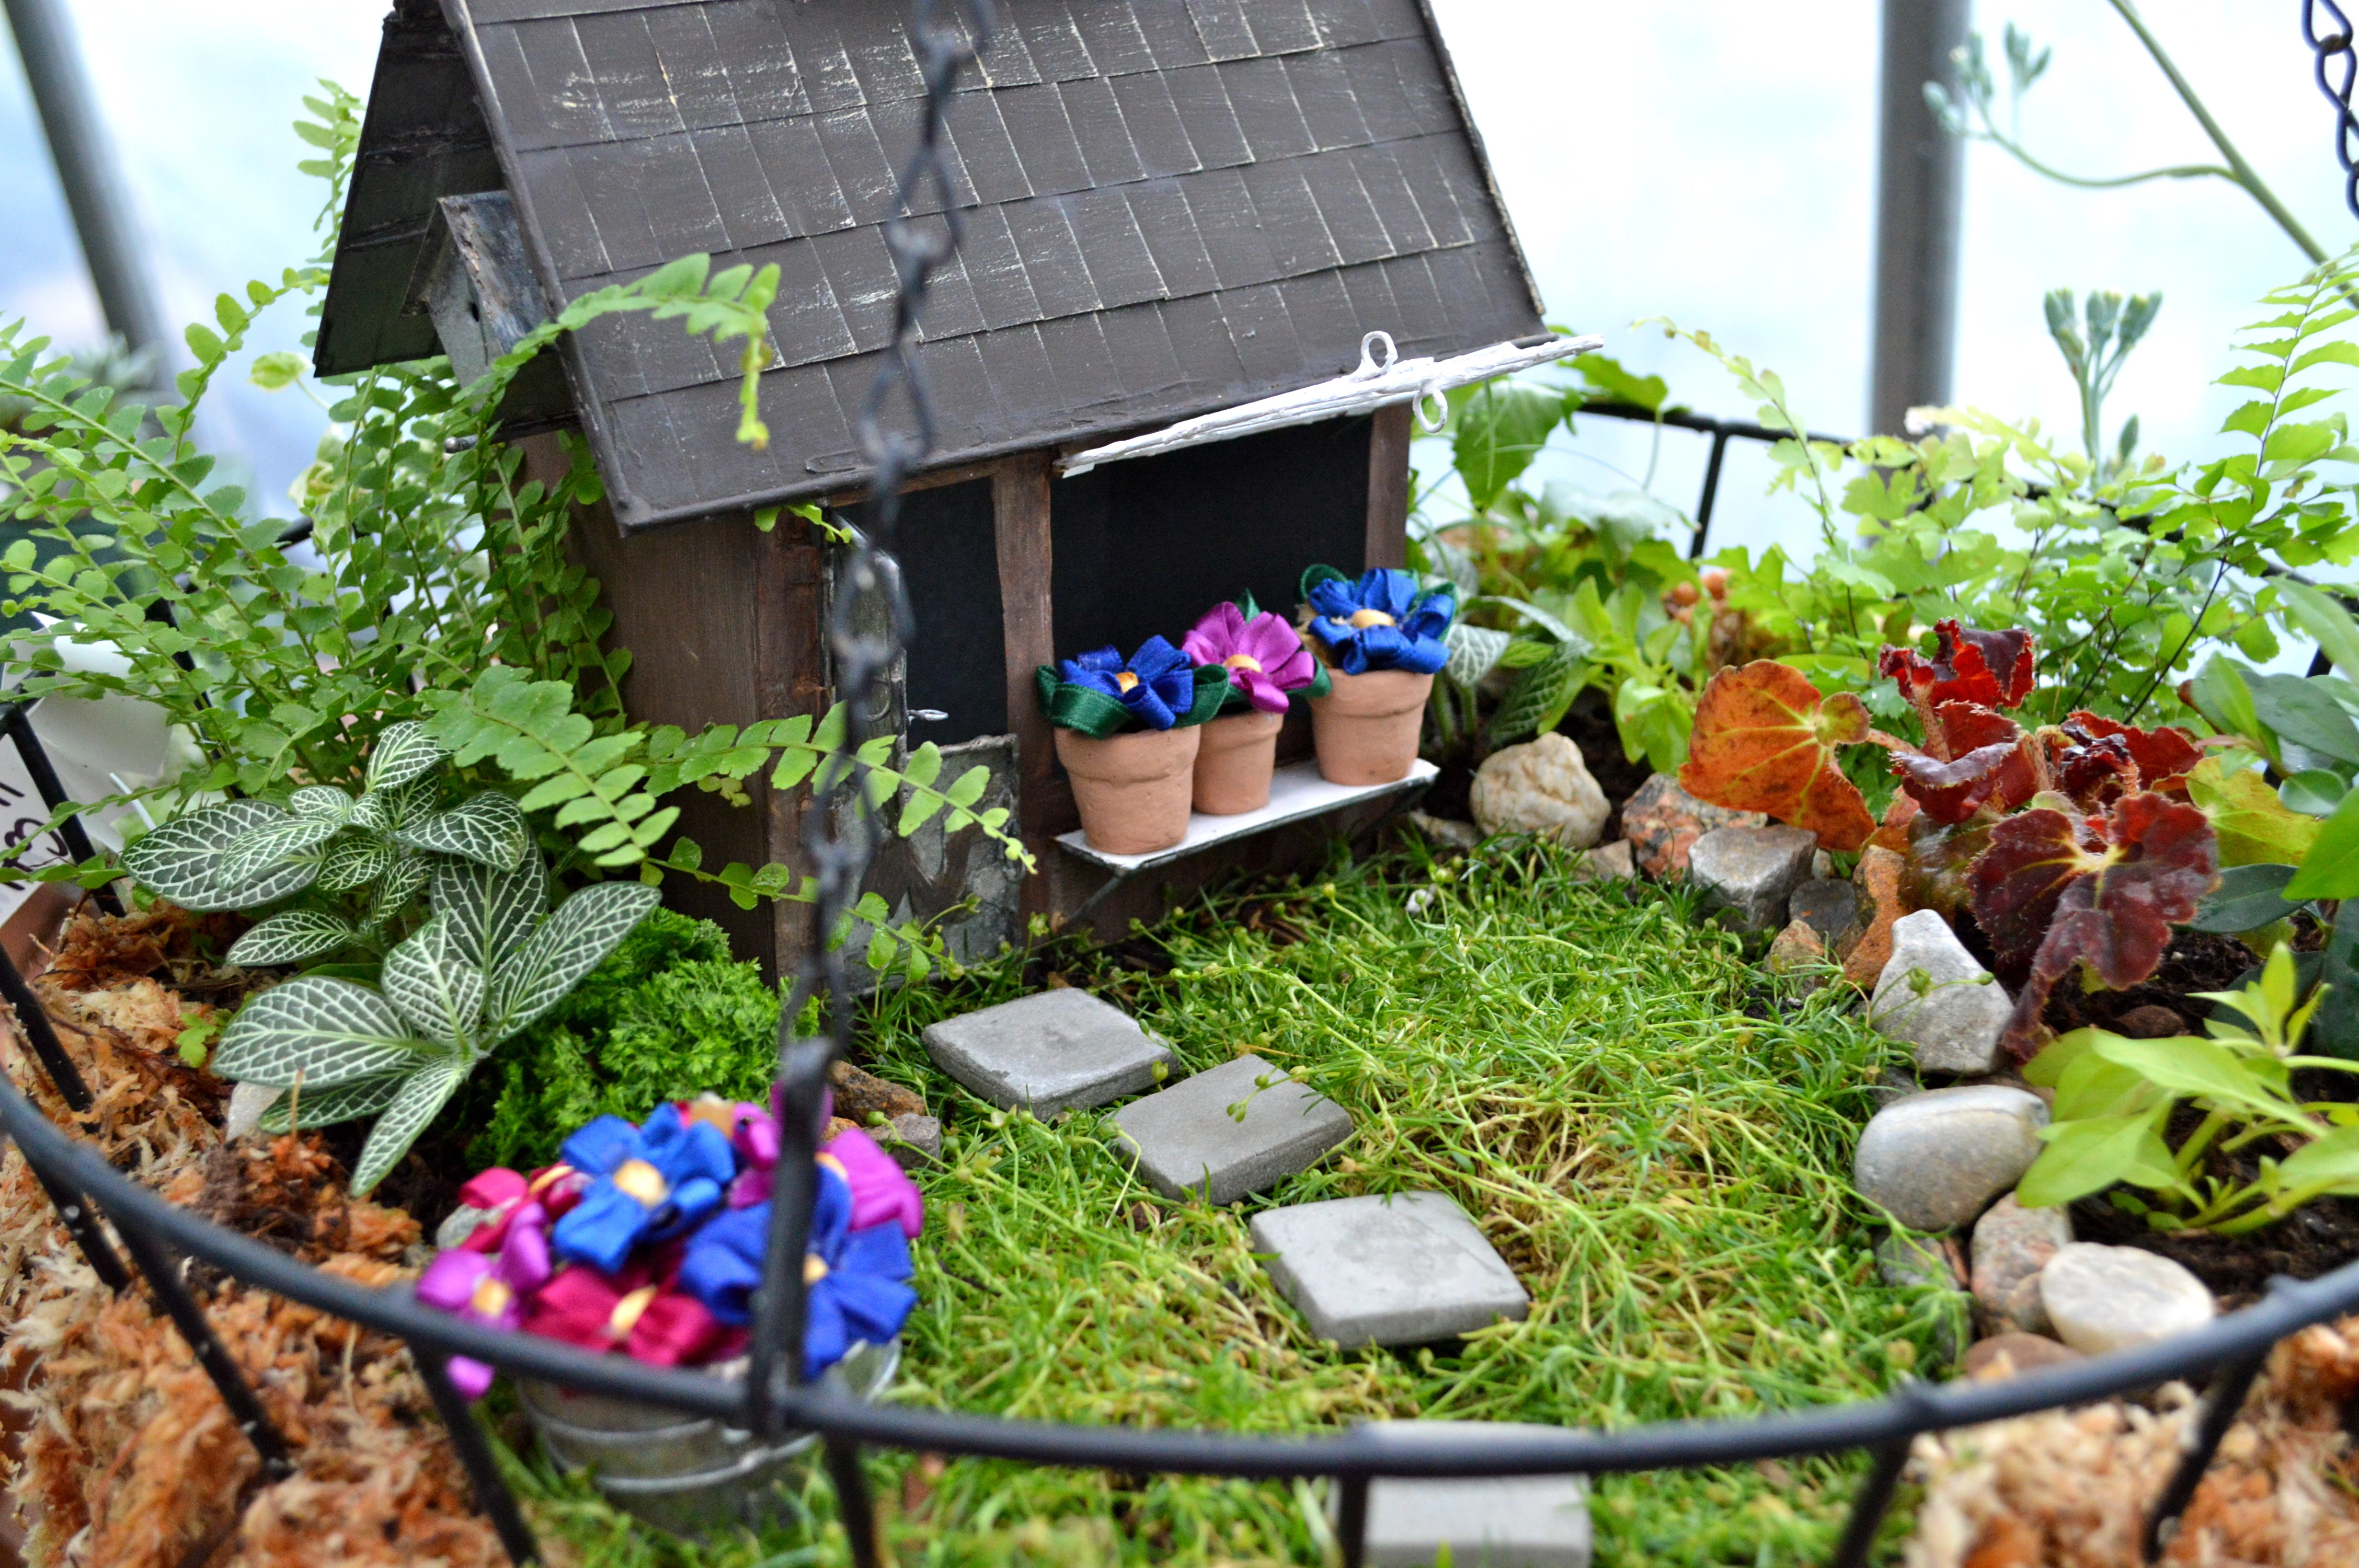
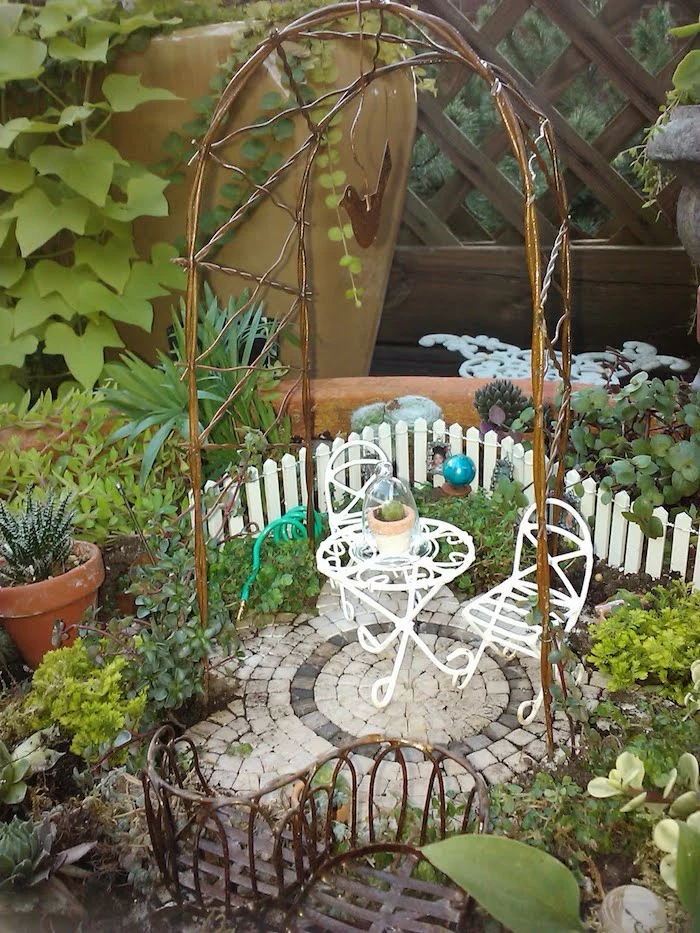
- Paths & Patios: Use small, flat stones, pea gravel, or even tiny tiles. You can simply press them into the soil or, for a more permanent path, set them on a thin layer of sand.
Keeping the Magic Alive: Long-Term Care
Your job eventually shifts from builder to caretaker. A little bit of maintenance, maybe 15 minutes every couple of weeks, will keep your garden looking amazing.

- Pests: If you see little bugs like aphids, you can often just dab them with a cotton swab dipped in rubbing alcohol. For a bigger problem, a simple spray of insecticidal soap works wonders. Just mix a few drops of mild dish soap (like plain Dawn, not the antibacterial kind) in a spray bottle of water and spritz the affected plants.
- Leggy Plants: If your succulents start stretching out and looking sparse, it’s a desperate cry for more light. Move the container to a sunnier spot.
- Trimming: To keep everything in miniature scale, you’ll need to give your plants a haircut now and then. Use small, sharp scissors (embroidery or bonsai shears are perfect) to snip back anything that’s getting too big. This encourages them to grow bushier and more compact.
- Winter Care: If you live where it freezes, you have to protect your garden. The easiest thing is to bring it into a sheltered, unheated space like a garage. It will go dormant and won’t need much attention. For watering, check it about once a month; only give it a small drink if the soil is completely bone dry.
A Few Final, Important Thoughts
This is a wonderfully rewarding hobby, but let’s wrap up with a little responsibility talk.
First, safety. These gardens are full of small parts. They are not toys, so keep them away from very young kids and pets who might see a tiny mushroom as a snack. And if you have curious pets, do a quick search for the ASPCA’s plant database online to make sure the plants you choose aren’t toxic.
Finally, have patience with yourself. Your first try might not be perfect, and that’s totally okay. My early projects were full of mistakes, but every single one was a learning experience. Start simple, enjoy working with your hands, and have fun creating your own tiny, living world.
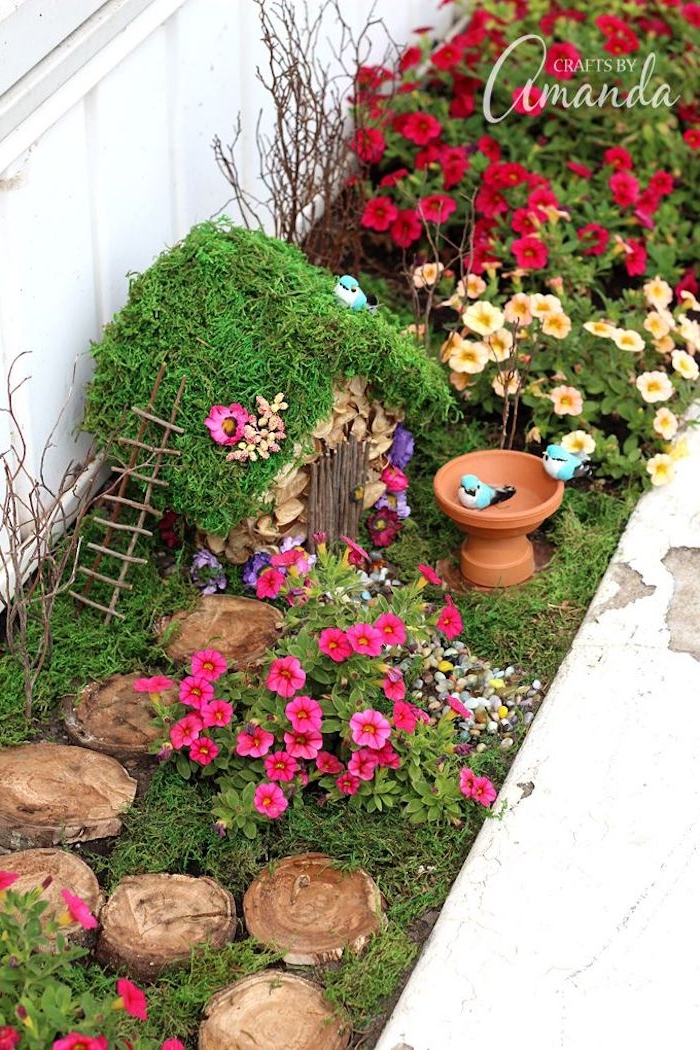
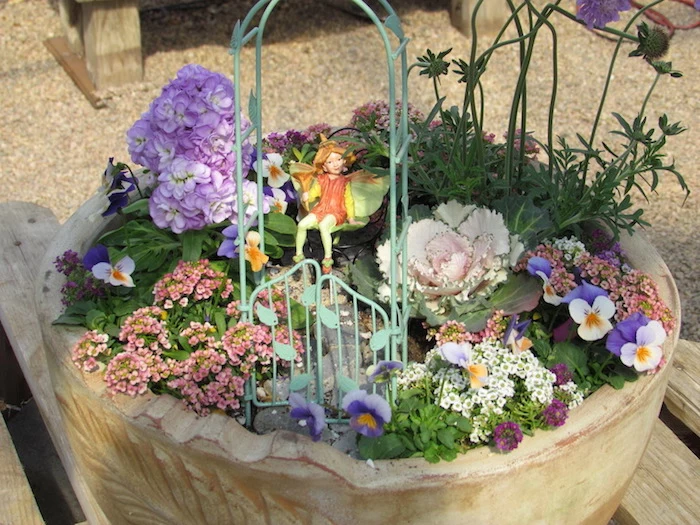
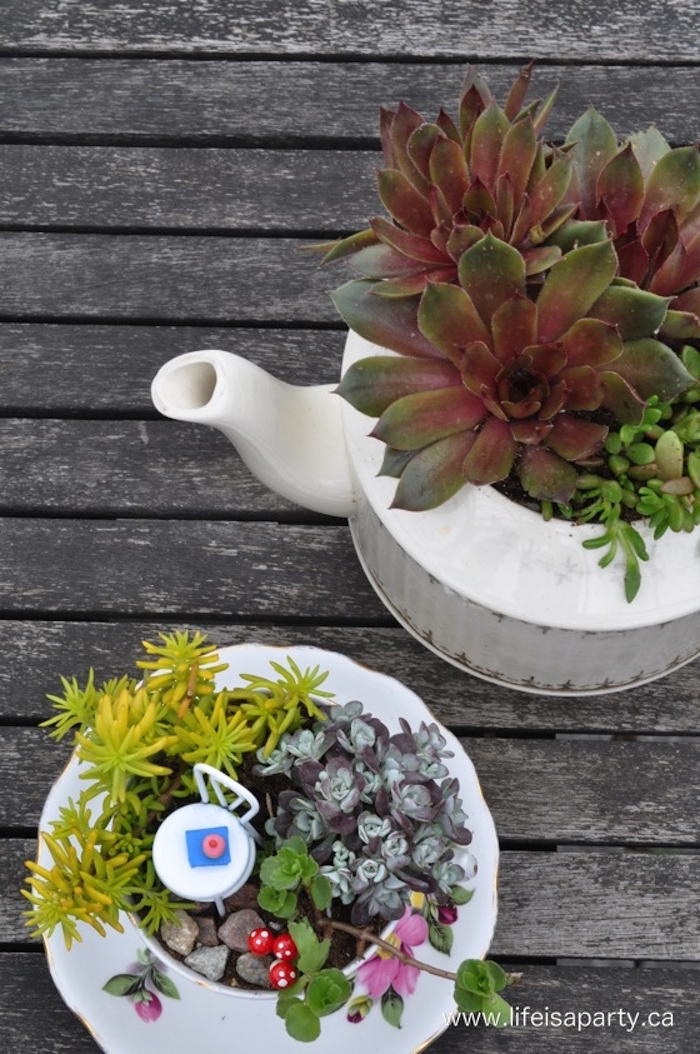
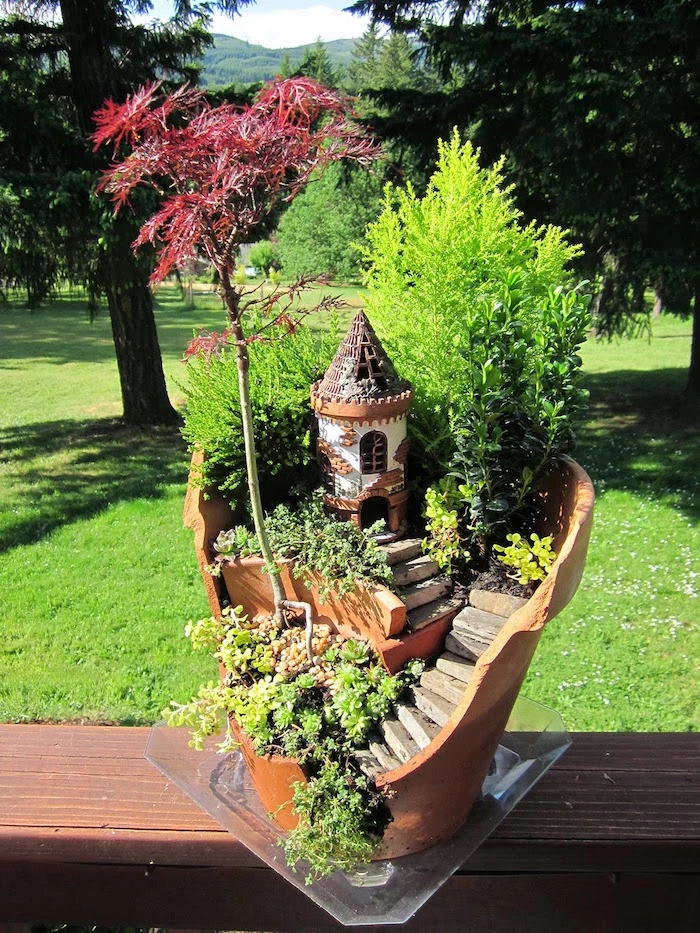
Inspiration Gallery
When choosing plants, think about their growth habits. A fast-growing ground cover can overwhelm your scene in a single season. Look for ‘step-able’, slow-spreading plants like Corsican Mint (Mentha requienii), which releases a lovely minty scent when touched, or Blue Star Creeper (Isotoma fluviatilis) for tiny, star-shaped flowers.
Did you know? The concept of miniature decorative gardens can be traced back to the Japanese arts of Bonsai, Saikei, and Bonkei, which have perfected the art of creating stunning, living landscapes in small containers for centuries.
The secret to a realistic path: Don’t just pour gravel. First, lay down a small piece of landscape weed barrier fabric cut to the shape of your path. This prevents the stones from sinking into the soil over time and keeps your design crisp and clean through many waterings.
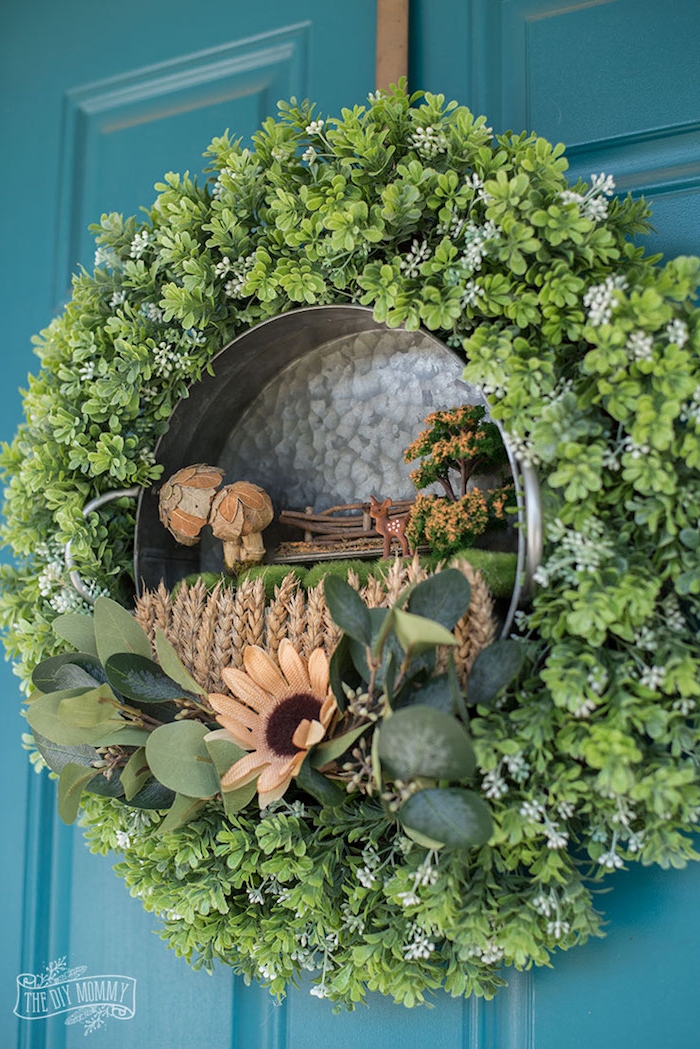
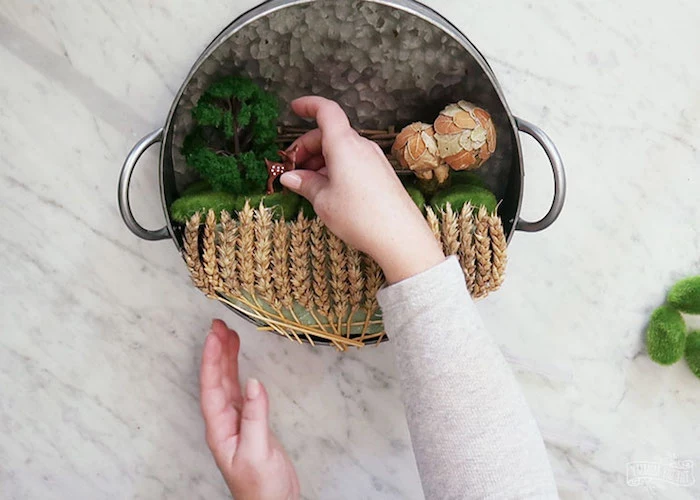
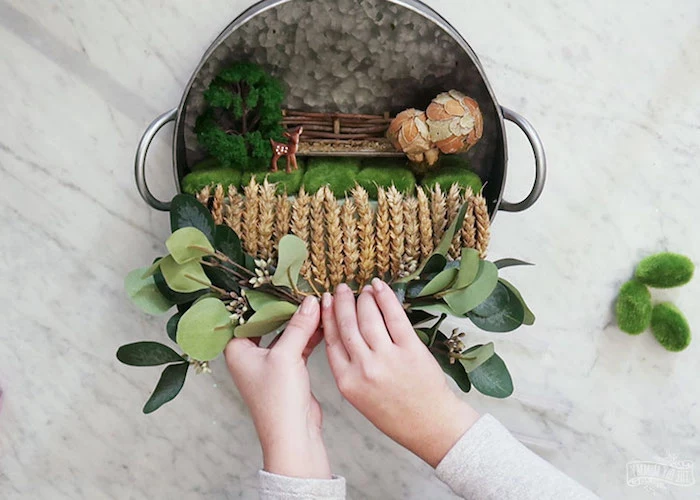
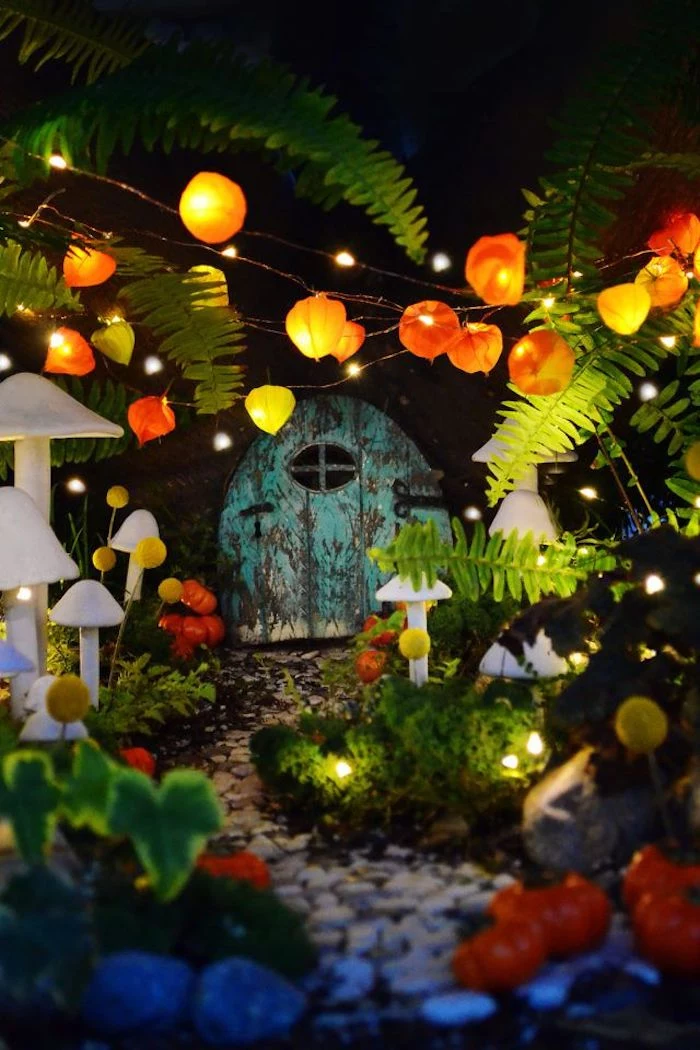
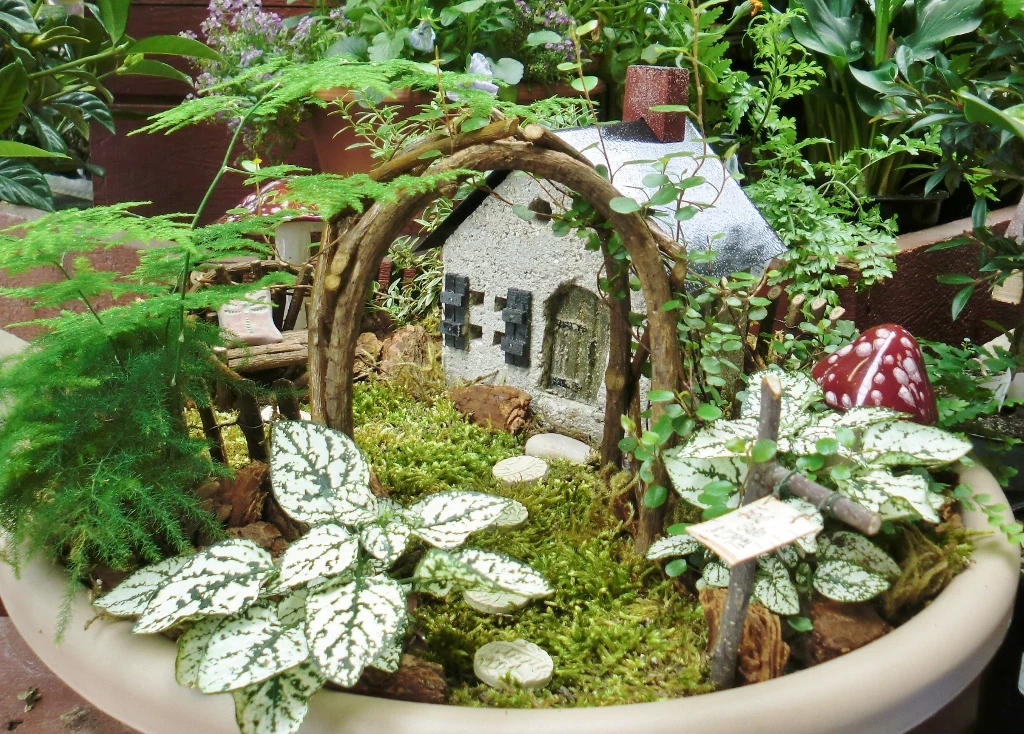
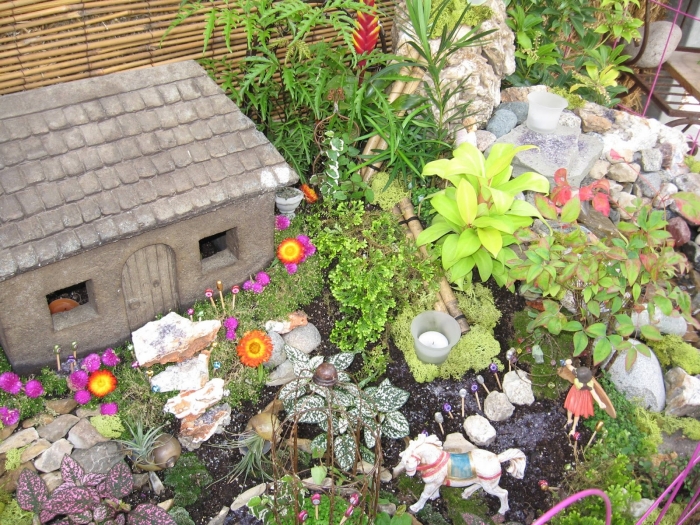
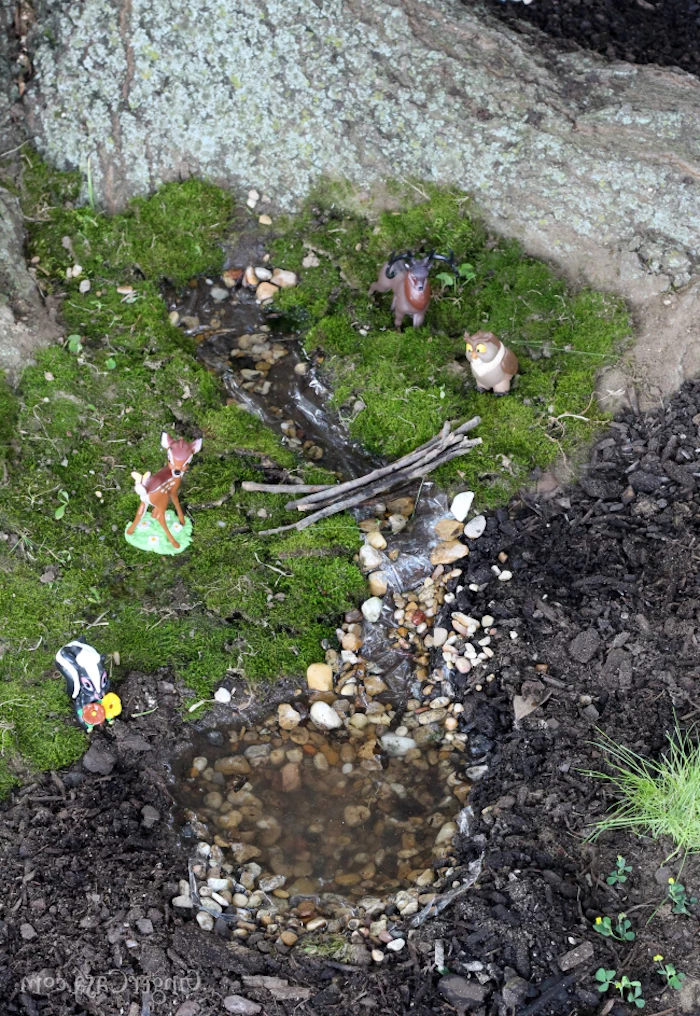
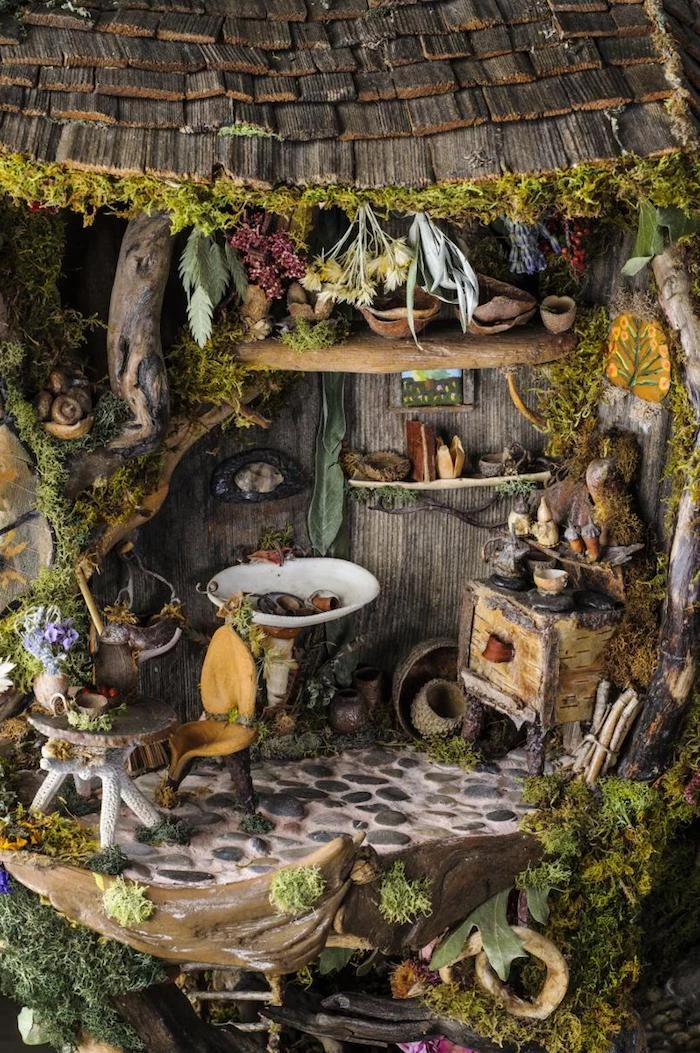
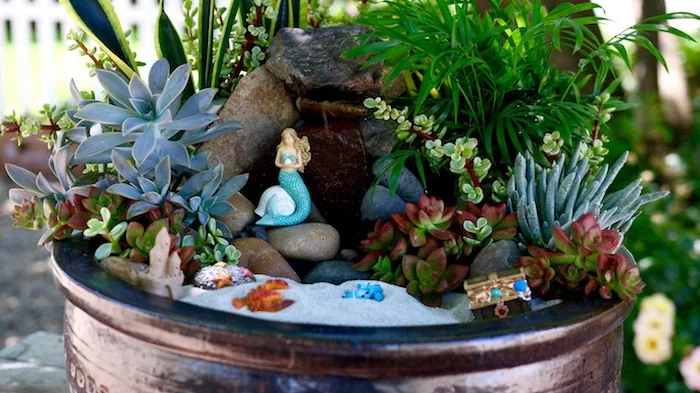
Creating a specific atmosphere is part of the magic. For a mystical woodland scene, consider these elements:
- Plants: Irish Moss (Sagina subulata) and small ferns like the Lemon Button Fern.
- Accents: A tiny bench made from twigs, a pathway of slate chips, and perhaps a faux mushroom from a brand like The Little Hedgerow.
- Container: A wide, shallow bowl or even a repurposed wooden drawer.
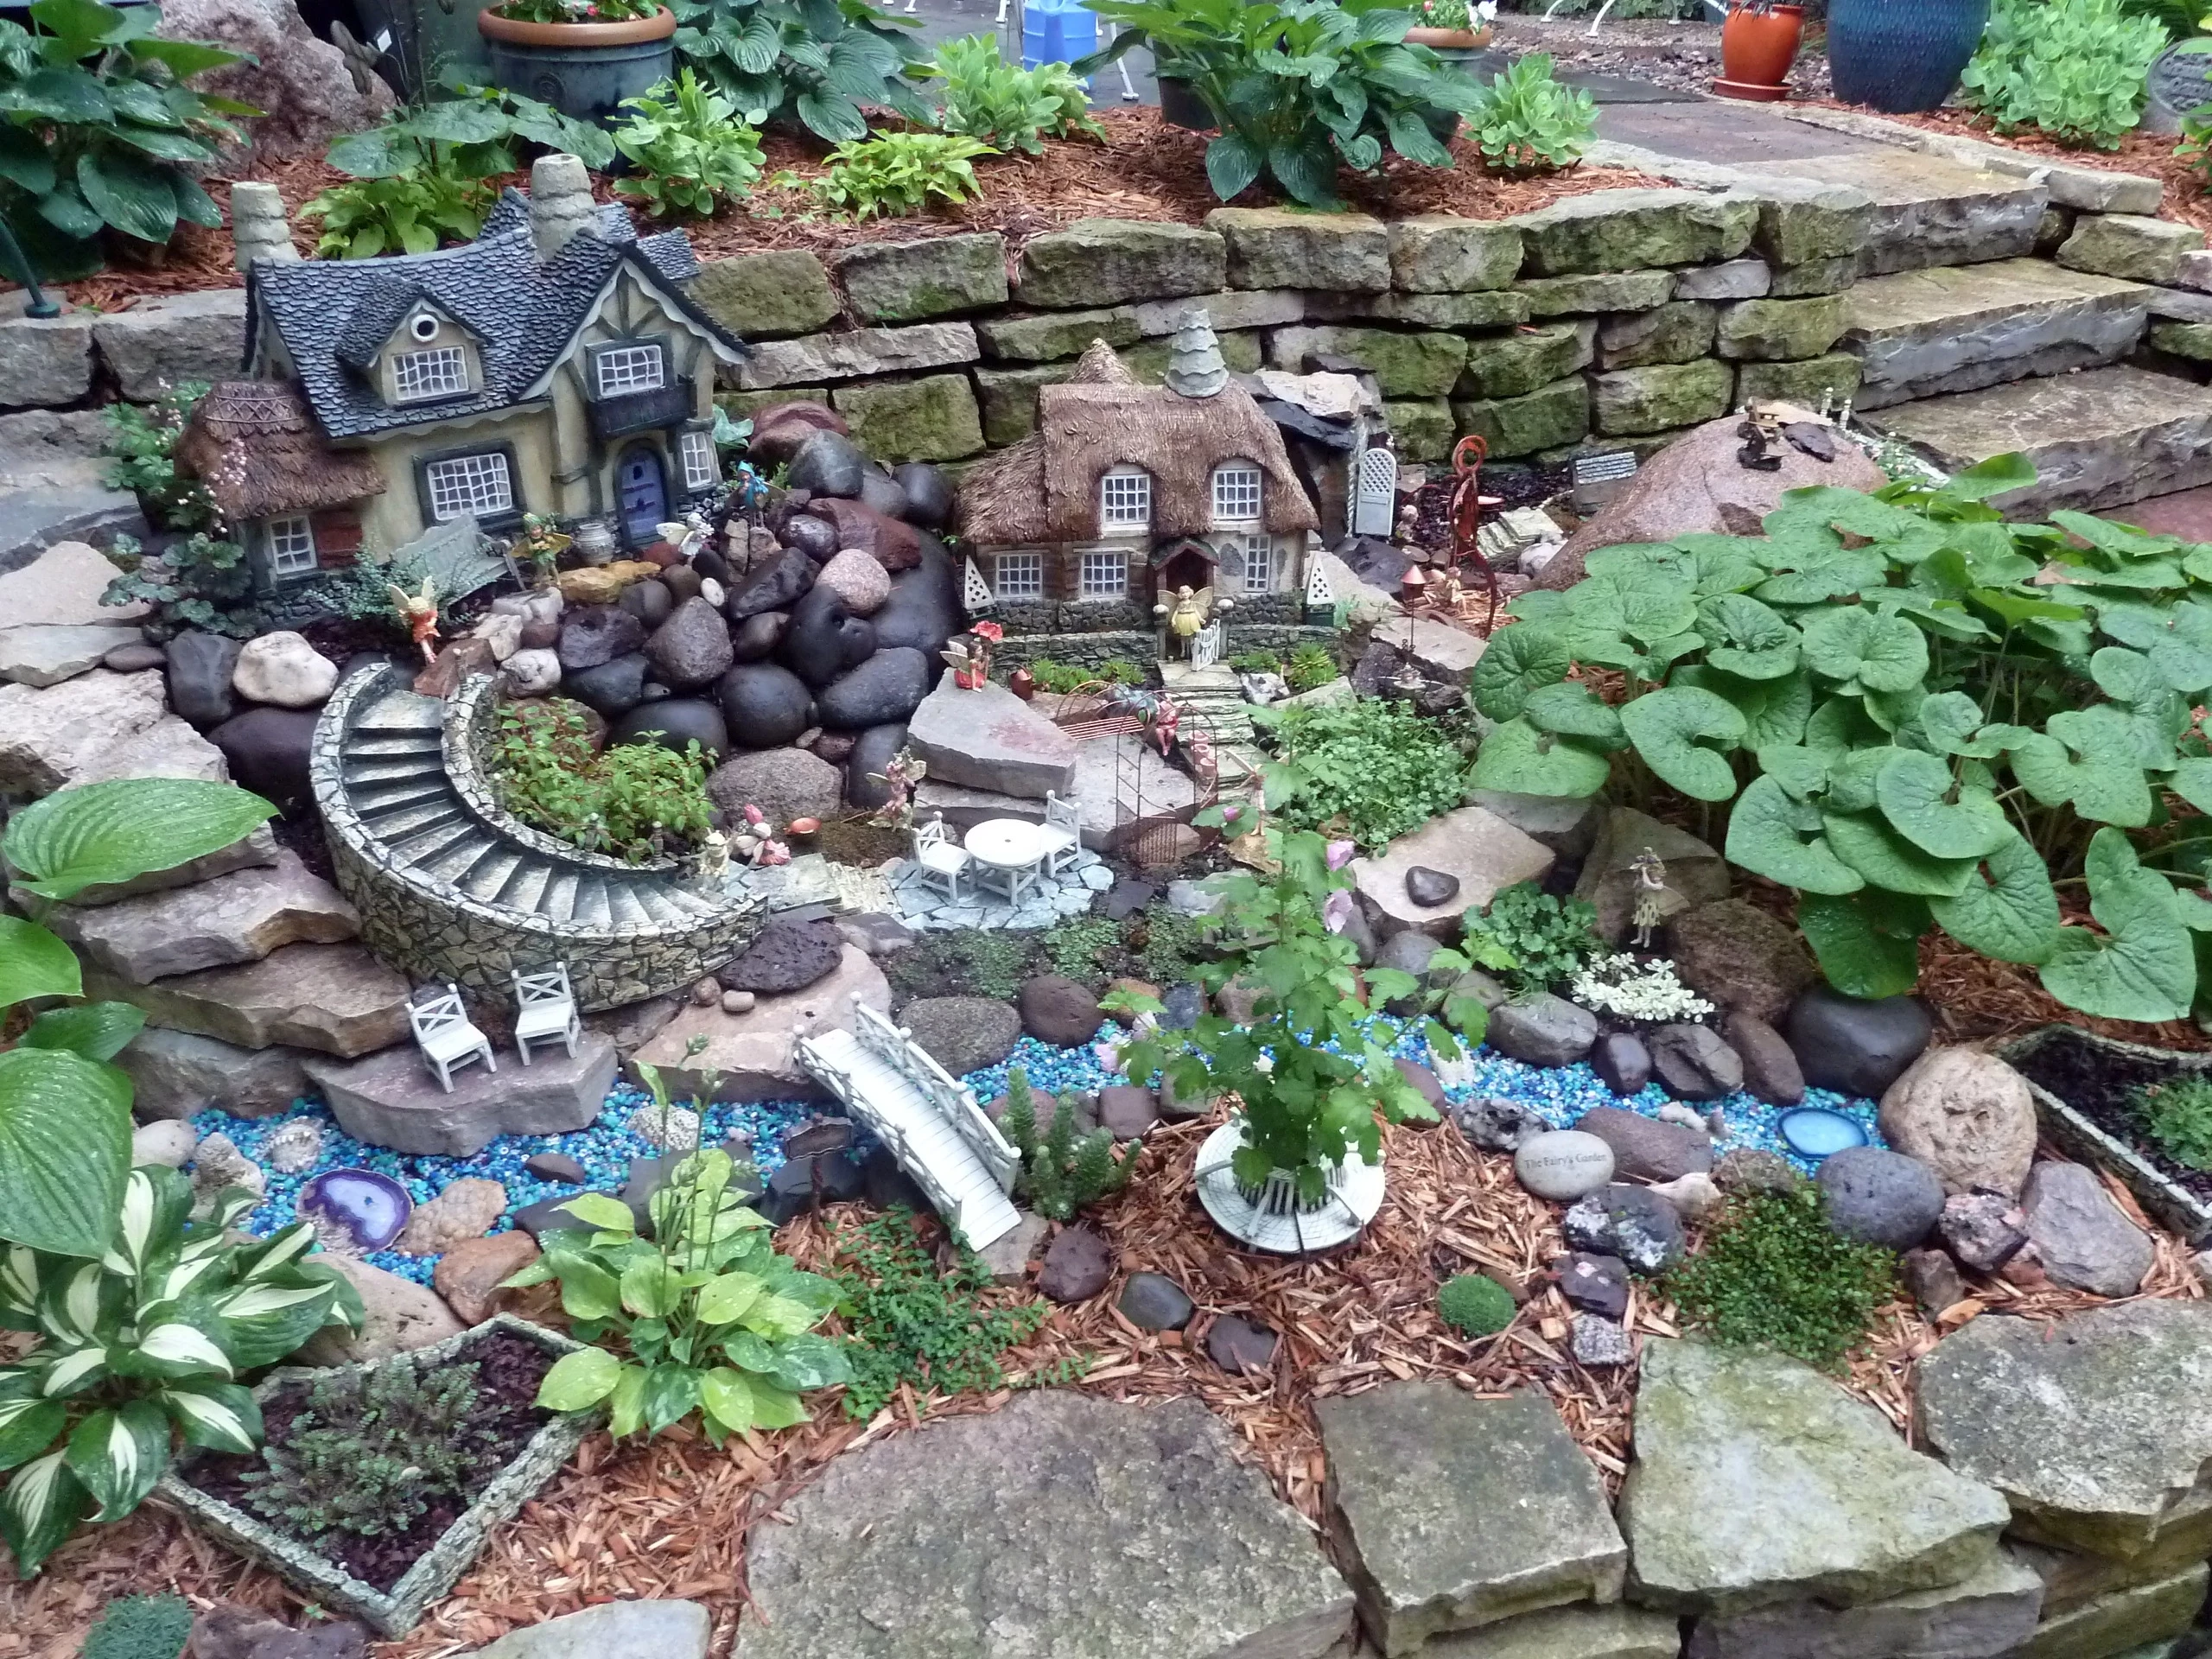
How do I create a tiny pond or stream?
Forget real water, which can get stagnant. Create the illusion with blue glass pebbles or flat floral marbles pressed into the soil. For a more permanent, glossy look, mix and pour a two-part clear casting resin (like EnviroTex Lite) into a prepared hollow. You can even embed tiny pebbles at the bottom before it sets.
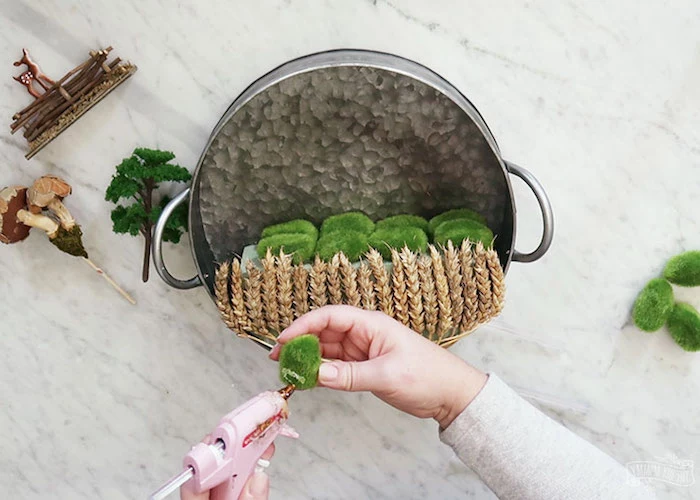
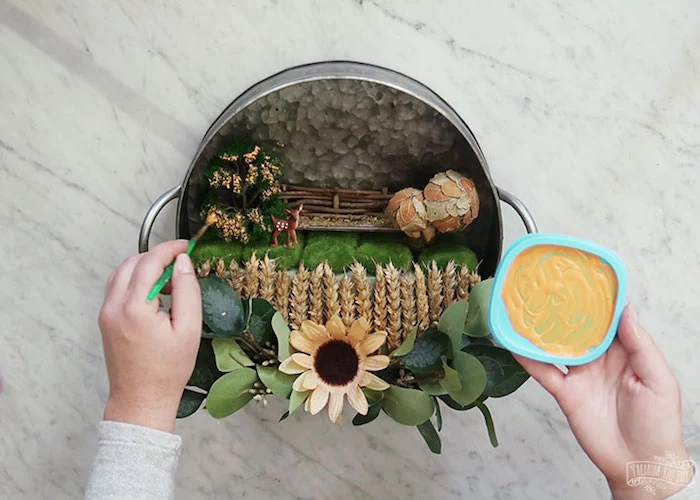
- It provides a lush, green carpet.
- It’s incredibly durable and slow-growing.
- It helps to visually anchor larger plants and accessories.
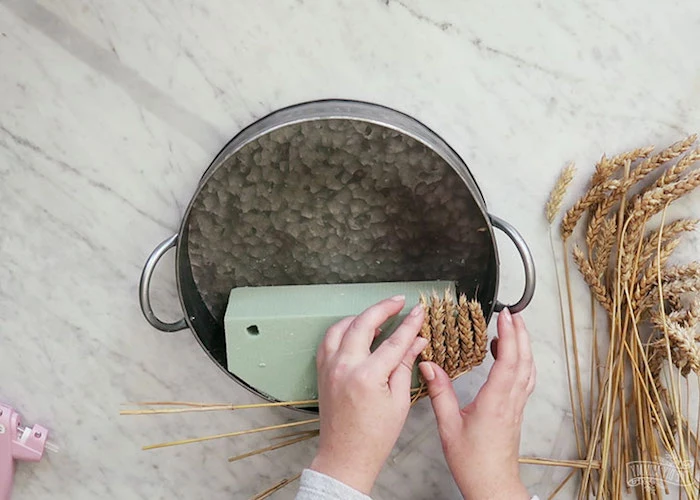
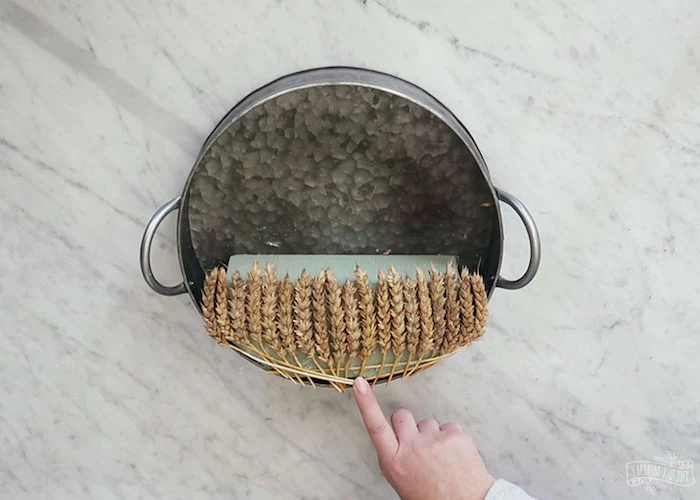
The secret? Using preserved moss instead of living moss. It requires no light or water and won’t rot or attract pests, offering a vibrant green look that lasts for years. You can find it in sheets or clumps at most craft stores.

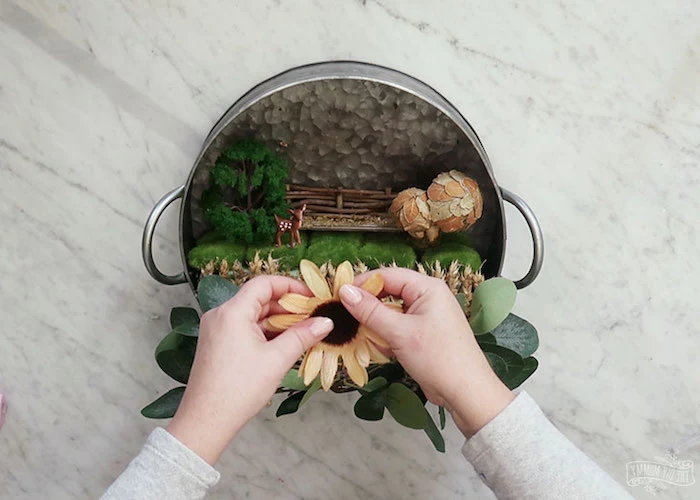
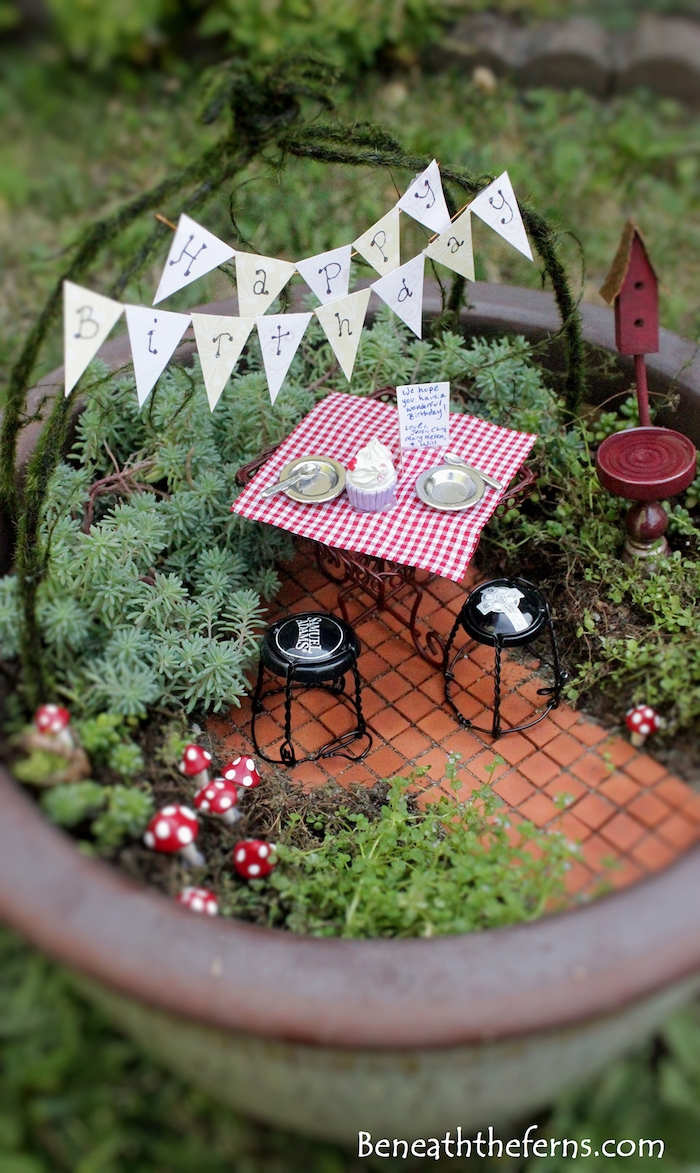
Don’t overcrowd your garden! It’s tempting to fit in every cute accessory, but negative space is crucial. A bit of open ‘lawn’ (perhaps a patch of Scotch Moss) makes the composition feel more like a real landscape and gives your plants room to breathe and grow.
Polymer Clay Accessories: Ideal for crafting custom items like mushrooms, tiny food, or paving stones. Brands like Sculpey or Fimo are oven-bake, waterproof, and won’t degrade in the soil.
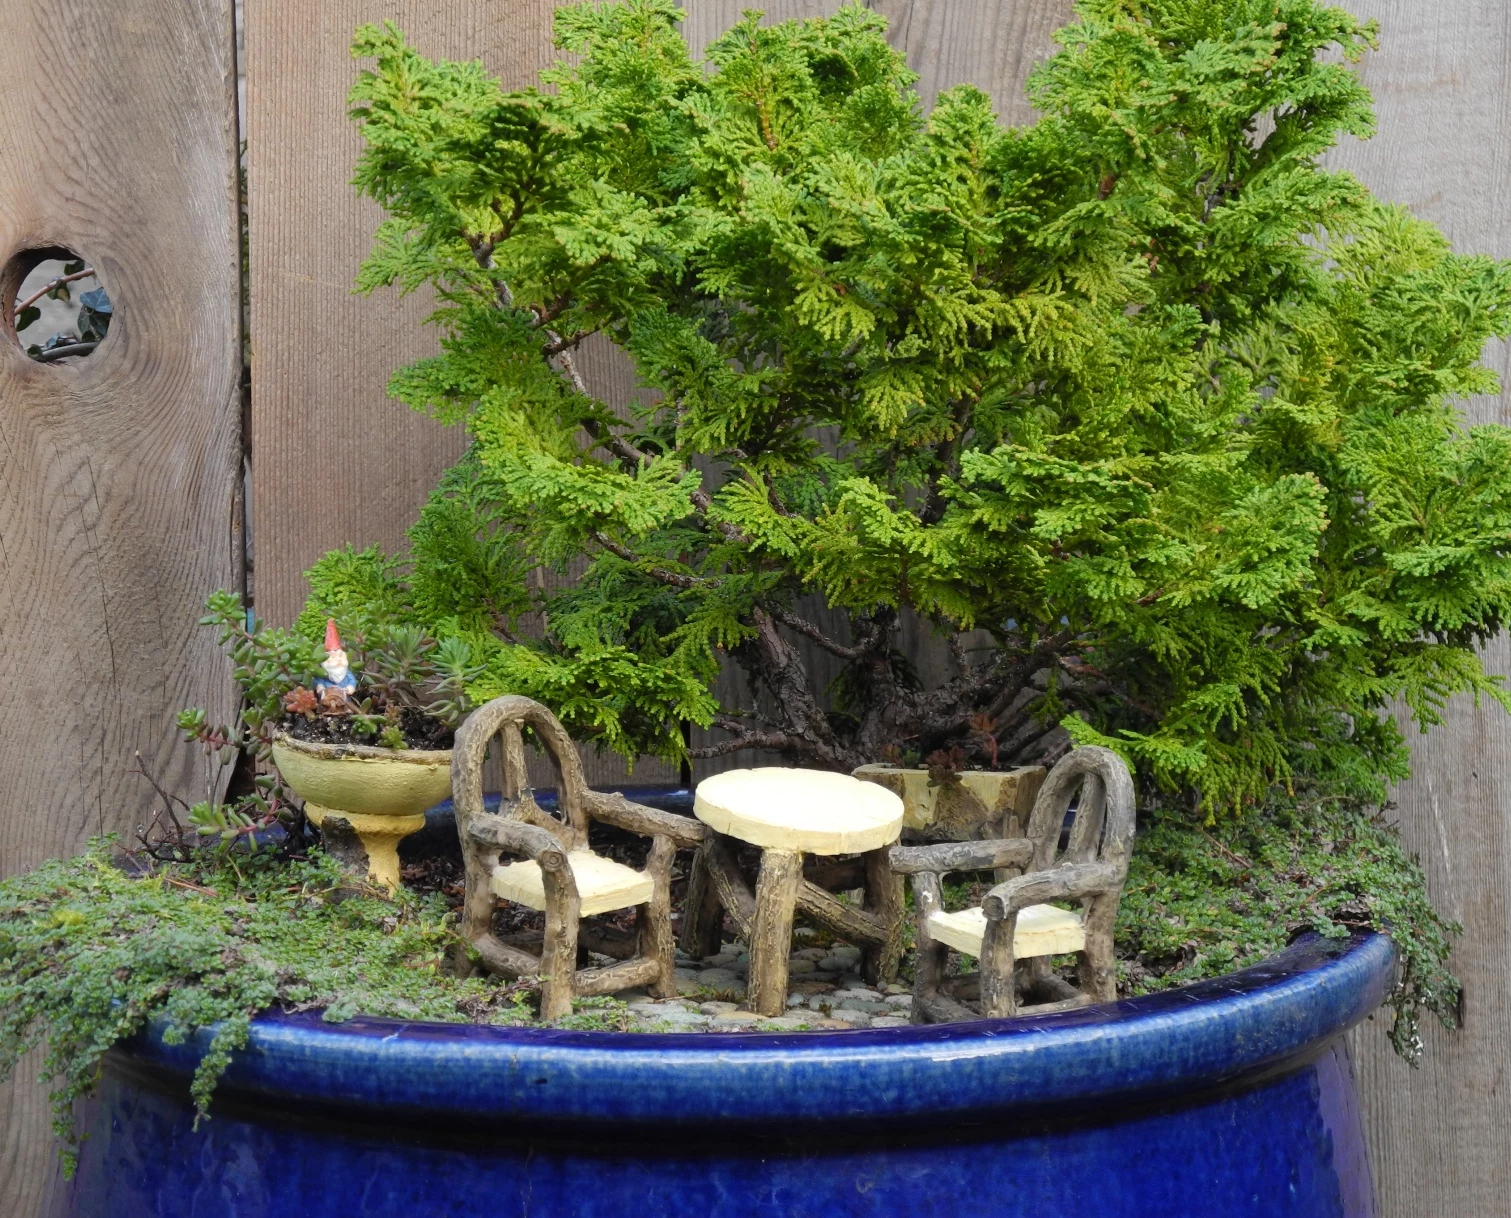
Natural Wood/Twig Furniture: Offers a wonderfully rustic look but can be prone to rot and mold. To extend its life, seal it with several coats of a clear, waterproof outdoor sealant before placing it in the garden.
For longevity, polymer clay often wins, but sealed natural materials offer unmatched authenticity.
A single gram of healthy soil can contain over a billion bacteria, thousands of species of fungi, and numerous protozoa.
This microscopic world is just as important in your tiny pot as it is in a vast field. Using a sterile potting mix, especially one formulated for succulents or cacti, prevents harmful pathogens from taking hold and ensures your fairy garden’s ecosystem starts off on the right foot.
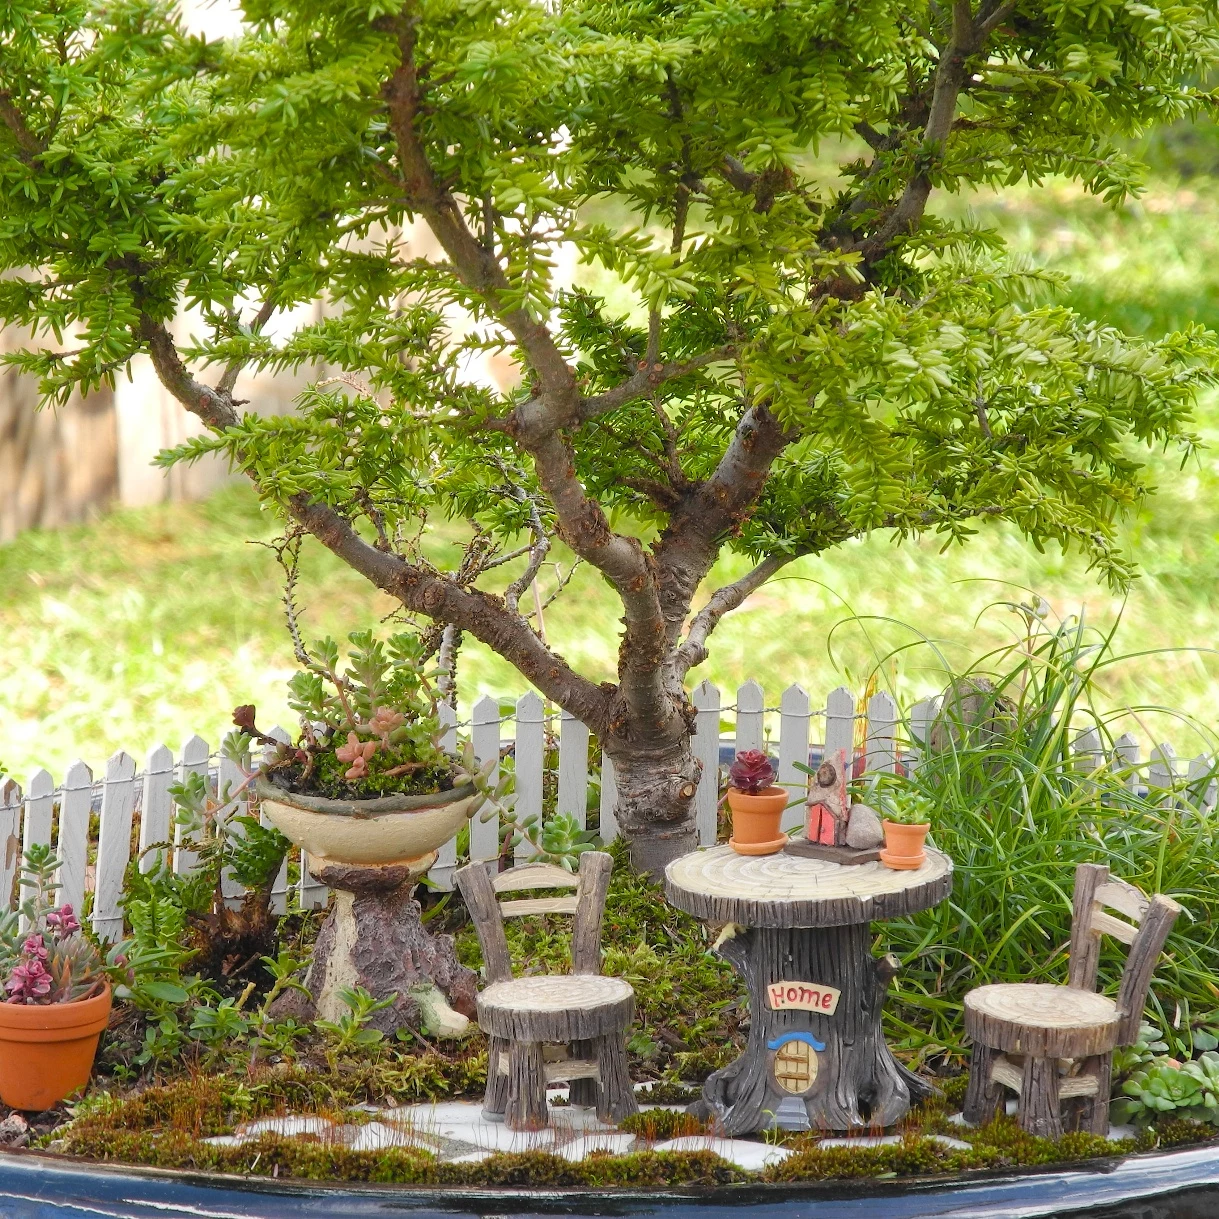
Looking for the perfect tiny ‘tree’? A sprig of rosemary not only looks like a miniature pine, but it also adds a lovely fragrance to your garden. Prune it carefully to maintain its shape and scale. Dwarf Alberta Spruce is another excellent, albeit slower-growing, option for larger fairy gardens.
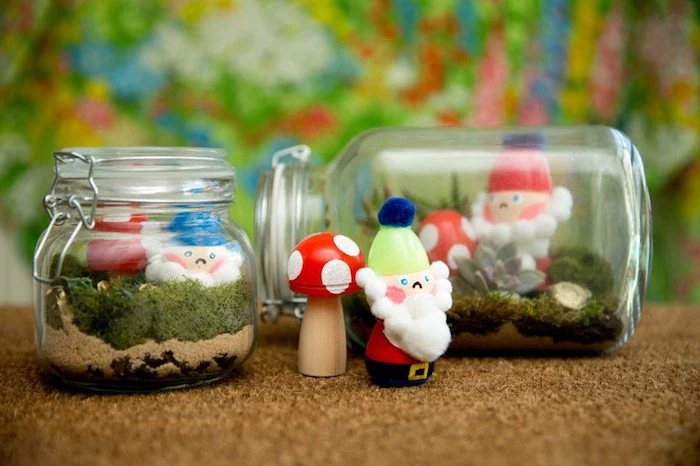
My fairy garden is in a closed terrarium. Why are my succulents dying?
Succulents and closed terrariums are a bad match. The high humidity trapped inside a sealed glass container is the opposite of the dry, arid conditions succulents crave. This environment inevitably leads to root rot. For a closed terrarium, choose humidity-loving plants like nerve plants (Fittonia), baby tears, or tiny ferns instead.
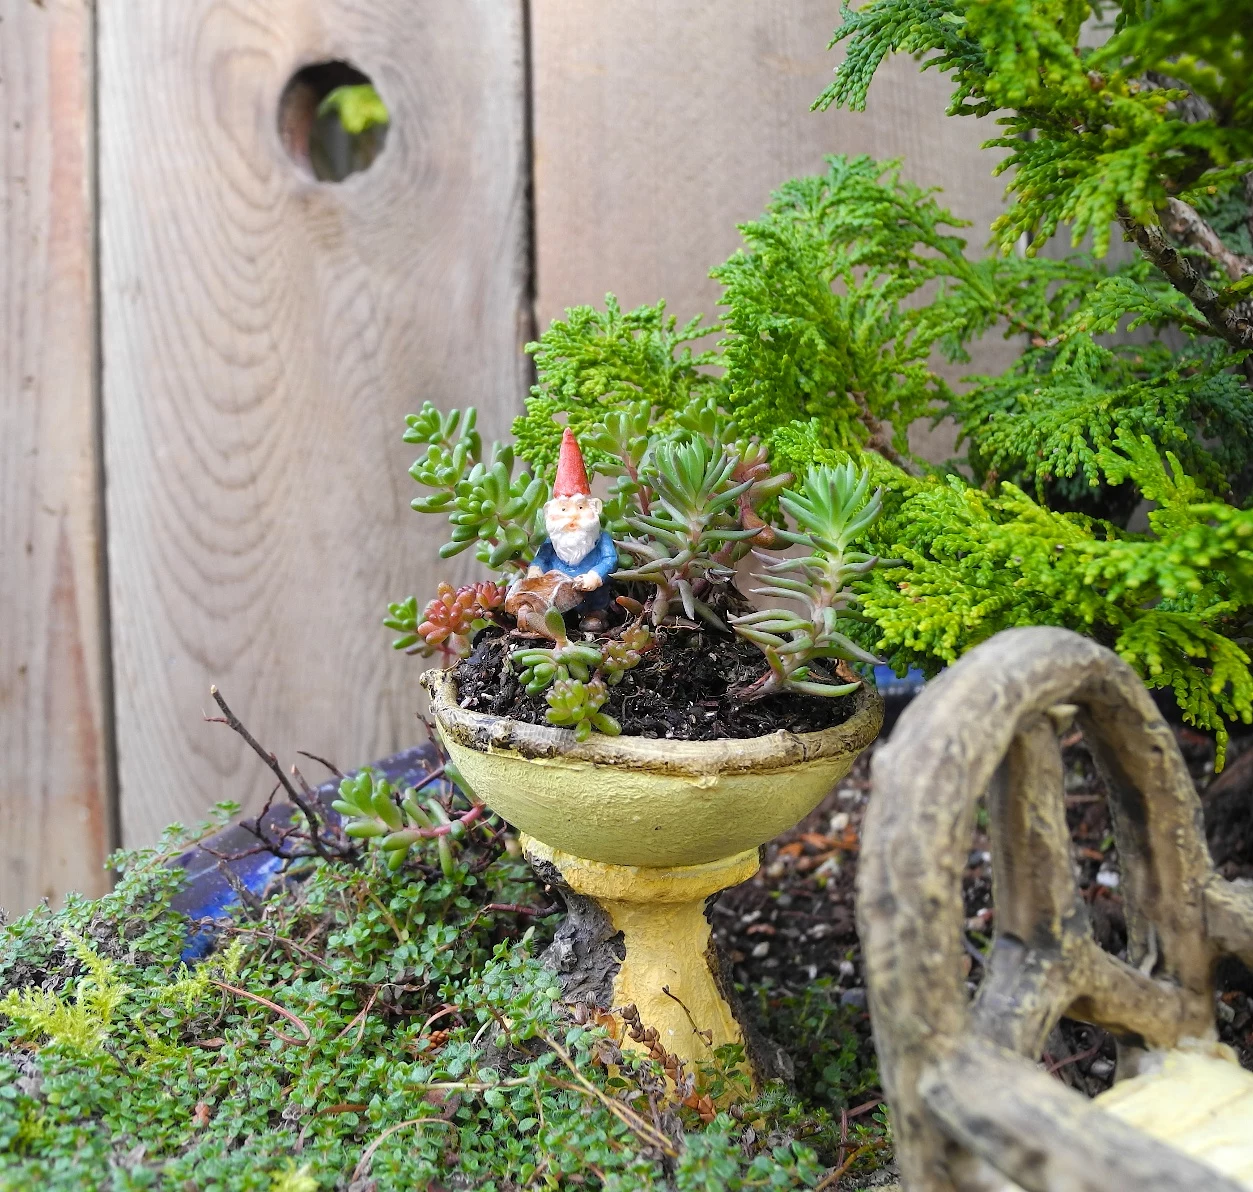
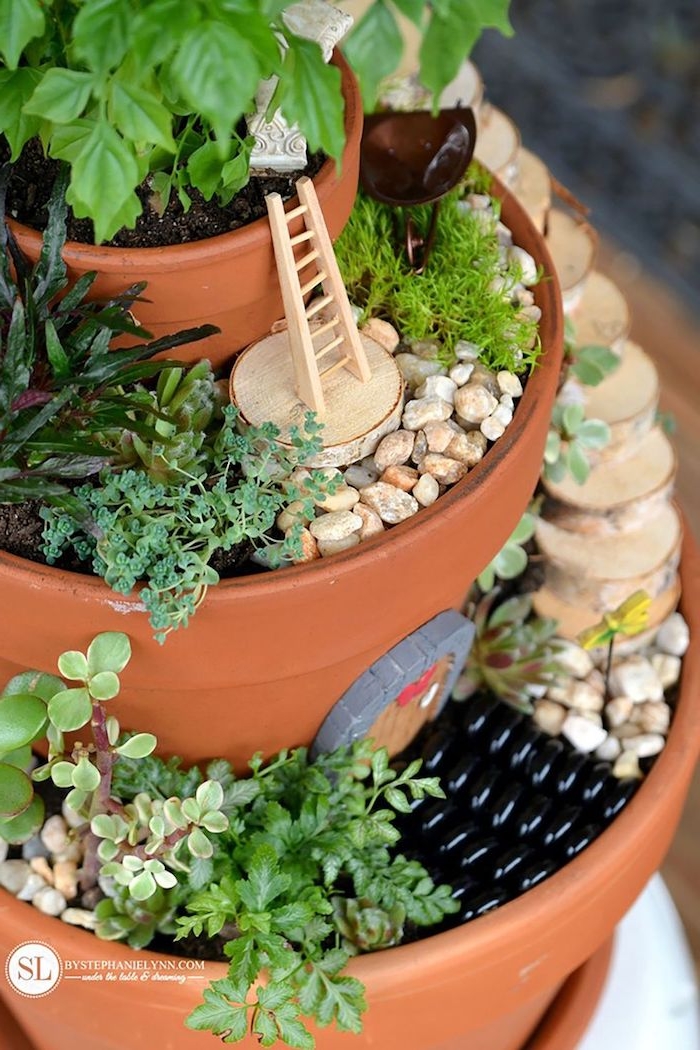
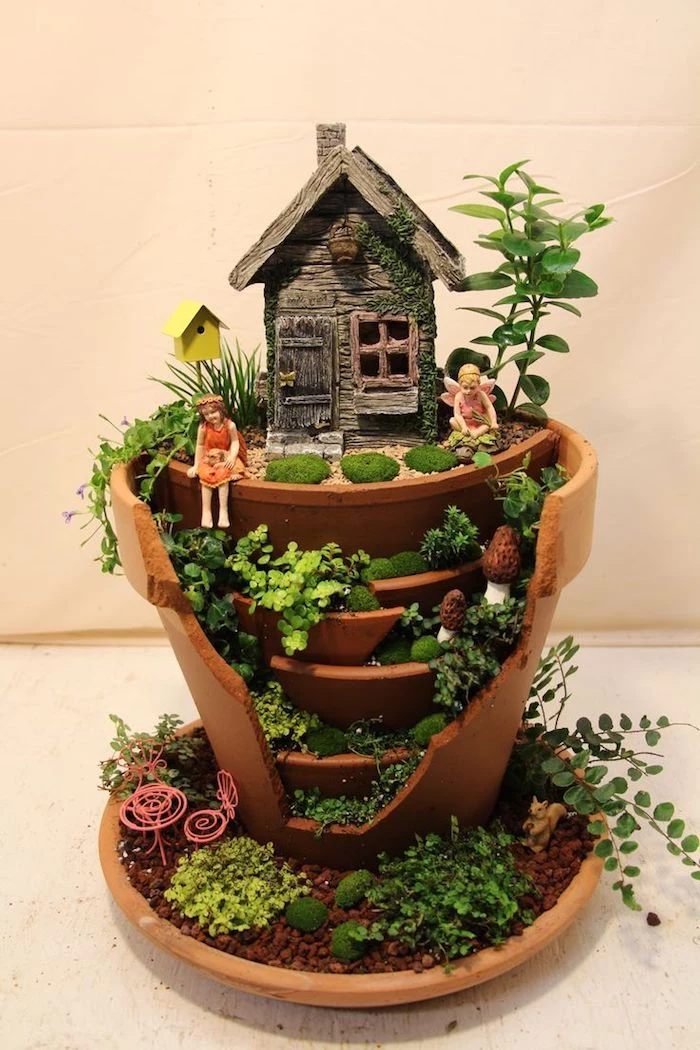
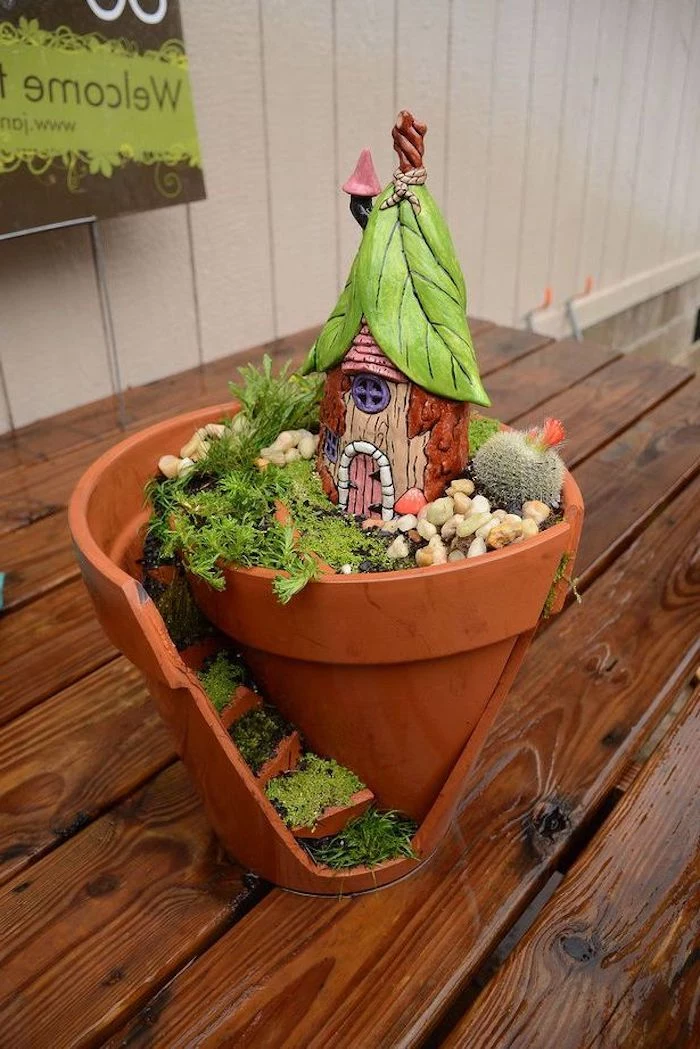
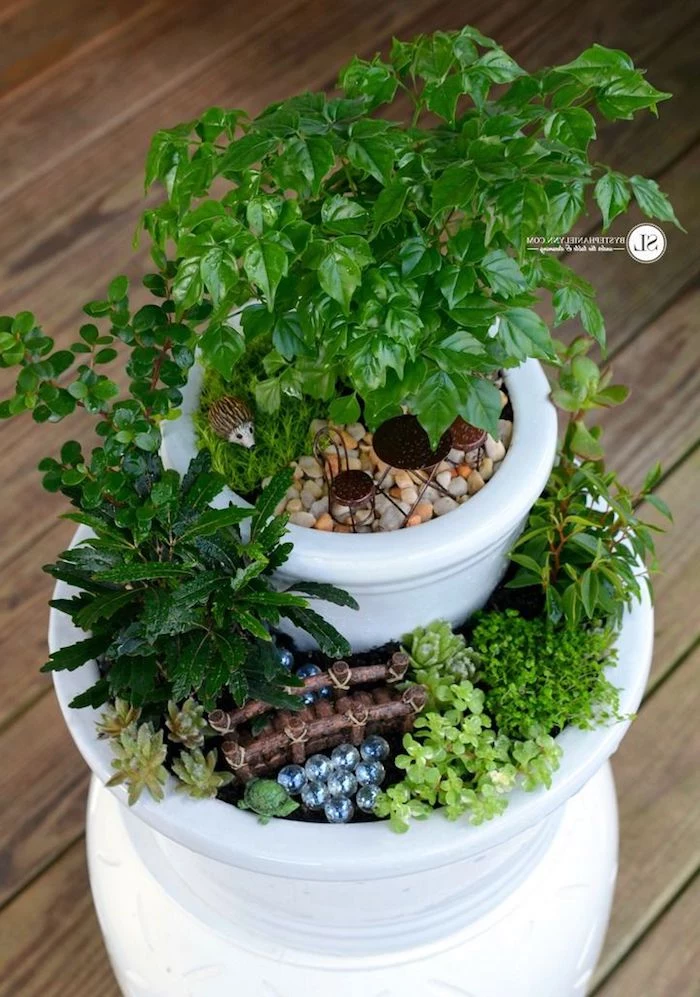
Give your fairy garden a sense of history by using a broken terracotta pot. The fractured edges can be arranged to create natural-looking tiers and staircases. Tuck plants like string of pearls (Senecio rowleyanus) into the cracks to cascade down the ‘ruins’.

A common mistake: Using plants with conflicting needs. Planting a water-loving fern next to a drought-tolerant succulent is a recipe for disaster. One will always be unhappy. Always group plants that share the same light, water, and soil requirements to create a harmonious and healthy micro-ecosystem.
- Elfin Thyme (Thymus serpyllum ‘Elfin’): A super-tight, low-growing groundcover that forms a dense mat and can handle light foot traffic from fairies.
- Dwarf Mondo Grass (Ophiopogon japonicus ‘Nanus’): Looks like miniature clumps of lawn grass and is incredibly tough.
- Miniature Sedum (like Sedum dasyphyllum ‘Minor’): Tiny, bead-like leaves that create a beautiful textural groundcover in sunny, dry spots.
To keep your miniature scene looking its best, you’ll need to become a micro-gardener. Use small, sharp scissors (like embroidery scissors) to carefully prune back plants that are getting too large. This not only maintains the scale but also encourages bushier, healthier growth.
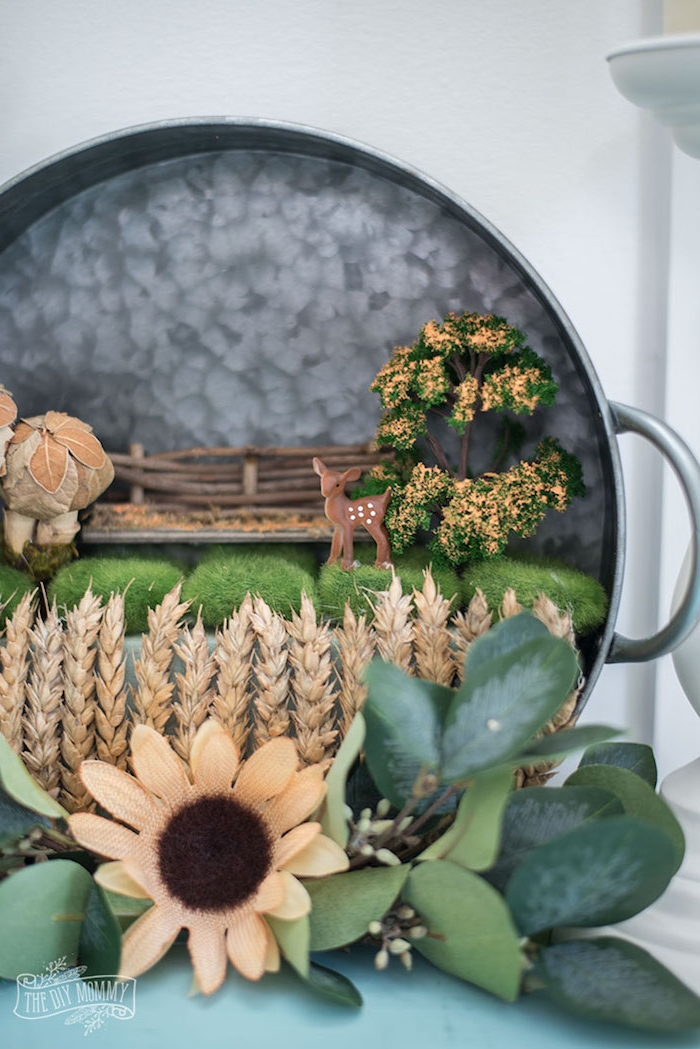
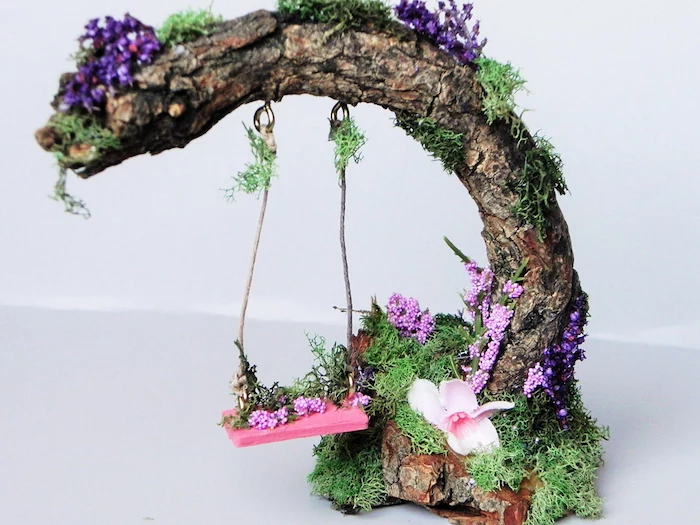
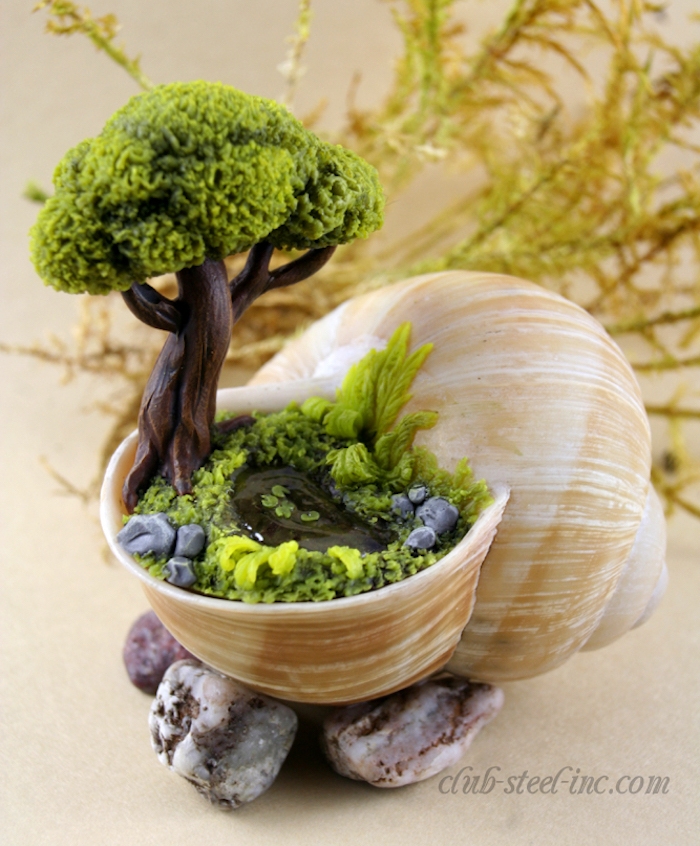
Forage for your fairy’s furniture! An acorn cap makes a perfect bowl, a flat piece of bark becomes a rustic tabletop, and small snail shells can be tiny planters. Just be sure to clean your finds and bake them on low heat (around 200°F/95°C) for 20 minutes to eliminate any unwanted pests.
How do I water without creating a flood that washes everything away?
Precision is key. Use a small watering can with a very narrow spout, or even a simple squeeze bottle (like a clean dish soap bottle). Aim the water directly at the base of the plants, avoiding the delicate decorative areas. This ensures the roots get a drink without disturbing your carefully placed pebble paths and tiny furniture.
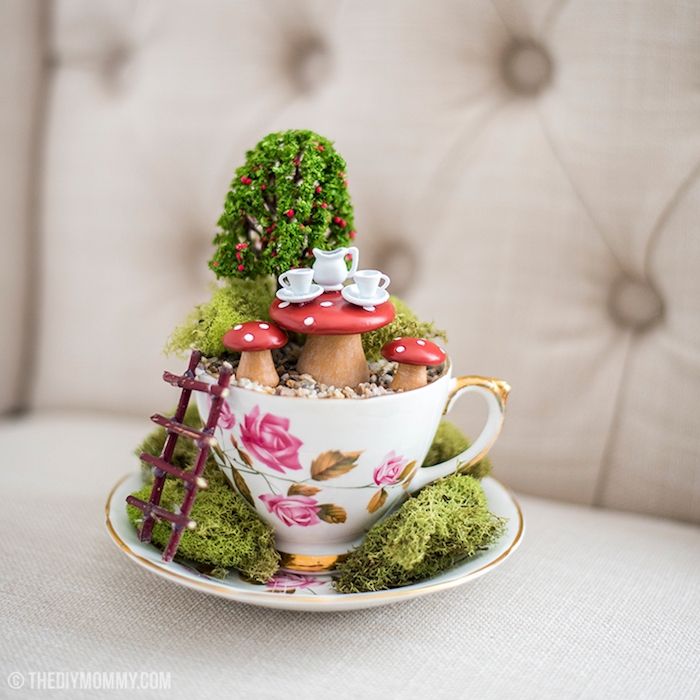
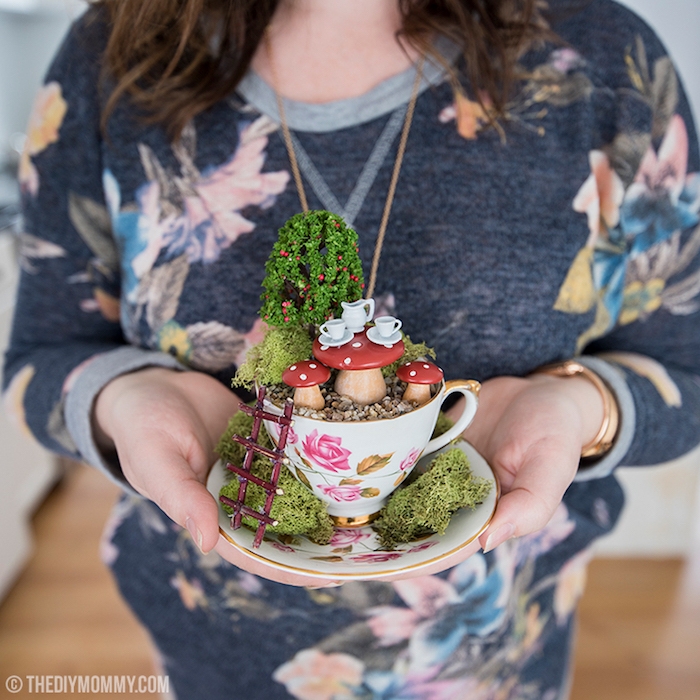
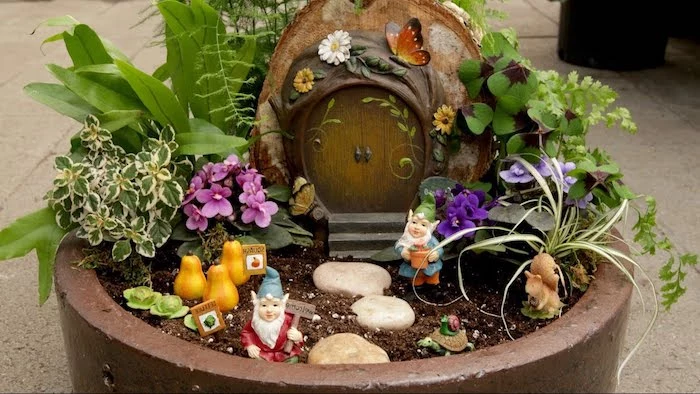
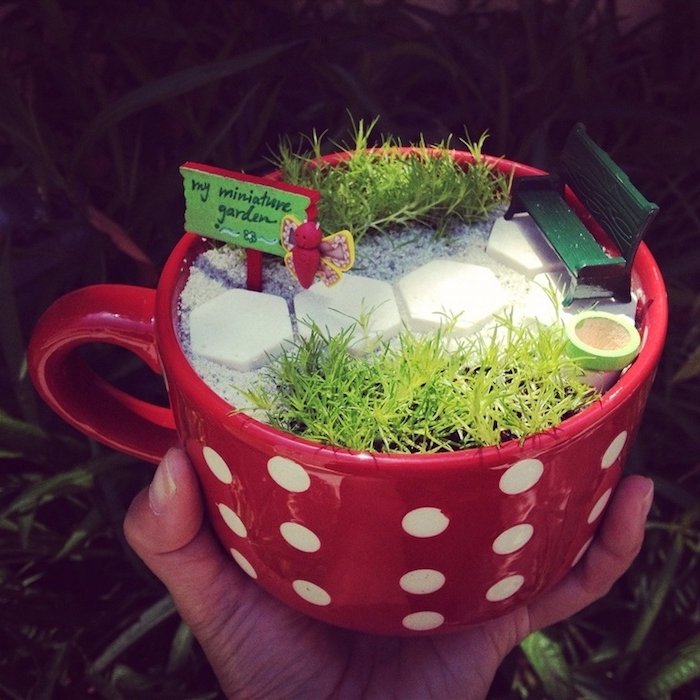
Don’t have the right pot? Look again! A vintage teacup, a chipped ceramic bowl, a wide coffee mug, or even a sturdy seashell can become a charming home for a tiny garden. The only rule? If it doesn’t have a drainage hole, you must carefully drill one using a diamond-tipped drill bit.
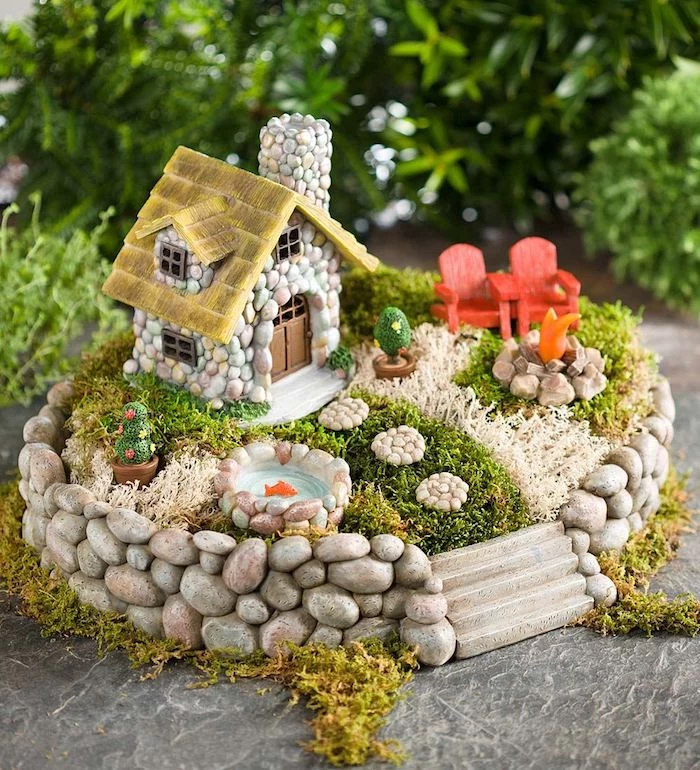
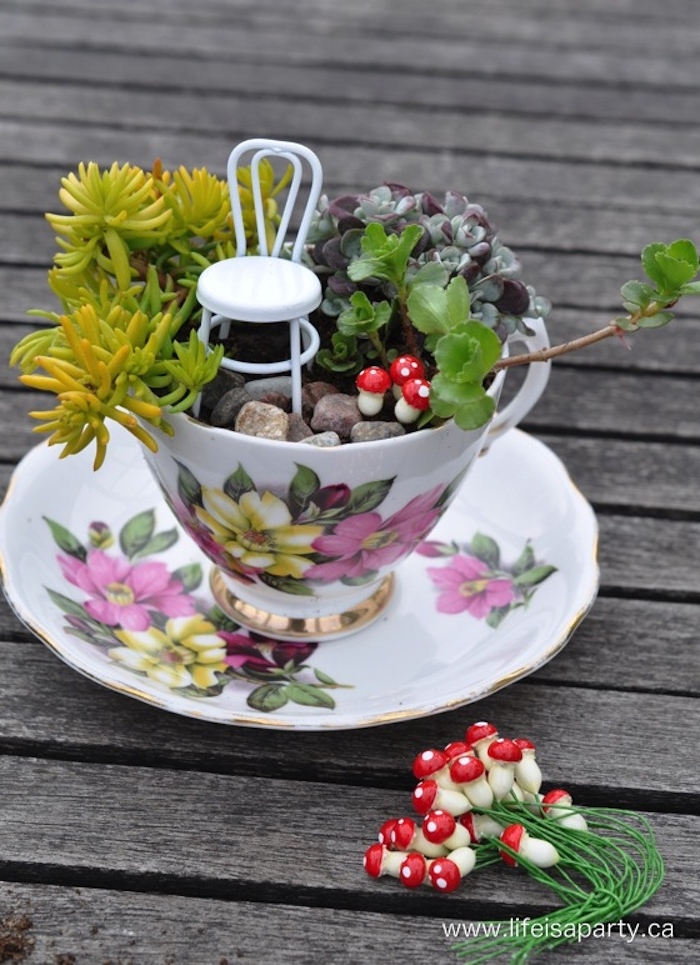
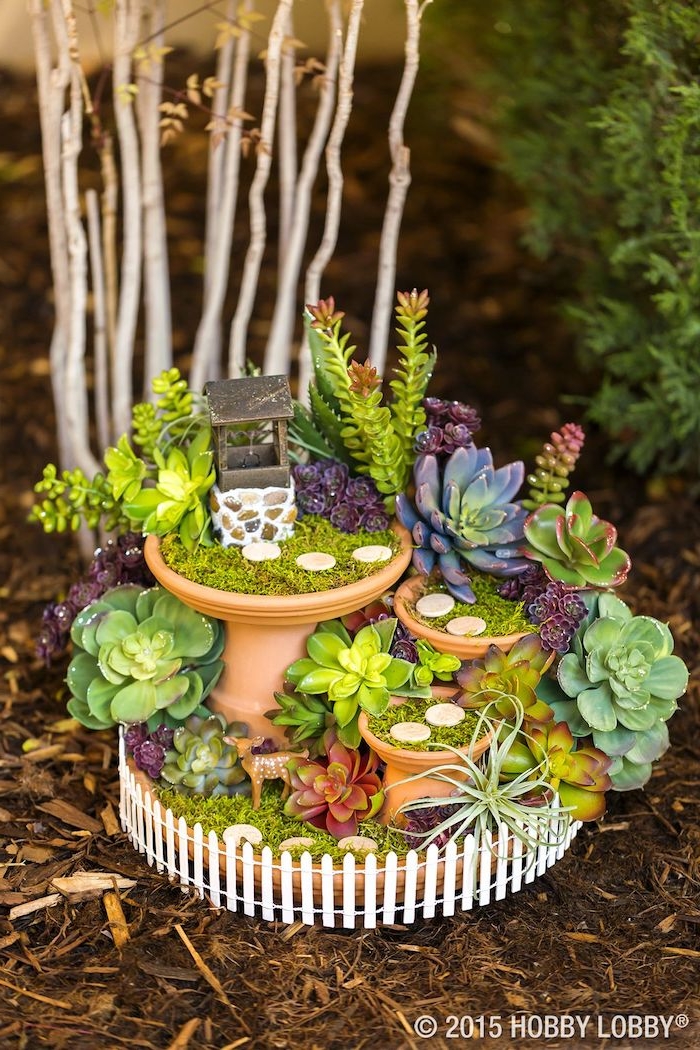
- Thrillers: A single upright plant that adds height, like a dwarf cypress or a Gasteria succulent.
- Fillers: Mounding plants that surround the thriller, like Scotch Moss or a small Echeveria.
- Spillers: Trailing plants that cascade over the pot’s edge, like String of Turtles or Creeping Fig.
This classic container design principle works just as well in miniature, creating a balanced and visually interesting composition.
A Word of Caution on Craft Sand: While colorful craft sand looks fun, the dyes can leach into the soil with watering, potentially harming your plants. Worse, fine sand can compact the soil surface, preventing water from penetrating to the roots. Opt for natural, un-dyed horticultural sand or fine aquarium gravel instead.
Want an otherworldly, soil-free fairy setting? Try using air plants (Tillandsia). Since they absorb water and nutrients through their leaves, they don’t need soil. You can simply nestle them amongst rocks, crystals, or pieces of driftwood for a magical, low-maintenance display. Just be sure to mist them a few times a week!
Bringing an outdoor fairy garden inside for the winter? Start the process before the first frost. First, check thoroughly for any pests and treat them with an insecticidal soap. Place the container in a spot that mimics its outdoor light conditions (e.g., a south-facing window for sun-lovers) and reduce watering, as plants grow less in winter.

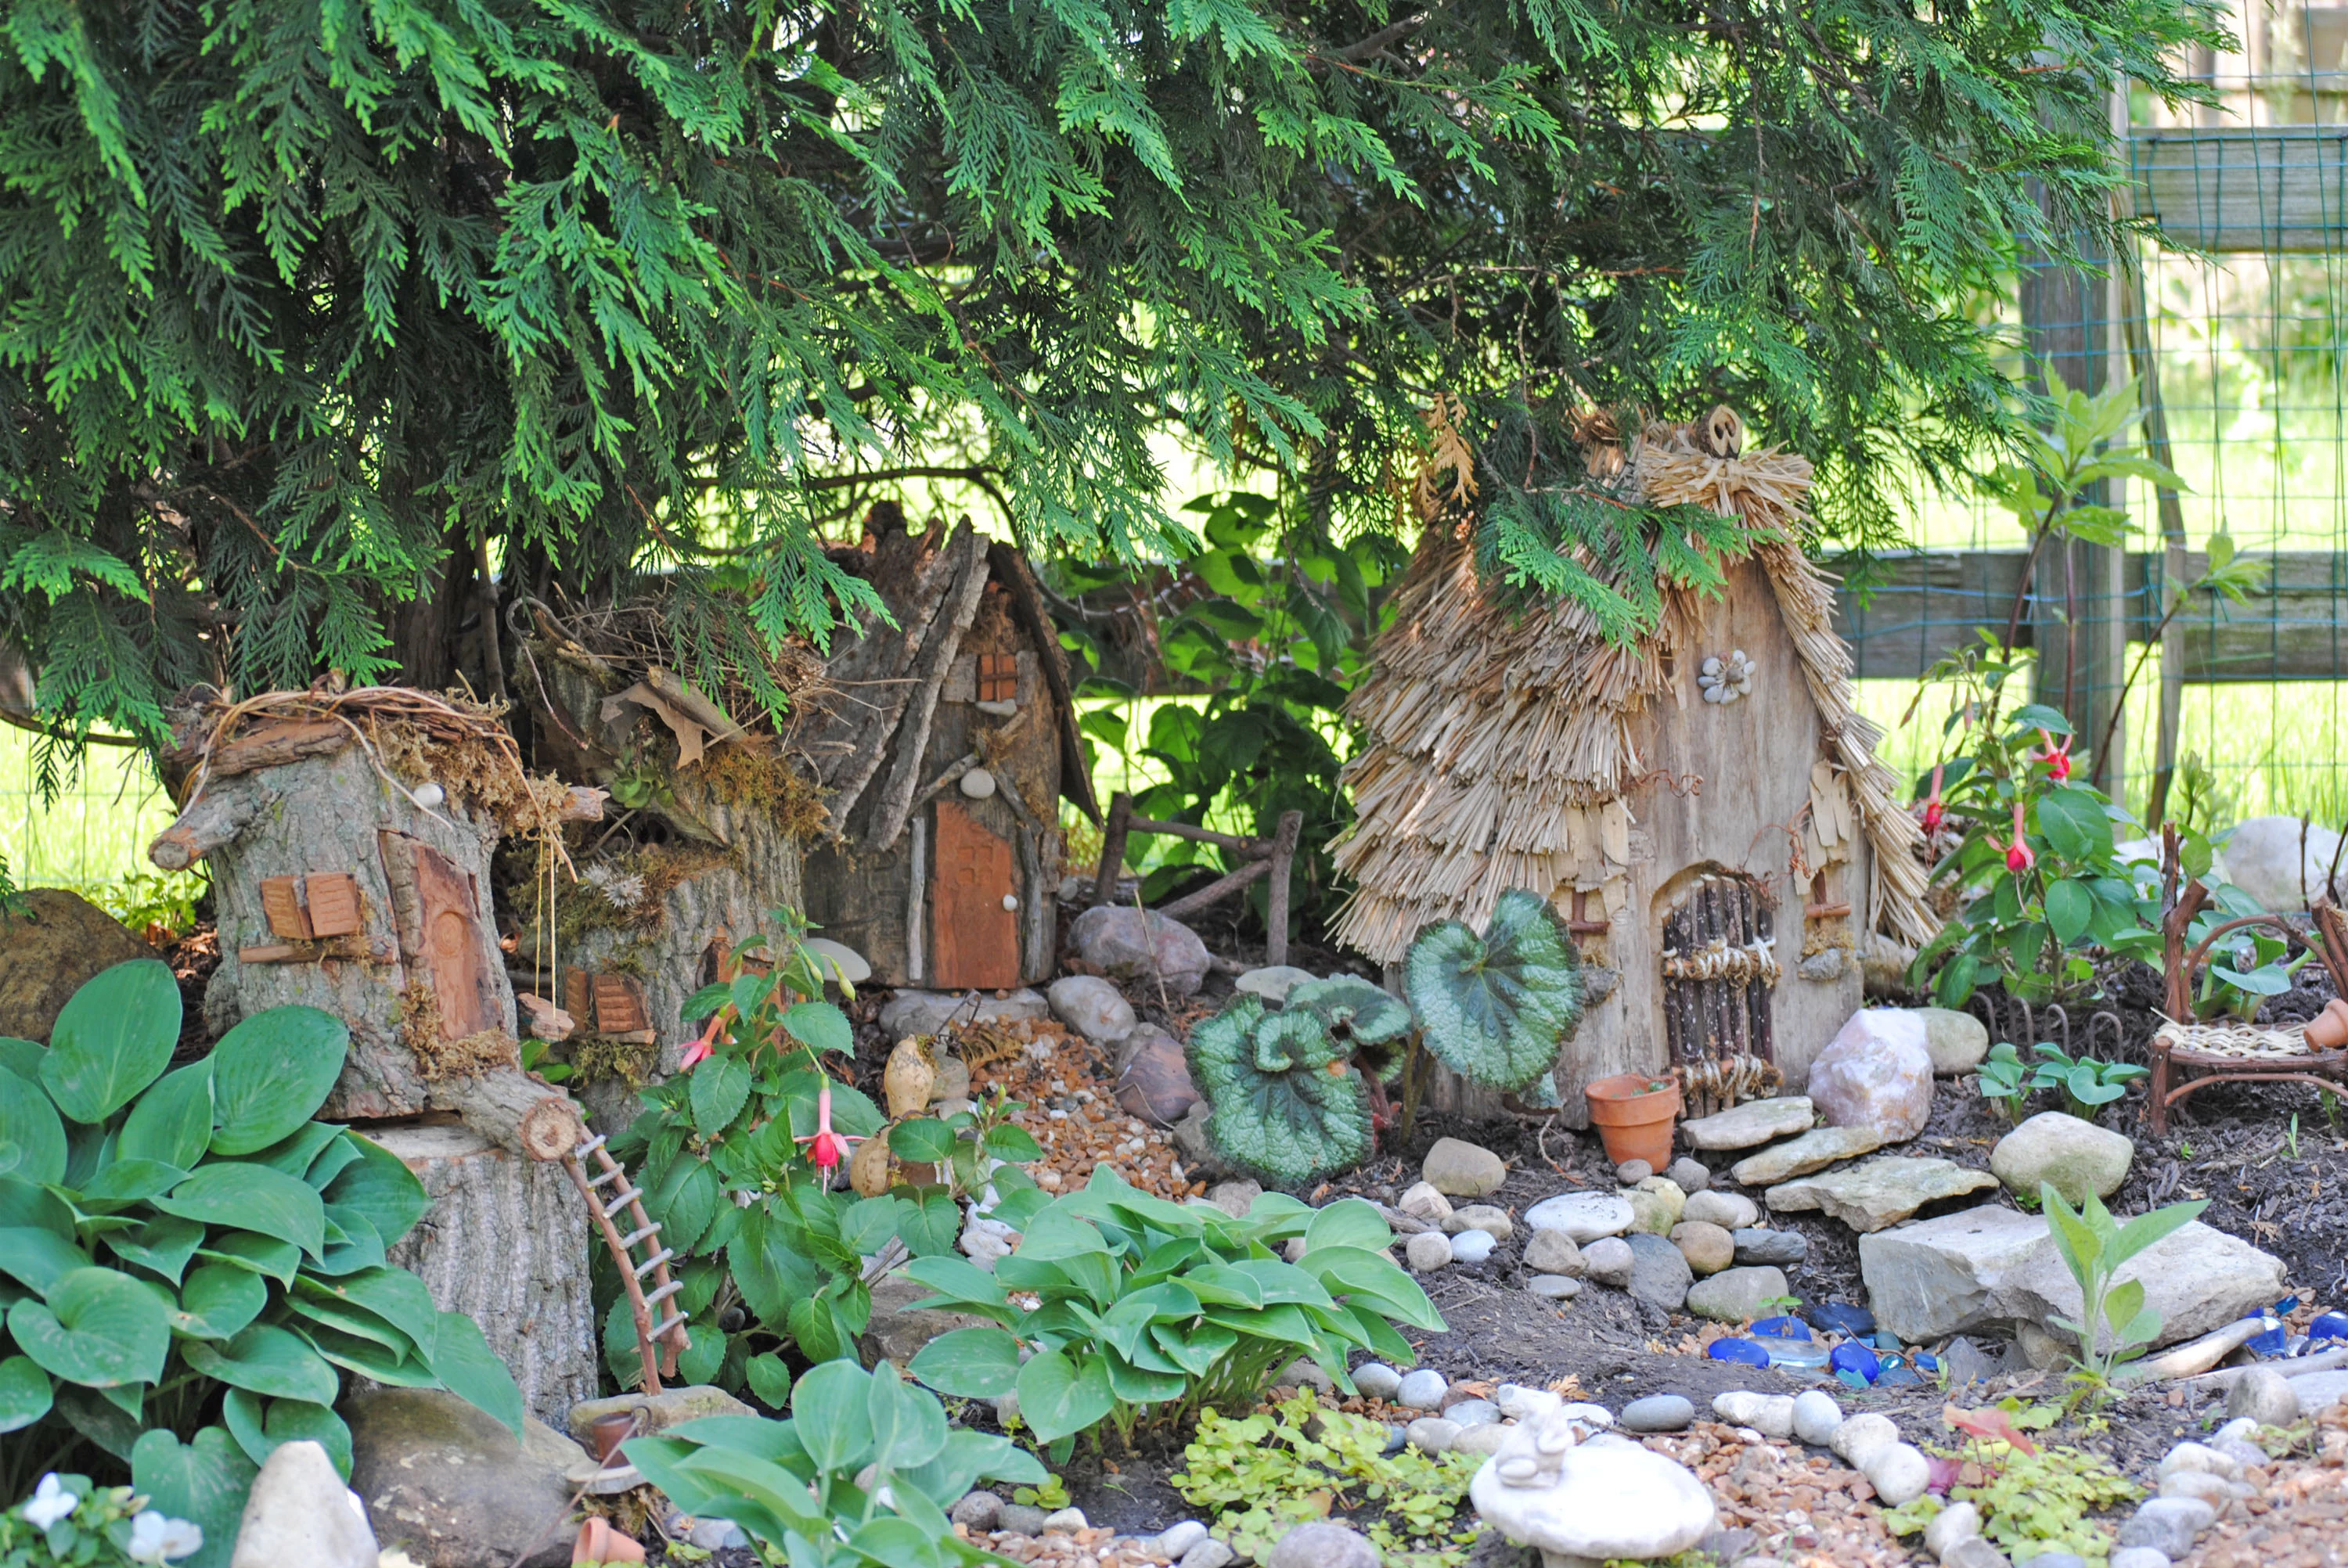
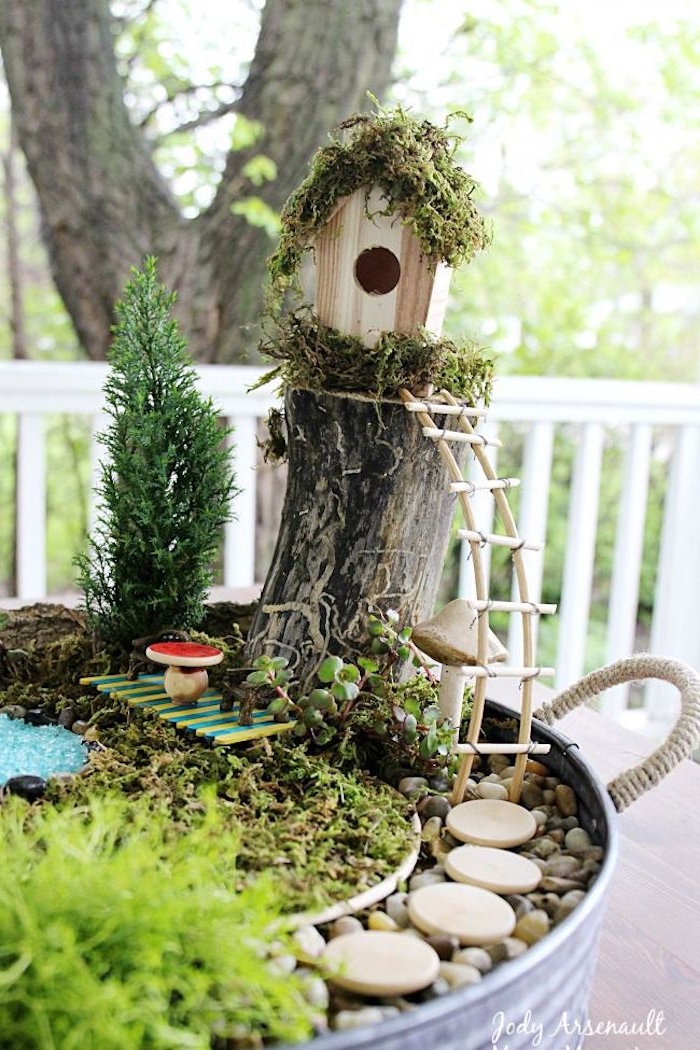
Goblincore Aesthetic: Embrace the beauty of the imperfect and the wild. This trend celebrates things you’d find on a forest floor. Think more moss, twisted twigs, real stones, and faux mushrooms. Let your plants grow a little more freely for a less manicured, more naturalistic vibe.
According to a 2021 survey, 42% of gardeners said creating a beautiful space was their primary motivation. A fairy garden is a perfect way to achieve this on a small, manageable scale.


